Ren: Lighting the Prison Cell

After a month of shooting exteriors, yesterday we shot the first interior set for Ren. Which was just as well since a tropical storm was raging outside and blowing down parts of the exterior village set.

It was a classic prison cell scene, one of those shaft-of-light-through-the-barred-window jobbies. Amanda Stekly and her team did a great job of creating a two-walled set with moss, wet stone and even real snails. Outside the window was a platform to sell the illusion that the cell was below ground level.

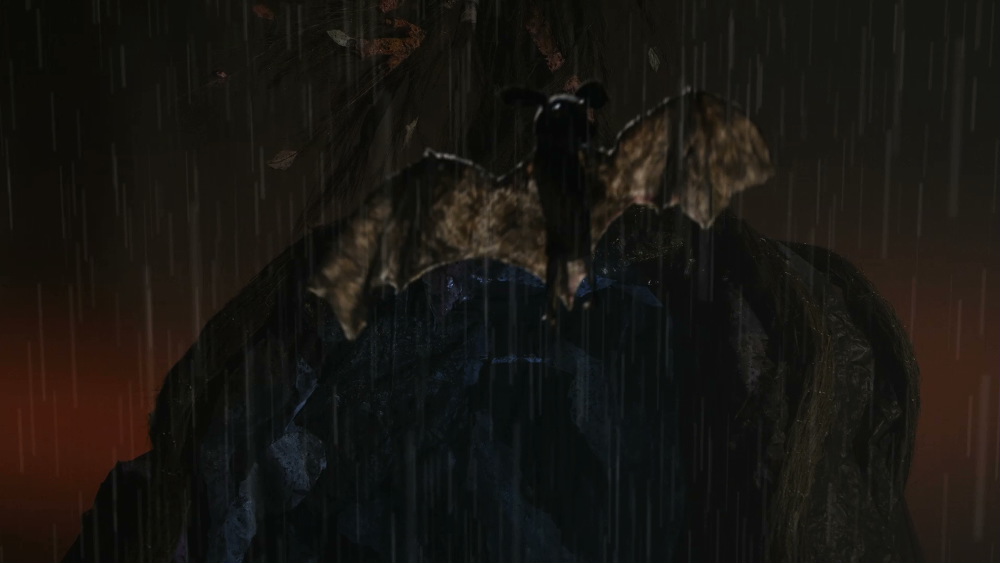
Here are some frames from the scene:

prison1 prison2

2.5K HMI
2.5K HMI

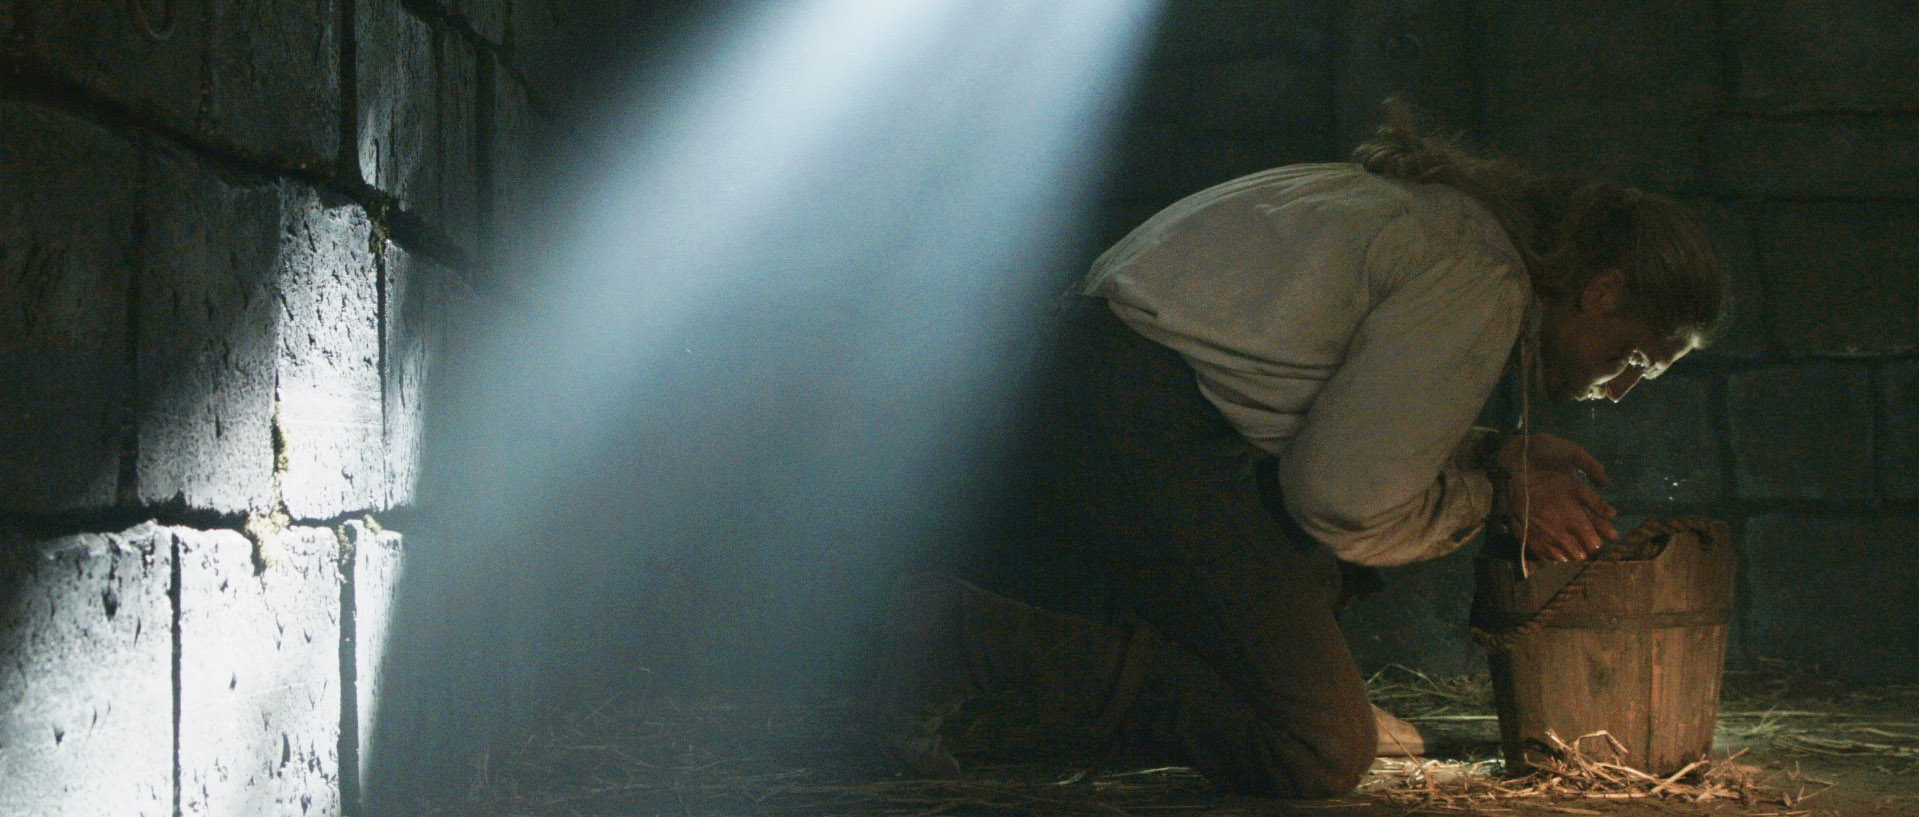
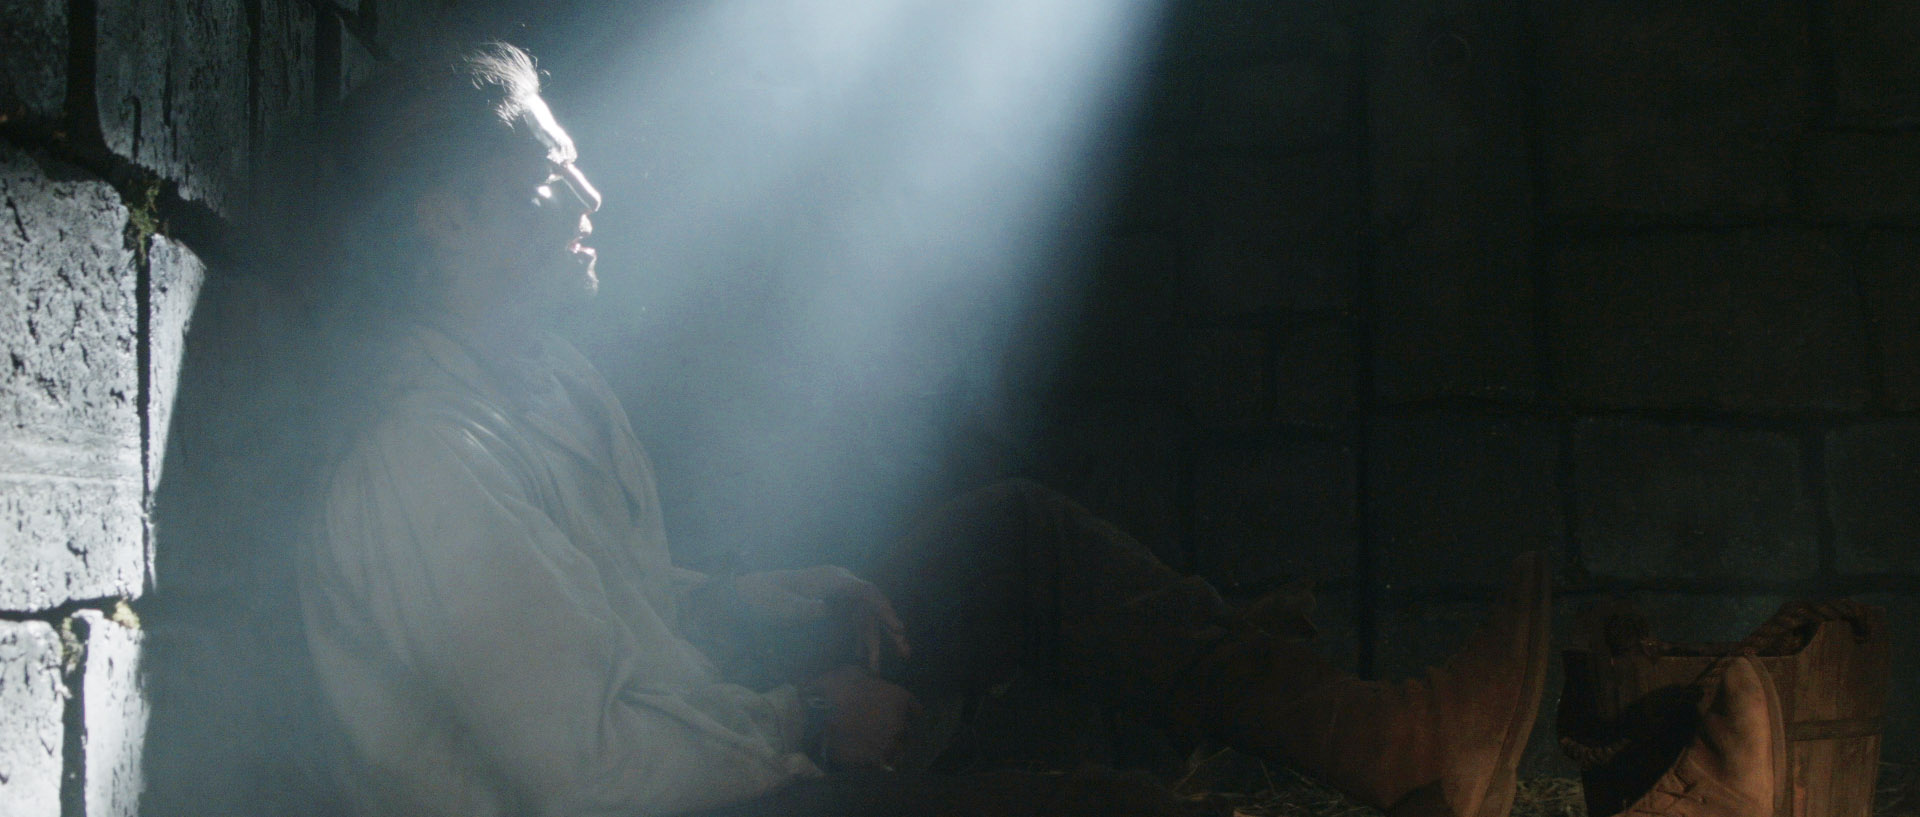
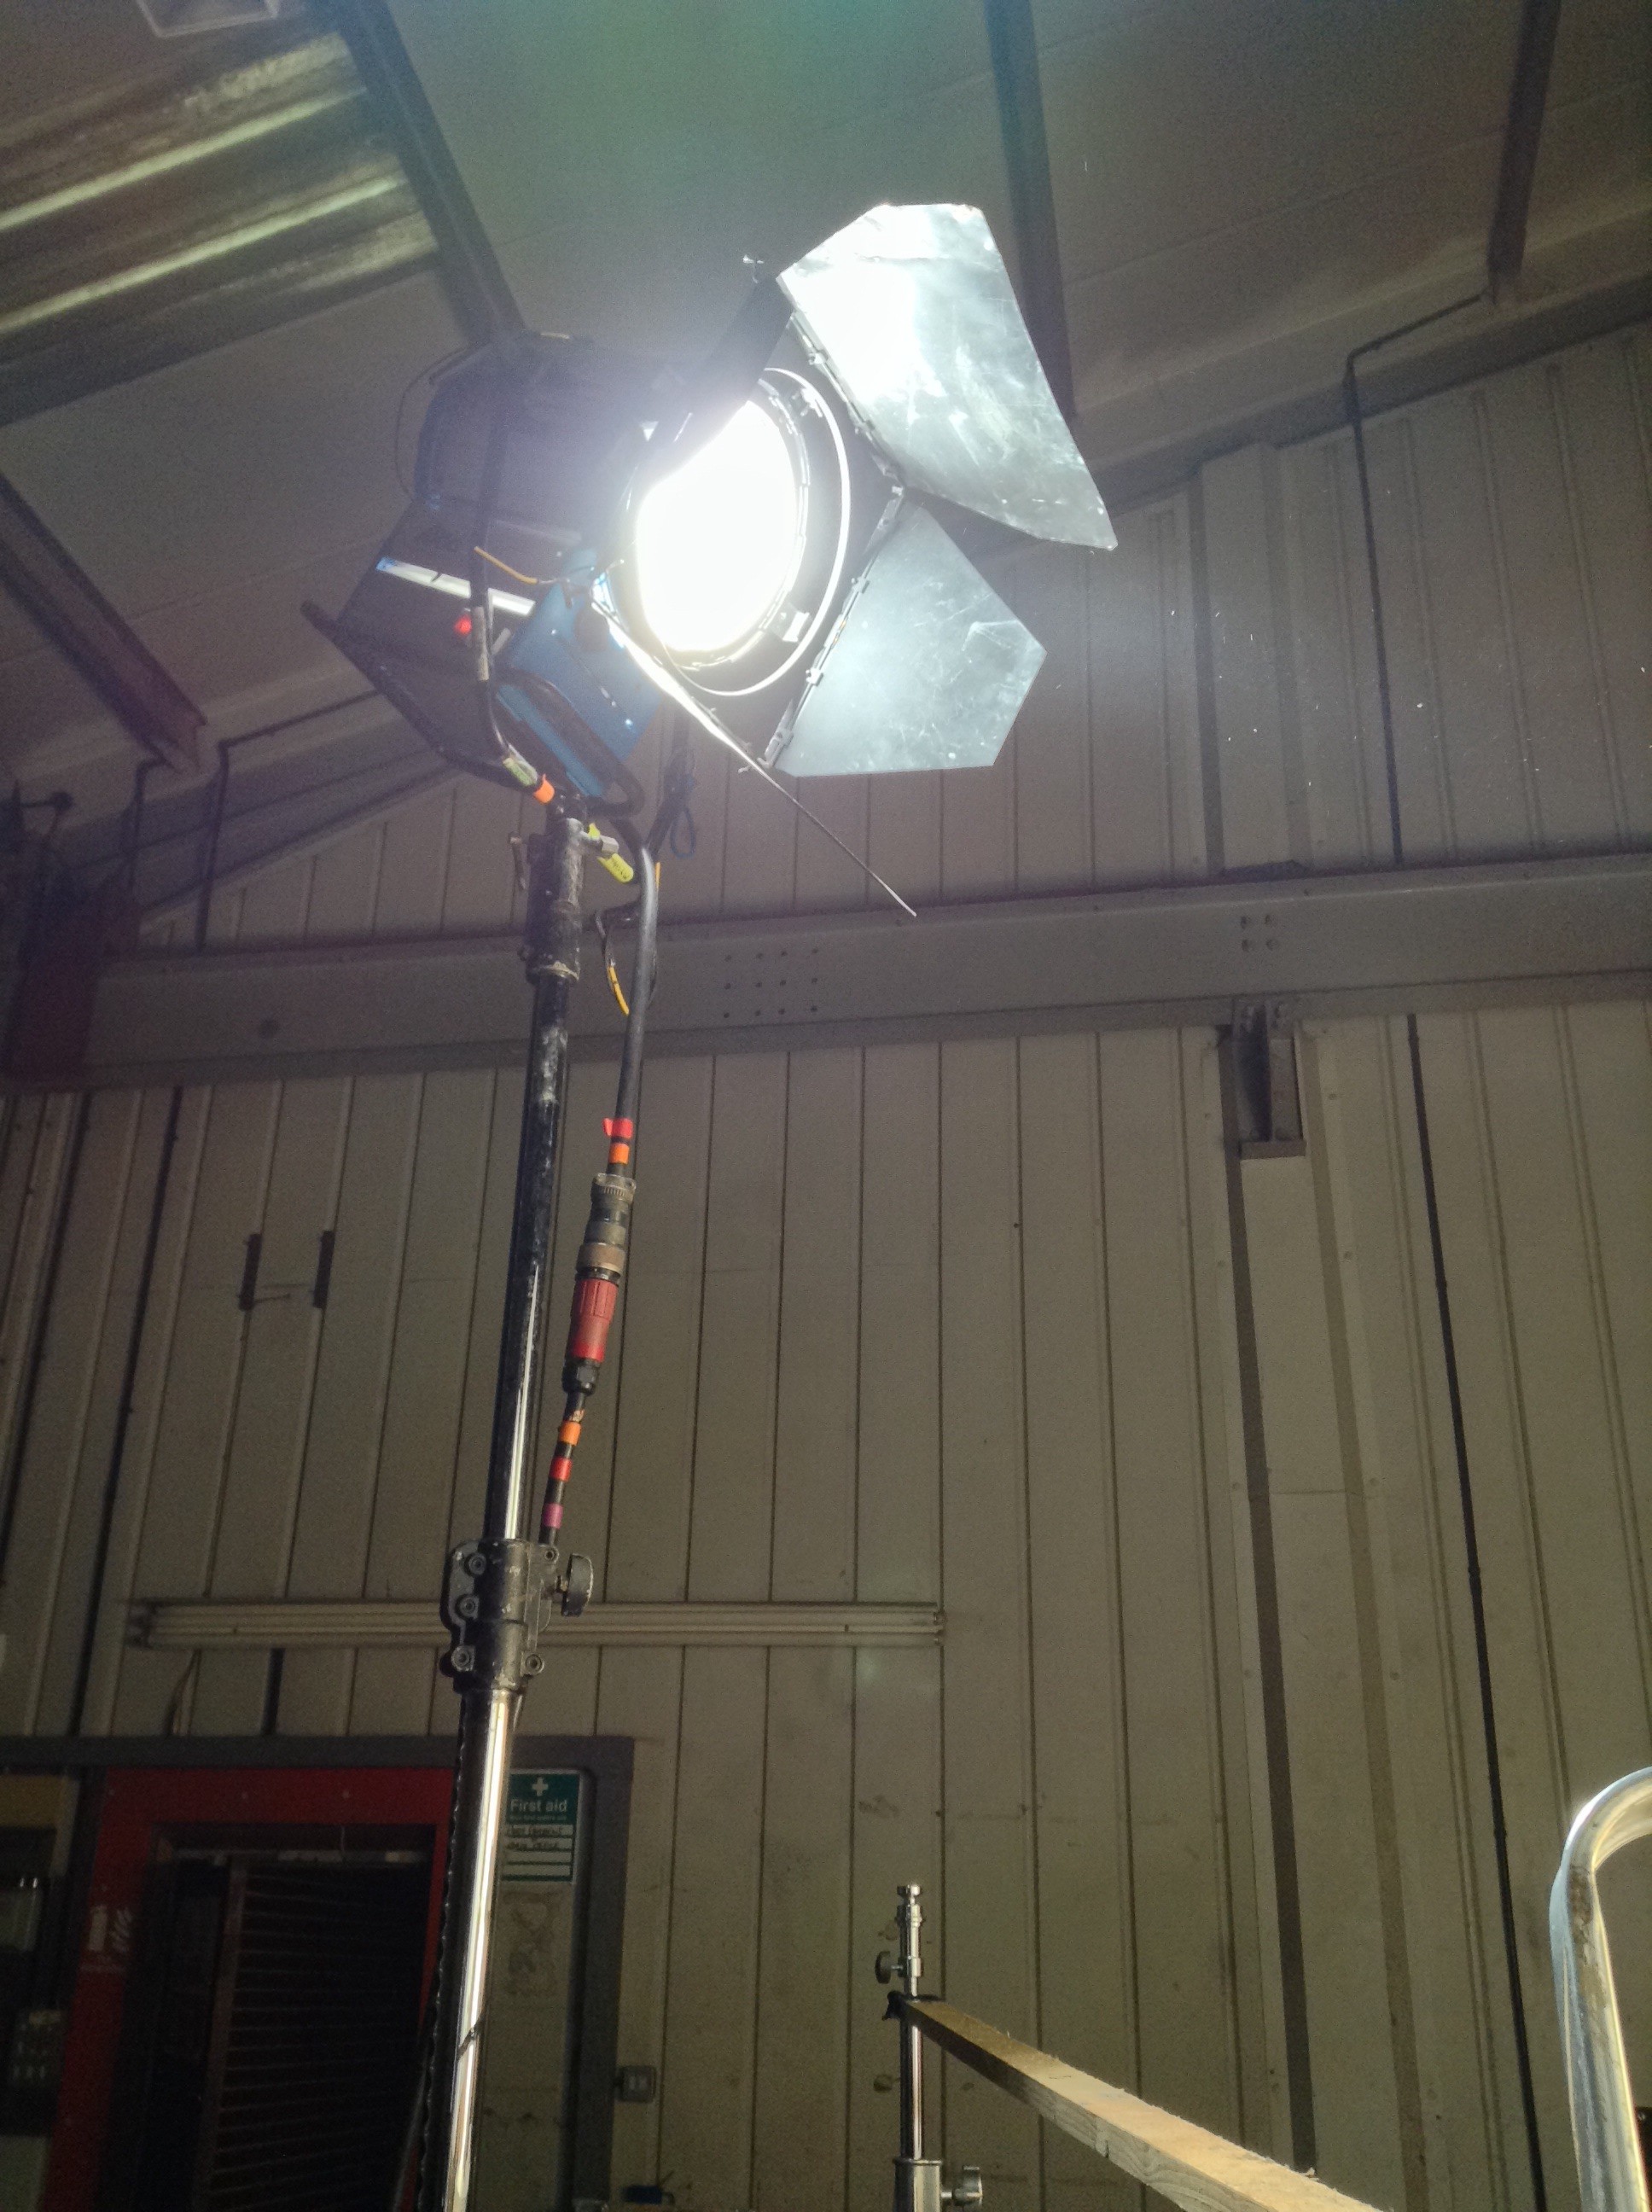
If you’re going for this shaft-of-light-piercing-the-gloom look, you need three things. Firstly, a powerful, focusable light; I used a 2.5K HMI fresnel. Secondly, you need to accept over-exposure. The only way you will get any detail in the shadows is by exposing bright enough that the highlights – anyone standing in the direct beam of light – will clip. If you don’t like the highlight roll-off characteristics of your camera, stay away from this type of lighting. The cool thing about having a keylight this hot is that when a character moves around in the light, especially if they’re wearing light-coloured clothing, they bounce the light around in interesting and often unpredictable ways.

I shot the scene on Richard Roberts’ Blackmagic Cinema Camera, partly because of ongoing problems getting a monitor signal out of my Production Camera, and partly because of the extra stop of dynamic range the BMCC would give me to milk this high contrast lighting scenario.

The third and very important thing you need is a smoke machine to volumise the shaft of light. (More about using smoke in a future post.)

In this view of the platform behind the set, the fluorescent fixture providing indirect "daylight" can be seen on the left, gelled with Quarter Minus Green to remove the green spike in the lamp's output.
In this view from behind the set, the fluorescent fixture providing indirect “daylight” can be seen on the left, gelled with Quarter Minus Green to remove the green spike in the lamp’s output.

In order to give the sense of indirect “sky” light also coming in through the window, I placed a fluorescent outside the window so as to catch some of the side wall of the set. When I first tested the lighting set-up the previous night, I placed a second fluorescent fixture directly above the window to get some edging on the tops of the stones underneath. But I found that the more sources I set up, the less definition I got in the shaft of HMI light, so I dropped the toplight.

The door gobo
The door gobo

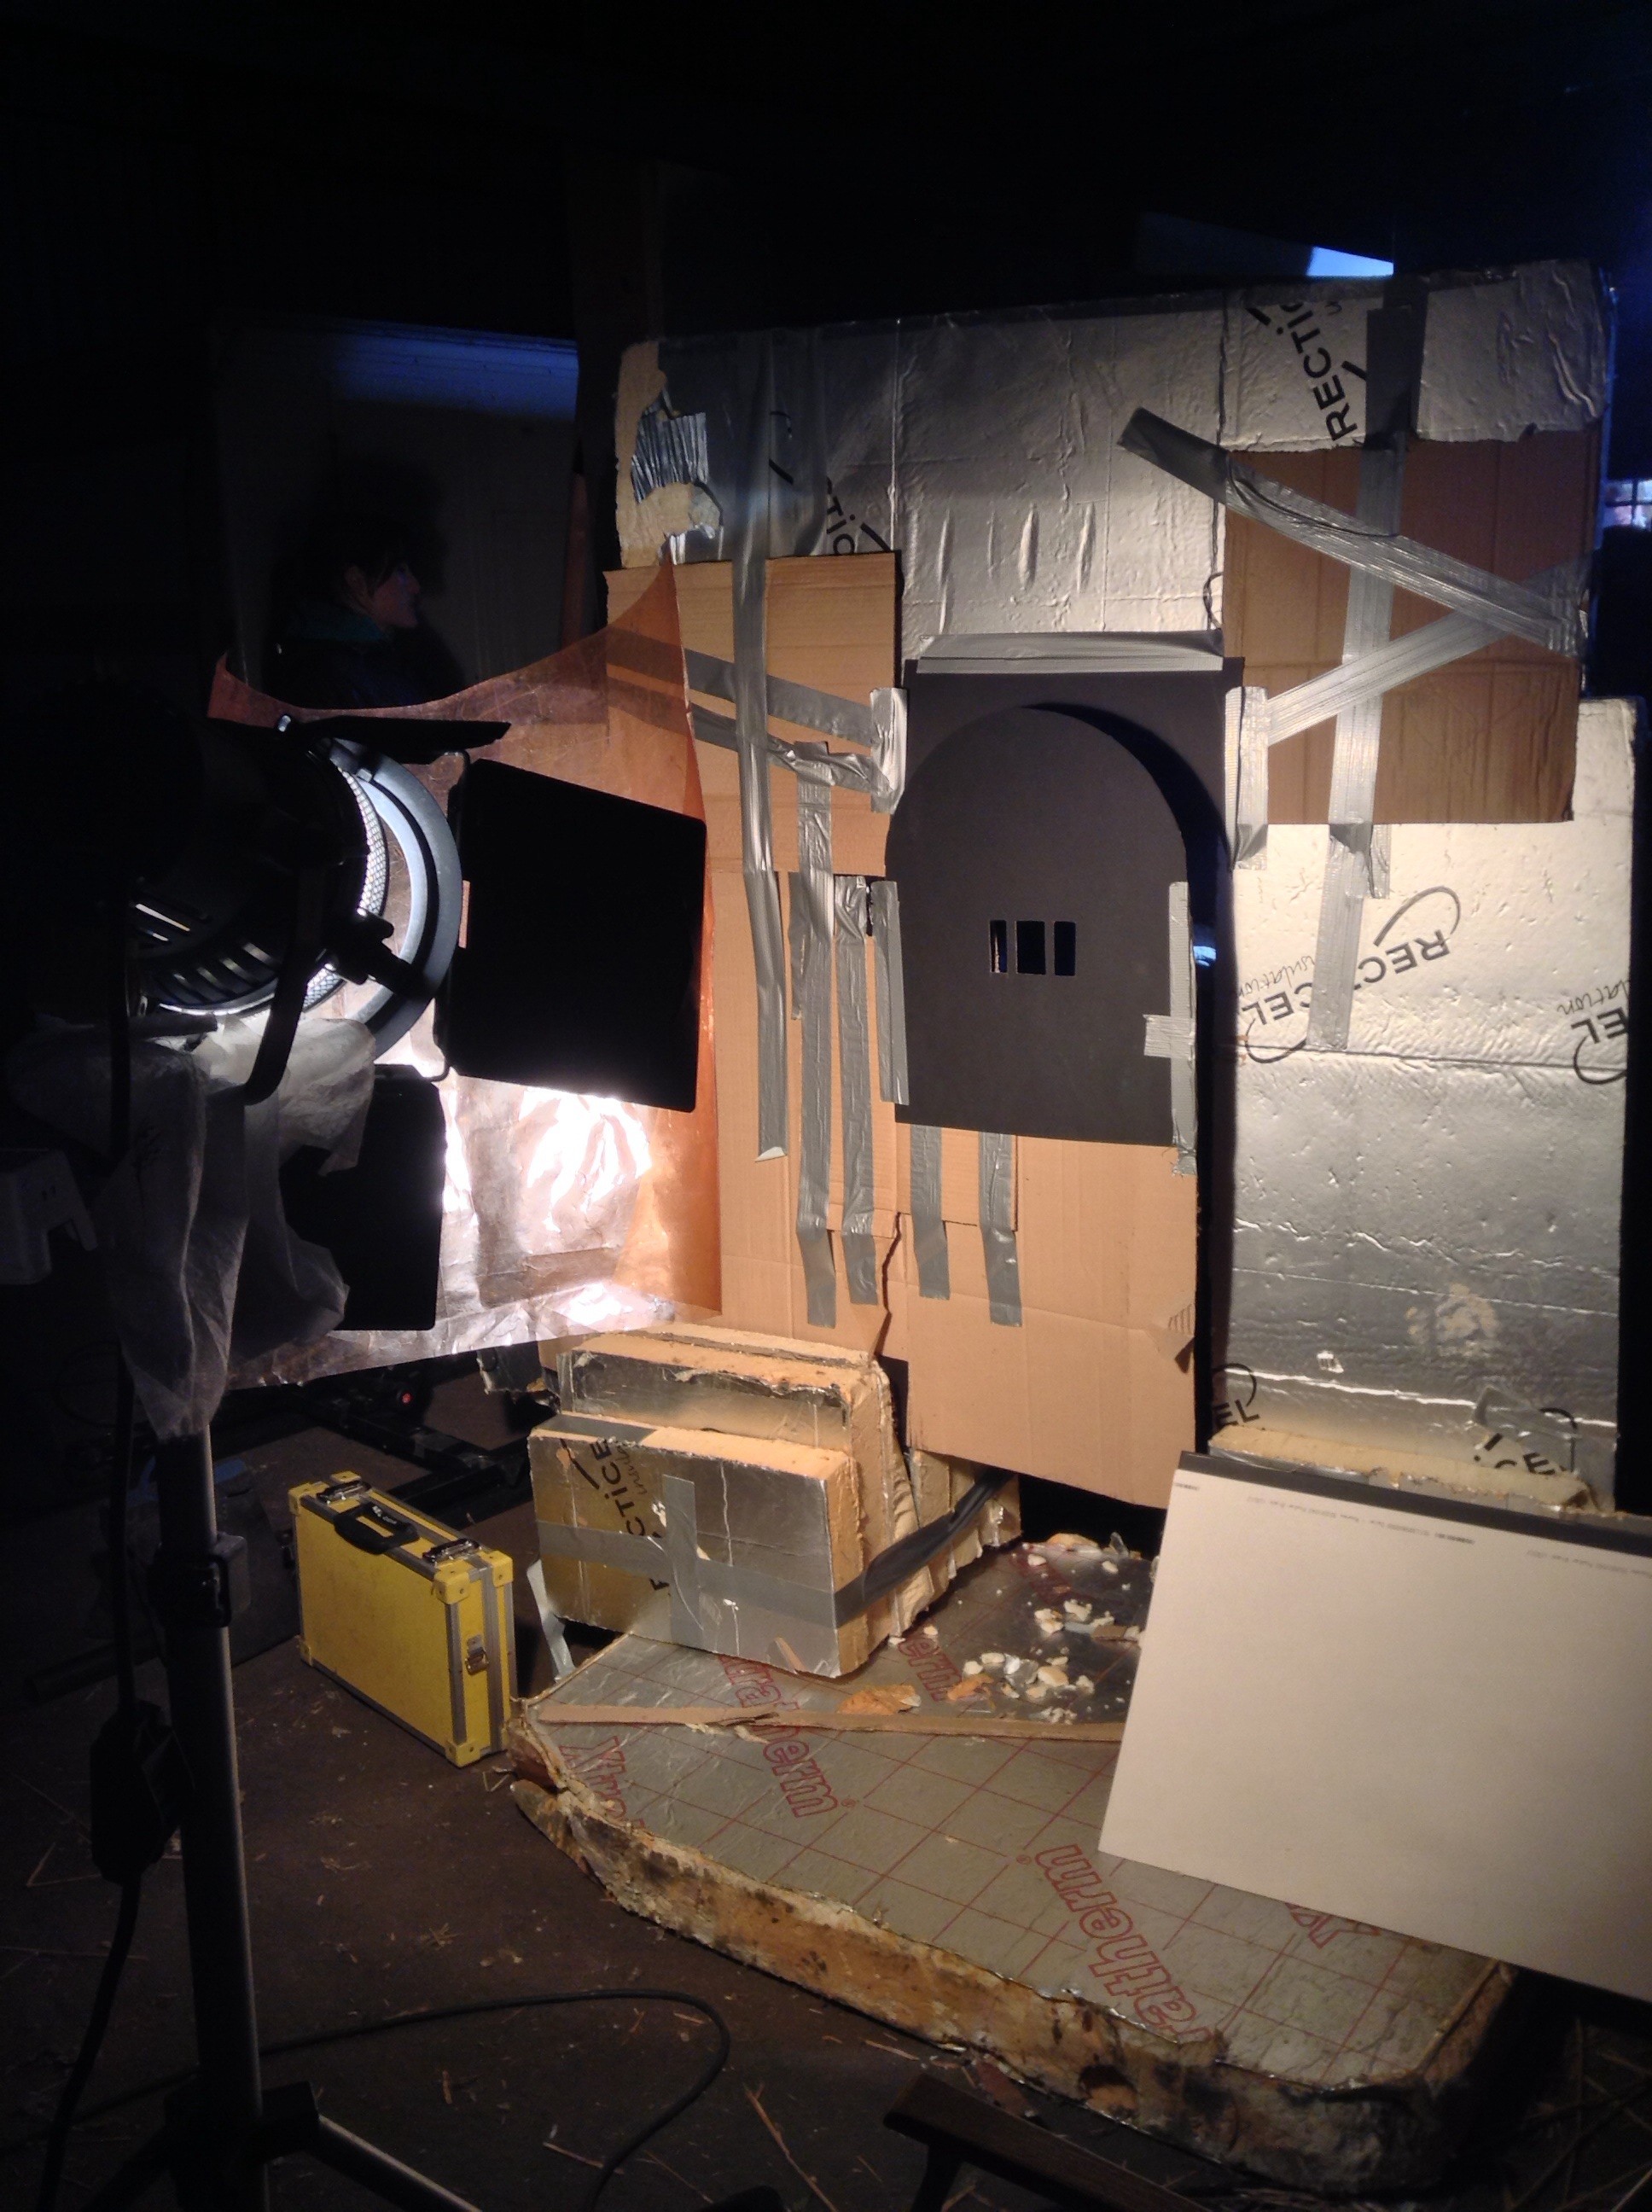
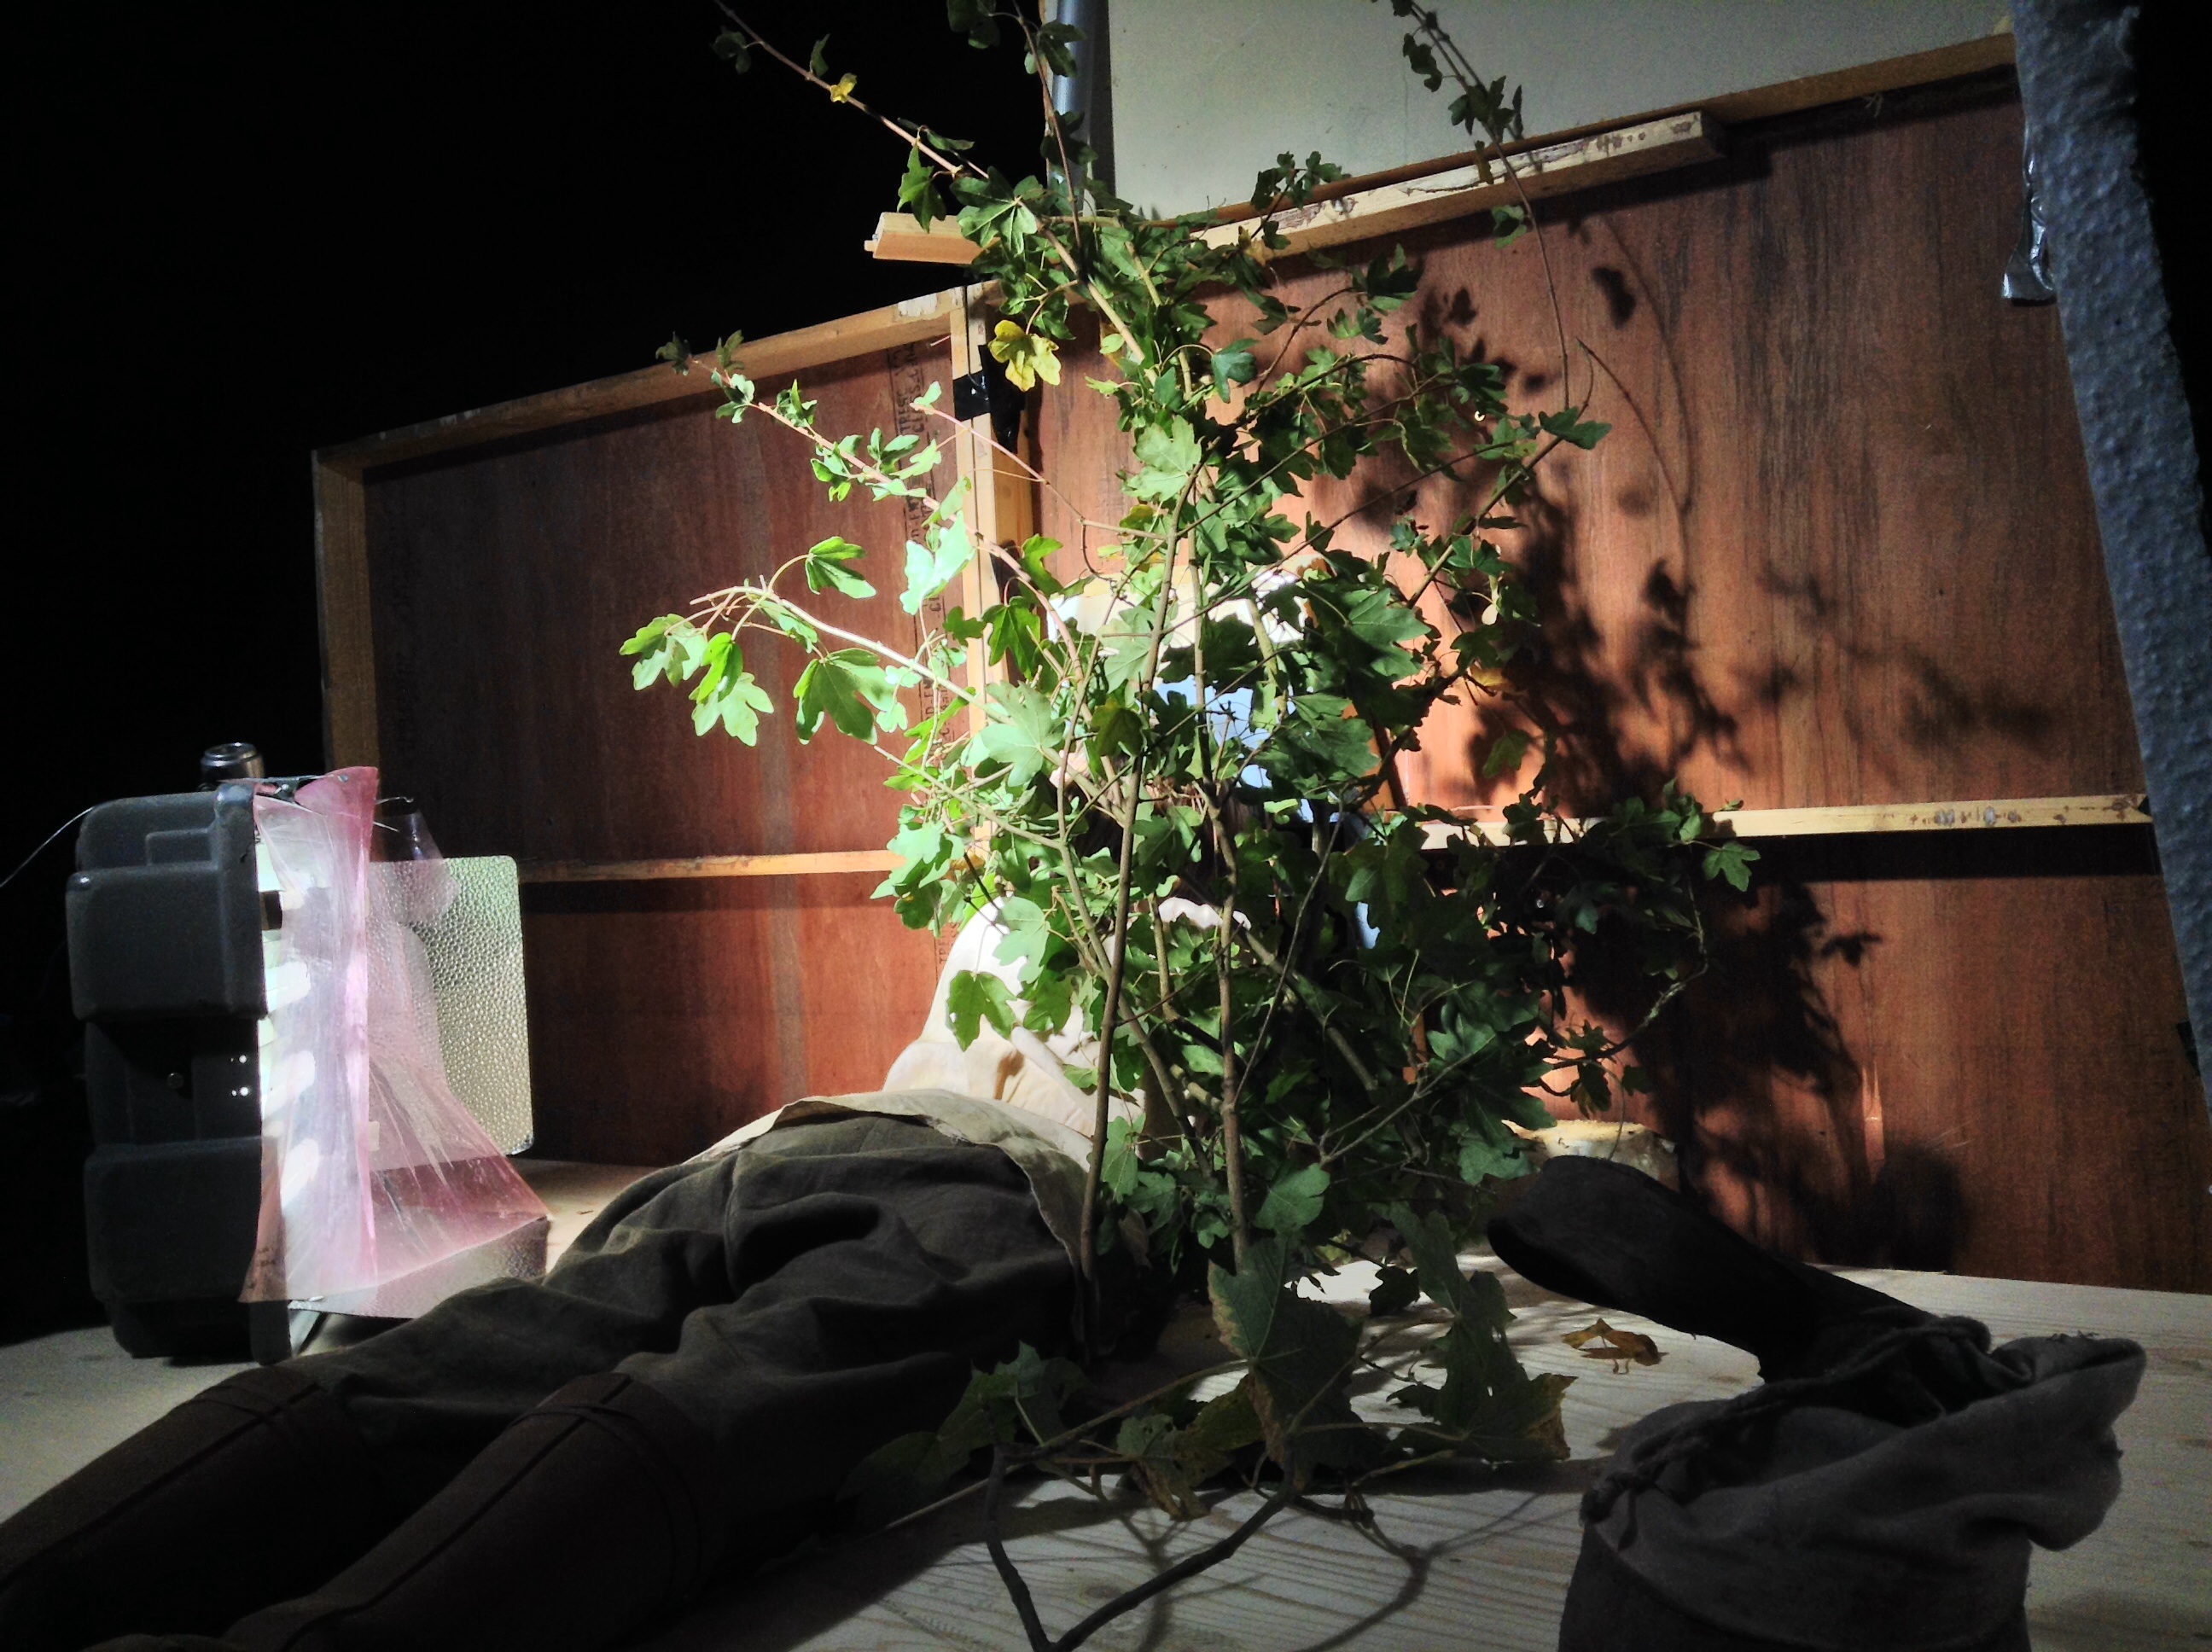
Although the script called for guards to drag Hunter (Duran Fulton Brown) into the cell and shut him in, the two-walled set had no door. So with help from the art department I constructed a ridiculous-looking door in roughly one-third scale, simply to cast the shadow of the door. Behind it I placed a redhead gelled with half CTO, which Richard wiggled during takes to suggest firelight.

The LED hidden behind the bucket

I set the camera to a white balance of 4,500K so that the “daylight” of the HMI would go a little cold and the “firelight” would go really warm.

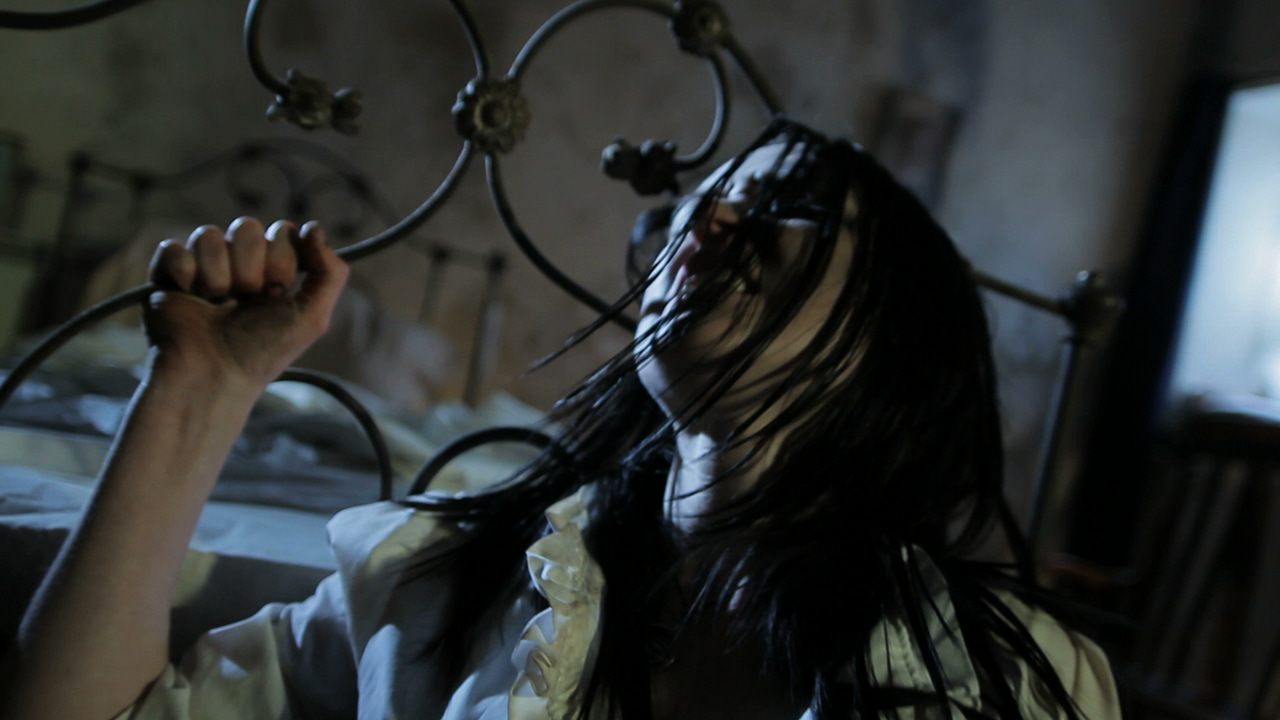
Our first shot involved Hunter washing his face at a bucket of water, then slumping back into the “sunlight”. We positioned the bucket out of the “sunlight”, in the small patch of light coming through the window of our fake door. But Hunter was still too dark by the bucket. I didn’t want to flood the set with fill and ruin the mood, so I hid a small LED light behind the bucket and diffed it down. This lights Hunter’s face when he leans over it, and hopefully suggests a reflection off the water.

A fluorescent toplight rigged over the bucket for the face-washing close-up
A fluorescent toplight rigged over the bucket for the face-washing close-up. Note the black cloth hanging from one side to reduce spill.

When we moved to a close-up of Hunter washing his face (below), I rigged a fluorescent toplight, suggestive of indirect daylight from the window, and placed a circle of foil at the bottom of the bucket. The idea was that the toplight would reflect off the foil and the surface of the water and light Hunter’s face. It didn’t work, but the toplight itself really made the shot for me. The more you work with an actor, the more you learn the best ways to light them, and I’ve learnt that Duran looks great with toplight.

Foil in the bucket for added bounce

Screen grabs (C) 2014 Mythica Entertainment. Visit www.rentheseries.com for more info.

prison3


Ren: Lighting the Prison Cell

Ren: Night for Day

The 2.5K HMI can be seen here in the lower right, and the fake sky on the top right.

It had to happen sooner or later. On an ambitious series like Ren, with a tight schedule, it was inevitable that we would at some point have to shoot a daylight shot after dark. So I’d given it some thought beforehand. It seemed to me like soft toplight, simulating sky, was what was needed. I figured that a 2.5K HMI fired into an overhead 6×6 silk would do the job, and that’s one of the reasons I pushed production to hire a 2.5 despite the very limited budget.

The moment came yesterday when we got into a time crunch with one of our lead actors (Duran Fulton Brown) and had to complete a scene despite the natural light running out. Fortunately the scene was scripted as evening and we had shot coverage at magic hour and in twilight with an HMI “sunset”. So we weren’t trying to match full-on daytime.

Colin (left) helps hold up the roof. Rich (right) does not. Duran Fulton Brown (centre) plays Hunter.

We used a redhead for the direct “setting sun” light. We had a silk but no sturdy stands to rig it on, so we built a quick roof out of poly and Celotex (matte silver bounce), holding it up with lightweight stands and crew members! We put the 2.5K on the floor in the corner and fired it into this ceiling. The final touch was to fire an LED panel at the back wall to fill in the black shadows that the redhead was casting.

Check out the final shot below. It looks a lot less convincing to me now than it did at the time, but I believe the concept was sound. We just needed more stands to rig the poly at a better angle to get the maximum bounce, including some behind Duran to give a general “sky” backlight. Lessons learnt for the next time!

image


Ren: Night for Day

Lighting Droplets

The tarsier puppet in Droplets

Lighting in the controlled environment of a studio should theoretically be much easier than lighting a location, but I found recently that it doesn’t come without its challenges.

Last month I had the pleasure of working on a music promo for Droplets by Lewis Watson and Gabrielle Aplin. Directed by Tom Walsh and designed by First Musketeer veteran Amy Nicholson, this magical, handmade puppet fest was only the second or third studio-bound production of my career. Tom had secured the use of Giltbrook Studios, an impressively equipped 1,300 sq ft soundstage in Nottingham, complete with manager Andy Swain as gaffer.

Apart from the exclusion of pesky natural light, the biggest advantage offered by a stage over a location is the lighting grid; no more wondering if that polecat or K-clamp will take the paint off the wall, and no more compromising your backlight position to keep the stand out of frame. The downside of the grid is the time it takes to rig or adjust a light, particularly if the grid, like Giltbrook’s, has no catwalks, and every adjustment must be made by bringing in and scaling a huge ladder. In fact it may be impossible to rig or adjust lights once there is a finished set underneath. All of which means you’re going to need a pre-rig day.

Some of the ill-fated space lights can be seen here, as well as the cucoloris rigged beneath the 650W fresnel key light. At the top left is the 2K fresnel backlight.

In the case of Droplets, the pre-rig day was also used to assemble the set, a tree on top of a cave, which must have measured about fifteen feet in height. As soon as it had been erected we realised that the six space lights Andy had spent all morning rigging were going to be in frame, as the top of the tree reached above the bottoms of these lights. (A space light is a circular arrangement of six tungsten tubes inside a cylinder of white diffusion cloth. They’re typically used in large numbers to simulate daylight in a studio.)

Some of the par cans that supplied the colour wash on the backdrop.

In fact my options on where I could put lights were very narrow, because of the lack of space around the set, both vertically and horizontally. We shot against the studio’s white infinity cove, and Tom wanted colour washes over this to suggest various times of day. Andy achieved this with gelled par cans off to either side of the set, but then it was crucial that no other light spilled onto the backdrop or it would ruin the effect.

We rigged a 2K tungsten fresnel immediately behind and above the set, for backlight, but it was hard to put anything in from the sides or the front without contaminating the backdrop. The 650W key light had to be rigged almost directly above the set, and even then its shadow can be seen on the floor in the wide shots if you look carefully. We hung a cucoloris (sheet of wood with random shapes cut in it) below the 650 to created the dappled effect of woodland light, taking care that a patch of light fell on the tarsier puppet’s main position.

For fill I used an LED panel off to the right of the set, dimming it to find a balance between its light being barely visible on the backdrop while still lifting the set and the puppets enough. I placed a smaller LED panel inside the cave, with a turquoise gel to suggest phosphorescence.

The final day/sunset look. From each side an orange-gelled and a pink-gelled par can light the backdrop. A 2K tungsten fresnel provides backlight, while a 650W fresnel with a cucoloris provides dappled light on the tree and tarsier. An LED panel off right supplies fill, and a second panel is inside the cave with a turquoise gel.
For closer shots, a reflector below frame and/or a Dedolight behind camera were used to fill in unwanted shadows.

Another advantage of a studio is that you can easily run all the lamps into a dimmer board. This was very handy for Droplets because in addition to the day/sunset look, we had nighttime scenes and a storm to light for, and some on-screen transitions between the states. We were able to set these all up in advance and switch between them pretty much by just pushing a few sliders up and a few others down.

The night state involved a yellow-gelled redhead on the floor behind the cave, pointed straight at the backdrop. With its barn doors removed, this created a circle of light which reminded me strongly of the huge yellow moon in the posters for The Nightmare Before Christmas. I hadn’t been intending to create such a defined circle, but when I saw it I immediately loved its stylised look.

A second 650W fresnel was rigged, close to the first, and with ulcered black wrap in front of it to again created a dappled look, but with a purple gel on it. This took us away from the more traditional blue of nighttime scenes, adding to the stylised look again, and contrasting nicely in colour with the yellow “moon”.

The 2K backlight remained on for the night scenes, but the sunset colour wash on the backdrop was switched off, as was the fill.

Nighttime in puppet land: the 2K backlight remains on, a yellow-gelled redhead lights the backdrop from behind the set, and a purple-gelled 650W fresnel in the grid pushes through a cucoloris to highlight the tarsier.

For the storm scene we experimented with strobes, but they caused unpleasant rolling shutter artefacts. Instead I used the flash button on the 2K’s dimmer box to create lightning. Both 650W fresnels were turned off for this state, but the fill was turned back on. While the pink colour wash remained off, we brought up the orange wash just a little bit to suggest an angry sky in the background.

Stormy weather. The orange colour wash coming from the par cans, originally set up for the sunset look, is used here much more dimly to suggest an angry sky. The LED panel off right supplies fill while the 2K backlight is flashed periodically.

Copious smoke was used throughout (another advantage of studios – your smoke stays put!) to generate god rays as the backlight streamed through the tree. It also helped soften the backdrop and render the colour washes more convincing as a sky.

Watch the video here. Shot on a Red Epic operated by Chris Wetton. Big thanks to Andy and Giltbrook Studios for all their help. Visit www.polymathematics.co.uk to find out more about the amazing work of Tom Walsh and Amy Nicholson.

Lighting Droplets

Depth Cues in Cinematography

One of the most important jobs of a director of photography is to help the viewer’s brain decode the image. Just as a sound mixer must get the cleanest possible dialogue and ensure that ambience, music and effects don’t distract from it or drown it out, so a cinematographer must ensure the eye is drawn to the character and not distracted by the surroundings.

Depth is a key part of creating this clarity. Christopher Nolan once said: “95 percent of our depth cues come from occlusion, resolution, color and so forth, so the idea of calling a 2-D movie a ’2-D movie’ is a little misleading.”

This week, on The Deaths of John Smith, I photographed a shot that used every trick in the book to create depth. Why? Because it was a one-shot scene, a flashback taken out of context, and the audience needed to “get it” quickly.

When I first set the camera up and we stood John (played by Roy Donoghue) in position, his dark suit melted into the dark wood panelling behind him, so there was clearly some work to do. Once lit, as you can see from these frame grabs, he stands out sharply.

Kirsty Minchella-Storer (Sarah) and Roy Donoghue (John) in The Deaths of John Smith, directed by Roger Harding, copyright 2013 Two Hats Films
frame2 frame3 Kirsty Minchella-Storer (Sarah) and Roy Donoghue (John) in The Deaths of John Smith, directed by Roger Harding, copyright 2013 Two Hats Films

Let’s look at the depth cues going on here.

  1. DEPTH OF FIELD. Although I’m shooting at f1.8, on a 20mm lens nothing is massively out of focus, so that isn’t helping much.
  2. SMOKE. There is more smoke between the camera and a distant object than between the camera and a close object, and therefore smoke aids depth perception.
  3. CONTRAST. The foreground is darker than the background, helping the eye to distinguish between the various layers. In particular, the smoke picks up the light from the windows at the back of the room, creating a blue-white haze against which John’s dark suit stands out clearly, as does Sarah’s silhouette.
  4. COLOUR CONTRAST. The foreground is lit with warm orange, while the background is a cool blue, again enhancing the separation between the layers. (Imagine you’re standing on a hill and looking at another hill in the distance. That distant hill looks much bluer than the one you’re standing on, due to atmospheric haze. The smoke and colour contrast mimic this effect.) For most of this film I kept all the light sources within about 1,500K of each other, but in this scene I deliberately allowed more like 3,000K of difference between warm and cool sources to give the flashback a more stylised look.
  5. BACKLIGHT. John has a little edge-light on his righthand side, ostensibly from the wall sconces, but in reality from a hidden Dedo. This helps to cut him out from the background.
  6. FRAMING. The doorway frames the image, adding an extra layer of depth.
  7. PARALLAX. This is the optical phenomenon whereby, when you move your head (or a camera) things closer to you appear to move more than things further away. By dollying slightly into the room behind Sarah we create a dramatic parallax effect as the doorway grows on camera much more than John and the room behind him.

I’ll leave you with my (retrospective) lighting plan for this scene. Be sure to check out the film’s official website at www.thedeathsofjohnsmith.com

Lighting plan
Lighting plan
Depth Cues in Cinematography

Lighting The One That Got Away

Lighting plan for the daylight scenes

Here’s a breakdown of the lighting choices made on my little puppet film, The One That Got Away. You can watch the film over at the Virgin Media Shorts website. If you enjoy it, please use the tweet button to register your vote and help us get a place on the shortlist.

Conventional wisdom with marionettes is probably to go for very flat lighting with no backlight, to make it as difficult as possible to see the strings. But on TOTGA I wanted to embrace and celebrate the tactile, handmade look of the puppets and sets, so I chose a traditional three-point lighting scheme that imparted depth and made no effort to hide the strings.

Normally I shoot wide open – typically f1.8 – on my DSLR, but as the puppets were small the depth of field would have been ridiculously shallow at that aperture. Instead I lit the set very brightly (about 3KW of tungsten horsepower in our cramped living room – not very pleasant during a heatwave!) and stopped down to around f4.

Daylight

The clouds cast shadows on the sky, but I think that adds to the charm.

For the daylight scenes I used my three open-face tungsten Arrilites: a 1K poking over the top of the backdrop for backlight, another 1K with tough-spun diffuser off camera left for key, and an 800W bouncing off the ceiling for fill. This last lamp was gelled blue to suggest ambient skylight.

I tried to simulate the camerawork that would have been used had this been shot at sea with real actors, so:

  • the camera bobs up and down in wide shots, as if Henry’s boat is being shot from another vessel;
  • the camera and boat are fixed in close-ups, with the background bobbing up and down, as if we’re now shooting on a tripod in Henry’s boat.

Underwater

A cool white balance and blue gels help to give an underwater look.

The underwater dream sequence was all shot dry-for-wet at 50fps for a watery slow motion. Using Magic Lantern I dialled in a cool white balance of around 2500K, and pumped in smoke to add diffusion and suggest currents. (I wished I’d use a lot more smoke, but we would have all choked to death.)

I used just two light sources: the 1K backlight, now gelled blue, and the other 1K, bounced off sheets of silver wrapping paper tacked loosely to the ceiling. This is exactly the same method I used for a scene in Ashes – flapping a piece of card at the wrapping paper makes the light ripple in a very watery way.

Shallow depth of field working nicely in the romantic underwater dream sequence

The underwater lighting scheme was a lot darker than the daylight one, so I opened up to around f2, giving a crazily shallow depth of field that worked nicely for this dream sequence. The mermaid’s close-ups were all shot through a CD case for an old-school soft-focus look.

I would have liked to have shot this sequence handheld, but a lack of crew meant I had to lock the camera off so I could operate the smoke machine, fan the wrapping paper and move little fish through frame.

Sunset

When Henry awakens from his dream, the fish escapes and he gives chase. Orange gels and lens flare were used to suggest the sun getting lower in the sky, until finally Henry and his quarry are silhouetted against the solar disc itself. This is a domestic 100W tungsten bulb peeking over the back wave. The only other light source is a row of six more such bulbs under a sheet of orange gel, just behind and below the first one.

The sun is an ordinary 100W tungsten lightbulb.

As the scene moves into twilight, the first bulb is removed and the orange gel over the other six is replaced with a purple one. The 1K backlight is turned back on (possibly it would have been more realistic without, but I’m just a sucker for backlight) and some pink fill is provided by placing a sheet of Minus Green gel on the other 1K and bouncing it off a reflector.

Pink and purple gels are used to give a post-sunset tinge to the final scene.

That’s all folks. Please do tweet about the film (being sure to include the title The One That Got Away and the hashtag #VMShortsVote for it to count as a vote) and click here to watch the behind-the-scenes featurette if you missed it.

Lighting The One That Got Away

Girl and a Scar: Using Lighting to Help Tell a Story Arc

Whatever position you occupy on a film crew, you are always a storyteller. Everyone is working to build and enhance the narrative and emotional threads which will engage the audience.

Cinematography is certainly no exception, and on the recent shoot for Dave Cave’s dark fantasy Girl and a Scar, my task was to take the lighting of an interior location on a journey which mirrored that of the titular Girl (Ileana Cardy), starting from a place of heightened realism, building to a crescendo of crazy and then finally returning to normality. It was a great visual script, describing candelight, daylight seeping in through cracks in boarded-up windows, wind and lightning, so there was plenty to get my creative juices flowing.

(Check out Girl and a Scar’s Facebook page. Lighting package courtesy of Dave Morgan.)

Stage 1 of the lighting arc. Copyright 2013 Fever Films
Copyright 2013 One For All Productions and Yellow Fever Films

Above is the wide shot from the opening scene. I’ve used a classic cool/warm colour contrast between the moonlight and the candlelight. The windows of the house were supposed to be boarded up, so the barn doors of the 650W tungsten fresnel (gelled with full CTB) off camera right are fairly narrow to create the streak of light on the back wall. A second blue-gelled 650W fresnel is behind the frosted door on the left, providing a bit of depth and suggesting another window or hole in the roof.

The candlelight is provided by an orange-gelled 300W fresnel hidden behind the corner of the fireplace to the left of screen. The difficulty with candlelight is always matching the angle the light should be coming from, and in particular hiding the shadow of the candle itself, which in reality would not exist. We solved the problem in this instance by splattering dark wax over the shadow on the top of the cabinet. A dimmer was used to flicker the 300W appropriately.

Stage 2 of the lighting arc. Copyright 2013 Fever Films
Copyright 2013 One For All Productions and Yellow Fever Films

Above is the third interior scene, and one of my favourite shots in the film. To kick up the stylisation a notch I’ve used flags to make the streak of light on the back wall a little harder-edged.

This shot is a good example of how effective side lighting can be. There are no light sources on the camera side of the subject at all; it’s all coming on from the side and slightly behind, leaving the camera side of her in darkness. We call this dark side of a subject the “down side”, and it’s always more interesting to have this side be the one facing camera.

Stage 3 of the lighting arc. Copyright 2013 Fever Films
Copyright 2013 One For All Productions and Yellow Fever Films

Above is the scene which represents the height of weirdness in the story. There are two things I’ve done to make the lighting more stylised. Firstly I’ve introduced some green light, motivated by an off-screen doorway. This combines with the make-up and a fantastic performance from the actress to enhance the character’s sickness. Secondly I’ve adjusted the blue-gelled 650W fresnel that was behind the frosted door in the first scene. It’s no longer bouncing off the wall in that back room – instead it’s pointed directly at the talent with the door now open. This creates a strong, steely backlight. Combined with a dutched handheld camera, the overall effect is suitably unsettling.

Stage 4 of the lighting arc. Copyright 2013 Fever Films
Copyright 2013 One For All Productions and Yellow Fever Films

The scene ends with the curtains of the room’s main window opening to bathe the Girl in light as she comes out of the other side of her dark journey. To enhance the natural light that would come in when the curtains were opened, I bounced a fresnel off the ceiling and ran it through a dimmer board so it could be faded up as the curtains parted. Another 650W was placed outside the window, positioned exactly behind the talent’s head to give her a halo of light and create lens flares when she moved her head to reveal the light. (The lamp itself can’t be made out on camera because it’s so bright.)

So that’s an example of how cinematography can serve narrative and character. How have you used light to tell the story?

Girl and a Scar: Using Lighting to Help Tell a Story Arc

Shadows and Ashes

Colin Smith lines up the Super-8 camera as director Sophie Black pans the mirror.

After an unseemly delay, here’s the third and final part of my series about lighting Ashes, Sophie Black‘s dark fantasy drama. Read part one here and part two here.

For the fantasy world dubbed “Toybox” by the production team, Sophie wanted a gritty, grainy, comfortable look. She was keen to shoot the scene on Super-8 and wanted to make full use of that high contrast celluloid look with harsh spotlighting, deep shadows and vignetting.

The biggest problem for me was how to get a spotlight effect in a fairly small room with an ordinary daylight fresnel. To get a circle of light small enough to fit entirely within the camera’s frame required the lamp to be much further from the subject than was possible within the space. I suggested shooting at night and putting the light outside the window, but the schedule couldn’t accommodate that.

The problem was solved by bouncing the light off a circular mirror. This masked the light into a relatively sharp circle, because the lamp was the entire length of the room away from the mirror. (The closer a mask is placed to a lamp, the fuzzier the edge of the mask will appear when thrown on the subject, so simply cutting a circle out of cardboard and placing it in front of the lamp would have given us a blob of light instead of a defined circle, because there wouldn’t have been enough space to put the cardboard far enough away from the lamp.)

Bouncing a redhead off a circular mirror. Photo: Sophie Black
Bouncing a redhead off a circular mirror for the sweeping light effect. Photo: Sophie Black

Not only did the mirror allow us to achieve a key shadow puppet shot which Sophie had conceived, it also enabled us to create a sweeping light effect for other parts of the sequence. Inspired by one of Lana del Rey’s music videos, Sophie wanted the effect of headlights passing by outside a window. We were able to do this simply by panning a redhead across the mirror.

The Toybox scene was shot both on Super-8 (by Col) and on my Canon 600D as a back-up. I set the ISO to 1600 on the DSLR to bake in a grainy look. I won’t do this again, however, because I failed to take into account the effect of the camera’s H.264 compression. The grain looked fine on the viewfinder, but once compressed and recorded there were lots of blocky artifacts. I hoped that the Super-8 film would come out well so this sub-standard digital material wouldn’t have to be used, but alas there were some focus issues and several of the shots were inexplicably missing from the reels when they came back from the lab. Fortunately the day was saved by a talented VFX artist who applied a very convincing Super-8 look to the 600D footage, which hides the compression artifacts.

Ashes is nearly finished now and we’re all very excited to see how it’s turned out. Meanwhile, here’s the trailer:

Shadows and Ashes

How to Light How to be Dead

In September I had the pleasure of working once again with Lara Greenway – star of Soul Searcher, director of Hostile and The Runner, and producer of Hard Boiled Sweets and Danny Dyer vehicle Deviation. This time she was directing a pilot for a comedy web series called How to be Dead, written by Dave Turner. It was released online for Halloween and here it is:

The pub scene is my favourite thing I’ve lit in a long time, so I thought I’d break down what went into it.

The aim was to separate the lead actors from the background as much as possible. This was accomplished through depth of field (shooting at around f2.0), colour contrast (lighting them warmly and the background coolly), backlight and smoke.

Working from the foreground of the shot backwards, we have a crossed pair of Dedos behind camera, each with a half orange gel and each spotted on one of the leads. Hanging from a pair of connected C-stand arms straddling two of the pub’s wooden roof beams is an 800W Arrilite giving the leads a white backlight.

There’s a fireplace off camera to the left (in the master shot). To give the impression of it being lit, I put a reflector in it – gold side facing out – and aimed a 1K Arrilite at this reflector. My trusty gaffer Col wobbles the reflector during takes to create a flickering effect which is visible on some of the closer extras in the left of the frame.

A third Dedo, positioned near the fireplace, is trained on the skeleton hanging in the background.

Outside in the tiny beer garden is a 2.5K HMI that’s blasting through the patio doors. A blue-gelled 1K Arrilite, indoors but in the far background, adds further “moonlight”. Between them these two lamps are illuminating the copious amounts of smoke we pumped in, giving the whole scene a wonderful volume and depth.

Finally, in the far background on the left, there’s a fourth Dedo hidden in the entrance to the ladies’ loo, throwing a little pool of light on a painting on the wall. I also turned on the pub’s existing sconces to create extra contrast.

Hopefully there will be much more of How to be Dead coming soon. Visit howtobedead.com and follow Death himself on Twitter.

And if you’re in the Worcestershire area this weekend, don’t forget to come along to the film festival at The Hive where I’ll be screening Video8 and giving a talk about crowd-funding Stop/Eject.

How to Light How to be Dead

Fire and Ashes

Last week I looked at some watery lighting created for one of the fantasy scenes in Sophie’s short, Ashes. Today let’s look at another of the film’s fantasy scenes and another element: fire.

Sophie wanted a 1940s Hollywood look to this romantic scene set in a room full of candles. Shane Hurlbut recently posted a great blog about building an artificial firelight source, but given the size and layout of the room I didn’t feel this was going to work for us. When I lit the Wasteland trailer last autumn I used domestic 100W clip-lights to represent candlelight, and this is what I chose to go for again.

Sarah Lamesch and Adam Lannon in the "Hollywood" scene
Sarah Lamesch and Adam Lannon in the “Hollywood” scene

There are about half a dozen 100W bulbs hidden on the floor behind the bed, and another half dozen on a boom arm out the top of frame, again behind the actors. There are no other light sources but the candles themselves. To give a little bit of movement to the light, my righthand man Col is wobbling a reflector just off camera. More movement would have been nice – some dimmers perhaps, or someone lying behind the bed wiggling the bulbs a bit – but given that it was a closed set I felt it was better to keep things simple.

Col tapes the tights to a filter tray

I was so focused on the lighting of this scene that it was only the day before the shoot that I realised the key to the forties look was going to be diffusion. By this point it was too late to add any Promist filters to our package, so I consulted Shane’s blogs on diffusion for other methods of softening the image. AD Chris was subsequently dispatched to buy some tights.

In an ideal world you get hold of some very fine silk stockings and tape a piece to the back of your lens. We were stuck with bog-standard 15 denier, and the design of the EF-S lens mount makes it impossible to put anything over the rear element, so it had to go on the front. Col stretched the piece of fabric across one of my Pro-aim shoulder rig’s 4×4″ filter trays. Putting the tights on the front rather than the back makes the effect much less subtle, but fortunately Sophie really liked it. You can see it in action on the still above, but I’ll leave you with a side-by-side comparison from a quick test we did on lead actress Sarah Lamesch:

Sarah Lamesch with (right) and without (left) the stocking filter
Fire and Ashes

Water and Ashes

The opening frame of the big track and dolly shot

Earlier this week I DPed Sophie Black’s short film, Ashes. The script contained three fantasy scenes which were really fun to light because they didn’t have to be in any way realistic. All the scenes took place in the same bedroom, so here was a great opportunity to light the same space in three completely different and pretty whacky ways (plus in a more down-to-earth way for the “real world” scenes).

In lighting the fantasy scenes I drew inspiration from techniques covered in some of the blogs I listed in my top five last week. Sophie’s vision for one fantasy scene was of the lead character, played by Sarah Lamesch, on a bed adrift on a sea of hands. The hands were moulded in plaster and spread all over the floor, and it was my job to create the impression of water through lighting. So I turned to The Underwater Realm’s website, recalling a video blog they posted last year when their DP Eve Hazelton began testing lighting techniques for dry-for-wet photography (around six minutes in).

The silver wrapping paper on the ceiling

Big thanks to Realm Pictures for posting this blog. Although Eve ultimately rejected the technique in favour of something more realistic, it was perfect for Ashes. I had Sophie buy several rolls of silver wrapping paper, which we pinned loosely to the ceiling. I placed a 1.2K Arri Daylight Compact on the floor in the corner, pointed up at the paper. As we rolled, Sophie aimed a desk fan at the paper to create rippling, watery reflections.

I knew I wanted to do something special with Sarah’s incredibly striking eyes in this scene, to complement the make-up. I started off by having Colin rig a DIY lamp above her, surrounded by black wrap and card with only a slit of light coming through to highlight her eyes. Unfortunately I discovered that the light from DIY lamps just isn’t focused enough for this kind of effect, so I abandoned it.

Instead I created Sarah’s eye-light using a string of white Christmas lights taped to a piece of black card. This was inspired by Galadriel’s eye-light in The Lord of the Rings – a reference Sophie gave me. As it turns out, I think the starry reflections you see in Sarah’s eyes here are more from the silver paper than the fairy lights.

Sarah Lamesch
Sarah Lamesch as Sarah

This scene was also interesting from a grip point of view. We’d borrowed a jib, which we mounted on my dolly so that we could boom up from the hands on the floor, over the footboard and track to Sarah’s face. This was a real team effort. Colin handled the dolly and jib movement, while first assistant director Chris Newman operated the camera to begin with. As soon as the camera had cleared the footboard I jumped up onto the bed and took over from Chris for the rest of the shot.

In my next couple of posts I’ll look at the other fantasy scenes and we’ll see how Shane Hurlbut’s blog and a Lana Del Rey video inspired the cinematography in those.

Water and Ashes