LED technology is transforming the way cinematographers can light. Running off batteries and not getting hot are two of their biggest advantages over other sources, making them much more flexible. I tend to avoid keying with them, because even the most expensive brands don’t render skintones as accurately as incandescent sources, but there are many other uses they can be put to. Here are a few of my favourite.
1. Eye-light on overcast day exteriors
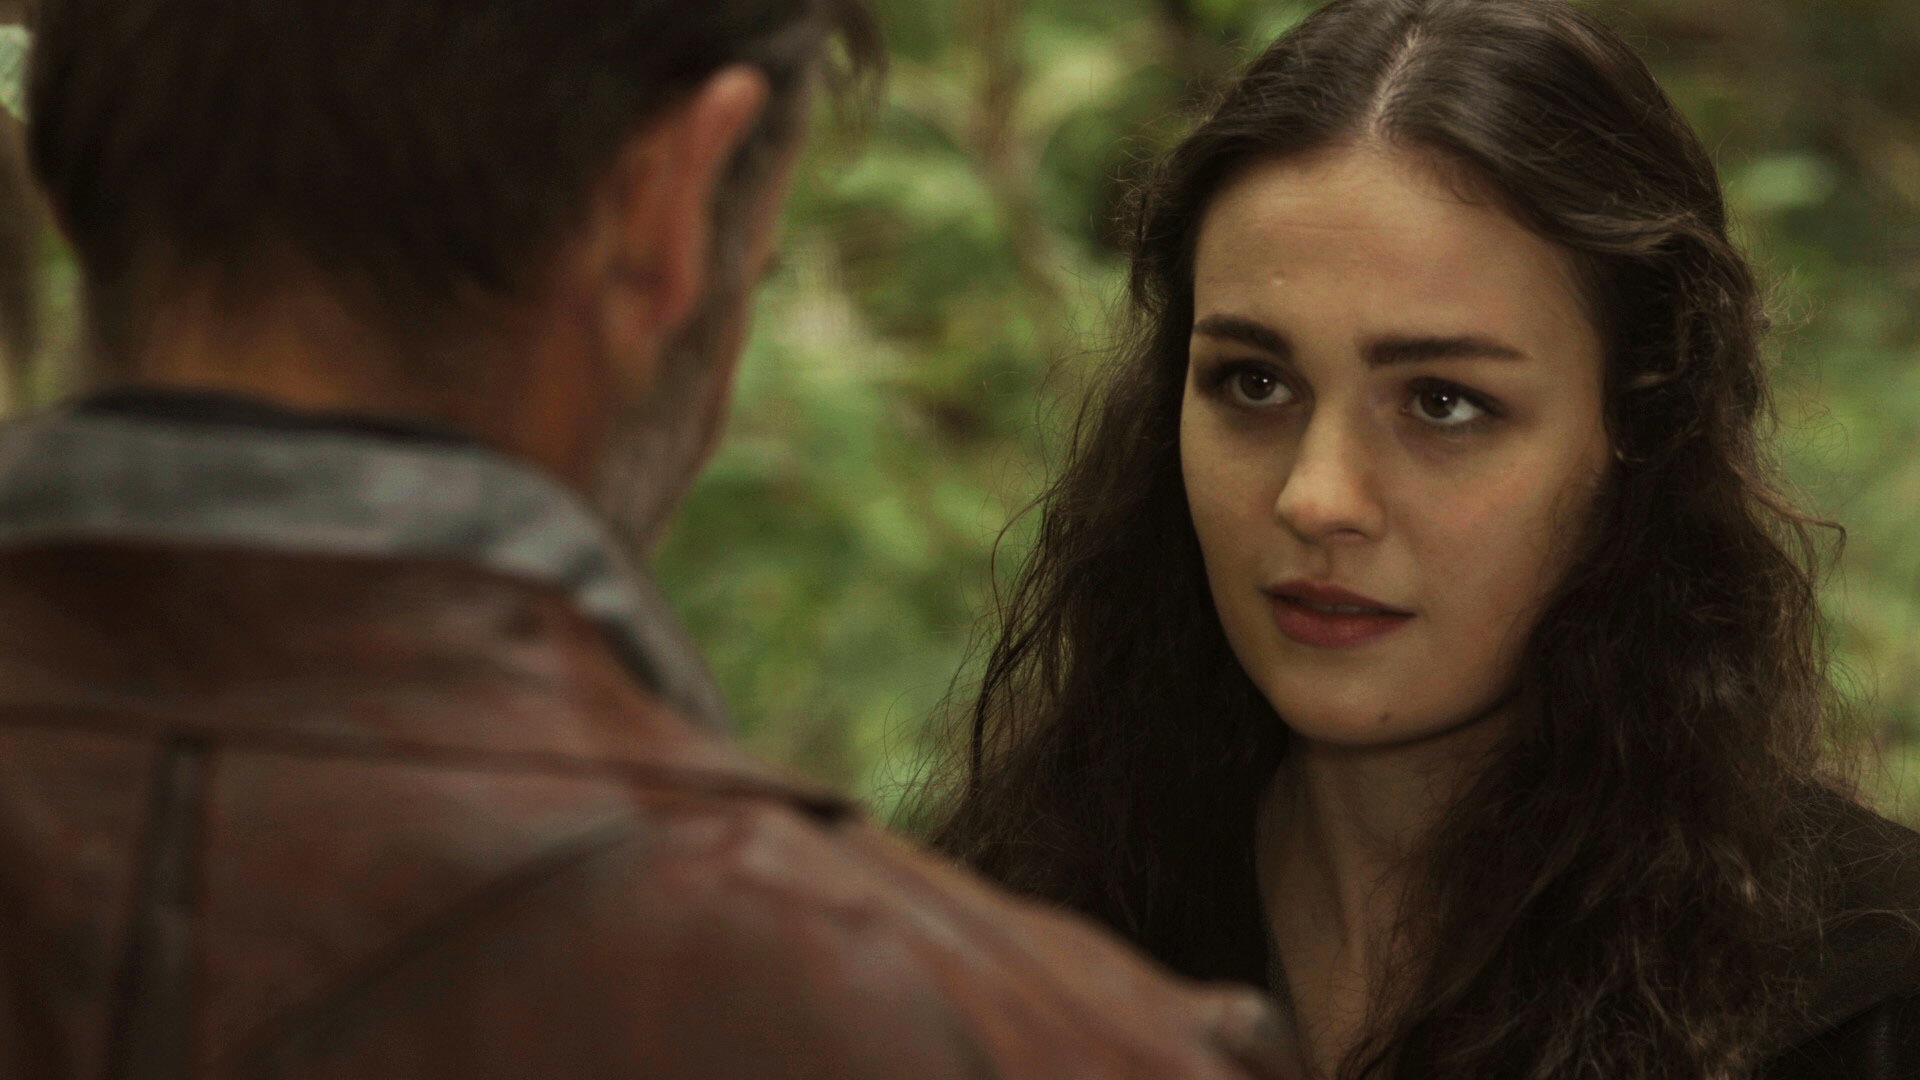
If it’s one of those dark days when reflectors just don’t seem to do anything, or you’re under the tree canopy of a forest, an LED panel can give you a bit of fill and eye-light.
So you’ve spent a while lighting the master shot of your big night exterior scene, and everyone’s ready to shoot. Then you notice that there’s an area in the background of frame which looks dark and empty, and you’d love a bit of extra light in there. Just slap a battery on your LED panel and run over there with it. No need to run power cables!
An LED panel lights the van and grass in the background of this shot from Forever Alone (dir. Jordan Morris)
An LED panel makes a good “TV” source because during the take your spark can mess with not only the brightness control but the colour balance as well, to suggest changing images on the screen.
If you’re shooting a long scene with your talent on the move and you need to maintain a little fill when they’re between lamps, an LED panel is easy for your spark to hand bash as they walk with the actors.
Under the black bag is an LED panel to keep some consistency to the light on the actors as the car moves, in a scene from The Gong Fu Connection (dir. Ted Duran)In a scene from Synced (dir. Devon Avery), we tracked the actors from the back of a pick-up truck, using the LED panel above me as fill.
Because they don’t get hot, and you don’t need power cables to them, it’s easy to hide LED panels behind bits of furniture or set dressing, to give interesting pools of light or punch up practicals.
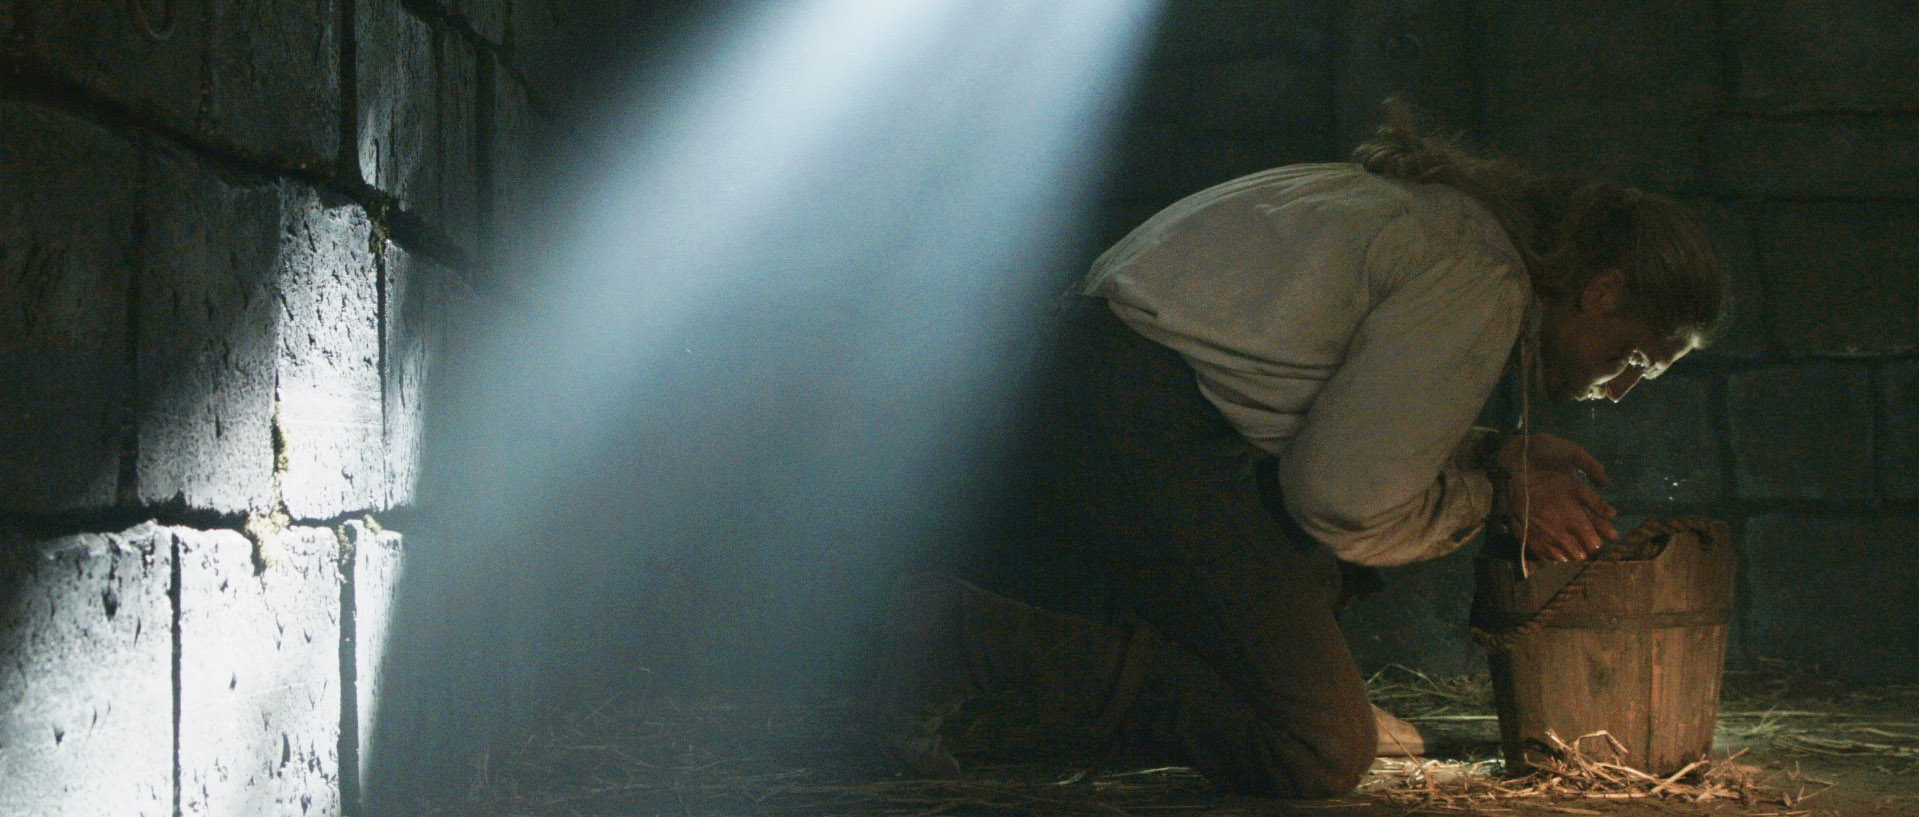
In this frame from Ren, Hunter’s face is lit by a small LED reporter light hidden behind the bucket to suggest a reflection off the water.
Actor Shigeki Maegawa, director Devon Avery, actor Oliver Park with Justine Avery in front of him, actress Daisy Hainsworth, actor Sydney Jay, me and gaffer Keisuke Ueda, at Himeji Castle575W HMI
On Wednesday May 27th I got a call from my friend and actor Oliver Park, saying he was flying to Japan on Sunday for a shoot and did I want to come as DP? He was playing the leading man in Synced, a sci-fi feature film directed and co-written by Devon Avery, and after a month of shooting in Glasgow, the existing DP had opted not to take part in the Asian shoot.
On Friday night my plane ticket came through, at midnight on Sunday I was changing planes in Qatar, and on Monday afternoon (local time) I was in Osaka. The following morning saw me at Arc System, a very helpful lighting rental house, with Devon, his wife/multi-talented assistant Justine and a couple of the Japanese crew. With two night exteriors and a night interior as well as a day exterior scene, a reasonable amount of kit was needed.
The mains electricity in Japan is 100V, 60Hz, so very similar to the US – and indeed the plugs and sockets are identical. But the killer is that you can only draw 7A per socket. That’s a maximum of 700W, as opposed to over 3,000W from a UK socket.
Canon Ultrasonic 24-70mm f2.8
So the biggest lamp we could hire without needing a generator was a 575W HMI. With one of those in the bag, I figured it was best to fill out the package with battery-powered lamps, and so hired four 1’x1′ Bi-Color LitePanels. Although I’m still not 100% sold on the colour rendition of any LED panels (even LitePanels, which are amongst the best), there’s no denying they’re incredibly handy and quick to set up.
Pentax 50mm f1.4
I would be shooting in 4K ProRes 422 HQ on my Blackmagic Production Camera, at 23.976fps. I initially stuck to two Canon L series lenses for continuity: Devon’s 24-70mm f2.8 and crew member Keisuke Ueda’s Canon L 50mm f1.4. Since I was constantly struggling to expose an image at the BMPC’s native 400 ISO, I later employed my Sigma 20mm f1.8 for faster wide shots, and I couldn’t resist trying my new Pentax 50mm f1.4, which performed beautifully at f1.7 and above, but did seem a touch soft when wide open.
Monitoring via Thunderbolt cable to Blackmagic Ultrascopes on a Powerbook
Regular readers will know of the trials and tribulations I’ve experienced getting a monitor signal out of my BMPC, with the result that I bought a 17″ Blackmagic SDI monitor last year. It was impossible to bring this to Japan, so instead – for the first time – I experimented with Thunderbolt monitoring. A runner was dispatched to buy a cable, and Devon installed the Blackmagic Camera package on his Macbook. This package includes Ultrascopes, which provides a live video view amongst other things, though annoyingly only in a pretty small window.
Whenever I turned the camera off or played anything back, the signal would be lost. To get it back, Devon would have to quit Ultrascopes and I’d have to switch to 25fps before he re-opened it. Only once it was re-opened could I switch back to 23.976fps. Please sort out that little bug, Blackmagic Design!
With the kit and workflow sorted, we travelled to Himeji (by bullet train, no less) ready to start shooting on Wednesday. Watch this space for part 2: shooting the kitchen scene.
Synced is copyright 2015 Empty Box Productions LLC.
The rain in France falls mostly on the crew of The First Musketeer.
Rain. How we’d love to go inside and have a cup of tea when the old British precipitation interrupts a shoot, but quite often the schedule demands that we carry on regardless. Here are a few tips for filming in the wet stuff.
Cover the Camera
If you don’t have a proper rain cover, a transparent recycling bag with a couple of holes cut in it will usually do the job, but have someone hold an umbrella over the camera at all times as added protection. If you have them, put on a matte box and top flag to keep rain off the lens.
Check the Lens
Condensation may well be an issue. Have an assistant with a ready supply of dry lens tissues (in a ziplock bag), because a cloth will quickly get too damp to be of any use.
In this photo by Miriam Davies from a location shoot on Ren, you can see a bagged LED panel on the left of frame.
Look After the Lighting
Transparent recycling bags are perfect for covering LED panels, which don’t get hot.
Tungsten lamps get so hot that they burn off any water before it can do any damage, so as long as they’re switched on you don’t need to worry about them getting wet, but you should wrap the switch in a plastic bag.
The same goes for HMIs, though you’ll need to put a bin bag over the ballast. Make sure the bag is loose at the top, so that the heat from the ballast can inflate it and then dissipate through the bag; if you wrap the bag on tightly, the ballast will overheat and cut out.
People can be understandably concerned about mixing water with electricity, but honestly, I’ve run tungsten and HMI lamps in the pouring rain for hours without covering them, and never had any problems. If you’re really worried, clip a sheet of gel over the lamphead to make a little hood.
16A cable
Use Outdoor Cabling
Ideally you should use only 16A (and above) cabling with C-form sockets (the round blue ones); these are rainproof. If you have to use domestic 13A extensions, wrap all the connections in plastic bags.
Seeing the Rain
The key to making rain show up on camera is backlight. If you want it to look like a real downpour, get your biggest HMI at the back of shot and blast it towards camera. Or maybe you don’t want to see the rain, maybe it’s bad for continuity, in which case you should avoid backlight at all costs.
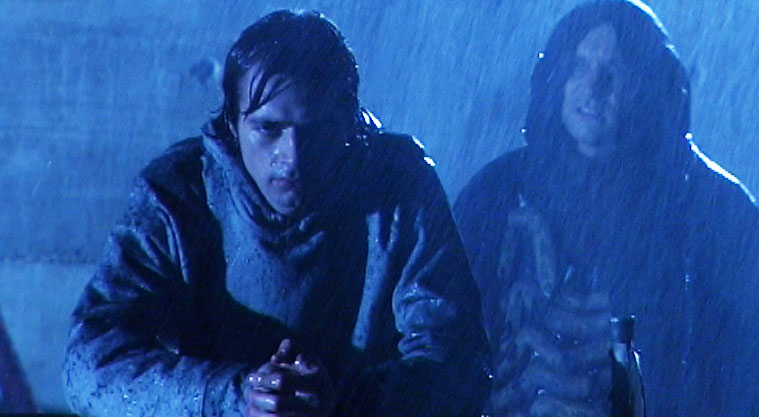
The rain in this shot from Soul Searcher is fake, but it’s backlight that makes it show up.
Need rain for your shoot but the sky is cloudless? Read my post on faking precipitation.
Got precipitation of a more wintry nature? Check out my tips for shooting in snow.
I’ll leave you with the latest Ren behind-the-scenes video, which is all about rain and shooting – or not shooting – in it. Subscribe to get the Mythica Entertainment channel to see all the latest Ren videos as they’re released.
This week the third annual Big League Cine Summit is taking place: two days of online masterclasses with top commercial, TV and feature film cinematographers. If you missed this educational and inspirational free event, here are the best tips I culled from day one’s sessions:
Frankie DeMarco – “Composition and Camera Operating for the Big Screen”
The advantage for a DP of working with a separate camera op is that you have a second opinion.
Try to think like an editor. What specific shots do you need to tell the story? Can you do it in a “oner”?
Lots of angles/coverage can kill performances and make the audience overly aware of the camera.
If you need to shift position for comfort, do it during a part of the take that the editor is unlikely to use.
You can sometimes get away with crossing the line if your singles are dirty.
Use clean singles to show that characters are not connecting with each other.
Single point perspective, a.k.a. formal composition (framing the subject centrally) can be very powerful.
Lighting for silhouette can make a simple moment highly evocative.
The best composition reflects character relationships, perhaps using layers and depth.
Good composition should draw the eye to the right part of the screen and not distract the audience.
Good cinematography should tap into the emotion of the scene and the character whose eyes we’re seeing it through.
When watching the blocking, think about the emotions. Let the scene tell you how it should be shot.
Let the lens talk to you. Try watching the blocking through different lenses and see what feels right.
A great static frame that the actor can move around in trumps panning around with the actor.
Use a dolly-in for an emotional moment, but a zoom-in to show a character having a thought or idea.
Check out Stanley Kubrick and William Friedkin films to see excellent use of zooms.
Use a long lens to disconnect your subject from their surroundings.
Play the first take safe, and then you can try tagging hand-props or pulling focus to background characters on later takes.
“When in doubt, turn it out.” i.e. beware of over-lighting!
Don’t be afraid of changing f-stops from angle to angle to maintain a consistent softness of background when your background is different distances away from different subjects.
Don’t worry about continuity too much. “The set is made of rubber.”
Try unusual compositions. Be willing to fail.
Kevin Shahinian – “Story Telling Techniques: Adding Massive Production Value”
In high-end events shooting, try to get the organisers to pick rooms that will work for sun orientation.
Use a long lens to create a potentially unsettling sense of voyeurism.
To build tension and unsettle the audience, short-side your subject and show lots of empty background.
In an over-the-shoulder shot, add power to the foreground character by having them dominate the frame.
With non-actors, shoot candid footage; you may capture genuinely great moments. Use action verbs to direct them, rather than talking in terms of emotions.
Rasmus Heise – “Extraordinary Cinematography with Minimal Lighting”
Design lighting that works from all directions, to minimise set-up times.
Use more than one colour to add depth.
Dot practicals around where possible, to give you sources that will work for different angles.
Focus on one key light source in a scene. Everything else is just a bonus.
Fluorescent tubes and sodium vapour lamps can be great low budget, low wattage solutions.
Philips makes fluorescent tubes with high CRI.
Wet down your exterior sets to add contrast and nice reflections.
Silhouette shots are quick, cheap and look great.
Matthew Santo – “Commercial Lighting: How to Light Fashion vs. Action”
Photographing commercials is all about heightened reality, perfect sunsets, perfect skin, etc.
It requires a lot of passive lighting: bounce cards, negative fill, contrast control.
On beauty and fashion commercials:
Your background can set a darker mood even if the talent has to be lit flatly for beauty.
Know your talent’s face in advance – e.g. do they have soft or hard features? Deep-set eyes?
What side is the talent’s hair parted on? This could affect your decision on which side to key from.
Try to make sure the make-up room’s lighting matches the colour of your lighting on set, so the MUA doesn’t get any nasty surprises on set.
Use Briese lights for beauty. They have hard- and softlight qualities.
Chimeras may be better for talent with less defined features.
Reduce skin texture by pushing fill through large frames or bounce, e.g. 12×12 frames.
Hard backlight looks great but beware of fly-away hair.
Combine hard and soft sources for backlight that has punch but wraps and doesn’t create shadow issues.
There’s a range of Cosmetic lighting gels that add a little warmth and diffusion.
Use a low overall light level for talent comfort and less squinting!
On sport and action commercials:
It’s about movement and body definition. Backlight and sidelight are most important.
Edgelight defines the talent’s body shape. Toplight adds muscle definition.
Lens flares add dynamism but reduce contrast, so light high-key.
Use higher light levels for highspeed shooting and to maintain focus as people move.
Here’s a brief video blog from the set of Handmade Theatre‘s The Flying Machine, explaining how spacelights are used to create an even light for multi-camera shooting.
Painting with Light is a book I first heard about when Hollywood DP Shane Hurlbut recommended it on his excellent blog. Browsing the shop at the BFI Southbank recently I came across a copy, liked what I saw… and went home and ordered it on line. Them’s the breaks.
John Alton was something of a rebel. In an era when most DPs used complex lighting set-ups hung from the studio grid, Alton lit from the floor, using fewer sources, and was consequently faster. This made him unpopular with his peers. A strained, in-out relationship with the American Society of Cinematographers didn’t help. He sometimes clashed with other heads of department too, notably designers, who didn’t like the way his lighting made their work look. But directors and producers loved him because he worked quickly.
When Painting with Light was published in 1949, Alton was emerging as a key cinematographer of the film noir genre. Today he is remembered as one of the masters of noir. His utterly black shadows, backlit fog and slatted keylights defined the visuals of films like The T-Men (1947, dur. Anthony Mann) and The Big Combo (1955, dir. Joseph H. Lewis).
A classic bit of Alton’s noir lighting from The Big Combo
However, noir lighting – or “Mystery Lighting” as Alton terms it – occupies only one chapter of Painting with Light. Two preceding chapters cover the basics of Hollywood filmmaking and introduce lighting equipment, most of which is now obsolete. Subsequent chapters cover “Special Illumination” – predominantly weather effects and vehicle interiors, “The Hollywood Close-up” – looking at key angles and introducing a clock system not dissimilar to the one I once blogged about – and “Outdoor Photography”.
The book then diverges from filmmaking, offering advice to novice photographers taking holiday snaps or equipping a portrait studio. Chapter nine, “Visual Music”, explores lighting and composition in terms of a musical allegory, each shot contributing to the symphony of the movie. Chapter twelve is the strangest, urging women to be aware of how their faces are lit as they go about their lives so that they can ensure they are always seen to their best advantage. All cinematographers know that beauty is as much about lighting as it is about bone structure and make-up, but I can’t see that idea ever catching on outside of the industry. Brief chapters on film processing, suggested improvements to cinemas, and the human eye as a camera, round out this mixed bag. A foreword, a lengthy but interesting biography and a filmography introduce the current edition.
Demonstrating the use of a clothes light
While many of the ideas and principles put forward by Alton are still relevant today, some of it serves more as a historical record of cinematography in the mid-twentieth century. Curiously propounding the system he apparently rebelled against (I wonder how different the book might have been had he written it at the end of his noir period), Alton paints a picture of a time in which cinematography was much more complex and artificial. Whereas today we talk of the three-point lighting system of key, fill and backlight, Alton speaks of an eight light system, adding:
eyelight – to give a sparkle in the eye
kicker – a three-quarter backlight to define the jaw
clotheslight – a cross-light to bring out the texture of the costumes
filler – not to be confused with fill, the filler is purely to cure vertical shadows from a high keylight
background light
While the modern cinematographer is aware of all of the above and tries to incorporate them, he or she tries to make lamps pull double- or triple-duty and would almost never use eight lamps to light a single close-up. Alton also advocates abandoning all of your wide-shot lighting and starting again from scratch for the close-up, to beautify your star; today’s audiences would not accept the mis-match of such radically re-lit close-ups. He talks of flag and grip equipment which could never work with today’s dynamic blocking and camera movement, like a “chin scrim” designed to cast a very specific shadow on the collar of a white dinner jacket to stop it blowing out.
Alton explains his clock system and its effect on an orange
But some sections still have undeniable value today. Alton looks at different types of faces and how to light each to their best advantage, how to light a dinner table or a campfire scene, and how to light for different times of day. He maintains that movie lighting should always mimic what natural light does in real life – hard to believe, but this was quite a radical concept in 1949. Examples and diagrams are used throughout to illustrate his techniques.
For me the most interesting part was his insight into depth in cinematography. Many DPs, myself included, feel that a shot looks best when the foreground is dark, the midground is correctly exposed and the background is bright. Alton offers the following explanation of this phenomenon:
At night when we look into an illuminated room from the dark outside, we can see inside but cannot be seen ourselves. A similar situation exists in the motion picture theatre during a performance. We sit in the dark looking at a light screen; this gives a definite feeling of depth. In order to continue this depth on the screen, the progression from dark to light must be followed up. The spot which should appear to be the most distant should be the lightest, and vice versa…
I have no doubt that there are more useful tomes on the market for a student of contemporary cinematography, but if you like a bit of history along with useful tips you’ll find Painting with Light a good read. Like a time capsule, reading Alton’s book today reveals which bits of the past were transient fads and which were timeless universal truths. The importance of depth, the tricks of lighting for different faces, the textural power of cross-lighting, the drama of back-lighting… There are plenty of timeless truths here, and in learning them from Alton you’ll be following in the footsteps of many great cinematographers.
As you would expect from the master of noir, Alton’s chapter on mystery lighting emphasizes the importance of shadows.
Lighting in the controlled environment of a studio should theoretically be much easier than lighting a location, but I found recently that it doesn’t come without its challenges.
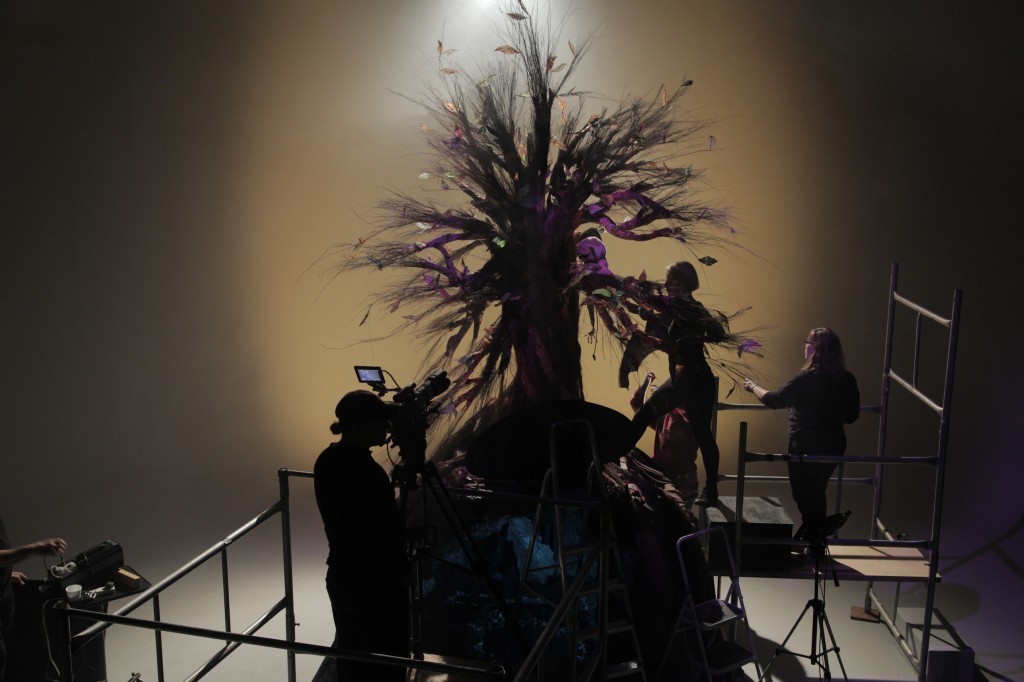
Last month I had the pleasure of working on a music promo for Droplets by Lewis Watson and Gabrielle Aplin. Directed by Tom Walsh and designed by First Musketeer veteran Amy Nicholson, this magical, handmade puppet fest was only the second or third studio-bound production of my career. Tom had secured the use of Giltbrook Studios, an impressively equipped 1,300 sq ft soundstage in Nottingham, complete with manager Andy Swain as gaffer.
Apart from the exclusion of pesky natural light, the biggest advantage offered by a stage over a location is the lighting grid; no more wondering if that polecat or K-clamp will take the paint off the wall, and no more compromising your backlight position to keep the stand out of frame. The downside of the grid is the time it takes to rig or adjust a light, particularly if the grid, like Giltbrook’s, has no catwalks, and every adjustment must be made by bringing in and scaling a huge ladder. In fact it may be impossible to rig or adjust lights once there is a finished set underneath. All of which means you’re going to need a pre-rig day.
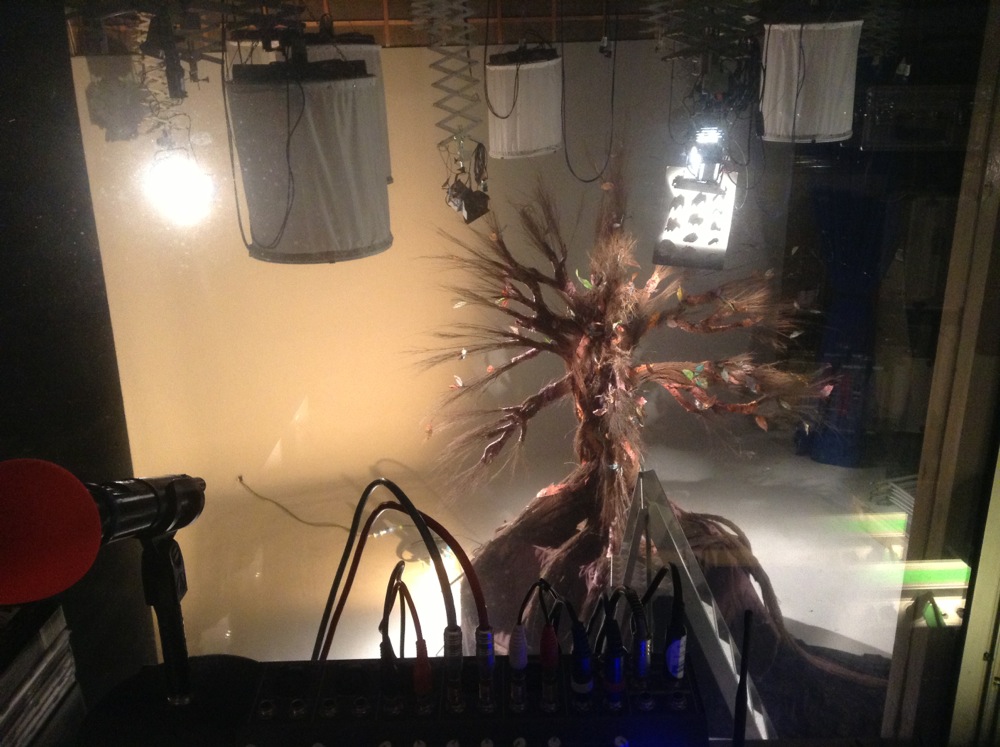
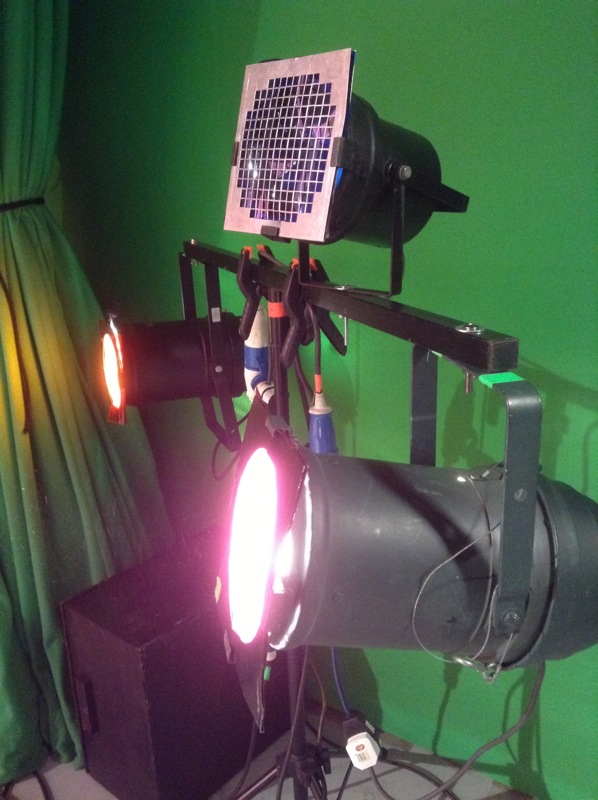
Some of the ill-fated space lights can be seen here, as well as the cucoloris rigged beneath the 650W fresnel key light. At the top left is the 2K fresnel backlight.
In the case of Droplets, the pre-rig day was also used to assemble the set, a tree on top of a cave, which must have measured about fifteen feet in height. As soon as it had been erected we realised that the six space lights Andy had spent all morning rigging were going to be in frame, as the top of the tree reached above the bottoms of these lights. (A space light is a circular arrangement of six tungsten tubes inside a cylinder of white diffusion cloth. They’re typically used in large numbers to simulate daylight in a studio.)
Some of the par cans that supplied the colour wash on the backdrop.
In fact my options on where I could put lights were very narrow, because of the lack of space around the set, both vertically and horizontally. We shot against the studio’s white infinity cove, and Tom wanted colour washes over this to suggest various times of day. Andy achieved this with gelled par cans off to either side of the set, but then it was crucial that no other light spilled onto the backdrop or it would ruin the effect.
We rigged a 2K tungsten fresnel immediately behind and above the set, for backlight, but it was hard to put anything in from the sides or the front without contaminating the backdrop. The 650W key light had to be rigged almost directly above the set, and even then its shadow can be seen on the floor in the wide shots if you look carefully. We hung a cucoloris (sheet of wood with random shapes cut in it) below the 650 to created the dappled effect of woodland light, taking care that a patch of light fell on the tarsier puppet’s main position.
For fill I used an LED panel off to the right of the set, dimming it to find a balance between its light being barely visible on the backdrop while still lifting the set and the puppets enough. I placed a smaller LED panel inside the cave, with a turquoise gel to suggest phosphorescence.
The final day/sunset look. From each side an orange-gelled and a pink-gelled par can light the backdrop. A 2K tungsten fresnel provides backlight, while a 650W fresnel with a cucoloris provides dappled light on the tree and tarsier. An LED panel off right supplies fill, and a second panel is inside the cave with a turquoise gel.For closer shots, a reflector below frame and/or a Dedolight behind camera were used to fill in unwanted shadows.
Another advantage of a studio is that you can easily run all the lamps into a dimmer board. This was very handy for Droplets because in addition to the day/sunset look, we had nighttime scenes and a storm to light for, and some on-screen transitions between the states. We were able to set these all up in advance and switch between them pretty much by just pushing a few sliders up and a few others down.
The night state involved a yellow-gelled redhead on the floor behind the cave, pointed straight at the backdrop. With its barn doors removed, this created a circle of light which reminded me strongly of the huge yellow moon in the posters for The Nightmare Before Christmas. I hadn’t been intending to create such a defined circle, but when I saw it I immediately loved its stylised look.
A second 650W fresnel was rigged, close to the first, and with ulcered black wrap in front of it to again created a dappled look, but with a purple gel on it. This took us away from the more traditional blue of nighttime scenes, adding to the stylised look again, and contrasting nicely in colour with the yellow “moon”.
The 2K backlight remained on for the night scenes, but the sunset colour wash on the backdrop was switched off, as was the fill.
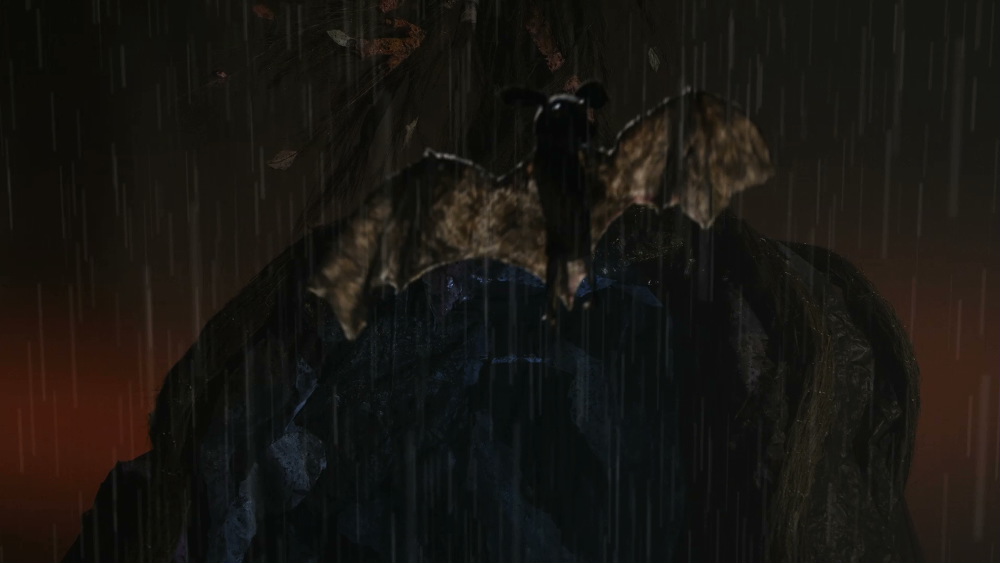
Nighttime in puppet land: the 2K backlight remains on, a yellow-gelled redhead lights the backdrop from behind the set, and a purple-gelled 650W fresnel in the grid pushes through a cucoloris to highlight the tarsier.
For the storm scene we experimented with strobes, but they caused unpleasant rolling shutter artefacts. Instead I used the flash button on the 2K’s dimmer box to create lightning. Both 650W fresnels were turned off for this state, but the fill was turned back on. While the pink colour wash remained off, we brought up the orange wash just a little bit to suggest an angry sky in the background.
Stormy weather. The orange colour wash coming from the par cans, originally set up for the sunset look, is used here much more dimly to suggest an angry sky. The LED panel off right supplies fill while the 2K backlight is flashed periodically.
Copious smoke was used throughout (another advantage of studios – your smoke stays put!) to generate god rays as the backlight streamed through the tree. It also helped soften the backdrop and render the colour washes more convincing as a sky.
Watch the video here. Shot on a Red Epic operated by Chris Wetton. Big thanks to Andy and Giltbrook Studios for all their help. Visit www.polymathematics.co.uk to find out more about the amazing work of Tom Walsh and Amy Nicholson.
A director of photography should always be backed up by a good gaffer. They will ensure that all the lights are rigged safely and that the appropriate power supply is provided for each one. Here are some basics you need to know if you’re stepping into this role.
Redheads draw 800W each
P=IV
Remember that from GCSE Physics? Power = current x voltage, or watts = amps x volts. From this we can calculate that an ordinary 13 amp domestic socket on the 240V UK mains supply can provide up to 3,120W.
A redhead draws 800W, so we can run three off one socket (3 x 800 = 2,400W which is under the 3,120W limit) without blowing a fuse.
Most UK houses have two separate circuits (known as ring mains) for the sockets: one for upstairs and one for downstairs. Usually these are each on a 30 or 32 amp breaker. So although you can only draw 3,120W off one socket, you can draw 7,200W (30 amps x 240 volts) total off one floor’s sockets.
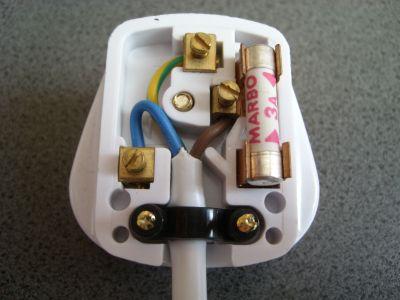
Always carry spare fuses
The first thing the gaffer should do on arriving at a location is to find the fusebox to check how many ring mains there are, where they are and what amperage of breaker they’re on. Beware that large commercial/industrial buildings may have multiple fuseboxes in different parts of the building. Make sure you have access to all of them so you can reset any circuit breakers you trip.
Also ensure you have a supply of fuses in case you blow any in the plugs of your lights or extension leads. When a bulb blows due to reaching the end of its natural life it will take the fuse with it.
Check the wound and unwound ratings of your extension reels
You need to make sure your cabling is appropriate for the load you’re drawing. Extension leads can melt if you try to run too much power through them. All extension reels will have two maximum wattages written on the front of them: one for when the reel is fully wound, and one for when it’s fully unwound. When the cable is wound up it can overheat very easily, so pay attention to those quoted limits.
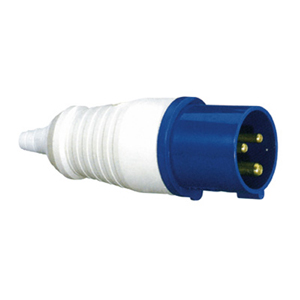
16 amp C form plug
Professional hired kit is often fitted with heavy duty cabling, signified by round blue “C form” plugs and sockets. C form outlets can be found in soundstages and factories, on generators and occasionally on exterior walls of houses. They are weather resistant, so much safer for use outdoors than domestic cabling.
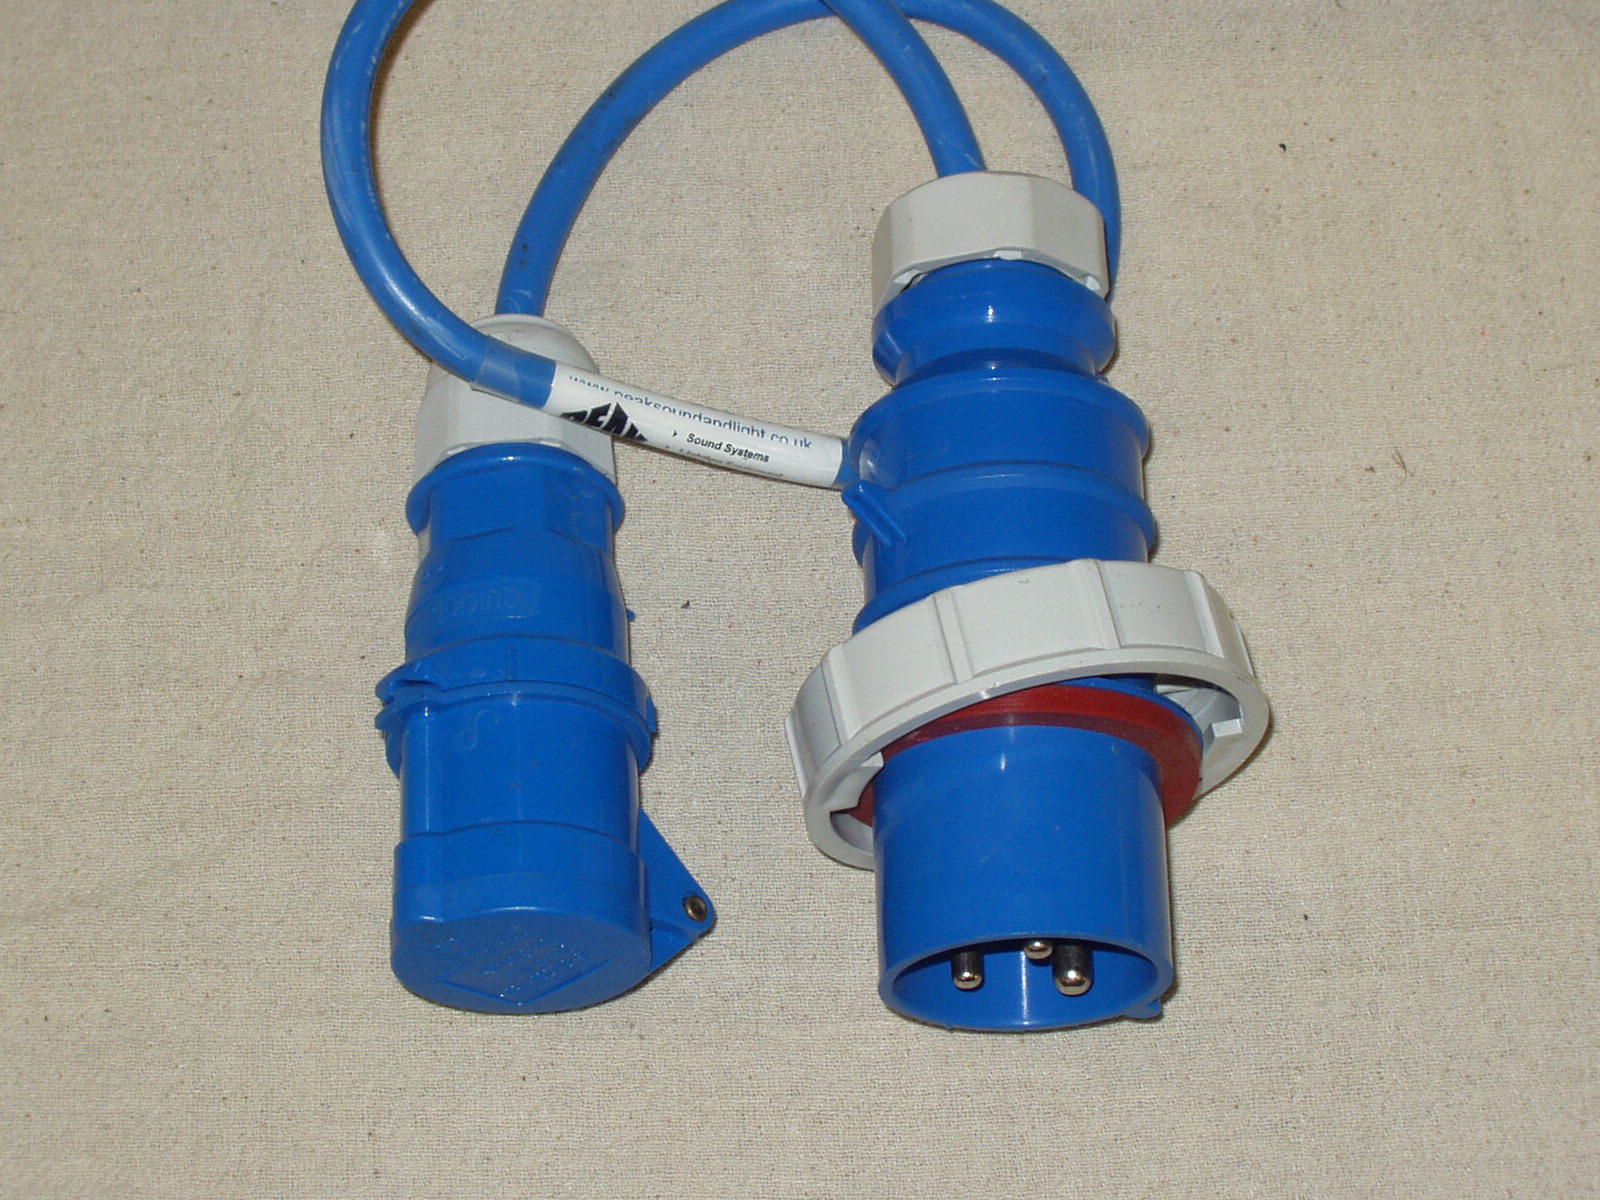
32 to 16 amp jumper
The associated cable comes in 16 amp and 32 amp flavours, the latter being thicker with larger plugs and sockets. A 13 to 16 amp jumper – a short adapter cable with an ordinary square UK plug on one end and a 16 amp C form socket on the other – will enable you to plug an appliance with a smaller C form plug into a standard domestic socket. Jumpers exist in every other possible direction and combination too, so it’s important you get the right ones.
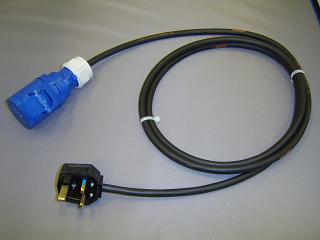
13 to 16 amp jumper
Also remember that, although a 13 to 32 amp jumper will let you physically plug, say, a 4KW HMI into a domestic wall socket, that 13 amp plug will not support a 4KW load; you’ll blow the fuse. In fact if something has a 32 amp plug on it then the only way to run it safely off a house is to have a qualified electrician wire a 32 amp socket into the fusebox. Definitely don’t try to do that yourself.
In fact if you’re in any doubt about any of the above, consult an experienced gaffer or electrician. Be safe!
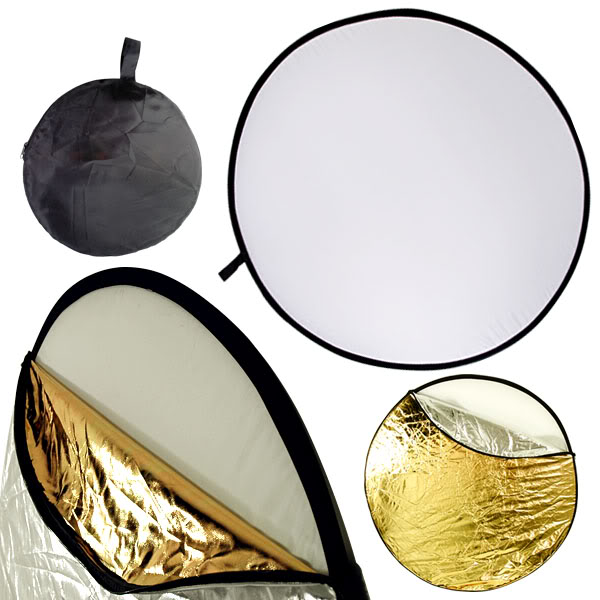
Reflectors are incredibly useful tools, whether you’re a one-man crew or a DP on a big set. And with a 5-in-1 reflector costing only around £10 on Amazon there’s really no excuse not to own one. Here are some of the things you can do with one of these:
On a cloudy day, use the SILVER side to bounce light into the shadows on your subject’s face.
On a sunny day, use the WHITE side for the same purpose (the silver side would be bright enough to make the subject squint) and to put a nice white reflection in the subject’s eyes.
To simulate firelight, bounce a lamp off the GOLD side of the reflector and wobble it gently.
Use the BLACK side for negative fill, useful when shooting in a room with white walls to get some shape and definition back into your subject’s face.
Strip the reflector down to the TRANSLUCENT WHITE centre and rig it on a C-stand above the subject’s head to reduce and diffuse harsh sunlight.
Two reflectors, one below and one above frame, perform functions 2 and 5 respectively. (Georgina Sherrington as Kate in Stop/Eject)
Loyal readers, once again I need your help. Do you own any of the following things? Would you be willing to lend them to us for the Stop/Eject shoot? (In most cases we would need to collect them on April 20th and return them on the 26th or soon after.)
A lady’s vintage/retro bike
Any empty cassette cases
A camera jib (small enough to be used indoors)
A mini-spotlight kit (Dedolights or similar)
An HMI (any wattage considered)
Any fast Canon EF(S) prime lenses 85mm or longer
Walkie talkies
Rest assured your items will be well looked after, and in return you’ll be credited on the film, receive an invite to the premiere, a DVD copy, and a free download of my indie feature film budget and sales exposé How to Make a Fantasy Action Movie for £28,000.
Also if there’s anything we can lend you in return, we’d be happy to do it. (I have some Canon DLSR camera kit, shoulder rig, tracking dolly, basic lights and so on.)
Since our travel budget is limited, we could really only borrow things that are located in or near Hereford or North Derbyshire, or somewhere en route between those two places (e.g. Birmingham).
Finally, if there are any unsigned bands out there who have an angry-sounding rock/metal/punk song we could use a little bit of in the film, please get in touch.
Contact me on: neiloseman [at] googlemail.com
By the way, let me assure any of you concerned by the cryptic ending of my last post that no-one has died or been injured or anything terrible like that. But unfortunately we are having to look for a new leading lady. The shoot dates have not been changed.