On the recce for The Second Shepherd’s Play. Photo: Douglas Morse
As a cinematographer, it can often be tempting to make your shots look as slick and beautiful as possible. But that’s not always right for the story. And sometimes it can leave you nowhere to go.
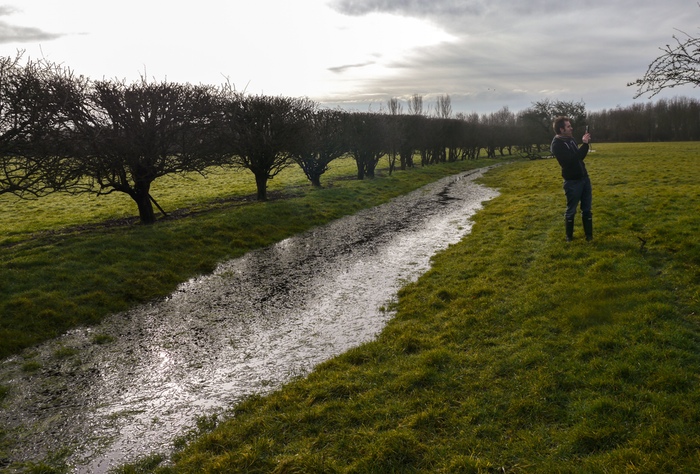
Currently I’m shooting The Second Shepherds’ Play, a medieval comedy adaptation, for director Douglas Morse. The story starts in the mud and drizzle of three shepherds’ daily drudge, and in a Python-esque twist ends up in the nativity. The titular trio develop from a base, selfish, almost animalistic state to something much more divine.
So, much as my instincts filming the opening scenes yesterday were to have a shallow depth of field and bounce boards everywhere to put a sparkle in the shepherds’ eyes, this wouldn’t have been right for this stage of the film. We had to have somewhere to go, so I shot at around f9 all day with unmodified natural, overcast light. As we get towards the end of the story – we’re shooting roughly in story order – I’ll start to use eyelight and more sculpted illumination and reduce the depth of field, as well as switching from handheld to sticks.
Grading episode one of Ren
Similarly, grading episode one of Ren the other day, it was important to keep things bright and cheerful, so that later episodes could be colder and darker by comparison when things go wrong for our heroes. And playing the long game, I lit Ren herself with soft, shadowless light for most of the first season, so that as she develops from innocence to more of an action heroine in later seasons, her lighting can get harder and moodier.
Like all heads of department on a production, DPs are storytellers, and it all comes down to doing what’s right for the story, and what’s right for that moment in the story.
Every cinematographer needs to make the cast look good. Here are some quick tips for minimising blemishes and undesirable physical attributes. To any readers who have been lit by me, please don’t get a complex! These techniques can also be used to make someone who’s already flawless look even more amazing. Conversely, if you have a bad guy, or a character who needs to look ill, or a prosthetic monster make-up, you might want to do the opposite of what I suggest below.
Thinning hair – Avoid toplight and strong backlight, which will show up the scalp under the hair.
Wrinkles, spots and scars – Avoid lighting that will throw shadows from these features, e.g. cross-light (meaning light from the side). Instead put the key light as close to the camera as possible. Ideally use a soft source. If you’re still seeing shadows, add more fill.
Double chins, bags under the eyes, general appearance of tiredness – Use Health Bounce – a reflector placed under the talent’s face to eliminate shadows cast from above.
Small or deep-set eyes – Again, use Health Bounce. It will help get light into the eye sockets and put a sparkle of reflection in the eyeballs.
Weak jawline – Use three-quarter backlight (a.k.a. “kicker”) to create a rim along the jawline on one side.
Shiny skin – This may be a make-up issue, but you can help by using bounced light. Kinoflos, though they are soft sources, are amongst the worst culprits for creating shine.
Big nose – Keep the key light close to the camera to minimise the shadow the nose casts.
I thought it was about time my showreel got an update, so here it is:
Please get in touch if you need a DP. I’ll consider most projects as long as they’re creative and not entirely unpaid.
These are the films, series and promos featured on the reel. If you want to find out more about any of these productions, you can find links in the showreel’s YouTube description.
The First Musketeer (dir. Harriet Sams)
The Gong Fu Connection (dir. Ted Duran)
Ren (dir. Kate Madison)
Savage Messiah: Hellblazer (dir. Tom Walsh)
WidthScribe (dir. Neil Oseman)
The One That Got Away (dir. Neil Oseman)
Girl and a Scar (dir. David Cave)
How to be Dead (dir. Lara Greenway)
Revenge of Calculon: X, Y & Z Rays (dir. Tom Walsh)
Self-control (dir. Stanislava Buevich)
Lewis Watson: Droplets feat. Gabrielle Aplin (dir. Tom Walsh)
The Wrong Funeral (dir. Roger Harding)
Stop/Eject (dir. Neil Oseman)
Wasteland trailer (dir. Tom Wadlow) *
See Saw (dir. Tom Muschamp)
Forever Alone (dir. Jordan Morris)
Three Blind Mice (dir. KT Roberts)
* Note: I only worked on the trailer, not the film itself.
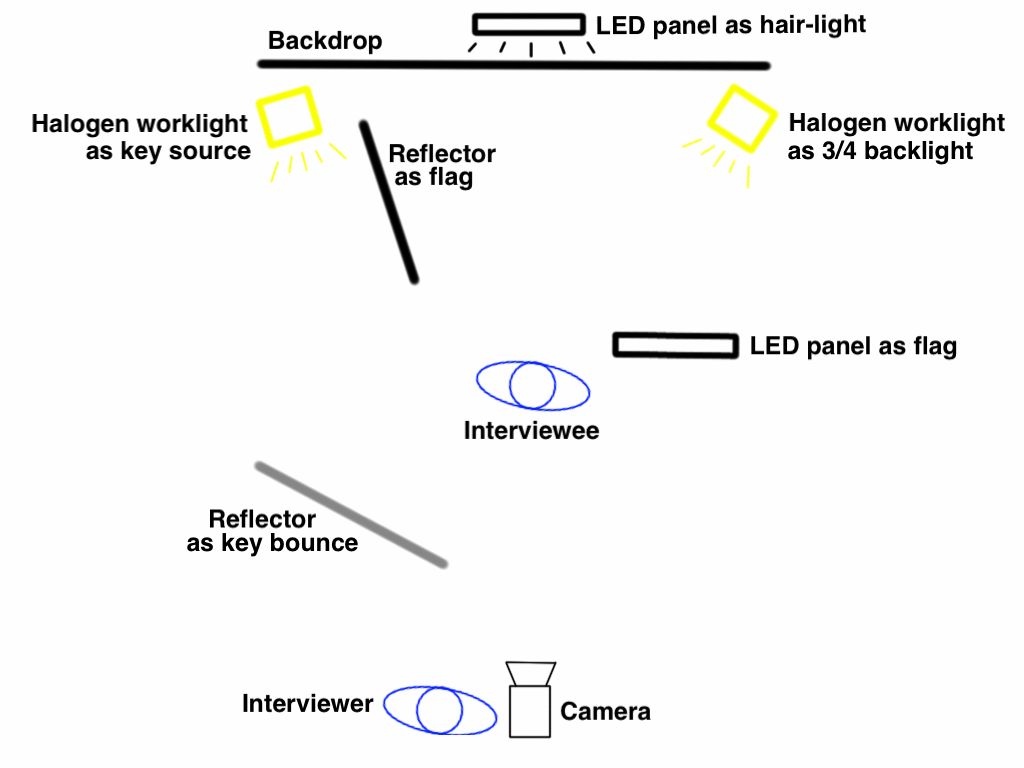
Left to right: the flipchart holding up the key bounce reflector, the halogen key source with the flagging reflector immediately to the right of it, the hair-light LED panel peeking over the backdrop above the hot seat, the LED panel acting as a flag, and the halogen 3/4 backlight.
Shooting interviews is a great way for a cinematographer to learn to light. I figured out loads about how human faces react to light of different kinds from years of experimenting on the talking heads in corporate videos. And because those interviews were often long and dull, there was plenty of opportunity to evaluate my lighting as I relaxed behind my locked-off camera.
At the weekend a “promo day” was held for Ren, the fantasy-action web series which you must all have heard of by now. The goal was to shoot publicity stills of the lead actors, and to shoot interviews for the EPK (Electronic Press Kit). We decided to stage these against a black backdrop.
Our venue was the office-cum-studio of the nascent Cambridge TV station, kindly lent to us for the day, but the only lighting kit we had were two Chinese LED panels, two halogen worklights and a couple of collapsible reflectors. I knew from the start that I wanted to use the worklights to key the talent, because halogen bulbs put out a much fuller spectrum of light than budget LEDs. Without a full spectrum you can’t capture all the skintones, and your subject will lack life.
Here’s the lighting set-up I arrived at.
I’ll talk you through it.
The keylight (halogen, top left) bounces off the silver side of a reflector (resting on a convenient flipchart) to give a nice, soft source. The second reflector is used as a flag to stop direct light from reaching the talent.
The second halogen (top right) serves as a hot three-quarter backlight. One of the LED panels is used as a flag (!) to stop this backlight flaring into the lens.
The other LED panel pokes over the top of the backdrop to provide hair-light.
The white walls of the studio provide sufficient bounce to render a fill light unnecessary.
The result is a nice, slick, minimal look. The two backlights stop dark hair or clothes from disappearing into the background, and the soft key is flattering to all yet is at enough of an angle to provide shape and contrast – see how it outlines Sophie’s left cheek and jaw.
Incidentally, we considered using a white backdrop for a little while. Had we gone with this, how would I have changed the lighting? I would have had to lose the backlights, because white rim-light will only make your subject bleed into a white background. The lamps thus freed could have been trained on the backdrop in an attempt to blow it out, but it’s questionable whether that would have been achievable with the Blackmagic’s dynamic range. Finally, I expect I would have introduced negative fill to get rich, black shadows on the talent’s up-side, in order to get some contrast into the image. More on lighting for a white backdrop here.
After the publicity shoot, we repaired to Kate’s place for a Q&A livestream. Here it is if you missed it. Subscribe to Mythica Entertainment’s YouTube Channel to make sure you never miss our behind-the-scenes videos and trailers.
A cinematographer should always be looking for ways to enhance the story through camerawork and lighting. 18 months ago I lensed a short film called 3 Blind Mice, which sadly seems permanently mired in no-budget postproduction hell. It comprises a trio of vignettes linked by a common theme. Each vignette featured two characters: one real, one supernatural or imaginary. In preproduction, director KT Roberts told me that she wanted the unreal characters to look somehow artificial, so I decided to give these characters each a perfect halo of backlight, whilst simultaneously eliminating all shadows on their faces. By contrast, the real characters would have no backlight and a grittier look to their faces with light and shade.
The first vignette to go before the camera was an interior scene, so we sat the unreal character (Charlotte Quinney, above right) in front of the window for backlight, and used a 4 bank 4ft kinoflo and a collapsible reflector to evenly light her face. The natural daylight was reinforced by a 1.2K HMI outside the window, gelled pink to match the colour scheme of the set dressing and suggest sunset. The real character (Libby Stewart Power, above left) was strongly lit from the right side by the “daylight”, with only a low level of fill from the reflector off left.
The other two vignettes were daylight exteriors. In both cases the 1.2K was used to halo the unreal character, with a reflector and silver foamcore used to fill in their faces (Will Attenborough, above right – third vignette). The 1.2K was used again when shooting the real characters, this time bouncing it off the reflector onto one side of their face. In the case of the final vignette, the other side of the real character’s face (Jack Mosedale, above left) was filled in by natural light, so we brought in a black drape hung from a flag arm as negative fill to combat this.
Shooting the real character in the final vignette. At left is the reflector bouncing the HMI (right). In the centre can be seen the black drape creating negative fill.Shooting the unreal character, surrounded by silver foamcore (bottom right) and a collapsible reflector (left) to remove shadows from his face. The 1.2K HMI in the background creates a halo of backlight around his head.
How have you used lighting to help tell your stories?
Recently I photographed Self Control, a short film by writer-director Stanislava “Stacey” Buevich. Joanna Kate Rodgers plays Lily, a woman who struggles to control her violent urges when she’s befriended by an extremely annoying colleague.
A read of Stacey’s shotlist revealed a clear Wes Anderson influence, which was great for me because I immediately knew the parameters: flat angles, formal composition, deliberate 90 degree pans and lateral tracks. Stacey also referenced Ida, which led to several wide shots with lots of headroom, like this one…
Creating interesting shadows by using a partition window at the location.
Lighting wise, it was a limited kit (two tungsten 2Ks and a Dedo kit with only two functioning lamps). Bin bags and some sheets of thin white packing foam were used to eliminate or reduce natural light coming through offscreen windows, to give shape and contrast to the images. For a scene in the office kitchen, I fired one of the 2Ks through a high partition window to create some shadows.
I knew that I wanted to do something with lighting to clue the audience into Lily’s true identity (she’s the devil in human form). By the end of the first morning I’d settled on lighting her from below whenever possible. In this CU from an office scene, a blue-gelled tungsten 2K was fired down onto a white desktop in front of Lily…
A 2K fires down onto a white desktop to uplight Lily (frame grab below).
For a yoga/relaxation scene on the second day, production designer Devon Barber conveniently dressed in a row of tealights on the floor in front of Lily, giving me a great excuse for satanic, fiery bottom-light. We set up a Dedo either side of camera, firing down into strips of kitchen foil so that the light would bounce back up onto Lily’s face. The Dedo dimmers were ridden by my ACs during takes to create a flickering effect.
Strips of tinfoil placed on the floor around the dolly track reflect two Dedolites (just out of frame either side) back up onto Lily’s face. A 2K hidden behind the wall on the right provides backlight.
To find out more about the work of Stacey and her producing partner Lara Myles, visit www.clockpunkfilms.com
The rain in France falls mostly on the crew of The First Musketeer.
Rain. How we’d love to go inside and have a cup of tea when the old British precipitation interrupts a shoot, but quite often the schedule demands that we carry on regardless. Here are a few tips for filming in the wet stuff.
Cover the Camera
If you don’t have a proper rain cover, a transparent recycling bag with a couple of holes cut in it will usually do the job, but have someone hold an umbrella over the camera at all times as added protection. If you have them, put on a matte box and top flag to keep rain off the lens.
Check the Lens
Condensation may well be an issue. Have an assistant with a ready supply of dry lens tissues (in a ziplock bag), because a cloth will quickly get too damp to be of any use.
In this photo by Miriam Davies from a location shoot on Ren, you can see a bagged LED panel on the left of frame.
Look After the Lighting
Transparent recycling bags are perfect for covering LED panels, which don’t get hot.
Tungsten lamps get so hot that they burn off any water before it can do any damage, so as long as they’re switched on you don’t need to worry about them getting wet, but you should wrap the switch in a plastic bag.
The same goes for HMIs, though you’ll need to put a bin bag over the ballast. Make sure the bag is loose at the top, so that the heat from the ballast can inflate it and then dissipate through the bag; if you wrap the bag on tightly, the ballast will overheat and cut out.
People can be understandably concerned about mixing water with electricity, but honestly, I’ve run tungsten and HMI lamps in the pouring rain for hours without covering them, and never had any problems. If you’re really worried, clip a sheet of gel over the lamphead to make a little hood.
16A cable
Use Outdoor Cabling
Ideally you should use only 16A (and above) cabling with C-form sockets (the round blue ones); these are rainproof. If you have to use domestic 13A extensions, wrap all the connections in plastic bags.
Seeing the Rain
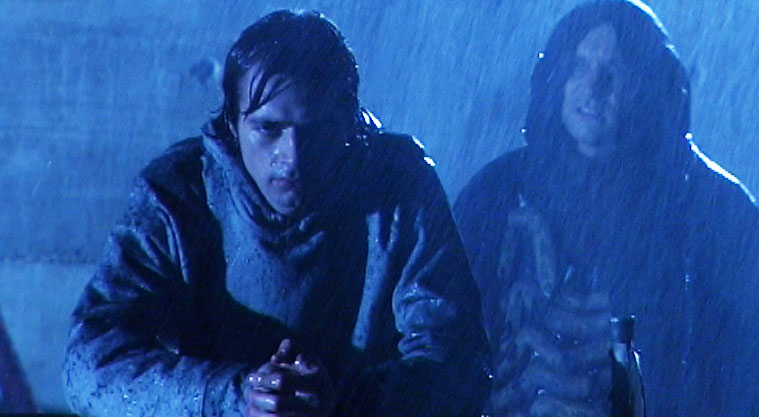
The key to making rain show up on camera is backlight. If you want it to look like a real downpour, get your biggest HMI at the back of shot and blast it towards camera. Or maybe you don’t want to see the rain, maybe it’s bad for continuity, in which case you should avoid backlight at all costs.
The rain in this shot from Soul Searcher is fake, but it’s backlight that makes it show up.
Need rain for your shoot but the sky is cloudless? Read my post on faking precipitation.
Got precipitation of a more wintry nature? Check out my tips for shooting in snow.
I’ll leave you with the latest Ren behind-the-scenes video, which is all about rain and shooting – or not shooting – in it. Subscribe to get the Mythica Entertainment channel to see all the latest Ren videos as they’re released.
Stage-bound music promos can be an interesting challenge for a cinematographer. Often there is no set that has any basis in reality, no windows, no starting point for lighting. This should be very freeing but is actually pretty scary. Where to start?
Nick Pylypiuk did an awesome job of building and programming the LED panels, and Amy Nicholson did a great job of dressing the gadgets and cables. How did I go about lighting it?
2 of the 800W tungsten lamps hidden behind the big LED panels
Well, cinematography isn’t just about mimicking natural light. It’s about depth and contrast, to name just two things. And depth was where I started. If I didn’t want the LEDs to float in a black background, then it was necessary to light the cyclorama to reveal it as a separate layer behind the LED panels. But leaving the cyc dark would give the image more contrast. I wanted to have my cake and eat it. So the lamps I lit the cyc with had to be dimmable so that they could be off at some points during the track and on at others.
I placed 800W tungsten lamps on the floor behind the central and outermost LED panels, uplighting the cyc. Poor Emma, the art assistant and the smallest member of the crew, was assigned to hide behind one of the panels, pulsing the 800s on a dimmer board in time with the music.
Next I needed to light the musicians. We didn’t have access to the studio grid, the LED panels were providing plenty of light from behind, and any light from the front would have polluted the panels, so my only option was to light from the sides. I placed a Dedolite off to each side, gelled with different varieties of blue/green gel to make this layer of the image stand out from the warm, ungelled tungsten of the 800s.
The 4 Dedolites can be seen here, gelled blue-green, blue-green, purple and yellow.
This was all very well, but it left a lot of the art department’s nice foreground dressing in complete darkness. So I set up a second Dedolite on each side, crosslighting the amps and other gubbins. I gelled one of these yellow and the other pinky-purple. Normally I prefer to use a narrower palette of colours, but since the patterns programmed into the LED panels used all the colours of the rainbow, I felt I had license to do the same.
After a couple of run-throughs, I decided on an alternating, pulsing pattern for the four Dedolites at half the speed of the 800s. My initial instinct had been towards something more sophisticated, but there was plenty going on on the LED panels without needing to make the foreground too manic.
Clockwise from top right: a blue-green-gelled LED panel, a tungsten-tubed Kinoflo and a daylight-tubed Kinoflo Divalite amongst the set dressing
Amy was still looking to add to the set dressing, so I suggested putting our battered old Kinoflo into shot for a bit of extra interest. This left only a Kinoflo Divalite and a 1×1′ LED panel in my arsenal. “What the hell,” I thought, and hid them behind a couple of the amps to pick out some more of the set dressing.
Despite all this, I still think the strongest bits of the video are those where all my lights are off, leaving just the patterns on the large LED panels. With a bit of dispersed smoke in the studio, the LEDs give off a lovely glow, and the dynamic wrapping backlight they shed on the performers is really beautiful.
And we quickly found that they looked great out of focus, and went with that for a few set-ups. In fact, much of the single day of shooting was spent experimenting and going with the flow. Tom trusted me to get interesting coverage while he helped operate the LED panels, and I found the electronic music guiding me into Wes Anderson-style camera moves: lateral tracks, and bold, simple pans and tilts.
Sometimes when shooting indoors, you need to make day look like night. And believe it or not, there’s an art to blacking out windows. Light is like water: it leaks in through the tiniest crack, and you need to appreciate that if you’re going to black out a window successfully. Here are my tips.
Don’t do it. Shoot at night; it’s quicker and easier. It will also look much better because you can light the view outside for added depth in the background of frame.
Ignored rule one? Well, at least do a split shoot so that you only shoot away from the windows during daylight, and shoot towards them after dark. If the windows aren’t actually in frame, your light seal doesn’t need to be 100%.
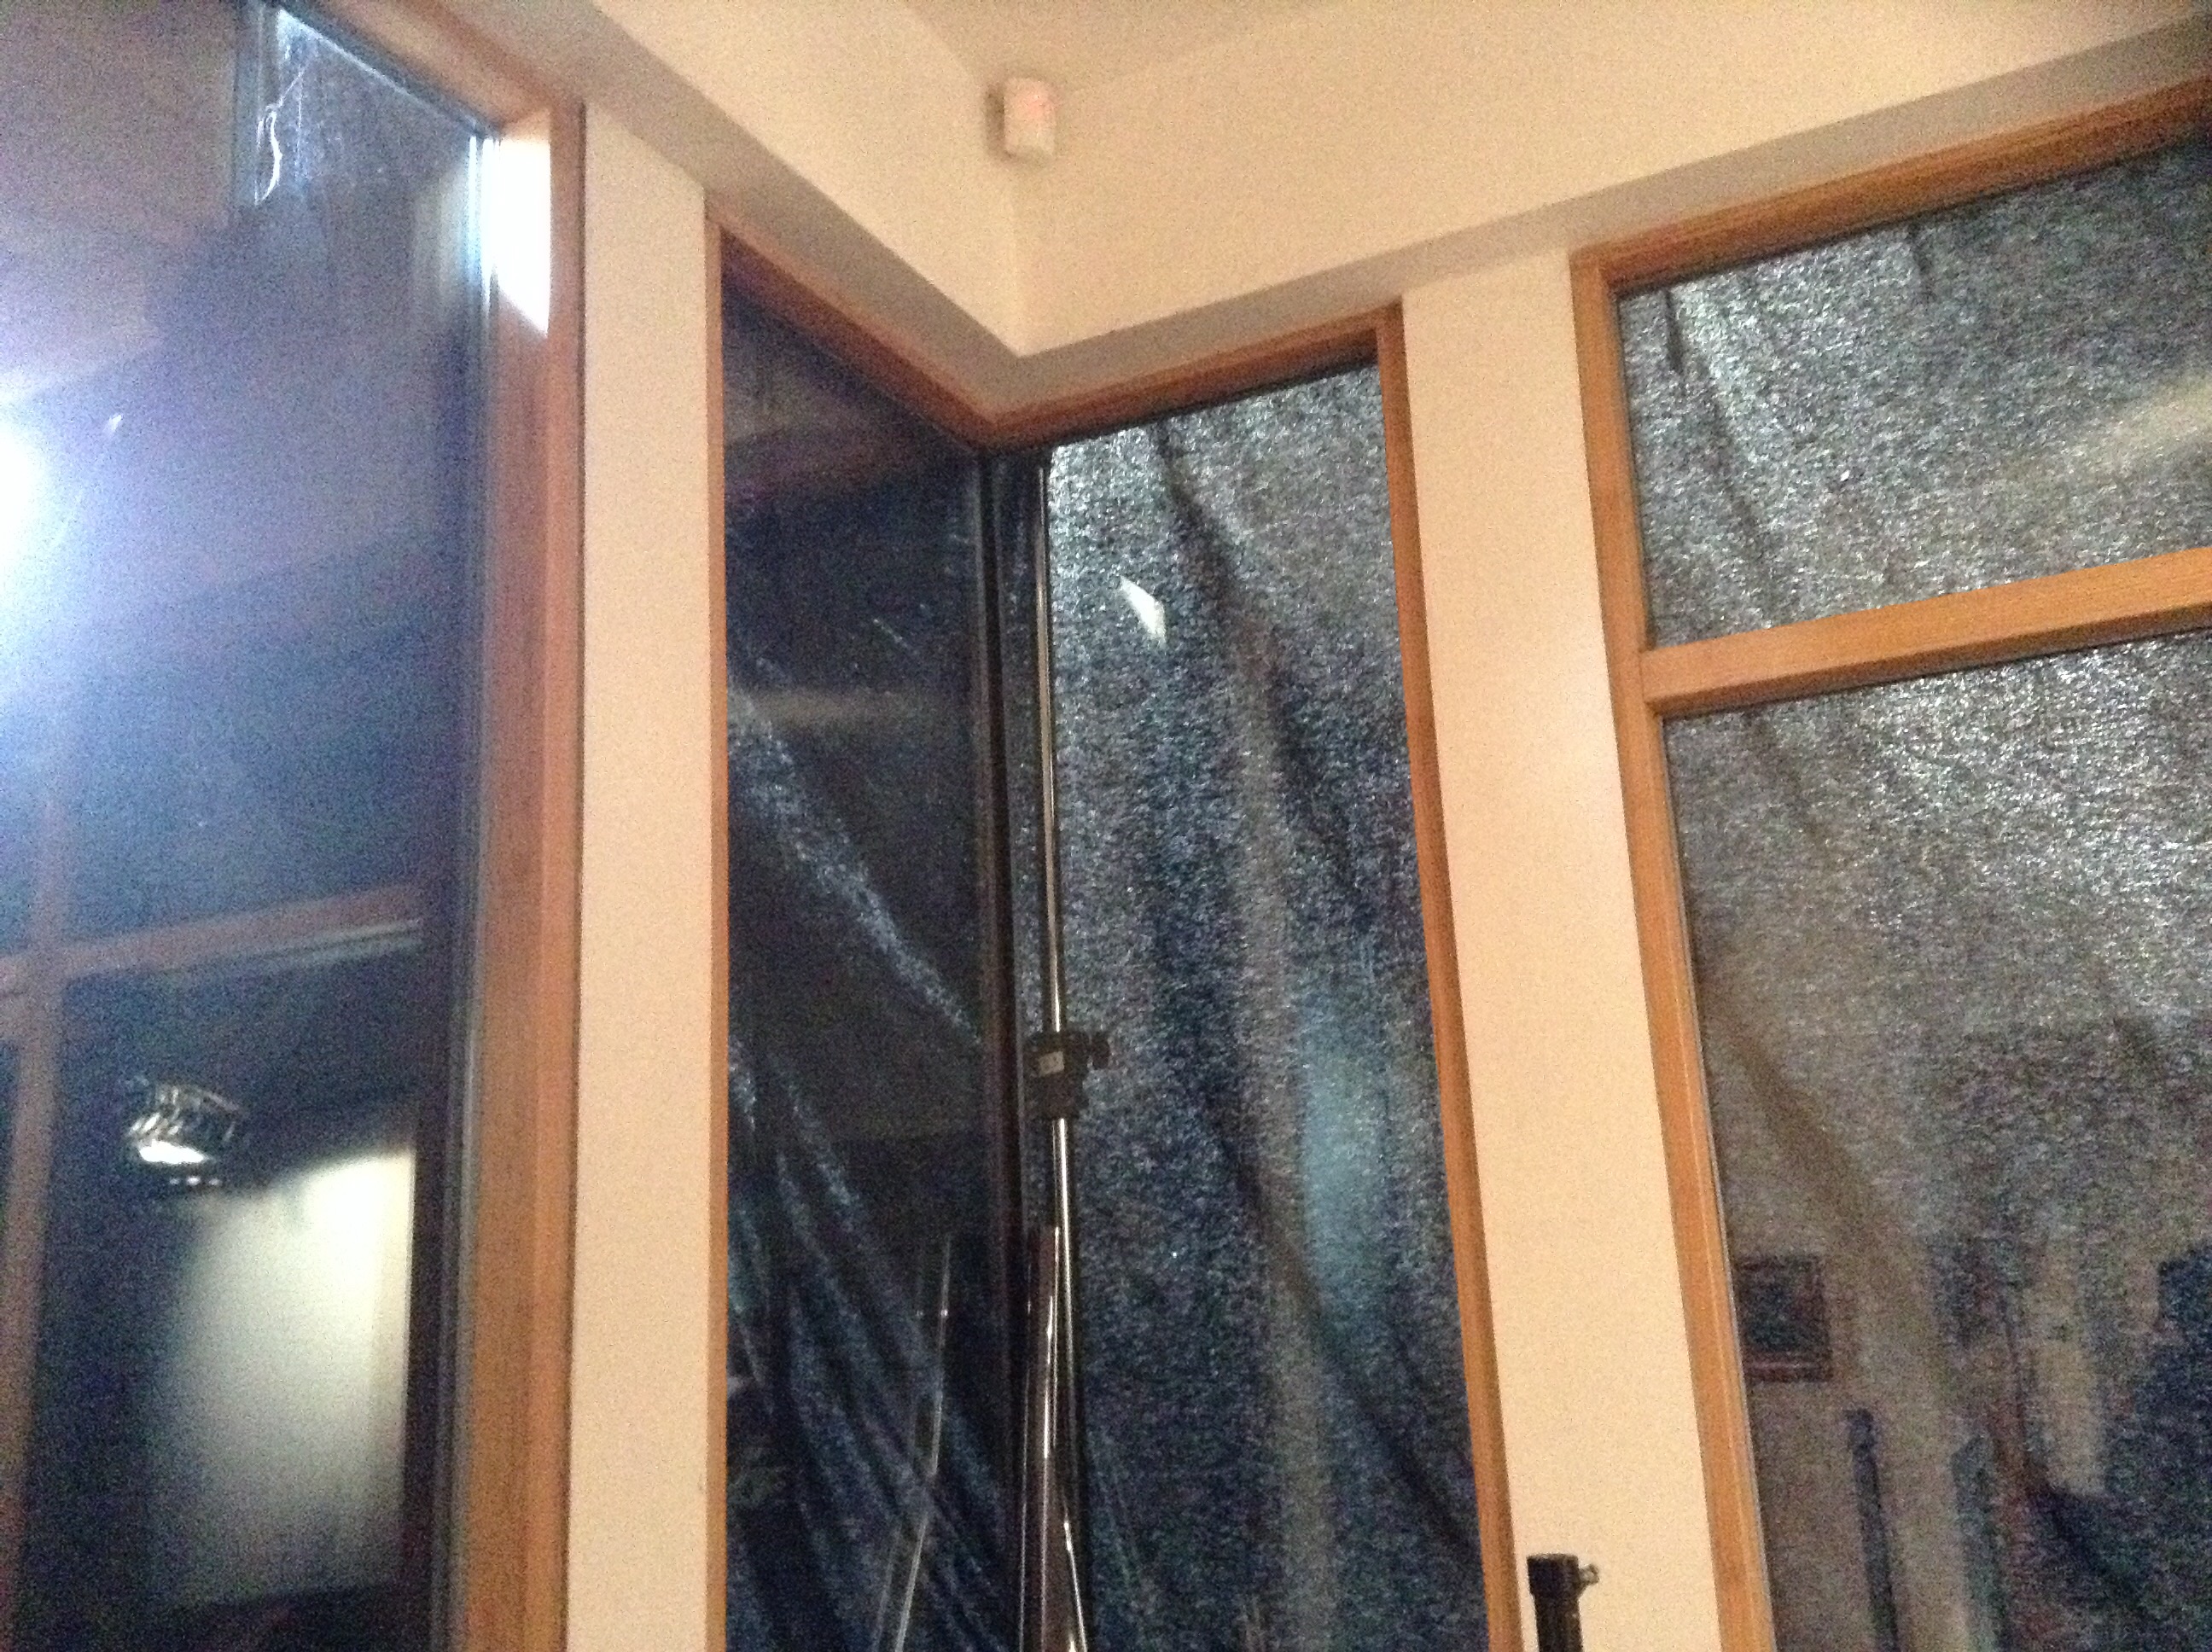
Ignored rule two as well? Unquestionably the best way to black out a window is to gaffer tape black drapes or bin bags to the outside of the window frame. Don’t try to tape to the surrounding brickwork; it won’t hold. The gaffer tape needs to go in an unbroken line all the way around the edges, or light will leak in through the cracks.
If you have large windows to black out, it may be tempting to rig drapes on stands. OK, fine, but you still need to gaffer tape all the edges. And make sure the stands are well sandbagged in case the wind gets up.
Here’s an example where the lefthand side hasn’t been taped. As you can see, the daylight comes in and nicely cross-lights the drapes, showing up every wrinkle and utterly destroying the illusion of a dark sky. (Fortunately, in this instance the window wasn’t going to be in shot, and the amount of light leaking in wasn’t sufficient to contaminate the DP’s lighting design.)
When you’re outside doing the blacking-out, it is impossible to judge the quality of your work. You need to go inside and see what it looks like. You’ll probably get a nasty shock.
Beware that some things that seem opaque from the outside – bin bags or fabric – actually let light through. Hold them up to the light to check this before you waste time gaffering them up. These drapes looked completely opaque from outside…
Sometimes the DP will want to put a lamp outside to simulate moonlight, and this will need to be tented around. This is extremely difficult and can waste a lot of time. The lamp will spill light onto the drapes, showing them up for what they are. Black wrap the lamphead as much as you can (without covering any vents) and don’t use a tarpaulin as black-out material because it will reflect the light.
Finally, remember to put any stands holding up the drapes BEHIND the drapes, so they’re hidden from camera. (I’ve seen this mistake made, and made it myself, several times – see picture above!
UPDATE: Karl Poyzer has this great tip: “A much easier way to black out windows not in shot or behind a curtain is to spray them with water and roll tin foil over them, stays stuck there indefinitely, blocks out 100% of the light, is cheap and won’t fall down.” Thanks Karl!
This coming week the core team from Ren, the fantasy adventure web series I lensed last autumn, will meet for a de-brief. We’ll discuss the challenges of season one and how we can meet those going forward to season two and beyond. And we’ll probably drink wine.
So I thought now would be a good time to reflect on what I personally learnt from Ren: Season One, and where I’d like to improve for season two.
“People talk about lighting, but the hardest thing to do [for a cinematographer] is to shoot a day exterior over an extended period… especially in England.” – Roger Deakins
The biggest challenge I was plunged straight into was the fact that most of the season was set outdoors on a single day. How could I maintain a consistency of lighting without huge cranes, silks and big HMIs, or without demanding the production grind to a halt whenever the light didn’t match (something the schedule couldn’t accommodate)? Quite simple, I couldn’t. Perhaps if I’d been involved in preproduction, I could have helped shaped the schedule so that certain scenes were only being shot at certain times of day, but given how much the schedule changed during shooting, this probably wouldn’t have helped.
Colin Smith slates a shot of Richard Zeman as the Kah’nath Commander
But being forced to leave lighting the set to Mother Nature had its advantages. Whereas indoors, or at night, the cinematographer must light the set and the actors, for daylight exteriors the only thing you have the ability to light is the actors. That really focused my attention on the faces and telling the story through the way light hit them.
I was able to compile a mental dossier of what works well for each actor – and each character. So I knew that Ren (Sophie Skelton) looked best with a soft front- or side-on key, but not three-quarter, that Hunter (Duran Fulton Brown) looked best in toplight, that Karn (Christopher Dane), the Commander (Richard Zeman) and Lyanna (Dita Tantang) all looked great with a hard side key. I knew that Baynon’s (James Malpas) eyes looked extra expressive with a large bounce board under his face, whereas Hunter only needed a little dot of an eyelight. And so on, and so forth. In the future I want to get better and faster at compiling these ‘dossiers’.
Setting an eyelight under the camera. Photo: Richard Roberts
Despite gathering all this info during the exterior shoots, it was a still a bit of a shock when week six hit and I suddenly had to light these familiar faces entirely artificially. In the past I’ve often seen natural light as more of a hindrance than a help, but working with it for five weeks solid gave me a new respect for it, and I found myself more critical of my own lighting than ever.
The main challenge indoors was achieving the soft, innocent look I’d established for the title character without a skyfull of natural light to bounce around. The kinoflos I used to key Sophie often made her look very shiny, much to the exasperation of make-up artist Becca Youngs, who had to keep slathering more powder on her. (Which is one of many reasons why camera and make-up tests in pre-production would be beneficial for future seasons.)
In fact it wasn’t until the very last day of the shoot when I discovered that the best soft sources were actually hard sources – like 800W tungsten lamps or even the 2.5K HMI – bounced off Celotex (matte silver bounce board). If you read things like American Cinematographer you start to realise that most DPs create soft sources this way, bouncing par or fresnel fixtures off poly, foamcore, Ultrabounce or the like and often pushing it through diffuser of some kind as well. Stephen Murphy and Ed Moore conducted a great test of various bounce and diffusion materials on their blog recently. The problem with this kind of lighting for a low budget DP is that you need to hire larger lamps, because bouncing and diffusing really dilute a lamp’s power. Though in last month’s Cine Summit, DP David Vollrath recommended cheap-to-hire Source 4 Leikos as bounce sources, so that’s worth looking into.
Shooting on my Sigma 50mm f1.4 from under my signature Stealth Cloth, to keep sunlight off the Blackmagic’s screen
The other thing I’d love to spend money on next time, if at all possible, is a set of cine lenses. Season one was shot with my three Sigma DSLR primes and some legacy Pentax primes belonging to gaffer Richard Roberts. While the Pentax glass looks great, and the Sigma glass is fine at f4 – the stop I shot most of the show at – when it starts to get wide open it goes a bit soft (not that the average viewer would notice). Inevitably some of the night and interior scenes had to be shot wider than f4, and everything shot on the B camera – Richard’s Blackmagic Cinema Camera, with its smaller 16mm sensor – was exposed at f2.8 to match the depth of field. Plus I deliberately used an ultra-shallow depth of field for certain scenes in which Ren is feeling the effects of the spirit within her. So lenses that hold their sharpness better at wide apertures, and which are easier to pull focus on, would be great for season two.
Whatever level of resources we can get for future seasons, I know it will be a fantastic experience and I’ll learn a whole lot more, so bring it on!
Filming Ren’s death scene. Just kidding…. or am I? Photo: Michael Hudson