Lighting The One That Got Away

Lighting plan for the daylight scenes

Here’s a breakdown of the lighting choices made on my little puppet film, The One That Got Away. You can watch the film over at the Virgin Media Shorts website. If you enjoy it, please use the tweet button to register your vote and help us get a place on the shortlist.

Conventional wisdom with marionettes is probably to go for very flat lighting with no backlight, to make it as difficult as possible to see the strings. But on TOTGA I wanted to embrace and celebrate the tactile, handmade look of the puppets and sets, so I chose a traditional three-point lighting scheme that imparted depth and made no effort to hide the strings.

Normally I shoot wide open – typically f1.8 – on my DSLR, but as the puppets were small the depth of field would have been ridiculously shallow at that aperture. Instead I lit the set very brightly (about 3KW of tungsten horsepower in our cramped living room – not very pleasant during a heatwave!) and stopped down to around f4.

Daylight

The clouds cast shadows on the sky, but I think that adds to the charm.

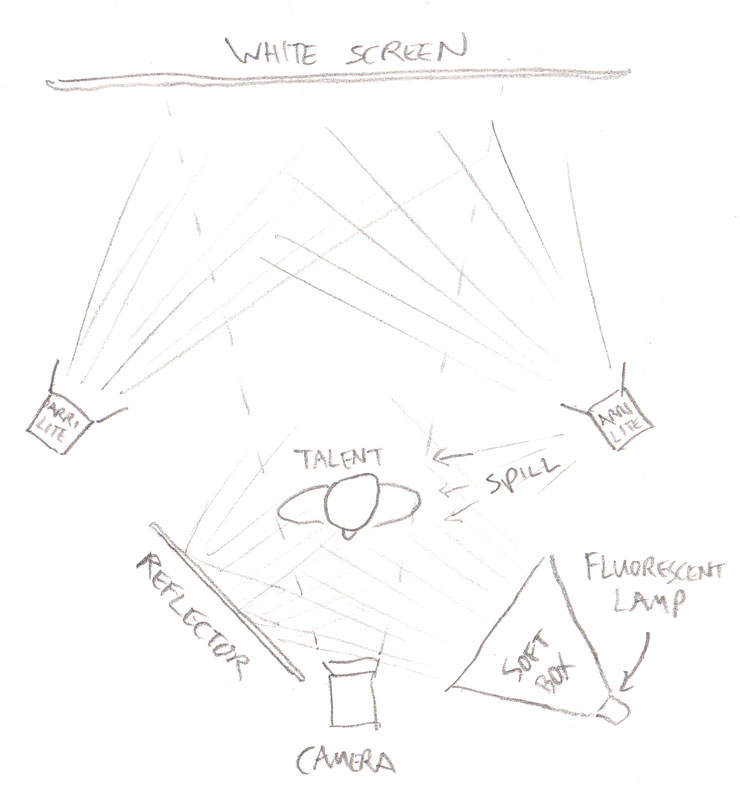
For the daylight scenes I used my three open-face tungsten Arrilites: a 1K poking over the top of the backdrop for backlight, another 1K with tough-spun diffuser off camera left for key, and an 800W bouncing off the ceiling for fill. This last lamp was gelled blue to suggest ambient skylight.

I tried to simulate the camerawork that would have been used had this been shot at sea with real actors, so:

  • the camera bobs up and down in wide shots, as if Henry’s boat is being shot from another vessel;
  • the camera and boat are fixed in close-ups, with the background bobbing up and down, as if we’re now shooting on a tripod in Henry’s boat.

Underwater

A cool white balance and blue gels help to give an underwater look.

The underwater dream sequence was all shot dry-for-wet at 50fps for a watery slow motion. Using Magic Lantern I dialled in a cool white balance of around 2500K, and pumped in smoke to add diffusion and suggest currents. (I wished I’d use a lot more smoke, but we would have all choked to death.)

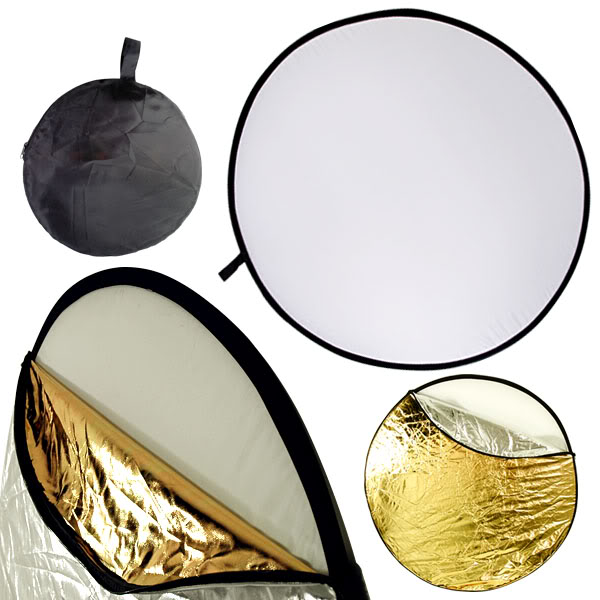
I used just two light sources: the 1K backlight, now gelled blue, and the other 1K, bounced off sheets of silver wrapping paper tacked loosely to the ceiling. This is exactly the same method I used for a scene in Ashes – flapping a piece of card at the wrapping paper makes the light ripple in a very watery way.

Shallow depth of field working nicely in the romantic underwater dream sequence

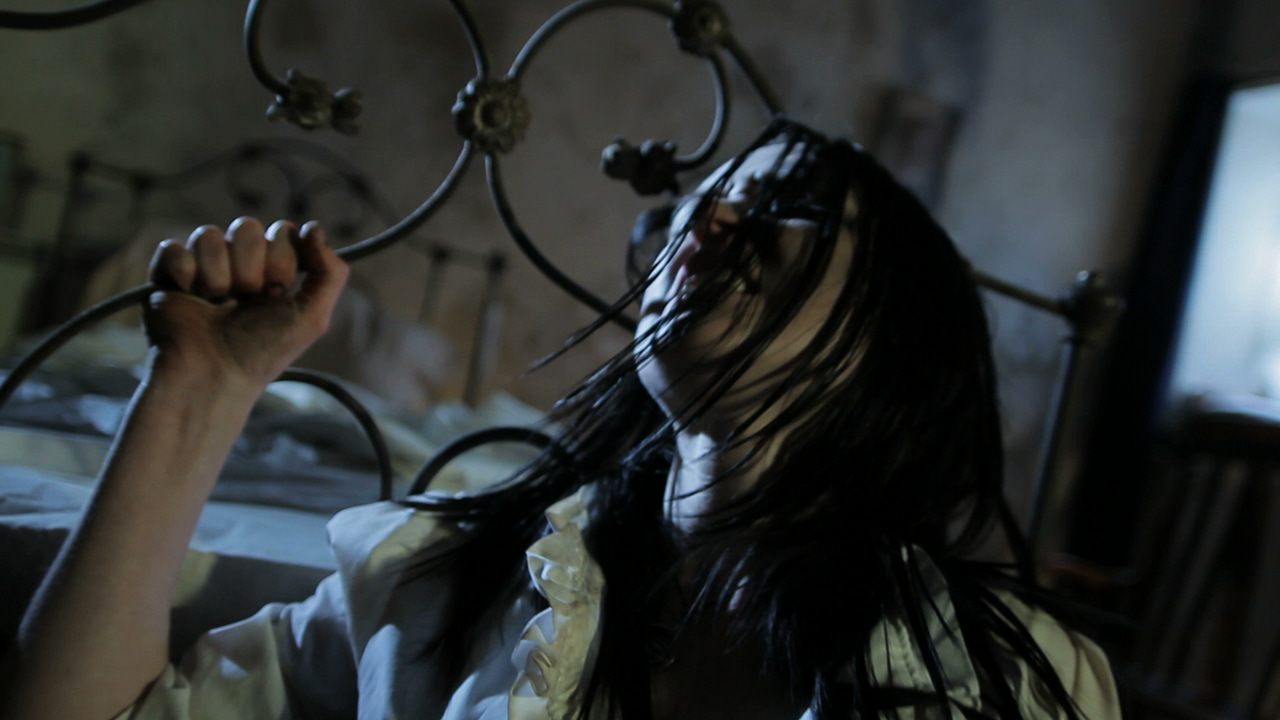
The underwater lighting scheme was a lot darker than the daylight one, so I opened up to around f2, giving a crazily shallow depth of field that worked nicely for this dream sequence. The mermaid’s close-ups were all shot through a CD case for an old-school soft-focus look.

I would have liked to have shot this sequence handheld, but a lack of crew meant I had to lock the camera off so I could operate the smoke machine, fan the wrapping paper and move little fish through frame.

Sunset

When Henry awakens from his dream, the fish escapes and he gives chase. Orange gels and lens flare were used to suggest the sun getting lower in the sky, until finally Henry and his quarry are silhouetted against the solar disc itself. This is a domestic 100W tungsten bulb peeking over the back wave. The only other light source is a row of six more such bulbs under a sheet of orange gel, just behind and below the first one.

The sun is an ordinary 100W tungsten lightbulb.

As the scene moves into twilight, the first bulb is removed and the orange gel over the other six is replaced with a purple one. The 1K backlight is turned back on (possibly it would have been more realistic without, but I’m just a sucker for backlight) and some pink fill is provided by placing a sheet of Minus Green gel on the other 1K and bouncing it off a reflector.

Pink and purple gels are used to give a post-sunset tinge to the final scene.

That’s all folks. Please do tweet about the film (being sure to include the title The One That Got Away and the hashtag #VMShortsVote for it to count as a vote) and click here to watch the behind-the-scenes featurette if you missed it.

Lighting The One That Got Away

5 Things to Do with a 5-in-1 Reflector

Collapsible reflector
5-in-1 reflector

Reflectors are incredibly useful tools, whether you’re a one-man crew or a DP on a big set. And with a 5-in-1 reflector costing only around £10 on Amazon there’s really no excuse not to own one. Here are some of the things you can do with one of these:

  1. On a cloudy day, use the SILVER side to bounce light into the shadows on your subject’s face.
  2. On a sunny day, use the WHITE side for the same purpose (the silver side would be bright enough to make the subject squint) and to put a nice white reflection in the subject’s eyes.
  3. To simulate firelight, bounce a lamp off the GOLD side of the reflector and wobble it gently.
  4. Use the BLACK side for negative fill, useful when shooting in a room with white walls to get some shape and definition back into your subject’s face.
  5. Strip the reflector down to the TRANSLUCENT WHITE centre and rig it on a C-stand above the subject’s head to reduce and diffuse harsh sunlight.
After
Two reflectors, one below and one above frame, perform functions 2 and 5 respectively. (Georgina Sherrington as Kate in Stop/Eject)

5 Things to Do with a 5-in-1 Reflector

Girl and a Scar: Using Lighting to Help Tell a Story Arc

Whatever position you occupy on a film crew, you are always a storyteller. Everyone is working to build and enhance the narrative and emotional threads which will engage the audience.

Cinematography is certainly no exception, and on the recent shoot for Dave Cave’s dark fantasy Girl and a Scar, my task was to take the lighting of an interior location on a journey which mirrored that of the titular Girl (Ileana Cardy), starting from a place of heightened realism, building to a crescendo of crazy and then finally returning to normality. It was a great visual script, describing candelight, daylight seeping in through cracks in boarded-up windows, wind and lightning, so there was plenty to get my creative juices flowing.

(Check out Girl and a Scar’s Facebook page. Lighting package courtesy of Dave Morgan.)

Stage 1 of the lighting arc. Copyright 2013 Fever Films
Copyright 2013 One For All Productions and Yellow Fever Films

Above is the wide shot from the opening scene. I’ve used a classic cool/warm colour contrast between the moonlight and the candlelight. The windows of the house were supposed to be boarded up, so the barn doors of the 650W tungsten fresnel (gelled with full CTB) off camera right are fairly narrow to create the streak of light on the back wall. A second blue-gelled 650W fresnel is behind the frosted door on the left, providing a bit of depth and suggesting another window or hole in the roof.

The candlelight is provided by an orange-gelled 300W fresnel hidden behind the corner of the fireplace to the left of screen. The difficulty with candlelight is always matching the angle the light should be coming from, and in particular hiding the shadow of the candle itself, which in reality would not exist. We solved the problem in this instance by splattering dark wax over the shadow on the top of the cabinet. A dimmer was used to flicker the 300W appropriately.

Stage 2 of the lighting arc. Copyright 2013 Fever Films
Copyright 2013 One For All Productions and Yellow Fever Films

Above is the third interior scene, and one of my favourite shots in the film. To kick up the stylisation a notch I’ve used flags to make the streak of light on the back wall a little harder-edged.

This shot is a good example of how effective side lighting can be. There are no light sources on the camera side of the subject at all; it’s all coming on from the side and slightly behind, leaving the camera side of her in darkness. We call this dark side of a subject the “down side”, and it’s always more interesting to have this side be the one facing camera.

Stage 3 of the lighting arc. Copyright 2013 Fever Films
Copyright 2013 One For All Productions and Yellow Fever Films

Above is the scene which represents the height of weirdness in the story. There are two things I’ve done to make the lighting more stylised. Firstly I’ve introduced some green light, motivated by an off-screen doorway. This combines with the make-up and a fantastic performance from the actress to enhance the character’s sickness. Secondly I’ve adjusted the blue-gelled 650W fresnel that was behind the frosted door in the first scene. It’s no longer bouncing off the wall in that back room – instead it’s pointed directly at the talent with the door now open. This creates a strong, steely backlight. Combined with a dutched handheld camera, the overall effect is suitably unsettling.

Stage 4 of the lighting arc. Copyright 2013 Fever Films
Copyright 2013 One For All Productions and Yellow Fever Films

The scene ends with the curtains of the room’s main window opening to bathe the Girl in light as she comes out of the other side of her dark journey. To enhance the natural light that would come in when the curtains were opened, I bounced a fresnel off the ceiling and ran it through a dimmer board so it could be faded up as the curtains parted. Another 650W was placed outside the window, positioned exactly behind the talent’s head to give her a halo of light and create lens flares when she moved her head to reveal the light. (The lamp itself can’t be made out on camera because it’s so bright.)

So that’s an example of how cinematography can serve narrative and character. How have you used light to tell the story?

Girl and a Scar: Using Lighting to Help Tell a Story Arc

Shooting Against a White Backdrop

Earlier this year I was hired to DP some promotional spots for Onstage in London. Onstage produces content for the web, hotel TV channels and the growing number of TVs in London taxi cabs, on the subject of West End theatre. The brief was to shoot interviews with actors and creatives against a white backdrop, to be intercut with EPK (Electronic Press Kit) footage of the shows or edited into montages like this one:

I’ve always been a bit wary of shooting against white screens. The danger can be that you have to pump in so much light to make the screen blow out on camera (meaning it turns to complete, uniform white) that the whole image becomes flat and you’re left with no shape to your talent’s face.

Further complicating matters was that, on the first day of shooting, we were travelling to the talent, rather than vice versa, so we were often setting up the backdrop, lights and camera in cramped dressing rooms.

Here is the set-up I came up with:

Set-up 1
Set-up 1

Yes, just one light. That one light does four things:

  1. Its direct light blows out the white backdrop.
  2. Its direct light through the diffuser serves as the talent’s key.
  3. Its bounce light creates a little edging on the talent. (I initially set up a dedicated backlight, but found that this bounce was doing a better job. Besides, if you put in too much backlight the talent starts to blend into the white screen.)
  4. The level of ambient light it created in the room served as fill. Sometimes there was too much fill, in which case I would have Colin hold up a black card near the talent’s down side (i.e. the side not lit by the key) to block some of the ambience and restore some shape and contrast to the image.

The next time we shot for this project we were in just one room, with significantly more space than we’d had before, so I plumped for a different set-up:

Set-up 2
Set-up 2

This time there was enough room to place the talent well away from the backdrop and light them separately. Two Arrilites blow out the backdrop while the fluorescent lamp serves as the talent’s key. Fill is provided by a reflector and a touch of edge light is serendipitously provided by spill from the cooling vents on the side of one Arrilite.

Has anyone else out there shot against a white screen recently? I’m interested to hear what your approach to lighting it was.

Visit Onstage’s website at www.onstageinlondon.com

Shooting Against a White Backdrop

Shadows and Ashes

Colin Smith lines up the Super-8 camera as director Sophie Black pans the mirror.

After an unseemly delay, here’s the third and final part of my series about lighting Ashes, Sophie Black‘s dark fantasy drama. Read part one here and part two here.

For the fantasy world dubbed “Toybox” by the production team, Sophie wanted a gritty, grainy, comfortable look. She was keen to shoot the scene on Super-8 and wanted to make full use of that high contrast celluloid look with harsh spotlighting, deep shadows and vignetting.

The biggest problem for me was how to get a spotlight effect in a fairly small room with an ordinary daylight fresnel. To get a circle of light small enough to fit entirely within the camera’s frame required the lamp to be much further from the subject than was possible within the space. I suggested shooting at night and putting the light outside the window, but the schedule couldn’t accommodate that.

The problem was solved by bouncing the light off a circular mirror. This masked the light into a relatively sharp circle, because the lamp was the entire length of the room away from the mirror. (The closer a mask is placed to a lamp, the fuzzier the edge of the mask will appear when thrown on the subject, so simply cutting a circle out of cardboard and placing it in front of the lamp would have given us a blob of light instead of a defined circle, because there wouldn’t have been enough space to put the cardboard far enough away from the lamp.)

Bouncing a redhead off a circular mirror. Photo: Sophie Black
Bouncing a redhead off a circular mirror for the sweeping light effect. Photo: Sophie Black

Not only did the mirror allow us to achieve a key shadow puppet shot which Sophie had conceived, it also enabled us to create a sweeping light effect for other parts of the sequence. Inspired by one of Lana del Rey’s music videos, Sophie wanted the effect of headlights passing by outside a window. We were able to do this simply by panning a redhead across the mirror.

The Toybox scene was shot both on Super-8 (by Col) and on my Canon 600D as a back-up. I set the ISO to 1600 on the DSLR to bake in a grainy look. I won’t do this again, however, because I failed to take into account the effect of the camera’s H.264 compression. The grain looked fine on the viewfinder, but once compressed and recorded there were lots of blocky artifacts. I hoped that the Super-8 film would come out well so this sub-standard digital material wouldn’t have to be used, but alas there were some focus issues and several of the shots were inexplicably missing from the reels when they came back from the lab. Fortunately the day was saved by a talented VFX artist who applied a very convincing Super-8 look to the 600D footage, which hides the compression artifacts.

Ashes is nearly finished now and we’re all very excited to see how it’s turned out. Meanwhile, here’s the trailer:

Shadows and Ashes

Tapering Lines and Milky Shadows

Recently I was hired by Astute Graphics to direct an advert-like promotional film for the launch of their new product, an Adobe Illustrator plug-in called WidthScribe. Here is the result:

Laura gets to grips with WidthScribe on a Cintiq touchscreen. Photo: Sophie Black

It was a really fun and creative project, working with a great bunch of people including gaffer and GlideCam operator Colin Smith, designer and make-up artist Sophie Black, actress Laura Markham, and Nick van der Walle from Astute Graphics.

I have noticed a recent trend in adverts for a milky, low-contrast look, and I felt this would be an appropriate project for such a look. I knew that we would be featuring crisp, contrasty vector graphics throughout the film, so it made sense to counterpoint these with live action that was organic, soft and diffuse.

In preparation I set up a picture profile on my Canon 600D with minimum contrast and sharpness, and slightly reduced colour saturation.

On set the front light came from softboxes, reflectors and natural bounce, though always with a strong backlight to prevent the image from looking completely flat. The backlight also produced lens flare which further reduced the contrast of the image by lifting the shadows. In fact, I decided that almost every shot should have a lens flare, to enhance that organic look. Often this meant that Col would stand next to the camera and shine a 100W reporter light into the lens.

Fake sun
The “sun” here is actually a 1,000W Arrilite in the garden. Lens flare and smoke soften the image, while a fluorescent lamp in a softbox provides fill from out of the top right of frame.

Smoke was used in the kitchen scene, again to lift the shadows and diffuse the light. By a stroke of luck, the direct, wintery sunlight I faked in this scene with a 1,000W Arrilite pretending to be the sun was replicated almost exactly by the real sun when we filmed the office scene the following day.

In a future post I’ll reveal the secrets of the driving shots.

Tapering Lines and Milky Shadows

How to Light How to be Dead

In September I had the pleasure of working once again with Lara Greenway – star of Soul Searcher, director of Hostile and The Runner, and producer of Hard Boiled Sweets and Danny Dyer vehicle Deviation. This time she was directing a pilot for a comedy web series called How to be Dead, written by Dave Turner. It was released online for Halloween and here it is:

The pub scene is my favourite thing I’ve lit in a long time, so I thought I’d break down what went into it.

The aim was to separate the lead actors from the background as much as possible. This was accomplished through depth of field (shooting at around f2.0), colour contrast (lighting them warmly and the background coolly), backlight and smoke.

Working from the foreground of the shot backwards, we have a crossed pair of Dedos behind camera, each with a half orange gel and each spotted on one of the leads. Hanging from a pair of connected C-stand arms straddling two of the pub’s wooden roof beams is an 800W Arrilite giving the leads a white backlight.

There’s a fireplace off camera to the left (in the master shot). To give the impression of it being lit, I put a reflector in it – gold side facing out – and aimed a 1K Arrilite at this reflector. My trusty gaffer Col wobbles the reflector during takes to create a flickering effect which is visible on some of the closer extras in the left of the frame.

A third Dedo, positioned near the fireplace, is trained on the skeleton hanging in the background.

Outside in the tiny beer garden is a 2.5K HMI that’s blasting through the patio doors. A blue-gelled 1K Arrilite, indoors but in the far background, adds further “moonlight”. Between them these two lamps are illuminating the copious amounts of smoke we pumped in, giving the whole scene a wonderful volume and depth.

Finally, in the far background on the left, there’s a fourth Dedo hidden in the entrance to the ladies’ loo, throwing a little pool of light on a painting on the wall. I also turned on the pub’s existing sconces to create extra contrast.

Hopefully there will be much more of How to be Dead coming soon. Visit howtobedead.com and follow Death himself on Twitter.

And if you’re in the Worcestershire area this weekend, don’t forget to come along to the film festival at The Hive where I’ll be screening Video8 and giving a talk about crowd-funding Stop/Eject.

How to Light How to be Dead

Lighting without Movie Lights

After my last post ranting about the very limited usefulness of redheads, I was asked what the alternative is for cash-strapped DPs. There are plenty of cheap fluorescent photography-studio-type lighting kits available on eBay now, but they have their own problems. So can you light without any film lights at all? Yes, you can – and here are a few examples.

Check out my pieces to camera in the Stop/Eject funding pitch which follows the trailer in this video:

£2 LED camping light

I was so lazy when I filmed this that even though I was only two metres away from where I keep my Arrilites, I didn’t use them. There are three light sources in this shot:

  1. My key-light is an ordinary, bare, domestic 100W bulb (NOT an energy-saver) clipped to a proper light stand. I wish I’d put it a touch closer to camera and a touch higher so that my right eye was better lit.
  2. My backlight is an LED camping light (£2 from a charity shop) propped up on top of a bookcase out of the rear left of frame.
  3. Behind me is a thin brown curtain through which daylight can be seen. Since I’m shooting on a tungsten white balance preset, this and the camping light appear blue.
Total value of the kit I used to light this: less than £5
By the way, if you haven’t contributed to Stop/Eject please do so over at stopejectmovie.com. We need everyone’s help to reach our funding total and complete the film.

Shelf Stackers (2011, dir. Tom Wadlow) is a comedy set mainly in the aisles of a supermarket – in reality a set in a conference centre. Colin and I rigged half a dozen 500W DIY work-lights to the ceiling using the method I described in a July post, in a line running down the centre of the aisle, all of them facing towards camera to provide backlight throughout the set.

I’ll confess there were a couple of Arrilites poking over the tops of the shelves, but often we used something much lower-tech as our key-light: a dozen 100W bulbs rowed up on a long piece of timber – the Cyclotron, as we dubbed it. The intention was to emulate the long, thin source of a fluorescent tube without the associated cycling and colour balance issues.

The Ikea reading light used as my backlight in the shot below
My backlight in the shot below

And here’s another one of me where I was too lazy to break out the proper lights. This is my living room, and the existing ceiling light – an energy-saver bulb in a spherical white Ikea shade – is providing the key. I made sure I stood in a position where this would illuminate both my eye sockets. I’m backlit by another Ikea product – a goose-necked reading light clipped to a bookcase out of shot.

Remember you can get a digital download of the full video, “How to Make a Fantasy Action Movie for £28,000” by donating £10 to Stop/Eject.

Lighting by Ikea
Lighting by Ikea

I hope that’s given you some ideas. And if you’ve done a good, cheapo lighting set-up yourself, leave a comment or Facebook me; I’d love to hear about it.

Lighting without Movie Lights

Why Redheads are Rubbish

Adjusting an Arri Daylight Compact 1200 (a 1.2K MSR) on the set of Ashes. Photo: Sophie Black

If you’re a Director of Photography working in the micro-budget field, you’ve probably heard this phrase pass producers’ lips many times: “We can’t afford to hire any lights, but I’ve got some redheads you can use.”

I’m quite proud of some of the lighting I’ve done with only redheads over the years, but it’s rarely been subtle, often been tricky and usually been time-consuming. Redheads are ubiquitous because they’re so affordable, but of all the types of film lamp on the market, they are the least useful.

They’re too bright for most interior spaces and too dim for most exteriors. They’re horribly inefficient, spilling lots of light out of the back and wasting a lot of their power input on heating up the room. They don’t have lenses, so they can’t be focused. And most frustratingly of all, you need to cut out half their light by putting CTB gel over them if you want them to match daylight – and those are usually the situations where you need the most power out of them, to fight the natural light.

(By the way, you should never buy the cheap redheads off eBay; they’re not earthed and the bulbs blow if you so much as breathe on them.)

In this close-up from Hostile (2009, dir. Lara Greenway), light supposedly from the match is created by a Dedo set to maximum spot.

So point out to the producer how much it will help the schedule if you don’t spend all day trying to flag, diffuse, gel and generally coerce redheads into doing things they don’t really want to do, how the talent will be much happier if they’re not sweating out half their body weight, and how the electricity bill will be slashed by using more efficient lamps.

And if the producer acquiesces, of the dazzling array of lamps offered by most hire companies, which should you pick? Of course every film is different, but I frequently find the most useful hires are an HMI and a Dedo kit.

HMIs (Hydrargyrum Medium-arc Iodide) are efficient, daylight-balanced lamps that come in many sizes. The 1.2K and 2.5K models are most useful. Both can be powered off an ordinary domestic ring-main (though make sure you have 13A to 16A jumpers), come in fresnel (lighthouse-style lens) and par (parabolic aluminised reflector) flavours and feature dimmers for an extra layer of control. They’re perfect for blasting through windows in daylight interiors, and they’ll also illuminate a large area of nighttime exterior.

The 1.2K MSR provides window light in a "real world" scene from Ashes (2012, dir. Sophie Black).
The 1.2K MSR provides window light in a “real world” scene from Ashes (2012, dir. Sophie Black).

HMIs come with a box called a ballast which regulates the power supply to the lamphead and ignites the arc. You’ll have a choice of magnetic or electronic (flicker-free) ballasts. The former are heavier and cheaper, whereas the latter are designed to prevent flickering of the light when shooting at a non-standard frame rate (which in the UK means anything other than, or not divisible by, 25).

The term HMI is used interchangeably with MSR (Medium Source Rare-earth). Although there is a slight difference in the technology, for all practical purposes they’re the same thing.

A 1.2K HMI punches through the window in a frame from Hostile (2009, dir. Lara Greenway).

Dedos are very small spotlights, usually 150W tungsten, though other types are available. They come in a kit of three or four and are fitted with dimmers either in the cables or in a separate control box. They’re brilliant for interiors where you want to create a very tight pool of light that doesn’t raise the ambient illumination or spill onto other areas. If they’re hooked up to a control box you can rig them all around the room and easily tweak the brightness of each one without getting back up on a ladder.

Both backlight and keylight in this frame from Lebensraum (2008, dir. Raes Mirza) come from Dedo lamps clamped to pole-cats just out of the top of frame.

You can watch Hostile at bravesoldier.co.uk/hostile.html and find out more about Ashes on Sophie Black’s blog. If you’ve enjoyed this post, please visit stopejectmovie.com/collection or stopejectmovie.com/donate and help me complete my new short film.

Why Redheads are Rubbish

Fire and Ashes

Last week I looked at some watery lighting created for one of the fantasy scenes in Sophie’s short, Ashes. Today let’s look at another of the film’s fantasy scenes and another element: fire.

Sophie wanted a 1940s Hollywood look to this romantic scene set in a room full of candles. Shane Hurlbut recently posted a great blog about building an artificial firelight source, but given the size and layout of the room I didn’t feel this was going to work for us. When I lit the Wasteland trailer last autumn I used domestic 100W clip-lights to represent candlelight, and this is what I chose to go for again.

Sarah Lamesch and Adam Lannon in the "Hollywood" scene
Sarah Lamesch and Adam Lannon in the “Hollywood” scene

There are about half a dozen 100W bulbs hidden on the floor behind the bed, and another half dozen on a boom arm out the top of frame, again behind the actors. There are no other light sources but the candles themselves. To give a little bit of movement to the light, my righthand man Col is wobbling a reflector just off camera. More movement would have been nice – some dimmers perhaps, or someone lying behind the bed wiggling the bulbs a bit – but given that it was a closed set I felt it was better to keep things simple.

Col tapes the tights to a filter tray

I was so focused on the lighting of this scene that it was only the day before the shoot that I realised the key to the forties look was going to be diffusion. By this point it was too late to add any Promist filters to our package, so I consulted Shane’s blogs on diffusion for other methods of softening the image. AD Chris was subsequently dispatched to buy some tights.

In an ideal world you get hold of some very fine silk stockings and tape a piece to the back of your lens. We were stuck with bog-standard 15 denier, and the design of the EF-S lens mount makes it impossible to put anything over the rear element, so it had to go on the front. Col stretched the piece of fabric across one of my Pro-aim shoulder rig’s 4×4″ filter trays. Putting the tights on the front rather than the back makes the effect much less subtle, but fortunately Sophie really liked it. You can see it in action on the still above, but I’ll leave you with a side-by-side comparison from a quick test we did on lead actress Sarah Lamesch:

Sarah Lamesch with (right) and without (left) the stocking filter
Fire and Ashes