What Does it Take to be a Cinematographer?

Adrian Biddle
Adrian Biddle

Being a director of photography is not just about having an eye for composition and understanding light. There are many other skills a DP needs. Today I’ll discuss what some of those are, in my opinion, and in the opinions of some top Hollywood DPs.

“Obviously you have to know what you are doing, have an eye for photography, and know about film and composition. But it’s a team effort.” – Adrian Biddle (Aliens, Event Horizon)

Shane Hurlbut (Need for Speed, Terminator: Salvation) says that 33% of a cinematographer’s job is managing their crew. You need to pick great people to work with, nurture them, share your knowledge with them, and trust them to deliver the goods.

Frankie DeMarco (Mad Men, All is Lost) advises trying to think like an editor: what specific shots do you need to tell the story? Editing is one of the areas it’s most useful to have experience of, as a DP. Knowing whether what you’re shooting will cut together is vitally important. I often find myself suggesting to a director that we run a scene from a little earlier, have someone come into shot at the start, or cut it later so they exit shot, knowing how useful that stuff can be in post.

Understanding the jobs of other departments is very useful. The more you know about production design, costume and make-up, the better you can light it. The more you know about acting, the better you can appreciate the impact your decisions – equipment placement, the strictness of adherence to marks you demand, the lenses and angles you select – have on an actor’s work. This doesn’t mean that you have to do all these jobs at some point, but try reading the occasional book or watching the odd YouTube video about the subject, or better still, forge great relationships with other heads of departments and pick their brains.

Douglas Slocombe
Douglas Slocombe

There are of course many rules to cinematography – the line of action, Golden Thirds, lighting the downside – but how many of them do you need to know?

“To any aspiring cinematographer, I’d say learn the rules before you try and bend or break them. You need a foundation on which to build.” – Douglas Slocombe (Indiana Jones trilogy)

You should take every opportunity to learn; read every blog, every book that you can, go to workshops, to masterclasses; watch behind-the-scenes videos. The more knowledge you have to fall back on in a crisis, the better.

“You always try to create a certain style for each film but there are times when you have to make it up as you go along.” – Jan de Bont (Die Hard, Flatliners)

Flexibility is key. You have to do what’s right for the scene, what’s right for the set and the talent, what the director wants, and what works for the schedule. Sometimes this means changing tack at the last minute. You can’t throw a hissy fit and weep for the lighting set-up you’d imagined; you have to get on with it. Corporate videos, in which you often have to sacrifice your photographic ideals for the mundane needs of the client, are great training for this.

You have to be a storyteller; all heads of department have to be. As DP, your tools for telling the story are lights and lenses. You need to absorb the script, appreciate the narrative beats and come up with creative ways to accent those beats using your tools.

Perhaps the most important thing to have is life experience.

“It’s my personal interpretation of a script that allows me to create the visuals. That interpretation is based on my own life experiences, aesthetics, education, and knowledge, all of which help to shape my understanding of a story.” – Janusz Kaminski (Saving Private Ryan, Lincoln)

Thanks to Stephen Murphy and his DOP Documents for the block quotes.

Janusz Kaminski
Janusz Kaminski
What Does it Take to be a Cinematographer?

Top Tips from Day Two of the Big League Cine Summit 2015

blcs-blue-on-whiteLast week I published the best tips I culled from day one of the 2015 Big League Cine Summit. To complete the set, here are the top tips from day two, starting with that legendary teacher of cinematography, Shane Hurlbut, ASC. Since Shane is so good at sharing his knowledge on the Hurlblog, I’ve only listed a few tips from him; I strongly recommend you check out his site for many, many more gems.

Shane Hurlbut – “Delivering Storytelling Impact with Light, Lens and Camera”

  • On the visual grammar of Crazy/Beautiful: controlled camera moves represent Jay’s controlling mother.
  • Shane likes to use the work of stills photographers as inspiration.
  • He added extra 400W sodium vapour fixtures to the existing 100W sodium vapour streetlights for night exteriors in Crazy/Beautiful.
  • He used a “damaged key” in Crazy/Beautiful to represent Kirsten Dunst’s flustered state. It’s messy, doesn’t quite reach both eyes.

David Vollrath – “Motivated Lighting”

  • “I don’t want to light their faces and bodies specifically. I like to light the space.” – Harris Savides
  • Stand where your subject will be to see what reflective objects are affecting your lighting.
  • Tabletops can be great bounce-boards for toplight. Maybe put muslim or paper on the table to enhance it.
  • Look for things to motivate light: windows, practicals, overhead fixtures, sconces, etc.
  • Once you’ve lit the space, it will become clearer how to light the faces.
  • Work with the art department in preproduction to make sure you get the practicals you need.
  • Flag your other sources off your practical so that excess light isn’t falling on them and washing them out.
  • You can use the reflection of a softbox to create a nice shine on a dark surface or even on a face.
  • A roll of duvetyne armed off a C-stand makes a fair stand-in for a 4×4 floppy flag.
  • “Beadboard” is just another name for polyboard. (I genuinely didn’t know that!)
  • Other bounceboards include foamcore and showcard.
  • Use Source 4 Leikos to fire into your bounce, because they’re easily cut and focused. They’re cheap to rent too.
  • It’s easier to rig a bounce card overhead than a softbox or a kinoflo.
  • Plus Green and Minus Green gels – to match or correct fluorescents – are useful in subtle 1/8th flavours.
  • “Lighting is in the gripping.” Taking away light can be more effective than adding it.
  • A “cocktail” is a layering of multiple gels.
  • A simple black card over a shiny piece of furniture can cut bounce and bring back contrast.
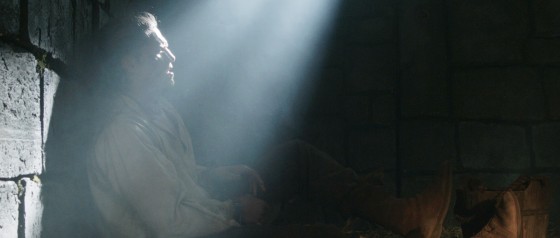
  • Hazers add great atmosphere, but they raise the fill level. To see shafts of light, use a dark background.

Caleb Pike – “Everything You Need to Know About Lenses”

  • A good set of primes will last you decades.
  • Lens choice affects: 1. Field of view, 2. Depth of field, 3. Compression (amount of perspective).
  • Use compression to isolate a subject, or to crop out equipment.
  • Use wide lenses to open up a space, exaggerate expressions or get the most out of camera moves.
  • Longer lenses are more flattering for close-ups. Short lenses can distort the face unpleasantly.
  • Don’t always shoot with your aperture wide open. Choose an appropriate depth of field for your story.
  • Generally it’s best to keep your aperture the same throughout a scene.
  • Avoid non-constant aperture zoom lenses for video work.
  • Primes (fixed focal length lenses) are generally faster, cheaper, lighter and sharper than zooms.
  • Cine lenses are heavier than stills lenses, do not breathe (zoom slightly when focusing), and have fixed filter rings.
  • Cine lenses have hard stops on the focus rings, so you can set focus marks on the lens.
  • Cine lenses have longer throws on the focus rings, so that follow focusing can be more precise.
  • Wide cine lenses have less distortion than their stills counterparts.
  • Passive lens adapters are cheap and simple; smart adapters maintain the electronic connection for autofocus etc.
  • Lens boosters can solve cropping problems caused by using a lens with a sensor size it’s not designed for.
  • Throttle adapters are passive adapters with neutral density fader filters built in.
  • Caleb’s budget lens recommendations:
    1. Nikon 35-70mm f3.5 macro
    2. Olympus 50mm zuiko f1.4 and 1.8 versions – sharp, with long focus throw – around $30
    3. Canon 40mm f2.8 pancake prime
    4. Nikon 100mm F2.8 E series – around $99
    5. Canon 28-80mm F2.8-4.0 L series – well built, very sharp – around $500

Matt Workman – “Camera Moves That Matter”

  • A camera “hand off” is a move that starts focused on one thing and then transitions to focus on another.
  • A classic establisher might start on a mysterious insert then pull back – “hand off” – to reveal the scene.
  • Spielberg, Scorsese, Luhrmann, Singer and Bay all use camera hand-offs frequently.
  • Camera moves increase production value and can cover multiple story beats in one shot.
  • Doing the same thing in cuts reduces your audience’s understanding of the scene’s geography.
  • Crane-ups give you a privileged view, a sense of power.
  • Write down the beats of the scene, then storyboard or previz. All departments can benefit from the previz.
  • Beware of boring bits in the middle of camera moves. Is it better to do it in cuts so you can speed it up?
  • Use Autodesk Maya for previz. Build a library of accurate grip equipment models.
  • Check out Matt’s other site which uses previz tools to illustrate other DPs’ set-ups.
Top Tips from Day Two of the Big League Cine Summit 2015

Top Tips from Day One of the Big League Cine Summit 2015

blcs-blue-on-whiteThis week the third annual Big League Cine Summit is taking place: two days of online masterclasses with top commercial, TV and feature film cinematographers. If you missed this educational and inspirational free event, here are the best tips I culled from day one’s sessions:

Frankie DeMarco – “Composition and Camera Operating for the Big Screen”

  • The advantage for a DP of working with a separate camera op is that you have a second opinion.
  • Try to think like an editor. What specific shots do you need to tell the story? Can you do it in a “oner”?
  • Lots of angles/coverage can kill performances and make the audience overly aware of the camera.
  • If you need to shift position for comfort, do it during a part of the take that the editor is unlikely to use.
  • You can sometimes get away with crossing the line if your singles are dirty.
  • Use clean singles to show that characters are not connecting with each other.
  • Single point perspective, a.k.a. formal composition (framing the subject centrally) can be very powerful.
  • Lighting for silhouette can make a simple moment highly evocative.
  • The best composition reflects character relationships, perhaps using layers and depth.
  • Good composition should draw the eye to the right part of the screen and not distract the audience.
  • Good cinematography should tap into the emotion of the scene and the character whose eyes we’re seeing it through.
  • When watching the blocking, think about the emotions. Let the scene tell you how it should be shot.
  • Let the lens talk to you. Try watching the blocking through different lenses and see what feels right.
  • A great static frame that the actor can move around in trumps panning around with the actor.
  • Use a dolly-in for an emotional moment, but a zoom-in to show a character having a thought or idea.
  • Check out Stanley Kubrick and William Friedkin films to see excellent use of zooms.
  • Use a long lens to disconnect your subject from their surroundings.
  • Play the first take safe, and then you can try tagging hand-props or pulling focus to background characters on later takes.
  • “When in doubt, turn it out.” i.e. beware of over-lighting!
  • Don’t be afraid of changing f-stops from angle to angle to maintain a consistent softness of background when your background is different distances away from different subjects.
  • Don’t worry about continuity too much. “The set is made of rubber.”
  • Try unusual compositions. Be willing to fail.

Kevin Shahinian – “Story Telling Techniques: Adding Massive Production Value”

  • In high-end events shooting, try to get the organisers to pick rooms that will work for sun orientation.
  • Use a long lens to create a potentially unsettling sense of voyeurism.
  • To build tension and unsettle the audience, short-side your subject and show lots of empty background.
  • In an over-the-shoulder shot, add power to the foreground character by having them dominate the frame.
  • With non-actors, shoot candid footage; you may capture genuinely great moments. Use action verbs to direct them, rather than talking in terms of emotions.

Rasmus Heise – “Extraordinary Cinematography with Minimal Lighting”

  • Design lighting that works from all directions, to minimise set-up times.
  • Use more than one colour to add depth.
  • Dot practicals around where possible, to give you sources that will work for different angles.
  • Focus on one key light source in a scene. Everything else is just a bonus.
  • Fluorescent tubes and sodium vapour lamps can be great low budget, low wattage solutions.
  • Philips makes fluorescent tubes with high CRI.
  • Wet down your exterior sets to add contrast and nice reflections.
  • Silhouette shots are quick, cheap and look great.

Matthew Santo – “Commercial Lighting: How to Light Fashion vs. Action”

  • Photographing commercials is all about heightened reality, perfect sunsets, perfect skin, etc.
  • It requires a lot of passive lighting: bounce cards, negative fill, contrast control.
  • On beauty and fashion commercials:
    • Your background can set a darker mood even if the talent has to be lit flatly for beauty.
    • Know your talent’s face in advance – e.g. do they have soft or hard features? Deep-set eyes?
    • What side is the talent’s hair parted on? This could affect your decision on which side to key from.
    • Try to make sure the make-up room’s lighting matches the colour of your lighting on set, so the MUA doesn’t get any nasty surprises on set.
    • Use Briese lights for beauty. They have hard- and softlight qualities.
    • Chimeras may be better for talent with less defined features.
    • Reduce skin texture by pushing fill through large frames or bounce, e.g. 12×12 frames.
    • Hard backlight looks great but beware of fly-away hair.
    • Combine hard and soft sources for backlight that has punch but wraps and doesn’t create shadow issues.
    • There’s a range of Cosmetic lighting gels that add a little warmth and diffusion.
    • Use a low overall light level for talent comfort and less squinting!
  • On sport and action commercials:
    • It’s about movement and body definition. Backlight and sidelight are most important.
    • Edgelight defines the talent’s body shape. Toplight adds muscle definition.
    • Lens flares add dynamism but reduce contrast, so light high-key.
    • Use higher light levels for highspeed shooting and to maintain focus as people move.

Stefan V. Borbely – “Deconstructing High End Car Commercials”

  • Rather than lighting the car, light the environment and the car will reflect that environment.
  • For exteriors, wait for dramatic skies because the car will reflect these.
  • Silver cars are the easiest to light.
  • Use long fluorescent tubes or long reflectors to make seamless long highlights on the bodywork.
  • Use Cinema 4D to test your lighting set-ups for reflections.
  • For night exteriors, take stills on the recce and note your exposure settings.
  • Bagolights are great for creating streaks of light on cars.
  • Fisherlights are a good substitute for the sky.
  • If you can’t afford Fisherlights overhead, put lamps on the floor and shoot them up into big polyboards.
  • Schedule your exterior shots for sunrise and sunset, and shoot inside the car in the middle of the day.

There is still time to get free access to the summit at bigleaguecinesummit.com Stay tuned to neiloseman.com for top tips from day two.


Top Tips from Day One of the Big League Cine Summit 2015

Ten Productive Ways to Fill a Lean January

Don't just sit around waiting for the giant, forced perspective phone to ring.
Don’t just sit around waiting for the giant, forced perspective phone to ring.

January is often a lean time for film freelancers. The powers that be have not recovered from Christmas sufficiently to commission any new work, the budget for the financial year is almost spent, and the weather and short hours of daylight make shooting difficult and unpleasant.

So when you’ve had enough of eating the Christmas leftovers, and watching TV box-sets, how can you gainfully fill your time? Here are some suggestions.

  1. Do your taxes. Really, you can’t put them off any longer.
  2. Update your showreel. Chase up producers for clips and get editing, so you can show your latest and greatest to the world and line up some sweet work for 2015. Don’t forget to add your latest credits to your CV as well, and update your website.
  3. Go through the job sites – Shooting People, Mandy, Talent Circle etc. – and  write some applications. Even if there’s nothing quite up your street, why not stretch yourself and apply for something a little different? If nothing else, it’s good practice.
  4. Attend events, workshops and talks to broaden your knowledge and network. Did you know, for example, that there’s a free cinematography masterclass on in Birmingham on the 31st?
  5. Learn more about your craft by reading books on the subject. (I recently posted a list of my favourite “making of” movie books.)
  6. Go to galleries and see relevant work – a cinematographer might want to look at the use of light in classic paintings; a costume designer might want to check out an exhibition of period fashions, and so on.
  7. Go to the cinema! There are several great films out at the moment, including The Imitation Game, The Theory of Everything and Birdman.
  8. Perform essential maintenance on your equipment. Fix those niggly things that you’ve put up with for the last few months while you’ve been busy, top up your consumables, and order those cheap accessories from Hong Kong now while you can afford to wait weeks for them to arrive.
  9. Do a personal project: make a micro-short, write a script, take some photos. It’ll help keep your skills sharp and could help you get work.
  10. Do something entirely unrelated to filmmaking. Such things exist. Apparently.
Ten Productive Ways to Fill a Lean January

Six Cinematic Uses for Fairy Lights

They’re everywhere at this time of year, twinkling away, but I carry a string of fairy lights with me on every shoot, whatever the season, because they can be useful in many ways. Here are a few:

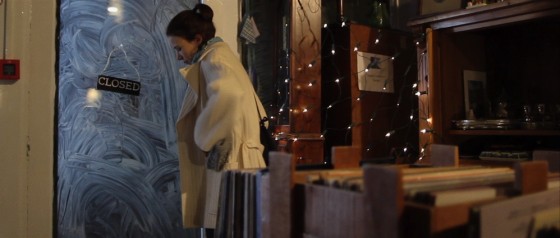
1. Firstly and most obviously, they’re handy set dressing to tell the audience that it’s Christmas. Useful in a montage to help sell a passage of time, like in this shot from Stop/Eject:

StopEject013682

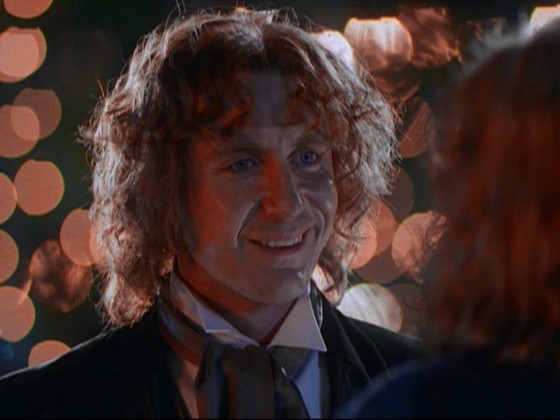
2. Fairy lights produce lovely bokeh in the background of a close-up, as in this scene from the Doctor Who TV Movie. Use a long lens and a wide aperture for the maximum effect.

vlcsnap-2013-02-06-10h48m38s142

3. In fact, you can use fairy lights to create a completely abstract background of out-of-focus lights, maybe as a backdrop for credits, titles or DVD menus.

stock-footage-bokeh-light-out-of-focus-fairy-lights

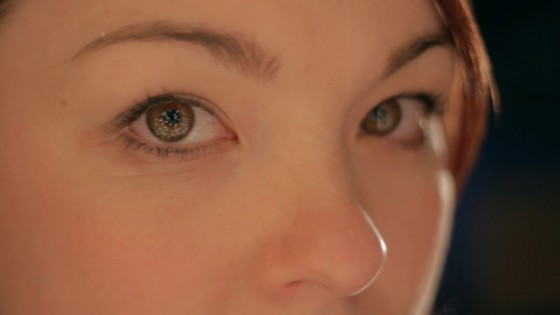
4. You can tape fairy lights to a polyboard and create a lovely soft light source as Eve Hazelton demonstrates in this video at 4:28.

eyelight

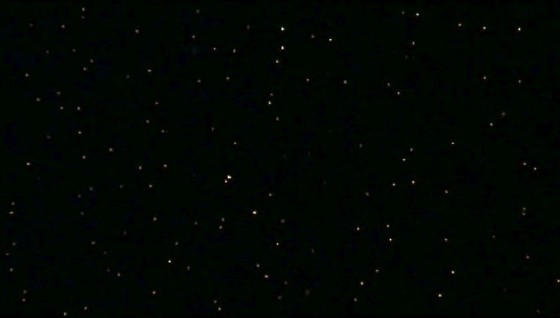
5. Fairy lights against a black background, underexposed, make an instant starfield backdrop as seen in Soul Searcher at 39:21. These were actually some of Hereford’s Christmas lights that the council had put up outside the window of my flat.

starfield

6. Similarly, fairy lights can represent distant city lights, as seen outside in the first shot of this trailer. (It was actually filmed in the daytime with makeshift black tenting around the window and the fairy lights within that.) For another example, check out the model shots of the train in Soul Searcher, above, like the one at 1:22:07. This behind-the-scenes photo of the miniature set shows the string of fairy lights that were used as “streetlights” between the model buildings.

TrainBG

Six Cinematic Uses for Fairy Lights

Lighting Techniques #5: Smoke

Smoke looks cool, I think we can all agree, but why? What are we trying to achieve when we spray a set with smoke?

In the famous cinematography manual Painting with Light, John Alton says of the cinema experience: “We sit in the dark looking at a light screen; this gives a definite feeling of depth. In order to continue this depth on the screen, the progression from dark to light must be followed up. The spot which should appear to be the most distant should be the lightest, and vice versa…”

Smoke can help you accomplish this dark-to-light depth. Because it’s white, if you spray it in the background then the background will get lighter, while the foreground will remain crisp and contrasty. It’s like standing on top of a hill and looking at more hills receding into the distance. The more distant ones are lighter, less saturated, less contrasty because of the atmospheric haze.

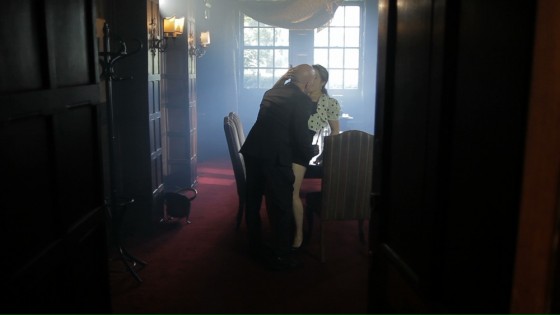
Smoke helps darkly-clad characters stand out from a dark background in The Deaths of John Smith (dir. Roger Harding)
Smoke machine
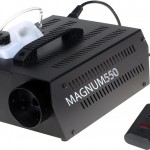
The Magnum 550: the most powerful smoke machine in the world. Are you feeling lucky, punk?

There are a number of ways to produce smoke. I own a Magnum 550, a small electric machine designed for DJs but perfectly useable on set. The smoke fluid is electrically heated until it turns to gas. On Ren we have an Artem smoke gun which uses propane gas cans to heat the smoke. This is handy on location because it doesn’t need a power supply, and it can produce thick clouds of smoke much more quickly than the Magnum.

An Artem smoke gun
An Artem smoke gun

You have to wait for both of these types of machine to heat up before you can use them. Ideally you need a dedicated crew member who is predicting when you might be ready to shoot and heating up the machine in readiness. If you’re outdoors, they also need to stay on top of the wind direction. You may think this would stay fairly constant, but trust me, it doesn’t.

Both types of machine produce wreaths of smoke which usually needs wafting in order to look like general atmosphere. And consistency is a challenge. It’s tricky not to have long takes that start with a lot of smoke and end with none. Both types of machine are too noisy to run during a take, though the sound recordist may agree to let you run an electric machine during pauses in dialogue, and an Artem can continue producing smoke for a little while after the gas is turned off.

A hazer
A hazer

If you’re indoors, a hazer may be more appropriate. This is an electric machine that uses compression rather than heat to vapourise the fluid, then blows it out continuously through a fan. The effect is much more subtle and constant than that produced by a smoke machine.

However you’re generating your smoke, remember to keep it in the background as much as possible. It’s all about making your subject stand out from the background.

You can find out more about smoke and why I use it in my Ren podcast at www.rentheseries.com/news/ren-podcasts.

Smoke used to volumise a shaft of light in Ren (copyright 2014 Mythica Entertainment)
Lighting Techniques #5: Smoke

Working with Other Departments

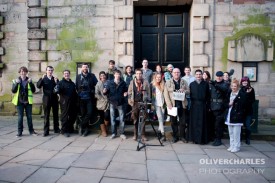
Art assistant Denise Barry's photo of the cast and crew shortly after arriving in France
The cast and crew of The First Musketeer – one of the best collaborative experiences of my career

Filmmaking is all about teamwork. But sometimes DPs can forget this and ignore the needs of other departments in their quest to get their perfect shot. In recent years I’ve really come to appreciate the importance of forging a good relationship with the other heads of department so as to get the best possible results and foster a good vibe on set.

Take cross-lighting as an example. Cross-light comes in from the side of frame and throws any texture into relief. This might be exactly what you need to show off the detail in a set or a costume and make the art department very happy. Or it might show up things we don’t want to see – the edge of a make-up appliance, or scarring on an actress’s face. In cases like this, a good DP should modify their lighting, no matter how much they love it, so that the make-up or the talent looks their best.

I’d like to collaborate more with make-up artists in the future. I’m sure we’re looking at a lot of the same things when we assess a face and decide how to approach it. Understanding the direction the make-up is going in could spark ideas about how to build on that with light. I once spent a lot of time trying to lighten up the face of an actor who had been made-up very dark; a brief chat with the MUA beforehand could have avoided that wasted time.

Stanley Kubrick’s production designer apparently used to design sets with a master shot in mind. So when you walk onto a set or a dressed location, talk to the designer about where they think it looks best from. They have lived with this set for longer than you have and they may have some great ideas.

It’s also important to respect others’ work. Don’t walk onto a set and start dressing stuff to camera; show the designer the monitor and let them work their magic. And don’t move stuff to get your tripod in without asking permission; they may need to take continuity pictures first so that they can put everything back in the right place later.

The cast and crew of Fled
The cast and crew of Brendan O’Neill’s “Fled”

The same goes for the sound department. If the boom op is struggling with shadows, tweak the lighting to help them out if you can. No film set is complete without a friendly rivalry between the camera and sound departments, but it’s vital this is underpinned by mutual respect. Sometimes there is an attitude on set that the DP outranks the sound recordist; don’t tolerate this. Sound and vision are equally important.

Last but definitely not least is the cinematographer’s relationship with the talent. It’s easy to forget how much important work is going on in an actor’s head. And what are the crew doing while the cast are trying to focus? Cracking jokes, spraying smoke around, turning on dazzling lights, thrusting polyboards in people’s faces, clapping slates and generally being incredibly distracting. Try to be aware of this and minimise it where possible, particularly for very serious or emotional scenes. Explain to the talent why you’re surrounding them with equipment and how it’s making them look good and servicing the story. Foster an environment where they feel they can ask you to move something if it’s distracting. If the acting isn’t good, no-one is going to watch the film long enough to admire the lighting – so do what you can to help the talent.

And remember, when people view your showreel, they’re judging not just the quality of your work, but the overall quality of the films you’ve worked on. In short, help make other people look good and you will look good too.

Working with Other Departments

Lighting Techniques #4: Health Bounce

This is a really simple technique but incredibly effective. All you do is put a reflector or a piece of polyboard under the talent’s face. Here’s an example frame from Ren starring Sophie Skelton. This was shot on an overcast day using a 2.5K HMI as backlight.

image

Sophie is very beautiful and the make-up (by Becca Youngs) is great, but the icing on the cake is a simple piece of polyboard out of the bottom of frame. It subtly lifts the shadows on her face and puts a ‘sparkle’ in her eye. That sparkle is actually the poly’s reflection, but it’s amazing how much life and energy that gives. I’m calling this technique the Health Bounce because it’s used a lot in ads for health and beauty products.

Here’s a side-by-side comparison without (left) and with (right) the poly.

image

The human brow has evolved to protect our eyes from sunlight, amongst other things. In an exterior scene, particularly on an overcast day, the light comes predominantly from above, rendering the forehead and the nose the brightest areas, and throwing the eye sockets into shadow. This is a challenge for cinematographers. So much of an actor’s performance is in the eyes – it’s essential to get light into the eye sockets to capture every nuance of that performance. A bounce board underneath the face helps do that.

Colin Smith holds the polyboard for the above shot of Sophie
Lighting Techniques #4: Health Bounce

Gaffering Tips

I just spent a couple of weeks gaffering for DP Paul Dudbridge on a feature shoot in South Wales. It was pretty much my first time gaffering, and I certainly made some classic mistakes. Here are some tips I’ve compiled as a result of my recent experiences.

  • Make sure cables have slack so the DP can adjust the positions of lamps.
  • Take extra time running cables initially so they are least likely to be in shot and won’t have to be rerouted later.
  • Swap out batteries on LED panels during coffee breaks or other downtime so they don’t go off during takes.
  • Keep track of how much power you’re drawing off each circuit to avoid tripping breakers. See Gaffering Basics for more on this.
  • Make sure you have access to the consumer unit (fuse box) so you can reset a tripped breaker straight away.
  • If drawing a large load off a 13A socket, periodically check the plug isn’t getting too warm – occasionally they can melt.
  • Righty tighty, lefty loosy. Make sure the weight on a C-stand knuckle is pulling it clockwise, i.e. tightening it.
  • Bulbs are most fragile when they’re hot – i.e. when they’re on or have recently been on – so handle them with particular care.
  • Observe the minimum safe distances illustrated on the lampheads. The heat can crack a window or burn a flag if placed too close.
  • When bouncing tungsten lights off the ceiling, black-wrap them straight away to cut out direct spill.
  • Be sure to disable the building’s fire alarm or bag the smoke detectors before switching on a smoke machine.
  • Keep an eye on the smoke level in the room and top it up when necessary.
  • Stay within earshot of the DP so you can respond to requests.
  • Anticipate DP requests: if you look at the monitor and see that the backlight is flaring, get a flag ready; if a lamp looks too hot on camera, break in a dimmer.

IMG_1029-0.JPG
Photo by Sophie Wiggins

Gaffering Tips

Lighting Techniques #2: Cross-backlighting

A common scenario in filmmaking is that you have two characters standing talking to each other and you need to do a two-shot and an over-the-shoulder of each. A quick way to light this kind of scene is cross-lighting: you set up two lamps so that each lamp serves as one character’s backlight and the other’s keylight.

I practice what I like to call cross-backlighting. What I mean by this is that the lamps are both on the opposite side of the actors’ eyeline to the camera. The result is that the downsides of their faces are lit. (Check out this post on key angles if you’re not sure what I mean by downside.)

This old Soul Searcher lighting featurette covers cross-backlighting around the 5:30 mark.

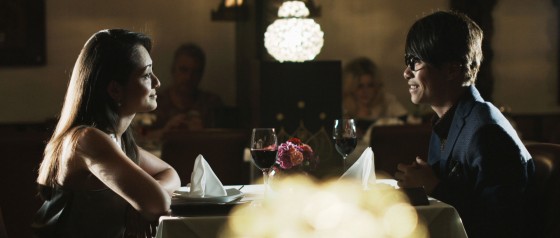
Here’s a super-recent example of cross-backlighting in action, on the set of The Gong Fu Connection. I’ve complicated things a bit though here. I’ve decided I want the characters’ keylights to be softer and cooler in colour than their backlights.

2-shot

So there’s actually a dedo and an LED panel behind each actor. The camera is set to a white balance of 3,200K. Each dedo provides a strong, white backlight, narrowly focused so as not to spill onto the opposite actor’s face. The LED panels, positioned much closer to the talent, provide a slightly softer light with a dialled-in temperature of 4,500K.

Sketch 2014-08-15 07_29_38

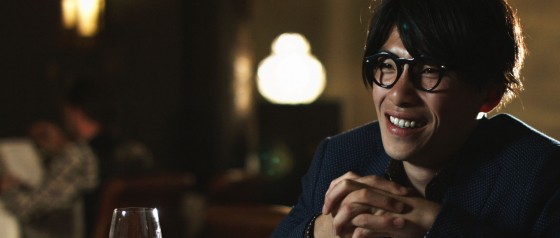
Harry

For the close-ups I repurposed the LED panel that wasn’t being used as a background light, dialling it back to 3,200K to match with the location’s existing tungsten lighting that was already doing a lot of the work.

Carmina

When we got to Carmina’s close-up I decided the LED panel alone was still too harsh, so I bounced it off the silver side of a collapsible reflector. I adjusted the panel to an angle where just a little direct light was hitting the side of Carmina’s face, and this kind of blends with the bounced light to provide a gentle wrapping illumination.

Stay tuned for more lighting techniques.

Lighting Techniques #2: Cross-backlighting