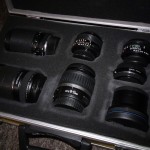
Although I use Ebay quite a bit, I rarely bid in the auctions. It annoys me too much how the price always seems so low and then jumps up exponentially in the closing minutes of the auction as everyone leaves bidding until the last possible moment. But when I saw a Sigma 20mm/f1.8 EF lens I couldn’t help myself and it was me that pounced at the last minute with my bid and won the lens.

What’s so great about this lens? I already have a Canon 18-55mm zoom – what’s wrong with that? The answer is: it’s all about depth of field.
Every filmmaker knows what depth of field is – the range of depth within an image which is in focus. Those of us cursed by tiny budgets to shoot on prosumer video formats have spent many years bemoaning how everything’s always in focus. Then HD-DSLRs came along and suddenly it all changed. Now you can control your depth of field. Now you can throw your background beautifully out of focus and keep your subject crisp and sharp, just like in real movies. But you can’t just turn on your DSLR and expect to get stunning depth of field straight away. So how can you make sure you’re always getting the shallowest possible focal depth? (Not that that is always the best look for every shot, but it’s nice to have the option.)
Let’s go back to basics and look at what affects depth of field. Most of us learnt all this when we first started making films, but let it drain from our brains over the years as our photographic dreams were crushed by the obstinately sharp backgrounds of a thousand Mini-DV frames.
1. Image size. The larger the image, the smaller the depth of field. That’s why DV cameras with their tiny image sensors give such large depth of field, while at the other end of the scale a 35mm celluloid frame will permit lovely narrow focal depth. It’s also why a “full frame” DSLR like the Canon 5D Mark II will supply smaller depth of field than a “crop chip” DSLR like my Canon 600D.
2. Lens length. The longer the lens, the smaller the depth of field. We all know this one well enough. How many times when DPing on DV have I heard the director ask me to zoom right in so the background goes nicely out of focus? But in the DV days it never went as out of focus as we wanted it to.
3. Subject distance. People commonly forget this one. The closer the subject is to the lens, the smaller the depth of field. This is why sometimes you can achieve shallower focal depth by using a wide lens and placing the camera close to your subject than by zooming right in and moving the camera back. It’s also why miniatures will have a tell-tale small depth of field (the distance between lens and subject is miniature, just like everything else in the set-up) unless you take steps to counter it.

4. Aperture size. The larger the aperture (i.e. the smaller the f-stop number) the smaller the depth of field. This is the crucial one with DSLRs. This is why I jumped on the Sigma f1.8 lens and why the f1.4 I borrowed on Field Trip was so beautiful. Of course, if you’re shooting in a bright environment then an aperture of f1.8 will give you a very over-exposed image, even with your camera on the lowest ISO. (Remember that you can’t compensate by changing the shutter speed, because that will also change the amount of motion blur in your footage, which unless you’re remaking Saving Private Ryan you normally don’t want to do.) The solution is to use an ND (neutral density) filter to cut down the amount of light entering the lens.
Of course there are far more technical details behind all of this, which frankly I don’t understand but fortunately I don’t need to in order to make films. I hope this post has refreshed your memory or tied together what fragments you already knew. I’ll let you know how I get on with the 20mm Sigma in the field. No pun intended. Well, maybe a little.


