Synced: The Japan Shoot – Part 1

cast-and-crew
Actor Shigeki Maegawa, director Devon Avery, actor Oliver Park with Justine Avery in front of him, actress Daisy Hainsworth, actor Sydney Jay, me and gaffer Keisuke Ueda, at Himeji Castle
575W HMI
575W HMI

On Wednesday May 27th I got a call from my friend and actor Oliver Park, saying he was flying to Japan on Sunday for a shoot and did I want to come as DP? He was playing the leading man in Synced, a sci-fi feature film directed and co-written by Devon Avery, and after a month of shooting in Glasgow, the existing DP had opted not to take part in the Asian shoot.

On Friday night my plane ticket came through, at midnight on Sunday I was changing planes in Qatar, and on Monday afternoon (local time) I was in Osaka. The following morning saw me at Arc System, a very helpful lighting rental house, with Devon, his wife/multi-talented assistant Justine and a couple of the Japanese crew. With two night exteriors and a night interior as well as a day exterior scene, a reasonable amount of kit was needed.

The mains electricity in Japan is 100V, 60Hz, so very similar to the US – and indeed the plugs and sockets are identical. But the killer is that you can only draw 7A per socket. That’s a maximum of 700W, as opposed to over 3,000W from a UK socket.

Canon Ultrasonic 24-70mm f2.8

So the biggest lamp we could hire without needing a generator was a 575W HMI. With one of those in the bag, I figured it was best to fill out the package with battery-powered lamps, and so hired four 1’x1′ Bi-Color LitePanels. Although I’m still not 100% sold on the colour rendition of any LED panels (even LitePanels, which are amongst the best), there’s no denying they’re incredibly handy and quick to set up.

Pentax 50mm f1.4
Pentax 50mm f1.4

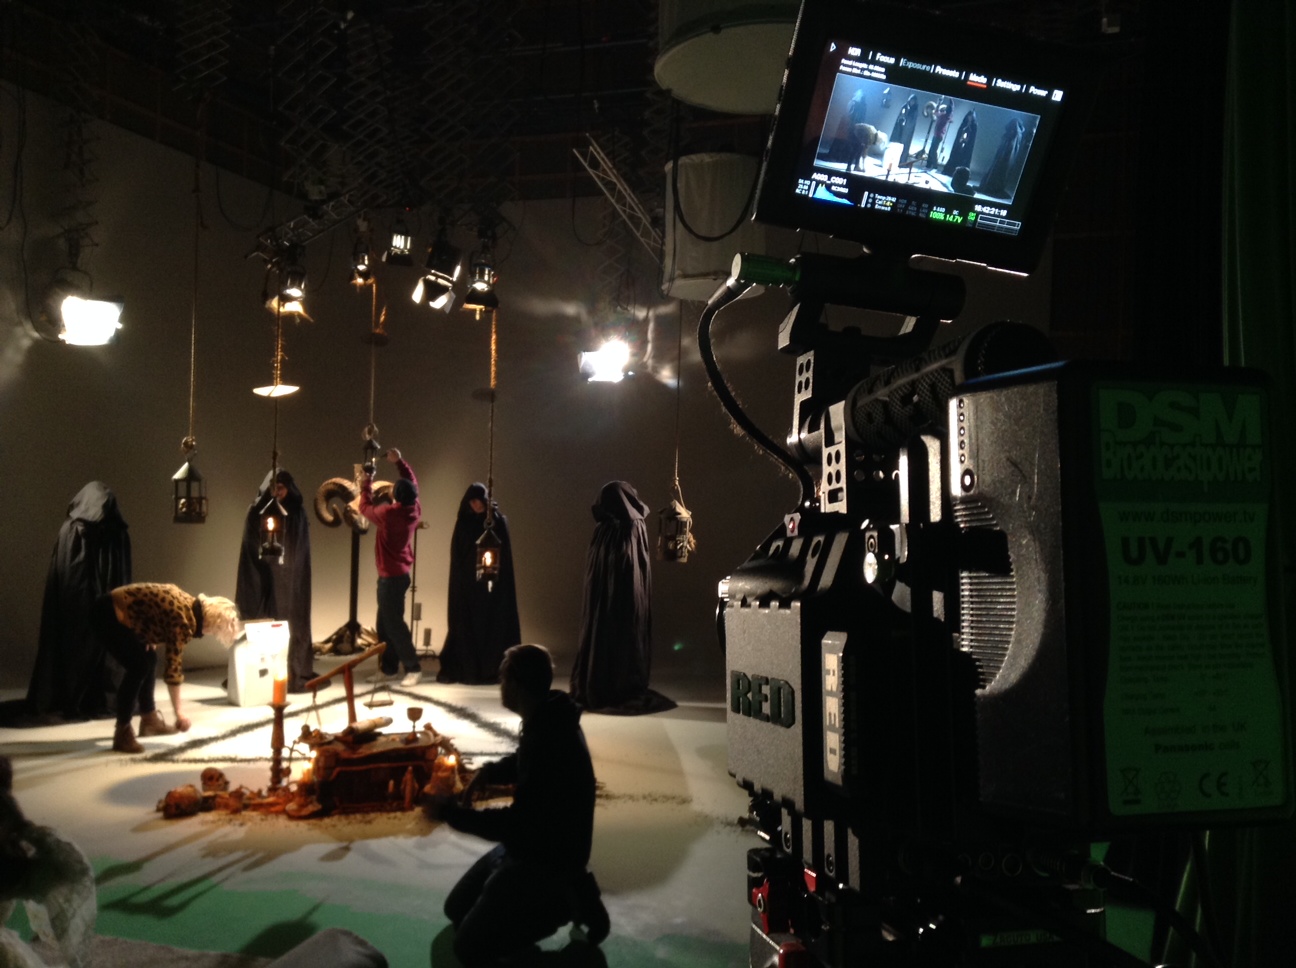
I would be shooting in 4K ProRes 422 HQ on my Blackmagic Production Camera, at 23.976fps. I initially stuck to two Canon L series lenses for continuity: Devon’s 24-70mm f2.8 and crew member Keisuke Ueda’s Canon L 50mm f1.4. Since I was constantly struggling to expose an image at the BMPC’s native 400 ISO, I later employed my Sigma 20mm f1.8 for faster wide shots, and I couldn’t resist trying my new Pentax 50mm f1.4, which performed beautifully at f1.7 and above, but did seem a touch soft when wide open.

Thunderbolt
Monitoring via Thunderbolt cable to Blackmagic Ultrascopes on a Powerbook

Regular readers will know of the trials and tribulations I’ve experienced getting a monitor signal out of my BMPC, with the result that I bought a 17″ Blackmagic SDI monitor last year. It was impossible to bring this to Japan, so instead – for the first time – I experimented with Thunderbolt monitoring. A runner was dispatched to buy a cable, and Devon installed the Blackmagic Camera package on his Macbook. This package includes Ultrascopes, which provides a live video view amongst other things, though annoyingly only in a pretty small window.

Whenever I turned the camera off or played anything back, the signal would be lost. To get it back, Devon would have to quit Ultrascopes and I’d have to switch to 25fps before he re-opened it. Only once it was re-opened could I switch back to 23.976fps. Please sort out that little bug, Blackmagic Design!

With the kit and workflow sorted, we travelled to Himeji (by bullet train, no less) ready to start shooting on Wednesday. Watch this space for part 2: shooting the kitchen scene.

Synced is copyright 2015 Empty Box Productions LLC.

Synced: The Japan Shoot – Part 1

Top Tips from Day Two of the Big League Cine Summit 2015

blcs-blue-on-whiteLast week I published the best tips I culled from day one of the 2015 Big League Cine Summit. To complete the set, here are the top tips from day two, starting with that legendary teacher of cinematography, Shane Hurlbut, ASC. Since Shane is so good at sharing his knowledge on the Hurlblog, I’ve only listed a few tips from him; I strongly recommend you check out his site for many, many more gems.

Shane Hurlbut – “Delivering Storytelling Impact with Light, Lens and Camera”

  • On the visual grammar of Crazy/Beautiful: controlled camera moves represent Jay’s controlling mother.
  • Shane likes to use the work of stills photographers as inspiration.
  • He added extra 400W sodium vapour fixtures to the existing 100W sodium vapour streetlights for night exteriors in Crazy/Beautiful.
  • He used a “damaged key” in Crazy/Beautiful to represent Kirsten Dunst’s flustered state. It’s messy, doesn’t quite reach both eyes.

David Vollrath – “Motivated Lighting”

  • “I don’t want to light their faces and bodies specifically. I like to light the space.” – Harris Savides
  • Stand where your subject will be to see what reflective objects are affecting your lighting.
  • Tabletops can be great bounce-boards for toplight. Maybe put muslim or paper on the table to enhance it.
  • Look for things to motivate light: windows, practicals, overhead fixtures, sconces, etc.
  • Once you’ve lit the space, it will become clearer how to light the faces.
  • Work with the art department in preproduction to make sure you get the practicals you need.
  • Flag your other sources off your practical so that excess light isn’t falling on them and washing them out.
  • You can use the reflection of a softbox to create a nice shine on a dark surface or even on a face.
  • A roll of duvetyne armed off a C-stand makes a fair stand-in for a 4×4 floppy flag.
  • “Beadboard” is just another name for polyboard. (I genuinely didn’t know that!)
  • Other bounceboards include foamcore and showcard.
  • Use Source 4 Leikos to fire into your bounce, because they’re easily cut and focused. They’re cheap to rent too.
  • It’s easier to rig a bounce card overhead than a softbox or a kinoflo.
  • Plus Green and Minus Green gels – to match or correct fluorescents – are useful in subtle 1/8th flavours.
  • “Lighting is in the gripping.” Taking away light can be more effective than adding it.
  • A “cocktail” is a layering of multiple gels.
  • A simple black card over a shiny piece of furniture can cut bounce and bring back contrast.
  • Hazers add great atmosphere, but they raise the fill level. To see shafts of light, use a dark background.

Caleb Pike – “Everything You Need to Know About Lenses”

  • A good set of primes will last you decades.
  • Lens choice affects: 1. Field of view, 2. Depth of field, 3. Compression (amount of perspective).
  • Use compression to isolate a subject, or to crop out equipment.
  • Use wide lenses to open up a space, exaggerate expressions or get the most out of camera moves.
  • Longer lenses are more flattering for close-ups. Short lenses can distort the face unpleasantly.
  • Don’t always shoot with your aperture wide open. Choose an appropriate depth of field for your story.
  • Generally it’s best to keep your aperture the same throughout a scene.
  • Avoid non-constant aperture zoom lenses for video work.
  • Primes (fixed focal length lenses) are generally faster, cheaper, lighter and sharper than zooms.
  • Cine lenses are heavier than stills lenses, do not breathe (zoom slightly when focusing), and have fixed filter rings.
  • Cine lenses have hard stops on the focus rings, so you can set focus marks on the lens.
  • Cine lenses have longer throws on the focus rings, so that follow focusing can be more precise.
  • Wide cine lenses have less distortion than their stills counterparts.
  • Passive lens adapters are cheap and simple; smart adapters maintain the electronic connection for autofocus etc.
  • Lens boosters can solve cropping problems caused by using a lens with a sensor size it’s not designed for.
  • Throttle adapters are passive adapters with neutral density fader filters built in.
  • Caleb’s budget lens recommendations:
    1. Nikon 35-70mm f3.5 macro
    2. Olympus 50mm zuiko f1.4 and 1.8 versions – sharp, with long focus throw – around $30
    3. Canon 40mm f2.8 pancake prime
    4. Nikon 100mm F2.8 E series – around $99
    5. Canon 28-80mm F2.8-4.0 L series – well built, very sharp – around $500

Matt Workman – “Camera Moves That Matter”

  • A camera “hand off” is a move that starts focused on one thing and then transitions to focus on another.
  • A classic establisher might start on a mysterious insert then pull back – “hand off” – to reveal the scene.
  • Spielberg, Scorsese, Luhrmann, Singer and Bay all use camera hand-offs frequently.
  • Camera moves increase production value and can cover multiple story beats in one shot.
  • Doing the same thing in cuts reduces your audience’s understanding of the scene’s geography.
  • Crane-ups give you a privileged view, a sense of power.
  • Write down the beats of the scene, then storyboard or previz. All departments can benefit from the previz.
  • Beware of boring bits in the middle of camera moves. Is it better to do it in cuts so you can speed it up?
  • Use Autodesk Maya for previz. Build a library of accurate grip equipment models.
  • Check out Matt’s other site which uses previz tools to illustrate other DPs’ set-ups.
Top Tips from Day Two of the Big League Cine Summit 2015

Hellblazer

A couple of weeks back, I served as director of photography on a music promo for heavy metal band Savage Messiah. Directed by Tom Walsh of Polymath Pictures, the video was released yesterday by Earache Records.

This shoot represented a number of firsts for me: first time operating a Red Epic, first time using a tilt-shift lens, and first time shooting more than 50 frames per second.

Red

While preparing for the shoot, I found this video tutorial from the oddly-named Embassies of Cinema was very helpful in demonstrating the basics of operating the Reds. As Tom said to me, a camera’s a camera, and if you know how to operate one then you can probably find your way around any other, but no-one wants to look like an idiot when they show up on set and start tentatively pressing buttons on an unfamiliar piece of kit.

If there’s one thing I learnt about the Red that I’d like to flag up to other first-time users, it’s the crop factors. The Epic has a Super-35mm sensor, but it only uses all of that sensor when in 5K mode. If you shoot at a lower resolution, the camera simply ignores the outer edges of the sensor, rather than scaling the image to that smaller size,. The result is that your lenses appear to get more telephoto as you decrease the resolution. So watch out for that.

phfx_RedScarletXResFOV

Tilt-shift

The tilt-shift lens
The tilt-shift lens

A tilt-shift lens is one which allows you to move the lens elements around relative to the focal plane. The shift mechanism is primarily of interest to stills photographers who want to capture skyscrapers without them appearing to taper towards the top. The tilt is the fun part.

A classic tilt-shift photograph

Normally, the glass elements in a lens are parallel to the focal plane (the camera’s sensor). Imagine a shot of three apples lined up next to each other on a table. They’re all the same distance away, so when you focus on one, the other two are in focus as well. But if you tilt the lens, only one apple might be in focus, and part of the background might be in focus too. This effect is often used to make cityscapes and landscapes look like miniatures, but it’s also useful for general weirdness. If you can’t afford to buy or hire a tilt-shift lens, a technique called “lens whacking” offers a low-tech alternative.

tilt_shift_flat

Highspeed Cinematography

Regarding highspeed photography, the only thing I have to say is, “Eh?” Can anyone out there explain why tungsten lights would flicker when shot at 300fps? Everything I’ve read says that only discharge lighting (HMIs, kinoflos) and very small tungsten bulbs should flicker at high frame rates. Surely the filament in a blonde shouldn’t be cooling enough between peaks in the AC power supply to register a flicker in a 600th of a second? I certainly can’t think of any other explanation.

You can see the flickering at around 2:24 in the video if you’re looking for it, but there’s enough dynamic lighting, smoke, lens flares and tilt-shifting that it all just seems part of the deliberate effect.

Setting up to shoot the narrative portions of the promo
Setting up to shoot the narrative portions of the promo. Director Tom Walsh kneels in midground.

Thanks to Tom and designer Amy Nicholson for another great shoot. I look forward to working with them again next week on A Cautionary Tale.

Hellblazer

Picking up the Pieces

A typical Stop/Eject pick-up shot

Over the years I’ve developed a bad habit of shooting pick-ups. I really wanted to leave Derbyshire on April 26th with the whole of Stop/Eject in the can, but sadly it was not to be. 25 close-ups of the tape recorder which were scheduled for filming with a skeleton crew on that final day were pushed aside to make way for the weir shots dropped earlier in production.

I grabbed three or four of these close-ups while we were packing up at Magpie, but the rest would have to be shot in my living room back in Hereford.

Which is what I spent most of yesterday doing, with my long-suffering wife Katie standing in for the leading lady once again.

The ultra-spacious 007 stage at Oseman Studios
The ultra-spacious 007 stage at Oseman Studios. Note the iMac in the top right showing the shot from principal photography I'm matching to.

Although it took longer than it would have done with a couple of extra crew and a bit more space, it was incredibly useful to have my iMac right there with all the footage from principal photography on it – some of it even roughly assembled – so we could make sure the lighting and hand movements matched perfectly.

Focusing up close with the Sigma EX 105mm

Almost every pick-up was shot with a Sigma EX 105mm macro lens which I bought on eBay a few weeks ago. This is a fantastic lens with a huge focusing range which enabled me to get big close-ups of individual buttons on the recorder.

It’s weird shooting things that tight because you start to worry about stuff that’s not normally visible, like tiny bits of dry skin on people’s hands and miniscule dents in things. When you think about what size of screen the film might be projected on at a festival it’s possible to become picky to a crippling degree.

Lovely optical artefacts from using a cheap macro adapter

For a few specific shots, where bad things are going on in the story, I switched out the Sigma for a Canon zoom and fitted a cheap macro adapter on the front. This gave me soft focus, blooming on the highlights and colour aberration around the edges of frame. I love to do optical stuff like this in-camera wherever I can, rather than relying on post-production effects which can often look cheesy.

Anyway, the shots were all accomplished successfully, despite the fact that the hero tape recorder had a fault and wouldn’t play for more than a couple of seconds before grinding to a halt. For extreme close-ups on the rotating capstans and the playhead moving into position I used a children’s tape player bought from a charity shop last year (for the opening shots of the Stop/Eject podcasts) from which I’d removed the cassette door.

Shooting a kiddies' recorder with the door removed

A couple of shots were storyboarded as being top-down from directly above the table. To save rigging up the camera on a C-stand, I laid the table on its side and blu-tacked the recorder and tapes to it.

Annoying as they are, I advise you to always expect there will be pick-ups to shoot (maybe right after principal photography, maybe only a couple of weeks before the premiere) and plan accordingly, i.e. keep as much stuff from the shoot as you possibly can, particularly…

  • any key hand props (like the tape recorder)
  • bracelets, bangles, rings and watches so you can film extra shots of characters’ hands (My heart briefly stopped when Katie pointed out yesterday that Georgie wore Sophie’s watch in principal photography, and it was therefore 100 miles away in Belper. Fortunately the one key shot of the watch was amongst those few we grabbed before leaving Magpie.)
  • ideally all of the costumes, but at least tops, since you can often film extra hand shots with the character’s torso filling the background of the frame
  • any parts of the sets that can be used to fill the background of a close-up or medium close-up (We brought the curtain and the table from the alcove back to Hereford with us. Sorry, Mrs. Briggs!)

Of course pick-ups aren’t always because you dropped stuff during principal photography. Often they’re new material that you realise you need as the edit develops. It’s too early to say whether Stop/Eject will have any of those. Either way, there is still one more storyboarded shot to film – of a microwave. Which sounds simple, but it’s not. More on that another time.

Picking up the Pieces

Marquetry and Macro Tubes

Anne lays sand-shaded veneer pieces into a panel
Setting up to shoot. Photo: Lisa Sansome

Last Monday was the first day of shooting on a promotional video for a company in Llandrindod Wells called Aryma. Aryma makes contemporary marquetry – exquisite and intricate inlaid wood panelling, typically for private jets, super yachts and luxury homes. An image is created not through paint of any kind, but by painstakingly building it up from many, many pieces of wood veneer, each one a different colour, and some of them shaded by singeing them in hot sand.

The video marked my first experience of using macro tubes: collars that fit between the lens and camera body to allow the lens to focus on closer objects than it normally can. This was necessary in order to properly capture the fitting of the veneer pieces, some of which are unbelievably tiny. Here is a glimpse of a few of the shots recorded so far.

Marquetry and Macro Tubes