The last of the Soul Searcher anniversary featurettes is a completely frank and open breakdown of the budget. Find out how I raised the money, what I offered my investors, what distribution deals were put on the table, how much the film made worldwide and how much of that money came back to me (you may be shocked). Most importantly, discover exactly what was spent on each element of the budget, from travel and catering to make-up and lighting.
Corrections: 1. UKTI stands for UK Trade & INVESTMENT, not Industry; 2. After completing the programme I discovered two more distribution contracts I was offered, both from Californian companies. Neither offered an advance. One proposed taking a 25% cut of the profits, the other 40%; 3. I misspelt Kevin MacLeod’s name, apologies. Visit his website at http://www.incompetech.com
For more information on film distribution I recommend The Guerrilla Filmmaker’s Movie Blueprint by Chris Jones.
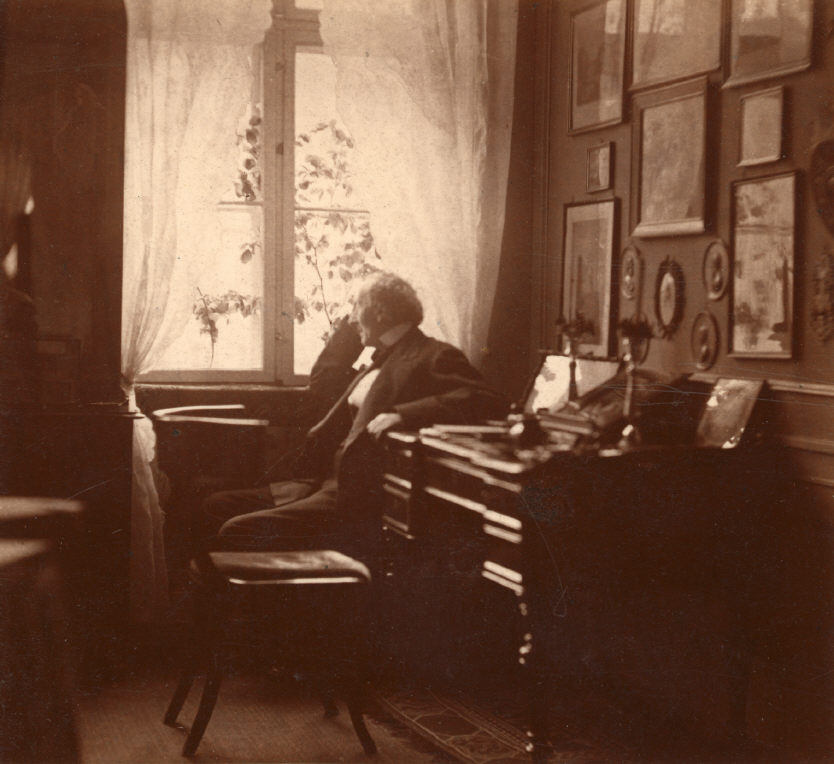
The Turn of the Screw, one of my references for A Cautionary Tale
In the new year I’ll be directing a short film called A Cautionary Tale, written by Steve Deery and produced by Sophia Ramcharan. This will be my first time directing without (co-)writing or (co-)producing too. (Steve got in touch with me after seeing the Stop/Eject trailer at a FiveLamps Film Night in Derby.) As usual, I’ll be documenting the filmmaking process on this blog.
A Cautionary Tale is a drama with a supernatural twist, featuring various authors who visit a cottage retreat to write, in several time periods from 1903 to the present.
It’s interesting in this prep stage how things I did unconsciously or which were inextricably entangled with the writing on other projects, require much more conscious thought and are much more clearly delineated when solely directing.
Other than providing notes on the various drafts of Steve’s screenplay, my first job was provide character breakdowns so Sophia could issue a casting call. First of all I went through the script and picked out all the clues Steve had provided about the characters. Then I sat down to compose backstories for them. There was an easy way into these, because two questions immediately arose for each of the authors: what kind of novel were they writing, and why had their publishers felt it necessary to pack them off to this retreat?
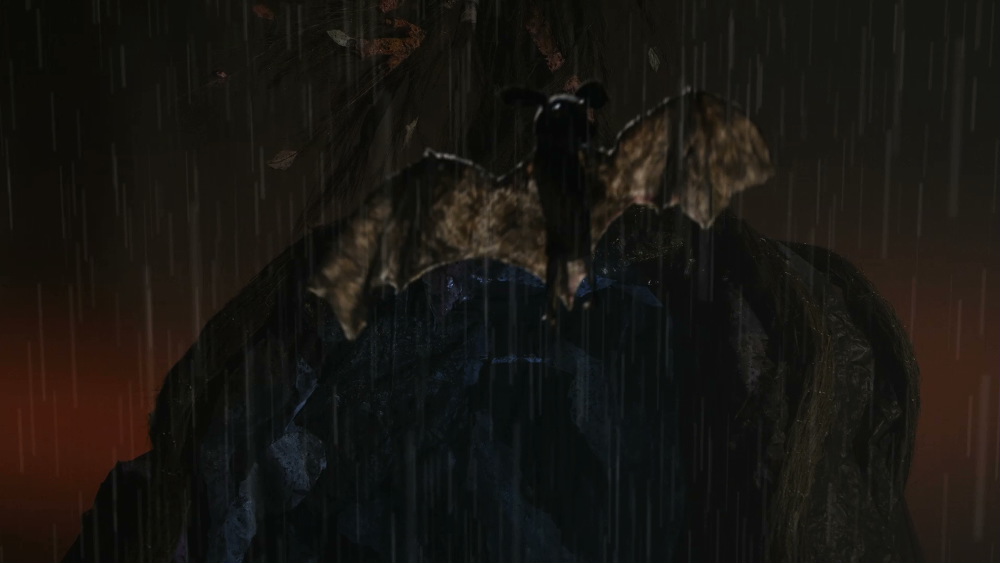
Another image from the moodboard
In the case of the 1903 authoress, I was highly influenced by a compendium of Frankenstein-related stories I was reading at the time; I decided to make her a gothic horror writer, with Mary Shelley her heroine. This fit neatly with the supernatural elements of the story, and led me to a key decision on the tone of the film: that I would give the whole thing a gothic edge.
I immediately began researching the genre, watching The Others, Sleepy Hollow, and The Elephant Man at a convenient BFI Gothic Season screening. I noted how framing and pacing were used to create atmosphere and sense of dread, and arrived at a keyword for my vision of A Cautionary Tale: trapped. Soon I had a page of notes on how this would come across in the camerawork, to go with my two pages of backstories for the characters and the house.
I’ve also started a moodboard on Pinterest. It’s weird to think that a year ago, before doing FilmWorks – on which, incidentally, Sophia was a fellow participant – I’d never even heard of a moodboard. Now I can’t imagine going into a project without one of these scrapbooks (virtual or otherwise) of visual references. The images in this post are from the board.
That’s all for now. Stay tuned for all the latest news on the making of A Cautionary Tale.
This video takes you through the many layers of sound created for Soul Searcher’s big battle scene in the villain’s lair, with subtitles explaining the creative process of choosing and recording the sounds. (This was originally an interactive bonus feature on the DVD release.)
Lighting in the controlled environment of a studio should theoretically be much easier than lighting a location, but I found recently that it doesn’t come without its challenges.
Last month I had the pleasure of working on a music promo for Droplets by Lewis Watson and Gabrielle Aplin. Directed by Tom Walsh and designed by First Musketeer veteran Amy Nicholson, this magical, handmade puppet fest was only the second or third studio-bound production of my career. Tom had secured the use of Giltbrook Studios, an impressively equipped 1,300 sq ft soundstage in Nottingham, complete with manager Andy Swain as gaffer.
Apart from the exclusion of pesky natural light, the biggest advantage offered by a stage over a location is the lighting grid; no more wondering if that polecat or K-clamp will take the paint off the wall, and no more compromising your backlight position to keep the stand out of frame. The downside of the grid is the time it takes to rig or adjust a light, particularly if the grid, like Giltbrook’s, has no catwalks, and every adjustment must be made by bringing in and scaling a huge ladder. In fact it may be impossible to rig or adjust lights once there is a finished set underneath. All of which means you’re going to need a pre-rig day.
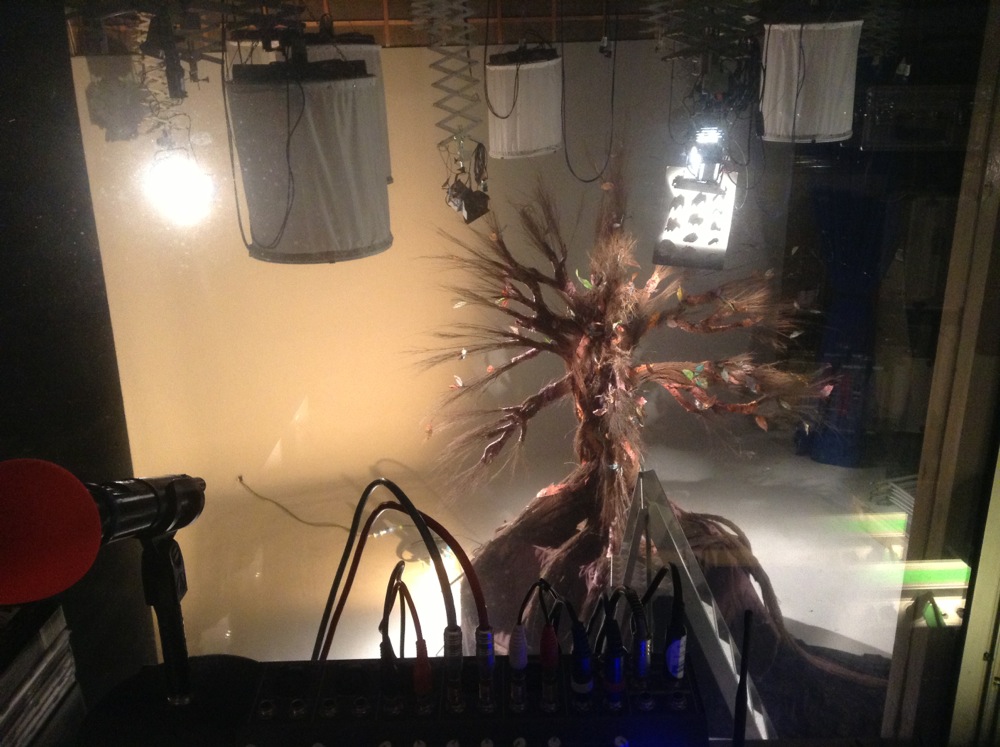
Some of the ill-fated space lights can be seen here, as well as the cucoloris rigged beneath the 650W fresnel key light. At the top left is the 2K fresnel backlight.
In the case of Droplets, the pre-rig day was also used to assemble the set, a tree on top of a cave, which must have measured about fifteen feet in height. As soon as it had been erected we realised that the six space lights Andy had spent all morning rigging were going to be in frame, as the top of the tree reached above the bottoms of these lights. (A space light is a circular arrangement of six tungsten tubes inside a cylinder of white diffusion cloth. They’re typically used in large numbers to simulate daylight in a studio.)
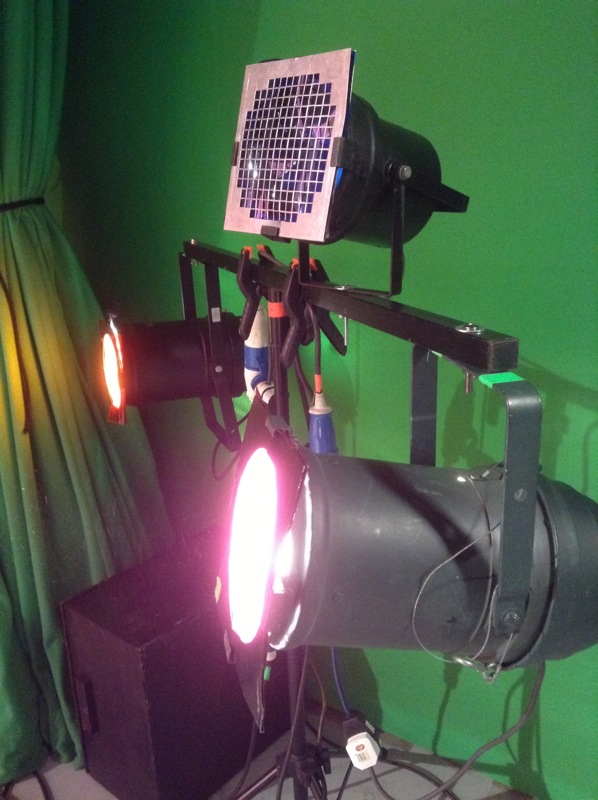
Some of the par cans that supplied the colour wash on the backdrop.
In fact my options on where I could put lights were very narrow, because of the lack of space around the set, both vertically and horizontally. We shot against the studio’s white infinity cove, and Tom wanted colour washes over this to suggest various times of day. Andy achieved this with gelled par cans off to either side of the set, but then it was crucial that no other light spilled onto the backdrop or it would ruin the effect.
We rigged a 2K tungsten fresnel immediately behind and above the set, for backlight, but it was hard to put anything in from the sides or the front without contaminating the backdrop. The 650W key light had to be rigged almost directly above the set, and even then its shadow can be seen on the floor in the wide shots if you look carefully. We hung a cucoloris (sheet of wood with random shapes cut in it) below the 650 to created the dappled effect of woodland light, taking care that a patch of light fell on the tarsier puppet’s main position.
For fill I used an LED panel off to the right of the set, dimming it to find a balance between its light being barely visible on the backdrop while still lifting the set and the puppets enough. I placed a smaller LED panel inside the cave, with a turquoise gel to suggest phosphorescence.
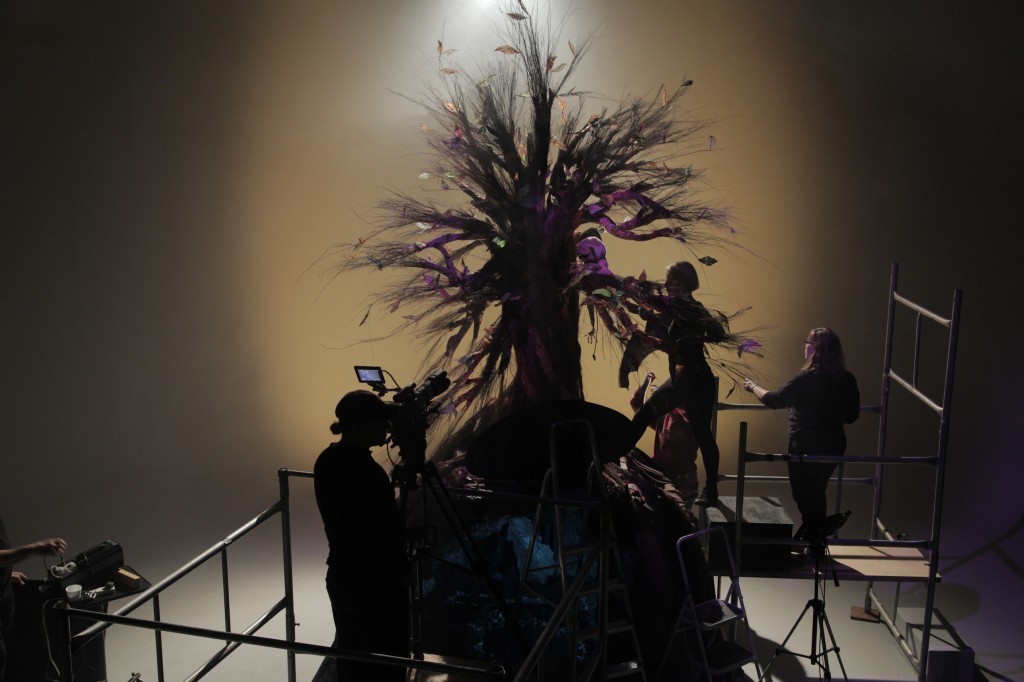
The final day/sunset look. From each side an orange-gelled and a pink-gelled par can light the backdrop. A 2K tungsten fresnel provides backlight, while a 650W fresnel with a cucoloris provides dappled light on the tree and tarsier. An LED panel off right supplies fill, and a second panel is inside the cave with a turquoise gel.For closer shots, a reflector below frame and/or a Dedolight behind camera were used to fill in unwanted shadows.
Another advantage of a studio is that you can easily run all the lamps into a dimmer board. This was very handy for Droplets because in addition to the day/sunset look, we had nighttime scenes and a storm to light for, and some on-screen transitions between the states. We were able to set these all up in advance and switch between them pretty much by just pushing a few sliders up and a few others down.
The night state involved a yellow-gelled redhead on the floor behind the cave, pointed straight at the backdrop. With its barn doors removed, this created a circle of light which reminded me strongly of the huge yellow moon in the posters for The Nightmare Before Christmas. I hadn’t been intending to create such a defined circle, but when I saw it I immediately loved its stylised look.
A second 650W fresnel was rigged, close to the first, and with ulcered black wrap in front of it to again created a dappled look, but with a purple gel on it. This took us away from the more traditional blue of nighttime scenes, adding to the stylised look again, and contrasting nicely in colour with the yellow “moon”.
The 2K backlight remained on for the night scenes, but the sunset colour wash on the backdrop was switched off, as was the fill.
Nighttime in puppet land: the 2K backlight remains on, a yellow-gelled redhead lights the backdrop from behind the set, and a purple-gelled 650W fresnel in the grid pushes through a cucoloris to highlight the tarsier.
For the storm scene we experimented with strobes, but they caused unpleasant rolling shutter artefacts. Instead I used the flash button on the 2K’s dimmer box to create lightning. Both 650W fresnels were turned off for this state, but the fill was turned back on. While the pink colour wash remained off, we brought up the orange wash just a little bit to suggest an angry sky in the background.
Stormy weather. The orange colour wash coming from the par cans, originally set up for the sunset look, is used here much more dimly to suggest an angry sky. The LED panel off right supplies fill while the 2K backlight is flashed periodically.
Copious smoke was used throughout (another advantage of studios – your smoke stays put!) to generate god rays as the backlight streamed through the tree. It also helped soften the backdrop and render the colour washes more convincing as a sky.
Watch the video here. Shot on a Red Epic operated by Chris Wetton. Big thanks to Andy and Giltbrook Studios for all their help. Visit www.polymathematics.co.uk to find out more about the amazing work of Tom Walsh and Amy Nicholson.
Martial arts action choreographer Simon Wyndham and martial artist and stuntman Shane Steyn discusses the challenges and considerations of co-ordinating fights for Soul Searcher with fists, feet, swords and scythes.
Earlier this year I met young filmmaker KT Roberts on a shoot in South Wales, and I remember her telling me all about her idea for a time travel feature film. This got my attention (a) because I love time travel movies and (b) because I always like to hear about low budget filmmakers who are not afraid to tackle a sci-fi or fantasy story. But before KT embarks on this feature, she’s making a short film called 3 Blind Mice. She asked me to help out and before I knew it I was the director of photography and drawing up an equipment list for Panalux.
KT, where did the concept for 3 Blind Mice come from?
I wrote two thirds of 3 Blind Mice on a plane back from a diving trip in Lanzarote – I’d had the ideas rattling around in my head for a while, but hadn’t yet put pen to paper but on that plane journey it came spilling out rather quickly. This is actually the first short film I’ve ever written that I like enough to want to take to the shooting stage. I have this writing thing all backwards in that I’ve already written a feature and have another in the pipeline, but I find it much harder to write short films as there’s so little time to explore anything in any detail. Paradoxical as it may seem, features are easier for me to write (though not necessarily to write well – only time will tell!) because they give you time to explore, examine and dissect your characters: a deep sea dive in the Caribbean as opposed to pressing your nose against the glass in an aquarium.
With this in mind I didn’t want to focus on just one character as I didn’t feel I’d be able to do them justice, or tell the sort of story I wanted to tell, in the shortened format of a short film. Instead I decided I wanted to make a film about a single idea and examine it in depth from different angles and perspectives – through the eyes of different people. I’m not entirely sure what drew me to death – no-one I know has died, not even a pet, so I’m not drawing directly from my own experience on that front. However I have had a massively overactive imagination since a very young age (I was one of those hyper children battling dragons with wooden sticks) – and I’m fascinated by the very human tendency to tell ourselves stories to help us deal with things we don’t understand. The stories we tell ourselves about death – from concepts of heaven and hell, to ghosts, the supernatural and the grim reaper- allow us to categorise and quantify this great unknown and thereby make it less scary. All three stories depict someone struggling with death and making up an imaginary companion to help them through it – each is coming from a different perspective and has a different outlook on what death means, but each of them must come to terms with it. I hope I have managed to convey the idea that while death can be scary and sudden and confusing, there are other, brighter facets to it if you look in a certain way.
How does 3 Blind Mice fit into your plans for future filmmaking?
I’m really looking forward to making this short and hope it will mark the start of a career which sees some of my bigger projects realised. Ultimately I would like to make one of my feature films, and my producer Julia and I have already discussed how we might film the opening to use as a pilot to try and raise the necessary funds. My work is slightly tricky in that I almost always have a science fiction, fantastical or supernatural angle in my writing, which can be difficult to bring to the screen for obvious reasons! However my work isn’t fiction in the same vein as something like Star Wars – it normally has just one element (for example my finished screenplay, Timelines, revolves around people who live in our world, but who can move through time). This means that with clever camera work and minimal special effects, my stories can be realised without the multi-million pound budgets that most science fiction films made today need. I’m not aiming to make art house films and I am very much aiming to entertain not preach, but if I can sneak in themes and perspectives that interest me or I feel strongly about then the story is always better for it, even if many people watching don’t realise it’s there. I want people to work to understand the storyline and the characters, not just sit back to watch mindless fluff.
So if I could look forward 20 years, I hope I’ll be writing and/or directing that sort of film and be able to look back on 3 Blind Mice as the first step on my way.
Right now KT and her dedicated production team are in the middle of a crowd-funding campaign to cover the modest costs of making 3 Blind Mice. Myself, Colin and the rest of the cast and crew are volunteering our time, but there are some costs you can’t escape. This is an all-or-nothing campaign, so if we don’t reach the target we get none of the money and cannot make the film. So please head on over to the Kickstarter page, contribute what you can and help get KT on the road to achieving her dreams.
Production designer Ian Tomlinson and assistant Vic Perry demonstrate how some of Soul Searcher’s props were made, including the drawbridge chain fashioned from rolled up newspaper and the plasma grenade that started life as a Jif lemon.
What angle the key light hits a character at is a KEY (groan) decision for a director of photography. The lighting featurette in my last post looked at some of the options, but today I’d like to expand on those with some more up-to-date examples.
Imagine a clock face. You’re looking down on the scene and your talent is at the centre with their eyeline to twelve o’clock.
The key light clock
With that in mind, consider the following shots. The camera is at between twelve and one o’clock in each case.
Key light at almost twelve o’clockHalf past elevenEleven o’clockQuarter to elevenHalf past nine (view the See Saw trailer)
Clearly the level of fill makes a big difference, but you can already see that a key light at noon gives a flawless, evenly lit look which is great for a leading lady, while a half-past-nine casts half of the face into darkness for a threatening or mysterious feel. There is a sweet spot I love at about quarter to eleven where, on one side of the face, only the eye and a triangle on the cheek are lit. But generally between half past ten and half past eleven models the face nicely.
In all of the above examples, with the camera at one-ish, the key was between nine and twelve, i.e. the key was on the opposite side of the eyeline to the camera. This is known as lighting the “downside” – the side away from camera. Most cinematographers, myself included, consider this the most pleasing side to light from, as it shows the shape of the face and gives a nice shadow area on the camera side into which you can dial your preferred amount of fill.
In many scenes, the position of the keylight will be dictated by the layout of the set or location, so a DP should consider this in pre-production discussions with the production designer, on location scouts or when the director is blocking the actors.
Continuing the tenth anniversary releases of the Soul Searcher DVD extras, this week we have the 10 Minute Lighting Masterclass. It’s a quick guide to some of the basic set-ups and techniques used to give the film its cinematic, moody look. Since making this featurette digital cameras have improved vastly and so has my lighting, so these days I would light more subtly with fill and soft sources, but the basic building blocks in this video are still valid. Later in the week I’ll expand on some of those building blocks here on the blog.