“Annabel Lee”: Lighting the Arrival

Last week, Annabel Lee – a short I photographed at the end of 2018 – won its sixth and seventh cinematography awards, its festival run having been somewhat delayed by Covid. I’ve previously written a couple of posts around shooting specific parts of Annabel Lee – here’s one about a Steadicam shot with a raven, and another about the church scene – and today I want to dissect the clip above. The sequence sees our two young refugees, Annabel and E, arriving at the Devonshire cottage where they’ll await passage to France.

I was a last-minute replacement for another DP who had to pull out, so the crew, kit list and locations were all in place when I joined. Director Amy Coop had chosen to shoot on an Alexa Mini with Cooke anamorphic glass, and gaffer Bertil Mulvad and the previous DP had put together a package including a nine-light Maxi Brute, a couple of 2.5K HMIs and some LiteMats.

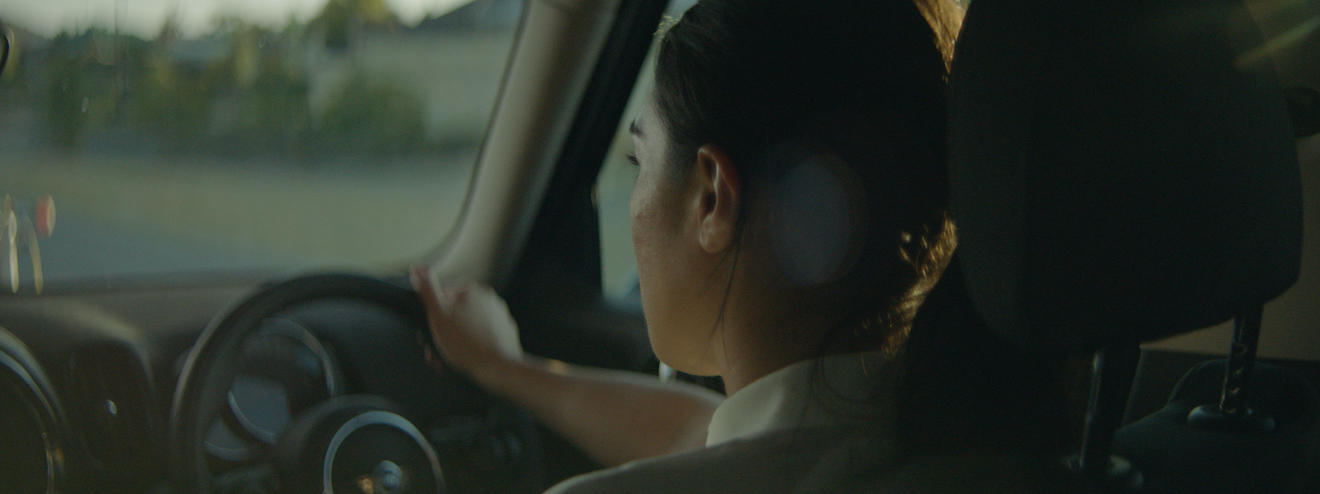
The Brute is serving as the moon in the exteriors, backlighting the (special effects) rain at least when we’re looking towards the driver. (If you’re not familiar with Maxi Brutes, they’re banks of 1K tungsten pars. Ours was gelled blue and rigged on a cherry-picker.) The topography of the location made it impossible to cheat the backlight around when we shot towards Annabel and E; rain doesn’t show up well unless it’s backlit, so this was quite frustrating.

We didn’t have any other sources going on except the period car’s tungsten headlights. It was very tricky to get the cast to hit the exact spots where the headlights would catch them while not shadowing themselves as they held out their hands with umbrellas or brooches.

Inside the cottage it’s a story point that the electricity doesn’t work, so until E lights the oil lamp we could only simulate moonlight and the headlights streaming in through the window. These latter were indeed a simulation, as we didn’t have the picture car at the time we shot inside. There was a whole sequence of bad luck that night when the camera van got stuck on the single-lane dirt track to the cottage, stranding certain crucial vehicles outside and sealing us all inside for three hours after wrap, until the RAC arrived and towed the camera van. So the “headlights” were a couple of tungsten fresnels, probably 650s, which were panned off and dimmed when the car supposedly departs. We also tried to dim them invisibly so that we could get more light on E as he comes in the door and avoid the Close Encounters look when the window comes into shot, but after a few takes of failing to make it undetectable we had to abandon the idea.

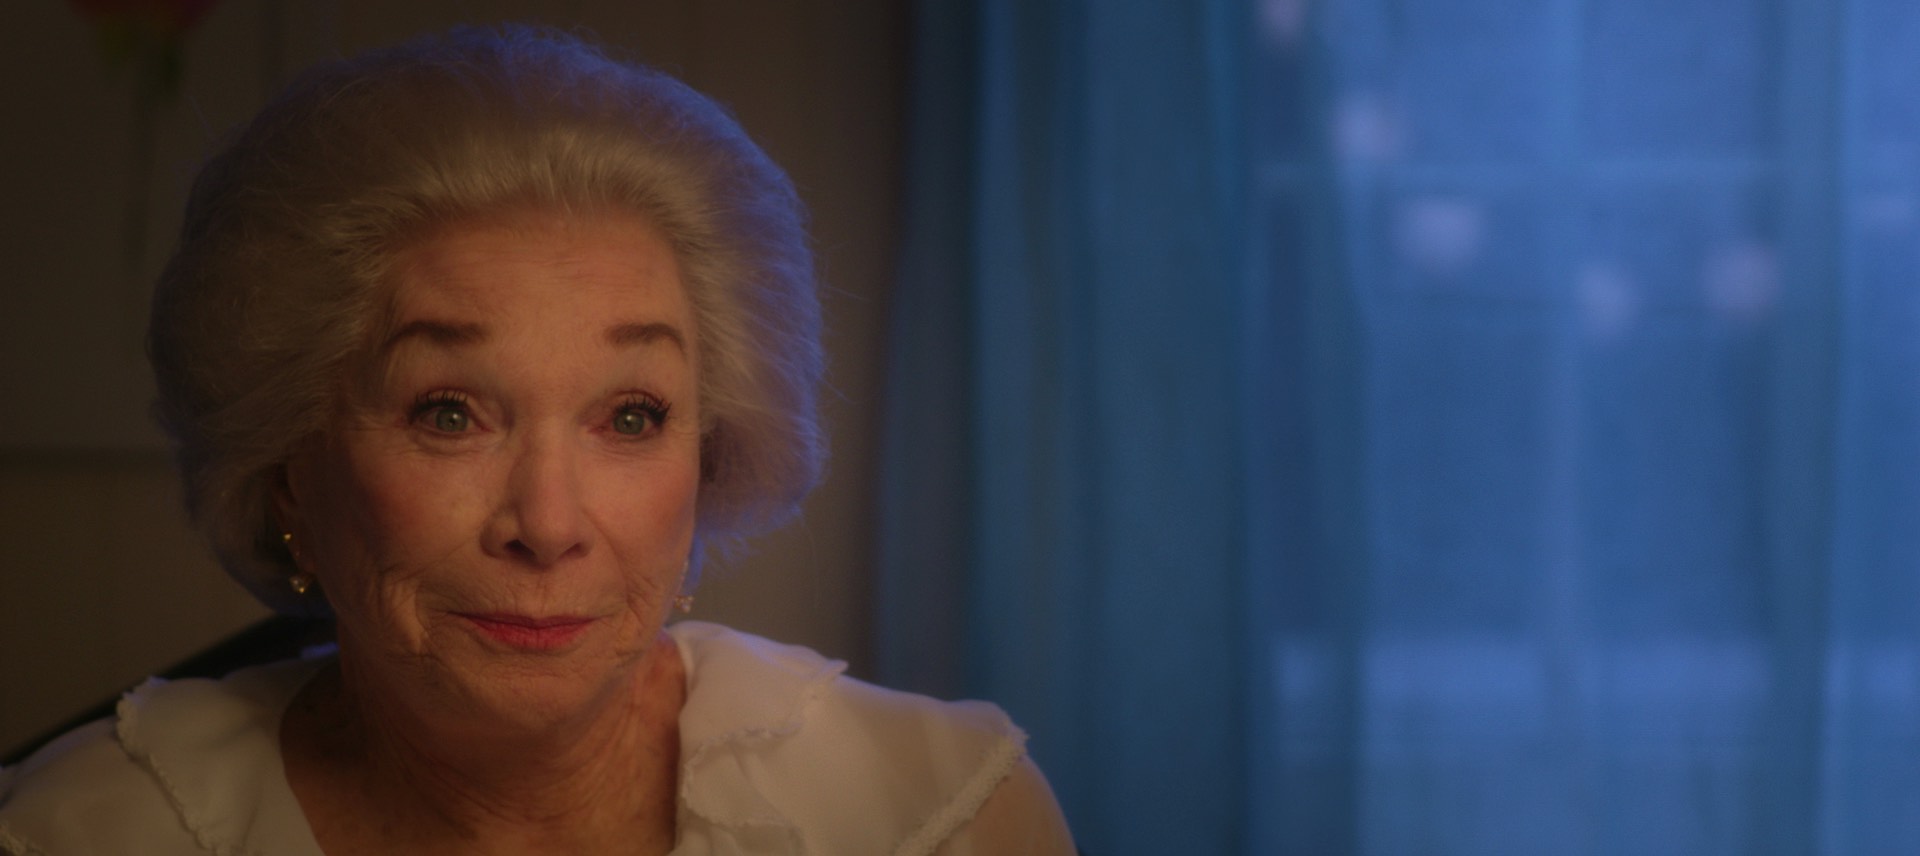
We also didn’t have the rain machine for the interiors, so as E opens the door you might briefly glimpse water being poured from an upstairs window by the art department, backlit by an LED panel. We put one of the HMIs outside a window that’s always off camera left to give us some “moonlight” in the room, create colour contrast with the tungsten headlights and the flame of the oil lamp, and ensure that we weren’t left in complete darkness when the “car” departs. Annabel looks right into it as she hugs E.

When the action moves upstairs, an HMI shines in through the window again. I remember it gave us real camera-shadow problems at the end of the scene, because Steadicam operator Rupert Peddle had to end with his back to that window and the talent in front of him (though the clip above cuts off before we get to that bit). The practical oil lamp does a lot of the work making this scene look great. I was sad that I had to put a little fill in the foreground to make E’s bruises at least a tiny bit visible; this was a LiteMat panel set to a very low intensity and bounced off the wall right of camera.

It’s worth mentioning the aspect ratio. My recollection is that I framed for 2.39:1, which is normal for anamorphic shooting. With the Alexa Mini in 4:3 mode, 2x anamorphic lenses produce an 8:3 or 2.66:1 image, which you would typically crop at the sides to 2.39 in post. When I arrived at the grade Annabel Lee was all in 2.66:1 and Amy wanted to keep it that way. I’m not generally a fan of changing aspect ratios in post because it ruins all the composition I worked hard to get right on set, but there’s no denying that this film looks beautiful in the super-wide ratio.

Finally, let me say a huge thank you to all the people who helped make the cinematography the award-winning success it has become, crucially drone operators Mighty Sky, underwater DP Ian Creed and colourist Caroline Morin. I’m sure the judges for these awards were swayed more by the beautiful aerial and aquatic work than the stuff I actually did!

“Annabel Lee”: Lighting the Arrival

Time Up for Tungsten?

Poppy Drayton, in “The Little Mermaid”, lit by a tungsten 1K bounced off poly

Last October, rental house VMI retired all of its tungsten lighting units as part of its mission to be a Net Zero company by 2030. I know this mainly because I am currently writing an article for British Cinematographer about sustainability in the film and TV industry, and VMI’s managing director Barry Bassett was one of the first people I interviewed.

Barry is very passionate about helping the environment and this is reflected in numerous initiatives he’s pioneered at VMI and elsewhere, but in this post I just want to discuss the tungsten issue.

I love tungsten lighting. There’s no better way to light a human face, in my opinion, than to bounce a tungsten light off a poly-board. (Poly-board is also terrible for the planet, I’ve just learnt, but that’s another story.) The continuous spectrum of light that tungsten gives out is matched only by daylight.

Dana Hajaj lit by another tungsten 1K bounced off poly

Tungsten has other advantages too: it’s cheap to hire, and it’s simple technology that’s reliable and easy to repair if it does go wrong.

But there’s no denying it’s horribly inefficient. “Tungsten lighting fixtures ought to be called lighting heaters, since 96% of the energy used is output as heat, leaving only 4% to produce light,” Barry observed in a British Cinematographer news piece. When you put it that way, it seems like a ridiculous waste of energy.

Without meaning to, I have drifted a little away from tungsten in recent years. When I shot Hamlet last year, I went into it telling gaffer Ben Millar that it should be a tungsten heavy show, but we ended up using a mix of real tungsten and tungsten-balanced LED. It’s so much easier to set up a LiteMat 2L on a battery than it is to run mains for a 2K, set up a bounce and flag off all the spill.

Shirley MacLaine lit by a tungsten book-light in “The Little Mermaid”

I admire what VMI have done, and I’ve no doubt that other companies will follow suit. The day is coming – maybe quite soon – when using tungsten is impossible, either because no rental companies stock it any more, or no-one’s making the bulbs, or producers ban it to make their productions sustainable.

Am I ready to give up tungsten completely? Honestly, no, not yet. But it is something I need to start thinking seriously about.

Time Up for Tungsten?

What is a French Over?

Film industry jargon isn’t shy of national references. A Dutch angle is a canted shot. To Spanish a piece of kit is to get rid of it (a corruption of “it’s banished”). To German a light – I think – is to lie the stand horizontal, attach the head, then raise the whole thing vertical. Or maybe that’s Italianing. I forget. But what is a French over?

It’s a type of over-the-shoulder shot. It requires the two characters to be bodily facing in the same direction, like on a bench or in the front seats of a car. If the camera shoots from behind their bodies, it’s a French over. Here are a few examples.

“Norman” (2010, DP: Darren Genet)
A commercial shot by Patrick O’Sullivan
“À bout de souffle” (1960, DP: Raoul Coutard)

A French over feels a little more conspiratorial or voyeuristic than a standard over. It gives the viewer a sense that they’re privy to a confidential conversation.

It works well for bench scenes because benches often have nice vistas in front of them which you can keep in the background of your close-ups, and you don’t have to cross the line to do a wide shot behind the bench showcasing the whole view.

“Mission: Impossible – Rogue Nation” (2015, DP: Robert Elswit, ASC)

It’s far easier to shoot French overs in a car because the operator can simply sit on the back seat rather than trying to jam the camera onto the dashboard.

French overs allow the editor more flexibility too. A typical problem of covering dialogue scenes where characters are facing the same way is that you can often clearly see the foreground character’s mouth, which locks the editor in to maintaining lip-sync every time they cut. In a French over you only see the back of the foreground character’s head so this problem is eliminated.

They’re not to everyone’s taste though. You certainly see less of the actors’ faces than in a standard over, and if the cast are not going to turn to look at each other very often their emotions could easily end up unreadable. If that’s not the effect you want, standard overs would be a better choice.

What is a French Over?

5 Things You Didn’t Know About the Iris in Your Lens

Inside a lens, amongst the various glass elements, is an ingenious mechanism which we call the iris. Just like your biological iris, it controls the amount of light passing through the pupil to form an image. I’ve written about the iris’s use to control exposure before, and its well-known side effect of controlling depth of field. But here are five things that aren’t so commonly known about irises.


1. f-stops and the entrance pupil

This image shows the exit pupil because it’s seen through the rear element of the lens. A view through the front element would show the entrance pupil.

The f-number of a lens is the ratio of the focal length to the diameter of the aperture, but did you know that it isn’t the actual diameter of the aperture that’s used in this calculation? It’s the apparent diameter as viewed through the front of the lens. A lens might have a magnifying front element, causing the aperture to appear larger than its physical size, or a reducing one, causing it to appear smaller. Either way, it’s this apparent aperture – known as the entrance pupil – which is used to find the f-number.


2. No-parallax point

The no-parallax point of a lens is located at its entrance pupil. Sometimes called the nodal point, although that’s technically something different, this is the point around which the camera must pan and tilt if you want to eliminate all parallax. This is important for forced perspective work, for panoramas stitched together from multiple shots, and other types of VFX.


3. Focus

If you need to check your focal distance with a tape measure, many cameras have a handy Phi symbol on the side indicating where the sensor plane is located so that you can measure from that point. But technically you should be measuring to the entrance pupil. The sensor plane marker is just a convenient shortcut because the entrance pupil is in a different place for every lens and changes when the lens is refocused or zoomed. In most cases the depth of field is large enough for the shortcut to give perfectly acceptable results, however.


4. Bokeh shape

The bokeh of a 32mm Cooke S4 wide open at T2 (left) and stopped down to T2.8 (right). Note also the diffraction spikes visible in the righthand image.

The shape of the entrance pupil determines the shape of the image’s bokeh (out of focus areas), most noticeable in small highlights such as background fairy lights. The pupil’s shape is determined both by the number of iris blades and the shape of their edges. The edges are often curved to approximate a circle when the iris is wide open, but form more of a polygon when stopped down. For example, a Cooke S4 produces octagonal bokeh at most aperture settings, indicating eight iris blades. Incidentally, an anamorphic lens has a roughly circular aperture like any other lens, but the entrance pupil (and hence the bokeh) is typically oval because of the anamorphosing effect of the front elements.


5. Diffraction spikes

When the edge of an iris blade is straight or roughly straight, it spreads out the light in a perpendicular direction, creating a diffraction spike. The result is a star pattern around bright lights, typically most visible at high f-stops. Every blade produces a pair of spikes in opposite directions, so the number of points in the star is equal to twice the number of iris blades – as long as that number is odd. If the number of blades is even, diffraction spikes from opposite sides of the iris overlap, so the number of apparent spikes is the same as the number of blades, as in the eight-pointed Cooke diffraction pictured above right.

5 Things You Didn’t Know About the Iris in Your Lens