Stop/Eject Lighting Breakdown #2: Living Room

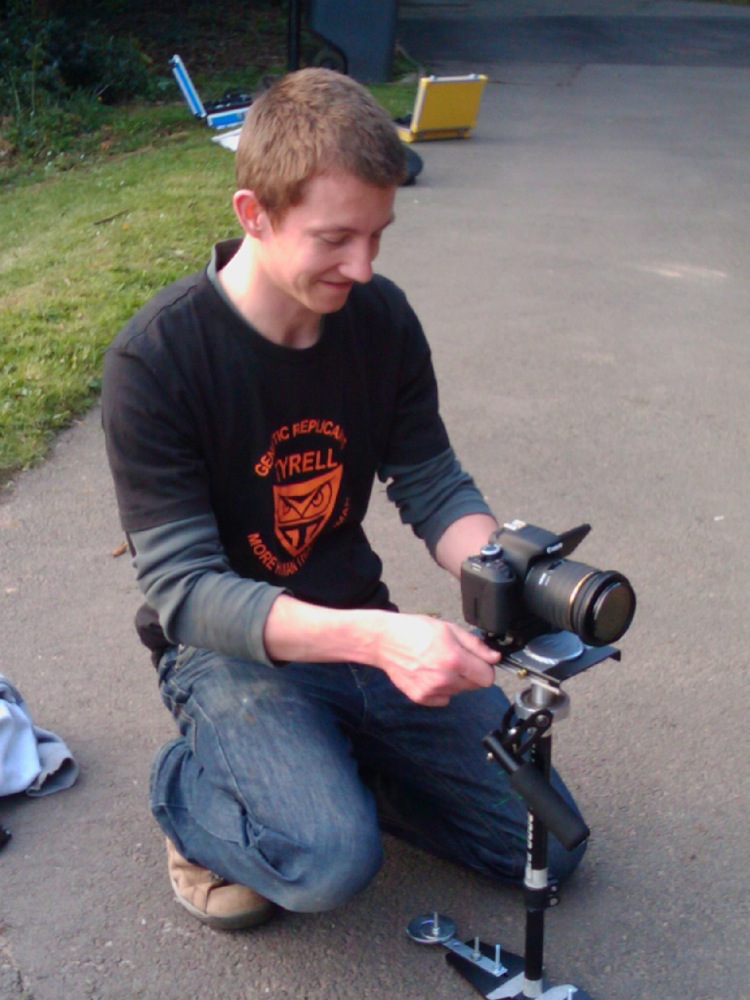
In this second part of my Stop/Eject lighting breakdown, looking at the how, why and what-with of lighting a short film, I’ll focus on the scenes in Kate and Dan’s living room. If you missed part one, check it out first to see what equipment we had with us. You can also read production designer Sophie Black’s blog about decorating and dressing the living room over on her website.

Int. Living Room – Day

Here’s my lighting plan for the main scene in the living room:

Living room lighting plan (day)

Along the bottom I’ve drawn in the tracks and camera for the master shot. I’m treating the location like a three-walled set, so this bottom wall will never be seen. (The pink highlight was to show Sophie which walls needed painting.)

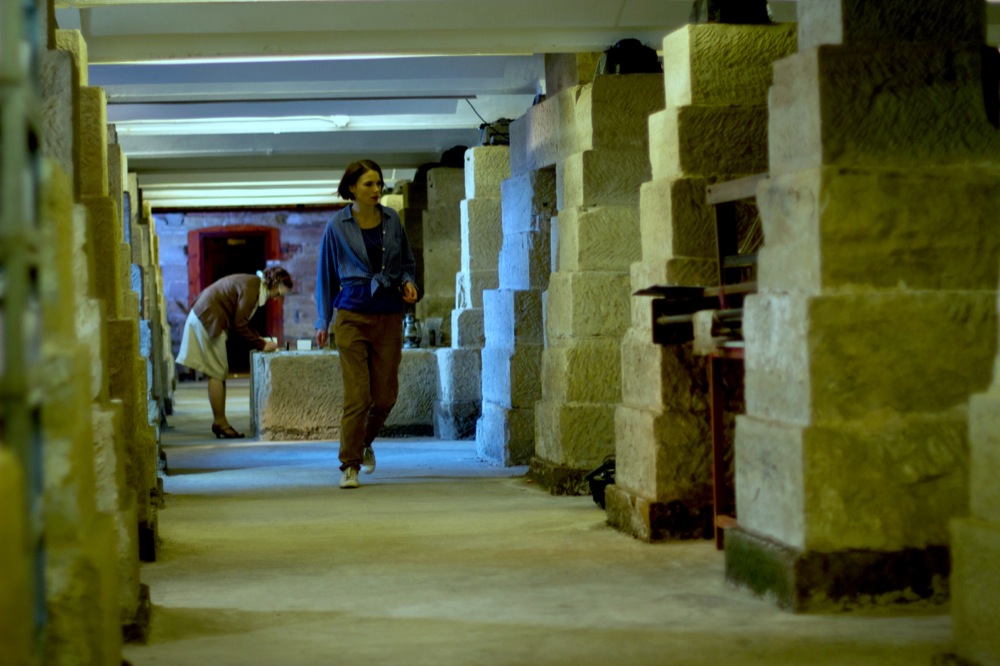
The wide tracking shot had the potential to be difficult from a lighting stand-point, since it would show almost 270 degrees of the room. Putting the lights behind camera is never a good idea creatively; you end up with a depth-less image that looks like a photo taken with flash. But fortunately the location had a high ceiling, so Col was able to rig lamps overhead.

Col runs power cables for a ceiling-rigged light

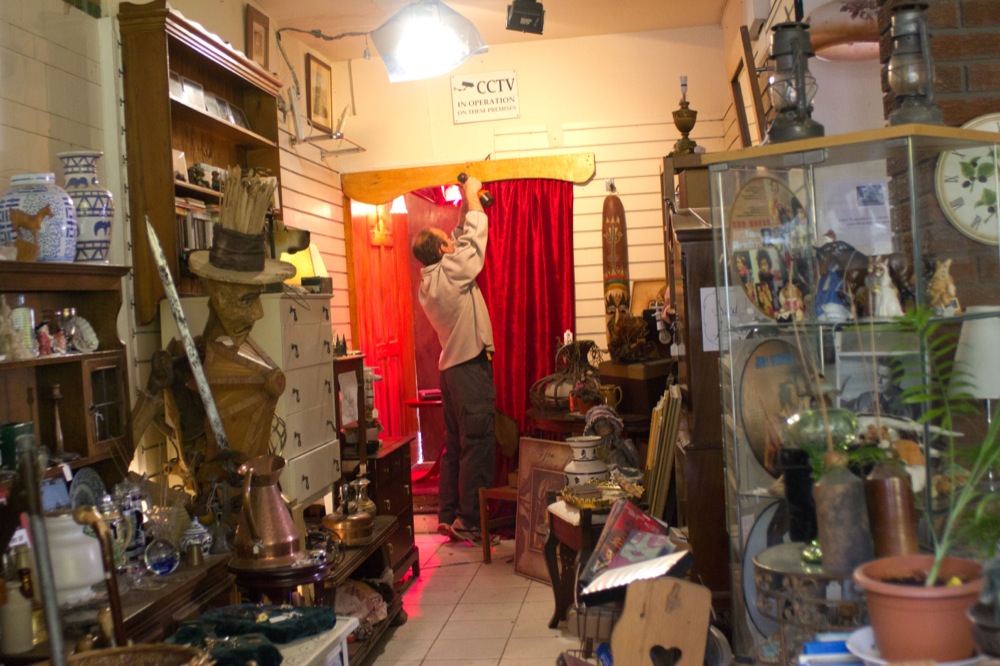
When you can’t afford to hire HMIs – which emit a 5,600K light, the same colour as sunlight – you have to make a difficult decision on your daytime interiors. You could put blue CTB “daylight” gels on your tungsten lights, but that immediately cuts out half their illumination, and they’re not very bright to start with. Or you could white-balance somewhere in between daylight and tungsten, letting one go slightly blue and the other slightly orange on camera, like I did in the shop.

Or you can cover the windows in CTO gel, tinting the incoming daylight orange to match your tungsten lamps. Typically this is only practical for rooms with small windows – and luckily our living room location was such a room. So once the window was gelled, I knew I could set my camera’s white balance to the tungsten preset (3,200K) and all the light would look white.

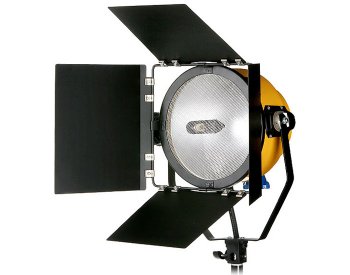
As daylight is liable to change – the sun moves across the sky, goes behind clouds – you’ll always want to reinforce it with an artificial light source for consistency. Besides which, I wanted it to look like the sun was out and shining straight in the window, which I clearly couldn’t rely on nature to do for me. Hence the 1KW Arrilite in the lighting plan (labelled simply “1K”), rigged above the window.

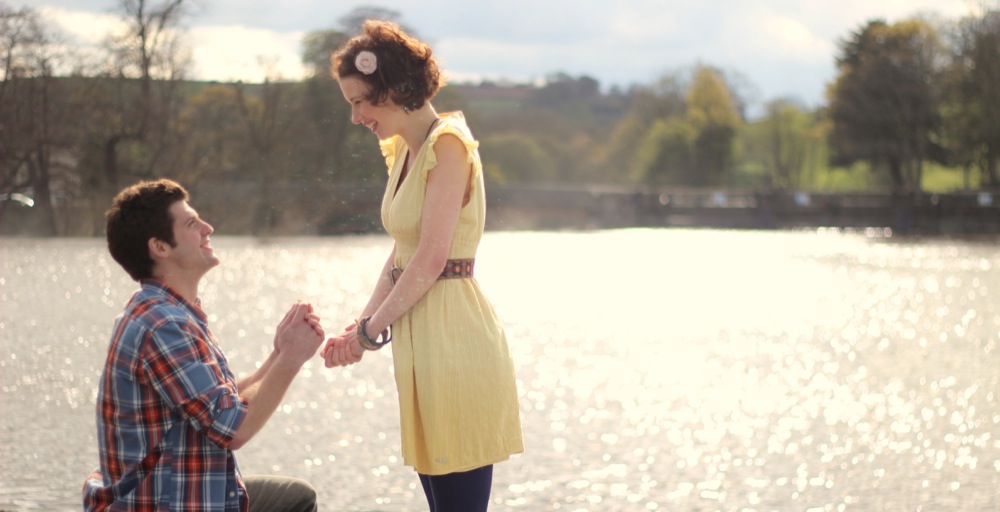
In discussions with Sophie and Katie, the costume designer, we had decided to make yellow the colour of happiness in Stop/Eject. So, since this scene is before Dan’s death, I chose to put straw gel on this 1K. In retrospect, this was a bit over the top, given that the walls were already painted yellow.

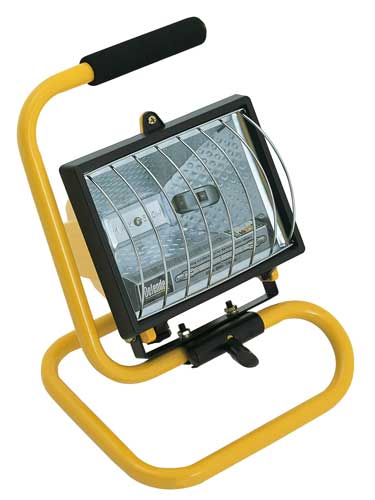
A 300W work-light was rigged from the ceiling just in front of the fireplace, to provide some backlight.

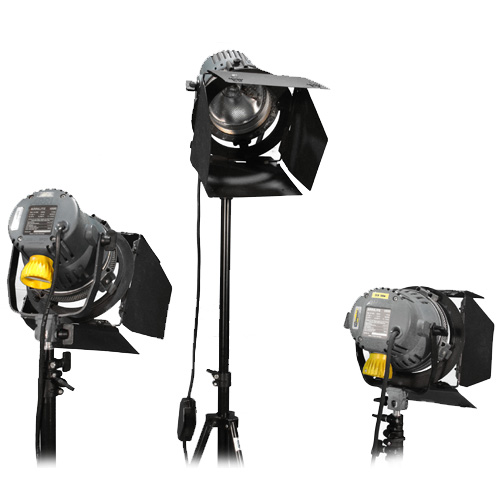
As in the shop, an 800W Arrilite with magenta gel was placed behind the alcove to represent the wall sconce.

A table lamp was placed on Dan’s desk to brighten up what could otherwise be quite a dark corner.

The other two lamps shown in the plan were ditched as unnecessary for the wide shot.

Finally, a little smoke was added to volumize the “sunlight” and generally diffuse the image.

Here are some frames from the rushes of the wide shot:

Living room master shot (start position)
Living room master shot (start position). The key light (a straw-gelled 1K Arrilite) is above the window, off camera right, while a magenta-gelled 800W Arrilite behind Kate (Georgina Sherrington) provides backlight.
Living room master shot (end position)
Living room master shot (end position). Both characters here are mainly lit by natural bounce off the walls. The window is gelled with CTO to match it to the tungsten light inside.

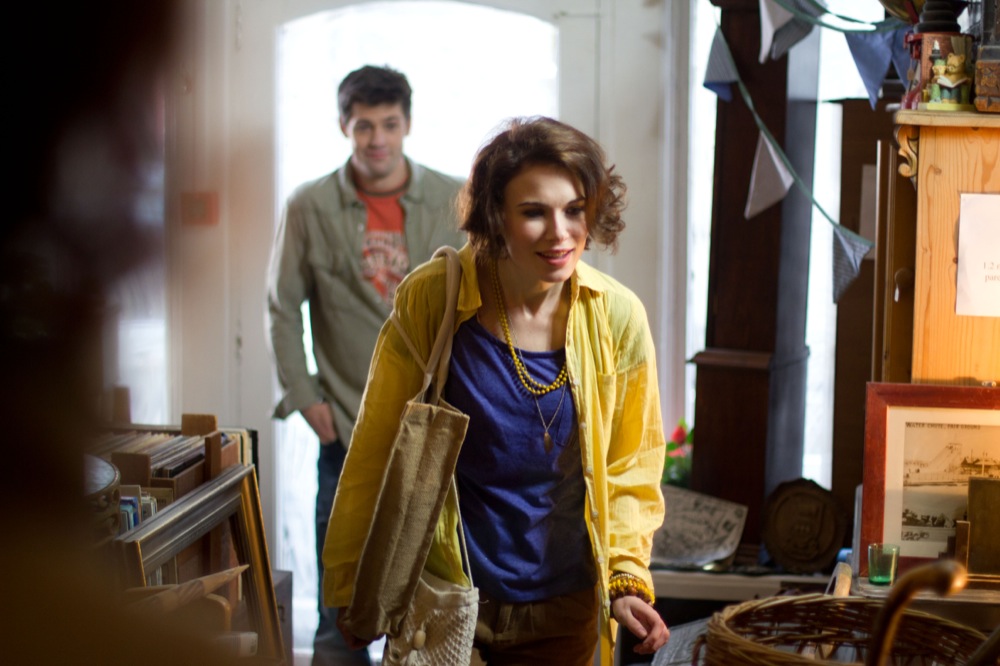
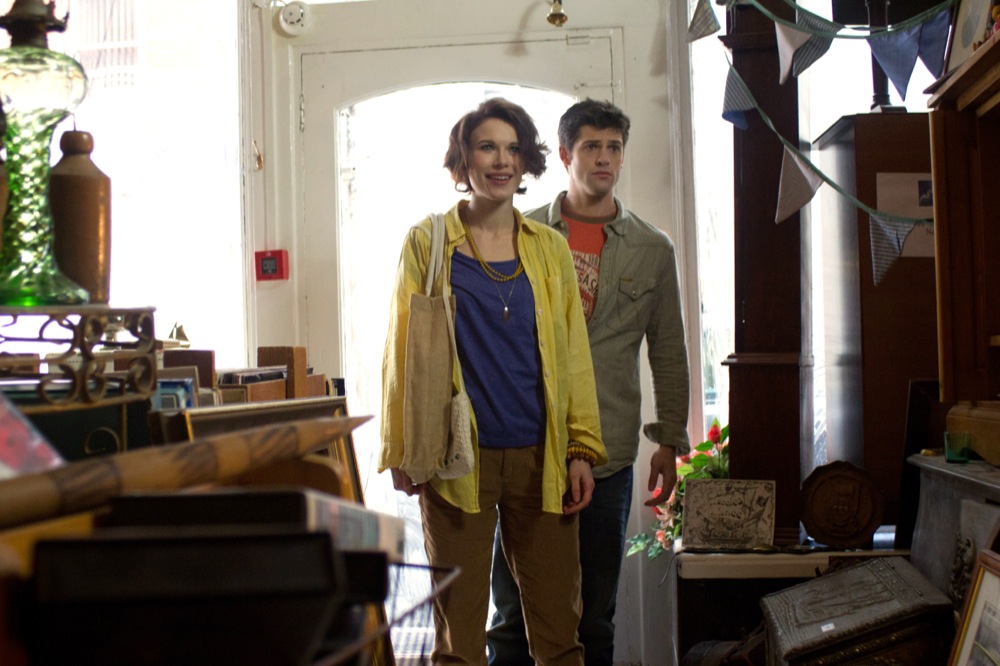
Let’s look at a couple of other camera angles in this scene, and how the lighting set-up had to be tweaked for them.

Kate's mid shot
Kate's mid shot

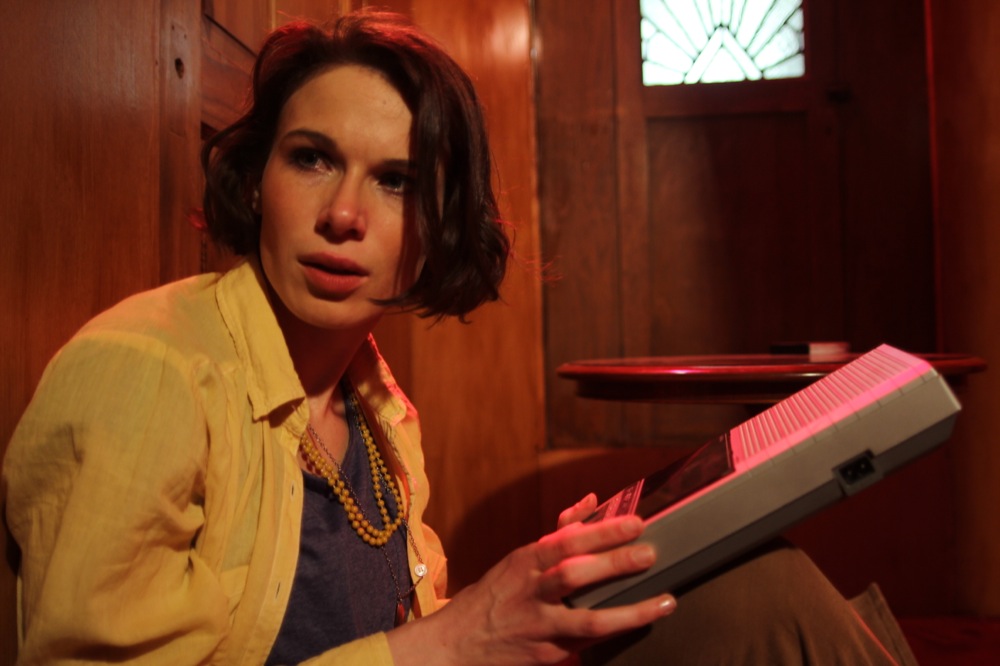
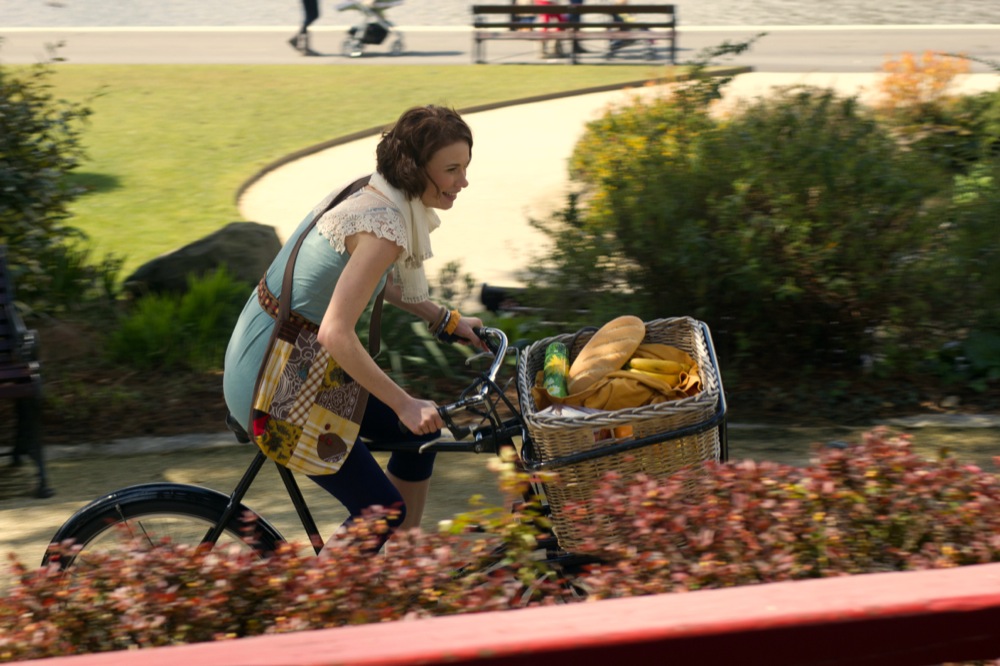
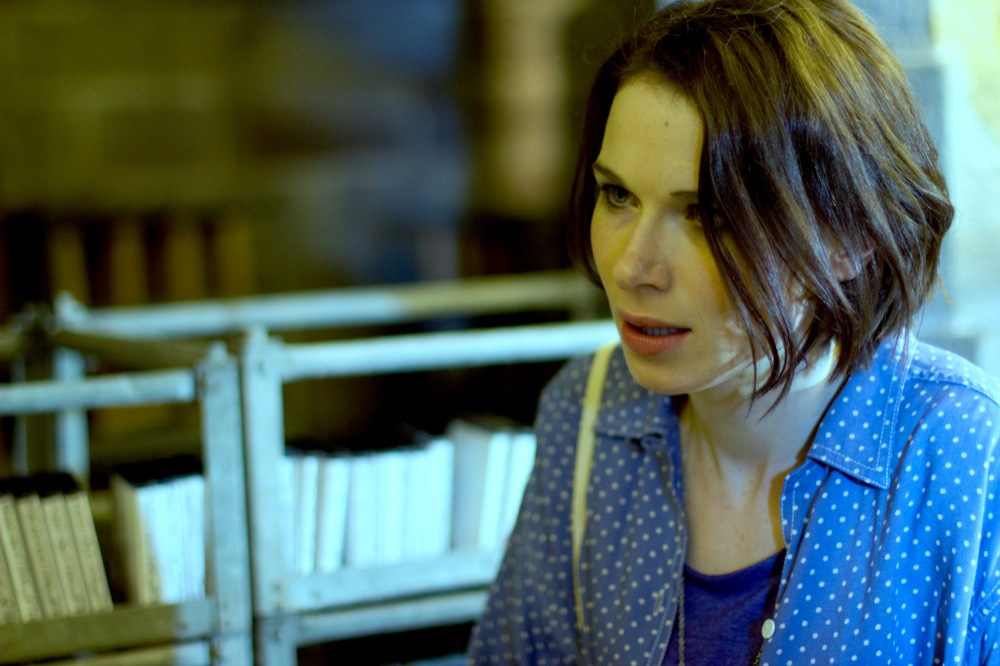
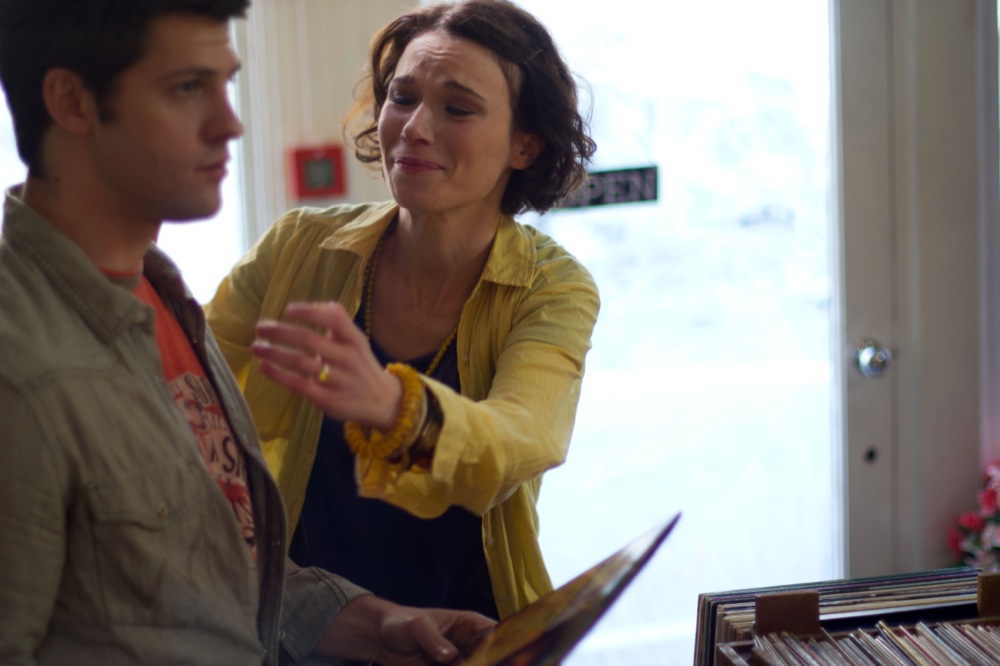
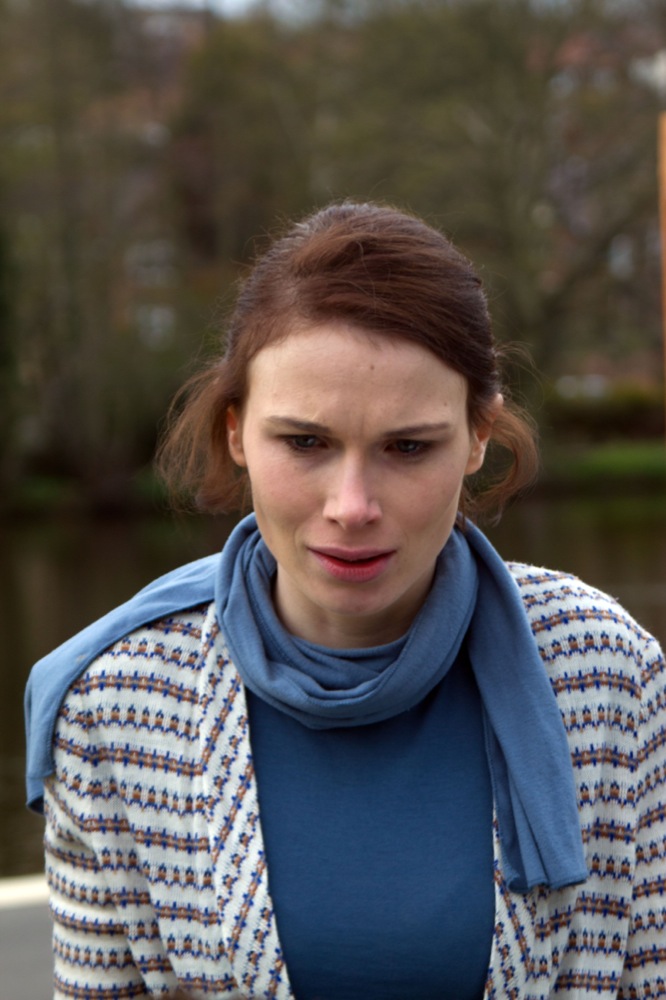
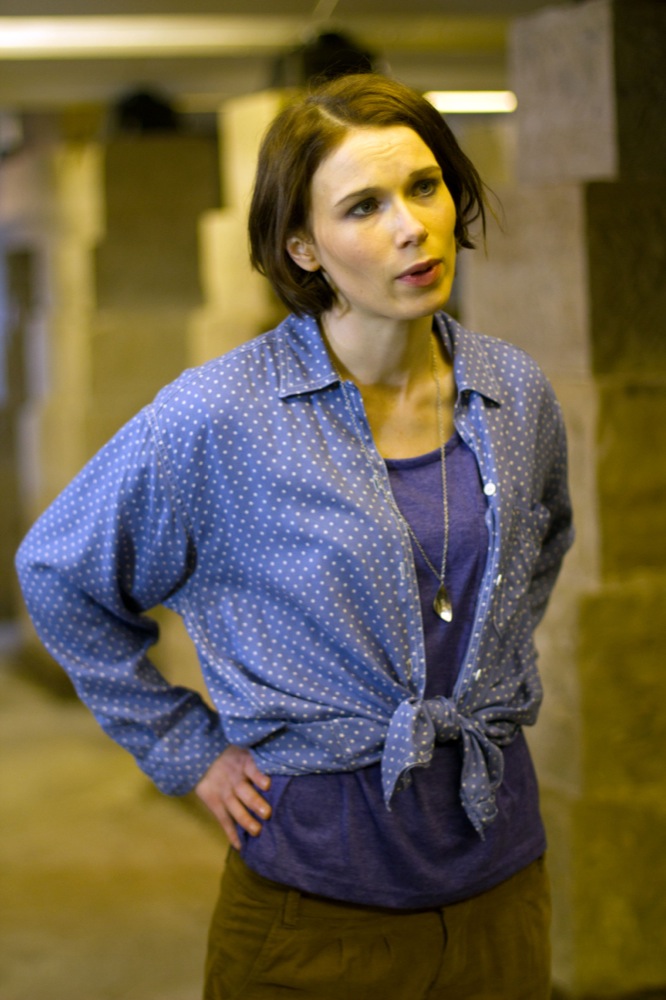
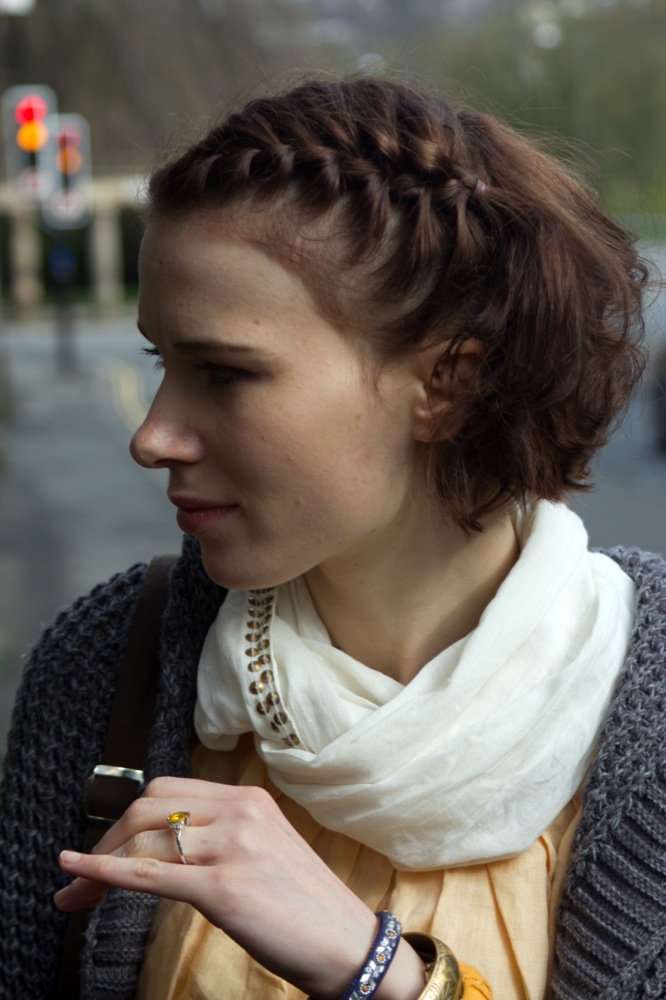
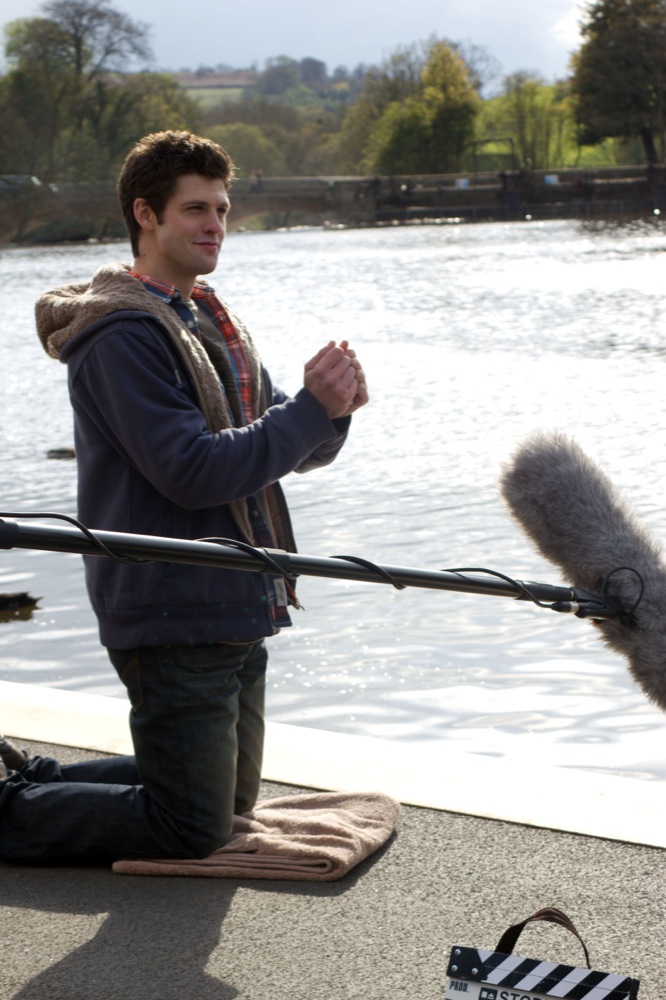
This mid-shot of Kate (Georgina Sherrington) was straightforward. The 1K “sun” provided lovely backlight, while the 300W work-light above the fireplace wraps this around the right side of her face a little. The only addition needed was a reflector next to camera for fill.
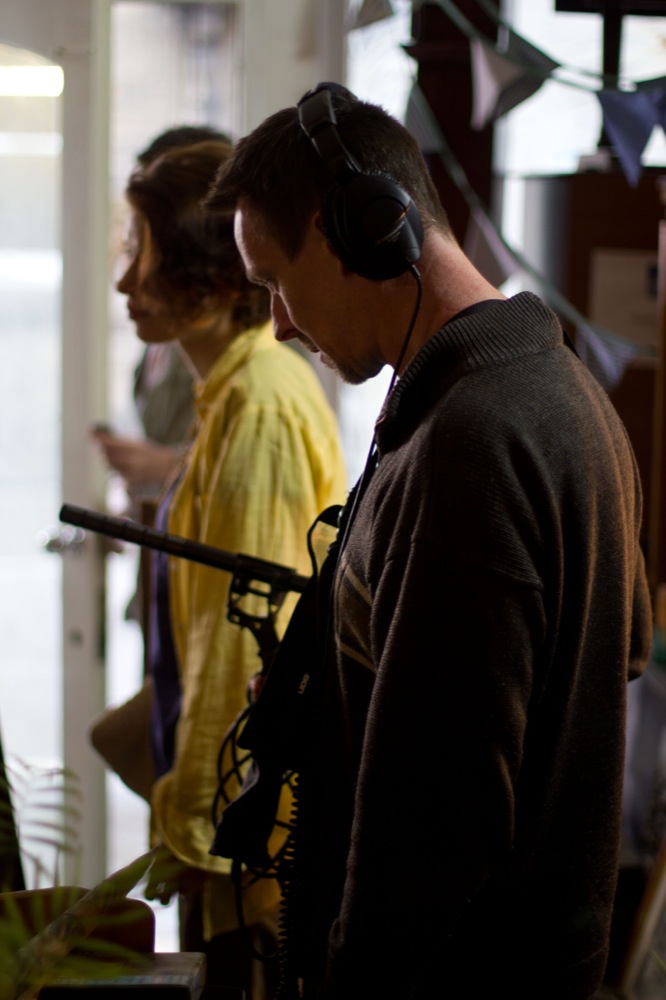
Dan (Oliver Park) editing audio on his laptop

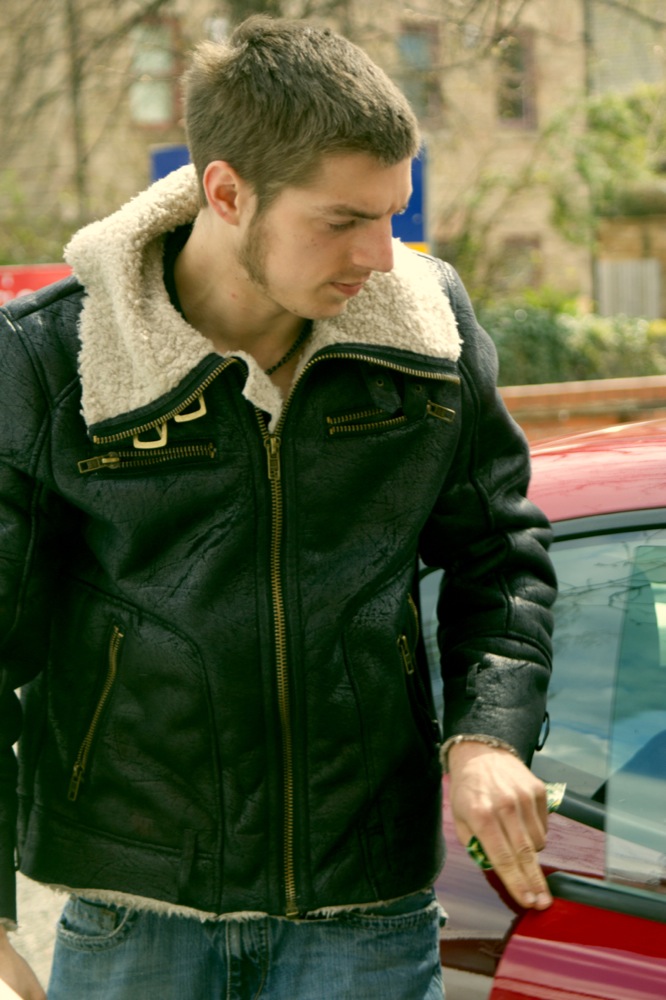
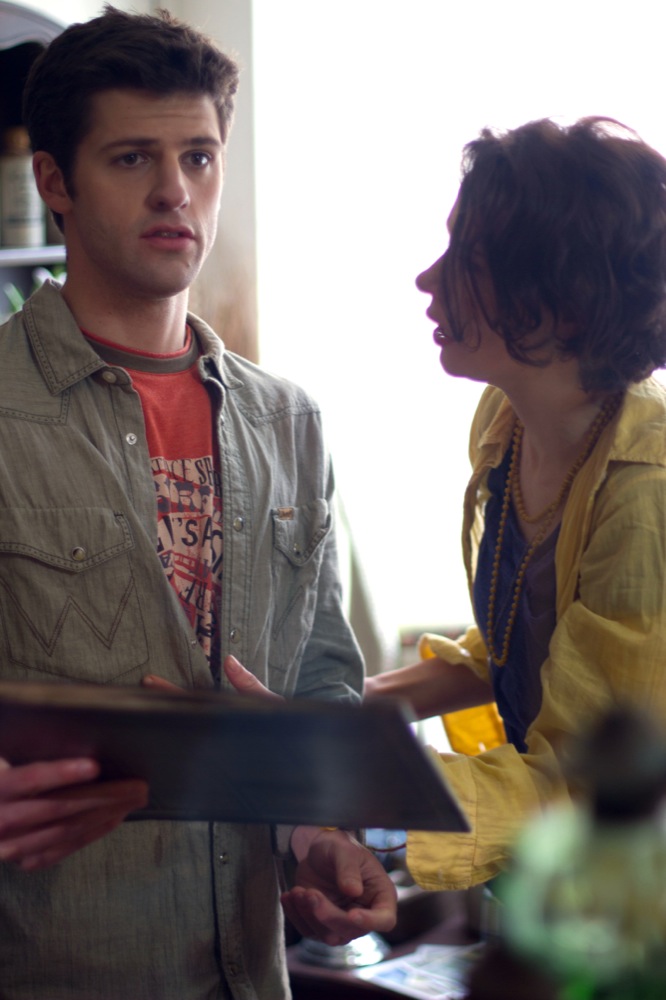
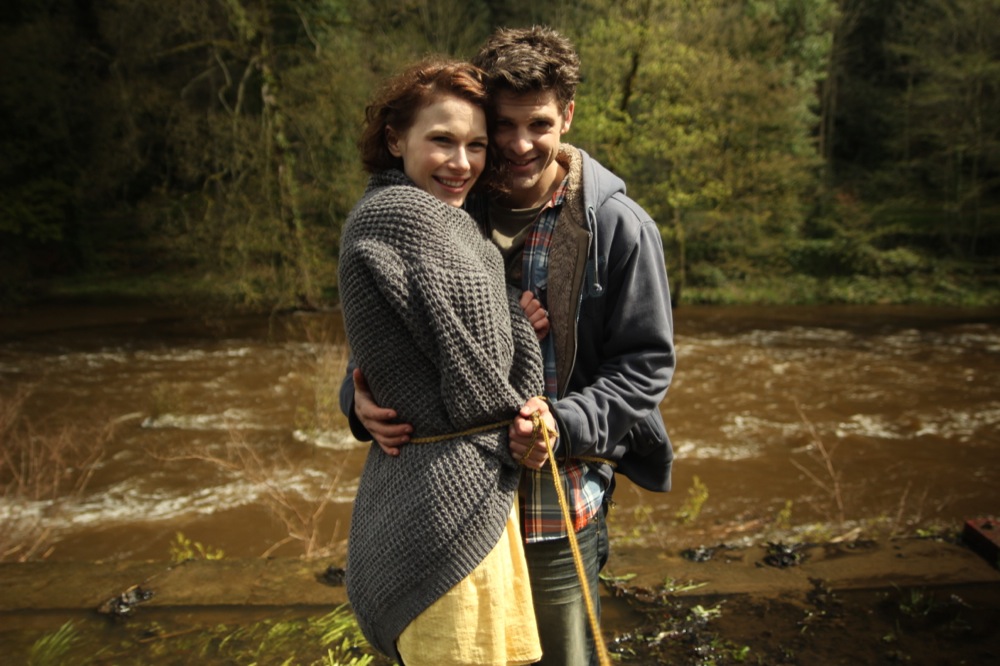
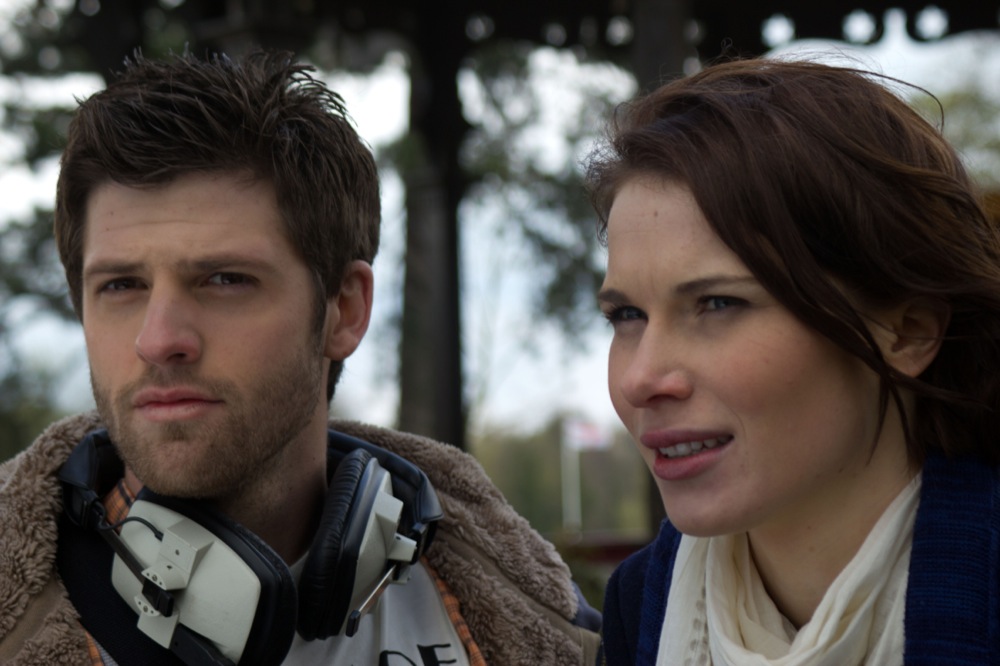
This angle starts as a single on Dan (Oliver Park). Kate is occasionally revealed in the background, and she was already well lit by the 1K “sun” and the 300W work-light.

I wanted some edge light on Dan to highlight his ear, because he’s listening closely to the audio he’s editing. This was a 100W clip-light off camera left at about the right height to suggest an unseen table lamp. As an added bonus, this light also supplied some fill on Kate as she crept up on Dan later in the shot:

Later we tilt up to Kate as she creeps up on Dan.
Dan's close-up tilts up to Kate creeping up on him. The straw-gelled 1K "sun" is providing her key, while the shadows on her face are filled in by a 100W clip light below and to the left of frame.

Once Kate is sat on Dan’s lap you can see the key light in action:

The close-up becomes a tight two-shot

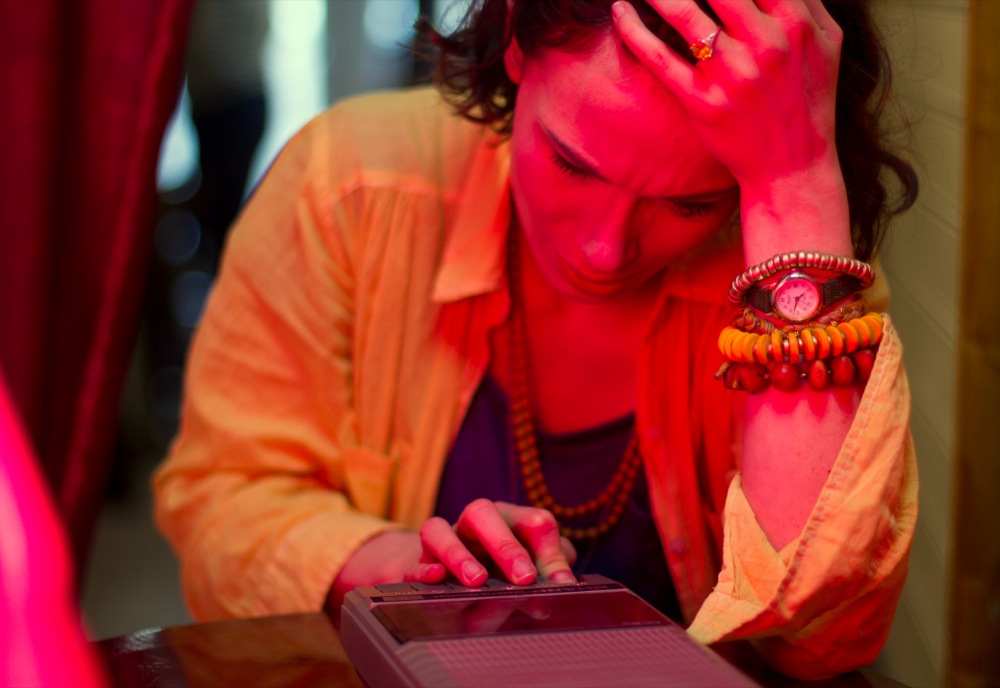
What was the key lamp? Having established the desk lamp in the wide, I could have used that – or something representing it – as the key. Instead I decided to add some colour contrast by using the blue light from the computer screen. The screen wasn’t bright enough to light him in reality, so this is where a £2 LED camping light came in handy – I simply hooked it over the top of the screen. (For more info on colour contrast, see this earlier post.)

LED camping light
LED camping light (picked up from a charity shop for £2)

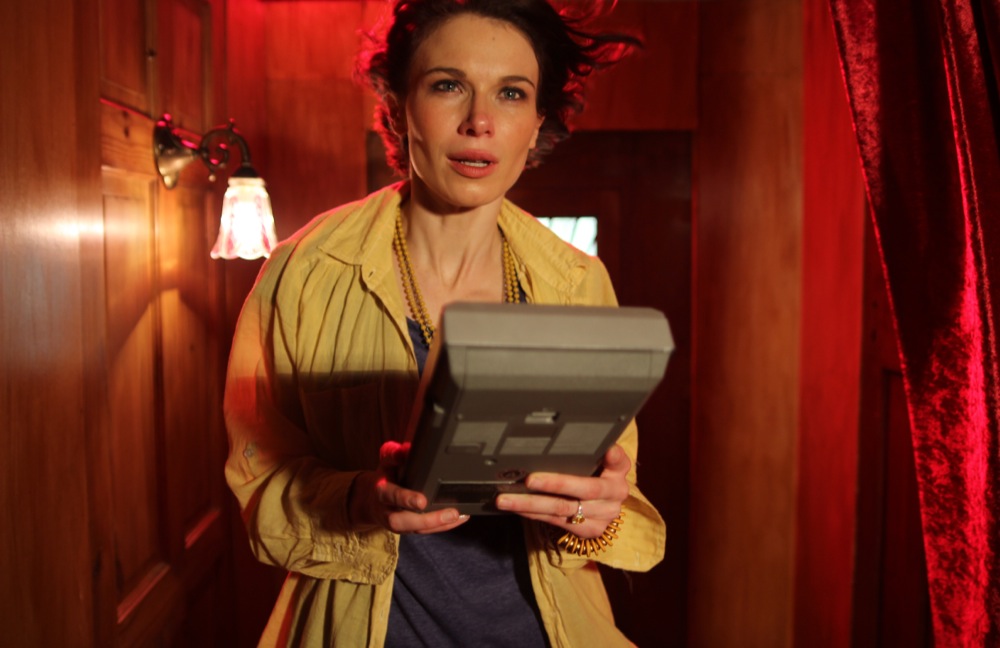
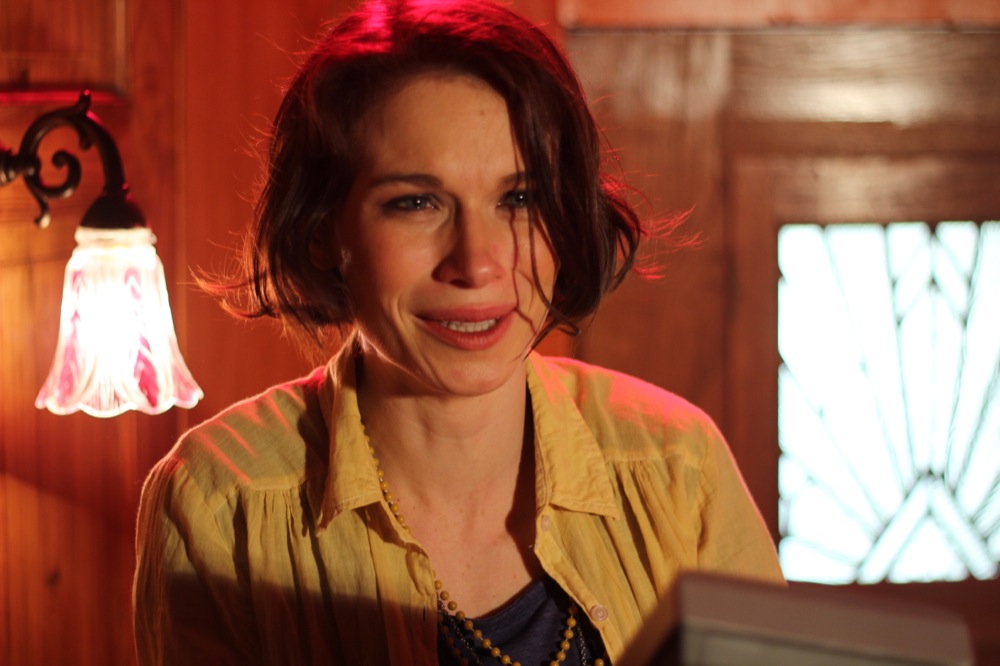
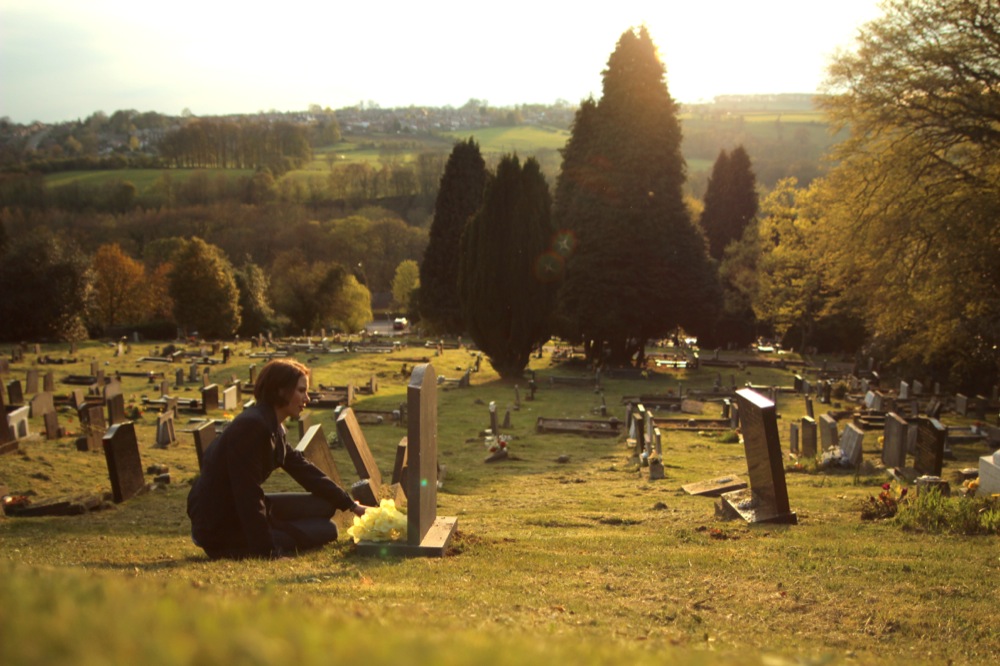
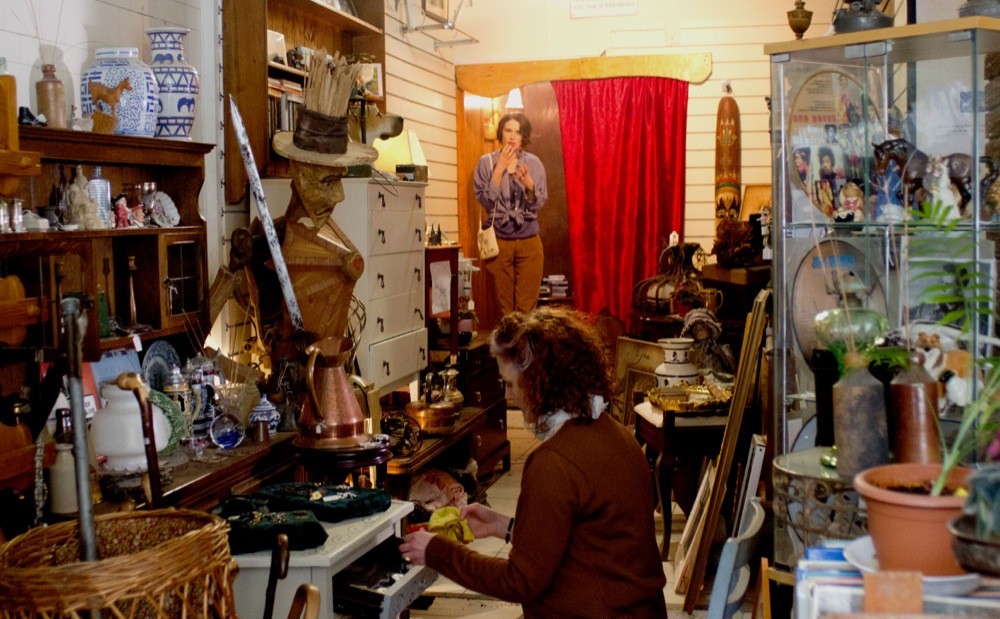
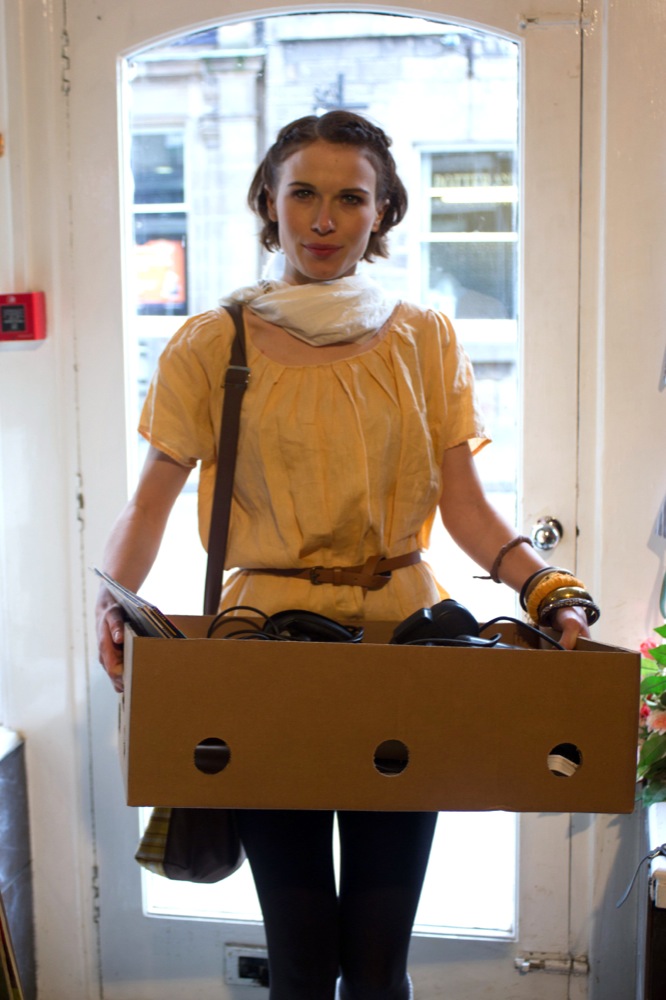
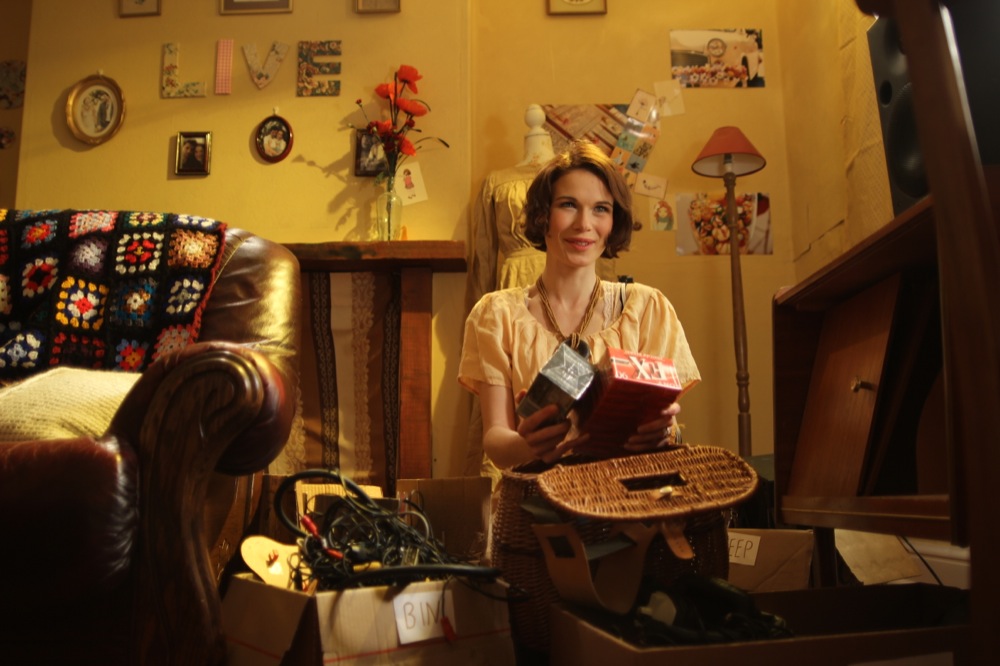
For a later daylight scene in the living room, I totally cheated the lights. It’s easier to get away with cheating your lighting angles when a scene only has one shot and the audience can’t see too much of the geography.

I had Col rig a second straw-gelled 1K Arrilite close to the first, but pointed at right-angles so as to directly backlight Kate. Naturally reflected light was not giving Kate’s face the definition I wanted, so I put the 800W Arrilite out of the right of frame with several layers of tough spun diffuser on.
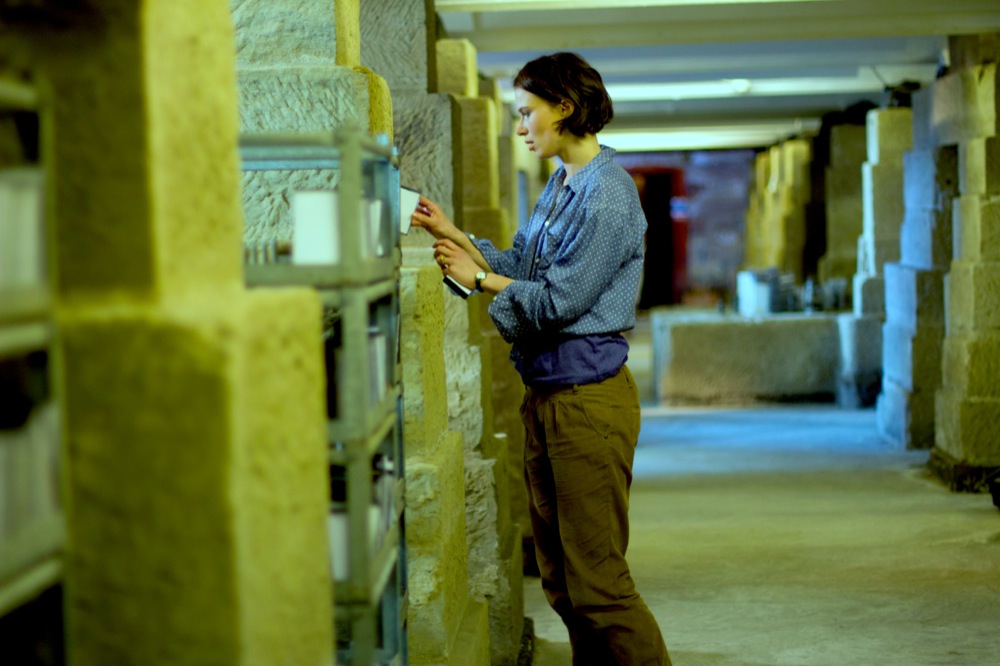
Here’s the result:

Georgina Sherrington as Kate in Sophie's living room set
Second daylight scene in the living room

The light sources don’t stand up to much scrutiny, but it’s a brief scene so I think I’ll get away with it. Except that I just told everybody. D’oh.

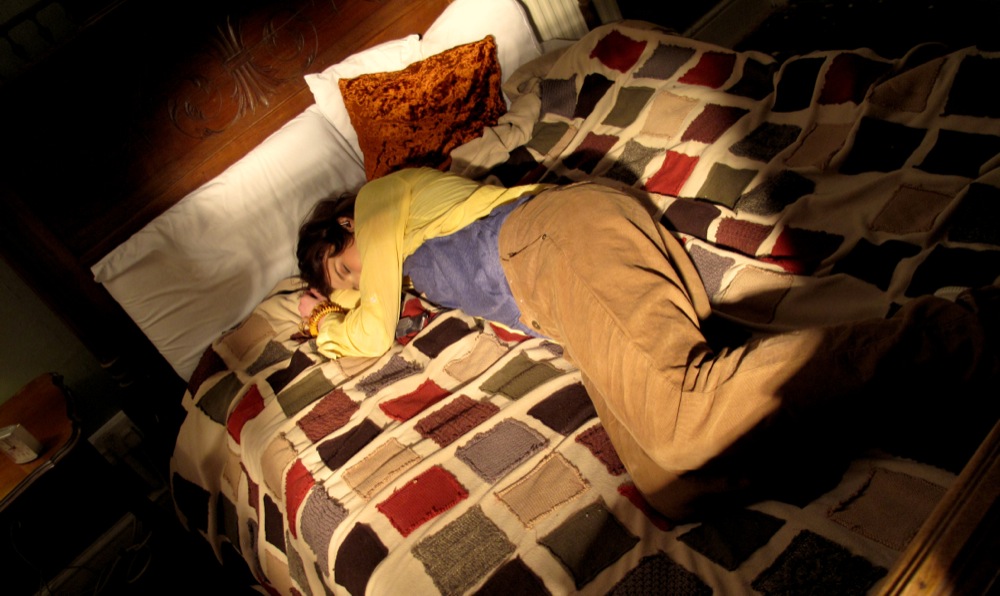
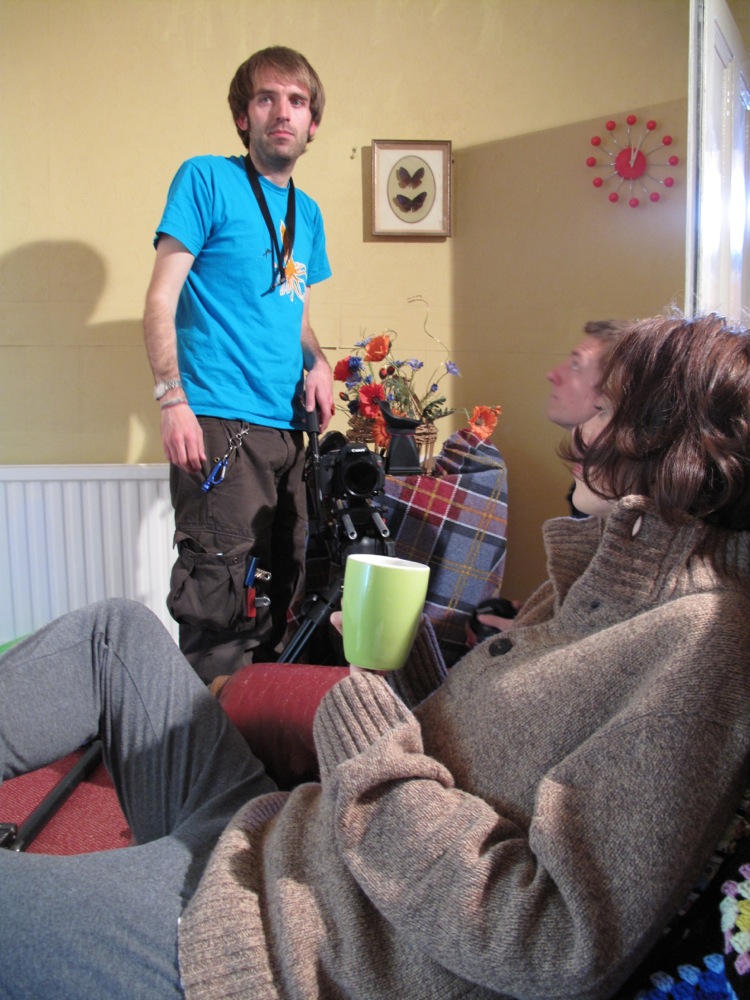
Int. Living Room – Night

Living room lighting plan (night)

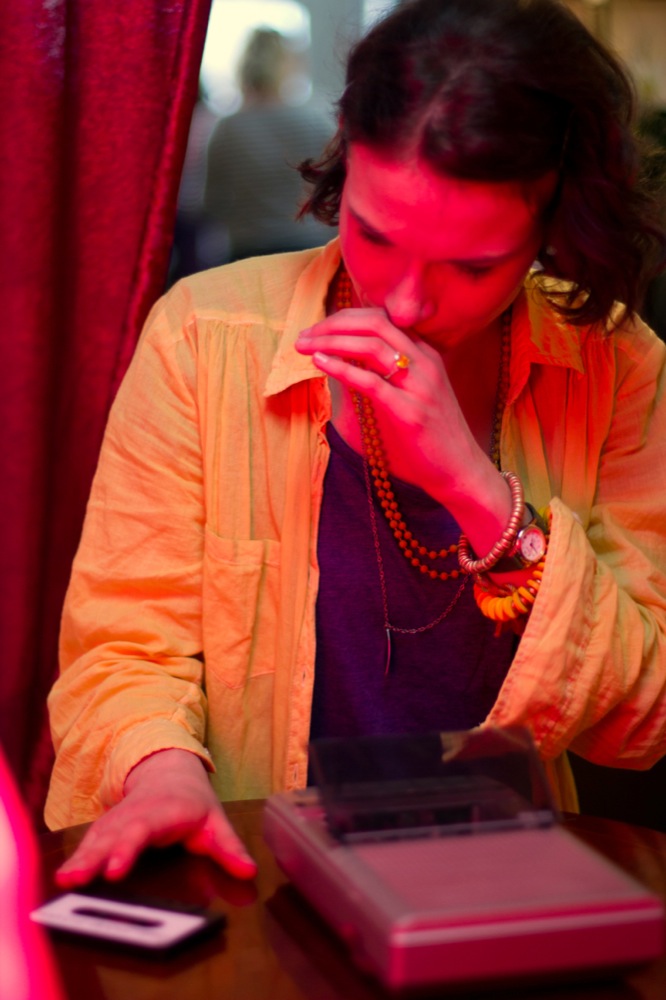
The single nighttime scene in this location was filmed in the early afternoon, so the crew blacked out the window. The 1K “sun” lamp was of course turned off, but the 300W work-light was left as a backlight for Kate on the sofa. A fluorescent-gelled 800W Arrilite was placed in the corridor to represent illumination from a strip light in the kitchen.

I wanted to trap Kate within a formal, symmetrical frame. Two practical lamps in the background, on either side of the wide shot, contributed to this effect.

Finally, she was meant to be watching TV, although the set would never be seen. Over the years I’ve tried several techniques for simulating TV illumination. I haven’t found a definitive one yet, but currently my favourite method is to bounce a day-light balanced lamp (in this case one of the fluorescent studio lamps, not an 800W Arri as the plan indicates) off a reflector that’s being wobbled by a crew member.

Nighttime in the living room

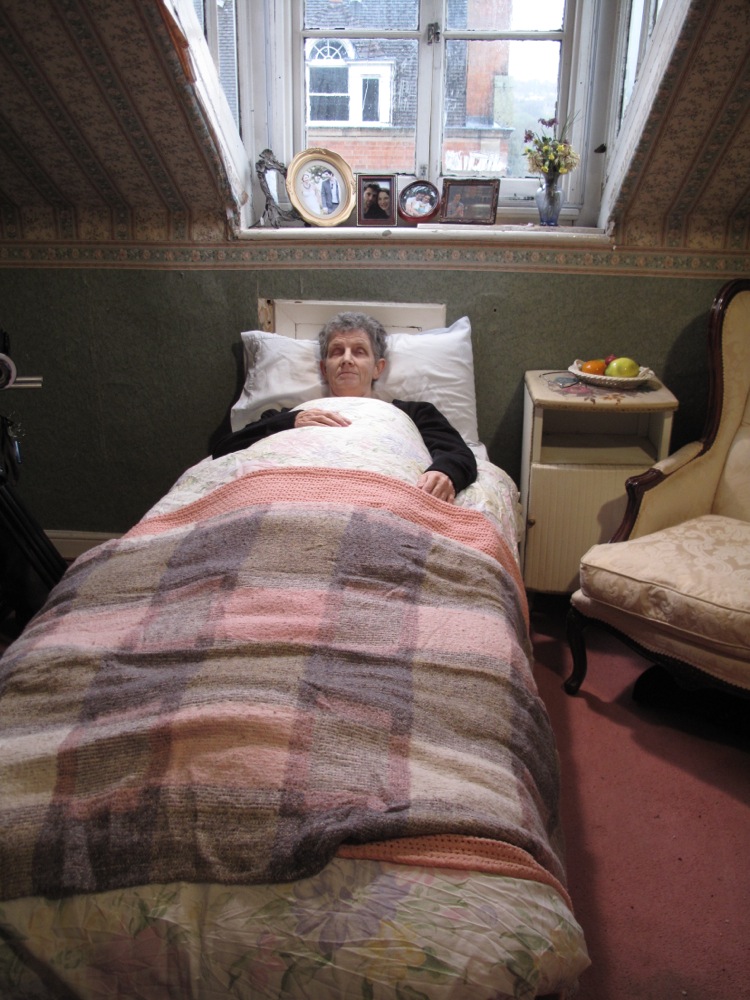
That’s your lot for today. Next time we’ll look at the bedroom scenes (minds out of the gutter, please).

Stop/Eject Lighting Breakdown #2: Living Room

Stop/Eject Lighting Breakdown #1: Charity Shop

This blog post is the third of our public rewards in the Stop/Eject crowdfunding campaign. If you’re reading this, it means we’ve raised at least £300 so far. If you don’t know what the hell I’m talking about, go to stopejectmovie.com to watch the trailer for my new short film and find out about the public and individual rewards we’re offering to anyone who sponsors the project.

In this post I’m going to break down the lighting set-ups for some of Stop/Eject’s key scenes in the shop, looking at what I was trying to achieve and how I went about it. I had intended to cover all of the film’s key scenes, but after writing out the shop stuff and realising how long it is, I’ve decided to save the rest for another time.

First of all, here’s the lighting equipment we had available to us on the shoot:

Plus stands, gels, sandbags and lots of splitters and extension leads. However many extension leads you think you need, triple it and you might just about have enough.

Int. Shop – Day

Here’s my lighting plan for the daylight interiors at Magpie, the shop location:

Shop lighting plan
Shop lighting plan

My aim with the lighting here was to create a transition from the cool realism of daylight at the front of the shop, through the warm shop floor, with patches of other colours adding depth and delineating different areas, to the alcove and the magenta light of the sconce which illuminates the tape recorder. In a nutshell: a magical journey.

Since it was a real location, there was genuine daylight flooding in through the windows, over which I had no control. This would determine my white balance and exposure, and everything I introduced would have to work with that. I knew that the windows would be blown out, but this was necessary anyway to hide certain things that were meant to be happening out on the street but weren’t.

We lensed the shop interiors at f1.8 on ISO 100 or 200. As you can see on the lighting plan, we set the white balance to 4,500K – dialling it in using Magic Lantern, which I’ll discuss in a future post. 4,500K is halfway between daylight and tungsten. This meant the daylight would appear slightly blue on camera, while any ungelled tungsten lamps would appear slightly orange, so my magical journey was already creating itself to some extent.

Col rigs the blonde outside the shop windows.
Col rigs the blonde outside the shop windows. Sandbags are a must if members of the public are walking by, and you should have a crew member man the lamp at all times.

Although my plan shows two 1K Arrilites outside the windows, on the day I chose to use the blonde instead. This was to enhance the backlight on characters near the windows. When we flipped around to shoot towards the back of the shop, we often turned off this blonde because the natural light was doing enough by itself.

Col rigs a work-light to the ceiling

I also forgot how many work-lights Col had when I drew the plan. There weren’t enough to have the three shining down the side wall. But I did have him rig the other four in the plan. The owner of Magpie was totally laid back about us screwing things into his ceiling, which made rigging these lamps fairly straightforward.

Two of the ceiling-rigged work-lights in action

The two 500W work-lights drawn either side of the legend “full fluorescent gel” were initially not gelled at all. I decided it was best to keep them warm to facilitate the transition I described earlier. But ultimately we gelled them with half CTB (Colour Temperature Blue, i.e. daylight correction) because they were looking a bit too warm. These two lamps served to drop splashes of orange light on Kate (Georgina Sherrington) as she approached the alcove when shooting towards the front of the shop, and to backlight her and the other characters when shooting towards the back.

The 300W work-light trained on the alcove was left ungelled, which really made the red of the curtain pop.

The lone 500W work-light shown to the left of the staircase in the plan was gelled with half-green fluorescent correction, as planned, for no particular reason other than to separate this area of the shop a bit from others.

A 1K Arrilite was placed at the top of the stairs pointing down to give background depth to wide shots, and also to give some highlights to Dan (Oliver Park) and Alice (Therese Collins) when they’re looking at the records. The 1K was gelled blue (full CTB) to represent daylight. A second one, not in the plan, was placed in a doorway off to the side of the staircase to throw some side-light both on the stairs and on a patch of the shop floor next to the clothes rack.

Ollie and Therese looking at the records
Dan and Alice looking at the records. The light hitting them from Dan’s elbow down is from the daylight-gelled 1K Arrilite at the top of the stairs (directly behind camera) and the rest of the front-light on them is from a 500W worklight on the ceiling with a half-green gel on it.

An 800W Arrilite was positioned at the back of the alcove, with a couple of layers of tough-spun diffuser and one of magenta gel. Sophie had chosen to paint the sconce in the alcove with magenta paint, and I felt I should reinforce this in my lighting. It completes the magical journey nicely by representing the reddest end of the lighting spectrum I’d created.

Wide shot towards the back of the shop
Wide shot towards the back of the shop. Hopefully you can see the transition I tried to create from the cool daylight in the foreground (enhanced by the blue-gelled blonde), through the orange backlights (from the ceiling work-lights) and pools of illumination from the clip-lights dotted about, to the magenta of the alcove in the background. Note also the extra depth created in the right of frame by Arrilites at the top of the stairs and off to the right of the stairs.

The final touch was clip-lights. We bought twelve of these £2.50 fixtures earlier in the year from B&M for the Cyclotron. Somehow the Cyclotron itself never got used, but the clip-lights were cannibalised and used extensively.

It’s all very well having a great location filled with interesting set dressing, but as DP if you don’t create depth with your lighting, then all that work is wasted. The clip-lights seemed like a great way to add little pools of warm light that would separate the layers of clutter from each other and provide contrast.

Georgie leans into one of the clip lights
Kate leans into one of the clip lights

I loved this moment in the wide shot when Kate leant into one, picking her out from the background and reinforcing her leaving Dan behind on her magical journey. (Tell you what, just down your drink every time I write “magical journey”, okay?)

I found myself in need of a little extra “daylight” near the door – to keep Kate in the “real world” a little longer – and so I had one of the fluorescent studio lamps set up on top of a cabinet. That’s what’s hitting Dan on the left of his face in the above image. If I had to justify this light source, I’d say it’s daylight reflecting off a glass cabinet front. You’d buy that, right?

A second fluorescent lamp was employed when the time came to shoot a crucial Glidecam shot leading Kate as she advances into the shop. It was great that she moved in and out of the tungsten lights on her journey, but I was losing her eyes too much. And if you can’t see into your actors’ eyes, you might as well pack up and go home because you don’t have a film.

So while Col operated the Glidecam on this shot, I walked behind him, shining the fluorescent lamp over his head and straight into Georgie’s face. This constant, soft frontlight was at just the right level not to kill the dynamics created by the other lamps, while still putting a sparkle in her eyes and filling in any unflattering shadows.

Check out the shot in the trailer about 8 seconds in:

I also love the shadow from the clothes rack that crosses her face during this shot. This is cast by the 1K Arrilite in the doorway by the stairs, on the other side of the rack. Ostensibly it’s daylight from an unseen window.

This turned out to be one of my favourite shots in the film from a cinematography perspective. Georgie looks absolutely stunning, because of course she is, but Debs’ lovely make-up and the lighting here really bring out her features.

Glidecam shot
Glidecam shot. The highlights on Kate’s face come from a blue-gelled 1K Arrilite off left, behind the clothes rack, while fill is provided by a fluorescent studio lamp I’m holding above camera.

Col pumped in smoke for all the shop interiors. This is another great way of adding depth, not to mention enhancing the dusty, mysterious feel of the shop.

Int. Shop – Night

When it came to the night scenes in the shop, the lack of natural light made quite a big difference without me having to do anything. I changed the white balance to tungsten (3,000K) and experimented with turning off different lamps until I arrived at the mood I wanted. The blue-gelled Arrilites now appeared even bluer, passing as moonlight.

Night time in the shop
Night time in the shop. Alice is backlit by a 1K Arrilite at the top of the stairs and side-lit by another 1K in a doorway off to the right, this one gelled blue to represent moonlight coming in through an unseen window. Note how we’ve turned on the practical lamps (the table lamp and floor lamp) to add contrast.

The most striking effect in the night scenes is the police lights. These were integral to the storyline, so I’d discussed them with Colin way in advance.

If you look at the opening scene of Soul Searcher (above – particularly noticeable from about 3’03 onwards), you’ll see that we made use of the flashing amber light on the street-cleaning vehicle. The actual light on the vehicle wasn’t powerful enough, so I asked Col to build a reflector that could be spun in front of an amber-gelled redhead to create the effect.

Eight years later, Col rebuilt this low-tech device for Stop/Eject’s police lights, gelling one side of the reflector red and the other blue. If you scroll back up to the Stop/Eject trailer and scrub to 2’00 you’ll see a behind-the-scenes glimpse of this in action.

Setting up the Spinning Disc Mark II

As it turned out, the reflected light from the catchily-named “Spinning Disc Mark II” was not bright enough for wide shots. Instead it fell to Sophie, if I remember rightly, to hold a flag in front of two lights, one gelled blue, the other gelled red, and move this flag back and forth during takes. At other times we simply switched the lights on and off in rapid succession.

During the shooting of all the shop scenes, I felt like I wasn’t quite achieving the look I wanted. Obviously my mind was on many other things, and we were very pushed for time, but somehow it wasn’t looking quite as moody and cave-like as I thought it should. But having played with colour-correcting a bit of the footage now, I’m more than happy that with a little grading it will look great.

If you have any questions about anything I’ve covered here, please comment or post on the Facebook page and I’ll be happy to answer.

That’s all for now, but I will be covering other scenes very soon. Thanks for getting our funding campaign to the £300 mark, and please keep giving and sharing the link so we can finish this epic little short to the best possible standard.

stopejectmovie.com

Stop/Eject Lighting Breakdown #1: Charity Shop

Trailer Tips

Watching the Soul Searcher trailer
Lara Greenway and Ray Bullock Jnr. watch the Soul Searcher trailer for, like, the gazillionth time.

For independent filmmakers, there was a time when trailers were something you didn’t worry about until the movie was finished and you were looking to get it distributed. Maybe you cut a basic one during or just after production to show the cast and crew some of the fruits of their hard work. (This proved a massive morale booster during Soul Searcher‘s six-week principal photography slog.)

But times have changed. Now the saturation of broadband has made video on the web an everyday thing, and a trailer for your short film or micro-budget feature posted on-line has a good chance of reaching some kind of audience and starting to build word of mouth about your project. Not to mention the rise of crowd-funding, for which having a pitch video – typically consisting partly of a trailer – is essential. Indeed, shooting a trailer before you’ve shot the film, in order to raise finance, has become extremely common.

So today I’m going to share some advice on editing trailers. I can’t claim to be an expert on trailer editing – it’s not an area of editing I’ve ever been able to specialise in – but the trailers I’ve cut generally get a good reaction, so I must be doing something right.

By the way, these tips assume that you’ve actually shot the film. If not, you’re more in the area of a teaser trailer, which is a whole other subject.

Music

The first trailer I cut for Soul Searcher – the morale-booster – used Mark Mancina’s theme from Speed. Since it was just for cast and crew and wasn’t going on the internet, the copyright thing wasn’t an issue. But these days you’ll definitely want to put your trailer online, so make sure you have the rights to use the music.

If you already have a composer lined up for your film, it may seem logical to have them score your trailer. This is what I did for Soul Searcher’s second trailer, edited primarily for a preview screening at 2004’s Borderlines Film Festival. Unfortunately this didn’t really work. The composer dutifully reflected every little change in the on-screen action. But that’s not how trailer music works. Trailer music needs to be driving and insistent, and should only change moods at two or three carefully planned points. So here’s the tip:

ALWAYS CUT YOUR TRAILER TO MUSIC. Never edit first and try to add music later or have music written to fit.

Watch the Dark Shadows trailer and notice how they use music to pace the edit and underline the transitions. Also note how they punctuate the comedy by stopping the music for the bigs gags, then bring it back in over a reaction shot.

Structure

Everything you need to know about how to edit a trailer can be learnt from simply watching trailers. You’ll notice that they’re structured into well-defined acts, with a key plot point and a change in the music between each act. Like an actual film, the first act will normally set up the world and characters, the second will present a sticky situation and the third will be about trying to resolve that situation, although of course in a trailer no resolution will come.

These days the studio logos tend to be a few shots in, or even at the start of the second act. If you don’t have a motion graphic logo for your production company, now’s the time to sort one out because it won’t feel like a trailer without it.

At the end of the third act will be the title and the “button”. This is a final beat – a sort of exclamation mark at the end of the trailer’s sentence – and is usually comedic. That’s followed by a couple of brief screens of credits (SFMoviePoster is a useful font to get hold of here) and a release date.

Look at the structure in The Dicator’s trailer below: a prelude building mystery, a first act setting up the character, a second act showing the kidnapping predicament, and a third act in which hilarity ensues. Possibly.

Style

Two stylistic things that have been pretty big in trailers for a few years are speed changes and lines over black.

Speed changes work best on tracking or craning shots, and quite simply involve speeding up the first part of the shot for no other reason that it looks kind of cool. Slow motion is used a lot as well, often because you need to emphasise a dramatic point in the trailer more than the director felt was necessary for the film itself. For the same reason, adding a digital zoom-in to a key close-up is quite common.

Running lines of dialogue over a black screen is another emphasis tool. Typically these come at the transition points between acts. We get a montage of shots and music, then everything goes black and silent except for one key line of dialogue, then – BOOM! – a new piece of music kicks in and we’re assailed with moving images once again.

Similarly, fades to black get used a lot in trailers. These can help hide continuity issues caused when you compress a scene, but also aid generally in pacing.

Strobing has become popular lately too – cutting black frames into shots to break them up. It adds pace and makes the viewer feel like they’re not getting to see everything. See the end of this Prometheus trailer for an example.

Text and Voiceovers

Keep these to a minimum. In fact, don’t do a voiceover at all unless you can afford to hire the actual Trailer Voice Guy. Anyone else voicing over your trailer will immediately make it sound amateurish, unless it makes sense for one of the characters in the film to do the VO.

And don’t put your cast’s names up in big letters in your trailer, unless they’re genuine name actors.

Taglines are fine as on-screen text. Check out trailers for films in a similar genre to help you choose a font. There was a time when every trailer had text which moved towards you, with the letters simultaneously separating out. That fad seems to be over now, but look out for things like this in big movie trailers which you can emulate. Dramas and chick-flicks tend to have their captions over a background of out-of-focus points of light – easy enough to shoot with a DSLR and some Christmas lights if you can’t get hold of a stock motion graphic.

Take This Waltz, below, uses this kind of text background.

Sound

Sound is just as phenomenally important in a trailer as it is in any other moving image format. Bad sound can instantly ruin all the hard work you’ve put in to make your trailer look like a “real” trailer.

It can be difficult, especially if you’re cutting your trailer early in post-production. You haven’t done your ADR yet and you don’t even have a post-production sound crew on board.

The solution? Download Audacity – a free piece of audio editing software – and use its noise removal filter on any troublesome production sound. It won’t work miracles, but if you have background noise like traffic, hiss or mains hum it will seriously reduce it. As a side effect you will get digital artefacts, but these will be inaudible once you’ve mixed in your music.

Make judicious use of good sound effects. Get hold of some nice, chunky whooshes to underscore your speed-changes, or your captions zooming on. If your film is a comedy, maybe throw in a record scratch effect when your music jars to a halt for an act change.

Check out the use of loud, whooshy, slammy noises (technical term) in the Men in Black III trailer:

And finally…

In case you somehow missed it, here’s the trailer for my new short film, Stop/Eject:

Trailer Tips

Bhasker Patel Wastes My Time

Bhasker Patel
Bhasker Patel

This is Bhasker Patel. Yes, he’s that guy from off of Eastenders.

Last autumn, when I posted the first casting call for Stop/Eject, Bhasker applied. At the time I envisaged the Shopkeeper as a little old man, so Bhasker fit the bill and I invited him to audition. He said he couldn’t make it because he was needed on the set of Eastenders.

Later I put out a call for Dan, aged 25-35. Bhasker applied again.

Then I put out a call for Old Kate, an elderly woman. Once again, Bhasker applied.

In fact, every casting call I put out for Stop/Eject (and I put out a lot, because as you know we had horrendous trouble getting – and keeping – a cast) Bhasker applied to.

This is a waste of my time and his. You apply for a role, it turns out you can’t make the audition – fine, could happen to anyone. You apply for a role you’re clearly unsuitable for – definitely comes across as desperate, but worse things have happened. You apply multiple times to the same film for roles you don’t fit when you know you probably don’t have time to audition anyway – clearly you’re not actually reading the breakdowns.

And he’s not the only one. Don’t even get me started on composers, many of whom seem to spend far more time writing spam than music. (Sorry to those composers I actually work with. You are lovely. Don’t ever change.)

Rant over.

Actually, those puppy-dog eyes staring out at me from Bhasker’s headshot make me feel like quite an arse for bashing him. Sorry dude. You’re probably quite a nice guy. Maybe someone hacked your email account? You should look into that.

Bhasker Patel Wastes My Time

Stop/Eject: Shoot Day 6 Podcast

A look at the unscheduled sixth day of principal photography on Stop/Eject

For Stop/Eject’s post-production crowd-funding campaign, we’ve introduced a new idea. As well as individual rewards for everyone who sponsors – anything from a ticket to the premiere to a voice role in the film, depending on how much you contribute – there are public rewards too. The way these work is that every time the total raised passes one of the hundred pound marks, we release a little treat online – like podcasts or special blog posts.

When the campaign was launched yesterday, we received an amazing £240 in just a few hours, smashing through the first two public reward targets.

Accordingly, Sophie has published a special, detailed blog breaking down the design and creation of the living room set, and a video podcast about the final day of shooting. Why the final day? Well, because the podcasts about the other days aren’t ready yet; we weren’t expecting the total to get past £200 so quickly!

Read Sophie’s blog here.

And you can watch the podcast above.

You can make your contribution to Stop/Eject at stopejectmovie.com and help us reach the next target, £300, for an in-depth breakdown of how I lit the shop scenes, what with and why.

Stop/Eject: Shoot Day 6 Podcast

Proaim Shoulder Rig Review: Ten Months On

Last July when I bought my Canon 600D (Rebel T3i) DSLR I also invested in a Proaim shoulder rig from Cine City. I reviewed the rig on this site soon afterwards, based mainly on playing about with it at home, but although I mentioned briefly how it fared during the Field Trip shoot last August I’ve never got around to giving a proper verdict on how this rig performs in a shoot scenario. Until now.

First and foremost, the rig is designed to give you the kind of smooth(ish) handheld shots you would get from a shoulder-mounted camera – broadcast/ENG, 16mm or whatever. While it certainly does that, all the weight of your DSLR is on the front of the rig, so it very quickly becomes difficult to hold up. You need to add a counterweight to the back – mine being a backpack which I can fill with whatever heavy stuff is to hand, loosely fastening the waist strap to prevent it swinging around. I’ve yet to make any serious use of this set-up, so I’ll have to get back to you on how it works out in the field.

The Proaim shoulder rig with top handle

Aside from the shoulder pad, the Proaim rig comprises several other elements which can be fitted onto the core rail system as required. These are:

  • a two-stage matte box and sunshade
  • follow focus
  • hand grips
  • a top handle (an optional extra I went for) with microphone mount

Prior to Stop/Eject, I generally fitted everything bar the follow focus whenever I used the camera. (Sadly most jobs I do lack the budget for a focus puller, and I don’t find the follow focus useful when pulling by eye.) To be perfectly honest, I did this mainly to make the camera look bigger and more impressive – particularly important on corporate jobs!

Shooting for Astute Graphics
Shooting for Astute Graphics. Photo: Nicholas van der Walle

On Stop/Eject there was no time to have unnecessary accessories getting in our way, so I fitted only the follow focus, adding the matte box and sunshades very occasionally to flag a bit of backlight or use a graduated ND filter. Whenever I had to pick the camera up while still on the tripod, I regretted not fitting the top handle, but I never found time to put it on.

So the follow focus was the main part of the rig to get used. And I’m afraid the verdict here is not good. I knew before I bought the rig that many reviewers had complained about the gears having a little play in them. But I also knew that better quality follow focus units were out of my price range, and that some reviewers reported being able to reduce or remove the play by tightening a screw.

Focus pulling
On Stop/Eject, Rick Goldsmith operates camera while Colin Smith pulls focus. Photo: Paul Bednall

Well, no amount of screw tightening has done the job; there is still play. You can turn the focus knob about a millimetre before the focus ring of the lens starts to rotate. Shooting at f1.8 on my 20mm Sigma lens for a big wide – such as the master shot of the basement – that single millimetre can represent 20 metres of focal distance. Result? I had to pull the focus on that master shot by eye.

Col got skilled enough by the end of the shoot to compensate for this play, but it still caused us problems from time to time. I believe Cine City have now released a version two of their follow focus, so perhaps this is an improvement.

I have to say that the most effective parts of the rig are the matte box and sunshades. Aside from looking impressive, the ease with which you can flag off stray light is brilliant – no more gaffer-taping bits of cardboard to your camera.

But I was surprised to find on Stop/Eject that I was often bypassing the rig altogether and slapping the camera straight on the tripod.

You’ve got to do whatever’s going to get the job done right. I’d definitely advise having this rig in your arsenal, assuming you can’t afford one of the better quality options. With a decent counterweight it will massively improve your handheld shots, and the rest of the bits will come in handy too – just don’t expect to use all of them all of the time.

Filming Stop/Eject with a minimal rig
Filming Stop/Eject with a minimal rig. Photo: Paul Bednall
Proaim Shoulder Rig Review: Ten Months On

Picking up the Pieces

A typical Stop/Eject pick-up shot

Over the years I’ve developed a bad habit of shooting pick-ups. I really wanted to leave Derbyshire on April 26th with the whole of Stop/Eject in the can, but sadly it was not to be. 25 close-ups of the tape recorder which were scheduled for filming with a skeleton crew on that final day were pushed aside to make way for the weir shots dropped earlier in production.

I grabbed three or four of these close-ups while we were packing up at Magpie, but the rest would have to be shot in my living room back in Hereford.

Which is what I spent most of yesterday doing, with my long-suffering wife Katie standing in for the leading lady once again.

The ultra-spacious 007 stage at Oseman Studios
The ultra-spacious 007 stage at Oseman Studios. Note the iMac in the top right showing the shot from principal photography I'm matching to.

Although it took longer than it would have done with a couple of extra crew and a bit more space, it was incredibly useful to have my iMac right there with all the footage from principal photography on it – some of it even roughly assembled – so we could make sure the lighting and hand movements matched perfectly.

Focusing up close with the Sigma EX 105mm

Almost every pick-up was shot with a Sigma EX 105mm macro lens which I bought on eBay a few weeks ago. This is a fantastic lens with a huge focusing range which enabled me to get big close-ups of individual buttons on the recorder.

It’s weird shooting things that tight because you start to worry about stuff that’s not normally visible, like tiny bits of dry skin on people’s hands and miniscule dents in things. When you think about what size of screen the film might be projected on at a festival it’s possible to become picky to a crippling degree.

Lovely optical artefacts from using a cheap macro adapter

For a few specific shots, where bad things are going on in the story, I switched out the Sigma for a Canon zoom and fitted a cheap macro adapter on the front. This gave me soft focus, blooming on the highlights and colour aberration around the edges of frame. I love to do optical stuff like this in-camera wherever I can, rather than relying on post-production effects which can often look cheesy.

Anyway, the shots were all accomplished successfully, despite the fact that the hero tape recorder had a fault and wouldn’t play for more than a couple of seconds before grinding to a halt. For extreme close-ups on the rotating capstans and the playhead moving into position I used a children’s tape player bought from a charity shop last year (for the opening shots of the Stop/Eject podcasts) from which I’d removed the cassette door.

Shooting a kiddies' recorder with the door removed

A couple of shots were storyboarded as being top-down from directly above the table. To save rigging up the camera on a C-stand, I laid the table on its side and blu-tacked the recorder and tapes to it.

Annoying as they are, I advise you to always expect there will be pick-ups to shoot (maybe right after principal photography, maybe only a couple of weeks before the premiere) and plan accordingly, i.e. keep as much stuff from the shoot as you possibly can, particularly…

  • any key hand props (like the tape recorder)
  • bracelets, bangles, rings and watches so you can film extra shots of characters’ hands (My heart briefly stopped when Katie pointed out yesterday that Georgie wore Sophie’s watch in principal photography, and it was therefore 100 miles away in Belper. Fortunately the one key shot of the watch was amongst those few we grabbed before leaving Magpie.)
  • ideally all of the costumes, but at least tops, since you can often film extra hand shots with the character’s torso filling the background of the frame
  • any parts of the sets that can be used to fill the background of a close-up or medium close-up (We brought the curtain and the table from the alcove back to Hereford with us. Sorry, Mrs. Briggs!)

Of course pick-ups aren’t always because you dropped stuff during principal photography. Often they’re new material that you realise you need as the edit develops. It’s too early to say whether Stop/Eject will have any of those. Either way, there is still one more storyboarded shot to film – of a microwave. Which sounds simple, but it’s not. More on that another time.

Picking up the Pieces

Stop/Eject: The Schedule

Georgina Sherrington as Kate in Sophie's living room set
Georgina Sherrington as Kate in Sophie’s living room set

Everyone on the cast and crew probably wanted to kill me because of the schedule. The days were too long and the turnaround times were too short. But let’s look at how the schedule developed in pre-production and how it turned out in practice.

Before we begin, some basic info. The script is 19 pages long, so theoretically 19 minutes. There are 31 scenes, 11 story days and 14 locations. Yeah, in a nutshell, ridiculous for a short film.

Six of the locations we found in one building: Magpie, in Matlock. Most of the remaining ones were in Belper, 11 miles down the road.

When we were going to shoot last October, it was a four-and-a-half day schedule. The first half day we would have been without the lead actress (who is in almost every scene) and the last half day we would have been without anyone except a skeleton crew, for shooting close-ups of the tape recorder.

When the project got up and running again this year, I immediately increased the schedule to five days. I had been really freaked out in October about getting it all shot in essentially just four.

Initially I wanted to shoot Monday-Friday, since weekdays seemed most convenient for the locations, but the two lead actors we had at the time both temped during the week and wanted to do as much as possible at the weekend, so I went with Saturday-Wednesday. (Ironically, it would have better suited Georgie, who ultimately played the lead role, if we had shot Monday-Friday.)

Remember that the first and foremost goal of your schedule is to minimise the number of location moves, because they waste phenomenal amounts of time. (A common mistake is to consider only the driving time between locations and overlook the time it takes to derig all the equipment, pack it into the vehicles, unpack it and set it up again at the other end. And don’t forget that at least one of your vehicles will probably get lost during the location move, so budget in time for that as well.)

Magpie. Photo: Paul Bednall

I knew that those of us who weren’t local to the area could stay at Magpie, and that we could also stay at Sophie’s in Belper from the third day onwards. So the most logical schedule was to shoot all the Magpie stuff Saturday-Monday, then move to Belper on Monday night and shoot everything there on Tuesday and Wednesday.

This was all well and good until Georgie was cast a week before the shoot, and she had a prior commitment in London on Sunday morning. This meant we would lose her at 7pm on Saturday and not get her back for 24 hours.

There was approximately a day’s worth of material that could be shot without her, but half of that consisted of tape recorder close-ups that couldn’t be filmed until we had her master shots to match them to, master shots from various locations that couldn’t possibly all be shot on Saturday. So it was clear that Sunday’s schedule would be pretty sparse until Georgie returned at 7pm, shooting just the Businessman scenes in Belper. The half-day of tape recorder close-ups would have to wait until Thursday, extending the schedule.

Filming in the basement of Strutt's North Mill, Belper. Photo: Paul Bednall
Filming in the basement of Strutt’s North Mill, Belper. Photo: Paul Bednall

The other fixed point I was working around was the basement location (in Belper), which was only available on the Tuesday. This prevented me from simply flipping the schedule and doing all the Belper stuff first, then the Magpie stuff.

Two full days of shooting would take place on the shop floor of Magpie, and it was essential that those were consecutive so that we wouldn’t have to restore the shop and then redress it again later. Given the availability of Georgie and the basement, the only solid two-day stretch was from Sunday evening through to Tuesday lunchtime, which even then isn’t a full two days. So that’s where the shop floor had to go, and the rest of the schedule just had to fit around it.

Since many of us would be staying at Magpie over the weekend, I was keen to do as much filming there as possible during that time, so I scheduled in the living room, bedroom and nursing home scenes for Saturday. But then I realised that this left the major exterior scenes nowhere to go except Wednesday – the last day of the shoot. If the weather was bad, we would have nowhere left to postpone them to.

So the living room, bedroom and nursing home got moved to Wednesday and the exteriors slotted in on Saturday, with the proviso that they would be swapped back if Saturday was rainy.

I had arrived at a final schedule, which looked like this:

Stop/Eject schedule download (.PDF, 157kb)

As you can see, there are some tight turnarounds, particularly during the shop floor stuff in the middle of the schedule. This was partly a result of squeezing two days of shop floor material into one full day, one morning and one evening. It was also difficult to balance conflicting things like the need to wait for it to get dark at the end of the day to shoot some scenes, but also needing to get up early enough in the morning to film exteriors outside the shop when the road wasn’t too busy.

I definitely felt like I was fighting the clock throughout the shoot.

We wrapped more or less on time on Saturday, but had dropped the sun GVs and a crucial wide shot for the weir scene.

On Sunday things kept to schedule until the evening, when we overran and wrapped about 75 minutes late.

We wrapped most of the cast and crew slightly later than the anticipated time of 10:30pm on Monday, but Colin and I cracked through the cutaways and wrapped the day overall a few minutes early.

On Tuesday we finished at Magpie at noon, not 11am, but made up some of the time on the location move (which almost never happens) and got to the basement only half an hour late. We wrapped there still about 30 minutes behind, but made up the time at the cemetery. Then we got ahead of schedule by changing the bridge shot (scene 15) from night to day, thus saving an hour of setting up lights, and were able to retire to Sophie’s and get the kitchen scene in a very relaxed fashion.

Filming a living room scene. Photo: Sophie Black

Wednesday was without a doubt the toughest day. Although the living room, the bedroom, the nursing home and the alcove set were all in the same building, moving between them still took time, and since we were all fatigued it was like wading through treacle. By lunchtime we were two hours behind and this only got worse as we moved onto the critical alcove scenes after dinner. It must have been getting on for 3am by the time we wrapped.

Thursday turned out very differently to what we’d planned. Fortunately Georgie and Ollie were both available to pick up the weir wide shots. We started late because everyone was so knackered, and couldn’t shoot at the first location we visited (due to heavy rainfall swelling the river), so had to move to another one. We finally got the two shots in the can by about 3pm, and decided to leave most of the planned tape recorder close-ups to another time. (I’ll be shooting them here in Hereford next week.)

I’ll discuss why we kept falling behind schedule in a future post, but I’d like to end on a cautionary note. Not allowing sufficient turnaround time is a vicious circle. I hated the mornings on the shoot because I could see that people weren’t getting up fast enough to get out of the door at the necessary time. I couldn’t hassle them because they’d been up late the previous night and were understandably very tired, but I knew that by starting late we would end up finishing late again and the cycle would continue.

The only way to lengthen the turnaround time would have been to have added another day to the schedule, and this of course brings its own problems in the form of increased costs and people’s availability. This is why making unpaid short films will always be a messy, unpleasant business and if you’re at all rational you’d do well to avoid such shoots like the plague.

But where’s the fun in that?

Rewind
Rewind
Stop/Eject: The Schedule