Planning Camera Angles and Lighting

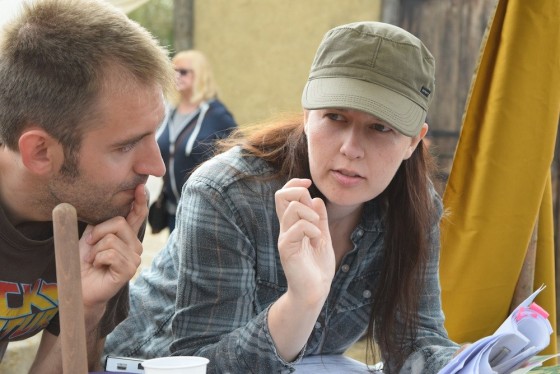
Discussing shots with director Kate Madison on the set of “Ren: The Girl with the Mark”. Photo: Michael Hudson

A thorough plan for shots and lighting can save lots of time on set, but no battle plan survives contact with the enemy. To what extent should a DP prepare?

How much camera angles are planned – and by whom – varies tremendously in my experience. Some directors will prepare a complete shot-list or storyboard and send it to the DP for feedback; others will keep it close to their chest until the time of shooting. Some don’t do one at all, either preferring to improvise on the day in collaboration with the DP, or occasionally asking the DP to plan all the shots alone.

A shot-list can be hard to interpret by itself, particularly if there’s a lot of camera movement. Overhead blocking diagrams, perhaps done in Shot Designer or a general graphics app, make things a lot clearer. Storyboards are very useful too, be they beautifully and time-consumingly drawn, or hastily scribbled thumbnails.
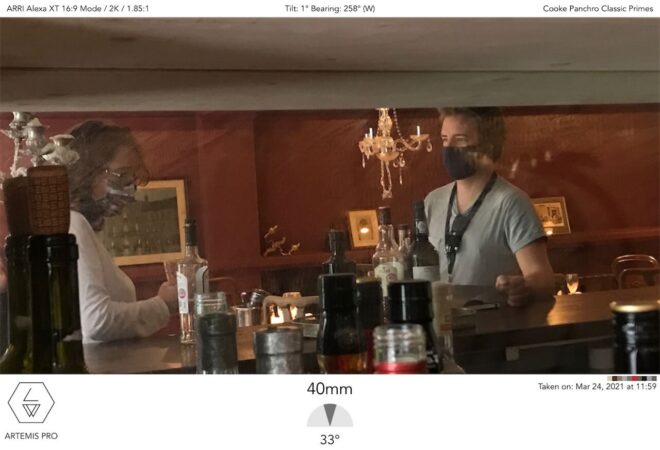
An Artemis shot from “Hamlet” using stand-ins

On a feature I shot last year, we were afforded the luxury of extensive rehearsals with the cast on location. I spent the time snapping photos with Artemis Pro, the viewfinder app, and ultimately output PDF storyboards of every scene; the 1st AD distributed these with the call-sheets every morning. That level of preparedness is rare unless complex stunts or VFX are involved, but it’s incredibly useful for all the departments. The art department in particular were able to see at a glance what they did and didn’t need to dress.
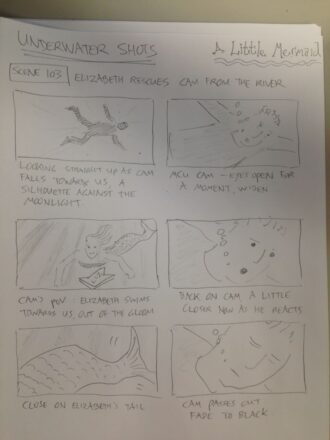
One of my unused storyboards from “The Little Mermaid”

Beware though: being prepared can kill spontaneity if you’re not careful. Years ago I directed a film that had a scene supposedly set at the top of a football stadium’s lighting tower; we were going to cheat it on a platform just a few feet high, and I storyboarded it accordingly. When we changed the location to a walkway in a brewery – genuinely 20ft off the ground – I stuck to the storyboards and ended up without any shots that showcased the height of the setting.

If the various departments have prepared based on your storyboards, not keeping to them can make you unpopular. So storyboards are a double-edged sword, and expectations should be carefully managed regarding how closely they will be adhered to.

The amount of planning that the DP puts into lighting will vary greatly with budget. On a micro-budget film – or a daytime soap like Doctors – you may not see the location until the day you shoot there. But on a high-end production shooting in a large soundstage you may have to agree a detailed lighting plot with the gaffer and pre-rigging crew days or weeks in advance.

Having enough crew to pre-rig upcoming scenes is one of the first things you benefit from as a DP moving up the ladder of budgets. Communicating to the gaffer what you want to achieve then becomes very important, so that when you walk onto the set with the rest of the cast and crew the broad strokes of the lighting are ready to go, and just need tweaking once the blocking has been done.
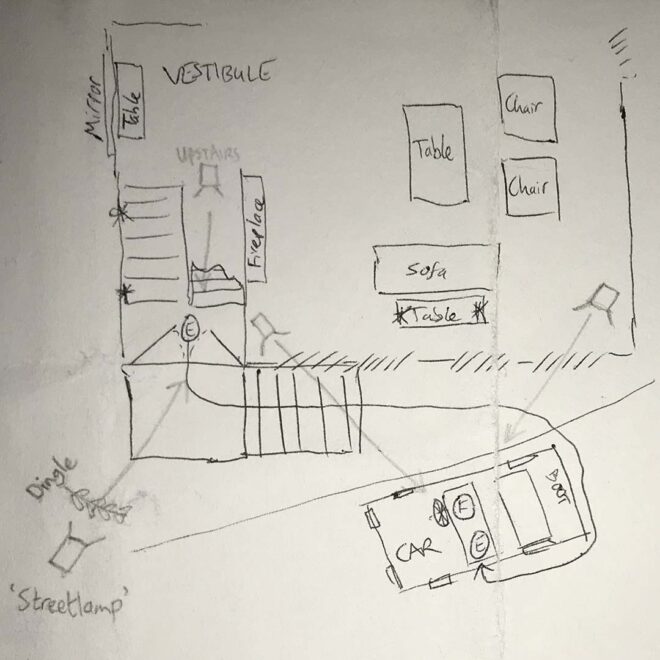
My lighting plan for a night exterior scene in “Exit Eve”

Blocking is usually the biggest barrier to preparedness. Most films have no rehearsals before the shoot begins, so you can never quite know where the actors will feel it is best to stand until they arrive on set on the day. So a lighting plan must be more about lighting the space than anything else, just trying to make sure there are sources in roughly the right places to cover any likely actor positions suggested by the script, director or layout of the set.

Whether a detailed lighting plan needs to be drawn up or not depends on the size and complexity of the set-up, but also how confident you feel that the gaffer understands exactly what you want. I often find that a few recces and conversations along with some brief written notes are enough, but the more money that’s being spent, the more crucial it is to leave no room for misunderstandings.

Again, Shot Designer is a popular solution for creating lighting plans, but some DPs use less specialised apps like Notability, and there’s nothing wrong with good old pencil and paper.

Overall, the best approach is to have a good plan, but to keep your eyes and mind open to better ideas on the day.

For more about apps that DPs can use to help them prep and shoot, see my article “Tools of the Trade” on britishcinematographer.co.uk.

Planning Camera Angles and Lighting

My New Online Course: “Cinematography for Drama”

My new second online cinematography course, Cinematography for Drama, is now out on Udemy. The course explains the role of a DP on set, from collaborating with the director in blocking the cast and choosing the camera angles, to lighting the scene with depth and mood.

Across the four modules of the course, I set up and shoot scenes in common contemporary locations: domestic banter in a sunny kitchen, a monologue in a dark bedroom, an awkward first date in a restaurant, and a walk-and-talk in an outdoor bar. Watch me try out different blocking and camera angles to get the most depth and interest in the frame, create movement using a slider and a gimbal, and work out the coverage needed to complete the scene. Then learn the secrets of cinematic lighting as I set up LED, tungsten and practical lights to create a look. Witness the camera rehearsals through to the final take, then sit back and watch the final edited scene. Every step of the way, I explain what I’m doing and why, as well as the alternatives you could consider for your own films.

This is a follow-up to my best-selling Udemy course Cinematic Lighting, which has over 3,600 students and a star rating of 4.5 out of 5. Here is some student feedback:

  • “Excellent. Informative and enjoyable to watch.” – 5 stars – David C.
  • “Thank you to Neil and his team for a fantastic course that gives a real insight into the thought process of a cinematographer.” – 5 stars – Dan B.
  • “Some great tips in this. Really enjoyed watching the decisions being made as and when the scenario is actually being lit, some good workarounds and nice in depth descriptions to why he’s doing what he is. Genuinely feels like your taking in some advice on set! Well worth taking the time to do this!” – 5 stars – Ed L.

You can get the new course for a special low price by using the code IREADTHEBLOG before April 2nd.

My New Online Course: “Cinematography for Drama”

The First Light a Cinematographer Should Put Up

Where do you start, as a director of photography lighting a set? What should be the first brushstroke when you’re painting with light?

I believe the answer is backlight, and I think many DPs would agree with me.

Let’s take the example of a night exterior in a historical fantasy piece, as featured in my online course, Cinematic Lighting. The main source of light in such a scene would be the moon. Where am I going to put it? At the back.

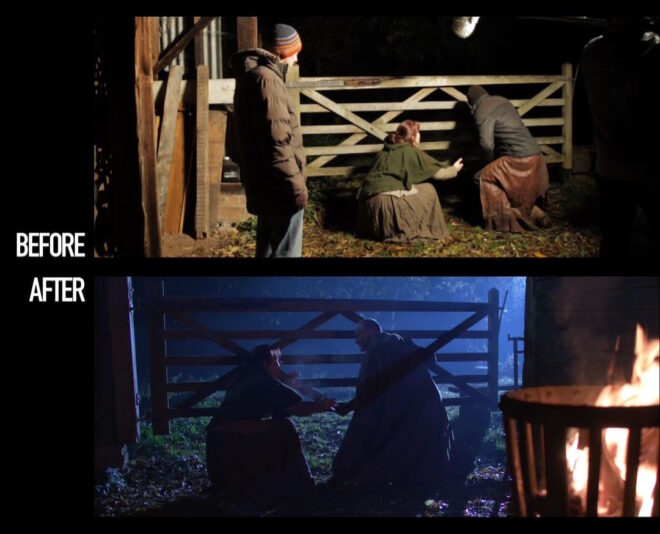
The before image is lit by an LED panel serving purely as a work-light while we rehearsed. It’s not directly above the camera, but off to the right, so the lighting isn’t completely flat, but there is very little depth in the image. Beyond the gate is a boring black void.

The after image completely transforms the viewer’s understanding of the three-dimensional space. We get the sense of a world beyond the gate, an intriguing world lighter than the foreground, with a glimpse of trees and space. Composing the brazier in the foreground has added a further plane, again increasing the three-dimensional impression.

Here is the lighting diagram for the scene. (Loads more diagrams like this can be seen on my Instagram feed.)

The “moon” is a 2.5KW HMI fresnel way back amongst the trees, hidden from camera by the wall on the right. This throws the gate and the characters into silhouette, creating a rim of light around their camera-right sides.

To shed a little light on Ivan’s face as he looks camera-left, I hid a 4×4′ Kino Flo behind the lefthand wall, again behind the actors.

The LED from the rehearsal, a Neewer 480, hasn’t moved, but now it has an orange gel and is dimmed very low to subtly enhance the firelight. Note how the contrasting colours in the frame add to the depth as well.

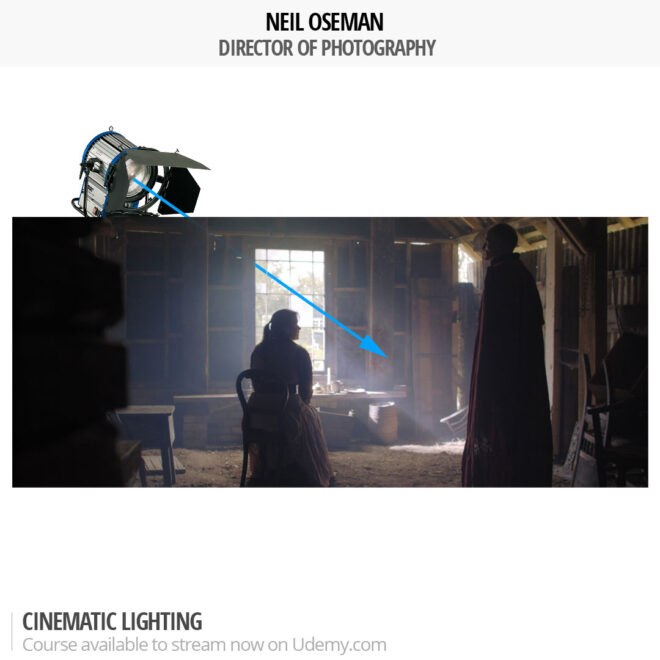
So I’ll always go into a scene looking at where to put a big backlight, and then seeing if I need any additional sources. Sometimes I don’t, like in this scene from the Daylight Interior module of the course.

Backlight for interior scenes is different to night interiors. You cannot simply put it where you want it. You must work with the position of the windows. When I’m prepping interiors, I always work with the director to try to block the scene so that we can face towards the window as much as possible, making it our backlight. If a set is being built, I’ll talk to the production designer at the design stage to get windows put in to backlight the main camera positions whenever possible.

In the above example, lit by just the 2.5K HMI outside the window, I actually blacked out windows behind camera so that they would not fill in the nice shadows created by the backlight.

Daylight exteriors are different again. I never use artificial lights outdoors in daytime any more. I prefer to work with the natural light and employ reflectors, diffusion or negative fill to mould it where necessary.

So it’s very important to block the scene with the camera facing the sun whenever possible. Predicting the sun path may take a little work, but it will always be worth it.

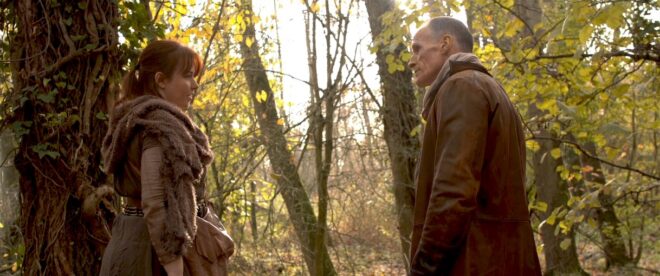
Here I’ve shot south, towards the low November sun, and didn’t need to modify the light at all.

Shooting in the opposite direction would have looked flat and uninteresting, not to mention causing potential problems with the cast squinting in the sunlight, and boom and camera shadows being cast on them.

You can learn much more about the principles and practice of cinematic lighting by taking my online course on Udemy. Currently you can get an amazing 90% off using the voucher code INSTA90 until November 19th.

For more examples of building a scene around backlight, see my article “Lighting from the Back”.

The First Light a Cinematographer Should Put Up

Classic Single Developing Shot in Back to the Future: Part II

“What the hell’s going on, Doc? Where are we? When are we?”

“We’re descending towards Hill Valley, California, on Wednesday, October 21st, 2015.”

“2015? You mean we’re in the future?”

Yep, we’re all in the future now.

The Back to the Future trilogy are the films that made me want to be a filmmaker, and 30 years has not dulled their appeal one bit. In a moment I’ll give a single example of the brilliance with which Robert Zemeckis directed the trilogy, but first a reminder…

If you’re in the Cambridge area, you can see Back to the Future along with my short film Stop/Eject at the Arts Picturehouse next Monday, Oct 26th, 9pm. You need to book in advance here.

If you can’t make it, I’m pleased to announce that Stop/Eject will be released free on YouTube on November 1st.

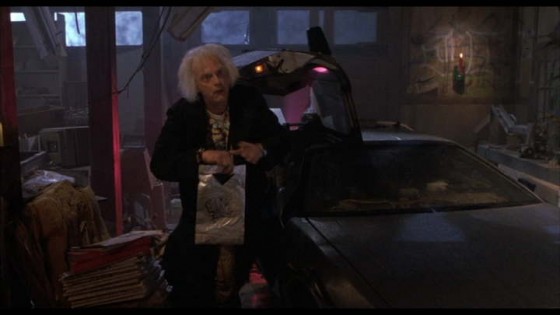
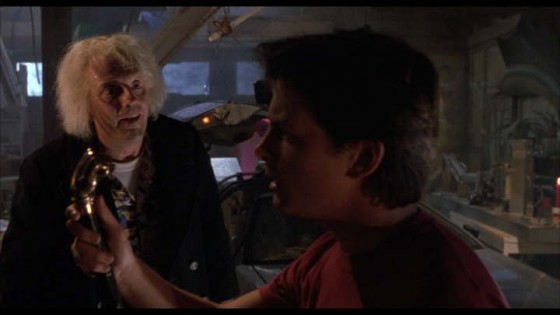
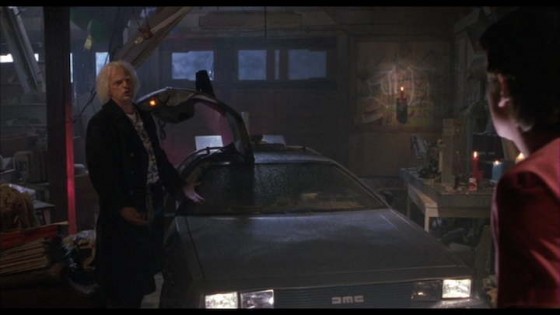
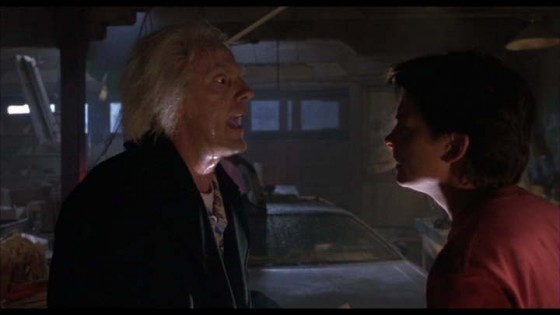
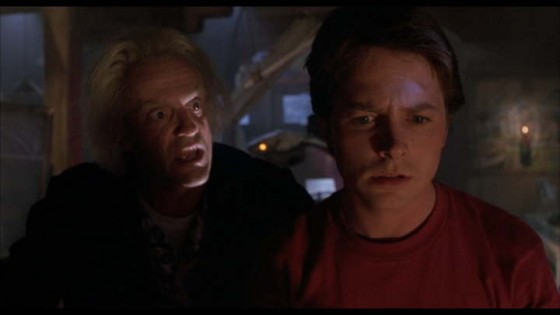
Stop-Eject release poster RGBAnyway, back to Back to the Future. Robert Zemeckis is a major proponent of the Single Developing Shot – master shots that use blocking and camera movement to form multiple framings within a single take. Halfway through BTTF: Part II comes a brilliant example of this technique. Doc has found Marty at his father’s graveside, the pair having returned from 2015 to a nightmarish alternate 1985. In an exposition-heavy scene, Doc explains how history has been altered and what they must do to put it right.

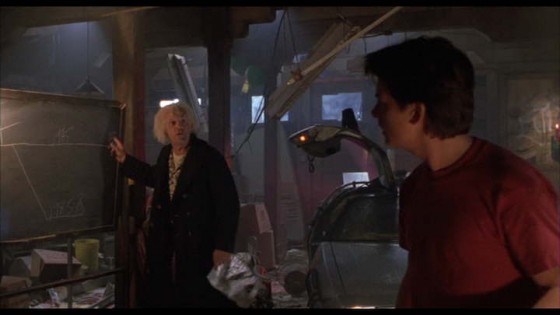
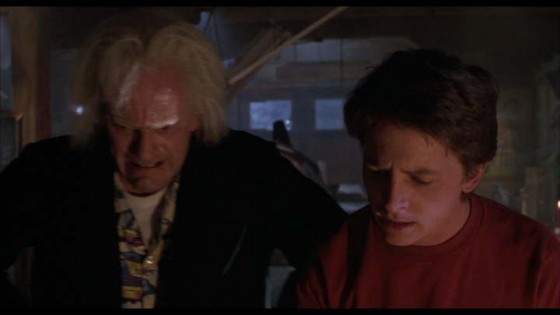
It could have been very dull if covered from a lot of separate angles (and not acted by geniuses). Instead Zemeckis combines many of the necessary angles into a single fluid take, cutting only when absolutely necessary to inserts, reverses and a wide. Here are the main framings the shot moves through.

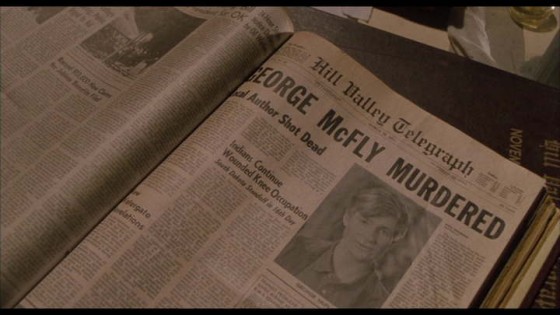
It starts on a CU of the newspaper…

Screen Shot 2015-10-19 at 21.30.42

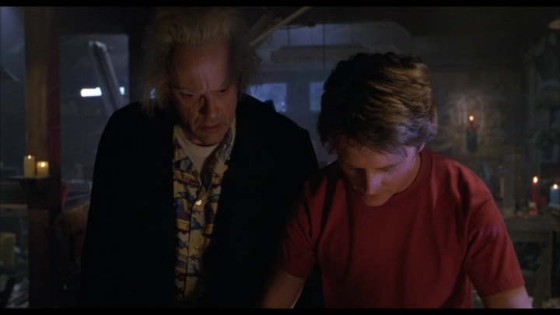
…then pulls out to a 2-shot…Screen Shot 2015-10-19 at 21.31.22

…which becomes a deep 2 as Doc walks away…Screen Shot 2015-10-19 at 21.31.47

…before pushing in to Doc at the blackboard…Screen Shot 2015-10-19 at 21.32.07

…and panning with him to the DeLorean…Screen Shot 2015-10-19 at 21.32.25

…then pulls back out to include Marty again…Screen Shot 2015-10-19 at 21.32.41

…rests briefly on another 2-shot…Screen Shot 2015-10-19 at 21.32.46

…then becomes a deep 2 once more as Doc moves away…Screen Shot 2015-10-19 at 21.32.55

…then a flat 2 again…Screen Shot 2015-10-19 at 21.33.16

…then a deep 2 again…Screen Shot 2015-10-19 at 21.33.33

…then pushes in to a tighter 2 as Marty realises it’s all his fault…Screen Shot 2015-10-19 at 21.33.40

…then it becomes an over-the-shoulder as Marty turns to Doc at the DeLorean…Screen Shot 2015-10-19 at 21.33.49

…then a 50/50 as they face each other…Screen Shot 2015-10-19 at 21.33.59

…then it tracks back to the blackboard…Screen Shot 2015-10-19 at 21.34.03

…and tracks in further to emphasise the reveal of the second newspaper…Screen Shot 2015-10-19 at 21.34.16

…then dollies back with Marty as he takes it into the foreground…Screen Shot 2015-10-19 at 21.34.26

…then dollies into a tight 2 to end.Screen Shot 2015-10-19 at 21.34.41I wonder how many takes they did of this, and how many different takes are used in the edit. Just after the reveal of the second paper there’s a cut to Einstein the dog, and when we come back to the developing shot the framing is slightly different, suggesting the dog shot is there to allow a splicing of takes more than anything else. All the other cuts in the scene are strongly motivated though, and seem to be there for narrative reasons rather than take-hopping.

Given the shortness of the lens – not more than a 35mm, I reckon – it’s likely that Michael J. Fox had to deliberately move out of the camera’s way at certain points, and the table seen in the opening frame may have been slid out by grips early on in the take to facilitate camera movement. I’d love to see some behind-the-scenes footage from this day on set, but none seems to exist.

So there you have it, one small example of the inventiveness which makes these films so enduring. Now stop reading this and get back to your trilogy marathon!

Classic Single Developing Shot in Back to the Future: Part II