It’s Wednesday, and that means it’s time for another episode of my YouTube series Lighting I Like. This one is about The Crown, one of the most beautifully shot shows of 2016.
I hope you enjoyed the show. Episode five goes out at the same time next week: 8pm GMT on Wednesday, and will cover a scene from my all-time favourite TV series, Life on Mars.Subscribe to my YouTube channel to make sure you never miss an episode of Lighting I Like.
In this final part of the Know Your Lights series, I’m taking a look at some of the LED fixtures currently available.
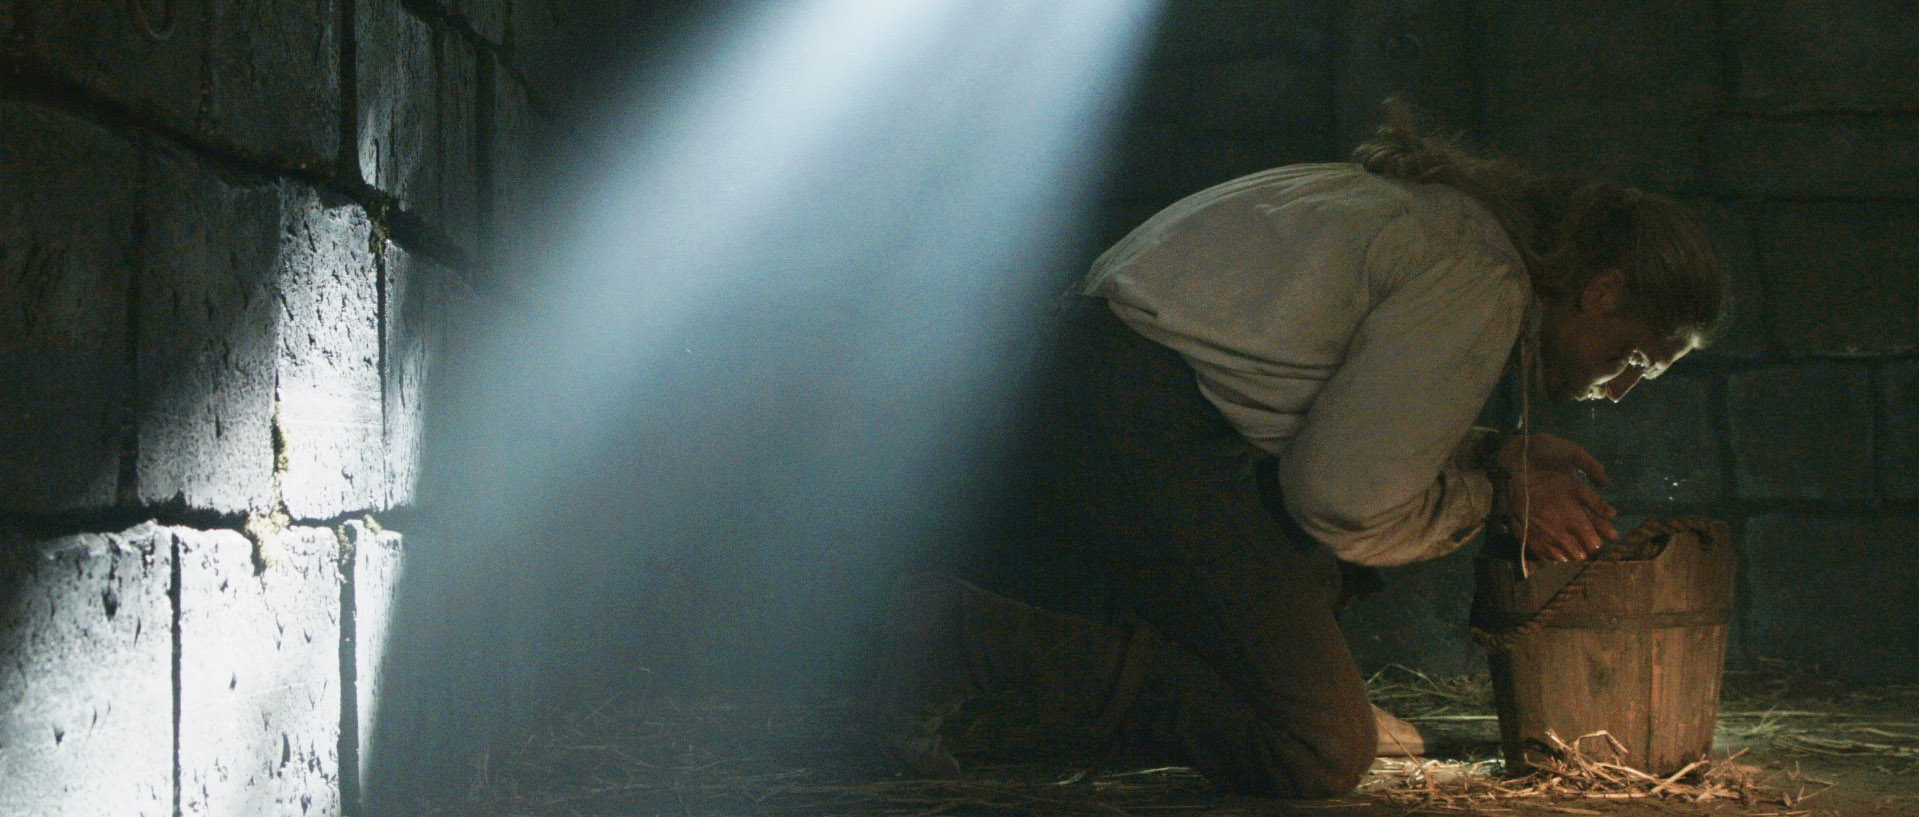
In this frame from Ren: The Girl with the Mark, Hunter’s face is lit by a small LED reporter light hidden behind the bucket to suggest a reflection off the water.
LEDs (light emitting diodes) generate light through electroluminescence. When a controlled direct current is applied to the electrodes, electrons in the semi-conductor reconfigure, releasing energy as light. LEDs have been around since the early sixties, but for decades they were only capable of emitting a weak red glow, restricting their applications to things like TV standby lights and digital clocks. In recent years the brightness and colour range of LEDs has improved dramatically, making them practical alternatives to traditional light sources.
Compared with those sources – tungsten, HMI and fluorescent – LEDs are more efficient, lighter, generate less heat, have a longer life, and are less likely to break and less dangerous when they do. They are fully dimmable, without the colour temperature changing, but if you wish, some fixtures allow you to alter the colour temperature with the turn of a knob.
On the down side, LED units are expensive, lack the raw power of large HMI or tungsten fixtures, and can often suffer from poor CRI (colour rendering index – see the overview for more info).
The technology is improving rapidly, and LEDs will only get better over the coming years. For now, many regard them as speciality lights, and they are almost always outnumbered by tungsten, HMI and fluorescent units in a drama lighting package. But some productions have really embraced them, an example being Guardians of the Galaxy, where many of the colourful practicals built into the sets were LEDs. Because they can be squeezed into smaller spaces than any other kind of light, and because you can get around the poor CRI by using coloured lamps, or gelling white ones, LEDs are well suited to creating practical glows from computers, control desks and other technology.
These are just a few of the LED fixtures currently on the market…
Panels
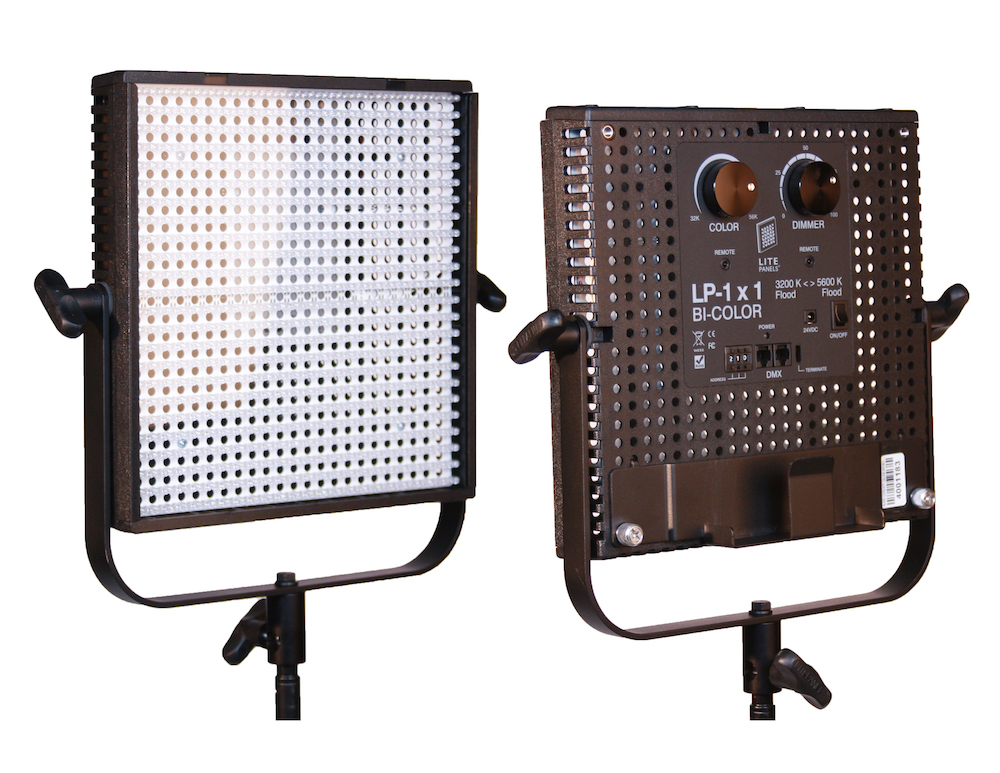
LP-1×1 Bi-color LitePanel
1’x1′ LitePanels are perhaps the most common LED unit. These panels have two dials on the back: one for brightness, and one for colour temperature (3200-5600K). They can be run off mains or a V-lock battery, drawing 40W to output about as much light as a 200W HMI.
LP-1×1 LitePanel, set up in seconds on a lintel in a street location in Japan for the sci-fi thriller Synced.
I usually ask for a couple of these panels in my package, and they are great for situations like these:
As you are about to roll, you spot an area of the frame that needs a little extra splash of light. It is the work of moments to slap a battery on a LitePanel and fly it into shot.
A light needs to be situated in a tight space in the set, or in a spot which a power cable couldn’t reach without appearing in frame, or both. The fact that you can just prop these panels up against the set without worrying about them getting hot and damaging something is huge.
When required to shoot a night exterior without a generator, LED panels can really help you out. Even if you do have a genny, the ability to set up a source without running power to it is extremely useful. A short film I shot called Forever Alone is a good example.
Wrapped in a diffuser like tough-spun or muslin, they make good fill lights or eye lights for day exterior close-ups.
They can make good TV sources, particularly if your set-up time is limited. A spark can twiddle the brightness and colour temp dials during takes to simulate changing images on the TV screen.
There are many manufacturers producing panels in 1’x1′ and other sizes, but LitePanels are the best ones I’ve encountered. However, I’ve yet to come across any LED unit with a good enough CRI to use as a key light.
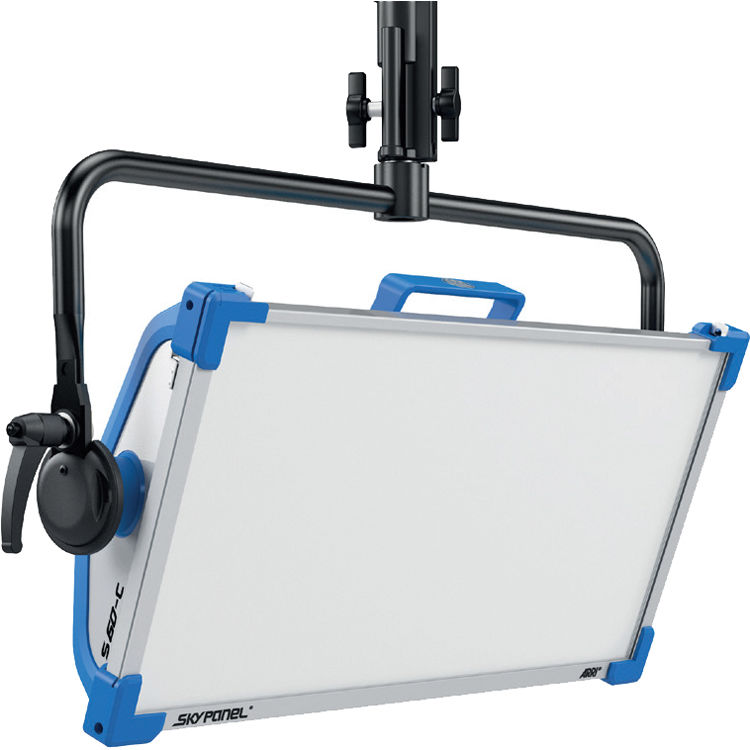
Under the black bag is an LP-1×1 LitePanel to keep some consistency to the light on the actors as the car moves, in this scene from The Gong Fu Connection.Arri SkyPanel S60-C, the 60cm colour-tuneable model
A range I haven’t used is the Arri SkyPanels. Designed primarily to be rigged overhead from studio grids, they come in 30, 60 and 120cm lengths. The coolest thing about these units is that you don’t need to gel them; just punch in the Lee or Rosco code of the gel you want to use, and the light instantly changes colour!
Rosco Lite Pads go for a slightly different approach. The LEDs are arranged around the edges of these panels, and bounce off the white backing to produce a soft daylight source. They’re not very bright, and again the CRI is not great, but the range of shapes and sizes they come in mean that you can find one to fit most tricky spaces.
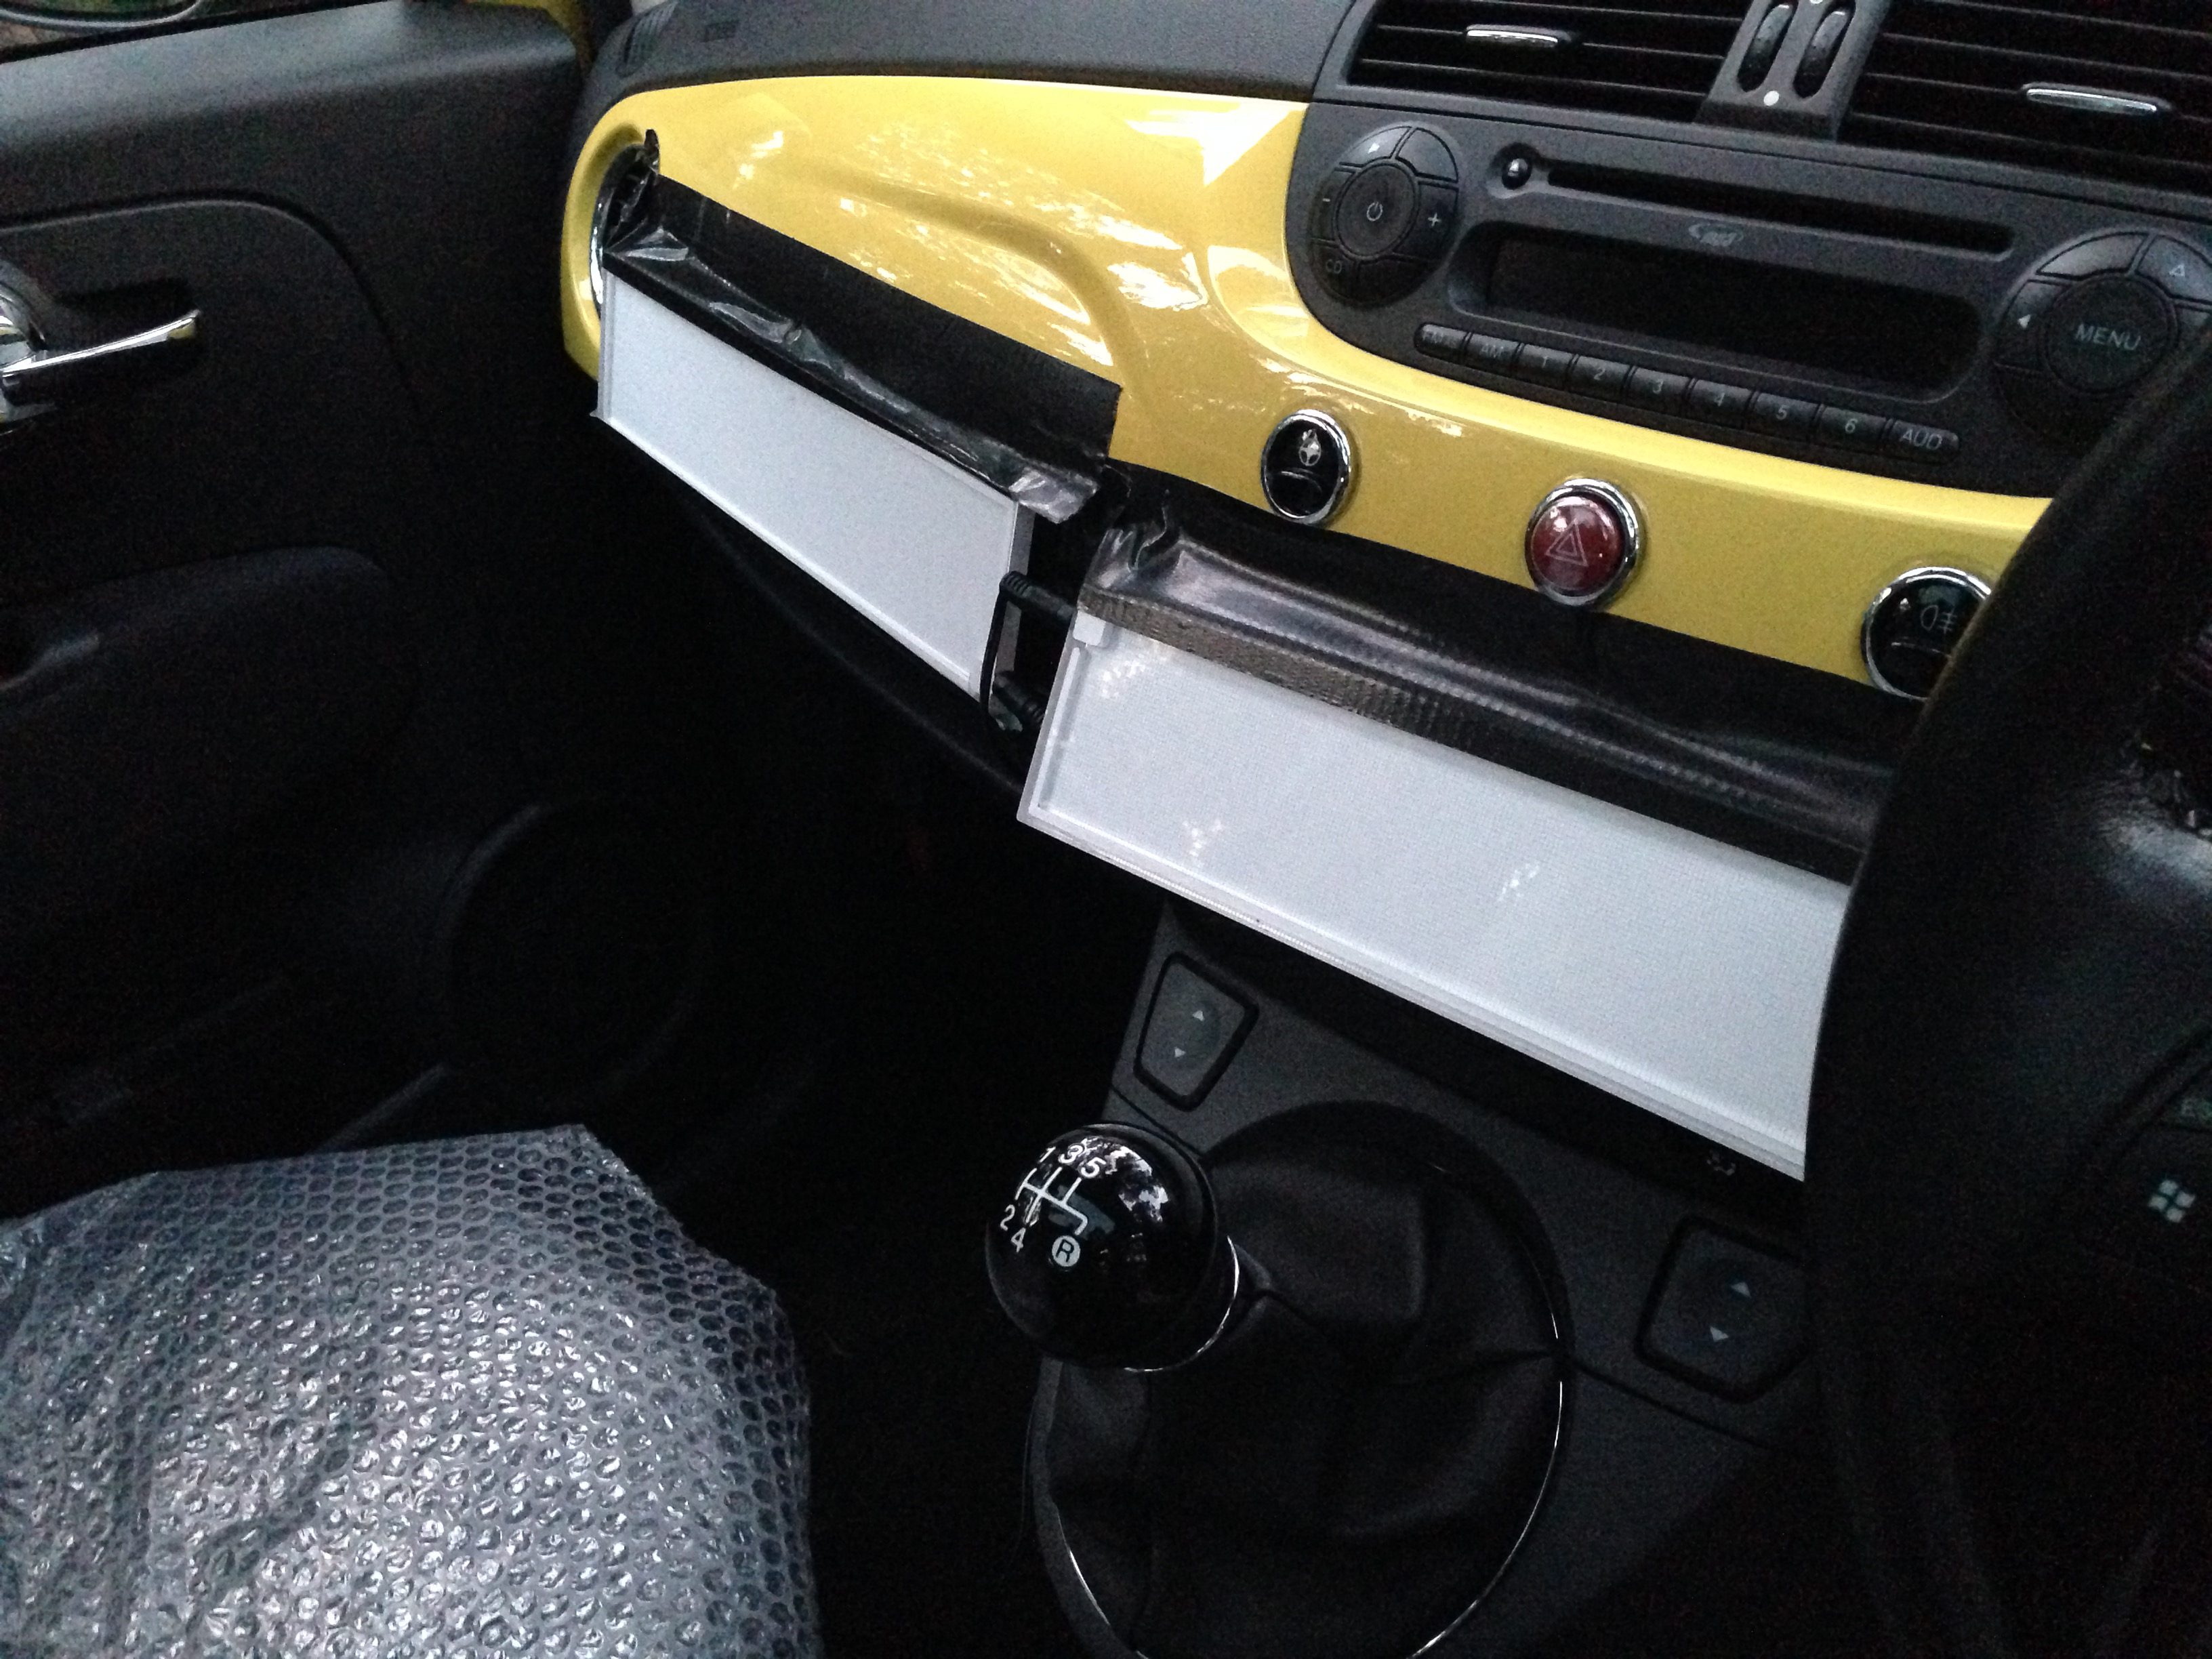
Two 3″x12″ Rosco LitePads taped to the dashboard of the picture car in Above the Clouds
I used these a lot on Above the Clouds (check out the blog posts) in many different situations. Two 3″x12″ Lite Pads saw extensive use as fill/eye light, taped to the dashboard of a Fiat 500 in driving scenes. The other standard sizes are 3″x6″, 6″x6″, 6″x12″, 12″x12″ and 3″ circular. The panels themselves are stripped down, so batteries and dimmers can be sited remotely.
Rosco also makes LitePad Vectors, which are more like other brands of LED panel, with on-board dimmers and increased light output, and they can even make custom LitePads.
Arri L7-C LED fresnel
Fresnels
Several companies make small fresnels which at first glance appear to be HMIs, but are in fact LEDs. LitePanels make the Sola 6C and Sola ENG, equivalent to 200 and 100W HMIs respectively. Arri makes the L5, L7 and L10 units, which are each available in three models with differing brightness and colour-tuneability characteristics. The brightest L10 models are comparable with a 2K tungsten fresnel, while drawing a fifth of the power.
There are budget models out there too, such as the NiceFoto CE-1500Ws, which I used a little on Ren: The Girl with the Mark. As with all budget LED and fluorescent lights, the CRI is very poor, but it was useful when we lacked enough traditional fixtures.
Overall, LED fresnels are currently most relevant in scenarios where power is very limited, or portability and lack of heat is particularly important – in a nutshell, electronic news-gathering (ENG).
Ribbons
One of the most exciting things about LEDs is that because the individual diodes are so small, they don’t necessarily have to be housed in a fixture of any kind. LiteGear, for example, supplies LiteRibbons, which are strips of LEDs “mounted to a white backing material that is flexible, cuttable and adhesive backed”. The possibilities for these ribbons are pretty much endless. Here are some examples:
The Enterprise bridge set featured in the last three Star Trek movies has all its control panels lit by LiteRibbons.
Mad Max: Fury Road, and many other movies with driving scenes, had strips of LEDs mounted to the ceiling, window frames and pillars of the truck cab to increase the exposure inside.
The mini reactor that powers Iron Man’s suit is illuminated by LiteRibbon LEDs.
Conclusion
Some predict that, as LEDs get brighter, cheaper and higher in CRI, they will eventually replace every other kind of lighting. For now though, they’re just another part of the toolkit in which tungsten and HMIs, and to a lesser extent fluorescents, are the go-to tools.
There is a fifth type of lighting that is emerging too: plasma lighting, but it’s so new and so rare at the moment that I don’t feel equipped to write a post about it yet. But you can read about it over on Shane Hurlbut’s blog.
Another great blog to teach you about the many lights out there is Set Lighting, written by experienced Hollywood gaffer Martijn Veltman. His site was really useful when I was researching this series.
Of course, the most important thing is not what lights you have, but how you use them. There are many, many posts here on neiloseman.com to teach you about that. Check out the Lighting Techniques series for some basics, watch my Lensing Ren video series to see how all four types of lighting are used in practice on a real shoot, or simply search the tag ‘lighting’ for a wealth of material.
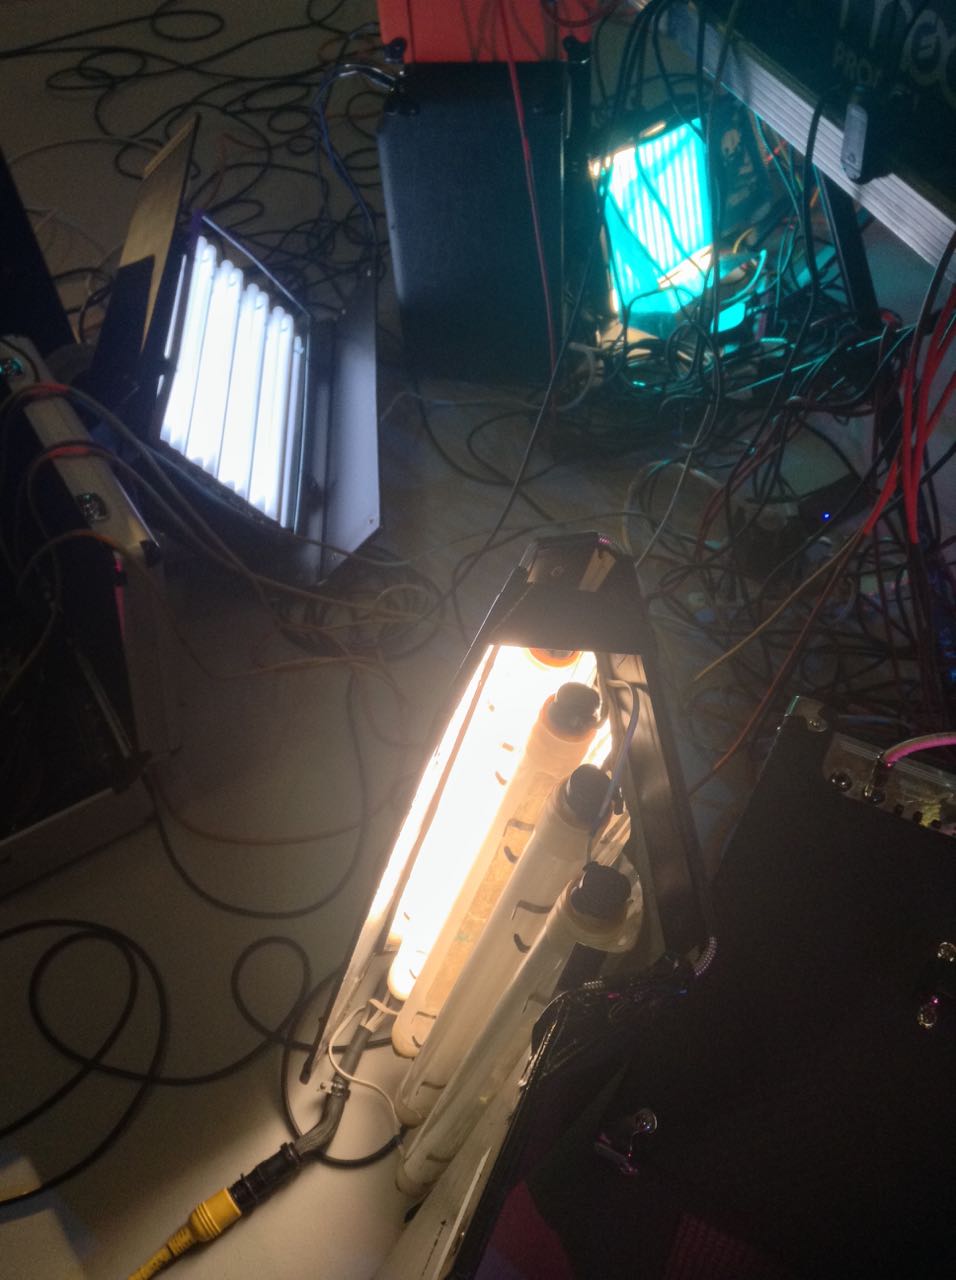
Unusually being used as practicals, in a music promo, are a 2’x4 Kino Flo (foreground, with 3200K tubes) and a Kino Flo Diva-Lite (top left, with 5500K tubes).
Tungsten and/or HMI lamps are usually the workhorse units of a lighting package, providing the power that is needed to key-light all but the smallest of set-ups. But they’re not right for every situation. If you don’t need the punch of a point source, and you want something a little softer, fluorescents might be the answer.
This is the third category of lighting units I’m covering in my Know Your Lights series; back up to the overview if you want to start from the beginning.
Fluorescent units use very similar technology to HMIs, with electrodes exciting a gas so that it gives off UV light. The phosphor coating on the tube absorbs the UV light and fluoresces, i.e. re-emits the light in the visible spectrum. Like HMIs, fluorescent units require a ballast to regulate the current.
One of the most notable early uses of fluorescents was in Robocop (1987). Jost Vocano, ASC chose the fixtures because the long, thin reflections looked great on Robocop’s suit. The flip side of that coin is that under certain circumstances fluorescents can make actors’ skin unpleasantly shiny. There was a scene in Ren: The Girl with the Mark where the poor make-up artist had to cake layers of powder onto Sophie Skelton to combat the shine of a Kino Flo I had set up.
Robocop (1987, dir. Paul Verhoeven) – note the fluorescent strips reflected in the suit.
One way I often use fluorescents is as a “Window Wrap”, a soft source that augments a hard HMI coming in through a window to wrap the light more pleasingly around the talent’s face. Or I’ll place a fluorescent outside the room, to represent or enhance indirect daylight spilling through a doorway.
Being soft sources, the light rays which fluorescents emit spread out widely, meaning the intensity drops off quickly as you move away from the lamp. (We refer to this as “throw”: fluorescents have little throw, whereas spotlights have a lot of throw.) For this reason they start to become pretty ineffective once you get more than about 6ft away from them, depending on the model.
Kino Flo is far and away the most common brand of fluorescent lighting used in the film and TV industry today, so apologies if the rest of this post reads a little like an advert for them. They’re not paying me, honestly!
The company was started by gaffer Frieder Hochheim and best boy Gary Swink after inventing the units for the 1987 comedy-drama Barfly (DP: Robby Müller, BVK). They required a fixture small enough to tuck into little alcoves in a bar location, without getting hot and causing damage.
Kino Flos come in two different kinds:
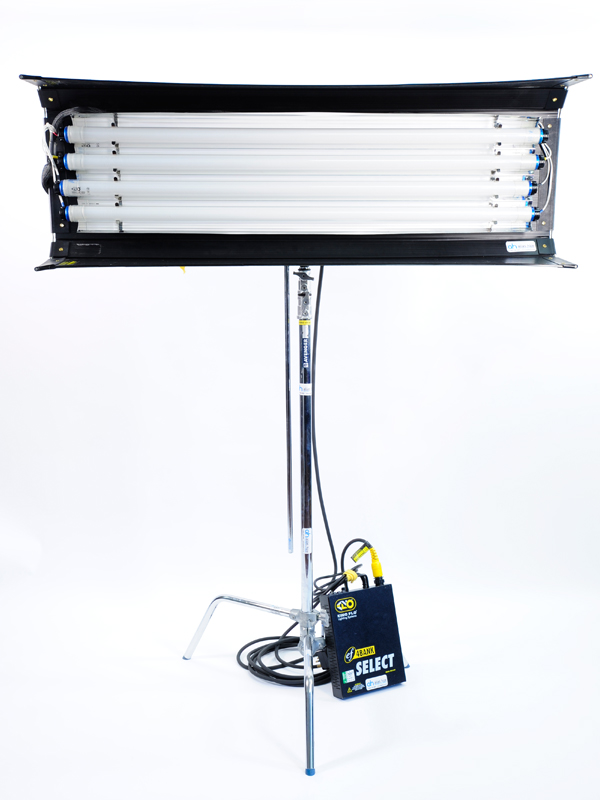
4’x4 Kino Flo with remote ballast leaning against the base of the C-stand4-bank Kino Flo ballast
Remote Ballast
With these units, the lighting fixture is separate to the ballast, and they are connected by a header cable, just like HMIs. Remote units are usually referred to by two numbers, the first representing the length of the tubes in feet, and the second representing the number of tubes. So a unit with two tubes, four feet in length, is called a “4ft 2-bank”, often written as: 4’x2 (pronounced “four by two”).
The most common units are 2’x4 (a.k.a. “fat boy”), 4’x4 and 4’x2, but others are available, including “Single Flo” units and 6ft/8ft “Mega” units.
The ballasts allow you to turn individual tubes on and off as required, and also feature a switch marked either Hi/Lo or 4ft/2ft, which reduces the light output by adjusting the current waveform.
Kino Flo Tegra. You can see the integrated ballast on the back.
Built-in Ballast
As you might expected, these models combine the fixture and ballast into a single unit. They are designed primarily for interview/ENG applications where it is more convenient to have everything in one. On drama productions it is generally preferable to have a remote fixture, which will be lighter, and a header cable running to an easily accessible ballast.
One advantage of built-in models over their remote cousins is that they are smoothly dimmable down to 5%.
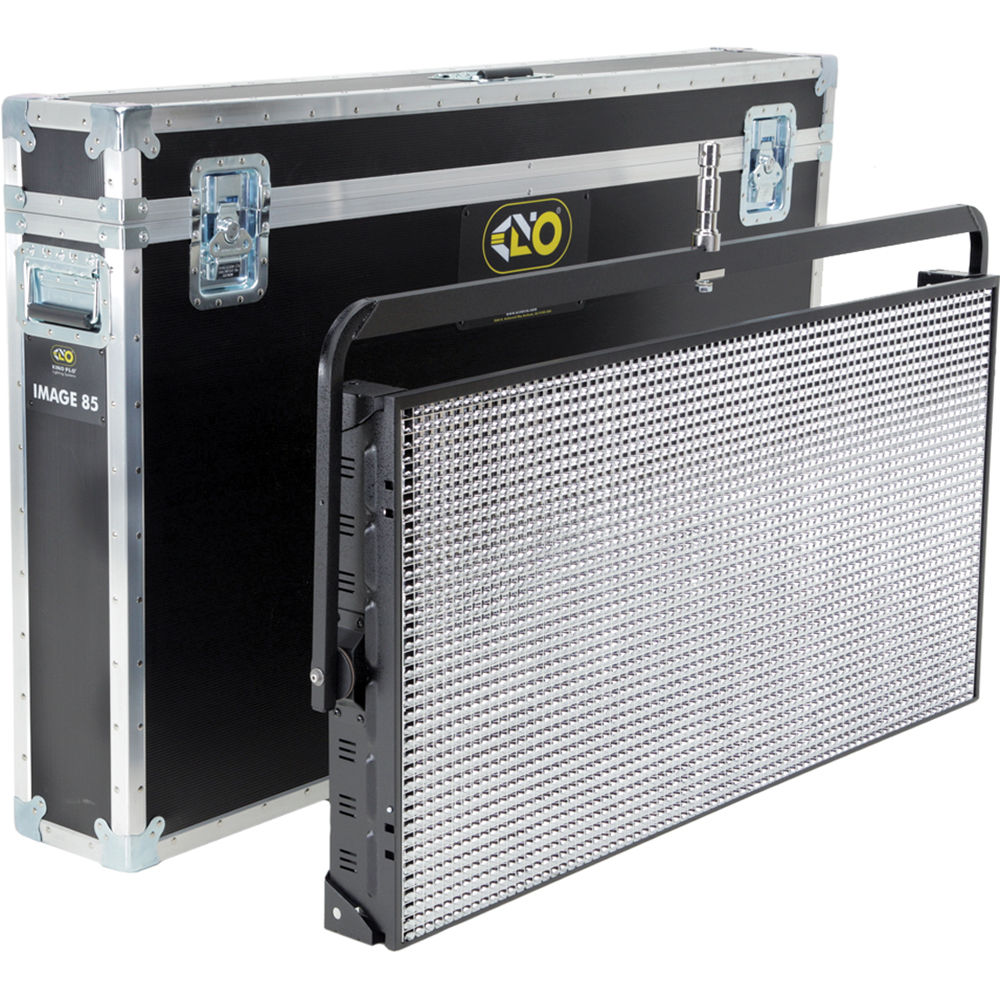
Built-in units are known by names rather than numbers: “Diva-Lite” (2’x4), “Tegra” (4’x4) and “BarFly”, which resembles a swollen 1’x1′ LED panel. There is also the large “Image 87”, a 4’x8 fixture with a built-in ballast. It’s great for lighting green and blue screens because it puts out so much soft light.
Kino Flo Image 87 with a silver egg crate fittedTop to bottom: 2900K, 3200K and 5500K tubes
Kino Flo tubes are available in five colours:
KF55 – 5500K – i.e. daylight – identified by blue end caps on the tubes
KF32 – 3200K – standard tungsten – gold end caps
KF29 – 2900K – warm tungsten – red end caps
420nm blue – an extra-saturated blue for lighting blue screens
525nm green – for lighting green screens
Kino Flos often come with plastic grids known as “egg crates” or “louvres”. Their purpose is to make the light more directional, effectively polarising it on a macro scale. They come in black, silver and “honeycomb” varieties, the latter available in 45º, 60º and 90º angles so you can choose how directional the light becomes – and, as a side effect, how much intensity you lose.
It is possible to remove the tubes and wiring from a Kino Flo housing so that the lamps can be squeezed into a tight space. For example, on The Little Mermaid we needed to see a soft blue glow emanating from a small translucent compartment in an organ. Best boy “Captain” Dan Xeller removed a 2ft Kino tube from its housing and placed it inside the compartment, running the wires out the back to the ballast.
Pampa Light in action behind the scenes of Ren: The Girl with the Mark. You can see I’ve gelled it with Quarter Minus Green in an attempt to correct the CRI.
Other than Kino Flo, another brand of fluorescent lights you may come across is Pampa Lights. They come in rugged boxes which can be interlinked to create larger banks of illumination. Unfortunately, in my experience the CRI (see overview) is not good, and they are best avoided.
The same goes even more so for the many fluorescent softbox kits available on Ebay from Hong Kong sellers. Not only are they flimsy in construction and questionable in terms of electrical safety, but the CRI of the lamps is very, very poor. If you need a cheap soft source, you would be much better off bouncing a halogen work light off a white card.
Indeed, firing an incandescent source into a bounce board will give you a better quality of light than even a Kino Flo. But a fluorescent fixture won’t make the room unbearably warm, it can emit daylight-balanced light, and it’s quicker to set up than a bounce board and the attendant flags. In a nutshell, it’s more convenient.
Next week, the Know Your Lights series concludes with a look at the fast-evolving world of LED illumination.
Following on from last week’s look at tungsten units, today we focus on HMI lighting. HMIs are more complex technology than tungsten, meaning they are far more expensive, and more prone to problems, particularly if you get a deal from a hire company and they give you older units. But they are bright and relatively efficient and because of this, and their colour temperature of 5,600K, they are by far the most popular type of light used in today’s film and TV industry when battling or mixing with natural daylight.
HMIs (hydragyrum medium-arc iodide) operate by creating an arc between two electrodes. This arc excites a gas which produces the light. In order to ignite the arc, a ballast is required. This device also regulates the current, while a special header cable connects the ballast to the light.
Arri electronic ballast for 2.5K and 4K HMIs
Ballasts come in two types: electronic and magnetic. Magnetic ballasts are cheaper, but if you are shooting at a shutter interval out of sync with the cycling of your power supply – e.g. 1/48th of a second with a 50Hz UK power supply – the HMI will appear to flicker on camera. Electronic ballasts have a ‘flicker free mode’ which converts the sine wave of the power supply into a square wave so that the arc does not extinguish at any point in the cycle. A side effect of this is that the head and/or ballast can produce humming, buzzing or squealing noises. Therefore many electronic ballasts have a ‘silent mode’ which reduces the noise but only prevents flicker at standard frame rates, not for high-speed work. In practice, flicker is rarely a problem as the shutter angles of today’s digital cameras can easily be tweaked to deal with it at common frame rates.
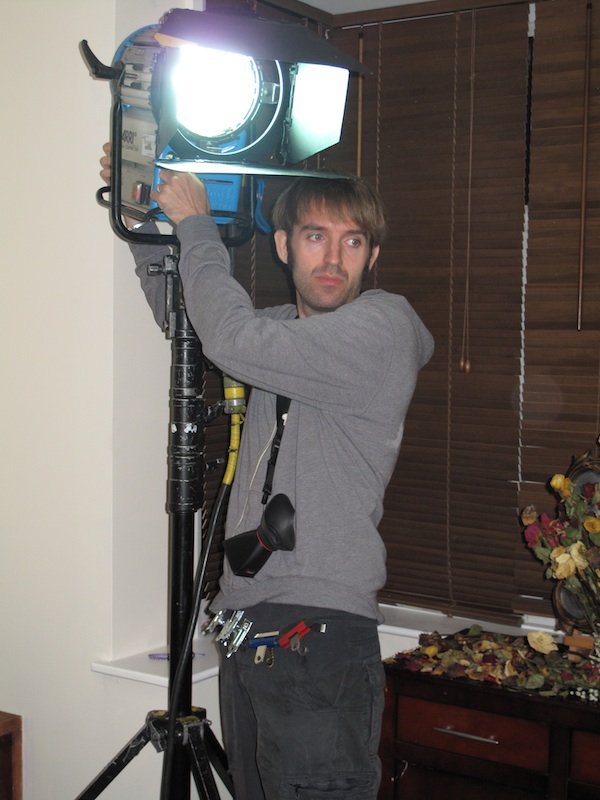
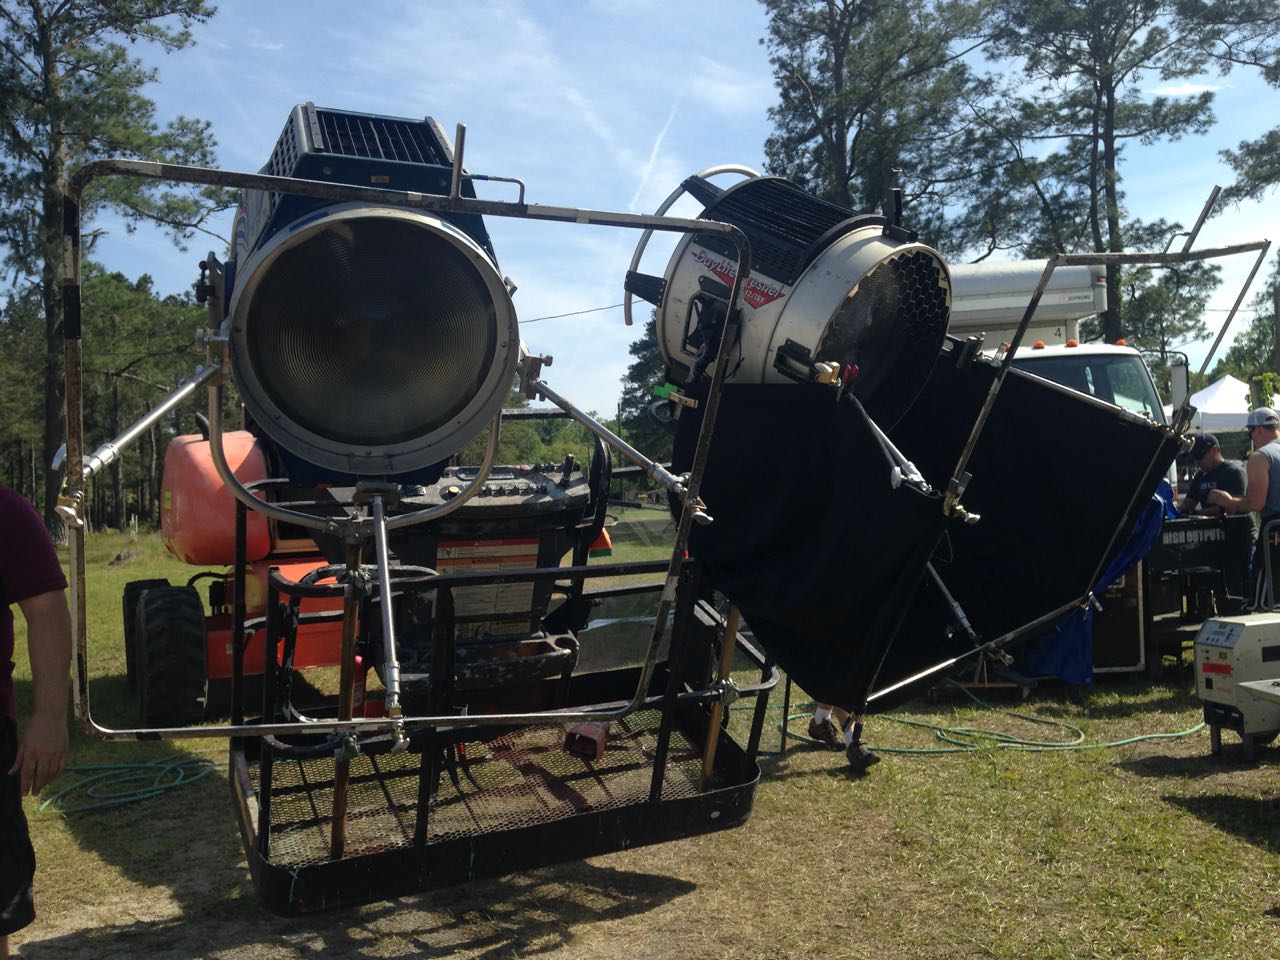
Adjusting an Arri Daylight Compact 1.2K HMI fresnel
Like tungsten units, HMIs are available in open face, par and fresnel varieties, though the open face models are not very common. Arri, the major manufacturers of HMIs, call their daylight par fixtures ‘Arrisun’. Other HMI brands include Film Gear, Silver Bullet and K5600, which makes Jokers (see below).
Measured by their wattage, standard HMIs sizes are: 200W, 575W, 1.2K, 2.5K, 4K, 6K, 12K, 18K.
The smaller models, up to 2.5K, are fairly common on no-budget sets, because they can run off a domestic power supply and so don’t require a generator. At the other end of the scale, 18Ks are standard for daylight exterior and interior work on medium budgets and above.
Because of their power, HMIs often play a key part in night exterior lighting too. A 12K or 18K on a condor crane may be used to simulate the moon, while other HMI units, perhaps bounced or coming through a frame, might serve as sidelight or fill. By choosing to shoot at 3,200K, you automatically turn these HMI sources blue, often a desirable look for nighttime work.
Two 18K Silver Bullet HMI fresnels rigged to a condor crane to provide moonlight for a night exterior on The Little Mermaid
There are many variants on the standard HMIs. Here are some of the more common ones.
Arrilux 125W Pocket Par
Pocket pars are little 125W daylight pars that can be run off batteries. Before the days of LED panels, I used one of these for eye-light on a short film set in a forest in daylight. They can also make a good TV gag when bounced off a wobbling silver reflector.
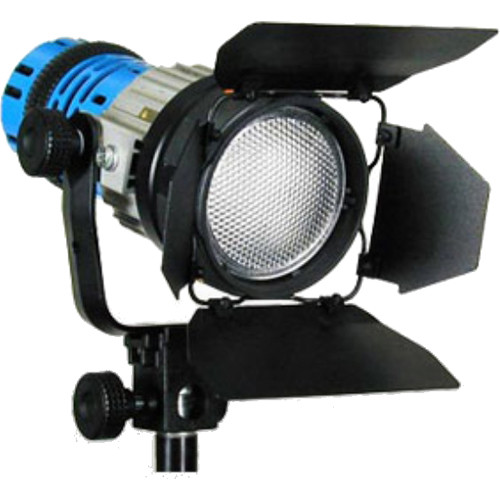
K5600 Joker Bug 800W
Jokers are small units that come in 400W and 800W models. They can be reconfigured in various ways and even slotted into Source 4 housings (see last week’s tungsten post) to convert these units to daylight. We used a 400W joker a couple of times on Heretiks, when there was little space to rig in but we needed a fair bit of punch – like daylight through a small window.
Arrimax M18
The Arrimax range uses a hybrid of par and fresnel technology. They are lighter and more efficient than standard HMIs – the 800W model puts out almost as much light as an ordinary 1.2K, for example – but they’re more expensive to hire and don’t create the nice shafts of light that some DPs like (ahem). The model numbers are the wattage in tenths of a kilowatt: M8 (800W), M18 (1.8K), M40 (4K), M90 (9K) and the anomalously-named Arrimax 18/12 which accepts both 12K and 18K bubbles.
Airstar helium balloons in action
Helium Balloons are designed to provide a soft overhead illumination for night exteriors or high-ceilinged interiors. They come in a range of shapes and sizes, and aren’t necessarily HMIs; they can be fitted with tungsten lamps, or a combination of both.
Again, please let me know on Facebook or Twitter if I’ve missed out any of your favourite units. Next week: fluorescents.
Season one of Ren: The Girl with the Mark has come to an end, and to ease the pain a little, here’s one last video breakdown of the show’s cinematography. This week I talk about the exterior scenes from daylight through sunset to night.
Here is the lighting plan for the final scene:
Check out the article I wrote during the shoot about the sunset scene if you’re still hungry for details. And here is an unpublished blog post I wrote during the shoot about the village night exteriors…
The 2.5K HMI backlight. The dimmer board for the Cyclotron can be seen in the lower right.
The last two days of principal photography on Ren were actually night shoots. It was great to take the village set that I’d shot in natural light for five weeks and chuck some of my own light at it.
In his American Cinematographer interview about The Monuments Men (February 2014), Phedon Papamichael said, “My big night-exterior lighting setups usually have one source” – often a backlight, judging by the examples given in the article – “and then I use whatever practicals are in the shot.” My approach is much the same, though a big source for me is a 2.5K HMI, not an Arri T12, sadly!
One of the Urban Sodium-gelled 800W Arrilites beefing up the braziers
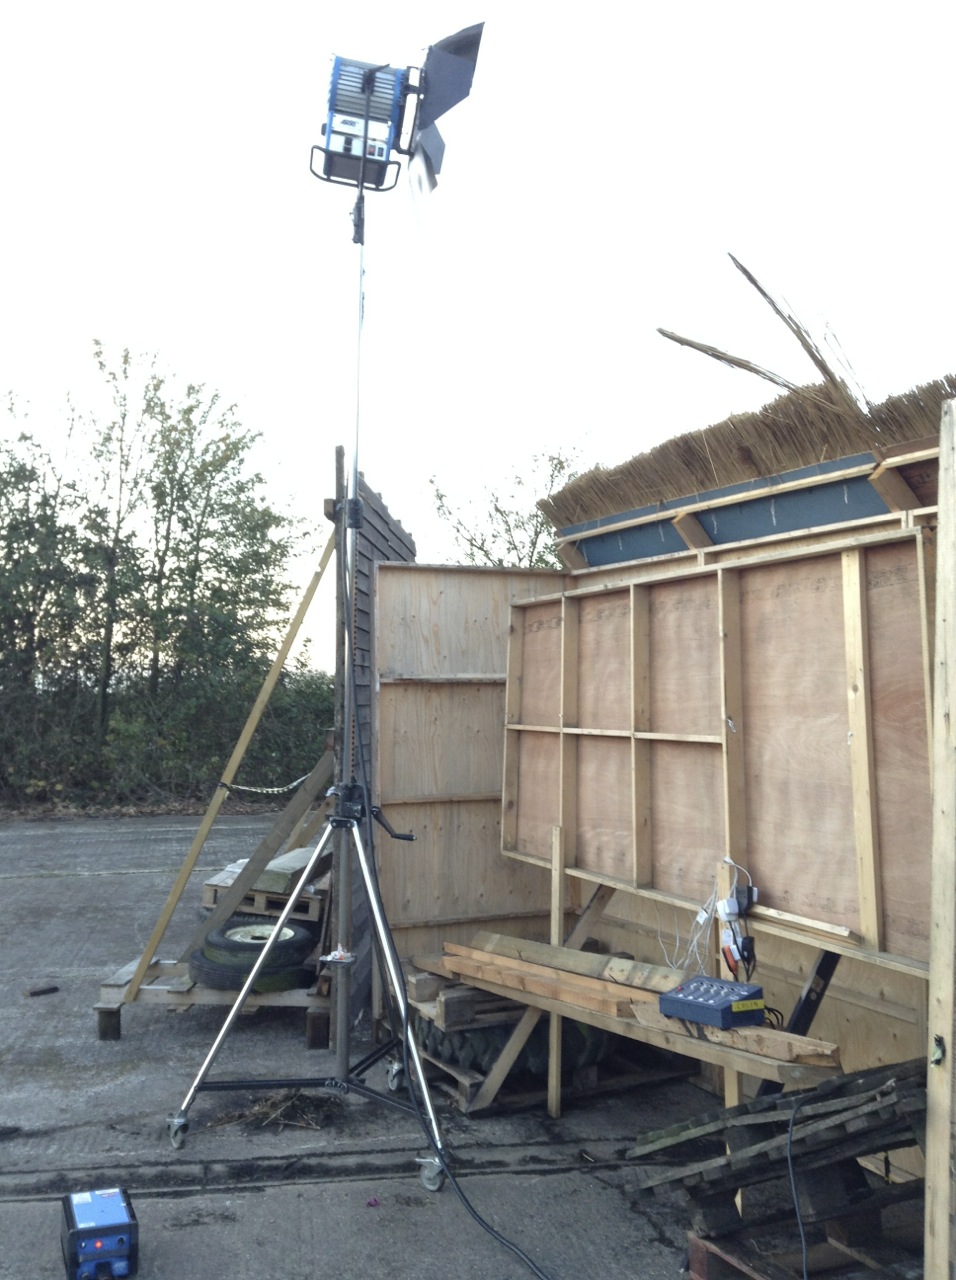
I knew our key shot was going to be Ren’s POV looking up the street to the Kah’Nath Master flanked by several archers, with Karn and Baynon in the background. I set up my 2.5K dead in the back of the shot, its stand hidden by the furthest house facade.
One of the Urban Sodium-gelled 800W Arrilites beefing up the braziers
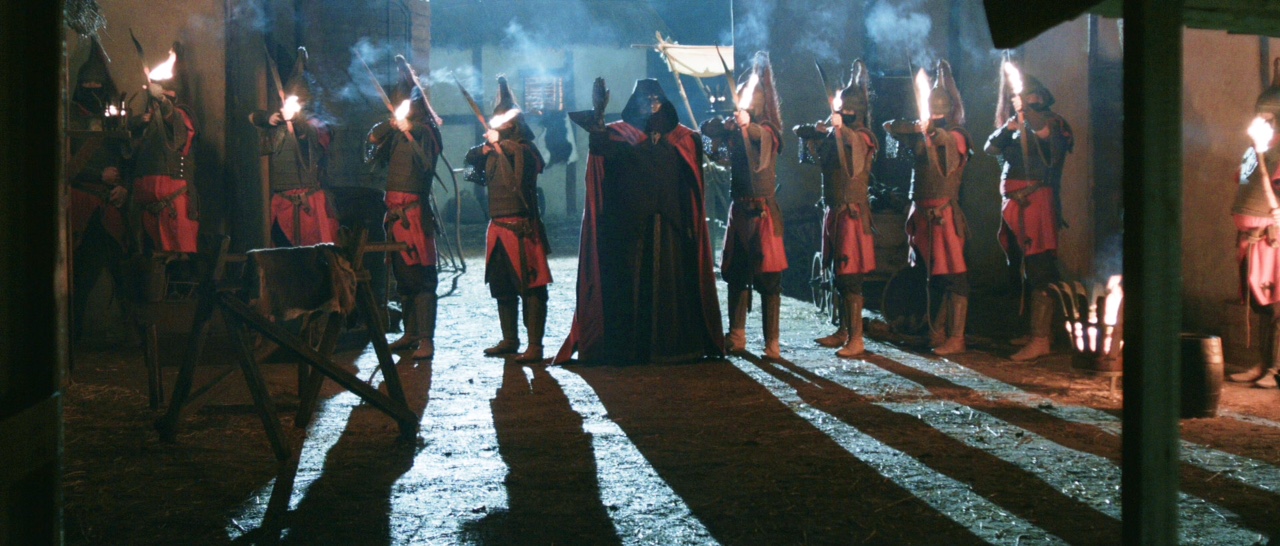
The plan was for the archers to light their arrows from two braziers, one either side of the street, so Chris Dane and Amanda Stekly dressed these in accordingly. I set up an Arrilite 800 near each one, choosing Urban Sodium gel to give the “firelight” a grungy colour appropriate to the bad guys. (I was shooting on a tungsten white balance to turn the HMI moonlight blue.)
The dimmers controlling the Arrilites
Chris – by this time well-attuned to my lighting needs – also rigged a third brazier to act as the key light for himself (Karn) and James Malpas (Baynon), towards the back of the set. The Arrilite for this one I gelled with full CTO for a yellower, friendlier colour.
All three Arrilites were run through in-line dimmers, and various bystanders were co-opted to flicker them throughout the evening.
The Cyclotron
I rigged a Cyclotron behind the window of the background house – four 100W bulbs under a sheet of CTO, wired to Colin’s dimmer board so they too could be flickered, suggesting firelight inside the house.
The Celotex bounce board
I figured that the front of this house would still be very dark, being out of range of the Arrilites and facing away from the HMI, so I had gaffer Richard Roberts rig a Celotex board to bounce some of the HMI light back onto it. As it turned out, when it got dark and we fired everything up, there was lots of bounce off the set pieces closest to the HMI anyway. This was a nice bonus that gave us more options when blocking Karn and Baynon’s actions, without having to set up extra lamps.
A sunset view of the lighting set-up from roughly the master camera position. The LED panel on the left was used only as a work light.
When the braziers were lit and the Master and soldiers strode onto the set in their awesome costumes (courtesy of Miriam Spring Davies and stand-in wardrobe supervisor Claire Finn), we all felt we had a truly epic sequence in the can.
If you’ve missed any of Lensing Ren or Ren itself, here’s a playlist featuring every episode of the fantasy series, interspersed with the corresponding cinematography breakdowns:
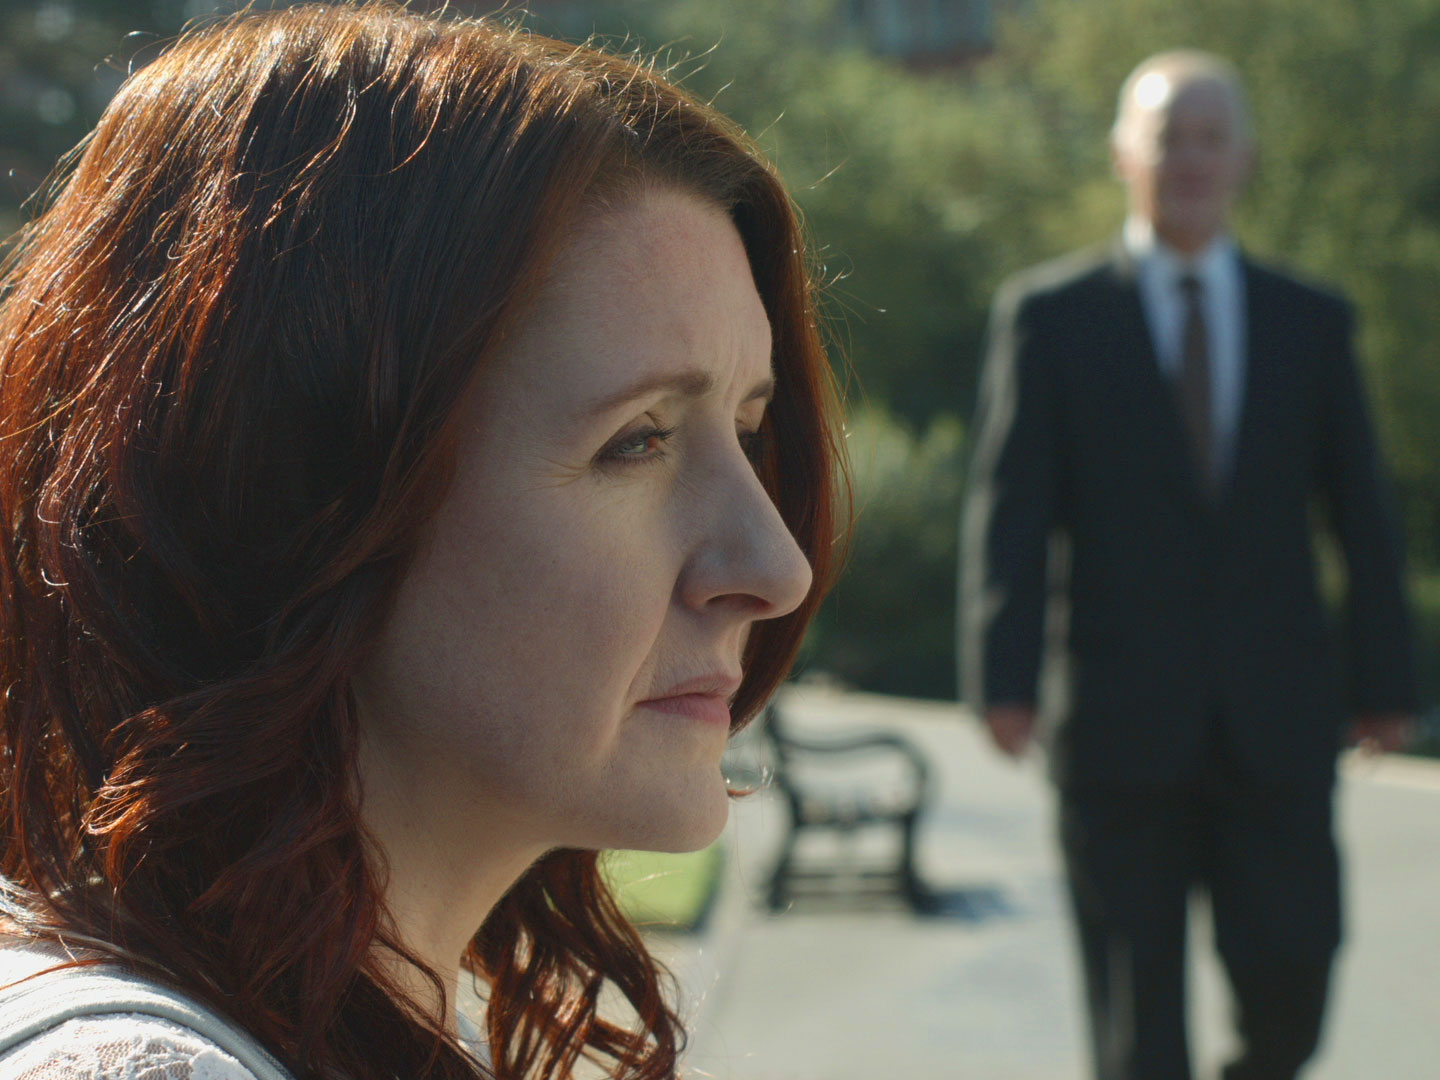
Michelle Darkin Price and Phil Molloy in Crossing Paths (C) 2015 B Squared Productions
The sun is an awesome light source, but you’re not alone as a DP if you sometimes feel it’s the enemy. Shooting Ben Bloore’s Crossing Paths at the weekend, I was very lucky to be met with a perfect blue sky, but even so there was work to do in maintaining and sculpting the light.
The first step on the road to succesfully photographing day exterior scenes is choosing the right location. Crossing Paths is mostly about two characters sitting on a park bench. It needed to look serene and beautiful – which means backlight.
The initial location had an east-facing bench, so I asked for the scene to be scheduled in the evening. That way the characters would be backlit by the sun as it set in the west.
Hard reflector
The location was later changed to Belper River Gardens (where, three years earlier, I had shot scenes from Stop/Eject). The new bench faced west, which meant shooting in the morning so it would be backlit from the east.
In a rare instance of nature co-operating, the sun blazed out over the trees at about 8am and perfectly backlit the actors as we set up for the master shot. I used an 8’x4′ poly to bounce the light back and fill in their faces.
As we moved into the coverage, a very tall tree started to block some of the sunlight. This was where our hard reflector came in. This is a 3’x3′ silver board mounted in a yoke so that it can easily be panned and tilted.
Col set up this reflector in a patch of sunlight, ricocheting it onto the back of the actors’ heads, maintaining the look of the master shot.
Col adjust the hard reflector to backlight the talent.
Later one of the characters stands up and looks down on the bench. We needed to shoot his CU for this moment without him squinting into the sun, and without harsh shadows on his face. Cue the next tool in our sun control arsenal: the silk. Stretched across a 6’x6′ butterfly frame, the silk acted like a cloud and softened the sunlight passing through it.
Col and production assistant Andrew position the silk.The silk in action on Phil. (C) 2015 B Squared Productions
You need to think carefully about what order to do your coverage in with natural light, particularly if the day is as sunny as this one was. I asked to leave the shots looking south last, so that the sun would have moved round to backlight this angle.
This south-facing shot was left until around midday in order to have it backlit. (C) 2015 B Squared Productions
What if it had been an overcast day? Well, it wouldn’t have looked as good, but we were tooled up for that eventuality too. We had an ArriMax M18 which could have backlit the actors in all but the widest shots (for which we would have had to wait for a break in the clouds) and a 4’x4′ floppy for negative fill if the light was too flat. More on those some other time.
Related posts: Lighting ‘3 Blind Mice’ – using positive and negative fill and artificial backlight for day exterior scenes Sun Paths – choosing the right locations for The Gong Fu Conection Moulding Natural Light – shooting towards the sun and modifying sunlight