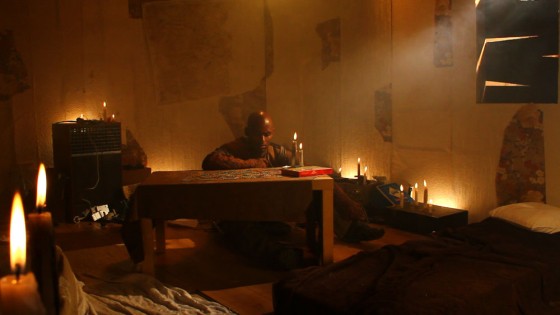
Here’s a look at the first day of shooting on my short film Stop/Eject, featuring the debut of the alcove set.
production
Stop/Eject Lighting Breakdown #4: Basement
As regular readers will know, I spent some time in pre-production planning the lighting of Stop/Eject‘s basement scenes – filmed at Strutt’s North Mill in Belper – even going so far as to mock up some previz images in Photoshop. Click here to read the post and see those images.
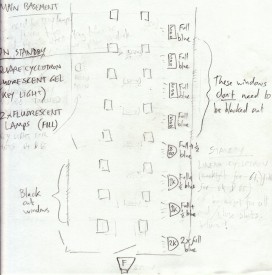
However, the best-laid plans of mice and men gang aft agley, and they ganged a bit agley in this case.
My lighting plan followed the concept I outlined in that pre-production blog post, which was to put lamps in between all the pillars on one side of the basement, representing daylight from unseen windows. Col and the runners duly set these up on the day, gelling them successively bluer along the length of the room, to enhance the feeling of depth.
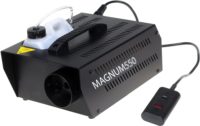
However, none of the staff at the location were able to disable the fire alarm, which sadly meant we couldn’t use the smoke machine. So no cinematic shafts of light, and a blow to my second method of showcasing the fantastic depth of the location. (Possibly if we had warned them in advance about the smoke they could have found out how to disable the alarm. Oh well, lesson learnt.)
The third way I wanted to create depth was by turning off alternating fluorescent tubes on the ceiling, so that every other pillar would be in darkness. In the final analysis it seemed pointless to do this, as many of the tubes were on the blink anyway and so there were already plenty of shadows. One of the tubes kept flickering, which was a nice little touch.
I went with a tungsten white balance, which gave the greenest look to the fluorescent tubes. (On a side note, I find my 20mm Sigma registers this green spike much more than my other lenses.) Since the “daylight” was blue, I had created a colour scheme that had no contrast at all, being all cool. This despite all my previz and planning. Yes, I am an idiot.
Looking at the rushes again now, I see that despite using the Sigma lens, the fluorescent light has come out quite yellow, so there is a bit of colour contrast after all. Dumb luck: 1, Neil’s skill: 0.
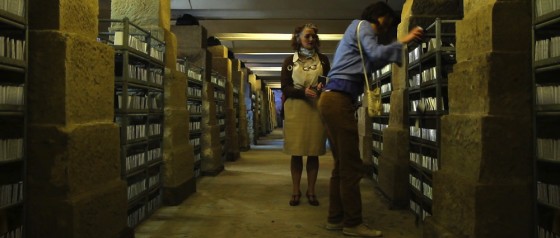
It will be fine when it’s graded, but it could have been so much better if only we could have used smoke.
Next up was a tracking-two shot over the shelves. I chose to shoot this from the opposite side of the basement to the “daylight” lamps, so that they would backlight the talent rather than giving us flat, boring front-light. We cheated the positions of two of these lamps massively so that they would both hit Kate (Georgina Sherrington) and Alice (Therese Collins) without being in shot.
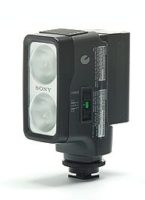
Some front-light was required, because the overhead tubes weren’t lighting the ladies sufficiently or giving a very flattering look. So we rigged a fluorescent studio light over the camera. This isn’t generally a good place to put a lamp, but when you’ve got some good backlight going on you can get away with some flatness elsewhere. Ironically, this fluroescent lamp – which had a daylight-balanced bulb – needed fluorescent gel on it to get the green look I wanted, to suggest the light was coming from the overhead tubes.
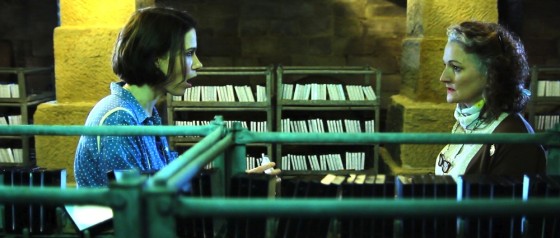
The basement was one of the few scenes in Stop/Eject in which moody close-ups with dark, unfilled shadows were justified.
One of the blue-gelled 800W Arrilites which had served as backlight in the two-shot now acted as Alice’s key. The edge-light on her hair comes from one of the overhead tubes.
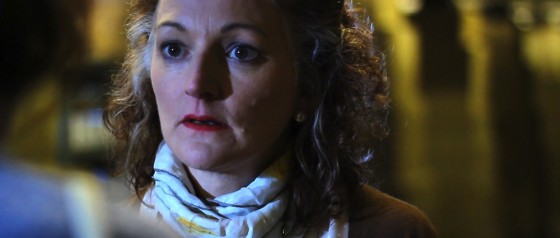
Another of those backlights became a key for Kate’s close-up. The yellowish fill is from the overhead tubes, while backlight is from another blue-gelled Arrilite positioned in a way that bore no resemblance to any previous lighting. (When you’re pushed for time as a DP, you often have to chose between making it look good or maintaining lighting continuity.)
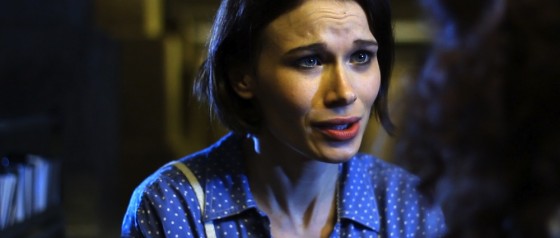
Incidentally, the trio of shots we’ve just covered – the two-shot and the corresponding singles – conform roughly to a lighting template I call “cross-backlighting”. This model consists of two backlights in the two-shot, one out of each side of frame, one of which immediately becomes a key for each close-up. There’s more info on cross-backlighting in The Ten Minute Lighting Masterclass, one of the bonus features you get when you rent the deluxe package of Going to Hell: The Making of Soul Searcher.
That brings the Stop/Eject lighting breakdown to a close. I hope you’ve found it useful. I’m more than happy to answer any lighting questions here in the comments or on the Stop/Eject Facebook page.
The next public reward is Sophie’s great little podcast about the first day of the shoot, which will go online when we reach £400, so be sure to visit stopejectmovie.com and help us get there. Thanks everyone!
Stop/Eject Lighting Breakdown #3: Bedroom
Today I’m taking a look at Stop/Eject‘s three brief scenes in Kate’s bedroom. Each consisted of one shot only, but each required a different look. Here’s my lighting plan:
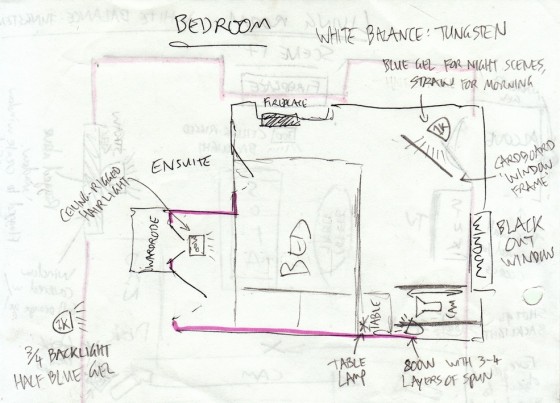
Much of the room, including the window, would never be seen. This allowed me to black it out and place my own fake window exactly where I wanted it.
If you imagine your subject (viewed from above) is at the centre of a clockface and they’re looking towards 12 o’clock, your key light should usually be at around 1:30 or 10:30. That’s enough of an angle to give their face some dimension and shadow, but not so much that you can’t get light into both eyes. That’s a rough rule of thumb, and of course it can vary according to the mood you want to create.
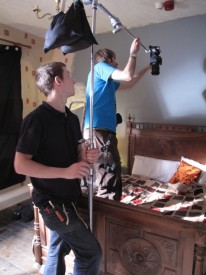
Knowing that Kate (Georgina Sherrington) was going to be facing more or less towards camera, I accordingly chose the corner of the room in the top right of the plan for the key. You can see I’ve drawn in a “cardboard window frame” gobo, but as it turned out there were some fold-up chairs kicking about, one of which threw a very window-like shadow when clamped to a C-stand in front of the 1K.
The first of the three scenes was set at night. Since Kate was exhausted, it was reasonable she would not bother turning on lights or closing the curtains, so the 1K – with blue gel for a moonlight effect – became the one and only light source for the scene.
To get a bird’s eye view of the bed, the camera was clamped to the cantilevered arm of a well-sandbagged C-stand.
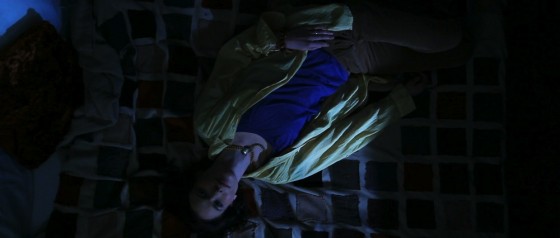
The next scene was the following morning. This was a piece of cake; I just swapped the blue gel on the 1K for orange for that sunrise look.
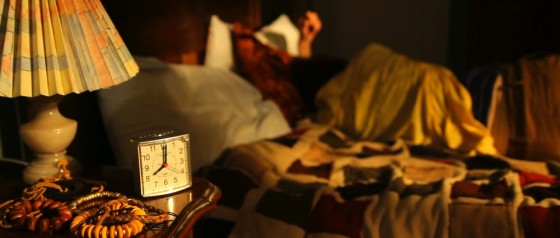
The third and final scene was night again, but this time with other light sources besides the window. Kate’s key was a practical table lamp, reinforced by a 100W clip-light just out of frame.
Col rigged a 300W backlight, or “hair light”, on top of the wardrobe, representing a ceiling light. As it turned out, once the door was opened it flagged this light off Kate. I didn’t mind because her dark hair stood out well against the light background anyway, and the 300W lamp still put a streak of light in the top right corner of the shot, which was a bit of added interest and helped frame the composition.
An Arrilite was set up in the corridor to create depth, and was gelled green to contrast chromatically with Kate’s orange skin tone.
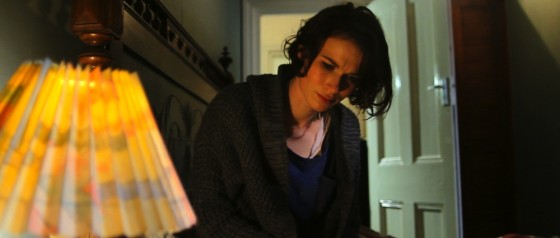
So although brief, one-shot scenes like these might seem restrictive for a director of photography, they’re actually some of the most creative because you can experiment and create a variety of different looks relatively quickly.
If you’ve found this blog useful, please visit stopejectmovie.com and make a contribution, or if you’re not able to do that then share the link with as many people as possible and help spread the word.
And stay tuned for the fourth and final part of this breakdown, in which I’ll look at my least favourite scene (lighting-wise): the basement.
Stop/Eject Lighting Breakdown #2: Living Room
In this second part of my Stop/Eject lighting breakdown, looking at the how, why and what-with of lighting a short film, I’ll focus on the scenes in Kate and Dan’s living room. If you missed part one, check it out first to see what equipment we had with us. You can also read production designer Sophie Black’s blog about decorating and dressing the living room over on her website.
Int. Living Room – Day
Here’s my lighting plan for the main scene in the living room:
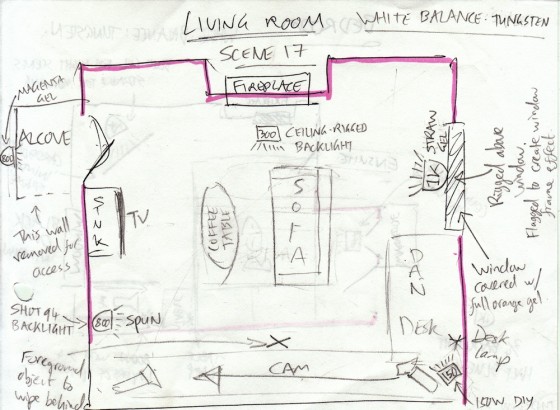
Along the bottom I’ve drawn in the tracks and camera for the master shot. I’m treating the location like a three-walled set, so this bottom wall will never be seen. (The pink highlight was to show Sophie which walls needed painting.)
The wide tracking shot had the potential to be difficult from a lighting stand-point, since it would show almost 270 degrees of the room. Putting the lights behind camera is never a good idea creatively; you end up with a depth-less image that looks like a photo taken with flash. But fortunately the location had a high ceiling, so Col was able to rig lamps overhead.
When you can’t afford to hire HMIs – which emit a 5,600K light, the same colour as sunlight – you have to make a difficult decision on your daytime interiors. You could put blue CTB “daylight” gels on your tungsten lights, but that immediately cuts out half their illumination, and they’re not very bright to start with. Or you could white-balance somewhere in between daylight and tungsten, letting one go slightly blue and the other slightly orange on camera, like I did in the shop.
Or you can cover the windows in CTO gel, tinting the incoming daylight orange to match your tungsten lamps. Typically this is only practical for rooms with small windows – and luckily our living room location was such a room. So once the window was gelled, I knew I could set my camera’s white balance to the tungsten preset (3,200K) and all the light would look white.
As daylight is liable to change – the sun moves across the sky, goes behind clouds – you’ll always want to reinforce it with an artificial light source for consistency. Besides which, I wanted it to look like the sun was out and shining straight in the window, which I clearly couldn’t rely on nature to do for me. Hence the 1KW Arrilite in the lighting plan (labelled simply “1K”), rigged above the window.
In discussions with Sophie and Katie, the costume designer, we had decided to make yellow the colour of happiness in Stop/Eject. So, since this scene is before Dan’s death, I chose to put straw gel on this 1K. In retrospect, this was a bit over the top, given that the walls were already painted yellow.
A 300W work-light was rigged from the ceiling just in front of the fireplace, to provide some backlight.
As in the shop, an 800W Arrilite with magenta gel was placed behind the alcove to represent the wall sconce.
A table lamp was placed on Dan’s desk to brighten up what could otherwise be quite a dark corner.
The other two lamps shown in the plan were ditched as unnecessary for the wide shot.
Finally, a little smoke was added to volumize the “sunlight” and generally diffuse the image.
Here are some frames from the rushes of the wide shot:
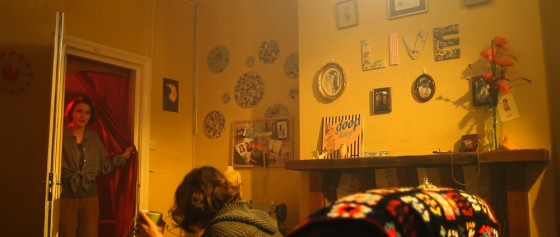
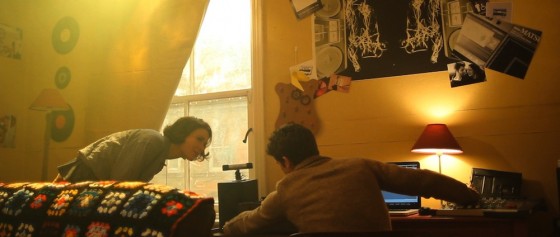
Let’s look at a couple of other camera angles in this scene, and how the lighting set-up had to be tweaked for them.
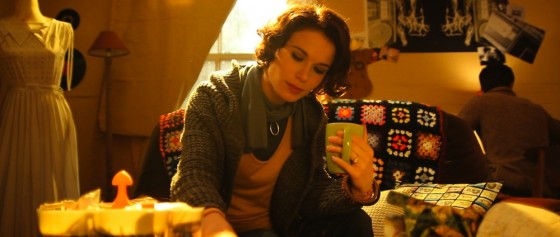
This mid-shot of Kate (Georgina Sherrington) was straightforward. The 1K “sun” provided lovely backlight, while the 300W work-light above the fireplace wraps this around the right side of her face a little. The only addition needed was a reflector next to camera for fill.
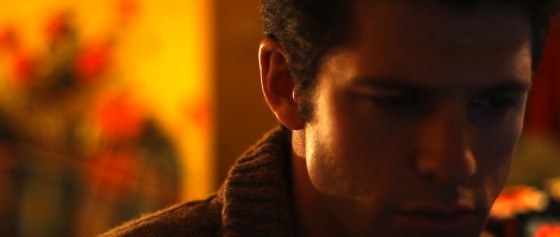
This angle starts as a single on Dan (Oliver Park). Kate is occasionally revealed in the background, and she was already well lit by the 1K “sun” and the 300W work-light.
I wanted some edge light on Dan to highlight his ear, because he’s listening closely to the audio he’s editing. This was a 100W clip-light off camera left at about the right height to suggest an unseen table lamp. As an added bonus, this light also supplied some fill on Kate as she crept up on Dan later in the shot:
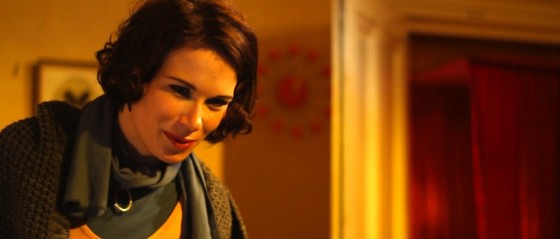
Once Kate is sat on Dan’s lap you can see the key light in action:
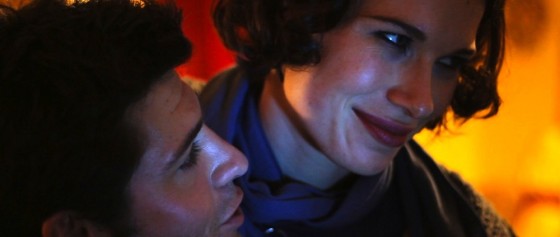
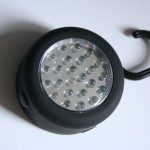
What was the key lamp? Having established the desk lamp in the wide, I could have used that – or something representing it – as the key. Instead I decided to add some colour contrast by using the blue light from the computer screen. The screen wasn’t bright enough to light him in reality, so this is where a £2 LED camping light came in handy – I simply hooked it over the top of the screen. (For more info on colour contrast, see this earlier post.)
For a later daylight scene in the living room, I totally cheated the lights. It’s easier to get away with cheating your lighting angles when a scene only has one shot and the audience can’t see too much of the geography.
I had Col rig a second straw-gelled 1K Arrilite close to the first, but pointed at right-angles so as to directly backlight Kate. Naturally reflected light was not giving Kate’s face the definition I wanted, so I put the 800W Arrilite out of the right of frame with several layers of tough spun diffuser on.
Here’s the result:
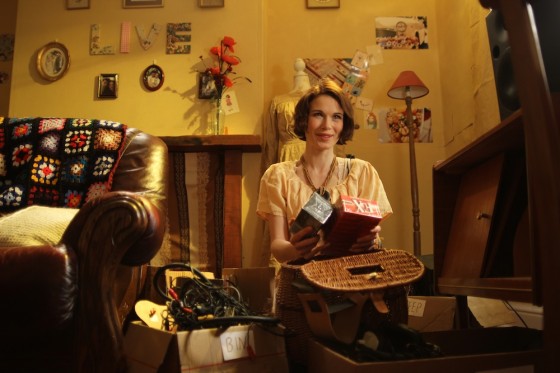
The light sources don’t stand up to much scrutiny, but it’s a brief scene so I think I’ll get away with it. Except that I just told everybody. D’oh.
Int. Living Room – Night
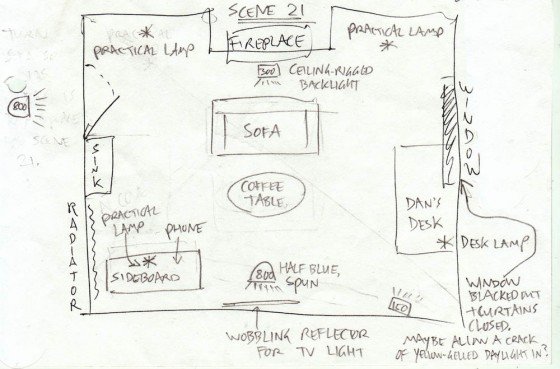
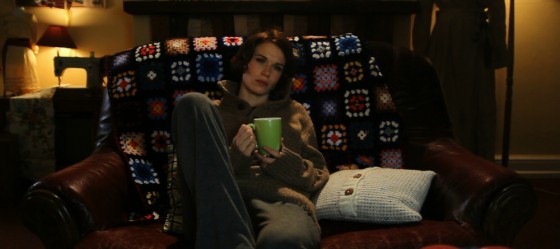
The single nighttime scene in this location was filmed in the early afternoon, so the crew blacked out the window. The 1K “sun” lamp was of course turned off, but the 300W work-light was left as a backlight for Kate on the sofa. A fluorescent-gelled 800W Arrilite was placed in the corridor to represent illumination from a strip light in the kitchen.
I wanted to trap Kate within a formal, symmetrical frame. Two practical lamps in the background, on either side of the wide shot, contributed to this effect.
Finally, she was meant to be watching TV, although the set would never be seen. Over the years I’ve tried several techniques for simulating TV illumination. I haven’t found a definitive one yet, but currently my favourite method is to bounce a day-light balanced lamp (in this case one of the fluorescent studio lamps, not an 800W Arri as the plan indicates) off a reflector that’s being wobbled by a crew member.
That’s your lot for today. Next time we’ll look at the bedroom scenes (minds out of the gutter, please).
Stop/Eject Lighting Breakdown #1: Charity Shop
This blog post is the third of our public rewards in the Stop/Eject crowdfunding campaign. If you’re reading this, it means we’ve raised at least £300 so far. If you don’t know what the hell I’m talking about, go to stopejectmovie.com to watch the trailer for my new short film and find out about the public and individual rewards we’re offering to anyone who sponsors the project.
In this post I’m going to break down the lighting set-ups for some of Stop/Eject’s key scenes in the shop, looking at what I was trying to achieve and how I went about it. I had intended to cover all of the film’s key scenes, but after writing out the shop stuff and realising how long it is, I’ve decided to save the rest for another time.
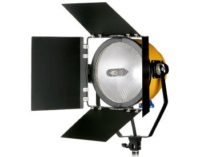
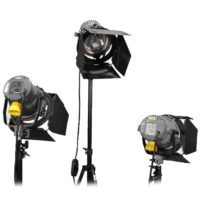
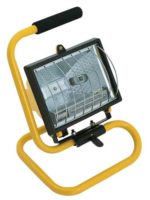
First of all, here’s the lighting equipment we had available to us on the shoot:
Plus stands, gels, sandbags and lots of splitters and extension leads. However many extension leads you think you need, triple it and you might just about have enough.
Int. Shop – Day
Here’s my lighting plan for the daylight interiors at Magpie, the shop location:
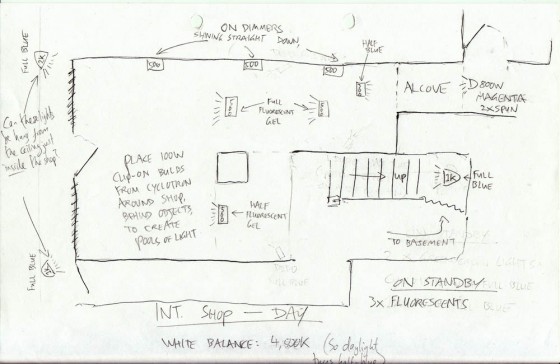
My aim with the lighting here was to create a transition from the cool realism of daylight at the front of the shop, through the warm shop floor, with patches of other colours adding depth and delineating different areas, to the alcove and the magenta light of the sconce which illuminates the tape recorder. In a nutshell: a magical journey.
Since it was a real location, there was genuine daylight flooding in through the windows, over which I had no control. This would determine my white balance and exposure, and everything I introduced would have to work with that. I knew that the windows would be blown out, but this was necessary anyway to hide certain things that were meant to be happening out on the street but weren’t.
We lensed the shop interiors at f1.8 on ISO 100 or 200. As you can see on the lighting plan, we set the white balance to 4,500K – dialling it in using Magic Lantern, which I’ll discuss in a future post. 4,500K is halfway between daylight and tungsten. This meant the daylight would appear slightly blue on camera, while any ungelled tungsten lamps would appear slightly orange, so my magical journey was already creating itself to some extent.
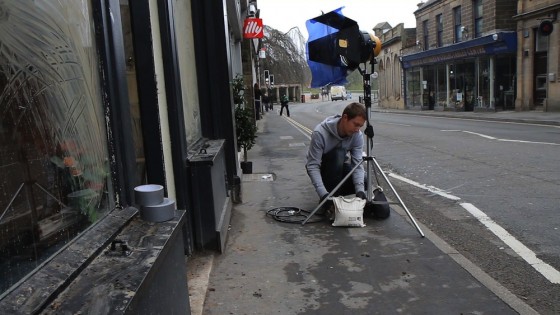
Although my plan shows two 1K Arrilites outside the windows, on the day I chose to use the blonde instead. This was to enhance the backlight on characters near the windows. When we flipped around to shoot towards the back of the shop, we often turned off this blonde because the natural light was doing enough by itself.
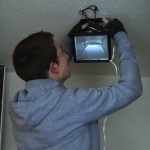
I also forgot how many work-lights Col had when I drew the plan. There weren’t enough to have the three shining down the side wall. But I did have him rig the other four in the plan. The owner of Magpie was totally laid back about us screwing things into his ceiling, which made rigging these lamps fairly straightforward.
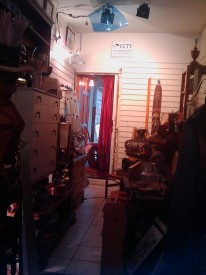
The two 500W work-lights drawn either side of the legend “full fluorescent gel” were initially not gelled at all. I decided it was best to keep them warm to facilitate the transition I described earlier. But ultimately we gelled them with half CTB (Colour Temperature Blue, i.e. daylight correction) because they were looking a bit too warm. These two lamps served to drop splashes of orange light on Kate (Georgina Sherrington) as she approached the alcove when shooting towards the front of the shop, and to backlight her and the other characters when shooting towards the back.
The 300W work-light trained on the alcove was left ungelled, which really made the red of the curtain pop.
The lone 500W work-light shown to the left of the staircase in the plan was gelled with half-green fluorescent correction, as planned, for no particular reason other than to separate this area of the shop a bit from others.
A 1K Arrilite was placed at the top of the stairs pointing down to give background depth to wide shots, and also to give some highlights to Dan (Oliver Park) and Alice (Therese Collins) when they’re looking at the records. The 1K was gelled blue (full CTB) to represent daylight. A second one, not in the plan, was placed in a doorway off to the side of the staircase to throw some side-light both on the stairs and on a patch of the shop floor next to the clothes rack.
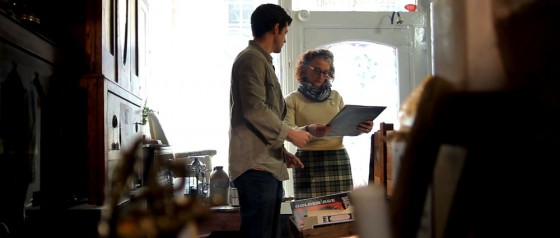
An 800W Arrilite was positioned at the back of the alcove, with a couple of layers of tough-spun diffuser and one of magenta gel. Sophie had chosen to paint the sconce in the alcove with magenta paint, and I felt I should reinforce this in my lighting. It completes the magical journey nicely by representing the reddest end of the lighting spectrum I’d created.
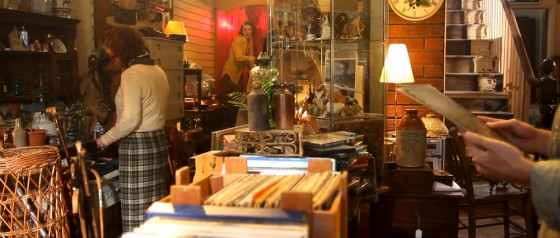
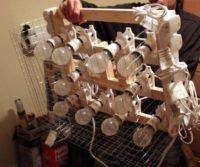
The final touch was clip-lights. We bought twelve of these £2.50 fixtures earlier in the year from B&M for the Cyclotron. Somehow the Cyclotron itself never got used, but the clip-lights were cannibalised and used extensively.
It’s all very well having a great location filled with interesting set dressing, but as DP if you don’t create depth with your lighting, then all that work is wasted. The clip-lights seemed like a great way to add little pools of warm light that would separate the layers of clutter from each other and provide contrast.
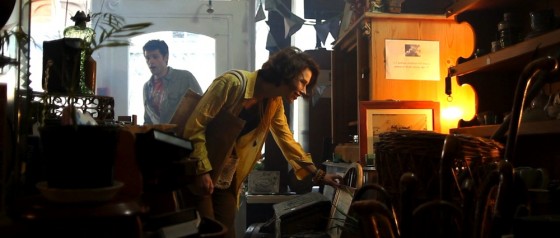
I loved this moment in the wide shot when Kate leant into one, picking her out from the background and reinforcing her leaving Dan behind on her magical journey. (Tell you what, just down your drink every time I write “magical journey”, okay?)
I found myself in need of a little extra “daylight” near the door – to keep Kate in the “real world” a little longer – and so I had one of the fluorescent studio lamps set up on top of a cabinet. That’s what’s hitting Dan on the left of his face in the above image. If I had to justify this light source, I’d say it’s daylight reflecting off a glass cabinet front. You’d buy that, right?
A second fluorescent lamp was employed when the time came to shoot a crucial Glidecam shot leading Kate as she advances into the shop. It was great that she moved in and out of the tungsten lights on her journey, but I was losing her eyes too much. And if you can’t see into your actors’ eyes, you might as well pack up and go home because you don’t have a film.
So while Col operated the Glidecam on this shot, I walked behind him, shining the fluorescent lamp over his head and straight into Georgie’s face. This constant, soft frontlight was at just the right level not to kill the dynamics created by the other lamps, while still putting a sparkle in her eyes and filling in any unflattering shadows.
Check out the shot in the trailer about 8 seconds in:
I also love the shadow from the clothes rack that crosses her face during this shot. This is cast by the 1K Arrilite in the doorway by the stairs, on the other side of the rack. Ostensibly it’s daylight from an unseen window.
This turned out to be one of my favourite shots in the film from a cinematography perspective. Georgie looks absolutely stunning, because of course she is, but Debs’ lovely make-up and the lighting here really bring out her features.
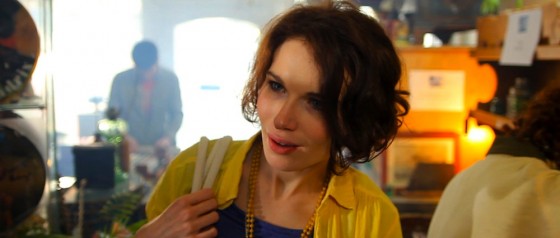
Col pumped in smoke for all the shop interiors. This is another great way of adding depth, not to mention enhancing the dusty, mysterious feel of the shop.
Int. Shop – Night
When it came to the night scenes in the shop, the lack of natural light made quite a big difference without me having to do anything. I changed the white balance to tungsten (3,000K) and experimented with turning off different lamps until I arrived at the mood I wanted. The blue-gelled Arrilites now appeared even bluer, passing as moonlight.
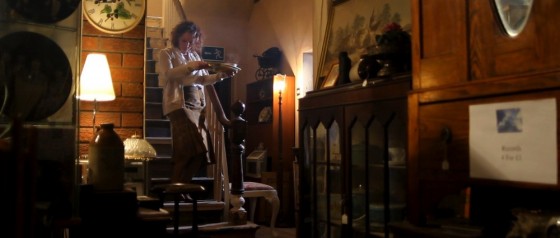
The most striking effect in the night scenes is the police lights. These were integral to the storyline, so I’d discussed them with Colin way in advance.
If you look at the opening scene of Soul Searcher (above – particularly noticeable from about 3’03 onwards), you’ll see that we made use of the flashing amber light on the street-cleaning vehicle. The actual light on the vehicle wasn’t powerful enough, so I asked Col to build a reflector that could be spun in front of an amber-gelled redhead to create the effect.
Eight years later, Col rebuilt this low-tech device for Stop/Eject’s police lights, gelling one side of the reflector red and the other blue. If you scroll back up to the Stop/Eject trailer and scrub to 2’00 you’ll see a behind-the-scenes glimpse of this in action.
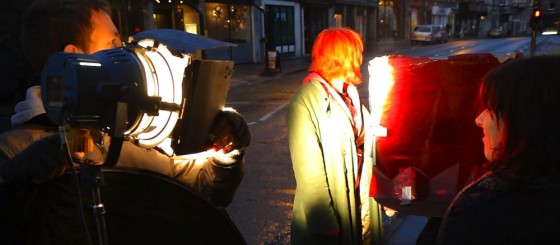
As it turned out, the reflected light from the catchily-named “Spinning Disc Mark II” was not bright enough for wide shots. Instead it fell to Sophie, if I remember rightly, to hold a flag in front of two lights, one gelled blue, the other gelled red, and move this flag back and forth during takes. At other times we simply switched the lights on and off in rapid succession.
During the shooting of all the shop scenes, I felt like I wasn’t quite achieving the look I wanted. Obviously my mind was on many other things, and we were very pushed for time, but somehow it wasn’t looking quite as moody and cave-like as I thought it should. But having played with colour-correcting a bit of the footage now, I’m more than happy that with a little grading it will look great.
If you have any questions about anything I’ve covered here, please comment or post on the Facebook page and I’ll be happy to answer.
That’s all for now, but I will be covering other scenes very soon. Thanks for getting our funding campaign to the £300 mark, and please keep giving and sharing the link so we can finish this epic little short to the best possible standard.
Wheels Within Wheels
One of the great things about DSLRs is that, being so small, you can put them in all kinds of unusual places and, being so light, you can rig them to things with relatively little hassle. Stop/Eject is not the sort of film where we’ll being doing a lot of this (unlike Act of Valor, which I strongly suggest you check out), but there is one shot that needs a custom rig…
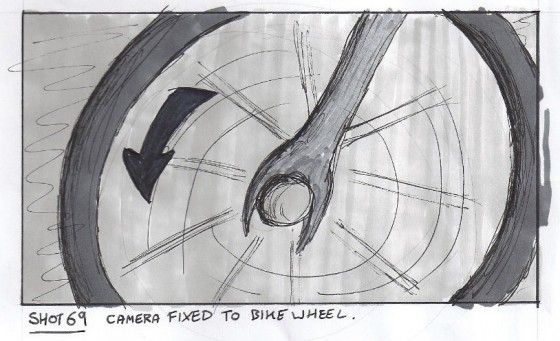
In this shot, the camera needs to be attached to the bike in some way so it moves with it, maintaining the same framing on the wheel throughout. This is part of the film’s visual theme of circles, which I discussed earlier this year on the blog.

If the shoot had gone ahead last October as originally planned, this shot would probably have got dropped or replaced with a similar but less effective version achieved by simply steadicamming along next to the bike. But one great advantage of a shoot being postponed is the opportunity to prepare so much better.
To that end, Colin and I borrowed his mum’s bike this morning to test the shot. Under the pressure of a low budget filming schedule, you can’t mess around trying to figure out a rig like this. You have to work it out in advance.
My plan was to use a C-stand arm and a cheap tripod to get the camera in the right place. First of all we tried clamping the arm to the frame of the bike, but it was too thick. So then we clamped it to the pedal (which meant roping or clamping the pedal to another part of the bike so it wouldn’t turn). The bottom of the tripod was clamped in turn to this arm. The handy thing about using a tripod, of course, is that you have a pan-and-tilt head for easy adjustments and a quick-release plate too.

Initially we filmed the rear wheel, but then I realised filming the front wheel would allow us to get a wider frame, since the pedals (which had to be framed out because the arm was clamped to one of them) were further away from the front wheel.
The rig worked out really well. We had to use a lens with an image stabiliser, and when we shoot it for real we’ll put someone on the bike to weigh it down and reduce the bumps further. I’d imagined we’d have to use a second clamp and bungee cords to keep the camera in place, but the sturdiness of the C-stand arm and the low weight of the camera made this unnecessary.
Yeah, we got a bit of the pedal in shot, not to mention Col’s feet. But those things are easily fixed.
Just before I sign off, I have to give you a link to Tony Hill Films, a site I came across while researching bike rigs. He’s built a number of unique and fascinating camera rigs which you can see in action on the site: http://www.tonyhillfilms.com/rigs

Suit You, Sir!

As regular readers will know, Sophie Black and I have raised over £2,000 for Stop/Eject through crowd-funding, and we’re doing some filmmaking lectures soon which will serve as fundraising events to increase that budget. (Don’t forget the Hereford one is next week, Tuesday, 7pm at The Rural Media Company.) The third and final piece of the fundraising puzzle is the sale of the “germ suit” worn by Benedict Cumberbatch in the pilot for my in-development fantasy film, The Dark Side of the Earth.
Benedict was playing Maximillian Clarke, a paranoid hypochondriac who’s so afraid of germs that he lives inside a sealed suit that filters all the bacteria out of his air and food. Isabelle Vincey, the heroine, finds him surviving in an igloo on the Dark Side of the Earth and he joins her on her quest to start the world turning again.
The suit was built by FBFX, whose credits include armour and special costumes for such films as Troy, Gladiator, The Phantom Menace and Event Horizon. Here’s the podcast about them building and testing it:

Benedict was a real trooper on the shoot. He was trailing cables and pipes, carrying all the weight of the suit, blinded by the fogging visor and deafened by the compressor that kept the suit inflated. Every time Katie took his helmet off he was sweating buckets. But he never complained. (By contrast, after he’d left – to go to the BBC for the first read-through of Sherlock – we put crew member AJ Nicol in the suit for five minutes for a wide shot and he came out swearing and cursing and moaning.) Here’s the podcast about shooting with the suit, featuring an interview with Benedict:

Since that shoot, in December 2008, the suit has been in a box in my loft. I always hoped one day I would live somewhere with enough space to display it on a mannequin, but there wasn’t much chance of that in the foreseeable future, so this year I figured it was time to trade it in for some filmmaking cash. If The Dark Side of the Earth ever gets off the ground, we can always build another one – an even better one.
Originally I planned to sell the suit on eBay, promoting the auction to Benedict fan sites and the like, but then Sophie put me in touch with David Bidwell, owner of The Monster Company. This Nottingham-based company sells movie props and memorabilia.
David was excited when I told him about the suit and Dark Side in general, and this morning he paid me a visit to check out the suit and watch the pilot. He loved the pilot so much he asked to watch it a second time. He went away with the suit tucked under his arm (alright, draped over his arm and with me following carrying a couple of boxes with the rest of it in) and the Stop/Eject budget looking a little healthier.
Crash Deconstruction

Following on from my last post, let’s take a closer look at how part of The Beacon‘s car chase sequence was created, in particular the bit where Sarah goes flying out through her windscreen during the crash and miraculously lands on the roof rack of the villain’s speeding car. This ridiculous feat garnered a round of applause at the premiere, but how was it done?
The car crash was done for real, as previously explained, but clearly I couldn’t afford the stunt team and wire rigs necessary to catapult someone through the air and then composite in the vehicles below, which is how you would probably do it if you had a proper budget.
In fact there are no visual FX in this sequence at all. The illusion is created entirely through editing, using quick cuts of Sarah (LJ Hamer) leaning through the pre-smashed windscreen, a close-up of her legs being pulled out through the windscreen by a couple of crew members stood on the bonnet, a low angle shot against sky where she’s not moving at all, and a dummy being thrown at the villain’s car. The dummy was pulled together from whatever items we had to hand and looked terrible, but only eight frames of it were needed in the edit before cutting to an angle of LJ (already on the roof rack) dropping from all fours onto her front.
They say a picture is worth a thousand words, so a video must be worth at least a million. So I’ve put together a little compilation of the rushes so you can see exactly what I mean.
Always know where your towel is

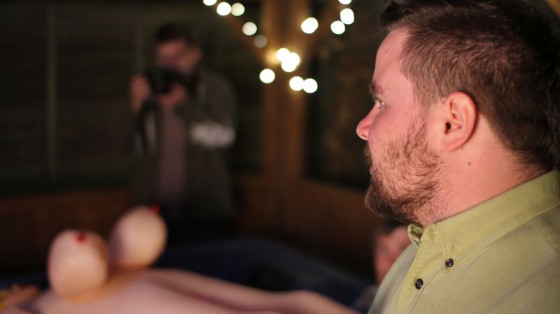
When you’re lighting without a budget, sometimes you have to press some very random objects into service. Yesterday I used a towel, a t-shirt and a hot tub cover to light a scene.
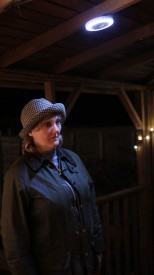
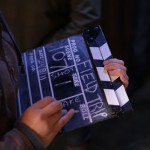
I was working on Patrick Coyle’s hilarious comedy feature Field Trip, which he was bravely attempting to shoot in just four days. (Sadly he didn’t succeed in that timeframe and another couple of days will be needed.) The style was documentary-esque, a la The Office, with everything to be shot using available light. But occasionally we were forced to add more light in order to expose an image; such was the case when shooting around a hot tub in a garden at night. Of course the light had to be soft and flat to match with other scenes that weren’t artificially lit.
The problem was that we only had one redhead. No reflectors, no flags, no polecats, no c-stands, not even any gels or diffuser. I noticed that the cover for the hot tub was cream on the underside, and could see its potential for bouncing light, but couldn’t see a way of rigging it up. After much head-scratching, at the suggestion of lead actor Tony Streeter we propped up the cover against one corner of the hot tub’s shelter and I aimed the redhead at it, throwing a large amount of soft light back towards the tub.
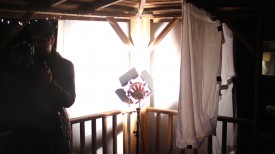
Then we needed to flag off some of this light to prevent it from blowing out one side of a character’s face when she was standing at the entrance. Being a hoopy kind of frood, the hot tub’s owner knew where his towel was, and had lent it to us along with an old t-shirt when we were experimenting earlier with makeshift diffusers. I now realised both these unlikely fabrics could be used as flags. With an LED camping light gaffered to the ceiling to add an extra spot of brightness, some Christmas lights for a bit of sparkle and some fast lenses on the cameras, the set-up was complete.
I’d advise any filmmaker to take as much kit as they possibly can wherever they go, but if you can’t, be prepared to use anything that comes to hand in the service of cinema.
More from the Field Trip shoot next time, when I’ll talk about what I learnt from four intense days of working with my new Canon 600D HDSLR and the Pro Aim shoulder rig.
How to Light a Zombie Movie, part 1: Candlelight
Yesterday I DPed the trailer for Light Films‘ upcoming zombie feature, Wasteland, and I thought I’d share some of the lighting process with you. The main scene featured actor Shameer Seepersand in a boarded-up old house he’s hiding out in; this was a nice little two-sided set designed by Sophie Black and built in director Tom Wadlow’s garage. The script and direction called for minimal daylight to be seeping through gaps in the window boards and the main light sources to be candles dotted around the set.
Candlelit scenes are tricky because, as with any practical light source, the Director of Photography needs to set up movie lamps to enhance the light shed by them without these movie lamps getting into frame, while ensuring that the pool of light and any shadows cast by it look as if they’re coming from the practical source. The available lighting equipment was very minimal: just three redheads, a reflector and bunch of clip-on domestic light fittings.
Most of the candles were behind Sham, so I started by having my gaffer Col rig one of the redheads to the rafters in the rear corner, to serve as backlight. A layer of full CTO (orange colour correcting gel) and one of spun (diffuser) helped to dim and soften the light and create a candle-like colour. Of course the angle was a massive cheat, coming from above rather than low down, but there was no other way to keep it out of shot.
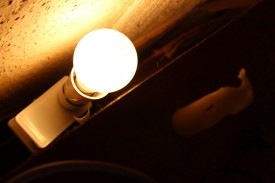
Next I needed to create pools of light around the candles. If I’d had a Dedo kit (small spotlights) I would have been tempted to position them near camera and focus each one’s little circle of light on a candle or group of candles. But I didn’t, so instead I used the domestic light fittings with 100W bulbs and hid them behind the set dressing. These shed pools of light on the walls behind the candles, though of course not on the surfaces on which the candles were stood. Fortunately the scene contained no camera angles high enough for this giveaway to be noticeable. The set and dressing immediately surrounding the bulbs were coated with fire retardant paint for safety.
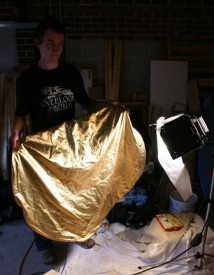
Finally I wanted to add some dynamics to create the impression of the candelight flickering. At first we tried bouncing a second orange-gelled redhead off a reflector which Col would wobble during the takes. A better solution occurred to me when I remembered that the reflector had a zip-off fabric cover that was golden on one side. We took the orange gel off the lamp and got rid of the reflector itself, instead bouncing the light off the golden cover as Col rippled it.
The third redhead was placed behind the window as “daylight”, and with a generous helping of smoke the effect was complete.
The trailer will be available to view online soon (when I get around to editing it) and there’s also some info coming on Stop/Eject, the short I’m developing for the same company, which had its first pre-production meeting on Sunday.
