Lighting Techniques #1: Three Point Lighting

This is the first in what I plan to be an ongoing series of quick techniques you can apply to your own cinematography. The first few are going to be from The Gong Fu Connection. If you find this post useful, please consider supporting the film over at www.indiegogo.com/projects/the-gong-fu-connection or even just sharing the link.

Let’s start at the beginning with three point lighting. The idea is that you should light a person using three sources:

  1. The KEY light models the face. What does that mean? Well, a face is a weird, lumpy object with lots of sticky-out bits and inny bits, and as a result it looks very different depending on where the main light is coming from. Light it from the front and it will seem flat – noses seem smaller, wrinkles and spots are reduced. Light it from the side and the nose will cast a huge shadow, as will every pimple. See my blog post on key light angles for more on this.
  2. The FILL light prevents the shadows cast by the key light from being completely black. Ideally the fill should be a soft, directionless light so it doesn’t cast its own shadows. The dimmer the fill light (i.e. the greater the key-to-fill ratio), the moodier your scene will look. Sometimes I like to not use any fill at all.
  3. The BACKLIGHT creates a rim of illumination around your subject, cutting them out from the background. It makes the whole image look slick and sparkly.

That’s all very well in theory, but here’s a practical example. This is a close-up of actress Marién Enid in The Gong Fu Connection.

Marien2

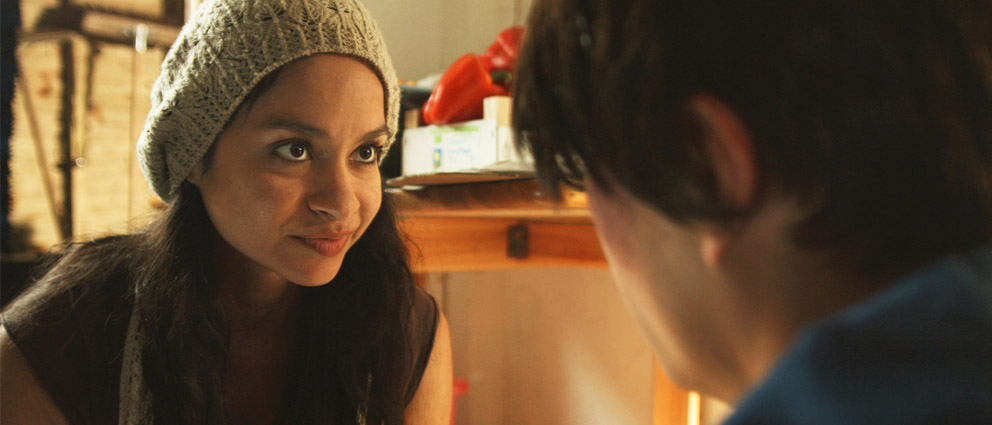
Marién’s keylight is an Arrimax M18 – a super-efficient 1.8KW HMI. It has a Straw gel (Lee no. 103)  to warm it up a bit. Why such a powerful lamp? I was using it as backlight on the wide. For this CU it needs to be much softer, so I intercept it a couple of metres from Marién with some tough-spun diffuser (no. 214). I have a roll of the stuff which I carry around. Frequently I slide it like a giant toilet roll onto a C-stand arm, unroll it to the desired length and peg the other end on another stand.

The Kinoflo Tegralite that provides the backlight

You can see that the keylight hits all of the lefthand side of her face (known as the downside, because it’s the side away from camera) but pretty much just her cheek on the righthand side. For my money, this is the optimal key position because it gives the most shape to the face.

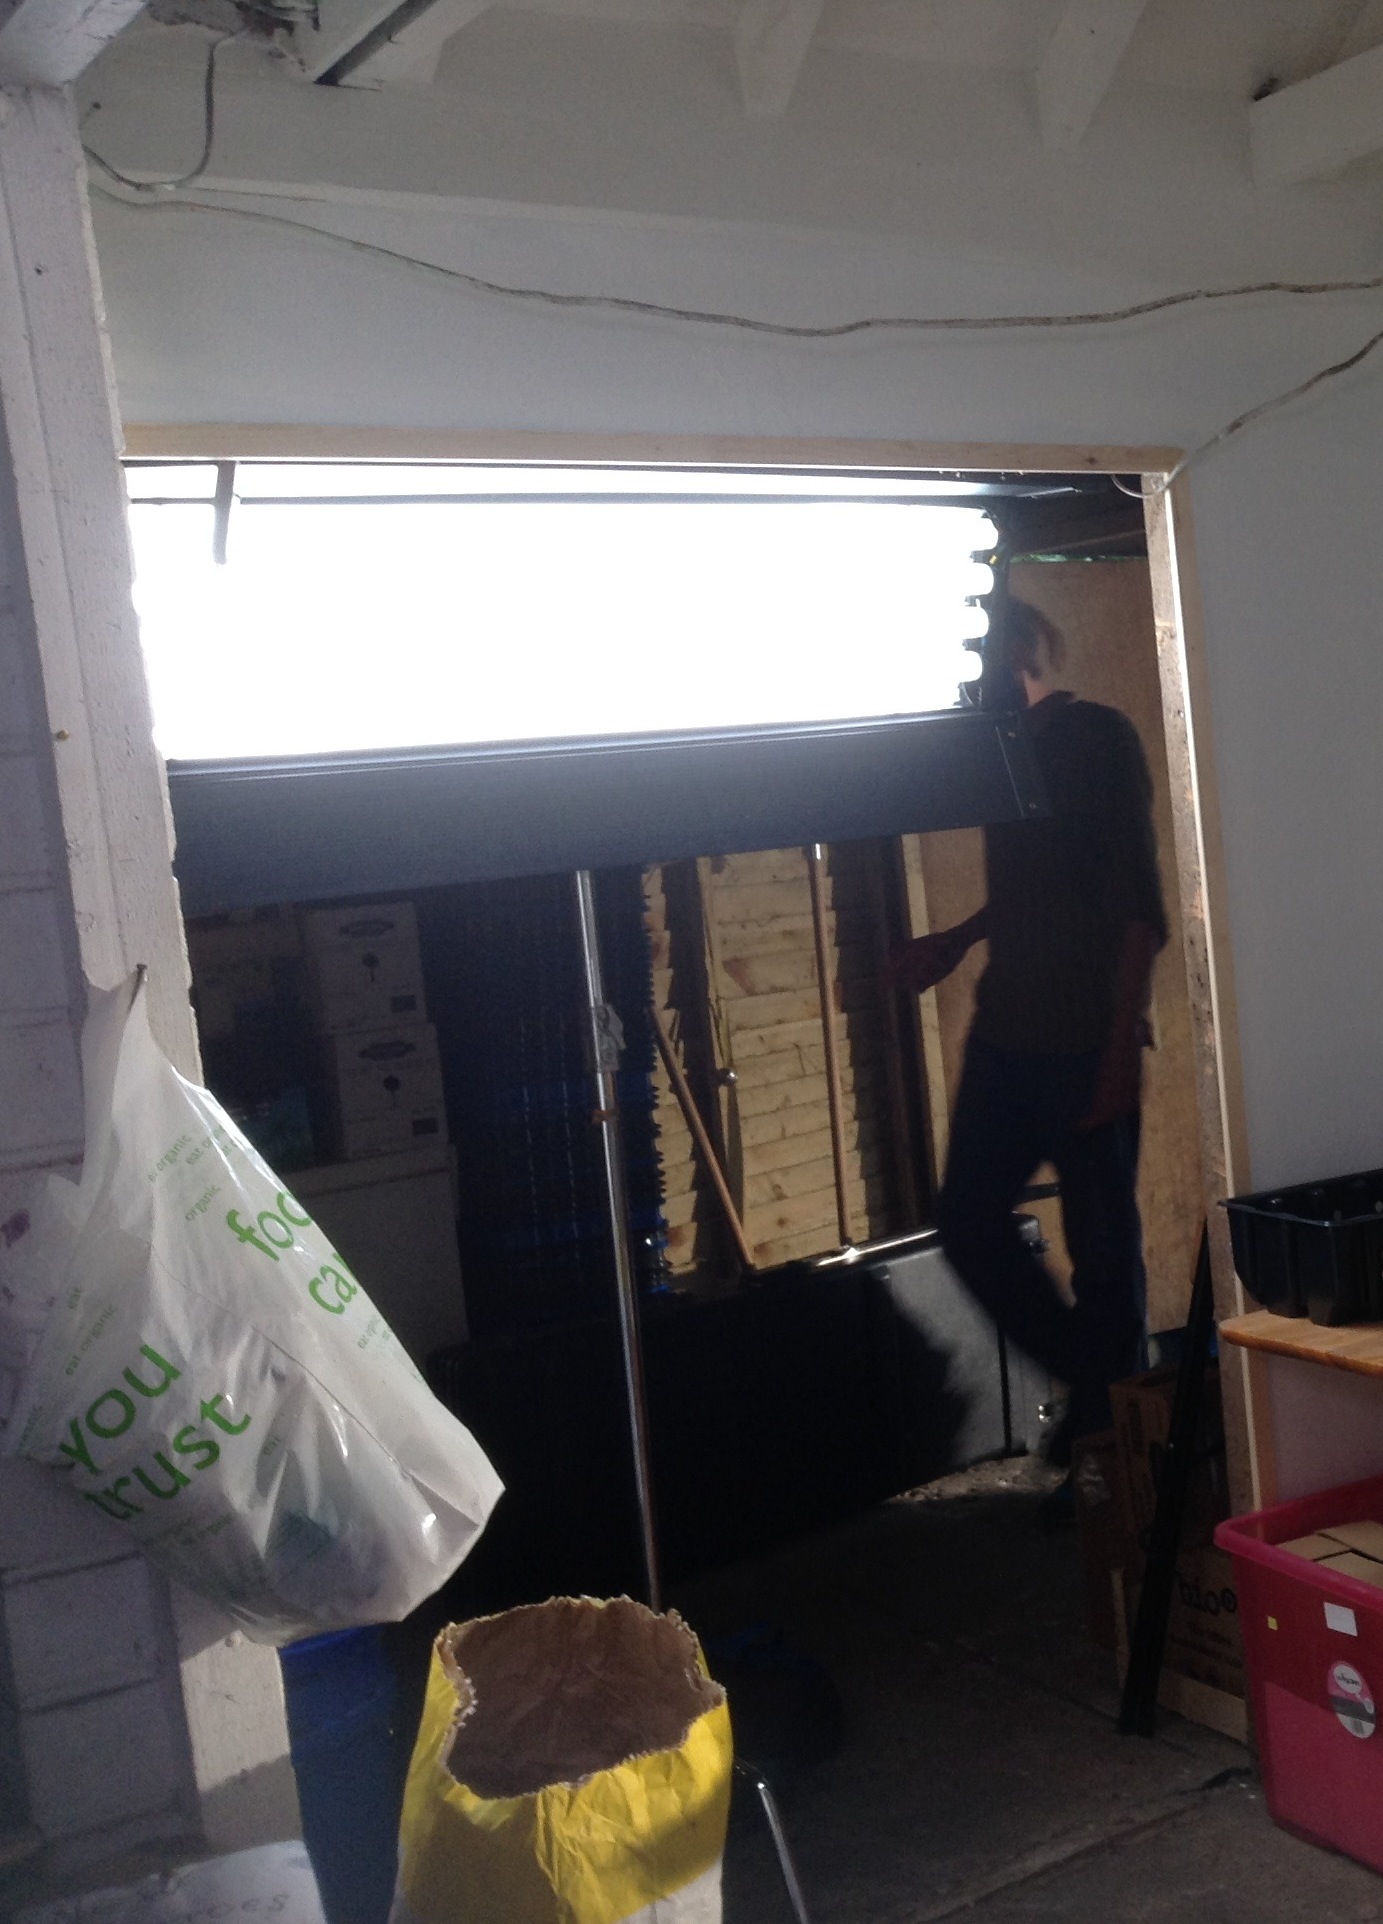
The backlight comes from a Kinoflo Tegralite (a 4ft 4-bank kino with a built-in ballast) shining through the doorway behind her. Again, this is a source that had been previously established on the wide shot. You have to think through your set-ups before you set your lamps for your wide, so that they will work for your other angles without so much cheating that everything looks completely different.

Fill is provided by a silver reflector out the bottom left of frame, bouncing the kino back onto the upside of Marién’s face. The ungelled kino gives a nice bit of colour contrast with the straw-gelled M18.

Look out for more lighting techniques coming soon.

Sketch 2014-08-15 07_07_38

Lighting Techniques #1: Three Point Lighting

Looking After Your Cast and Crew

The cast and crew
The cast and crew of Stop/Eject

On a low budget shoot, it’s all too easy to overlook the welfare of your cast and crew in the push to get your story in the can. I’ve been on both sides of the equation, and I’ve put together a list of suggestions to keep morale high and leave your cast and crew with warm feelings about working on your productions. These things are especially important when you cannot afford to pay people much or anything. I’ve got all of these wrong at various times in the past, sometimes several at once. I’m trying to do better though.

  1. Be polite. Compliment people’s work whenever possible, thank them frequently and apologise when things go wrong. If people feel appreciated, they’ll go that extra mile for you.
  2. Feed them well. I was on a shoot recently where we were served hot, home-cooked meals every lunchtime, followed by delicious homemade desserts, followed by a pot of tea. Amazing! Sadly, I’ve also done shoots where there was neither lunch break nor lunch itself – we were all expected to just keep on going. It’s essential to feed your cast and crew well to keep up morale and energy levels.
  3. Let them see the rushes. The heads of department may all be buoyed by the creativity they’re getting to express, but what about the assistants and runners? Let them see the monitor while you’re shooting, or screen some rushes of an evening, and they’ll feel much more valued and engaged with the project.
  4. Try to stay on schedule. When you’re not a Bectu/Equity shoot, it’s easy to take advantage of the lack of regulations and power on through that scheduled wrap time. But you’re shooting yourself in the foot, because everyone will be more tired and work more slowly the next day. And don’t forget that some crew members – the DIT, for example – still have work to do after you’ve wrapped, and people may have a long commute to get home.
  5. Reward them. When the shoot’s over, do something to show you valued and appreciated everyone’s hard work. Throw a wrap party, or buy people little gifts, or send “thank you” cards.
  6. Keep them in the loop. Postproduction often drags on and on when you have little or no budget, but don’t forget your production crew. Keep them up to date, and if they need material for their showreels, get it to them as soon as you can. A cast and crew screening, even if it’s just at your house, will always be appreciated, as will a DVD or Blu-ray copy if you can possibly afford it.
Looking After Your Cast and Crew

Seven Considerations for Night Shooting

Il pleut dans la nuit. Ce n'est pas jolie.
Il pleut dans la nuit. Ce n’est pas jolie.

As a cinematographer, the idea of shooting at night, working from a blank canvas, can be very appealing. As a director or producer comparing your schedule to the limited hours of daylight we have at this time of year, it can also seem tempting to shift things to after dark. By all means do so; it will probably look great on screen, but do consider the following things first…

  1. Let’s not beat about the bush: it’s unpleasant. Human beings are not built to work in the dark. It’s usually cold and when it rains as well it’s one of the most depressing experiences you can have on a set. If you shoot at night, morale will suffer.
  2. It’s slow. People don’t work as fast at night, because they’re tired and cold and they can’t see what they’re doing very well. Also everything has to be lit, which is very time-consuming. Expect to get about half as much done as you would during the day.
  3. Location owners may not like it. Most premises will be closed at night, which usually makes it easier to film there, but the location owners will need to find a member of staff willing to stay up all night and keep an eye on the place. Could be expensive.
  4. Power can be an issue. You’ll be using lots of lights, and homes and businesses you might normally run power from will not be so readily accessible after hours. You’re probably in generator territory, which means hire costs, transportation issues, refuelling, annoying trip-outs even though you’re drawing a full kilowatt less than the generator’s alleged maximum load… and of course nightmares for the sound department.
  5. Other logistical things which are straightforward in the daytime can prove difficult at night, like catering and access to toilet facilities. Crews need a lot of hearty, hot food to  get them through the night, but who’s going to cook it or warm it up at 2 o’clock in the morning? Hot beverages should also be in plentiful supply.
  6. Many buildings have some kind of external lighting than comes on at night, either on a timer or motion-activated. The DP is unlikely to want that on, so the locations department must ensure access to the switches.
  7. Generally locations will be quieter at night, but beware of drunken revellers, street-cleaning machines and automatic systems that kick in in the middle of the night.

On A Cautionary Tale ,we have a script that is set entirely in daylight, but in order to fit it all into three days of shooting, some of it will almost certainly have to be done after dark. The most important question must always be: is it right for the story? In our case, with the film’s supernatural undertones, I think darkness can only add to the atmosphere.

Seven Considerations for Night Shooting

Ten Questions to Ask on a Recce (Location Scout)

Scouting a weir for Stop/Eject. We didn't count on heavy rains turning it into a raging torrent though.  Photo: Sophie Black
Scouting a weir for Stop/Eject. We didn’t count on heavy rains turning it into a raging torrent though. Photo: Sophie Black

Tomorrow I’m off to Nottingham to recce for A Cautionary Tale, so I thought now would be a good time to list the questions that a filmmaker and their team should be asking when they check out a location.

  1. Is the mains supply beefy enough for your lighting package? Check the fuse box to see how many circuits there are for sockets and what amperage each is fused at.
  2. Can you access the land outside the windows to set up lights shining in?
  3. If you intend to use a smoke machine or hazer, can any smoke alarms be disabled?
  4. Is it noisy? Just because it isn’t noisy when you scout, it doesn’t mean it won’t be when you shoot. Might that road be busier the day you shoot? Are there any matches scheduled for that playing field next door? Will people be trampling around in the room upstairs? Is there a market, festival or other occasional event on? Is it on a flight path? Can any humming electrical devices be turned off? Some modern buildings have their aircon controlled remotely from other sites.
  5. How might weather affect the location? For example: river levels change; fields can flood; mud can make moving equipment difficult; attractive green grass can turn yellow in a drought. Don’t forget to consider tides if you’re on the coast.
  6. To what extent can you modify the location? Can you screw into or paint the walls? For a period piece – are there anachronisms? Can they be removed or covered?
  7. If outdoors, is there a toilet that everyone can use? What about somewhere to get warm at lunchtime?
  8. Is there space for a green room and HMUW (Hair, Make-Up and Wardrobe)? If not, is a separate base camp required and where will that be?
  9. Is there sufficient parking?
  10. Is the owner willing to sign a location release? If not, this may come back to bite you, particularly if you’re entering your film into Virgin Media Shorts or selling it to a distributor. Get them to sign before you start filming; you don’t want them to pull out when you’ve shot two of the four scenes set there.

Can you think of anything I’ve missed?

UPDATE: Leslie Lowes adds:

  • Is there mobile phone coverage? Which networks?
Ten Questions to Ask on a Recce (Location Scout)

Plan for Cannes

A Cannes photo I did not take.

Considering a trip to the Cannes Film Festival this year? Well, now is the time to start planning and booking. Here are links to the most useful Cannes-related blogs I’ve posted over the last few years.

First up, if you’re thinking about entering your movie into Cannes’ Short Film Corner, this guest blog by Sophie Black explains exactly what you can expect to get from your entry fee and how you can make the best use of your time at the festival.

There are some things you don’t want to leave home without – read Packing for Cannes to find out the essentials.

Attending Cannes can be expensive if you’re not careful. Have a look at a breakdown of my Cannes spending in 2011, and check out Five Tips for Doing Cannes on a Budget for hints and tricks to conserve your cash on the Côte d’Azur.

Things I’ve Learnt in Cannes and Things I Learnt (Again) from Cannes 2013 lay out some of the important truths about the film industry that my trips to Cannes have hammered home to me.

If you want to find out how Sophie and I got on at the festival last year, watch our 2013 video blogs.

To get a sense of the madness of my very first trip to the festival as I attempted to sell my indie feature Soul Searcher, read my 2005 Cannes blog.

And finally, not particularly useful but quite amusing, here is the account of my travel woes on my way to Cannes in 2010.

Plan for Cannes

Five Simple But Effective Camera Tricks

Today I’m running down the five simplest yet most effective camera tricks I’ve used in my films. These are all techniques that have been used on the biggest Hollywood productions as well.

1. Looming Hollywood Sign (The Beacon)

Building Moon's forced perspective corridor
Building Moon’s forced perspective corridor

In amongst all the terrible CGI, The Beacon did feature the odd moment of low-tech triumph. As a damaged helicopter dives towards the Hollywood hills, the famous sign is reflected in the sunglasses of the injured pilot, played by my friend and fellow filmmaker Rick Goldsmith. The letters were actually 2″ high cardboard cut-outs stuck to a black piece of card, and Rick himself is holding it at arm’s length and moving it slowly towards his face.

This is a type of forced perspective shot, which I covered in my previous post. Die Hard 2’s airport control tower set was surrounded by a forced perspective miniature of the runways, complete with model planes, and more recently Duncan Jones and his team used the technique to create an endless corridor of clone drawers in Moon.

Colin Smith readies the watering can for Jonny Lewis's close-up, while Chris Mayall steadies the ladder.
Colin Smith readies the watering can for Jonny Lewis’s close-up, while Chris Mayall steadies the ladder. Photo: Simon Ball

2. Rain Fight Close-ups (Soul Searcher)

While most of this fight sequence was shot under the downpour created by an industrial hosepipe fired into the air, this wasn’t available when extra close-ups were required later. Instead a watering can was used.

It’s not uncommon for close-ups in a scene to be achieved much more simply than their corresponding wide shots. NASA allowed Bruce Willis and Ben Affleck to be filmed in their training tank for Michael Bay’s Armageddon, but CUs of the other actors had to be shot dry-for-wet with a fishtank in front of the lens and someone blowing bubbles through it.

3. The Wooden Swordsman Catches His Sword (The Dark Side of the Earth)

Getting the puppet to genuinely catch his sword was likely to require a prohibitive number of takes. (We were shooting on 35mm short ends.) So instead we ran the action in reverse, ending with with the sword being pulled up out of the puppet’s hand. When the film is run backwards, he appears to be catching it.

Backwards shots have been used throughout the history of cinema for all kinds of reasons. Examples can be seen in the Face Hugger sequence in Aliens (the creature’s leaps are actually falls in reverse) and in John Carpenter’s The Thing (tentacles grabbing their victims). At the climax of Back to the Future Part III, the insurers refused to allow Michael J. Fox to sit in the DeLorean while it was pushed by the train, in case it crushed him, so instead the train pulled the car backwards and the film was reversed.

4. Distortion of Tape and Time (Stop/Eject)

A classic Who extermination

At a crucial point in this fantasy-drama about a tape recorder that can stop and rewind time, I needed to show the tape getting worn out and images of the past distorting. I combined two techniques to create a distorted image of Dan (Oliver Park) without any manipulation in post. One was lens whacking, whereby the lens is detached from the camera and held in front of it, moving it around slightly to distort the focal plane. (See this episode of Indy Mogul and this article by Philip Bloom for more on lens whacking.) The other was to shake the camera (and lens) rapidly, to deliberately enhance the rolling shutter “jello” effect which DSLRs suffer from.

Flaws in camera technology can often lead to interesting effects if used appropriately. Let’s not forget that lens flares, which many filmmakers love the look of, are actually side-effects of the optics which lens manufacturers have worked for decades to try to reduce or eliminate. And in the early days of Doctor Who, the crew realised that greatly over-exposing their Marconi TV cameras caused the image to become a negative, and they put this effect to use on the victims of Dalek extermination.

Shooting The One That Got Away. A row of 100W bulbs can be seen on the right.

5. Sunset (The One That Got Away)

A painted sunset would have been in keeping with the style of this puppet fairy tale, but it was quicker and more effective to peek an ordinary 100W tungsten bulb above the background waves. Click here for a complete breakdown of the lighting in The One That Got Away.

Using an artificial light to represent the sun is extremely common in cinematography, but showing that lamp in shot is less common. For another example, see the opening Arctic sequence of Captain America: The First Avenger, in which a large HMI stands in for a low sun at the back of the mist-shrouded set.

Click here for my rundown of the top five low-tech effects in Hollywood blockbusters.

Five Simple But Effective Camera Tricks

Ten Tips for Running Auditions

With the casting for A Cautionary Tale fresh in my mind, here are a few tips on running auditions.

  1. Send all your auditionees the full script and/or audition sides in advance. Whether they read it all and how much they prepare will tell you a lot about their attitude to their craft and their enthusiasm for this particular role.
  2. Bring an assistant. If actor #2 turns up while actor #1 is mid-audition, it helps a lot to have someone to greet them.
  3. Make sure that the venue you’re using has an anteroom or corridor for people to wait in.
  4. Take signs (and Blutak) to direct people to the right room within the building.
  5. There will be no-shows. C’est la vie.
  6. Introduce yourself and the project before the reading, but don’t waffle because the more you keep the actor in suspense, the more nervous they will be when they finally get to read.
  7. If you’re filming the auditions, which I recommend, you should have a separate person doing that, so that you the director can watch and judge the performance with your naked eye.
  8. Check the actor’s ability to take direction by having them read a second time with a different emotional emphasis or motivation.
  9. Use an improv or two to gauge the actor’s creativity and get a sense of what they can do outside the confines of the sides.
  10. Take the time to answer any questions the actor may have about your previous experience. Remember that it’s just as much about whether they want to work with you as it is about whether you want to work with them.

How do you like to run auditions? Any tips you could add to these?

Casting for The Beacon, way back in 2001
Ten Tips for Running Auditions

Soul Searcher: 10 Minute Lighting Masterclass

Continuing the tenth anniversary releases of the Soul Searcher DVD extras, this week we have the 10 Minute Lighting Masterclass. It’s a quick guide to some of the basic set-ups and techniques used to give the film its cinematic, moody look. Since making this featurette digital cameras have improved vastly and so has my lighting, so these days I would light more subtly with fill and soft sources, but the basic building blocks in this video are still valid. Later in the week I’ll expand on some of those building blocks here on the blog.

Soul Searcher: 10 Minute Lighting Masterclass

How to be a Filmmaker

Business cards are just the beginning

Robert Rodriguez famously said that all you need to do to be a filmmaker is get some business cards printed claiming that you are. Of course there’s more to it than that, so if you’ve just graduated from university or are otherwise starting out in the business, what can you do to get things going?

  1. START MAKING FILMS. Almost everyone now owns a device that can record moving images. Use it. Your first films will be terrible but you’ll learn loads with each one you do.
  2. EDUCATE YOURSELF. Read blogs like this one, like Chris Jones’ and Danny Lacey’s. Watch YouTube channels like Indy Mogul and Film Riot. Devour DVD extras (click here for a list of my favourites). Get yourself books like The Guerilla Filmmakers Handbook, Rebel Without a Crew and The Mind of the Modern Moviemaker.
  3. OBSERVE OTHER FILMMAKERS. This is a crucial one that many people overlook. There’s only so much you can self-teach. You must get onto other people’s sets and see how they do it. The bigger the production the better. You want to learn from the people who are doing it properly, to the high standards of quality and discipline that the top end of the industry demands. In practice this means moving to London or a TV-making hub like Manchester or Cardiff and knocking on lots of doors.
  4. MAKE SOME CORPORATE VIDEOS. Even if you have no interest in these, they bring some money in, help you hone your skills and most importantly the process of dealing with a client’s feedback and requirements will prepare you for producer/studio notes on proper films.
  5. NETWORK. It’s not what you know, it’s who you know, so get to know as many people as you can. Go to events like the London Screenwriters Festival, Cannes, the BAFTA Filmmakers Market, Raindance evening classes. Stick around after the event proper is over and go for a drink with your fellow attendees. Shake lots of hands and give out lots of business cards. Follow up after the event (but don’t pester). Eventually you’ll strike gold when you contact someone at just the moment they have a position to fill.
  6. BUILD A WEBSITE. This is very easy these days with the likes of Wix and WordPress. An online presence will make people take you more seriously, will make you easier to look up online, and can showcase your talents.
  7. WORK SOCIAL MEDIA. The digital equivalent of point 5. When I’m looking for crew these days I’m more likely to do a Facebook shout-out than post on one of the official filmmaking networks. That said, you should still….
  8. JOIN ONLINE FILMMAKING NETWORKS. Shooting People is £30 a year but Mandy and Talent Circle are free. Every day there are several new jobs posted on each one, so get applying.
  9. CUT A GREAT SHOWREEL. Keep it short (3-5 minutes) and punchy. Link to it whenever you apply for a job and keep it on your mobile devices so you can show it at networking events to anyone who displays the slightest interest in you. A great showreel will stick in their mind much better than an eager face.
  10. FIND AN AUDIENCE. This is the tricky one. Once you’ve reached a point where your films are good enough to show the big, wide world, you need to start getting them in front of eyeballs. This means either getting them into festivals, which is largely beyond your control, but still remains the most prestigious route, or posting them online and driving a huge amount of traffic to them (see 6 and 7 above). If you can connect with a significant audience base then congratulations, you’ve made it! Please write in and tell me how to do it.
How to be a Filmmaker

Bafta Sargent-Disc Filmmakers Market

The New Talent Summit at the Princess Anne Theatre, Bafta

Yesterday I attended the Filmmakers Market at Bafta, a day of masterclasses, round-table discussions and one-on-one surgeries. Highlights included frank discussion about the ups and downs of directing with Bharat Nalluri (Life on Mars), Penny Woolcock (Tina Goes Shopping) and Neil Marshall (The Descent), and career tips from a panel comprising the NFTS, BFI, Film London and others. Here are the stand-out nuggets I took away from the event:

  • Even in this age when it’s relatively easy to make a micro-budget feature, shorts are still considered the best calling cards. One of the panellists claimed that if you make a bad first feature it will be a decade before anyone lets you make another one…. A truth all too familiar to me.
  • Most of us aspire to work in feature films, but don’t forget that most working directors are employed in TV, and even if you do become successful in the cinematic arena, chances are that you will have got there by laying down the groundwork in TV, music promos or commercials.
  • Although there are exceptions (Bryan Singer, Robert Rodriguez…) generally no-one under 35 is going to make a decent feature film; you just don’t have enough life experience. Based on how my work has matured as I speed towards that unfortunate age I am inclined to believe this.
  • Qualities that make a good director: understanding of story and editing; ability to listen and communicate, particularly with actors; the flexibility to turn the inevitable compromises of the shoot into improvements. “The enemy of art is the absence of limitations,” said Orson Welles.
  • All three of the director panellists dislike storyboarding and rehearsals because they kill the on-set spontaneity, but they concede that preparation is necessary even if it all goes out of the window when you start to work with the actors on the day.
  • The director’s job is to create an environment in which the cast can do their best work. Every actor/director relationship is different – figure out what each person needs from you.

What do you reckon to this advice? What great tips have you heard for new and emerging filmmakers?

(By the way, I highly recommend getting yourself on Bafta’s mailing list because they often have interesting events like this.)

Bafta Sargent-Disc Filmmakers Market