Five Tips for a Smooth and Speedy Postproduction

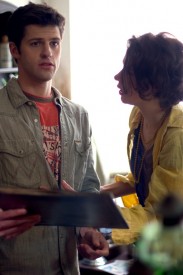
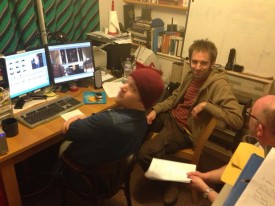
Consulting with editor Adam Hale (left) and director Brendan O'Neill (right). Photo: Anneliese Cherrington
Consulting with editor Adam Hale (left) and director Brendan O’Neill (right). Photo: Anneliese Cherrington

Last weekend I participated in my first 48 hour film challenge, serving as both director of photography and postproduction supervisor. This is the first time I’ve ever done the latter role and I made the huge mistake of failing to prepare for it. This, coupled with the fact that I wasn’t around during the start of the editing process because I was busy DPing, meant that some avoidable errors were made. We got the film finished on time to a good standard, but I learnt several things that will be useful if I ever take on the role of postproduction supervisor again.

Here are the top five things I’d recommend to anyone wishing to have a quick and painless postproduction process:

  1. Sit down with the camera and post departments before the shoot to make sure everyone knows the workflow and what’s expected of them. This includes agreeing on a format and frame rate to shoot, and a format to edit from, and making sure that all hard drives and memory sticks to be used during post are formatted appropriately so they can be read by all the computers being used.
  2. Have a dedicated clapper person on set and make sure they understand the importance of getting the right info on the board. Too often on a low budget the job of slating is given to a crew member with several other responsibilities, increasing the chances of them writing the wrong thing on it and confusing the hell out of the editor. (We got this right on last weekend’s shoot, and it helped enormously.)
  3. Beware of shooting too much footage, particularly if you have a B camera or second unit. We had so much that there simply wasn’t time to view it all in post. Also avoid shooting series (multiple takes without cutting in between) as a time-pressured editor will often miss the fact that there are several takes within the same clip.
  4. Keep logs if at all possible, noting any technical problems with each take and the director’s preferences.
  5. Ideally the DIT (Digital Input Technician) or an assistant editor should do three things once he or she has ingested the material, besides the obvious backing up: 1. Transcode the footage to ProRes or whatever format has been pre-arranged for editing, 2. Sync the sound, 3. Associate information from the logs with the clips, or at least rename the clips with slate and take number. It’s a bad idea to rename the files themselves because it can cause re-linking headaches down the line, but if the DIT has access to the editing software they can rename the clips within the bins.

Watch this space for a forthcoming interview with writer-director-producer Brendan O’Neill on the whole process of making a 48 hour challenge film. Meanwhile, here’s the film:

Five Tips for a Smooth and Speedy Postproduction

ADR Podcast

Here is a video podcast from the ADR (Automated Dialogue Replacement / Additional Dialogue Recording) session on March 15th, in which the actors explain some of the challenges of recreating their performances in a studio.

This is a belated public reward for passing the £1,400 mark in Stop/Eject‘s crowd-funding campaign (over two months ago!). See my earlier blog for more info about how the session went.

Thanks to Gerard Giorgi-Coll for filming this and Soundtree Music for the use of their studio.

ADR Podcast

Press Kit Tips

Stop/Eject press kit

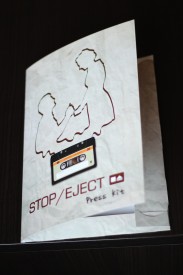
This week the lovely press kit folders for Stop/Eject arrived. Although we probably won’t need these for a while, you never know when something might come up; I wish I’d had one of these for the FilmWorks finale last month. The folders were designed by Alain Bossuyt of Le Plan B, who won the poster competition last summer, and printed by Sign Link Graphics.

For Soul Searcher I had the press kits printed as brochures. The disadvantage with this is that you have to reprint the whole thing if you want to make changes or add things, which might well happen as reviews come in and your festival run develops. With folders it will be easy to remove sheets and add new or revised ones.

Stop/Eject press kit

So what will be on those sheets? What should a press kit contain?

First up you need a SYNOPSIS. For a feature film you should include a short one, similar to the blurb you’d get on the back of a DVD cover, and a longer one, somewhere between 500 and 1,000 words. If you read Sight & Sound magazine you’ll see that they reprint these synopses verbatim.

Then you need biographies of the key CAST AND CREW. Sometimes these are included as extras on vanilla DVD releases.

Next come the PRODUCTION NOTES – behind-the-scenes anecdotes about the origins and making of the film. In the early days of DVDs you could often find these reproduced like liner notes in a little leaflet inside the case.

Stop/Eject press kit

Next you need a BONUS SECTION, for want of a better name. This is where you provide some extra material for a journalist to fill out their article with. Commonly this will be something related to the subject of the film. For example, the press kit for The Fast and the Furious might have included some facts and figures about illegal street racing. For Stop/Eject we might put in some info about cassette tapes and their history. For Soul Searcher I took a slightly different tack and included some extracts from my production diary.

Finally you need to include the complete CREDITS. Again, Sight & Sound reproduces these in full.

(If you’re supplying publicity photos on CD, which is unusual in these days of ubiquitous broadband, you shoud also include a sheet of thumbnails with accompanying filenames and photographer credits.)

Stop/Eject press kit

Remember when you’re writing all this that you’re trying to give a journalist a story on a plate. You need to give them all the exciting elements they need to effortlessly put an interesting article together. The bonus section in particular gives you a chance to provide them with an angle – a hook which convinces them this is a story worth telling.

Why print all this, rather than emailing a PDF? Because a nice glossy folder on a journalist’s desk is more likely to get read than yet another attachment in the inbox. And if you meet someone unexpectedly at a festival or other event, it’s far better than to give them a hardcopy to take away than to rely on them reading an email you send later.

Press Kit Tips

Stop/Eject Trailer VFX Breakdown

The following post has been created and released because you lovely people out there have between you contributed over £900 to the post-production funding of my fantasy-drama Stop/Eject. Visit stopejectmovie.com to become part of the project if you haven’t already.

Since Stop/Eject is still being edited, work has not yet begun on the visual effects for the film itself, but the trailer we released in May features three representative FX shots and it’s these that I’m now going to take you through. First, watch the trailer if you haven’t already.

And here’s the breakdown video. A full explanation of the steps involved can be found below.

Dan’s Death

This is a key shot and was carefully planned. I wanted it to be in slow motion, but the Canon 600D we used can only over-crank to 50 frames per second if the resolution is lowered from 1080P (full HD) to 720P. I built this limitation into the VFX design.

Firstly a wide shot of the shop facade was recorded at 1080P25. This was deliberately done in the morning, when the shop was in the sun and the opposite side of the street was in the shade, in order to minimise the genuine reflections. Then Kate (Georgina Sherrington) was shot emerging from the shop at 720P50, with the camera mounted on its side and framed solely on the doorway. This slow motion element could then be placed within the larger 1080P25 frame recorded earlier, maintaining the image resolution.

Dan (Oliver Park) and the car were shot in a car park with a locked-off camera, the former at 720P50 to ensure his movements matched the slow motion of Kate’s, and the latter at 1080P25 with the car driving at half the speed it should have been. These two elements were combined with a simple feathered crop. The collision will never be seen, so he simply vanishes at the critical moment. I figured the lower resolution of Dan would not be noticeable once this element was composited as a reflection.

In Photoshop, I created an alpha matte of the shop’s windows and door. I applied this to the Dan/car composite, then layered it on top of the Georgina/shop composite with an opacity of about 50% to give the impression of a reflection.

The door’s alpha matte was key-framed to distort as Kate opens it. The final step was to animate this part of the reflection to pan sideways with motion blur and fade out as the door opens.

Rehearsing the "ghostly Kate" scene. Photo: Paul Bednall
Rehearsing the “ghostly Kate” scene. Photo: Paul Bednall

Ghostly Kate

Kate and Dan were shot separately for this, with the camera locked off. For both elements I created a difference matte in Final Cut, whereby the computer compares the element with a base image, in this case the same locked-off shot without either character present. I could then important these mattes into Shake and clean them up using rotoshapes and Quickpaint nodes.

Further use of these tools was made to animate the intersection of the two characters, revealing Kate little by little as she passes through Dan, all the time striving to give the impression that both bodies are three-dimensional. (Here I drew on many über-geeky teenage hours spent watching VFX shots in Quantum Leap and Red Dwarf frame by frame on my VCR, admiring the artistry and trying to figure out the technical trickery.)

After subtracting one matte from the other, I imported the result back into Final Cut and applied it to the original Dan element, placing the Kate element beneath to generate the final composite. A separate, static matte for the foreground records was used to layer them back on top, and an artificial camera move was applied to the whole thing to take the curse off the locked-off look. This move was possible without loss of image quality since we had shot 16:9 but were masking to 2.35:1, so we had surplus material at the top and bottom of frame.

Tape Archive

Not a tape in sight. Photo: Paul Bednall

Hopefully you didn’t even spot that this was a VFX shot. Sophie spent many sleepless nights labelling hundreds of cassette cases for the basement scene, but even these represented only a small fraction of the number required to fill the master shot. Therefore it was always planned to lock off the camera and fill in the missing tapes digitally.

I started by exporting a single frame to Photoshop, where I used primarily good old copy-and-paste, plus a bit of airbrushing and a lot of distorting and resizing, to clone the real tapes many times over. I then imported this layered file into Final Cut.

Next came the most time-consuming part. Hold-out mattes had to be generated for Kate and Alice (Therese Collins) to keep them in front of the cloned tapes. These were created in Shake as rotoshapes and key-framed every few frames to follow the characters’ movements. Once applied back in Final Cut, the foreground characters and falling tapes appear to occlude the digital tapes in the background as you would expect.

That’s all, folks. Please keep the donations coming. We’re just £43 away from the £1,000 mark and the next public reward – the podcast covering day four of the shoot.

Stop/Eject Trailer VFX Breakdown

Editing Stop/Eject

Since I’m about to hand over the Stop/Eject editing reigns to Miguel Ferros, now seemed as good a time as any to share a little insight into some of the kinds of things an editor has to think about while shaping a sequence.

This is the £700 public reward for Stop/Eject. (If you haven’t got a clue what that means, visit stopejectmovie.com to find out.) The total is actually up to £906 now, so there are two more public rewards coming your way: a podcast covering the third day of the shoot, and a breakdown of how the visual effects shots in the trailer were accomplished.

Here’s a little about Miguel, the man who will be taking my edit and polishing it up into a final cut. Miguel is the technical director of the Hay Film School, and indeed organised the Stop/Eject talk I gave in Hay last weekend. He’s also the director of Digital Film and Post, a consultancy company that advises on post-production workflows, helping to navigate the ever-changing landscape of tapeless acquisition formats, ingesting, off- and on-lining, distribution and archiving. His experience includes editing, VFX, producing and directing, mainly in the genres of documentaries, promos and commercials.

Stop/Eject marks a welcome foray into drama for Miguel, and I’m sure he’ll bring all his eighteen years of post-production experience to bear in fine-tuning the film. I’ll leave you with an award-winning Diesel Jeans commercial he edited.

Editing Stop/Eject

Converting 24P Cine Mode Footage to 25fps

This is a pretty esoteric post, I’ll warn you now.

Some of the Stop/Eject behind-the-scenes footage was shot on a Canon camcorder set to “24P Cinema Mode”. It took me ages to figure out how to convert this material to 25 frames per second without the motion becoming very jerky. So I’m going to set down how I eventually did it, in case it can help any other poor souls in the same situation. I was working on an iMac with Lion and FCP Studio 7.

The 24P footage I converted includes a dual interview with Kate (Georgina Sherrington) and Copy-Kate (Katie Lake).
The 24P footage I converted includes a dual interview with Kate (Georgina Sherrington) and Copy-Kate (Katie Lake), shot by Laura Iles and Kurt Baker.

What is 24P Cinema Mode? It’s aimed at American users, and emulates how “real” movies look when they’re broadcast on US TV. Real movies are shot at 24fps and telecined to 30fps (actually 29.97fps, but we’ll say 30 for simplicity’s sake) which is the standard frame-rate of American TVs, DVD players and so on. 24P Cinema Mode captures 24 frames per second and converts them, as the camera is recording, to 30fps. It essentially does this by duplicating every fifth frame and using interlacing to smooth out the motion. This is known as 2:3 pulldown. More expensive cameras embed metadata in their 2:3 pulldown footage so that software like Final Cut Pro can automatically restore it to genuine 24fps, but the material I was working with had no such metadata. I believe it was shot on a Canon Vixia HF10 or similar.

Step 1: Converting to 1080i60 Quicktimes using Adobe Media Encoder

The other problem I had with the footage in question was its format: AVCHD (identified by a .MTS file extension), which Macs don’t really like. Final Cut Pro will convert them via the Log and Transfer window, but only if they’re on an SD card or a disc image of an SD card. But I’d been given the footage on a data DVD, and copying it to an SD card did not fool Final Cut. After much trawling of the magical interweb and trying various free applications that didn’t work very well, I discovered that Adobe Media Encoder accepts MTS files. (If you don’t have the Adobe suite, you can buy an application called VoltaicHD that will apparently do the job.)

So here are the three transcoding stages I went through to convert the material into editable 1080P25:

Step 2: reversing the telecine effect using Compressor
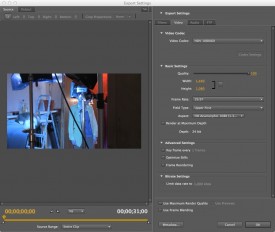
  1. I used Adobe Media Encoder to convert the source files to Quicktimes. I chose the HDV 1080i60 codec and retained the interlacing, field order (upper first), frame size (1440×1080 anamorphic) and frame rate (29.97fps) of the original material.
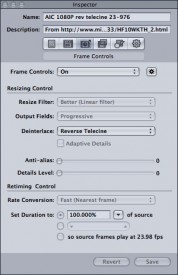
  2. I followed the method on this web page using Apple Compressor. In a nutshell, you take an existing preset – say one of the ProRes ones, if that’s the format you like to edit footage in – and alter two things: the frame rate, found by clicking the video Settings button in the Encoder tab, and the deinterlace option, found in the Frame Controls tab. Set the former to 23.976 and the latter to Reverse Telecine (after first enabling the Frame Controls by clicking the small gear next to the on/off pulldown menu, and selecting On from said menu). At this stage you can also resize the image to true HD, 1920×1080. The resulting video file should be genuine 24fps with no interlacing.
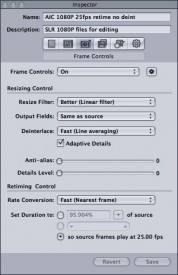
  3. Next bring your 24fps file back into Compressor and drop another preset onto it. Again, use ProRes or whatever your codec of choice is, but this time make sure the frame rate is set to 25fps, deinterlace is NOT set to Reverse Telecine and, at the bottom of the Frame Controls tab, where it says “Set Duration to”, click the last radio button, “so source frames play at 25.00 fps”. What this does is to speed up your video about 4% so that it runs at 25fps. This is the smoothest way to convert 24fps to 25fps, and the speed difference will not be noticeable on playback. In fact, whenever you watch a movie on UK TV it is sped up like this.
Step 3: retiming to 25fps with Compressor

If you’re in any doubt as to whether it’s worked, step through the video frame by frame in Final Cut and see if there are any duplicated, skipped or interlaced frames.

Of course, after all this transcoding, the image quality will have suffered a bit, but at least the motion should be smooth. Has anyone out there found a better method of doing this? I’d love to hear from you if so. Alternatively, if you want any more details on the steps above, just leave a comment and I’ll be happy to share them.

The moral of the story is, if you’re in the UK, don’t use 24P Cine Mode. Just like shooting 24fps on celluloid, it unnecessarily complicates post-production. Stick to 25fps and everything will come up smelling of roses.

Converting 24P Cine Mode Footage to 25fps

The Power of Post

Ray Bullock Jnr. as Joe
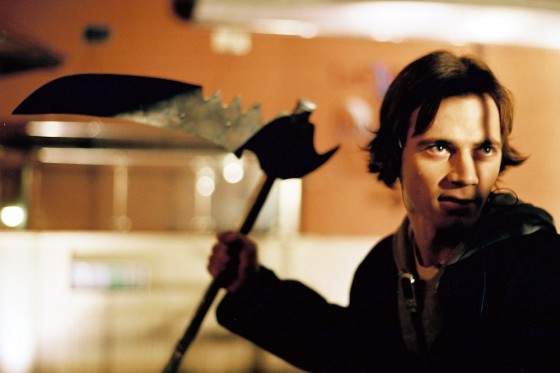
Ray Bullock Jnr. as Joe, preparing to fight the marauding demon

As we search for an editor for Stop/Eject, here’s a demonstration of the power an editor wields.

A few weeks before the premiere of Soul Searcher, my fantasy-action feature about a trainee Grim Reaper, I showed the film to my flatmates of the time. One comment concerned a scene in which the trainee reaper, Joe (Ray Bullock Jnr.), fights a demon (Shane Styen) while drunken revellers cheer him on.

As scripted, the scene covers only the start of the fight – enough to show how cocky Joe has become in his new role. (On the day of shooting we decided to extend the scene to show Joe killing the demon, but after a couple of shots Shane injured himself, forcing us to revert to the shorter version.) My flatmate wanted to see Joe kill the demon, and I decided he was right.

I certainly wasn’t going to do a reshoot at that stage in the game, but nonetheless I was able to alter the scene to have the demon die. I did it in three steps, and these conveniently illustrate the three prongs of attack you can use in post-production to change and improve your story.

  1. Re-purpose existing footage. The demon knocks Joe’s scythe from his hand early in the scene, so my first challenge was to get the hero his blade back so he could strike the fatal blow. Fortunately I had left the camera running while shooting a series of takes of Joe’s scythe hitting the ground. Therefore I had also caught the scythe being picked up on camera. This was never intended to be used, but it worked a treat.
  2. Visual effects. I’m no fan of digital fixes, but there’s no denying they can get you out of a tight spot. The existing cut of the scene had a shot of Joe walking up to the demon, but now I needed to put the scythe into his hand, so I cut out the scythe from a freeze-frame of another shot and motion-tracked it to Joe’s movements.
  3. Sound. This is the most commonly-used tool for changing things in post. Any time in a movie that a line of exposition is delivered without the speaker’s mouth being clearly seen, chances are that it’s Additional Dialogue Recording (ADR). It’s far easier to get the actor into a recording studio to perform a new line than to go back to a location or a long-struck set and reshoot. But in this case all I needed to do was put in some slicing, crunching sounds and a grunt, which I ran over a handy shot of the drunken revellers.

Here is the original scene followed by the bits I changed and then the final version:

Remember that with great power comes great responsibility. I’ve heard of actors who’ve found themselves edited into scenes they’d never shot. If you’ve substantially changed the character with your tinkerings, or placed an actor into a sensitive or controversial scene, be sure to discuss it with them just as you would have done beforehand if it had been shot conventionally. The same goes for the writer if you’ve made a big change to their script.

Some might look at all this as cheating, and I confess I have mixed feelings about it myself. I believe in getting things right in-camera, but the reality is that all films are prototypes, and you’re often well into post-production – at least – before you really figure out what the best way is to make this particular movie.

The Power of Post

Window Smash VFX Breakdown

Here’s one from the archives. This is one of the featurettes from The Beacon‘s long-forgotten DVD in which I break down a crude but effective VFX shot.

Compositing elements shot against black in my living room was an MO I heavily expanded on when I made my next feature, Soul Searcher, and you can see the extensive break-downs for that film by renting or buying the deluxe package below.

Window Smash VFX Breakdown

Ghost-trainspotting VFX Breakdown

As promised, here is the VFX breakdown for the main shot of the ghost train in my recent Virgin Media Shorts entry, showing how a crude model shot can work a treat, given the right compositing:

Due to the looming nature of the competition deadline, this was a pretty quick and dirty shot. Having said that, my VFX skills are pretty limited and I doubt I could have significantly improved it even if I’d had more time. It took a couple of hours to set up and shoot the miniature, and no more than an hour to do the compositing you see above. (I re-used smoke footage shot for Soul Searcher.)

As always, my approach was low-tech, avoiding any CG elements, and I did all the compositing work in Final Cut Pro. Soul Searcher had loads of shots that utilised this low-tech method, creating effects with everything from indoor sparklers to milk being poured into a fish tank. You can see a breakdown of all those effects as part of the Deluxe Package rental of Going to Hell: The Making of Soul Searcher. And remember, if you embed this video on your own site, you get a cut of any sales made through it.

Ghost-trainspotting VFX Breakdown

EPK Advice

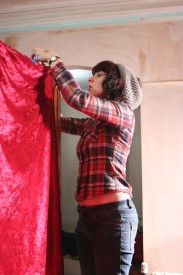
Sophie Black at work on the set

Another guest blog from Stop/Eject‘s producer Sophie Black today. She’s been hard at work creating the Electronic Press Kit, to promote the post-production crowd-funding campaign, and I asked her to share her thoughts on what makes a good EPK.

The Electronic Press Kit is an important part of post-production because we use it to send to regional news programmes and television shows, in the hope that they will do a feature on our film. There’s a lot of things which can be put into it – and in some cases it’s down to choice and what you think will best promote your film – but I got my checklist from Chris Gore’s Ultimate Film Festival Survival Guide, which I’ve been using as a guidebook. Actually it’s a corking book, and very useful, so I recommend that you get a copy. But, in the meantime, here is his checklist for EPK assemblage, and my notes on each:

  1. Two Trailers – one with music and one without. This is mainly in case they want to show the trailer but are fearful of copyright infringement with the music. We included just the one copy of the trailer, with music, because the sound track (not the score) is still in early days and it might feel seem somewhat exposed without the music. If you have the same concerns then you can do what we did and include a copy of the license agreement for your music, so that they feel safe to use it. If you haven’t got clearance for your music – what are you doing? Go and get some at once! And if you can’t, you lose all chance of having your trailer played anywhere that gets attention, and you’re wasting valuable promotional opportunities. Another reason to only include one trailer is that ours came with a swanky little pitch video, so there’s two videos included in the package already!
  2. Selected Scenes – basically this is an opportunity for you to put in the best scenes of the film to show how great your film is, or to show the general style and tone of your film (if your trailer hasn’t done this enough for you). But of course, you do run the risk of giving away too much too soon. We didn’t include any scenes in our EPK because ours is to promote the trailer and the final funding campaign, rather than a finished film (yes, this does mean there may be a second EPK at a later date).
  3. B-roll
    B-roll

    A Making-Of Featurette – Gore says that this is optional but I LOVE behind the scenes footage. No news room is going to want to show a full making-of in a small report, but including a snippet of one can entice them in (a person at a planning desk is still ‘your audience’, after all) and make them want to do their own piece on the film. Particularly when targeting local news, clips of their best scenery with film crews working on them – and looking all professional – will basically spell out the story for them. So we didn’t include a full Making-of, but I did include a happy little montage of the crew assembling the alcove and equipment in the Rivergardens, taken straight from the first podcast. Lovely Belper Scenery: check. Crew looking professional and hard at work: check.

  4. B-roll Footage – again, optional, but I recommend it more than anything. If you weren’t lucky enough to have a news crew capturing your activity whilst you were still on set (and, let’s be honest, you’d have to have quite a name for yourself for that to happen, and in that case you probably wouldn’t want them there), then sending your own behind-the-scenes footage is the only way for that to be featured in the report. News stories about films being made, particularly by independent filmmakers in local areas, are often character-driven and at least half made-up by behind the scenes footage. In conclusion, don’t submit clips of the director looking thoughtful and saying ‘action’, or the actors rehearsing a scene in front of a nice camera, and you probably won’t get a story! Again, any clips you do send should be relevant to the people you’re sending it too, so the majority of ours showed the Belper/Matlock streets and landmarks being used.
  5. Interview footage
    Interview footage

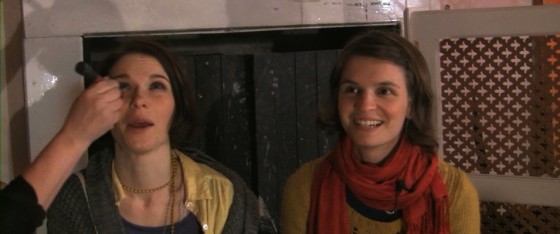
    Interviews – and here is where the second half of a character-driven news report comes from. Companies like the BBC will always shoot their own interviews, as a rule, but submitting your own interview clips will show them the type of thing the cast/crew would say in an interview, and suggests that they are in fact worth interviewing! Even better, get a clip of them saying something along the lines of “the local area is brilliant etc.” then it shows the crew will have relevant things to say for the local news channels, and that we might even make them look good – it gives them a sample sound bite and hopefully shows that the programme will get some good publicity in return. I put the interview clips in order of relevance to who I was sending to, assuming that the news crew will lose interest towards the end – that’s a good rule with anything like this, actually. Put your best stuff first – these people are very busy and might not even have chance to see all of it, even if they want to, so you have to snare them quick. So the clip of Neil talking about how lovely it was to film in the East Midlands went right towards the top. The majority of the interview snippets came from Neil and Georgina, being our main attractions, but I also included a clip of myself from an early podcast, purely because I was talking about the locations and showing how beautiful they looked.

  6. Promotional Images  –  just as with a regular press kit, it is important to include  your poster, logo, website screenshot etc., only in this case in a digital format. If you’re lucky, your logo may even be used in the background when the newsreader headlines your story, so make sure it’s in a high resolution! I also included a scan of our Belper News feature – the way I see it, that showed that we were already ‘news worthy’ and hope that it encourages further publicity.

Yes, that is a big list, but put it all together and you’ll have yourself a bonafide, well-researched-looking EPK!

At the start of the DVD, you should also include your company logo, and a disclaimer which is well-worded to discourage people from spreading your material willy-nilly without putting them off promoting it at all.

Before EVERY clip on the EPK, make sure you include the title of the film, the director’s name, a brief description of what the clip is, and a total running time of said clip. This makes the whole thing look very corporate but is helpful for the people researching and compiling your story on the other side.

You also have to silence the creative editor inside you, which is the part I found hardest. The clips you submit should be snappy and interesting, cutting straight to the relevant shots of people working and the local scenery looking great, or a one-sentence answer (if possible) in your interview clips. There’s no room for elegant pacing here.

Finished EPK
Finished EPK

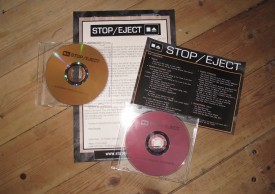
One area where you can be creative, however, is in the presentation of the package itself. Don’t just put the clips onto a basic disk with a note – here is an opportunity for you to show how professional and interesting your film is before they’ve even watched the disk, which will make them want to do so. I created the disks using Lightscribe, featuring the film’s logo, and the covering letter/DVD contents sheet were made using our original posters as backgrounds. This kept everything in our colour scheme and made it looks as though everything was designed specifically for the EPK. It’s also important to ring up the news companies in advance to make initial contact; you can get addresses and numbers on the internet but you have to track down the name of the person to send the EPK directly to, to avoid it going unsorted in a forgotten pile. Plus it gets your names into the reporters’ heads before the EPK arrives, and they will (hopefully) know to look out for it.

Cheers, Sophie. Let’s hope this gets us some local news coverage.

EPK Advice