I’ve spent the last three days in Sussex, scouting locations for a short film called The Gong Fu Connection. Written and directed by Ted Duran, the film follows a young man as he learns Kung Fu, not just the fighting but the whole lifestyle. Themes of sustainability and connection to nature are woven throughout.
The script is predominantly daylight exterior, with many picturesque rural settings including a number of farms. As director of photography, my main concern during the recce was to make the best use of the natural light. That meant checking the orientation of each location to the sun path.
Apps like Helios exist to show you the sun path on your iPhone or iPad wherever you are, but I find that for most locations such precision is unnecessary. A simple compass and a bit of guesswork based on the time of year can tell you what you need to know.
The best direction to shoot is usually towards the sun. This gives everything a lovely halo of backlight, while illuminating it softly from the front with “north light”. If north light isn’t enough, you can choose your reflectors at will – soft or hard, white or silver or gold – to mould the frontlight. For more on this, see my blog entry on moulding natural light. (One exception to this rule of thumb is establishing shots of buildings, which look best in crosslight.)
The shooting schedule is still in flux, so I was able to give the Gong Fu Connection’s production team my recommendations about when scenes should be shot for the best light.
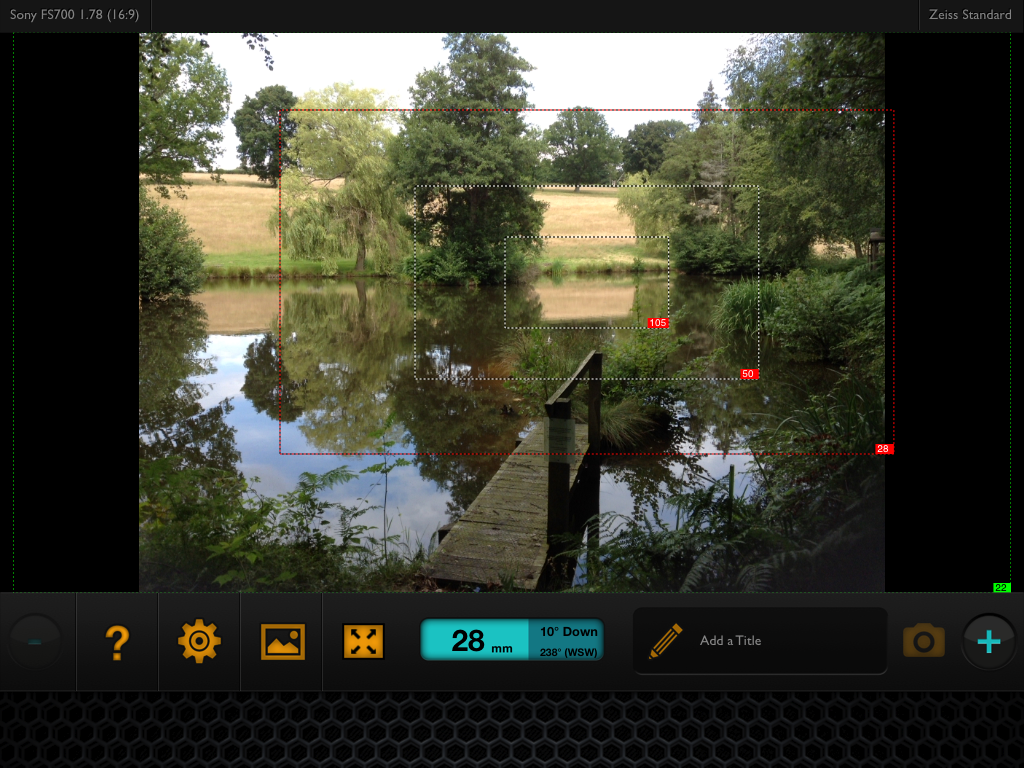
An Artemis screengrab showing various focal lengths and the compass bearing at the lower centre
One app I did use extensively on the recce was Artemis, the virtual director’s viewfinder. Although Ted and I didn’t use it for picking lenses at this stage, it was useful to take screengrabs so I could get a sense of how the location would look with different focal lengths. Artemis also handily displays the compass bearing at the bottom of the screen – something I only noticed after I’d spent the whole three days photographing my pocket compass!
Painting with Light is a book I first heard about when Hollywood DP Shane Hurlbut recommended it on his excellent blog. Browsing the shop at the BFI Southbank recently I came across a copy, liked what I saw… and went home and ordered it on line. Them’s the breaks.
John Alton was something of a rebel. In an era when most DPs used complex lighting set-ups hung from the studio grid, Alton lit from the floor, using fewer sources, and was consequently faster. This made him unpopular with his peers. A strained, in-out relationship with the American Society of Cinematographers didn’t help. He sometimes clashed with other heads of department too, notably designers, who didn’t like the way his lighting made their work look. But directors and producers loved him because he worked quickly.
When Painting with Light was published in 1949, Alton was emerging as a key cinematographer of the film noir genre. Today he is remembered as one of the masters of noir. His utterly black shadows, backlit fog and slatted keylights defined the visuals of films like The T-Men (1947, dur. Anthony Mann) and The Big Combo (1955, dir. Joseph H. Lewis).
A classic bit of Alton’s noir lighting from The Big Combo
However, noir lighting – or “Mystery Lighting” as Alton terms it – occupies only one chapter of Painting with Light. Two preceding chapters cover the basics of Hollywood filmmaking and introduce lighting equipment, most of which is now obsolete. Subsequent chapters cover “Special Illumination” – predominantly weather effects and vehicle interiors, “The Hollywood Close-up” – looking at key angles and introducing a clock system not dissimilar to the one I once blogged about – and “Outdoor Photography”.
The book then diverges from filmmaking, offering advice to novice photographers taking holiday snaps or equipping a portrait studio. Chapter nine, “Visual Music”, explores lighting and composition in terms of a musical allegory, each shot contributing to the symphony of the movie. Chapter twelve is the strangest, urging women to be aware of how their faces are lit as they go about their lives so that they can ensure they are always seen to their best advantage. All cinematographers know that beauty is as much about lighting as it is about bone structure and make-up, but I can’t see that idea ever catching on outside of the industry. Brief chapters on film processing, suggested improvements to cinemas, and the human eye as a camera, round out this mixed bag. A foreword, a lengthy but interesting biography and a filmography introduce the current edition.
Demonstrating the use of a clothes light
While many of the ideas and principles put forward by Alton are still relevant today, some of it serves more as a historical record of cinematography in the mid-twentieth century. Curiously propounding the system he apparently rebelled against (I wonder how different the book might have been had he written it at the end of his noir period), Alton paints a picture of a time in which cinematography was much more complex and artificial. Whereas today we talk of the three-point lighting system of key, fill and backlight, Alton speaks of an eight light system, adding:
eyelight – to give a sparkle in the eye
kicker – a three-quarter backlight to define the jaw
clotheslight – a cross-light to bring out the texture of the costumes
filler – not to be confused with fill, the filler is purely to cure vertical shadows from a high keylight
background light
While the modern cinematographer is aware of all of the above and tries to incorporate them, he or she tries to make lamps pull double- or triple-duty and would almost never use eight lamps to light a single close-up. Alton also advocates abandoning all of your wide-shot lighting and starting again from scratch for the close-up, to beautify your star; today’s audiences would not accept the mis-match of such radically re-lit close-ups. He talks of flag and grip equipment which could never work with today’s dynamic blocking and camera movement, like a “chin scrim” designed to cast a very specific shadow on the collar of a white dinner jacket to stop it blowing out.
Alton explains his clock system and its effect on an orange
But some sections still have undeniable value today. Alton looks at different types of faces and how to light each to their best advantage, how to light a dinner table or a campfire scene, and how to light for different times of day. He maintains that movie lighting should always mimic what natural light does in real life – hard to believe, but this was quite a radical concept in 1949. Examples and diagrams are used throughout to illustrate his techniques.
For me the most interesting part was his insight into depth in cinematography. Many DPs, myself included, feel that a shot looks best when the foreground is dark, the midground is correctly exposed and the background is bright. Alton offers the following explanation of this phenomenon:
At night when we look into an illuminated room from the dark outside, we can see inside but cannot be seen ourselves. A similar situation exists in the motion picture theatre during a performance. We sit in the dark looking at a light screen; this gives a definite feeling of depth. In order to continue this depth on the screen, the progression from dark to light must be followed up. The spot which should appear to be the most distant should be the lightest, and vice versa…
I have no doubt that there are more useful tomes on the market for a student of contemporary cinematography, but if you like a bit of history along with useful tips you’ll find Painting with Light a good read. Like a time capsule, reading Alton’s book today reveals which bits of the past were transient fads and which were timeless universal truths. The importance of depth, the tricks of lighting for different faces, the textural power of cross-lighting, the drama of back-lighting… There are plenty of timeless truths here, and in learning them from Alton you’ll be following in the footsteps of many great cinematographers.
As you would expect from the master of noir, Alton’s chapter on mystery lighting emphasizes the importance of shadows.
Lighting in from outside is crucial for a cinematographer. (Photo by Anneliese Cherrington from the set of The Deaths of John Smith)
On a low budget project there are extra challenges for everyone. As a cinematographer, the most common problem I come across, the one thing that most often foils my efforts to make the images look good, is not the lack of time, or money, or equipment, or crew. It’s the locations.
I understand that for many small projects, even just the travel expenses associated with the DP attending the recce can be prohibitive. If that’s the case, then here are a few things you can look out for yourself. Clearly there will always be compromise in low budget filmmaking, but if you can follow these tips ,where possible, you’ll enable the cinematographer to put the most production value on screen.
Avoid locations with white or magnolia walls, particularly blank ones. They look cheap and nasty on camera and make it very hard to control the ambient light level.
Ensure that permission is obtained to set up lights on the land outside the windows. Almost all cinematography for interior scenes is based heavily on lighting from outside in. Avoid locations where it’s physically impossible to put a light outside, such as rooms that aren’t on the ground floor, unless you can afford scaffolding, heavy-duty stands or a cherry picker.
If there is a fire detection system, make sure the smoke alarms can be disabled. Many cinematographers use smoke or haze to bring a scene to life, but we don’t want to set the fire alarm off.
If the scene is set at night, choose a location that will permit nighttime shooting. Blacking out windows to simulate night during daylight hours is time consuming. It also cuts off the DP’s main place to shine in lights, and it sacrifices depth in the images by denying the opportunity for a view out of the window.
Choose locations that are appropriate for the lighting budget. It doesn’t matter what the camera’s native ISO is, no DP can properly light a classroom, or a village hall, or a car park without HMIs. If you can’t afford to hire big lights, you may well achieve better production values by choosing smaller locations.
A clip from The First Musketeer has been released. Taken from episode three, it shows the first meeting between Athos and the mysterious Marion.
Rocamadour. Crazy, huh?
This was shot at Rocamadour, a medieval town carved into the side of a gorge. (Read director Harriet Sams’ blog for more on the locations of The First Musketeer.) And I think this may have been the night when gaffer Richard Roberts quite literally got a shock as the 1.2K HMI ballast packed up. His arm was numb for 20 minutes. Fortunately this happened after he had executed some nice steadicam work for the early part of this scene.
Come to think of it, it was probably also the night he knackered “the donkey”. Take a moment to come up with your own jokes. Done? Okay, so the donkey was his van. Yeah, not so funny, but at least I let you dream for a bit. Anyway, you can imagine how steep the road was to get down to this place. Now imagine it’s also incredibly narrow. And that the van is quite small but loaded full of generators and other heavy kit. Like I say, Richard knackered his donkey.
Richard avec le steadicam. Photo: Jessica Ozlo
My recollection is that this was our first big night exterior, and I remember being shocked at how long it took just to cable everything. Often we were throwing cables over balconies to someone else below – to avoid running the cable through shot. When it was unavoidable, the wonderful art department – Amy Nicholson and her assistant Denise Barry – would come in and hide the cables with straw. It really felt like 30% of the set-up time was planting the lights, and the other 70% was running the cables, hiding the cables, siting the generators, checking we weren’t overloading either of them, discovering we were even though the generators were rated a full kilowatt above what we were drawing, deciding to run some stuff off the mains, blowing a fuse because the electrics are old, failing to find the fusebox, etc, etc.
When lighting night exteriors, I tend to start from the back and work my way forwards. Backlight lets you see everything without really seeing it, and then you can add in pools of light from the sides when you need to see more. So for the wide shot at the start of the scene, the first lamp to go up was a 1.2K HMI (before it died), right at the back. There was some debate about whether we could site it there, because it was on some steps which were used occasionally during the night by the resident monks. Yep, monks. In the end we said “screw it” and put it there, leaving as much room as possible for the monks to get past it. Once smoke was pumped in, that HMI gave us the nice blue ambience in the background.
Nicole O’Neill as Marion De Lorme. Photo: Jessica Ozlo
Opposite the door of the tavern were a couple of Dedos creating pools of light around the candles – more on that in a future post. In the foreground I placed a Kinoflo on the floor to the left of frame, dimmed right down and diffused, just so characters wouldn’t be complete silhouettes going under the arch.
The conversation between Athos and Marion is backlit by a Dedo boomed over their heads, behind them (from the camera’s point of view). It wraps around Marion’s face enough to make out her profile, which is about all you want in a mysterious scene like this. There’s some bounce on Athos which I think was just coming off the surrounding stone. The only other lamp was a 2.5K HMI, lighting the background. For Marion’s close-up, I aimed the Dedo at Athos and let the bounce off his shirt and jacket light her face.
If you want me to rationalise it now, I’d have to say that this Dedo represents a particularly bright moon, and the HMI represents starlight. Frankly this was one of those cases where making it look good seemed more important than making it look realistic.
On the left, a real streetlight. On the right, a 650W Arrilite with Urban Sodium gel.
Saturday night saw the third and final day of production on Forever Alone. If you haven’t already, check out my blogs on day one and two of this sci-fi short by Jordan Morris. (I’ve gone back and added some frame grabs into the day two post.)
This time around, our lighting kit had grown just slightly with the addition of a 650W Arrilite. Without this it would have been near impossible to light the nighttime alley scenes that were scheduled. The alley in question was in a suburban area, conveniently adjacent to the producer’s house and thus a power source.
I knew going into this shoot that I would have to embrace the sodium vapour streetlamps. In the past I’ve always avoided or flagged them, because that grungy orange look gives away that you don’t have the budget to swap out the bulbs like they do in Hollywood. American film and TV nights are always steely blue; British film and TV nights are usually seedy orange. With only one flag and one C-stand in our kit, however, I had no choice.
The orange backlight on Faith (Haruka Abe) and the fence, although apparently from the streetlamp in the background, is actually from an Arrilite 650 out of frame right, gelled with Urban Sodium. A daylight-balanced LED panel, also out of frame right but closer to camera, keys Faith. A second panel hidden behind the end of the fence lights the white van and the grass in the background.
Fortunately there were no streetlamps close enough to spill light onto our character, Faith (Haruka Abe) – they were only creating pools of light in the background, which helped add depth. I used one in particular to motivate a strong backlight, in reality generated by the Arrilite, gelled of course with Urban Sodium (Lee no. 652).
For colour contrast, an LED panel set to 5,600K threw in a little “moonlight” from the side. The second panel, also set to daylight, was positioned to light the deep background. It was so handy, as I raced to rig our final set-up before wrap, to be able to slap a V-lock battery on one of these panels and move it across the street in seconds.
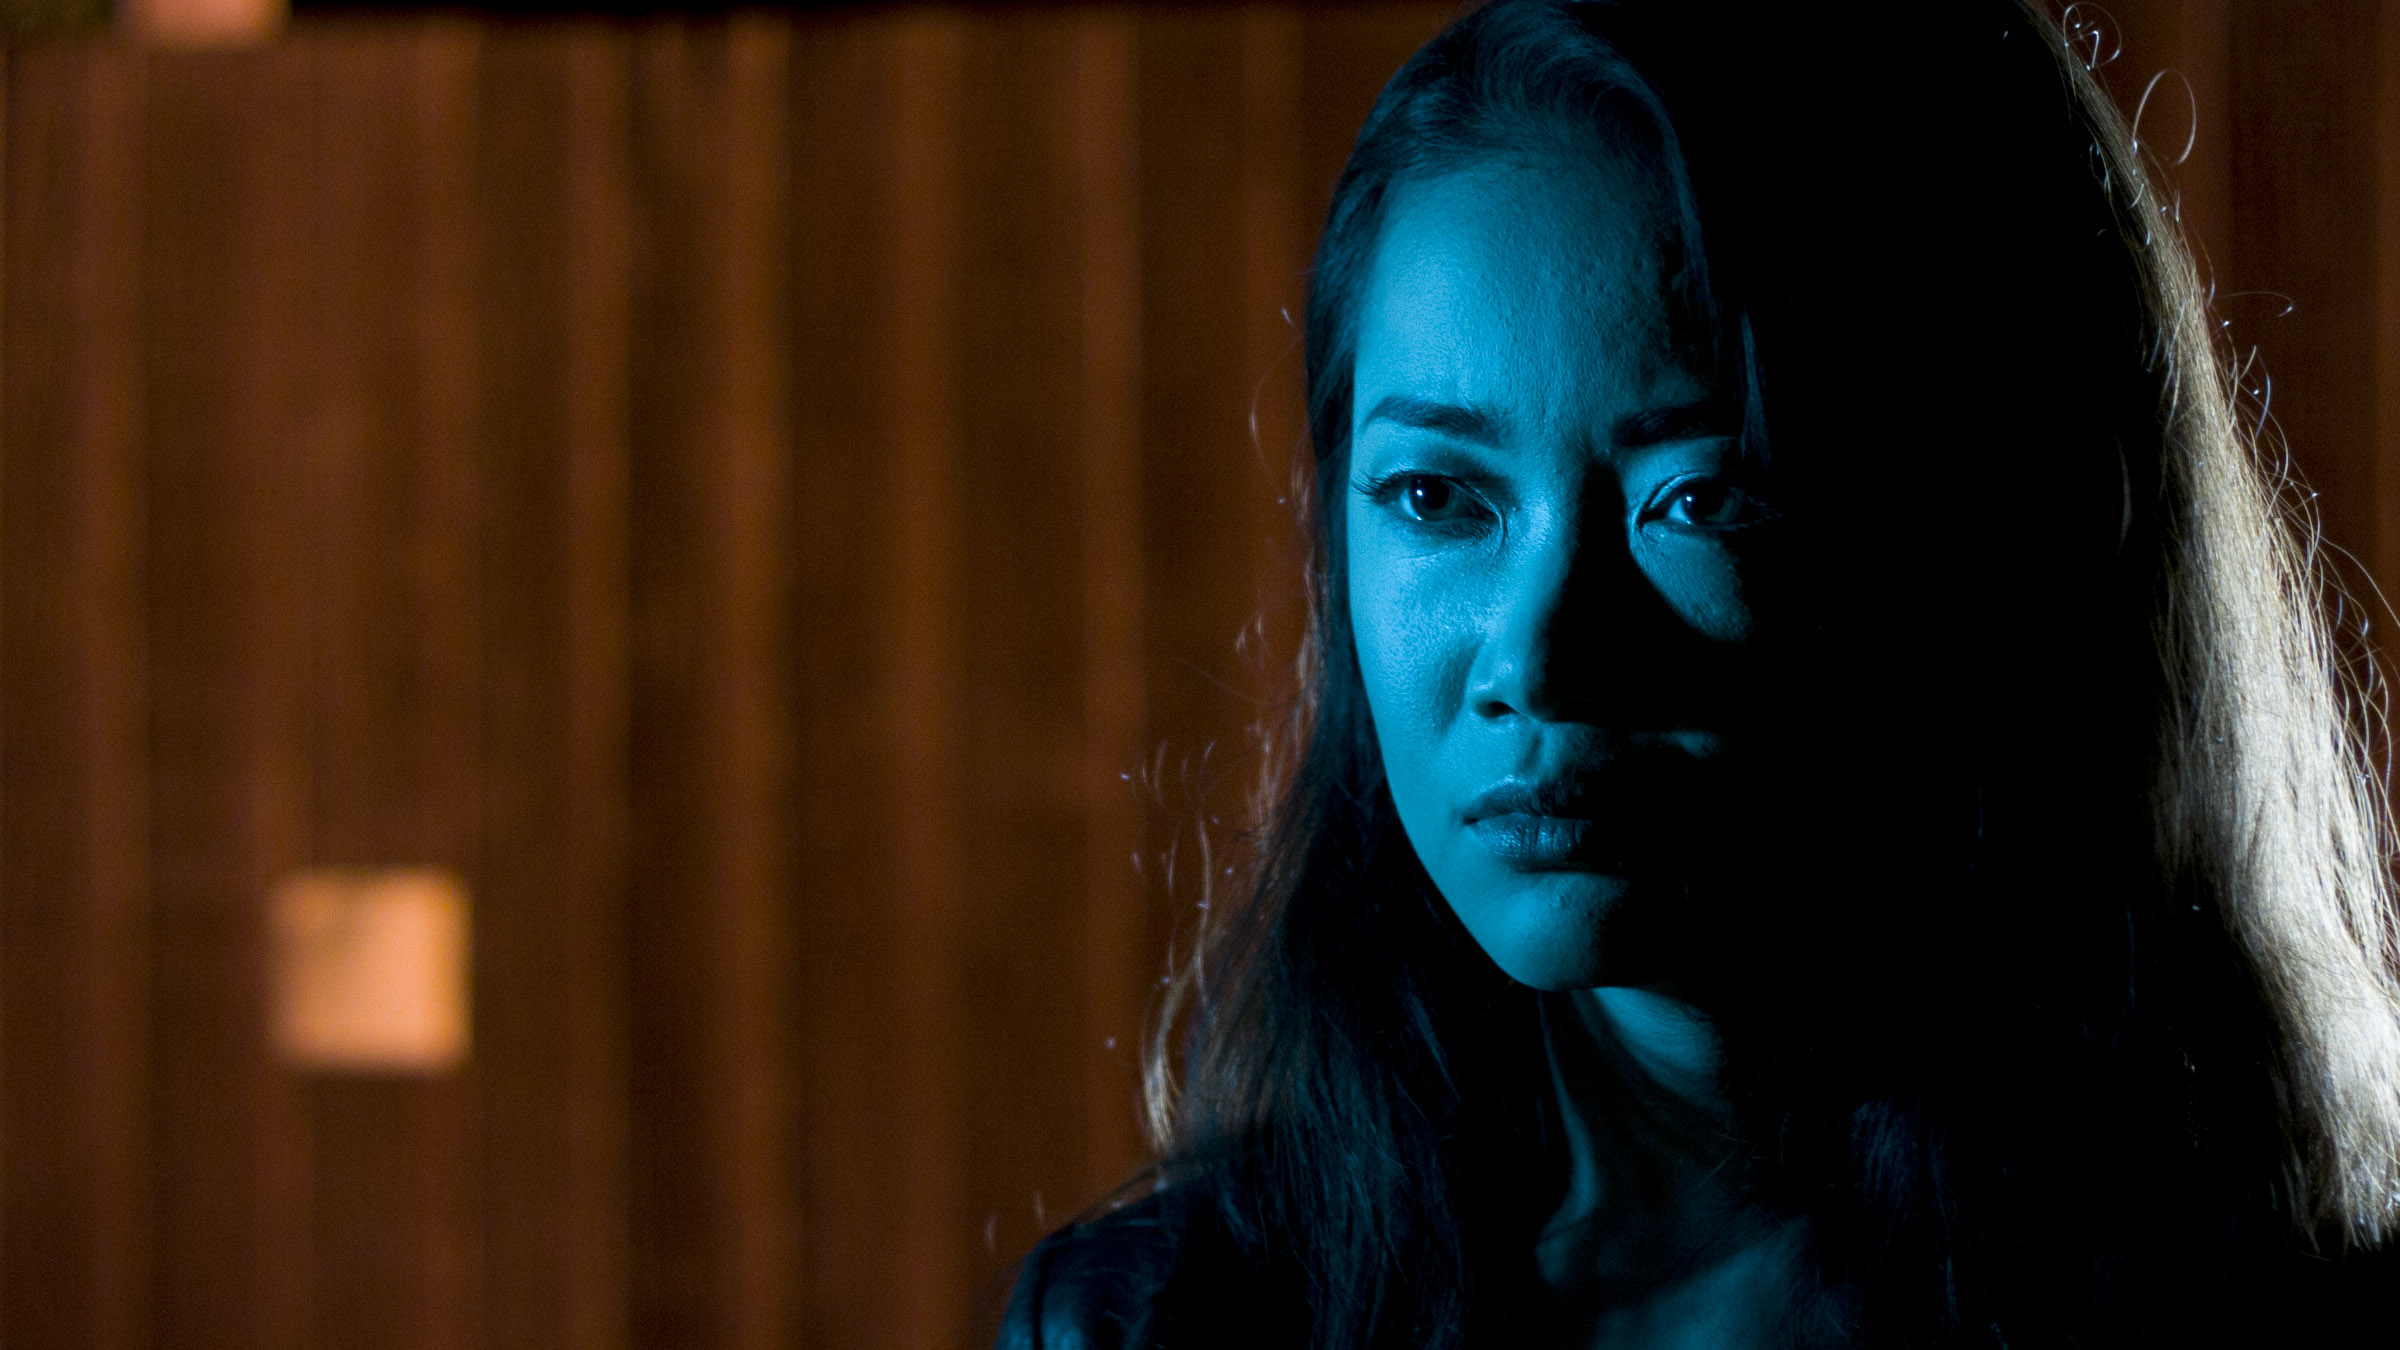
When Other Faith appears on the scene, she’s keyed by a Dedo covered with tough-spun diffuser and the characteristic Medium Blue/Green gel. My favourite shot of the night was her close-up:
Haruka Abe as Other Faith. Image courtesy of Jordan Morris
Emulating the beautiful contrasty look of the TV show Fringe, I eliminated all fill light to put one side of her face in crisp, black shadow. An LED panel backlights her hair, while the Urban Sodium-gelled Arrilite rakes across the fence in the background.
Eliminating the fill was unexpectedly difficult – a downside of using a sensitive camera. The slightest bit of bounce would contaminate the blacks, as did a faux period streetlamp in the adjacent garden. It’s hard to figure out where unwanted light is coming from when it’s so dim that your naked eye can barely perceive it.
Forever Alone is now wrapped, and Jordan’s beginning the processes of editing and adding extensive visual effects. Personally I’ve learnt a lot about how far a camera be pushed, specifically the Blackmagic Cinema Camera. Many of the wide shots I’ve reviewed are under-exposed (partly due to our widest lens being relatively slow) but the raw data allows the exposure to be bumped up in post without them looking nasty.
What’s the most you’ve ever had to push a camera?
In this splitscreen shot, the two Faiths are backlit by the 650 – this time without a gel, while an LED panel gelled with Urban Sodium lights the background. A second LED panel, daylight balanced, keys the downside of First Faith (left), while a Dedo gelled with Medium Blue/Green keys the downside of Other Faith (right).
Day two saw us shooting a big scene in the dining room. Since the location was only available to us during daylight hours, the windows had to be blacked out with bin bags. Ideally for night interiors, I would put an HMI outside to shine “moonlight” in through the windows, and perhaps use halogen floodlights to create depth and interest in the deep background. This can bother some directors, however, because it means leaving the curtains open – hardly realistic. I figured that if I could create an interesting night interior look on Forever Alone without the crux of open curtains and deep background, it would give me a lot of confidence in the future when working with those restrictions.
An LED panel hidden behind the wall that Charlotte is leaning on supplements the ceiling light from a more flattering angle. A CTB-gelled Kinoflo Divalite provides the blue wash in the foreground. Image courtesy of Jordan Morris
I began by turning on the ceiling light, something I almost never do. I’m not a big fan of toplight, but it seemed appropriate given the interrogative nature of the scene, and I knew I could add bounced light off the table-top if the look was too harsh. Also, the shadow of the lightshade added some interest to the room’s blank white walls. I used the 60W tungsten bulb, and placed black-wrap across the top of the shade to prevent bounce off the ceiling from raising the ambient light level.
Cardboard barn doors. This kind of DIY solution is so much easier with sources that don’t get hot.
I clamped the Dedo to the top of a mirror directly behind Faith, which allowed me to give her a dedicated backlight. I gelled this pink, foreshadowing her eyes glowing this colour at the end of the script.
Other Faith, a visual representation of the heroine’s darker side, was keyed by another dedicated source, this time gelled with Medium Blue/Green again. Ideally this source would have been a Dedo, to achieve fine control, but only an LED panel remained available. So to reduce the panel’s spill onto other characters, I fashioned makeshift barn doors out of a cardboard box.
To light the living room – visible in the background on reverses – I employed the Divalight. This was gelled blue to suggest moonlight and create some depth and separation – a proxy, I suppose, for those deep backgrounds I couldn’t have outside the windows.
Much has been made in recent years of the low-light sensitivity of modern digital cameras, and the attendant reduction in required lighting power. When competing with natural light, larger instruments are still necessary, but Forever Alone really helped me to see what can be achieved with minimal gear. This weekend I get to see how much I can push this in a night exterior scene, as we complete principal photography. Stay tuned.
Working from the foreground back, an LED panel to the right provides the key on Charlotte (centre), with fill supplied by the ceiling light. Other Faith (right) is keyed by a second panel, gelled with Medium Blue/Green. A Dedo provides backlight, while a blue-gelled Divalite illuminates the background. Image courtesy of Jordan Morris
Haruka Abe as Faith in Forever Alone. She is side-lit by an LED panel and 3/4 backlit by a Dedo, while a Kinoflo Divalite illuminates the background. Image courtesy of Jordan Morris
When I was offered the role of DP on sci-fi short Forever Alone, I must confess that I had pause for thought. It was a student production, and the lighting package available from the university was much smaller than I’m used to. But I figured it would be a good challenge for me, to see if I could deliver a slick sci-fi look for a script set entirely at night, using only a handful of small instruments.
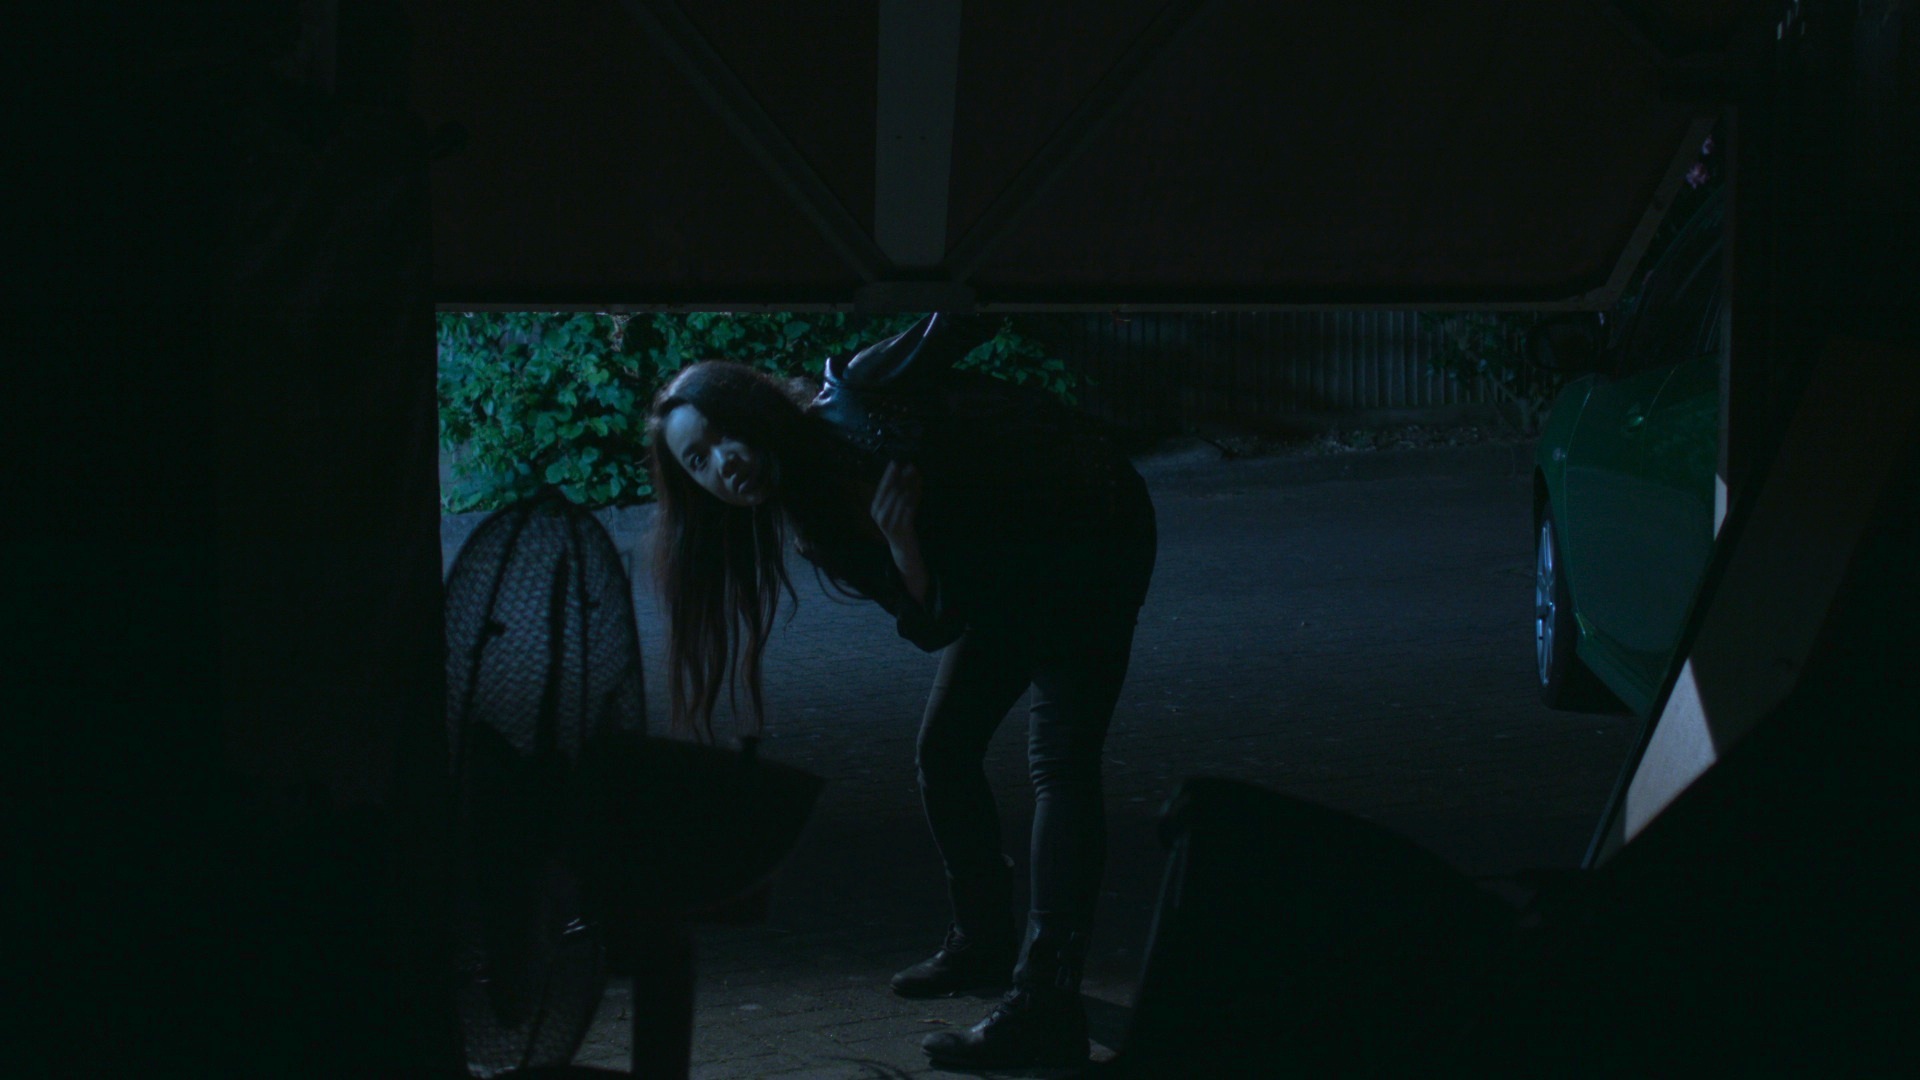
Creating darkness around the garage door meant making good use of the garage’s random contents.
The package consisted of a Dedo kit, a Kinoflo Divalite, two 12×12″ LED panels, a collapsible reflector, a single C-stand (with an arm but no knuckle) and one flag. And we quickly discovered that the Dedo kit contained only one in-tact bubble. On arriving at the house location, I checked out all the ceiling lights and, amongst the energy saver bulbs, found a single 60W tungsten globe. I immediately added that to my modest arsenal, along with my trusty £2 LED camping light which I’d brought along. Additionally, at my request, director Jordan Morris purchased a powerful LED torch for a key sequence. Dynamic practical lighting always looks good, and I thought it might help fill in any areas which our other sources couldn’t reach.
£2 LED camping light
We were shooting on the Blackmagic Cinema Camera with three Canon primes, the slowest of which was f2.8. Regular shots would be recorded in 1080P ProRes, while VFX plates would be captured in the 2.5K CinemaDNG Raw format. I feared I would be struggling to light to f2.8 without raising the camera’s ISO above its native 800, but in fact only one scene felt underexposed.
Interactive light, the low-tech way: a 60W bulb on a stick
This scene took place in the garage, where the lead character, Faith, uses her superhuman abilities to generate a glowing light source above her head. To create the requisite interactive light, I borrowed the pendant fitting from the ceiling of the garage, removed the fluorescent bulb, put in the 60W tungsten globe and taped it to the end of a broomstick. I had chosen Medium Blue/Green as Faith’s “special powers” colour, but this is a very dark gel. With only a 60W bulb inside, even boomed above Faith’s head, it didn’t shed quite as much light as I wanted. Hopefully these shots, recorded in Raw, can be brought up in the VFX/grading process without too much noise creeping in.
Other sources used in the garage included the two LED panels, colour-balanced to 5600K so as to show up blue on the tungsten-balanced camera. These were positioned in the rafters at either end of the space and dimmed right down, to give a hint of backlight to scenes supposedly taking place in pitch blackness.
The garage’s ceiling light, turned on by the characters of Mitchell and Charlotte when they enter, was represented by our only functioning Dedo. I chose the Dedo for its focus; I didn’t want the room awash with light, just a pool of illumination that would still have shape and mysterious shadows.
Stella Taylor and Oliver Park, as Charlotte and Mitchell, are keyed here by a Dedo in the rafters. A foreground glow is created by an LED panel. Image courtesy of Jordan Morris
For several shots I used my LED camping light as a key, believe it or not, even going so far as to rig it on a stand for certain close-ups. The distances involved were small, so it was quite effective. In one shot (not the one pictured below) I bounced it off the floor AND covered it in tough-spun diffuser, to get an ultra-sublte eyelight.
Haruka Abe as Other Faith, keyed by the LED camping light shown above. Image courtesy of Jordan Morris
Stay tuned for my report from day two of the shoot.
Back in early 2012, gaffer Colin Smith and I built a wagon light – or Cyclotron, as it was soon dubbed. Alright, Colin did most… all of the building, despite what this video may appear to show.
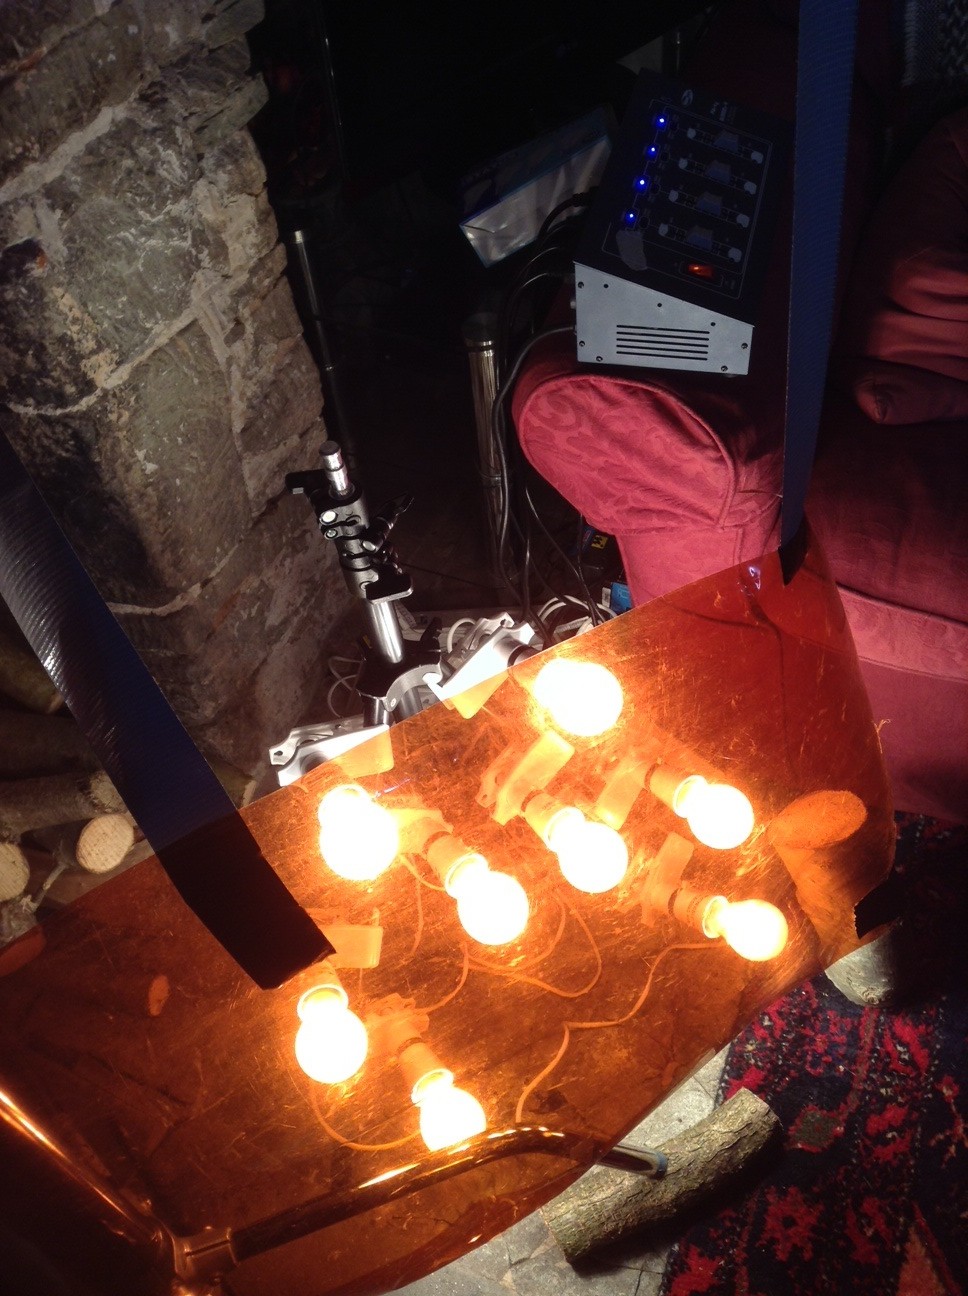
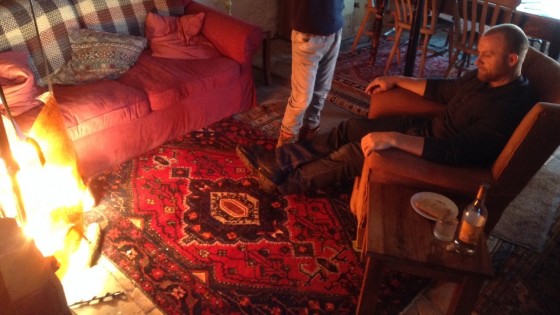
The dimmer board controlling the Cyclotron sits on the arm of the sofa next to the tungsten avenger itself.
Shooting Coffin Grabber, directed by Claire Elizabeth Alberie, we needed firelight to play on the face of a character called Phil. I asked Col to rig up a bank of eight 100W bulbs, running two of them into each of the four channels on his dimmer board. During the takes he would oscillate the faders in random patterns to suggest the flicker of flames.
In front of the bulbs I hung a sheet of Urban Sodium gel. Given Phil’s character, I didn’t want the sunny feel of a straw colour or the homely orange of CTO (Colour Temperature Orange). I happened to have some Urban Sodium in my gels bin and I felt that had just the right dirty, gritty and a little bit hell-ish look for Phil.
There are many ways to simulate firelight. Check out this blog by Shane Hurlbut about how he built an elaborate rig using gooseneck microphone mounts for The Greatest Game Ever Played. And look out for a forthcoming post from me on simulating candlelight when The First Musketeer is released.
Phil (Ross O’Hennessy) basks in the warm glow of the Cyclotron.
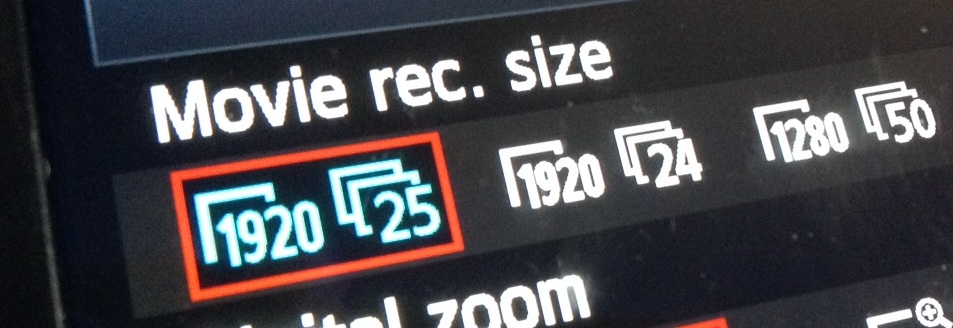
It’s a common dilemma in the UK for filmmakers: do you shoot at 24 or 25 frames per second? Until a couple of years ago, I would have said 25 every time, but with DCPs and Blu-rays now about, and most TVs capable of handling a range of frame rates, the answer is not so clear-cut. Unlike aspect ratio or shooting format, the decision has no discernible creative impact on your project, merely a technical one. And it’s so easy to convert between the two that it often feels like it makes no odds. Nonetheless, to help anyone on the horns on this dilemma, here’s my round-up of the respective advantages of each frame rate.
The Case for 25fps
If you need to record to any kind of tape format at any point in your process, 25fps is what you need.
The same goes for PAL DVDs.
If your film is going to be broadcast on UK TV, it will be transmitted at 25fps.
Since your camera’s running in sync with the UK mains supply’s alternating current, you don’t need flicker-free ballasts for your HMIs. Having said that, pretty much every time I’ve hired an HMI, it’s come with a flicker-free ballast as standard anyway.
If you’ve made a 25fps feature film that isn’t quite long enough for distributors to classify it as a feature, the extra running time you squeeze from exhibiting it at 24fps might make the difference.
The same goes for Blu-rays. (Blu-rays do not technically support 25P, but they support 50i, which can contain progressive 25fps content. However, discs authored to the 50i spec apparently will not play on most US machines.)
If you shoot at 24fps and need to convert to 25fps for any reason, your film will become 4% shorter, making it that extra bit pacier and able to squeeze into a shorter slot at a film festival.
If shooting on film, your postproduction facilities will be much more comfortable with 24fps material. We really freaked out our lab on The Dark Side of the Earth by shooting 25.
Many traditional film projectors will only run at 24fps.
Can you think of any other factors that I’ve missed?
I’d say the balance has tipped in favour of 24fps. However, I think you’ll find that many people in the UK (outside of the celluloid world) are still more comfortable with 25…. for now.
A couple of weeks back, I served as director of photography on a music promo for heavy metal band Savage Messiah. Directed by Tom Walsh of Polymath Pictures, the video was released yesterday by Earache Records.
This shoot represented a number of firsts for me: first time operating a Red Epic, first time using a tilt-shift lens, and first time shooting more than 50 frames per second.
Red
While preparing for the shoot, I found this video tutorial from the oddly-named Embassies of Cinema was very helpful in demonstrating the basics of operating the Reds. As Tom said to me, a camera’s a camera, and if you know how to operate one then you can probably find your way around any other, but no-one wants to look like an idiot when they show up on set and start tentatively pressing buttons on an unfamiliar piece of kit.
If there’s one thing I learnt about the Red that I’d like to flag up to other first-time users, it’s the crop factors. The Epic has a Super-35mm sensor, but it only uses all of that sensor when in 5K mode. If you shoot at a lower resolution, the camera simply ignores the outer edges of the sensor, rather than scaling the image to that smaller size,. The result is that your lenses appear to get more telephoto as you decrease the resolution. So watch out for that.
Tilt-shift
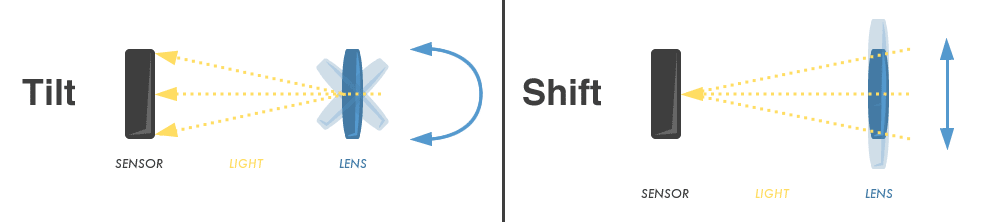
The tilt-shift lens
A tilt-shift lens is one which allows you to move the lens elements around relative to the focal plane. The shift mechanism is primarily of interest to stills photographers who want to capture skyscrapers without them appearing to taper towards the top. The tilt is the fun part.
A classic tilt-shift photograph
Normally, the glass elements in a lens are parallel to the focal plane (the camera’s sensor). Imagine a shot of three apples lined up next to each other on a table. They’re all the same distance away, so when you focus on one, the other two are in focus as well. But if you tilt the lens, only one apple might be in focus, and part of the background might be in focus too. This effect is often used to make cityscapes and landscapes look like miniatures, but it’s also useful for general weirdness. If you can’t afford to buy or hire a tilt-shift lens, a technique called “lens whacking” offers a low-tech alternative.
Highspeed Cinematography
Regarding highspeed photography, the only thing I have to say is, “Eh?” Can anyone out there explain why tungsten lights would flicker when shot at 300fps? Everything I’ve read says that only discharge lighting (HMIs, kinoflos) and very small tungsten bulbs should flicker at high frame rates. Surely the filament in a blonde shouldn’t be cooling enough between peaks in the AC power supply to register a flicker in a 600th of a second? I certainly can’t think of any other explanation.
You can see the flickering at around 2:24 in the video if you’re looking for it, but there’s enough dynamic lighting, smoke, lens flares and tilt-shifting that it all just seems part of the deliberate effect.
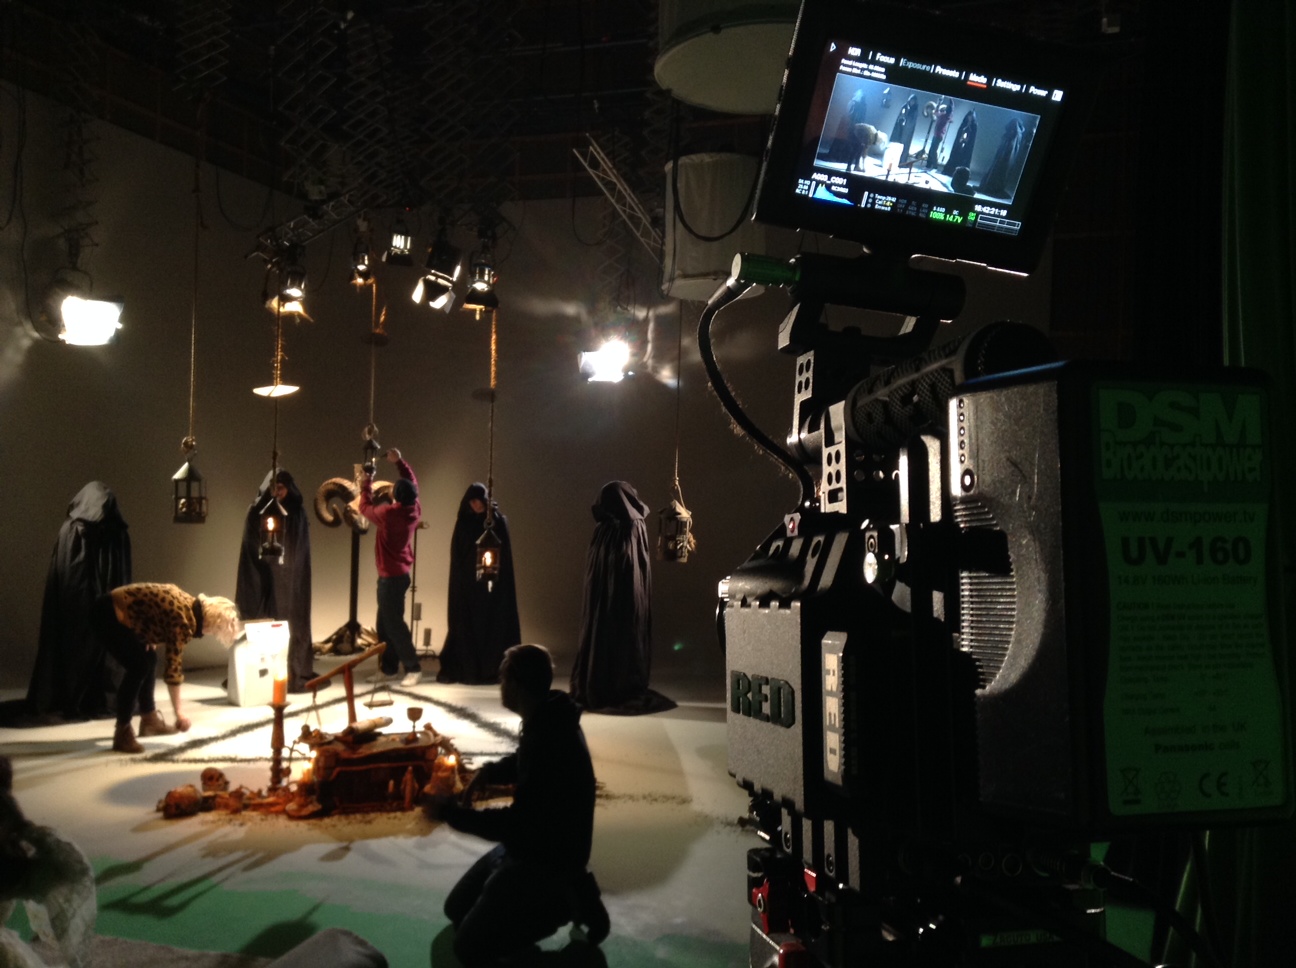
Setting up to shoot the narrative portions of the promo. Director Tom Walsh kneels in midground.
Thanks to Tom and designer Amy Nicholson for another great shoot. I look forward to working with them again next week on A Cautionary Tale.