Shooting in the Snow

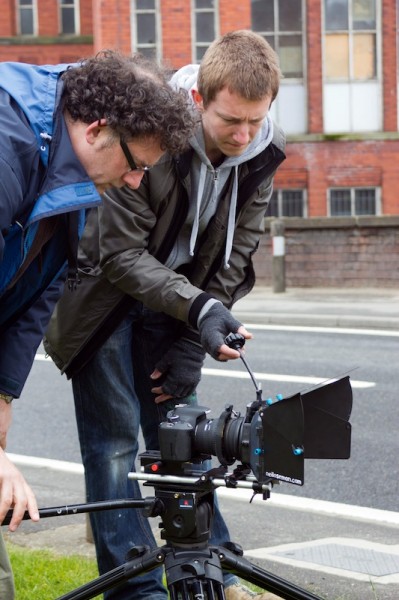
Chris Newman films the bandstand at Belper River Gardens. Photo: Sophie Black
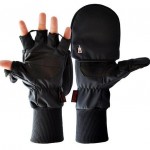
Flip-top gloves
Flip-top gloves, or “fittens” as they have become known amongst my crew.

Yesterday Sophie Black and cinematographer Chris Newman braved the snow and ice to get me some wintery shots of Belper and Matlock for Stop/Eject. If you too are tempted to take the opportunity of filming in a winter wonderland, I’ve put together some tips with Chris’s help:

  1. DRESS APPROPRIATELY. I’ve never been able to find full gloves, no matter how thin, that give my fingers enough sensitivity through the fabric to effectively operate a camera. Instead I wear fingerless gloves which have mitten-like attachments that can be slipped over my fingertips when I’m not operating. I am roundly mocked for this, but they work. “Wrap up warm,” Chris adds, “and wear sensible footwear with plenty of grip!”
  2. BEWARE OF FOOTPRINTS. If you’re filming drama in the snow, plan your coverage around the inevitable appearance of footprints as your crew tramples around. Start with wide shots and any other angles that might show the ground, then move on to close-ups when the snow’s been disturbed.
  3. EXPOSE CAREFULLY. (No, this is not advice for winter flashers.) If you’re shooting GVs like Chris was, he suggests over-exposing slightly but being careful not to blow out the snow. If you’re shooting people, chances are you will have to blow out the snow in order to get decent skin tones. Chris says a variable ND filter is particularly useful so that you can keep your depth of field shallow, and they’re “also very handy for shooting around sunset as you can lose the light very quickly and need to adjust the amount of light [coming] into the lens.”
  4. PROTECT THE CAMERA. DSLR advocate and Hollywood DP Shane Hurlbut suggests that ziplock freezer bags are the best way to protect these little cameras from moisture and low temperatures. Arrange the zip at the back, so you can easily access the battery and card compartments when you unzip, and cut a hole for the lens, taping around the edges with electrical tape. Beware that your camera may still need time to acclimatise to the cold before it will function properly.
  5. BATTERIES DON’T LAST AS LONG. Cold temperatures shorten battery life, so take plenty of spares and keep them in your pocket to benefit from your body heat.
  6. BRING A LENS CLEANING KIT. It’s “essential for wiping away those snowflakes from the lens and to prevent smudging,” says Chris.

Find out more about Chris and his work at www.christophernewman.co.uk
Shooting in the Snow

Proaim Shoulder Rig Review: Ten Months On

Last July when I bought my Canon 600D (Rebel T3i) DSLR I also invested in a Proaim shoulder rig from Cine City. I reviewed the rig on this site soon afterwards, based mainly on playing about with it at home, but although I mentioned briefly how it fared during the Field Trip shoot last August I’ve never got around to giving a proper verdict on how this rig performs in a shoot scenario. Until now.

First and foremost, the rig is designed to give you the kind of smooth(ish) handheld shots you would get from a shoulder-mounted camera – broadcast/ENG, 16mm or whatever. While it certainly does that, all the weight of your DSLR is on the front of the rig, so it very quickly becomes difficult to hold up. You need to add a counterweight to the back – mine being a backpack which I can fill with whatever heavy stuff is to hand, loosely fastening the waist strap to prevent it swinging around. I’ve yet to make any serious use of this set-up, so I’ll have to get back to you on how it works out in the field.

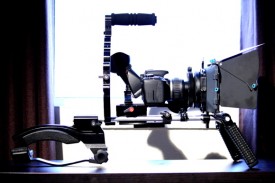
The Proaim shoulder rig with top handle

Aside from the shoulder pad, the Proaim rig comprises several other elements which can be fitted onto the core rail system as required. These are:

  • a two-stage matte box and sunshade
  • follow focus
  • hand grips
  • a top handle (an optional extra I went for) with microphone mount

Prior to Stop/Eject, I generally fitted everything bar the follow focus whenever I used the camera. (Sadly most jobs I do lack the budget for a focus puller, and I don’t find the follow focus useful when pulling by eye.) To be perfectly honest, I did this mainly to make the camera look bigger and more impressive – particularly important on corporate jobs!

Shooting for Astute Graphics
Shooting for Astute Graphics. Photo: Nicholas van der Walle

On Stop/Eject there was no time to have unnecessary accessories getting in our way, so I fitted only the follow focus, adding the matte box and sunshades very occasionally to flag a bit of backlight or use a graduated ND filter. Whenever I had to pick the camera up while still on the tripod, I regretted not fitting the top handle, but I never found time to put it on.

So the follow focus was the main part of the rig to get used. And I’m afraid the verdict here is not good. I knew before I bought the rig that many reviewers had complained about the gears having a little play in them. But I also knew that better quality follow focus units were out of my price range, and that some reviewers reported being able to reduce or remove the play by tightening a screw.

Focus pulling
On Stop/Eject, Rick Goldsmith operates camera while Colin Smith pulls focus. Photo: Paul Bednall

Well, no amount of screw tightening has done the job; there is still play. You can turn the focus knob about a millimetre before the focus ring of the lens starts to rotate. Shooting at f1.8 on my 20mm Sigma lens for a big wide – such as the master shot of the basement – that single millimetre can represent 20 metres of focal distance. Result? I had to pull the focus on that master shot by eye.

Col got skilled enough by the end of the shoot to compensate for this play, but it still caused us problems from time to time. I believe Cine City have now released a version two of their follow focus, so perhaps this is an improvement.

I have to say that the most effective parts of the rig are the matte box and sunshades. Aside from looking impressive, the ease with which you can flag off stray light is brilliant – no more gaffer-taping bits of cardboard to your camera.

But I was surprised to find on Stop/Eject that I was often bypassing the rig altogether and slapping the camera straight on the tripod.

You’ve got to do whatever’s going to get the job done right. I’d definitely advise having this rig in your arsenal, assuming you can’t afford one of the better quality options. With a decent counterweight it will massively improve your handheld shots, and the rest of the bits will come in handy too – just don’t expect to use all of them all of the time.

Filming Stop/Eject with a minimal rig
Filming Stop/Eject with a minimal rig. Photo: Paul Bednall
Proaim Shoulder Rig Review: Ten Months On

Marquetry and Macro Tubes

Anne lays sand-shaded veneer pieces into a panel
Setting up to shoot. Photo: Lisa Sansome

Last Monday was the first day of shooting on a promotional video for a company in Llandrindod Wells called Aryma. Aryma makes contemporary marquetry – exquisite and intricate inlaid wood panelling, typically for private jets, super yachts and luxury homes. An image is created not through paint of any kind, but by painstakingly building it up from many, many pieces of wood veneer, each one a different colour, and some of them shaded by singeing them in hot sand.

The video marked my first experience of using macro tubes: collars that fit between the lens and camera body to allow the lens to focus on closer objects than it normally can. This was necessary in order to properly capture the fitting of the veneer pieces, some of which are unbelievably tiny. Here is a glimpse of a few of the shots recorded so far.

Marquetry and Macro Tubes

Wheels Within Wheels

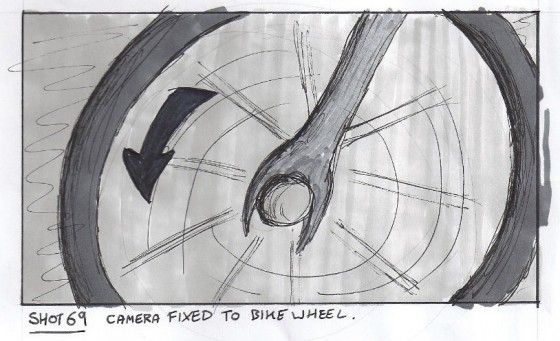
One of the great things about DSLRs is that, being so small, you can put them in all kinds of unusual places and, being so light, you can rig them to things with relatively little hassle. Stop/Eject is not the sort of film where we’ll being doing a lot of this (unlike Act of Valor, which I strongly suggest you check out), but there is one shot that needs a custom rig…

Shot 69, as drawn by Sophie Black

In this shot, the camera needs to be attached to the bike in some way so it moves with it, maintaining the same framing on the wheel throughout. This is part of the film’s visual theme of circles, which I discussed earlier this year on the blog.

Rigged for the rear wheel

If the shoot had gone ahead last October as originally planned, this shot would probably have got dropped or replaced with a similar but less effective version achieved by simply steadicamming along next to the bike. But one great advantage of a shoot being postponed is the opportunity to prepare so much better.

To that end, Colin and I borrowed his mum’s bike this morning to test the shot. Under the pressure of a low budget filming schedule, you can’t mess around trying to figure out a rig like this. You have to work it out in advance.

My plan was to use a C-stand arm and a cheap tripod to get the camera in the right place. First of all we tried clamping the arm to the frame of the bike, but it was too thick. So then we clamped it to the pedal (which meant roping or clamping the pedal to another part of the bike so it wouldn’t turn). The bottom of the tripod was clamped in turn to this arm. The handy thing about using a tripod, of course, is that you have a pan-and-tilt head for easy adjustments and a quick-release plate too.

Rear wheel shot
Rear wheel shot

Initially we filmed the rear wheel, but then I realised filming the front wheel would allow us to get a wider frame, since the pedals (which had to be framed out because the arm was clamped to one of them) were further away from the front wheel.

The rig worked out really well. We had to use a lens with an image stabiliser, and when we shoot it for real we’ll put someone on the bike to weigh it down and reduce the bumps further. I’d imagined we’d have to use a second clamp and bungee cords to keep the camera in place, but the sturdiness of the C-stand arm and the low weight of the camera made this unnecessary.

Yeah, we got a bit of the pedal in shot, not to mention Col’s feet. But those things are easily fixed.

Just before I sign off, I have to give you a link to Tony Hill Films, a site I came across while researching bike rigs. He’s built a number of unique and fascinating camera rigs which you can see in action on the site: http://www.tonyhillfilms.com/rigs

Front wheel rig
Front wheel rig
Wheels Within Wheels

Depth of Field

Although I use Ebay quite a bit, I rarely bid in the auctions. It annoys me too much how the price always seems so low and then jumps up exponentially in the closing minutes of the auction as everyone leaves bidding until the last possible moment. But when I saw a Sigma 20mm/f1.8 EF lens I couldn’t help myself and it was me that pounced at the last minute with my bid and won the lens.

The Sigma 20mm/f1.8 on my Canon 600D

What’s so great about this lens? I already have a Canon 18-55mm zoom – what’s wrong with that? The answer is: it’s all about depth of field.

Every filmmaker knows what depth of field is – the range of depth within an image which is in focus. Those of us cursed by tiny budgets to shoot on prosumer video formats have spent many years bemoaning how everything’s always in focus. Then HD-DSLRs came along and suddenly it all changed. Now you can control your depth of field. Now you can throw your background beautifully out of focus and keep your subject crisp and sharp, just like in real movies. But you can’t just turn on your DSLR and expect to get stunning depth of field straight away. So how can you make sure you’re always getting the shallowest possible focal depth? (Not that that is always the best look for every shot, but it’s nice to have the option.)

Let’s go back to basics and look at what affects depth of field. Most of us learnt all this when we first started making films, but let it drain from our brains over the years as our photographic dreams were crushed by the obstinately sharp backgrounds of a thousand Mini-DV frames.

1. Image size.  The larger the image, the smaller the depth of field. That’s why DV cameras with their tiny image sensors give such large depth of field, while at the other end of the scale a 35mm celluloid frame will permit lovely narrow focal depth. It’s also why a “full frame” DSLR like the Canon 5D Mark II will supply smaller depth of field than a “crop chip” DSLR like my Canon 600D.

2. Lens length.  The longer the lens, the smaller the depth of field. We all know this one well enough. How many times when DPing on DV have I heard the director ask me to zoom right in so the background goes nicely out of focus? But in the DV days it never went as out of focus as we wanted it to.

3. Subject distance.  People commonly forget this one. The closer the subject is to the lens, the smaller the depth of field. This is why sometimes you can achieve shallower focal depth by using a wide lens and placing the camera close to your subject than by zooming right in and moving the camera back. It’s also why miniatures will have a tell-tale small depth of field (the distance between lens and subject is miniature, just like everything else in the set-up) unless you take steps to counter it.

Depth of field varying with aperture
At f5.0 (left) almost all of the DeLorean is in focus, but at f1.8 (right) the depth of field is much smaller.

4. Aperture size.  The larger the aperture (i.e. the smaller the f-stop number) the smaller the depth of field. This is the crucial one with DSLRs. This is why I jumped on the Sigma f1.8 lens and why the f1.4 I borrowed on Field Trip was so beautiful. Of course, if you’re shooting in a bright environment then an aperture of f1.8 will give you a very over-exposed image, even with your camera on the lowest ISO. (Remember that you can’t compensate by changing the shutter speed, because that will also change the amount of motion blur in your footage, which unless you’re remaking Saving Private Ryan you normally don’t want to do.) The solution is to use an ND (neutral density) filter to cut down the amount of light entering the lens.

Of course there are far more technical details behind all of this, which frankly I don’t understand but fortunately I don’t need to in order to make films. I hope this post has refreshed your memory or tied together what fragments you already knew. I’ll let you know how I get on with the 20mm Sigma in the field. No pun intended. Well, maybe a little.

Depth of Field

SLR Learner

Shooting director Patrick Coyle in his role as Buck

You learn something with every job you do. On last weekend’s intensive shoot for Field Trip, I learnt a hell of a lot. Aside from one day filming the Wasteland trailer and a morning filming a corporate, it was my first use of my new Canon 600D and Pro Aim shoulder rig. Four days, up to seventeen hours each day, and every shot handheld: I could not have asked for a tougher crash course in HD-DSLR cinematography.

Between takes
Between takes

The director wanted a documentary style: lots of ad-libbed camera movements including crash zooms. It quickly became apparent that SLRs are not the right format for such a style, prone as they are to the rolling shutter “jelly” effect, and given that the lenses we were using noticeably adjusted the exposure – even in manual mode – whenever we zoomed. So that was the first lesson: choose your camera to fit your movie, and don’t just follow the crowd.

Aside from that, perhaps the key thing I realised is that I’ve bought into a system, a system which I can adapt to my needs and finances. This is true of both the rig and the camera. In the case of the former, I left off the follow focus and frequently the matte box and sunshades too, since these slowed down lens changes and made it harder for me to pull focus on the fly.

My lenses
My lenses

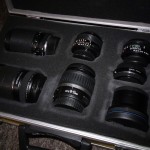
With the latter, lenses were the big revelation. To keep costs down, I didn’t purchase any lenses with my camera. I already owned Canon’s basic 18-55mm and 55-250mm zooms, and an adaptor would allow me to use my old 28, 50 and 70-210mm Minolta lenses too. None of these are particularly great, and crucially none of them are very fast. When I borrowed some f1.4 andf f1.8 primes from a helpful runner, I was blown away by the tiny depth-of-field. Conclusion: I’m wasting my camera’s potential with my current set of lenses, and I must get hold of some nice fast ones pronto.

Other things learnt or reinforced on Field Trip include: always make very sure the data has all been transferred before you wipe a card; you get what you pay for (one of my cheap third party batteries packed up); and I need some nice ND filters.

As ever, you’ll be the first to know when I get the new kit and how it stacks up. Thanks to James Byrne for the Field Trip photos.

SLR Learner

Proaim shoulder rig from Cine City: review

Sorry, I know I promised this several posts back, but here at last is my review of the Proaim shoulder rig I recently purchased for my Canon 600D. It’s available in several different configurations, but I went for “Kit 3 + cage” which cost a little under £700 all told.

The Proaim shoulder rig with top handle

The main reason I wanted it was to address one of DSLRs’ key flaws for video work: the handling. They’re small – meaning shaky shots – and not designed for using in the kind of positions a moving image camera operator needs. By bracing the camera against your body, a shoulder rig steadies the shot. Of course it will never eliminate the movement of the human body completely, but rather than a shake it will give you more of a sway which viewers will subconciously recognise from handheld TV and film and associate with big, expensive cameras (which all sit on your shoulder, of course).

One of the two 4x4" filter trays partially raised out

But with Proaim’s “Kit 3 + cage” you get more than just a shoulder mount. You get a complete rail system which you can reconfigure to your heart’s content, a matte box, follow focus and a top handle. While researching the system online, I found many people complaining about the build quality – many of whom had never used one, it must be said. Obviously it’s not as robust as its more expensive counterparts, but it all seems solid enough to me. It takes a bit of getting used to, as many of the parts bump into each other if you try to configure them in certain ways, but this is a small price to pay for the flexibility of the rig overall.

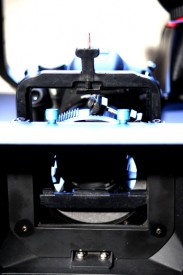
Let’s look at the rig in more detail from front to back. The matte box contains two filter trays which can be rotated (but not separately, unfortunately) and is equipped with side and top flags. The trays take standard 4×4″ filters, which are pricey, so I currently have a cheap Cokin-compatible graduated ND sellotaped into one of my trays!

The follow focus

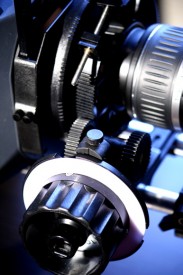
The follow focus is perhaps the most useful part of the set-up. Various different gears are provided which slip onto your lenses’ focus rings and mesh with the gears in the follow focus unit itself. When you turn (or, more to the point, your focus puller turns) the knob on the side, it therefore drives the focus ring – or indeed the zoom ring, if you wish to configure it that way. You also have the option of connecting a crank or a whip (flexible shaft) to the knob (oh dear, it’s all getting a bit Carry On), the idea being that whatever strange position the camera is in and whatever moves it has to do, your camera assistant can still hit their focus marks without getting in the way. And I can confirm that this system works just fine even if you’re using lenses whose focus rings move back and forth as they’re turned.

Coming to the camera mount itself, there is the usual quick-release plate that screws into your DSLR’s tripod thread. On the 600D, this covers a small portion of the battery cover – just enough to prevent it opening. As per this review‘s advice, I filed out a recess in the quick-release plate and the battery cover now opens. On the bottom of the rig is another screw thread so you can attach your tripod’s quick-release plate and easily put the whole thing onto sticks.

The battery compartment now opens

I’ve attached the top handle just behind the camera, to stop it getting in the way of the follow focus. Two extra railing tubes are provided (not pictured) and can be mounted either at the side or on the top, and a basic suspension mount for a shotgun mic is also supplied (again, not pictured).

At the back is the shoulder pad, which isn’t the most luxurious but seems comfortable enough, and a bracing arm folds down to put some of the weight against your stomach and side. However, this doesn’t stop the rig from being very front-heavy and tiring to hold up for more than a few minutes at a time. In a later post I’ll explain how I overcame this problem.

The Proaim shoulder rig viewed from the rear

All in all, I really like this rig and look forward to doing my first proper shoots with it next week. The value for money is excellent, and it completely transforms my little stills camera into a proper, workhorse video camera.

Proaim shoulder rig from Cine City: review

Canon 600D HD-DSLR: Sound Advice

Yesterday Ian Preece came over to do a sound test on my new Canon 600D HD-DSLR. Although the new wave of DSLRs capable of shooting full HD video are extremely popular with filmmakers these days, they are designed primarily for taking photographs, which can cause some problems for those more interested in motion pictures. The biggest one is sound.
As far as I know all the HD-DSLRs on the market have a microphone socket and some, like the 600D, allow you to manually adjust the recording level. But where they fall down is that none of them have a headphone socket, so there’s no way of monitoring the sound when you’re recording. If your lapel mic rustles on the interviewee’s jacket, or a gust of wind causes some rumbling, or the cable has been damaged and the sound is intermittently cutting out, you’ll be completely unaware until you play back the shot.
By far the best way to overcome this problem is dual system sound. This means, like shooting on film, you record the sound on a separate device and sync it to the picture later. (Typically with a clapperboard, but software like Plural Eyes can automate the process.) This is all well and good for drama shoots, but if you’re a one-man crew shooting a simple corporate or vlog, having to operate two devices and then spend the time in post syncing the footage is not ideal.
When researching my camera prior to purchase, I found that some people out there had discovered a way to monitor the sound being recorded to it. However, after receiving the camera and trying out this method, I discovered I couldn’t do it. It involved connecting a headphone amplifier to the AV out socket via a special cable. The problem is, as soon as you connect anything to that socket, the camera’s screen shuts off (since it assumes you’ve just plugged it into a TV). There is a firmware hack called Magic Lantern which prevents the screen from shutting off, but a full version is not yet available for the 600D (a relatively new model) and even when it is, I’m not sure I will want to risk it permanently damaging the camera.
(Note: Many DSLR filmmakers don’t care if their screen shuts off, because they’re using an external HDMI monitor as a viewfinder anyway. I’m not doing that, because the 600D has a flip-out screen, and when combined with a simple magnifying viewfinder attachment it becomes the perfect viewfinder.)
So I purchased a Beach Box, since these have a headphone socket. Okay, you’re not monitoring what the camera’s recording but you’re pretty close to it, and if you set it up correctly and keep checking the playback you should theoretically have no problems. Unfortunately, yesterday’s test with Ian did not go well. We tried first without the Beach Box, since he has a mixer with a headphone socket anyway. When this gave strange and unuseable results we turned to the Beach Box, which didn’t work either. Several weird things were going on, but the main one was that when we connected a mic to one stereo channel it came in incredibly loud and distorted, no matter how low we set the recording level, and on the other channel (which should have been silent) there was a very quiet, hissy version of the same audio.
It wasn’t long before we were forced to admit defeat. The Beach Box is going back whence it came, and I’m going to purchase a portable audio recorder and use dual system at all times. I’ll let you know how I get on with that in the coming weeks.
That’s all for now. Next time I’ll discuss the shoulder rig.

Canon 600D HD-DSLR: Sound Advice

The Dark Side of the Earth: March 16th, 2011

Technology. On and on it advances. It can’t be bargained with. It can’t be reasoned with. It doesn’t feel pity or remorse or fear. And it absolutely will not stop, ever, until… well, you get the idea with that.
In the earliest years of my filmmaking career, you could safely say I was filled with fear, but after a while I could film anything you please – some shirts, some trousers and a few LPs. (Arrrggh! Stop quoting things and get to the point.)
In the earliest years of my filmmaking career, I kept up-to-date with all the latest techie developments. Ironically, from today’s viewpoint, there was barely anything to keep up-to-date with. Mini-DV and Final Cut Pro hit in 1999, the year I got into the industry, and for about a decade the low-end video world stayed the same. You shot on Mini-DV; you edited in FCP. The only real development in that time was the shift from VHS to DVD as the final delivery medium.
But lately things have gone nuts. HD arrived in all its various flavours. For a while it seemed like things would continue much as before, with HDV replacing Mini-DV in a fairly seemless manner, but no. The unstoppable T-800 of technology marched on.
Web-based video was becoming more and more prevalent, holding off the desire for HD in many corporate jobs, but bringing various format compatibility issues until Flash won out. At the same time, tapeless shooting was becoming a reality, again with a confusing array of formats and settings. Tapeless still scares the hell out of me whenever I have to delete my rushes during the shoot, an action which every nerve in my body screams against. And then there was the DSLR hybrid revolution, and now 3D is becoming affordable (though, I suspect, extremely poor-quality 3D).
This whole subject has been occupying my thoughts a lot lately, as my current camera is nearing the end of its natural life and I’ll soon have to invest in a new one. The first two cameras I owned for professional use, a Canon XM1 and XL1-S respectively, both seemed like the perfect cameras for me at the times that I bought them. I can’t say I’ve been as happy with the next camera I bought, a Sony A1, but I chose it mostly because it seemed like clients would all be asking for HDV very soon, but six years later this still isn’t the case. At least it was a fairly straightforward decision; back then the only options in my price bracket were Mini-DV and HDV. Now the choice is bewildering.
My ideal camera has recently been released – the Panasonic AF1 – but unless there’s a major change in my finances, I won’t be able to afford it. A number of the DSLRs appeal, but there are issues: the rolling shutter effect, the audio complications, the need for accessories like viewfinders and shoulder braces to make it practical to shoot moving images with.
Last weekend I DOPed a short film using a Panasonic DVX110 and a Red Rock adaptor which allowed me to use Nikkon 35mm lenses. The results were beautiful, my sole regret being that the chip at the back end of the rig was only standard definition. The experience made me keen to ensure my next camera is capable of using 35mm lenses. After all, with the DSLR explosion currently going on, footage shot on tiny chips with a huge depth of field is soon going to look as cheap and old-fashioned as analogue video.
I’ll keep you posted on how my camera choosing develops.

The Dark Side of the Earth: March 16th, 2011