5 Tips for Successful Pick-ups

Discussing the next set-up on the Ren pick-ups shoot with director Kate Madison. Photo: Michael Hudson

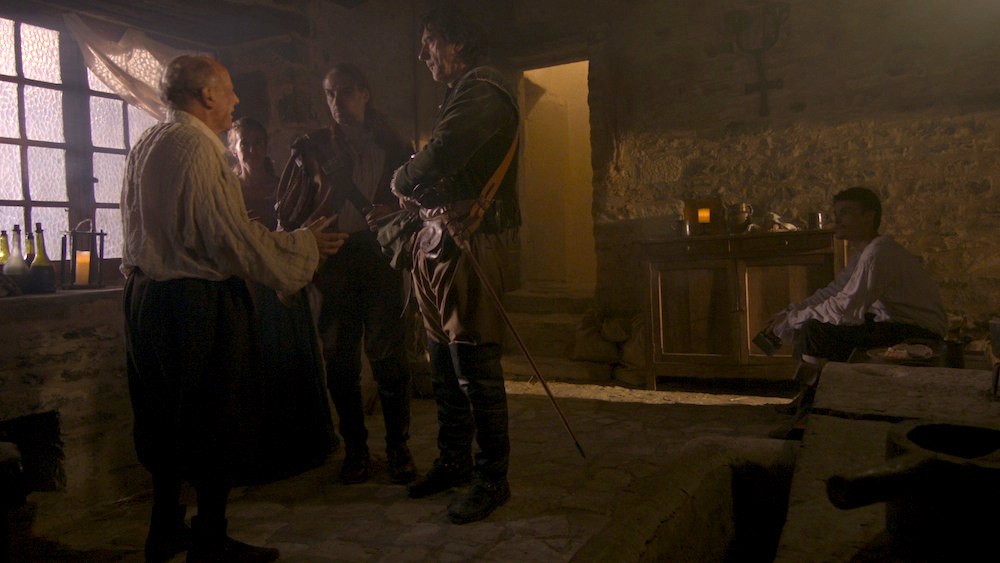
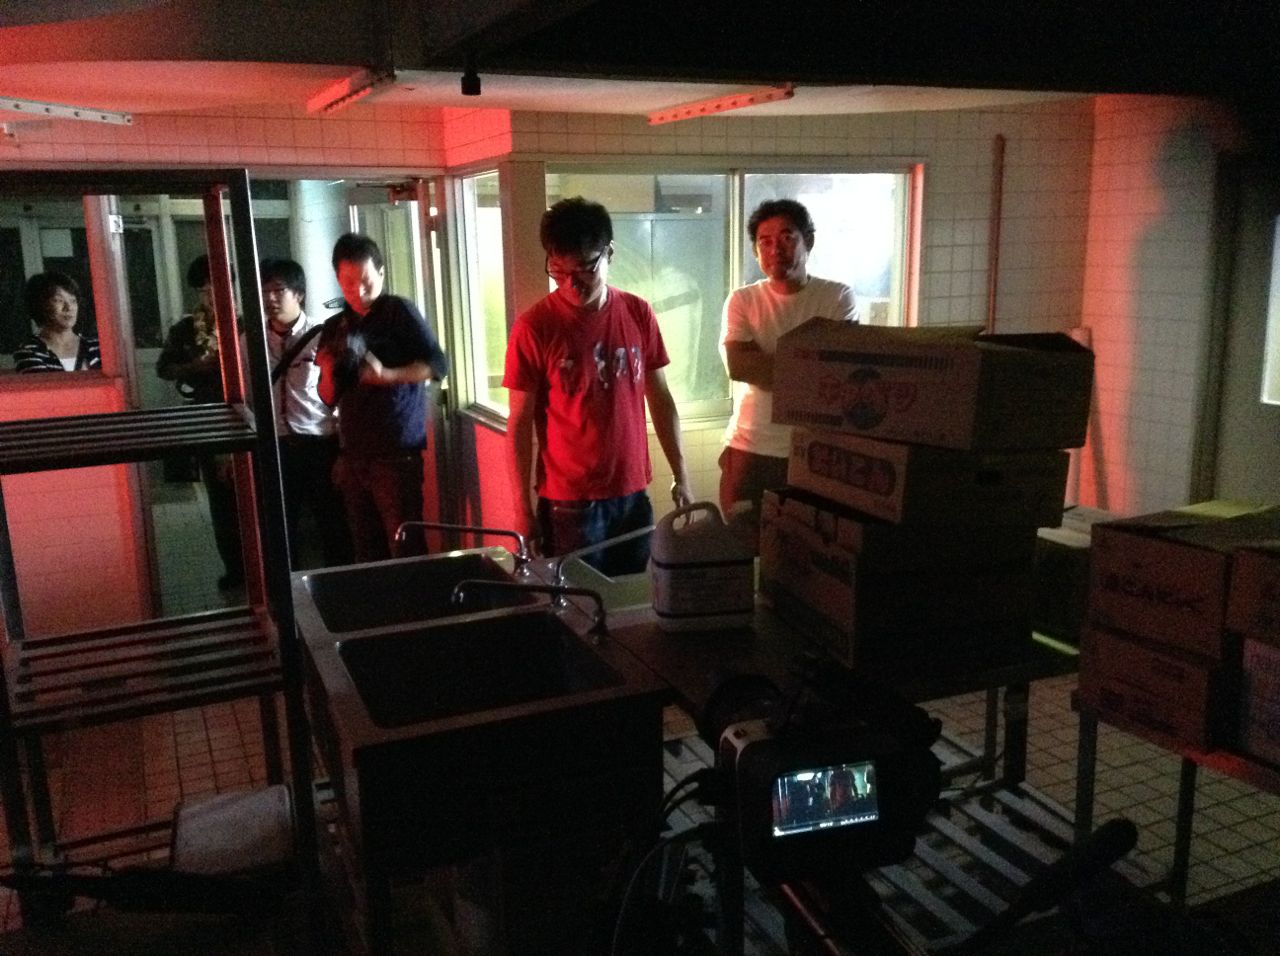
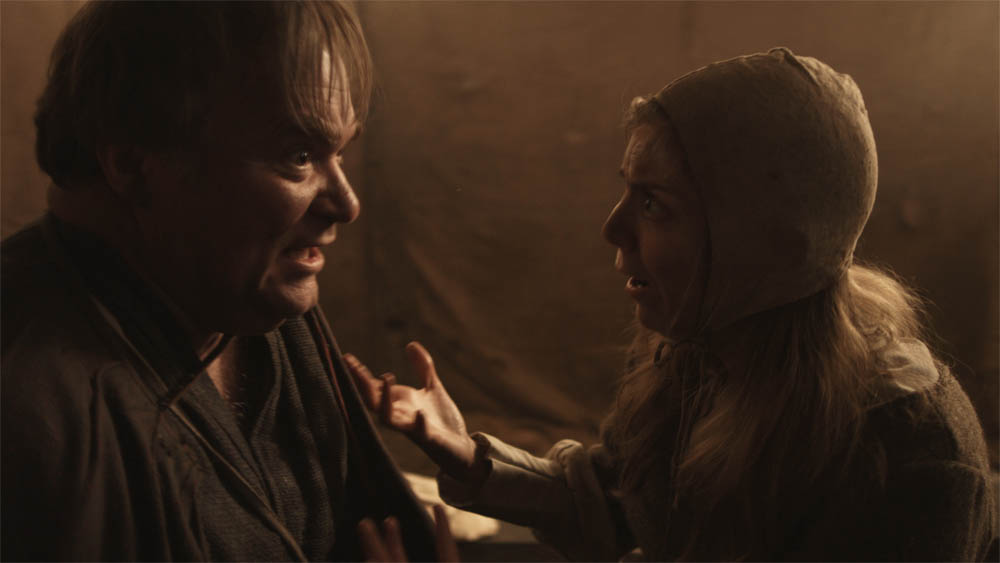
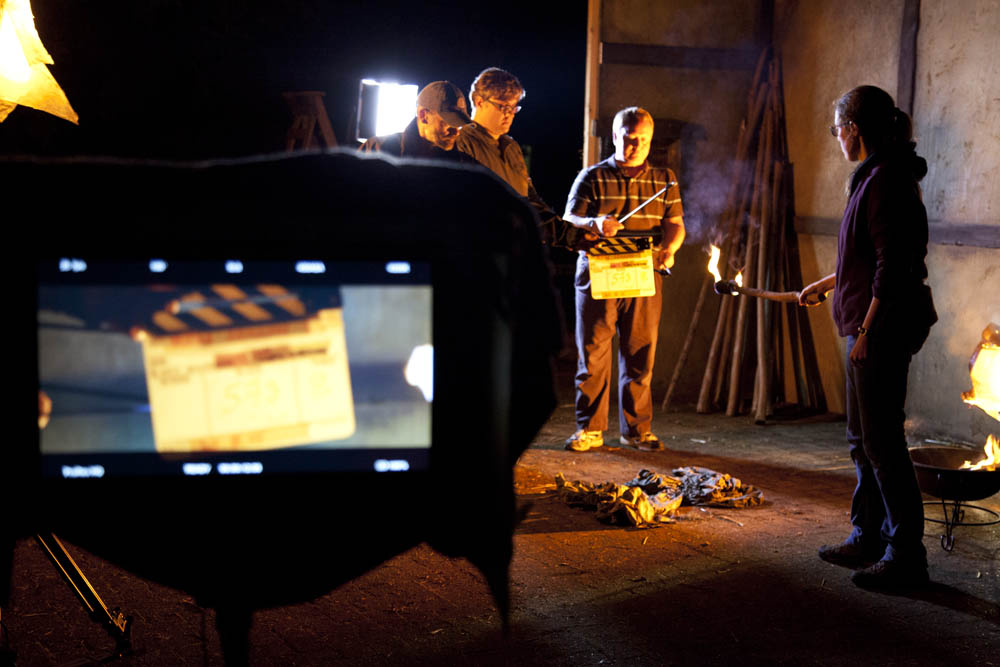
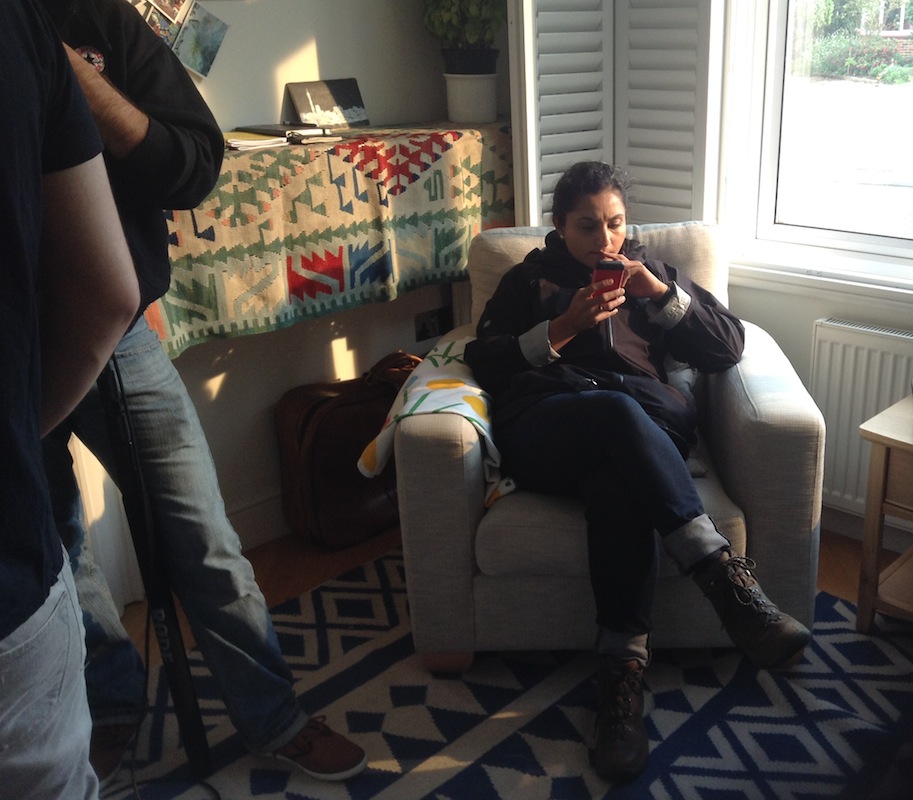
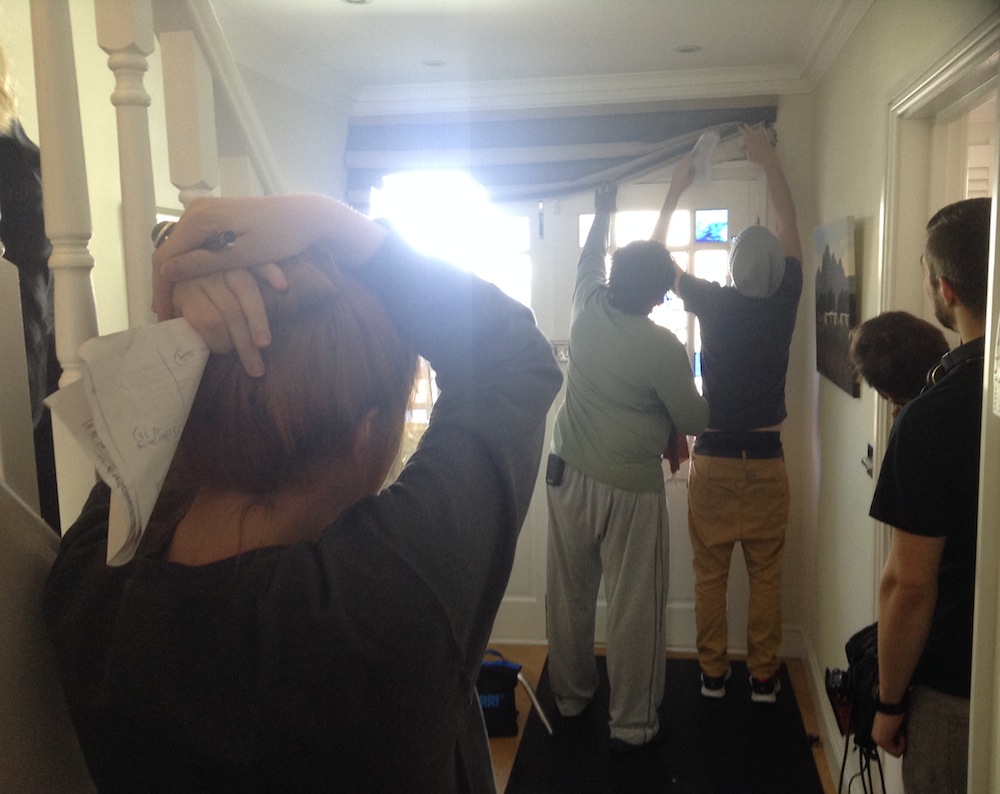
Recently I’ve been involved in pick-ups shoots for a couple of projects I lensed last year: action-comedy feature The Gong Fu Connection and fantasy series Ren. Both pick-up shoots were strange experiences, featuring some very familiar aspects of the original shoot – locations, sets, costumes – but noticeably lacking others – certain actors, crew members and so on. The Ren pick-ups in particular were like re-living principal photography in microcosm, with stressful crowd shoots followed by more relaxed, smaller scenes and finally night shots with flaming arrows again!

A CTB-gelled Arrilite 1000 stands in for the 2.5K we used for backlight during principal photography on Ren! Photo: Michael Hudson
A CTB-gelled Arrilite 1000 stands in for the 2.5K HMI used for backlight during principal photography on Ren! Photo: Michael Hudson

I’ve blogged previously about how a director/producer can prepare for pick-ups – by keeping certain key props and costumes, for example – but today I have a few thoughts from a DP’s perspective.

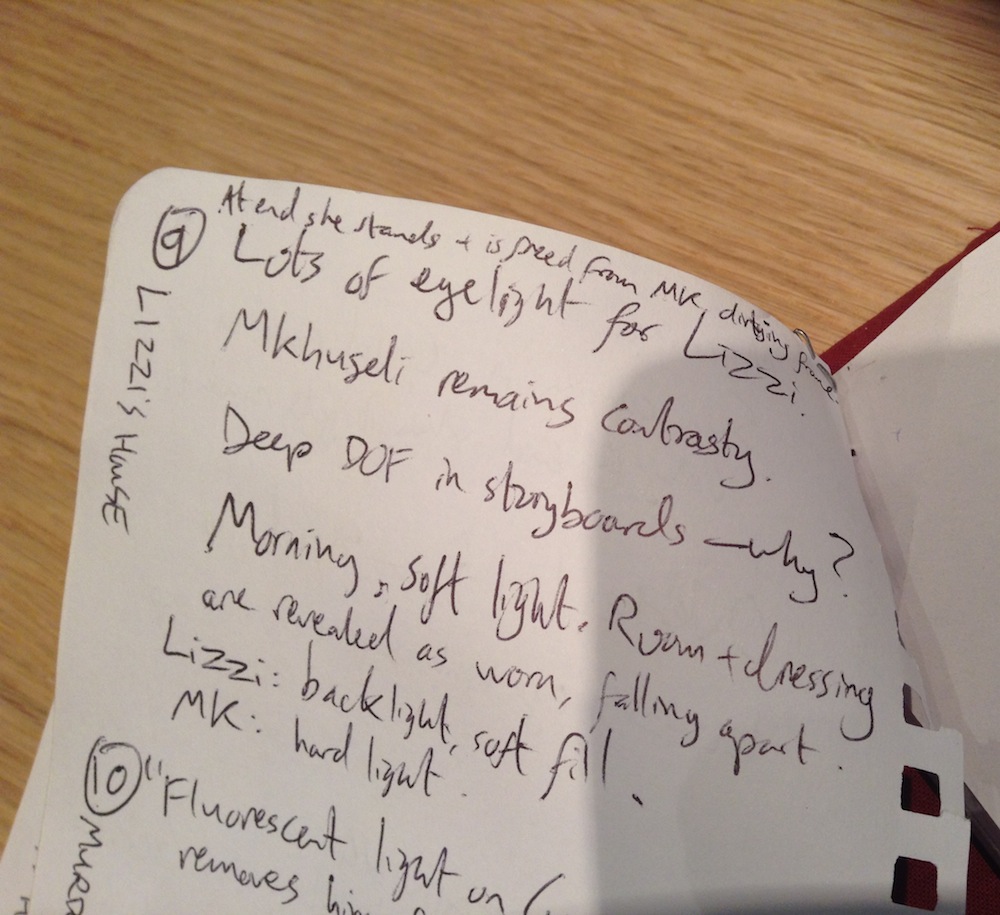
1. Keep a record of lighting plans. I have a pretty good memory for my lighting set-ups, but not everyone does, so keeping notes is a good idea. Your gaffer may even do this for you. I frequently use this blog as a means of recording lighting set-ups, and indeed tried to access it during the Ren pick-ups shoot but was foiled by dodgy wifi.

2. Keep camera logs. On a properly crewed shoot this will be the 2nd AC’s job. The logs should include at least the following info for each slate: lens, aperture, ASA, white balance and shutter angle. This can be useful in principal photography too, for example if you shoot the two parts of a shot-reverse at different ends of the day or different days all together, and need to make sure you use the same lens.

Production assistant Claire Finn tends the brazier which provides smoke in the absence of the Artem smoke gun we used during principal photography. Photo: Michael Hudson
Production assistant Claire Finn tends the brazier which provides smoke in the absence of the Artem smoke gun used during principal photography. Photo: Michael Hudson

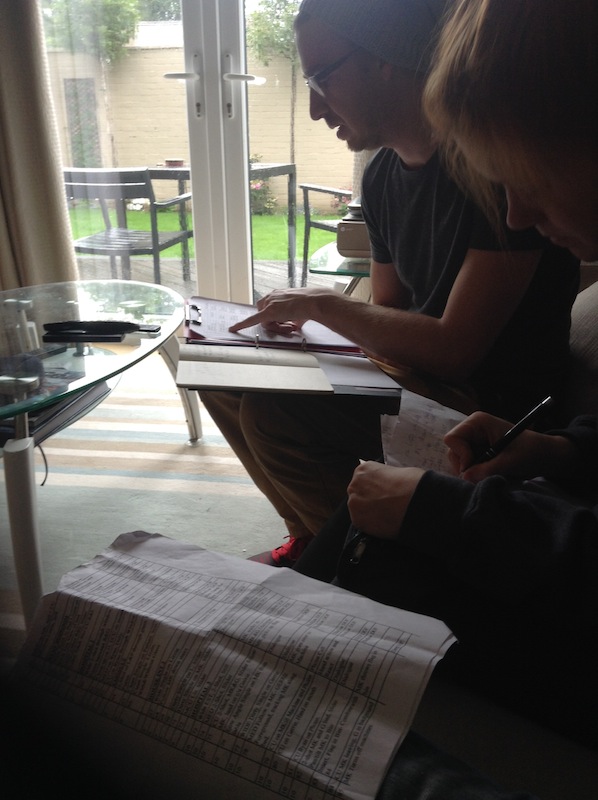
3. Have the original scene handy when you shoot the pick-ups. Load the edit onto a laptop or tablet so that you can compare it on set to the new material you’re framing up.

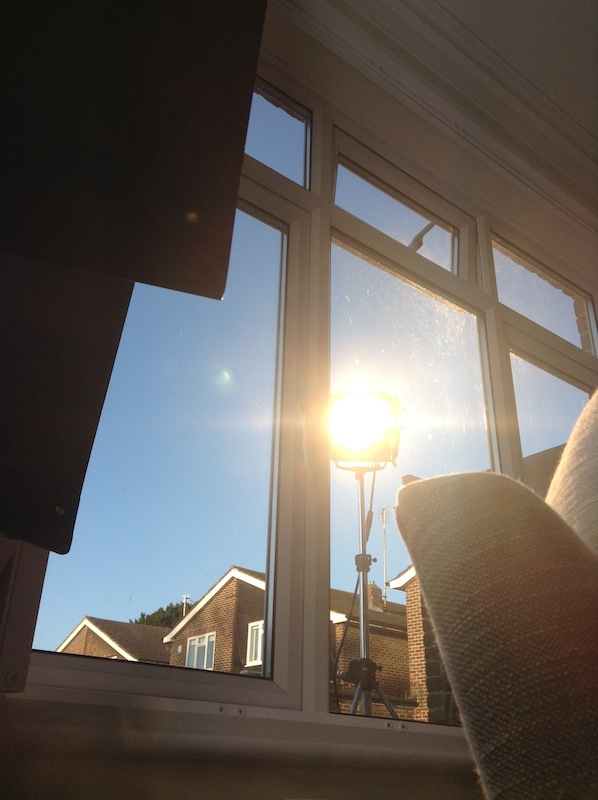
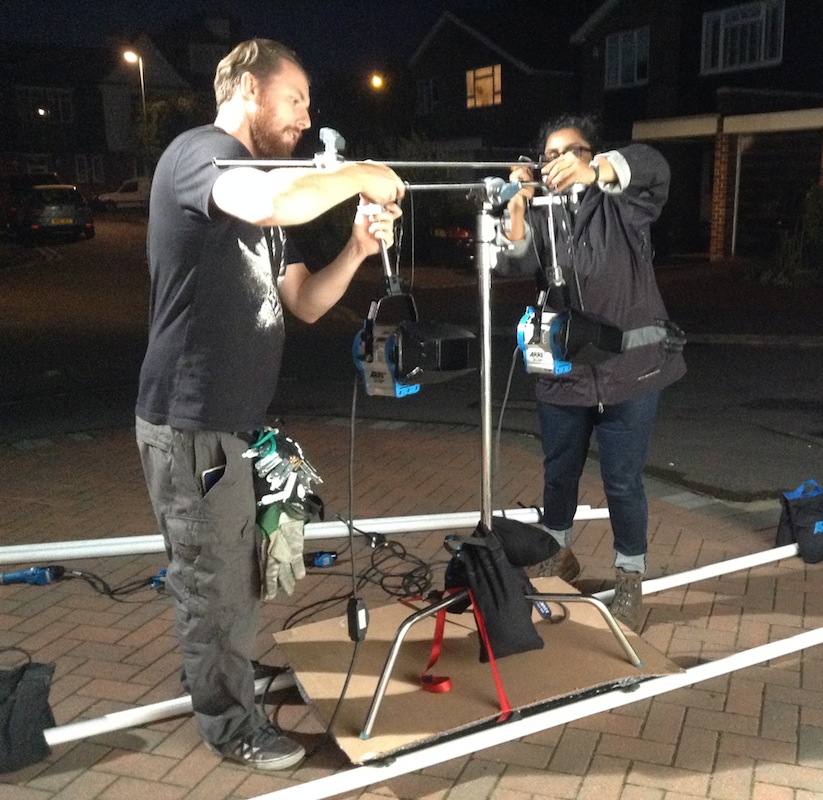
4. Own a bit of lighting kit if you can. In the shed I have some battered old Arrilites and a few other bits and pieces of gear that has seen better days. On a proper shoot I would leave this at home and have the production hire much better kit. But for pick-ups, when there’s often no money left, this stuff can come in handy.

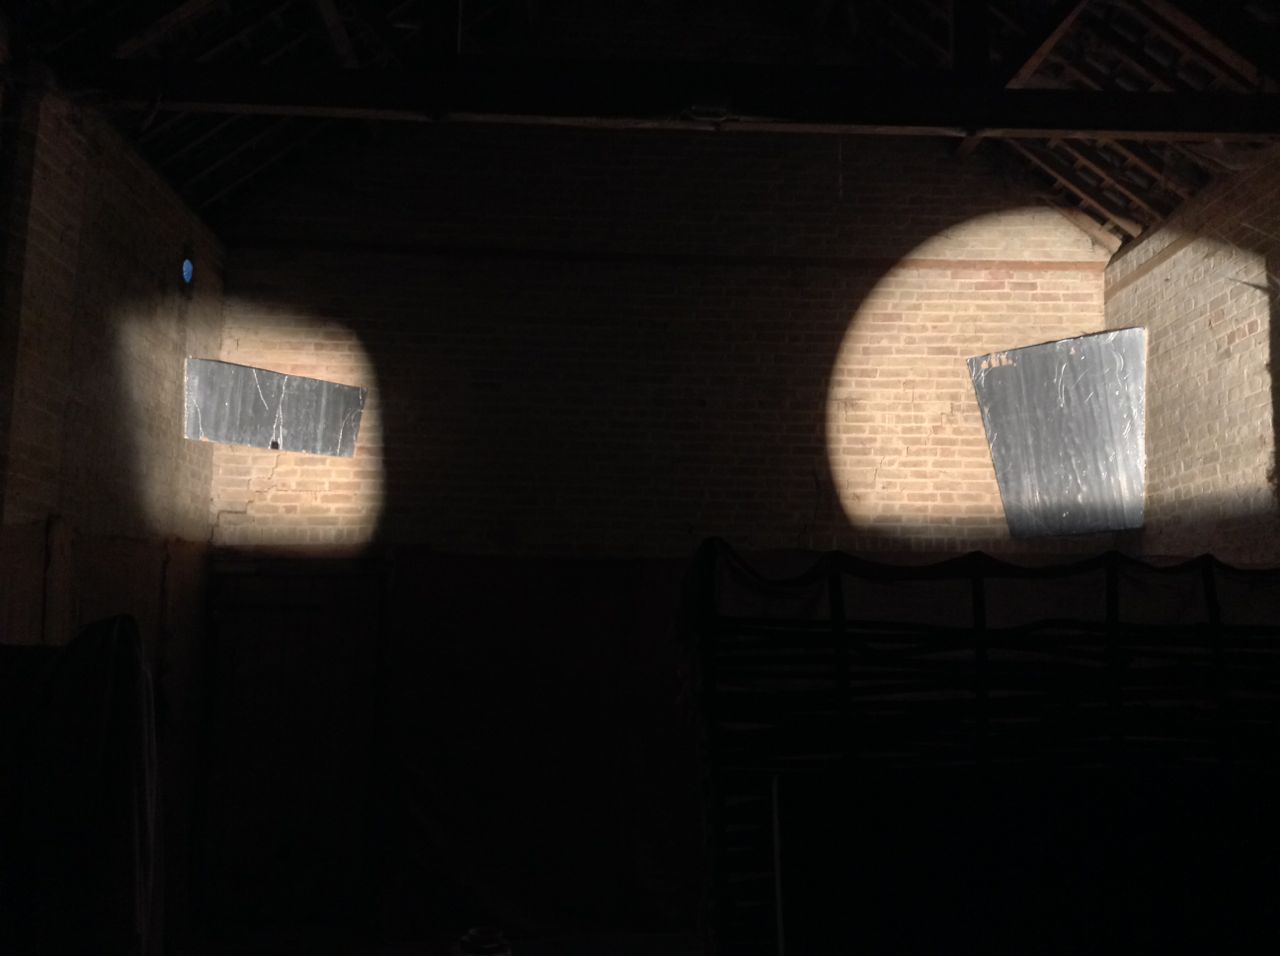
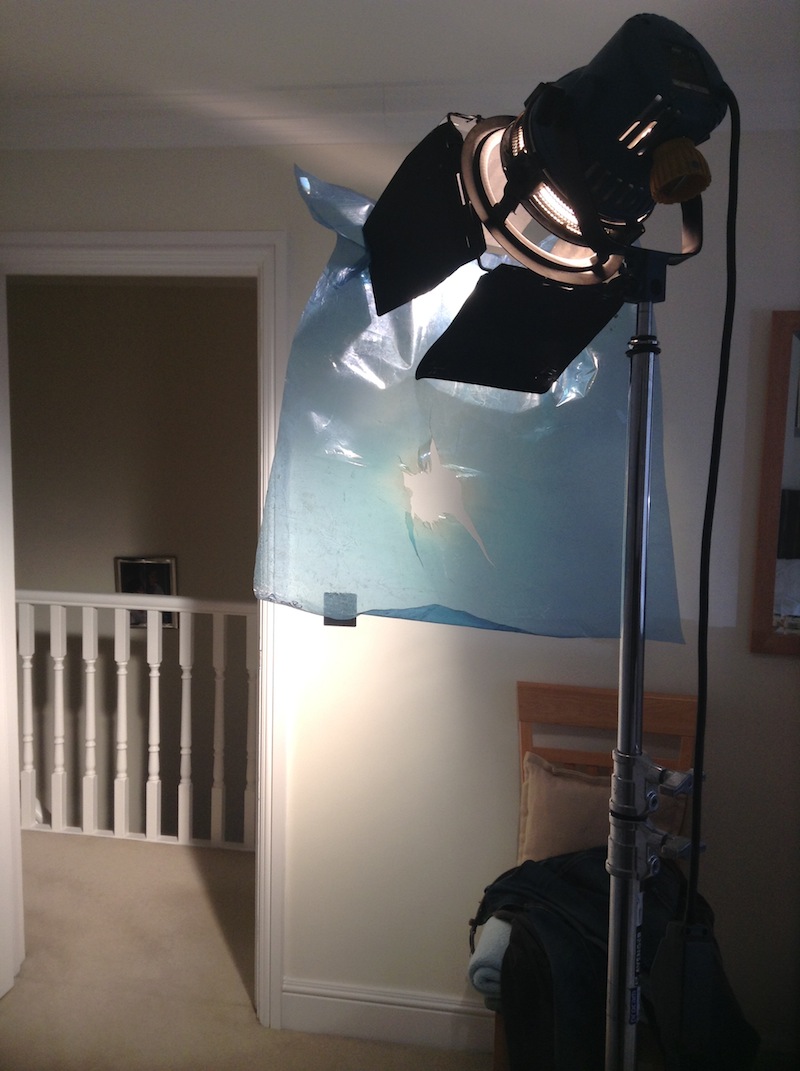
5. Keep gels. If you employ an unusual colour of gel during principal photography, try to keep a piece of it in case you need to revisit that lighting set-up in pick-ups. Production will have to pay for the gel once it’s been used anyway. On the Ren pick-ups shoot, after pulling all of my gels out of the plastic kitchen bin I keep them in, I was relieved to find that I still had two pieces of the Urban Sodium gel I used in the flaming arrows scene the first time around.

Urban Sodium gel provides the grungy orange light for the flaming arrows scene, just as it did last November. Photo: Hermes Contreras
5 Tips for Successful Pick-ups

A Day in the Life of a DP

What does a cinematographer’s working day look like? Here’s a snapshot of last Wednesday, the fifth shooting day of six on a short film in south London. It’s a split day, with one daylight and one night scene scheduled, so the call time is 2pm.

IMG_24941:48pm As the cast and crew begin to arrive (I’m being accommodated at the location, conveniently) I check my notes for the upcoming scene. These were written during my second reading of the script, a few weeks previously, and include my thoughts and ideas on camerawork and lighting.

IMG_24961:54pm I sit down with James the director and Mari the 1st AD to decide what order the day’s set-ups will be shot in. Generally shots are grouped by the rough direction the camera is pointing in, to minimise lighting resets.

IMG_24972:13pm Mari assembles the crew to watch a block through of the scene, so everyone knows what they’re doing. Using Artemis, the virtual viewfinder app, James and I select the lens and camera positions for the first set-up. It’s a Steadicam shot, so my 1st AC and Steadicam operator Rupert is in on this conversation.

IMG_24982:24pm The cast go into make-up and it’s time for my department to swing into action.

IMG_24992:26pm On the recce the previous week I had broadly decided how to light this scene. I confirm the details with Ben, my gaffer, and he and the spark begin setting up the key light outside, a 2.5K HMI, and a kinoflo for fill.  IMG_25012:31pm I go and set up an Arrilite to shine down the stairs.

IMG_25022:31pm The ACs rig the Steadicam and put on my chosen lens.

IMG_25032:32pm Meanwhile, DIT and standby 1st AC Max sets up the director’s monitor and focus monitor, which are connected wirelessly to the camera with a Teradek Bolt system.

IMG_25063:09pm Rupert rehearses the Steadicam move using a crew member as a stand-in.

IMG_25073:13pm 2nd AC Nat marks positions to aid Max in pulling focus.

IMG_25083:47pm With camera and lighting set, we get a break waiting for a tricky ageing make-up to be finished. We are completely professional during this hiatus.

IMG_25104:31pm We frame up the actor, Sibusiso, in position to check how the make-up looks under the right lighting.

IMG_25114:38pm Dimple, the spark, sits in while Sibusiso returns to make-up for tweaks, and I tweak my lighting.

IMG_25264:41pm I decide that the morning sunlight look I’m going for is too subtle, so I have Ben replace the HMI’s half CTO gel with full CTO.

IMG_25124:44pm Rupert and James finesse the camera move. When the make-up artist, Carly, is happy, we start shooting.

IMG_25134:44pm I sit back and watch the monitor, giving a note or two to Rupert after the first take.

IMG_25144:57pm With the Steadicam shot in the can, we select a lens and position for the next shot, a wide.

IMG_25164:59pm Activity on set pauses while James catches a spider that is freaking out some of the crew.

IMG_25185:04pm I squeeze myself in behind the camera, which is set up on sticks on the stairs, ready to shoot the wide. James gives some final direction to Lasharne, the actress, before we shoot the first take.

IMG_25195:05pm Nat prepares the clapperboard for the next take.

IMG_25205:12pm The camera team set up the slider for the third set-up.


IMG_25215:32pm Carly does final checks on Lasharne’s make-up.

IMG_25225:32pm For this set-up I’m using a polyboard under the camera in an effort to raise the room’s ambient light level closer to the burnt-out view through the window.

IMG_25236:25pm Mari and James adjust an armchair to better suit the next set-up, another slider shot.

IMG_25247:12pm Cunningly disguised as a lens, my cup of tea sits in easy reach beside the tripod.

IMG_25257:12pm We do a camera rehearsal to see if the set-up can accommodate Lasharne standing up, and it can. Max will move the slider while I control pan and tilt, and Rupert pulls focus remotely.

IMG_25278:13pm As the daylight starts to fade, we complete the scene and break for ‘lunch’. The food is quickly devoured.

IMG_25288:14pm We assemble on set again to watch a block through of the nighttime scene.

IMG_25298:21pm Ben discusses a car headlight effect which James wants for the scene.

IMG_25308:24pm We clear the set to allow Jorge, the art director, to dress it. I check my notes for the scene.

IMG_25318:29pm Once Jorge has done his thing, James and I pick a lens and position for the first set-up. By this point most of the lighting has been done, except this…

IMG_25338:50pm Ben and Dimple construct a car headlight rig using two 300W tungsten fresnels mounted on a camera a dolly.

IMG_25349:10pm The 300s prove too dim and the dolly too flimsy, so instead a Source 4 is rigged to Rupert’s Magliner.

IMG_253510:29pm The night scene is deliberately designed to echo the day scene, so I’m soon back on the stairs for a wide shot.

IMG_2536
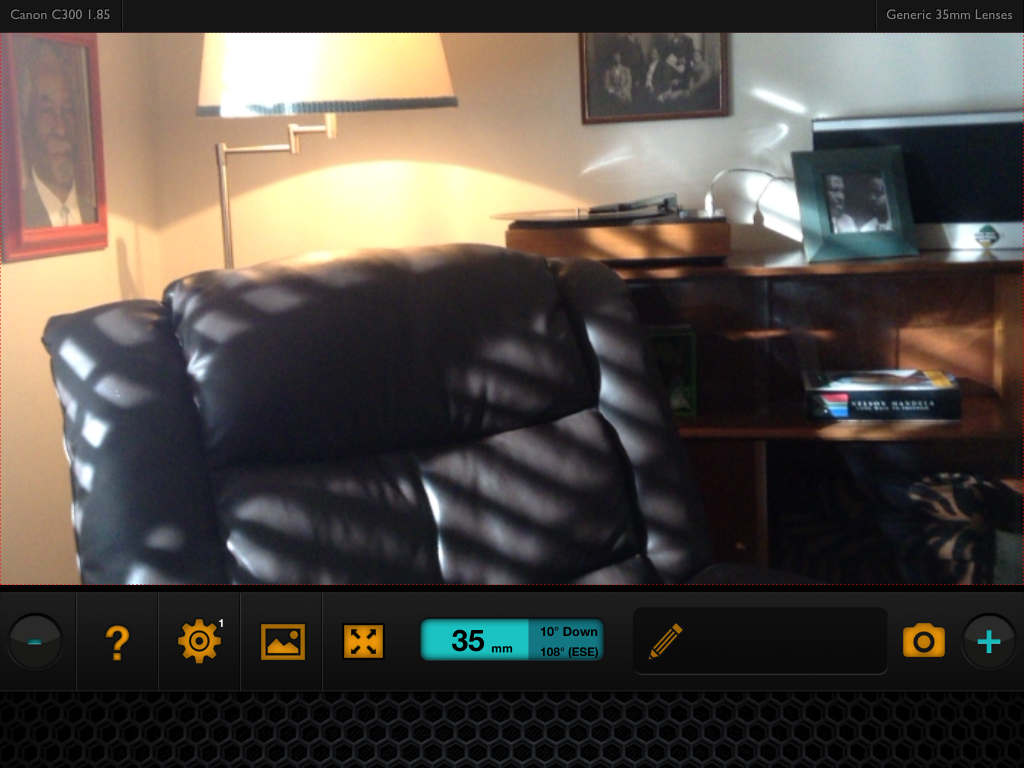
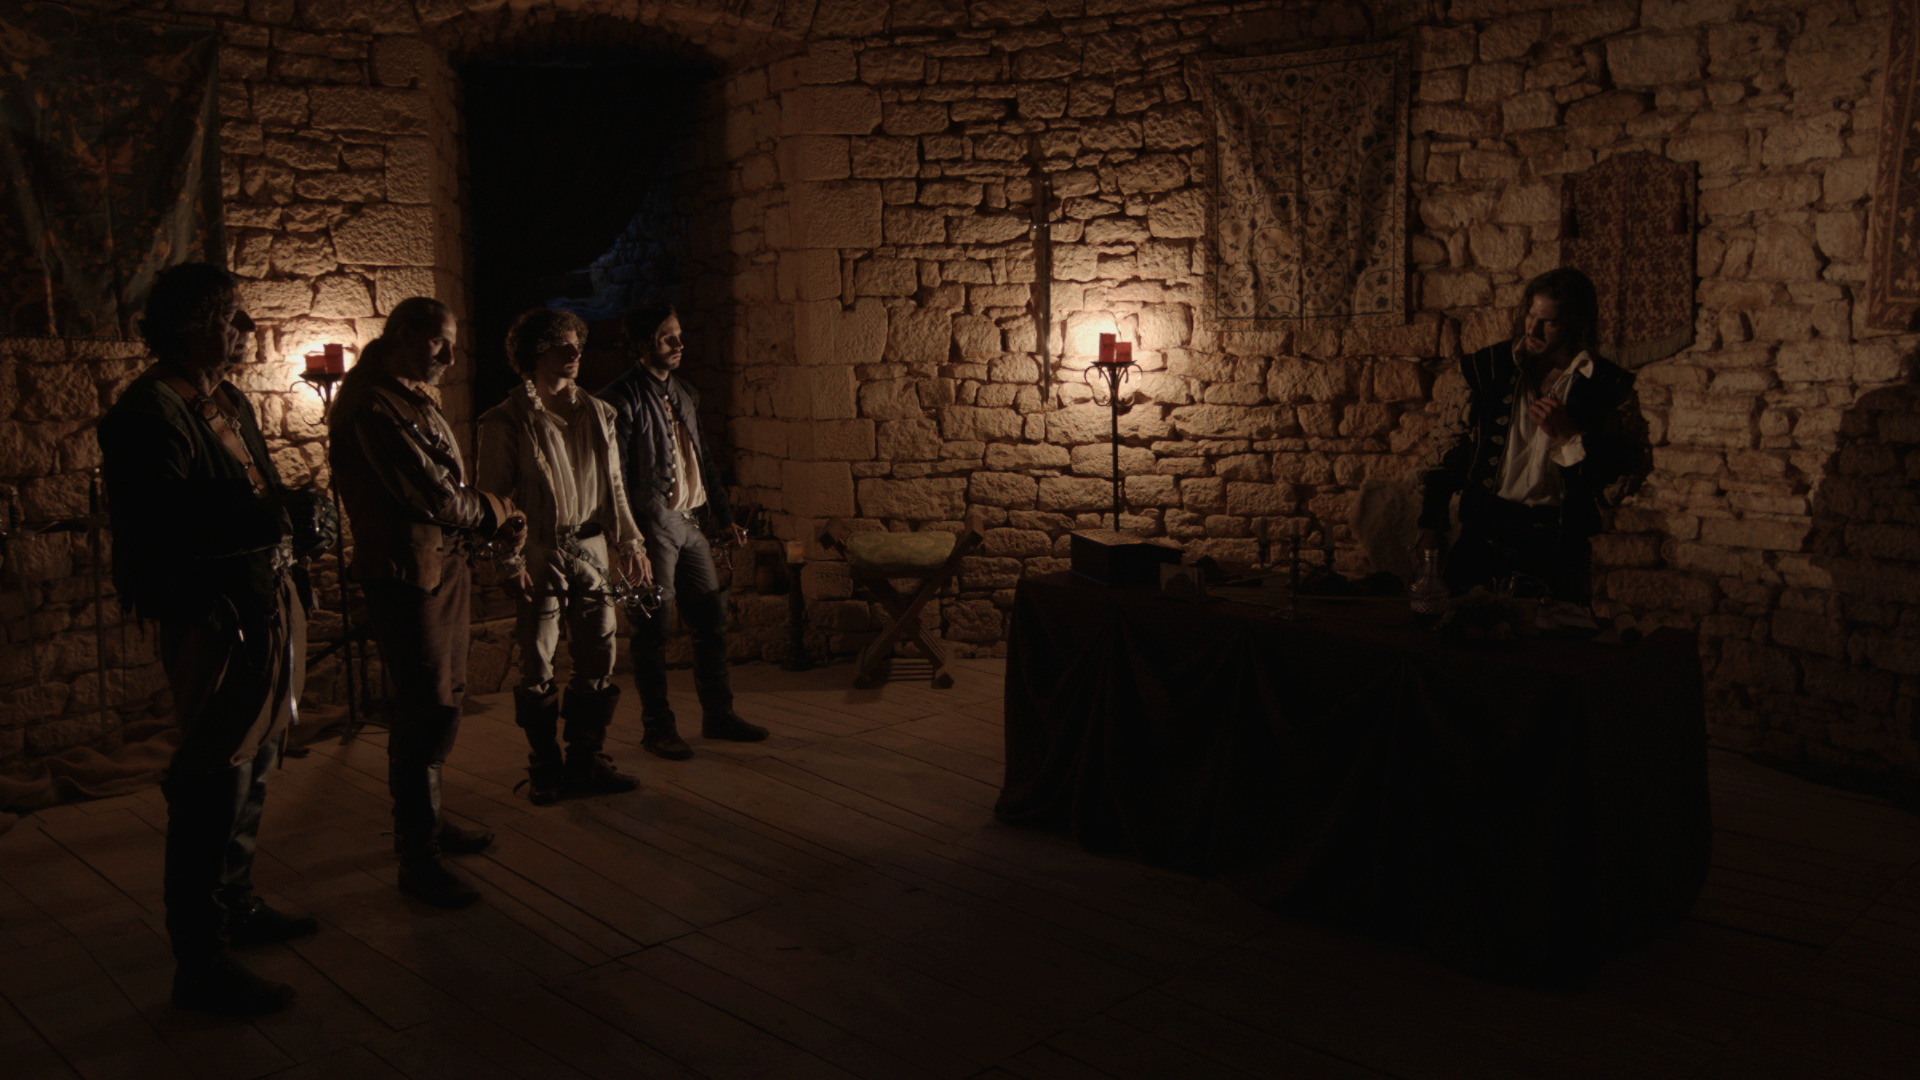
12:46am We carry on with the scene, getting some very cool shots in the can, before wrapping a little after midnight. The kit is packed away in the living room, ready to load into the van tomorrow. Cider and sleep beckon.

A Day in the Life of a DP

Lighting Techniques #6: Cross-light

Cross-light is illumination which comes in from the side, raking across a surface. At this angle, every last bump and imperfection in a surface will cast a big shadow. Terrible for beauty lighting, but brilliant for emphasising textures.

The same wallpaper lit by front-light (left) and cross-light (right).

And emphasising textures is a key part of photographing period pieces, as I learnt on The First Musketeer. In this post I’ll highlight a few examples of this technique throughout the show. (The whole series is on YouTube now so you can enjoy all six action-packed episodes at your leisure.)

At 2:27 in episode 1, Lazare and Ghislain enter an inn. Most of the scene is lit very simply with two cross-lights. One is an open-face 800W tungsten lamp coming in through a doorway off camera right; this bring outs all the texture in the back wall. The other is a 2.5K HMI coming in through the beautiful purple-tinted window on camera left; this also brings out texture – in the men’s faces! Cross-lighting is well suited to these characters, who (I hope they won’t mind me saying) are grizzled old soldiers.

A 2.5 HMI comes in through the window at left, while an 800W open-face tungsten rakes in through a doorway just off frame right. A second 800 lights the hall in the background.

(At 8:20 in episode 1 you can see what can happen when you don’t cross-light. Part of the reason that the location here looks like a flat, painted set is that the lighting is all frontal.)

The first scene of episode 3, at 0:33, is one of my favourites for lighting. The angle on Ghislain and Porthos practicing is lit by just two Kinoflo Barflies hung from the ceiling at the back of shot. These backlight the characters while also cross-lighting (vertically rather than horizontally) the stonework nicely.

A 1.2K HMI outside the door cross-lights the stonework, while smoke volumizes this light, resulting in a very satisfying depth and texture. The only other light sources are two kinoflo Barflies hanging from polecats above the bench at the back of shot. This backlight is reflected back at the foreground characters by a sheet of silver foamcore beneath the camera.

In the reverse (above) a 1.2K HMI outside the door rakes across the wall. A little smoke adds additional texture, while the Barflies (now above Athos and Lazare) provide backlight again.

There’s a shot at 5:12 in episode 5 where, again, a 1.2K HMI outside the door rakes across a wall, showing up the folds in an old tapestry.

This scene is lit purely by a 1.2K HMI out in the corridor.

Finally, in the secret room, seen in episodes 4 and 6 (at 6:41), 100W bulbs hidden behind the candles cross-light the surrounding stonework.

The two candle stands in the background have 100W bulbs hidden behind them. 40W bulbs would have been more suitable, but unfortunately we didn't have any. The light supposedly cast by these candles actually comes from two dedos. The first is at ceiling height off frame left, aimed at the Duke de Luyne (Toby Lorde) on frame right. The second is hidden behind the duke's desk and lights the heroes on frame left
The two candle stands in the background have 100W bulbs hidden behind them. 40W bulbs would have been more suitable, but unfortunately we didn’t have any. The light supposedly cast by these candles actually comes from two dedos. The first is at ceiling height off frame left, aimed at the Duke de Luyne (Toby Lorde) on frame right. The second is hidden behind the duke’s desk and lights the heroes on frame left

The First Musketeer (C) 2014 First Musketeer Ltd. Written, directed & produced by Harriet Sams.

Lighting Techniques #6: Cross-light

The First Musketeer: Lighting the Barracks

Creator Harriet Sams and some of The First Musketeer cast presented a panel at ExiliCon, a gaming and genre convention, last weekend, and their discussion of the Fumel scenes brought back some memories of lighting it which I’d like to share. The Chateau de Fumel stood in for the musketeers’ barracks, appearing most prominently at the end of episode three from 8:32 onwards. (Click here for a playlist of the whole season.)

The walkway by day
The walkway by day

Set at night, like most of the show, the scene involved two major steadicam shots tracking up and down a covered walkway. This walkway was essentially a corridor which, save for pillars, was open along one side.

One of the steadicam shots was a walk-and-talk dialogue scene, the other an epic single shot fight scene. Tracking shots in corridors are always a pain to light because there’s never anywhere to put backlight without it coming into frame. Ideally you use practicals in the ceiling, but despite scratching our heads over it for a while, gaffer (and Steadicam op) Richard “Squish” Roberts and I couldn’t figure out any way to rig lights to the ceiling without damaging the historical building or getting some part of the rigging in shot.

In fact, the only possible place to hide lights – except behind camera, which would have made for a flat, boring image – was in the garden outside the walkway. So all the light would be side-light, broken up the pillars and the bushes between those pillars.

Here’s the lighting scheme I arrived at:

lighting-plan

I decided to fire in “moonlight” from our 2.5K HMI, positioned on the far side of the garden. Shooting at a white balance of 3,200K, this would appear blue on camera. (We were shooting on Squish’s Blackmagic Cinema Camera, using a Tokina 11-16mm f2.8 zoom or a Sigma 20mm f1.8 for wide shots.)

hmi
The 2.5K HMI on the far side of the garden

Then I had Squish set up two or three 800W open-face tungsten lamps as 3/4 backlights, spaced evenly along the run. We gelled these with CTO so that they’d appear orange on camera, suggesting firelight sources of some kind. (The First Musketeer is full of implied firelight sources, because we were never able to have naked flames in the locations!)

The 800W tungsten lamps hidden behind the pillars

The final touch was to light the far end of the corridor, to give the shot some deep background. We tucked a 2′ 4-bank Kinoflo (with tungsten tubes) into a little alcove and shone it at the back wall. To provide a third layer of colour to the image, while still staying within the palette of firelight, I gelled this with Straw. When the smoke catches the light, it gives a nice bright patch in the background which is great for the depth of the image.

Toby Lorde as the Duke de Luyne in the walkway, lit for shooting. Photo: Jessica Ozlo
The walkway, lit for shooting. Photo: Jessica Ozlo
A frame grab from the walk-and-talk scene

Toby Lorde (the Duke de Luyne) on the steps, backlight by a half-CTB-gelled 800 and keyed by the 2.5K HMI, way off left
Toby Lord (the Duke de Luynes) on the steps, backlit by a half-CTB-gelled 800 and keyed by the 2.5K HMI, way off left. A Kino off right provides fill. Photo: Jessica Ozlo

Later in the scene we moved out to the far side of the garden, shooting back towards the building as the Duke de Luynes thanks Athos and friends for their help.

The 2.5K stayed in the the same place, 3/4 backlighting the heroes, side-lighting the duke and 3/4 front-lighting the building. The 800s were moved inside the walkway and hidden behind pillars.

Another source was required to rake the heroes’ profiles and backlight the duke. This was another 800, gelled with half CTB for a vaguely starlight look, placed at the top of the steps. When I have stairs in a shot I always like to put a lamp at the top and fire it down so that it catches the top of every step, as it does here.

We were all set up and ready to turn over on this wide shot, when suddenly the building’s automatic floodlights came on. We hunted high and low, but couldn’t find the switch to turn them off. Instead, I placed a piece of CTO over each of the floodlights and assigned members of the crew to hold their hands over the lights, wiggling their fingers. The result is that the front of the building appears to be uplit by brazieres. It works beautifully and adds another layer of depth which we couldn’t have created otherwise, because all our film lamps were already in use.

You should always be ready to improvise like this when shoots throw you a curve ball.

This illustrates the directions the various lamps were coming in from. Click the image to enlarge.

Visit The First Musketeer’s YouTube channel to view the whole series for free. The show is © First Musketeer Ltd 2014.

The First Musketeer: Lighting the Barracks

Synced: The Japan Shoot – Part 4

Setting up in front of Himeji Castle

This is the final instalment looking back at the whirlwind shoot I DPed in Japan at the start of this month. Part 1 looked at the equipment package, Part 2 covered an interior scene, and Part 3 covered night exteriors.

By the time we wrapped those night exteriors it was about 4:30am and starting to get light. After some well-earned sleep, we reconvened at 3pm to shoot the daylight exterior scene in front of Himeji Castle – featured in You Only Live Twice as a Ninja training school.

The first shot had to start with a picture postcard composition of the castle and a martial artist, then pan to reveal Daisy and a crowd watching her, while still keeping the castle in. This took some considerable time to set up, carefully placing all the extras. To balance the opening composition, I framed it with a tree in the foreground. This is the kind of thing you have to look out for as cinematographer, because simply shooting your cast in front of a landmark can result in a very flat image if there aren’t other elements in the frame to add depth.

Yurijo shades the actors between takes. You can see the bounce board being held by another crew member on frame  right, and how effectively this is filling in everyone's faces.
Yurijo shades the actors between takes. You can see the bounce board being held by another crew member on frame right, and how effectively this is filling in everyone’s faces.

After watching the initial blocking, I requested that everything be flopped in order to place Sydney in direct sunlight and Daisy in backlight. I knew that the backlight would look fantastic on Daisy’s hair – especially as the sun was very low by the time we got to her CU – and we could fill in her face with flattering bounce from a big white sign that the ever-resourceful Keisuke had brought along.

Ollie and the crew very kindly built me a sunshade.

Masculine facial features tend to look better in harder, direct light, which is why I was happy to face Sydney into the sun. (There’s more to it than that though, and I’ll be debating the ethics of lighting men and women differently in an upcoming post.) However, for the first take of Sydney’s CU, worried about shine and squinting, I chickened out of the hardlight and put up a sheet of Full Frost to soften it. For the second take I got rid of it, which made for better lighting continuity with the wider shots, but left Sydney looking very shiny. There’s only so much powder can do when someone’s looking straight into the setting sun. I’ll be interested to see which one Devon prefers in the edit, although his decision will likely be based on performance rather than light and shine! A good colourist can probably reduce the shine anyway. If only I’d had 1/4 or 1/2 Frost to get the best of both worlds.

Judging when to shoot the various angles in your scene is an important part of a DP’s job for day exterior work, and especially so at Golden Hour. Devon wanted to shoot Sydney’s CU before Daisy’s, his logic being that if we lost the sun before we shot Daisy then it wouldn’t matter because her face was in shadow anyway. Knowing that I was probably going to diffuse Sydney’s light, I felt the greater priority was capturing the lovely backlight on Daisy, and so asked to shoot her first.

Anyway, when the sun went down, that was a wrap for the brief but intense Japan shoot. Many thanks to Devon and co for bringing me along, and to the people of Himeji for welcoming us so warmly.

Synced: The Japan Shoot – Part 4

Synced: The Japan Shoot – Part 3

Shooting tracking shots from the back of a pick-up. Above me is camera assistant Yujiro Matsumoto with a diffused LitePanel which provides fill during the move.

Continuing the story of lensing the sci-fi feature Synced’s Japanese scenes earlier this month. In part 1 I looked at the prep, and part 2 covered an interior scene.

Next up, after dark, was a street scene with the beautiful Himeji Castle visible in the distance. The castle was already lit up by spotlights, but while the street had a fair bit of existing lighting, that wasn’t bright enough to shoot under. The scene was a slow chase in which the trio of heroes, one of them wounded, is slowly but menacingly pursued by the limping villain. This would be captured primarily in tracking shots, filmed from the back of a small pick-up truck pushed by the crew to avoid engine noise spoiling the soundtrack.

Wide-street
The set-up for the street scene
Exisiting practical lighting around the doorway the characters enter at the end of the scene

Employing my standard approach to night exteriors, I had the crew set up the 575W HMI as backlight, tucked around a corner. When we came to do the reverse shot, the HMI was moved to the opposite end of the street. It glared horrendously off some windows and shiny tiling, but with the time and equipment available I could see no way to remedy this. The lamp really needed more height, but I hadn’t hired a double wind-up stand because it wouldn’t have fitted in the car.

Three of the LitePanels were spaced along the street as sidelights, suggesting additional off-camera streetlamps. The furthest one, illuminating the villain on his first appearance, I gelled with Light Straw to separate him from the heroes.

The fourth LitePanel, with diffusion and egg crate fitted, was mounted on the pick-up truck behind the camera, providing a constant low level of fill.

Keisuke’s little LED panel was gelled red and wedged into a shop doorway to lend a sinister tone to a key moment in the scene.

The scene ends with two of the heroes entering a building. There was some existing practical lighting around this doorway which I asked to be turned on, and this proved sufficient to illuminate the characters as they approached and entered the door.

The set-up for the alley scene

The final scene of the night took place in a quaint little alleyway. Cool blue streetlamps contrasted nicely with a halogen security light, but the former were too frontal and flat, while the latter was triggered by an infrared sensor – meaning it could go on and off annoyingly during takes.

So we flagged the main streetlamp and disabled the security light by gaffering the sensor, and I recreated the colour contrast of that lighting using our own lamps.

The houses on either side had convenient ledges above the windows, perfect for placing LitePanels on. So two panels became 3/4 quarter backlights from either side, set to 5,600K.

The third panel, set to 3,200K, was hidden behind a gate to light some of the background and edge the actors a little before they got in front of the other backlights. (I left the existing practicals to light the deep background.)

The fourth and final panel, set to 4,500K and gelled with Light Straw, blasted out of the door the actors came out of, matching to the light in the last part of the kitchen scene.

Near the end of the scene, the master shot becomes a two-shot of Ollie and Daisy, and the two 3/4 quarter backlights serve as a classic cross-backlighting set-up.

For Daisy’s close-up, since she was quite close to the wall and therefore quite dark, I tweaked the lights heavily. I brought one of the backlight panels much closer, bouncing it off the cream-coloured wall next to Ollie to serve as her key, and switched the second backlight to the opposite side of camera to balance it out. I also added a ‘health bounce’ reflector, ensuring she had a nice big eyelight to underline her vulnerability in the scene.

In the fourth and final part I’ll be looking at the day exterior scene we shot in the grounds of Himeji Castle.

Synced: The Japan Shoot – Part 3

Synced: The Japan Shoot – Part 2

Setting up for the kitchen shoot

In part 1 I described how we arrived at a lighting package and monitoring solution for the Japanese leg of this sci-fi feature shoot.

The first scene to go before the camera was the night interior, set in a hospital kitchen. The location was blacked out by the Japanese crew with incredible efficiency, so we could shoot it in the afternoon. Unable to light through the windows, I hid LitePanels in alcoves and around corners. They were all set to 5,600K and most were gelled with half CTB to appear very cool when shot with a white balance of 4,500K. The idea was to give the impression of streetlights – many of which are cool blue in Himeji – spilling into the dark, abandoned kitchen.

But Japan is a colourful place, and at night all hues of lighting are seen from signs and shopfronts as well as streetlamps. So, behind the frosted glass door of a locker room at the back of the master shot, I set up the HMI, gelled with Light Straw to suggest an older sodium vapour streetlight.

For a third layer of colour, I gelled one of the LitePanels red.

The kitchen had big hooded vents above the cookers, and for certain shots I was able to clamp the red panel inside one of these using a C-stand knuckle.

Sketch 2015-06-06 11_02_46

As the action progressed around the room, shot by shot, I moved the panels to new areas when the old areas ceased to be in frame, always taking care that the light was hitting the actors from the sides or from behind, never from the direction of the camera. (This would have made for flat lighting, a massive no-no in cinematography.) At one point I needed one more lamp than we had, and Keisuke saved the day with a small but very bright LED panel of his own.

This iPad photo gives a rough idea of how the lighting in the above diagram will appear in the movie.

In part 3 I’ll be breaking down the night exterior scenes.

Synced: The Japan Shoot – Part 2

Synced: The Japan Shoot – Part 1

cast-and-crew
Actor Shigeki Maegawa, director Devon Avery, actor Oliver Park with Justine Avery in front of him, actress Daisy Hainsworth, actor Sydney Jay, me and gaffer Keisuke Ueda, at Himeji Castle
575W HMI
575W HMI

On Wednesday May 27th I got a call from my friend and actor Oliver Park, saying he was flying to Japan on Sunday for a shoot and did I want to come as DP? He was playing the leading man in Synced, a sci-fi feature film directed and co-written by Devon Avery, and after a month of shooting in Glasgow, the existing DP had opted not to take part in the Asian shoot.

On Friday night my plane ticket came through, at midnight on Sunday I was changing planes in Qatar, and on Monday afternoon (local time) I was in Osaka. The following morning saw me at Arc System, a very helpful lighting rental house, with Devon, his wife/multi-talented assistant Justine and a couple of the Japanese crew. With two night exteriors and a night interior as well as a day exterior scene, a reasonable amount of kit was needed.

The mains electricity in Japan is 100V, 60Hz, so very similar to the US – and indeed the plugs and sockets are identical. But the killer is that you can only draw 7A per socket. That’s a maximum of 700W, as opposed to over 3,000W from a UK socket.

Canon Ultrasonic 24-70mm f2.8

So the biggest lamp we could hire without needing a generator was a 575W HMI. With one of those in the bag, I figured it was best to fill out the package with battery-powered lamps, and so hired four 1’x1′ Bi-Color LitePanels. Although I’m still not 100% sold on the colour rendition of any LED panels (even LitePanels, which are amongst the best), there’s no denying they’re incredibly handy and quick to set up.

Pentax 50mm f1.4
Pentax 50mm f1.4

I would be shooting in 4K ProRes 422 HQ on my Blackmagic Production Camera, at 23.976fps. I initially stuck to two Canon L series lenses for continuity: Devon’s 24-70mm f2.8 and crew member Keisuke Ueda’s Canon L 50mm f1.4. Since I was constantly struggling to expose an image at the BMPC’s native 400 ISO, I later employed my Sigma 20mm f1.8 for faster wide shots, and I couldn’t resist trying my new Pentax 50mm f1.4, which performed beautifully at f1.7 and above, but did seem a touch soft when wide open.

Thunderbolt
Monitoring via Thunderbolt cable to Blackmagic Ultrascopes on a Powerbook

Regular readers will know of the trials and tribulations I’ve experienced getting a monitor signal out of my BMPC, with the result that I bought a 17″ Blackmagic SDI monitor last year. It was impossible to bring this to Japan, so instead – for the first time – I experimented with Thunderbolt monitoring. A runner was dispatched to buy a cable, and Devon installed the Blackmagic Camera package on his Macbook. This package includes Ultrascopes, which provides a live video view amongst other things, though annoyingly only in a pretty small window.

Whenever I turned the camera off or played anything back, the signal would be lost. To get it back, Devon would have to quit Ultrascopes and I’d have to switch to 25fps before he re-opened it. Only once it was re-opened could I switch back to 23.976fps. Please sort out that little bug, Blackmagic Design!

With the kit and workflow sorted, we travelled to Himeji (by bullet train, no less) ready to start shooting on Wednesday. Watch this space for part 2: shooting the kitchen scene.

Synced is copyright 2015 Empty Box Productions LLC.

Synced: The Japan Shoot – Part 1

The First Musketeer is Online Now!

11053883_759009810885699_5425239994580240133_n

Strap on your scabbard and saddle your horse – The First Musketeer has arrived! After 21 months in postproduction, the action-adventure web series shot in the south of France is finally out on YouTube. I served as director of photography on the show, written and directed by Harriet Sams. Watch all six episodes now!

I’ve written several blog posts about lighting and shooting the show, and there are more to come. Here are the best of the ones currently available:

Know Your Lights – a video blog in which I show you the lamps in our lighting package and explain the advantages of each.

Week Two on The First Musketeer – featuring on-set video blogs in which I explain how a couple of key scenes were lit.

Period Cinematography – what I learnt from doing The First Musketeer about the best ways to light and lense material set in the past.

Athos and Marion – a light-hearted look back at the lighting and shooting of a scene in Rocamdour, a medieval town built into the side of a ravine.

Candlelight – describing the various methods of simulating candlelight which I used on the show.

The First Musketeer is Online Now!

Soft Wrapping Backlight on The Shepherds’ Play

The Second Shepherds’ Play, the medieval comedy which I lensed last week, had several scenes in “the Mak Shack”, the grotty home of the antagonists. The set posed an interesting problem in that – apart from the door, which wouldn’t always be open – it contained no light sources. No windows, no lamps, no candles. Given the wordy script and the tight schedule, I needed to light it in a way that would not need tweaking between set-ups, and which would work for one particular scene that director Doug Morse wanted to film as a single developing shot showing about 180º of the set.

One option would have been to posit a window in the off-screen 180º, but that would have resulted in very flat illumination, all lit from the front like a photo taken with flash.

I wanted to create a cross-backlighting set-up (Lighting Technique #2), but it was impossible to hang lamps above the rear of the set without damaging the location’s brickwork. So instead I had Colin rig two pieces of Celotex (matte silver bounce board) above the back two corners. Into these I fired Source Fours, peeking over the front walls of the set. These lamps, designed for theatre use, are relatively cheap to hire and have lenses and cutters which provide a great deal of control over where the light does and doesn’t go, meaning you can ensure it all goes onto a bounce board and nowhere else. Using Source Fours as sources for bounced light is a tip I picked up from David Vollrath‘s talk in the Big League Cine Summit in January.

Here you can see a Source Four Junior peeking over a wall at the front of the set to hit a bounceboard at the back.
Viewed from the back of the set, both Source Fours can be seen firing over the front walls.
Viewed from the back of the set, both Source Fours can be seen firing over the front walls. The lamps are high enough that their beams go completely over the heads of the talent.
This reverse angle shows the two bounce boards above the back corners of the set, which you'll have to trust me is directly underneath them in the darkness.
This reverse angle shows the two bounce boards above the back corners of the set, which you’ll have to trust me is directly underneath them in the darkness.

This set-up enabled me to execute the 180º handheld shot without casting any shadows myself, and without the actors casting hard shadows (which would have been inappropriate for a period piece), while still primarily lighting the downsides of their faces to give depth and shape to the image. It also provided backlight to ensure the actors stood out.

I’ll leave you with some frame grabs (courtesy of Grandfather Films) and a floor plan of the set-up. Visit Grandfather Films on Facebook for more on the Shepherds’ Play.

longtake2

longtake1a

longtake1

Diagram2

Soft Wrapping Backlight on The Shepherds’ Play