Earlier this week I DPed Sophie Black’s short film, Ashes. The script contained three fantasy scenes which were really fun to light because they didn’t have to be in any way realistic. All the scenes took place in the same bedroom, so here was a great opportunity to light the same space in three completely different and pretty whacky ways (plus in a more down-to-earth way for the “real world” scenes).
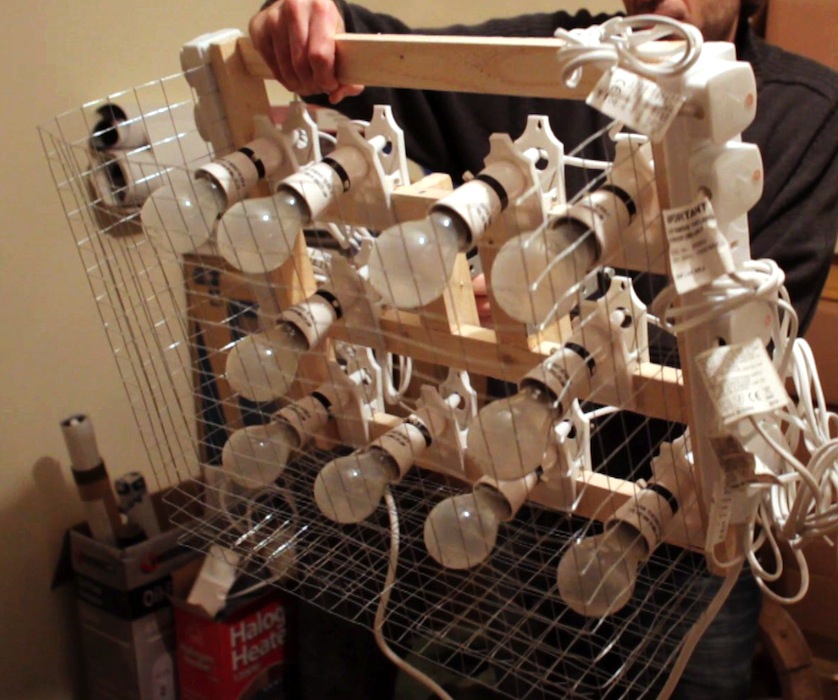
In lighting the fantasy scenes I drew inspiration from techniques covered in some of the blogs I listed in my top five last week. Sophie’s vision for one fantasy scene was of the lead character, played by Sarah Lamesch, on a bed adrift on a sea of hands. The hands were moulded in plaster and spread all over the floor, and it was my job to create the impression of water through lighting. So I turned to The Underwater Realm’s website, recalling a video blog they posted last year when their DP Eve Hazelton began testing lighting techniques for dry-for-wet photography (around six minutes in).
The silver wrapping paper on the ceiling
Big thanks to Realm Pictures for posting this blog. Although Eve ultimately rejected the technique in favour of something more realistic, it was perfect for Ashes. I had Sophie buy several rolls of silver wrapping paper, which we pinned loosely to the ceiling. I placed a 1.2K Arri Daylight Compact on the floor in the corner, pointed up at the paper. As we rolled, Sophie aimed a desk fan at the paper to create rippling, watery reflections.
I knew I wanted to do something special with Sarah’s incredibly striking eyes in this scene, to complement the make-up. I started off by having Colin rig a DIY lamp above her, surrounded by black wrap and card with only a slit of light coming through to highlight her eyes. Unfortunately I discovered that the light from DIY lamps just isn’t focused enough for this kind of effect, so I abandoned it.
Instead I created Sarah’s eye-light using a string of white Christmas lights taped to a piece of black card. This was inspired by Galadriel’s eye-light in The Lord of the Rings – a reference Sophie gave me. As it turns out, I think the starry reflections you see in Sarah’s eyes here are more from the silver paper than the fairy lights.
Sarah Lamesch as Sarah
This scene was also interesting from a grip point of view. We’d borrowed a jib, which we mounted on my dolly so that we could boom up from the hands on the floor, over the footboard and track to Sarah’s face. This was a real team effort. Colin handled the dolly and jib movement, while first assistant director Chris Newman operated the camera to begin with. As soon as the camera had cleared the footboard I jumped up onto the bed and took over from Chris for the rest of the shot.
In my next couple of posts I’ll look at the other fantasy scenes and we’ll see how Shane Hurlbut’s blog and a Lana Del Rey video inspired the cinematography in those.
Today I’m going to take a brief look at what you can do to shape natural light when you’re filming outside and you don’t have the budget for big HMIs or massive silks hanging from cranes.
Firstly, choose the right direction to shoot in. Work out where the sun is going to be at the time you need to film the scene and decide whether you want to shoot into the light, with your back to it or at an angle. There are iPhone apps that will tell you where the sun’s going to be if you’re too lazy to figure it out for yourself. Remember the sun moves left to right across the sky in the northern hemisphere.
Amateur photographers are often told not to shoot towards the sun. This is simply because amateurs will be using auto-exposure, which will close the iris right up as soon as the sun flares into the lens and leave you with a silhouette. As a professional, you’ll be setting your camera manually, so you can expose for the shadows and let the backlight from the sun blow out beautifully.
Here’s a shot from Stop/Eject where we made the most of this effect, and really lucked out with the reflections in the water:
All the evidence you need that shooting towards the sun is good.Using a reflector on the banks of the Derwent. Photo: Paul Bednall
Out the bottom of frame is a reflector, bouncing some of the sunlight back at the actors – and it’s being wiggled by a crew member to suggest it’s a watery reflection.
Collapsible reflector
If you don’t have a reflector you should drop what you’re doing and order one now off Amazon. They’re less than £10 and have a reversible zip-off cover giving the options of white, silver or gold surfaces to reflect off, or black to block light. If you remove the cover entirely you’re left with a translucent white disc which can be used to diffuse light, as we’ll see shortly.
If you choose to shoot with your back to the sun, you won’t be able to affect the light in your wide shots without big-budget gear, but you can transform your close-ups.
Let’s look at another example from Stop/Eject, before we did anything to the light:
Before
Georgina Sherrington (“Kate”) is facing directly towards the sun, which is behind and above camera. As you can see, the light is incredibly harsh and the shadows are so dark that you can’t see her eyes; an effect that would only have got worse had I stopped down to prevent the highlights blowing out.
Two reflectors were required to sort this out. The first, with cover removed, was held over her head so that the sunlight hitting her face would have to pass through the translucent material and be diffused. (The diffusion is actually less significant than the amount of light the material blocks.) A second reflector was held out of the bottom of frame, bouncing sunlight back into the shadows on her face and putting a sparkle in her eyes.
After
A much nicer image.
If it’s a cloudy day – and let’s face it, this is the overwhelming likelihood here in the UK – the above techniques will still work, but much more subtly. If you have access to a power supply, try to set up a lamp to get some eye-sparkle and fill in your actors’ faces.
In 2008 I DPed a short set entirely in a forest: Into the Woods, directed by Matt Taabu. I knew that getting light into people’s eye sockets was going to be a major challenge, so I insisted on hiring a battery-powered 200W daylight par. We put a layer of tough-spun diffuser on this and the gaffer hand-held it for most shots, aiming it into the talent’s face. You can see the eye-sparkle it produced in this production still:
Branko Tomovic in Into the Woods (2008, dir. Matt Taabu). Photo: Alex Bender
So if you’re DPing a daylight exterior, don’t think that means you can rest on your laurels. It’s still up to you to create the right mood and make the talent look their best.
As regular readers will know, I spent some time in pre-production planning the lighting of Stop/Eject‘s basement scenes – filmed at Strutt’s North Mill in Belper – even going so far as to mock up some previz images in Photoshop. Click here to read the post and see those images.
Basement lighting plan
However, the best-laid plans of mice and men gang aft agley, and they ganged a bit agley in this case.
My lighting plan followed the concept I outlined in that pre-production blog post, which was to put lamps in between all the pillars on one side of the basement, representing daylight from unseen windows. Col and the runners duly set these up on the day, gelling them successively bluer along the length of the room, to enhance the feeling of depth.
However, none of the staff at the location were able to disable the fire alarm, which sadly meant we couldn’t use the smoke machine. So no cinematic shafts of light, and a blow to my second method of showcasing the fantastic depth of the location. (Possibly if we had warned them in advance about the smoke they could have found out how to disable the alarm. Oh well, lesson learnt.)
The third way I wanted to create depth was by turning off alternating fluorescent tubes on the ceiling, so that every other pillar would be in darkness. In the final analysis it seemed pointless to do this, as many of the tubes were on the blink anyway and so there were already plenty of shadows. One of the tubes kept flickering, which was a nice little touch.
I went with a tungsten white balance, which gave the greenest look to the fluorescent tubes. (On a side note, I find my 20mm Sigma registers this green spike much more than my other lenses.) Since the “daylight” was blue, I had created a colour scheme that had no contrast at all, being all cool. This despite all my previz and planning. Yes, I am an idiot.
Looking at the rushes again now, I see that despite using the Sigma lens, the fluorescent light has come out quite yellow, so there is a bit of colour contrast after all. Dumb luck: 1, Neil’s skill: 0.
The existing overhead fluorescent tubes do most of the work in this wide shot, with some patches of "daylight" from our blue-gelled Arrilites and work-lights in the background.
It will be fine when it’s graded, but it could have been so much better if only we could have used smoke.
Next up was a tracking-two shot over the shelves. I chose to shoot this from the opposite side of the basement to the “daylight” lamps, so that they would backlight the talent rather than giving us flat, boring front-light. We cheated the positions of two of these lamps massively so that they would both hit Kate (Georgina Sherrington) and Alice (Therese Collins) without being in shot.
Some front-light was required, because the overhead tubes weren’t lighting the ladies sufficiently or giving a very flattering look. So we rigged a fluorescent studio light over the camera. This isn’t generally a good place to put a lamp, but when you’ve got some good backlight going on you can get away with some flatness elsewhere. Ironically, this fluroescent lamp – which had a daylight-balanced bulb – needed fluorescent gel on it to get the green look I wanted, to suggest the light was coming from the overhead tubes.
Backlights hit Kate (Georgina Sherrington) and Alice (Therese Collins) from either side.
The basement was one of the few scenes in Stop/Eject in which moody close-ups with dark, unfilled shadows were justified.
One of the blue-gelled 800W Arrilites which had served as backlight in the two-shot now acted as Alice’s key. The edge-light on her hair comes from one of the overhead tubes.
Alice (Therese Collins)
Another of those backlights became a key for Kate’s close-up. The yellowish fill is from the overhead tubes, while backlight is from another blue-gelled Arrilite positioned in a way that bore no resemblance to any previous lighting. (When you’re pushed for time as a DP, you often have to chose between making it look good or maintaining lighting continuity.)
Kate (Georgina Sherrington)
Incidentally, the trio of shots we’ve just covered – the two-shot and the corresponding singles – conform roughly to a lighting template I call “cross-backlighting”. This model consists of two backlights in the two-shot, one out of each side of frame, one of which immediately becomes a key for each close-up. There’s more info on cross-backlighting in The Ten Minute Lighting Masterclass, one of the bonus features you get when you rent the deluxe package of Going to Hell: The Making of Soul Searcher.
That brings the Stop/Eject lighting breakdown to a close. I hope you’ve found it useful. I’m more than happy to answer any lighting questions here in the comments or on the Stop/Eject Facebook page.
The next public reward is Sophie’s great little podcast about the first day of the shoot, which will go online when we reach £400, so be sure to visit stopejectmovie.com and help us get there. Thanks everyone!
Today I’m taking a look at Stop/Eject‘s three brief scenes in Kate’s bedroom. Each consisted of one shot only, but each required a different look. Here’s my lighting plan:
Bedroom lighting plan
Much of the room, including the window, would never be seen. This allowed me to black it out and place my own fake window exactly where I wanted it.
If you imagine your subject (viewed from above) is at the centre of a clockface and they’re looking towards 12 o’clock, your key light should usually be at around 1:30 or 10:30. That’s enough of an angle to give their face some dimension and shadow, but not so much that you can’t get light into both eyes. That’s a rough rule of thumb, and of course it can vary according to the mood you want to create.
Setting up for a top shot
Knowing that Kate (Georgina Sherrington) was going to be facing more or less towards camera, I accordingly chose the corner of the room in the top right of the plan for the key. You can see I’ve drawn in a “cardboard window frame” gobo, but as it turned out there were some fold-up chairs kicking about, one of which threw a very window-like shadow when clamped to a C-stand in front of the 1K.
The first of the three scenes was set at night. Since Kate was exhausted, it was reasonable she would not bother turning on lights or closing the curtains, so the 1K – with blue gel for a moonlight effect – became the one and only light source for the scene.
To get a bird’s eye view of the bed, the camera was clamped to the cantilevered arm of a well-sandbagged C-stand.
The bedroom by moonlight
The next scene was the following morning. This was a piece of cake; I just swapped the blue gel on the 1K for orange for that sunrise look.
The bedroom by sunlight
The third and final scene was night again, but this time with other light sources besides the window. Kate’s key was a practical table lamp, reinforced by a 100W clip-light just out of frame.
Col rigged a 300W backlight, or “hair light”, on top of the wardrobe, representing a ceiling light. As it turned out, once the door was opened it flagged this light off Kate. I didn’t mind because her dark hair stood out well against the light background anyway, and the 300W lamp still put a streak of light in the top right corner of the shot, which was a bit of added interest and helped frame the composition.
An Arrilite was set up in the corridor to create depth, and was gelled green to contrast chromatically with Kate’s orange skin tone.
The bedroom by artificial light
So although brief, one-shot scenes like these might seem restrictive for a director of photography, they’re actually some of the most creative because you can experiment and create a variety of different looks relatively quickly.
If you’ve found this blog useful, please visit stopejectmovie.com and make a contribution, or if you’re not able to do that then share the link with as many people as possible and help spread the word.
And stay tuned for the fourth and final part of this breakdown, in which I’ll look at my least favourite scene (lighting-wise): the basement.
Here’s my lighting plan for the main scene in the living room:
Living room lighting plan (day)
Along the bottom I’ve drawn in the tracks and camera for the master shot. I’m treating the location like a three-walled set, so this bottom wall will never be seen. (The pink highlight was to show Sophie which walls needed painting.)
The wide tracking shot had the potential to be difficult from a lighting stand-point, since it would show almost 270 degrees of the room. Putting the lights behind camera is never a good idea creatively; you end up with a depth-less image that looks like a photo taken with flash. But fortunately the location had a high ceiling, so Col was able to rig lamps overhead.
Col runs power cables for a ceiling-rigged light
When you can’t afford to hire HMIs – which emit a 5,600K light, the same colour as sunlight – you have to make a difficult decision on your daytime interiors. You could put blue CTB “daylight” gels on your tungsten lights, but that immediately cuts out half their illumination, and they’re not very bright to start with. Or you could white-balance somewhere in between daylight and tungsten, letting one go slightly blue and the other slightly orange on camera, like I did in the shop.
Or you can cover the windows in CTO gel, tinting the incoming daylight orange to match your tungsten lamps. Typically this is only practical for rooms with small windows – and luckily our living room location was such a room. So once the window was gelled, I knew I could set my camera’s white balance to the tungsten preset (3,200K) and all the light would look white.
As daylight is liable to change – the sun moves across the sky, goes behind clouds – you’ll always want to reinforce it with an artificial light source for consistency. Besides which, I wanted it to look like the sun was out and shining straight in the window, which I clearly couldn’t rely on nature to do for me. Hence the 1KW Arrilite in the lighting plan (labelled simply “1K”), rigged above the window.
In discussions with Sophie and Katie, the costume designer, we had decided to make yellow the colour of happiness in Stop/Eject. So, since this scene is before Dan’s death, I chose to put straw gel on this 1K. In retrospect, this was a bit over the top, given that the walls were already painted yellow.
A 300W work-light was rigged from the ceiling just in front of the fireplace, to provide some backlight.
As in the shop, an 800W Arrilite with magenta gel was placed behind the alcove to represent the wall sconce.
A table lamp was placed on Dan’s desk to brighten up what could otherwise be quite a dark corner.
The other two lamps shown in the plan were ditched as unnecessary for the wide shot.
Finally, a little smoke was added to volumize the “sunlight” and generally diffuse the image.
Here are some frames from the rushes of the wide shot:
Living room master shot (start position). The key light (a straw-gelled 1K Arrilite) is above the window, off camera right, while a magenta-gelled 800W Arrilite behind Kate (Georgina Sherrington) provides backlight.Living room master shot (end position). Both characters here are mainly lit by natural bounce off the walls. The window is gelled with CTO to match it to the tungsten light inside.
Let’s look at a couple of other camera angles in this scene, and how the lighting set-up had to be tweaked for them.
Kate's mid shot
This mid-shot of Kate (Georgina Sherrington) was straightforward. The 1K “sun” provided lovely backlight, while the 300W work-light above the fireplace wraps this around the right side of her face a little. The only addition needed was a reflector next to camera for fill.
Dan (Oliver Park) editing audio on his laptop
This angle starts as a single on Dan (Oliver Park). Kate is occasionally revealed in the background, and she was already well lit by the 1K “sun” and the 300W work-light.
I wanted some edge light on Dan to highlight his ear, because he’s listening closely to the audio he’s editing. This was a 100W clip-light off camera left at about the right height to suggest an unseen table lamp. As an added bonus, this light also supplied some fill on Kate as she crept up on Dan later in the shot:
Dan's close-up tilts up to Kate creeping up on him. The straw-gelled 1K "sun" is providing her key, while the shadows on her face are filled in by a 100W clip light below and to the left of frame.
Once Kate is sat on Dan’s lap you can see the key light in action:
The close-up becomes a tight two-shot
What was the key lamp? Having established the desk lamp in the wide, I could have used that – or something representing it – as the key. Instead I decided to add some colour contrast by using the blue light from the computer screen. The screen wasn’t bright enough to light him in reality, so this is where a £2 LED camping light came in handy – I simply hooked it over the top of the screen. (For more info on colour contrast, see this earlier post.)
LED camping light (picked up from a charity shop for £2)
For a later daylight scene in the living room, I totally cheated the lights. It’s easier to get away with cheating your lighting angles when a scene only has one shot and the audience can’t see too much of the geography.
I had Col rig a second straw-gelled 1K Arrilite close to the first, but pointed at right-angles so as to directly backlight Kate. Naturally reflected light was not giving Kate’s face the definition I wanted, so I put the 800W Arrilite out of the right of frame with several layers of tough spun diffuser on.
Here’s the result:
Second daylight scene in the living room
The light sources don’t stand up to much scrutiny, but it’s a brief scene so I think I’ll get away with it. Except that I just told everybody. D’oh.
Int. Living Room – Night
Living room lighting plan (night)
The single nighttime scene in this location was filmed in the early afternoon, so the crew blacked out the window. The 1K “sun” lamp was of course turned off, but the 300W work-light was left as a backlight for Kate on the sofa. A fluorescent-gelled 800W Arrilite was placed in the corridor to represent illumination from a strip light in the kitchen.
I wanted to trap Kate within a formal, symmetrical frame. Two practical lamps in the background, on either side of the wide shot, contributed to this effect.
Finally, she was meant to be watching TV, although the set would never be seen. Over the years I’ve tried several techniques for simulating TV illumination. I haven’t found a definitive one yet, but currently my favourite method is to bounce a day-light balanced lamp (in this case one of the fluorescent studio lamps, not an 800W Arri as the plan indicates) off a reflector that’s being wobbled by a crew member.
Nighttime in the living room
That’s your lot for today. Next time we’ll look at the bedroom scenes (minds out of the gutter, please).
This blog post is the third of our public rewards in the Stop/Eject crowdfunding campaign. If you’re reading this, it means we’ve raised at least £300 so far. If you don’t know what the hell I’m talking about, go to stopejectmovie.com to watch the trailer for my new short film and find out about the public and individual rewards we’re offering to anyone who sponsors the project.
In this post I’m going to break down the lighting set-ups for some of Stop/Eject’s key scenes in the shop, looking at what I was trying to achieve and how I went about it. I had intended to cover all of the film’s key scenes, but after writing out the shop stuff and realising how long it is, I’ve decided to save the rest for another time.
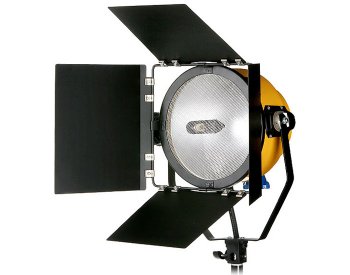
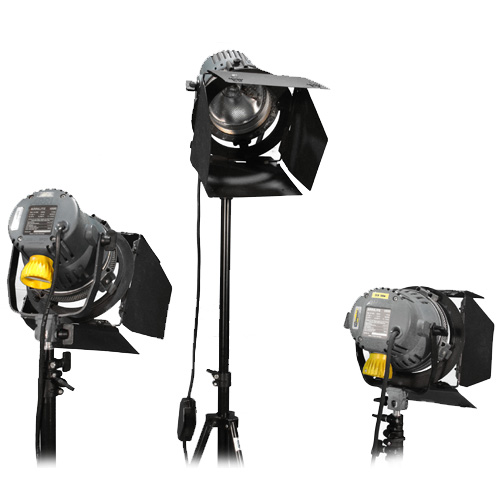
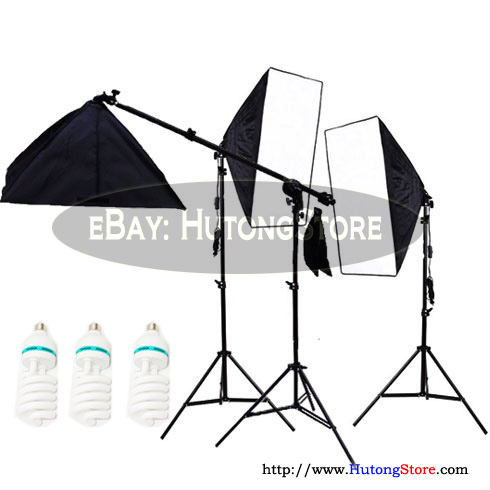
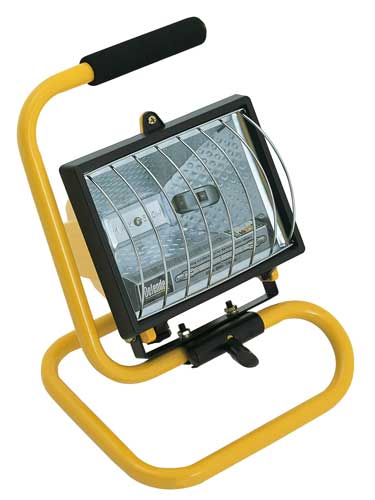
First of all, here’s the lighting equipment we had available to us on the shoot:
Plus stands, gels, sandbags and lots of splitters and extension leads. However many extension leads you think you need, triple it and you might just about have enough.
Int. Shop – Day
Here’s my lighting plan for the daylight interiors at Magpie, the shop location:
Shop lighting plan
My aim with the lighting here was to create a transition from the cool realism of daylight at the front of the shop, through the warm shop floor, with patches of other colours adding depth and delineating different areas, to the alcove and the magenta light of the sconce which illuminates the tape recorder. In a nutshell: a magical journey.
Since it was a real location, there was genuine daylight flooding in through the windows, over which I had no control. This would determine my white balance and exposure, and everything I introduced would have to work with that. I knew that the windows would be blown out, but this was necessary anyway to hide certain things that were meant to be happening out on the street but weren’t.
We lensed the shop interiors at f1.8 on ISO 100 or 200. As you can see on the lighting plan, we set the white balance to 4,500K – dialling it in using Magic Lantern, which I’ll discuss in a future post. 4,500K is halfway between daylight and tungsten. This meant the daylight would appear slightly blue on camera, while any ungelled tungsten lamps would appear slightly orange, so my magical journey was already creating itself to some extent.
Col rigs the blonde outside the shop windows. Sandbags are a must if members of the public are walking by, and you should have a crew member man the lamp at all times.
Although my plan shows two 1K Arrilites outside the windows, on the day I chose to use the blonde instead. This was to enhance the backlight on characters near the windows. When we flipped around to shoot towards the back of the shop, we often turned off this blonde because the natural light was doing enough by itself.
Col rigs a work-light to the ceiling
I also forgot how many work-lights Col had when I drew the plan. There weren’t enough to have the three shining down the side wall. But I did have him rig the other four in the plan. The owner of Magpie was totally laid back about us screwing things into his ceiling, which made rigging these lamps fairly straightforward.
Two of the ceiling-rigged work-lights in action
The two 500W work-lights drawn either side of the legend “full fluorescent gel” were initially not gelled at all. I decided it was best to keep them warm to facilitate the transition I described earlier. But ultimately we gelled them with half CTB (Colour Temperature Blue, i.e. daylight correction) because they were looking a bit too warm. These two lamps served to drop splashes of orange light on Kate (Georgina Sherrington) as she approached the alcove when shooting towards the front of the shop, and to backlight her and the other characters when shooting towards the back.
The 300W work-light trained on the alcove was left ungelled, which really made the red of the curtain pop.
The lone 500W work-light shown to the left of the staircase in the plan was gelled with half-green fluorescent correction, as planned, for no particular reason other than to separate this area of the shop a bit from others.
A 1K Arrilite was placed at the top of the stairs pointing down to give background depth to wide shots, and also to give some highlights to Dan (Oliver Park) and Alice (Therese Collins) when they’re looking at the records. The 1K was gelled blue (full CTB) to represent daylight. A second one, not in the plan, was placed in a doorway off to the side of the staircase to throw some side-light both on the stairs and on a patch of the shop floor next to the clothes rack.
Dan and Alice looking at the records. The light hitting them from Dan’s elbow down is from the daylight-gelled 1K Arrilite at the top of the stairs (directly behind camera) and the rest of the front-light on them is from a 500W worklight on the ceiling with a half-green gel on it.
An 800W Arrilite was positioned at the back of the alcove, with a couple of layers of tough-spun diffuser and one of magenta gel. Sophie had chosen to paint the sconce in the alcove with magenta paint, and I felt I should reinforce this in my lighting. It completes the magical journey nicely by representing the reddest end of the lighting spectrum I’d created.
Wide shot towards the back of the shop. Hopefully you can see the transition I tried to create from the cool daylight in the foreground (enhanced by the blue-gelled blonde), through the orange backlights (from the ceiling work-lights) and pools of illumination from the clip-lights dotted about, to the magenta of the alcove in the background. Note also the extra depth created in the right of frame by Arrilites at the top of the stairs and off to the right of the stairs.
The final touch was clip-lights. We bought twelve of these £2.50 fixtures earlier in the year from B&M for the Cyclotron. Somehow the Cyclotron itself never got used, but the clip-lights were cannibalised and used extensively.
It’s all very well having a great location filled with interesting set dressing, but as DP if you don’t create depth with your lighting, then all that work is wasted. The clip-lights seemed like a great way to add little pools of warm light that would separate the layers of clutter from each other and provide contrast.
Kate leans into one of the clip lights
I loved this moment in the wide shot when Kate leant into one, picking her out from the background and reinforcing her leaving Dan behind on her magical journey. (Tell you what, just down your drink every time I write “magical journey”, okay?)
I found myself in need of a little extra “daylight” near the door – to keep Kate in the “real world” a little longer – and so I had one of the fluorescent studio lamps set up on top of a cabinet. That’s what’s hitting Dan on the left of his face in the above image. If I had to justify this light source, I’d say it’s daylight reflecting off a glass cabinet front. You’d buy that, right?
A second fluorescent lamp was employed when the time came to shoot a crucial Glidecam shot leading Kate as she advances into the shop. It was great that she moved in and out of the tungsten lights on her journey, but I was losing her eyes too much. And if you can’t see into your actors’ eyes, you might as well pack up and go home because you don’t have a film.
So while Col operated the Glidecam on this shot, I walked behind him, shining the fluorescent lamp over his head and straight into Georgie’s face. This constant, soft frontlight was at just the right level not to kill the dynamics created by the other lamps, while still putting a sparkle in her eyes and filling in any unflattering shadows.
Check out the shot in the trailer about 8 seconds in:
I also love the shadow from the clothes rack that crosses her face during this shot. This is cast by the 1K Arrilite in the doorway by the stairs, on the other side of the rack. Ostensibly it’s daylight from an unseen window.
This turned out to be one of my favourite shots in the film from a cinematography perspective. Georgie looks absolutely stunning, because of course she is, but Debs’ lovely make-up and the lighting here really bring out her features.
Glidecam shot. The highlights on Kate’s face come from a blue-gelled 1K Arrilite off left, behind the clothes rack, while fill is provided by a fluorescent studio lamp I’m holding above camera.
Col pumped in smoke for all the shop interiors. This is another great way of adding depth, not to mention enhancing the dusty, mysterious feel of the shop.
Int. Shop – Night
When it came to the night scenes in the shop, the lack of natural light made quite a big difference without me having to do anything. I changed the white balance to tungsten (3,000K) and experimented with turning off different lamps until I arrived at the mood I wanted. The blue-gelled Arrilites now appeared even bluer, passing as moonlight.
Night time in the shop. Alice is backlit by a 1K Arrilite at the top of the stairs and side-lit by another 1K in a doorway off to the right, this one gelled blue to represent moonlight coming in through an unseen window. Note how we’ve turned on the practical lamps (the table lamp and floor lamp) to add contrast.
The most striking effect in the night scenes is the police lights. These were integral to the storyline, so I’d discussed them with Colin way in advance.
If you look at the opening scene of Soul Searcher (above – particularly noticeable from about 3’03 onwards), you’ll see that we made use of the flashing amber light on the street-cleaning vehicle. The actual light on the vehicle wasn’t powerful enough, so I asked Col to build a reflector that could be spun in front of an amber-gelled redhead to create the effect.
Eight years later, Col rebuilt this low-tech device for Stop/Eject’s police lights, gelling one side of the reflector red and the other blue. If you scroll back up to the Stop/Eject trailer and scrub to 2’00 you’ll see a behind-the-scenes glimpse of this in action.
Setting up the Spinning Disc Mark II
As it turned out, the reflected light from the catchily-named “Spinning Disc Mark II” was not bright enough for wide shots. Instead it fell to Sophie, if I remember rightly, to hold a flag in front of two lights, one gelled blue, the other gelled red, and move this flag back and forth during takes. At other times we simply switched the lights on and off in rapid succession.
During the shooting of all the shop scenes, I felt like I wasn’t quite achieving the look I wanted. Obviously my mind was on many other things, and we were very pushed for time, but somehow it wasn’t looking quite as moody and cave-like as I thought it should. But having played with colour-correcting a bit of the footage now, I’m more than happy that with a little grading it will look great.
If you have any questions about anything I’ve covered here, please comment or post on the Facebook page and I’ll be happy to answer.
That’s all for now, but I will be covering other scenes very soon. Thanks for getting our funding campaign to the £300 mark, and please keep giving and sharing the link so we can finish this epic little short to the best possible standard.
Following on from my last post, here’s what I was going for when I created the above lighting previz image for the basement scene in Stop/Eject.
As DoP Eve Hazelton lucidly explains in this video blog, one of the keys to great cinematography is creating depth, even (and especially) when you’re shooting in 2D. The basement location already has great depth with all those pillars tapering into the distance, but how can that be maximised on camera?
I’ve added smoke. Smoke creates depth because there will be more of it between the camera and a distant subject than between the camera and a close subject.
The light illuminating the smoke gets bluer as it gets further from camera. (This will be achieved by layering increasing numbers of blue gels on the lights.) This simulates the effect you can see when you look at the view from the top of a hill, whereby other hills in the distance seem bluer due to atmospheric haze.
I’ve thrown alternating pillars into shadow. This makes each “layer” of pillars contrast with the ones behind and in front of it, highlighting the depth. (We can achieve this on the day by simply turning off or removing the tubes in every other fluorescent light.)
Colour wheel
As the characters walk through this shot towards us, they will go in and out of smoke and shadow, and become clearer through the smoke. That gives us dynamics, which are also important in good cinematography.
Now let’s look at the issue of colour contrast, something which I must admit I’ve only got to grips with quite recently. To cut a long story short, images look more interesting if they contain contrasting colours. Typically this means choosing two colours on opposite sides of the colour wheel, like blue and yellow as in the above previz. Or I could have gone with orange/red and green…
Lighting concept #2
… though green daylight is hard to justify! It does fit nicely with the colour palette we’ve already established for the costume and production design though.
I also tried orange daylight and green fluorescent light, but since the scene doesn’t take place at sunrise or sunset that’s hard to justify too.
Finally I tried orange and blue. One is a warm colour and the other is a cool colour – another classic way of creating colour contrast.
Lighting concept #3
The jury’s still out on this one. A lot will depend on what colour I’m able to make the fluorescent light appear through white balancing, since we’re unlikely to have time to gel all of them to my desired hue, and also what colour costumes Katie puts the characters in for that scene.
Okay, that’s all for today. Once the film’s in the can, there will be lots more about how the scenes were lit. In the meantime, perhaps I’ll share some of my lighting plans in a future post.
I’m DOPing Stop/Eject as well as directing it, which means I have to be well prepared. I’m not going to have time to stand around on location figuring out how I want to light it. I need to do that in advance.
Last year I drew up some lighting plans, and thanks to the postponement of the shoot I have more time to work on these and get them just right. And recently I had a previsualisation idea: to take recce shots of the location and photoshop them to show the lighting I want to achieve.
So here’s the image I decided to work with, from the basement at Strutt’s North Mill in Belper:
Raw frame grab from the basement recceCeiling fluorescents
So, how do I want to light the basement? How does a DOP decide how to light anything? For me it always starts with three questions:
Realistically, where would light be coming from?
Creatively, where do I want to put the lightst?
Practically, where can I put the lights?
Let’s try to answer these for the basement scene…
The basement is only partially underground, so it does have some windows, but I don’t ever have to show them if I don’t want to (an advantage of being director too). A room like this would have regularly spaced ceiling lights, probably fluorescent. Perhaps the characters would have a torch or lamp of some kind too.
Soul Searcher’s car park scene, lit almost entirely by the existing overhead fluorescents
I’m going to choose to include the daylight, to provide some contrast with the ceiling lights. This is our most impressive location and perhaps the scene where the film’s fantasy side is most apparent, so I want it to look magical and cinematic. More on the creative side later.
We would have access to the areas outside the windows, so I could light through them if I wanted. (In practice I’ll probably never show the windows, and the lamps representing the daylight will actually be inside the building, just out of frame.) Our time at this location is likely to be extremely limited, so although the ceiling is suitable for hanging lamps from, I’ll probably just have to go with the existing fluorescents. I’ve done this before – the multi-storey car park in Soul Searcher – and it looked good.
So with all that in mind, here’s what I came up with in Photoshop:
Lighting concept #1 for the basement
In my next post I’ll explain what I’ve done and why, particularly with reference to creating depth, and show you some alternate versions of the above image which will demonstrate some of the basics of colour theory. Sounds intriguing, huh? Better not miss it.
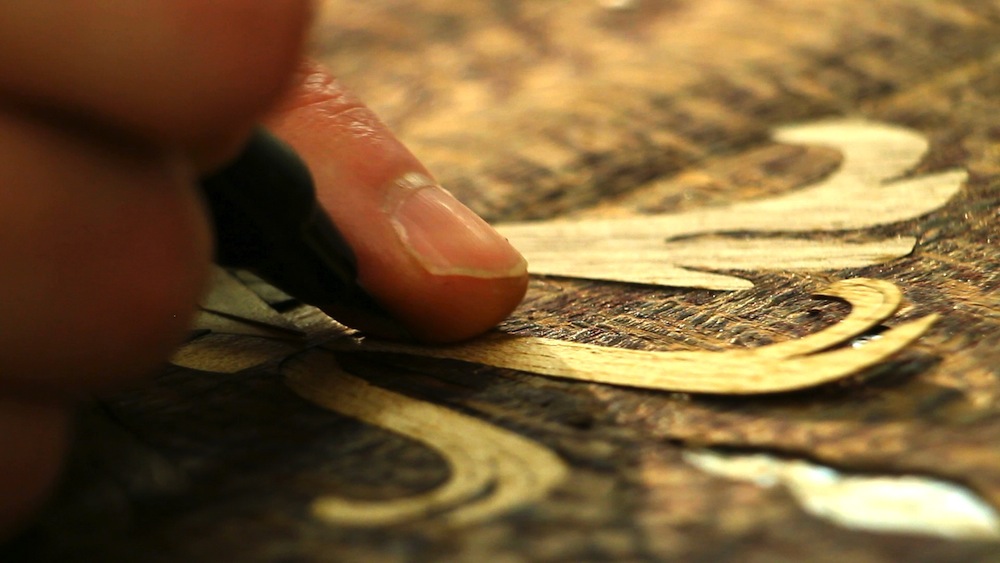
Anne lays sand-shaded veneer pieces into a panelSetting up to shoot. Photo: Lisa Sansome
Last Monday was the first day of shooting on a promotional video for a company in Llandrindod Wells called Aryma. Aryma makes contemporary marquetry – exquisite and intricate inlaid wood panelling, typically for private jets, super yachts and luxury homes. An image is created not through paint of any kind, but by painstakingly building it up from many, many pieces of wood veneer, each one a different colour, and some of them shaded by singeing them in hot sand.
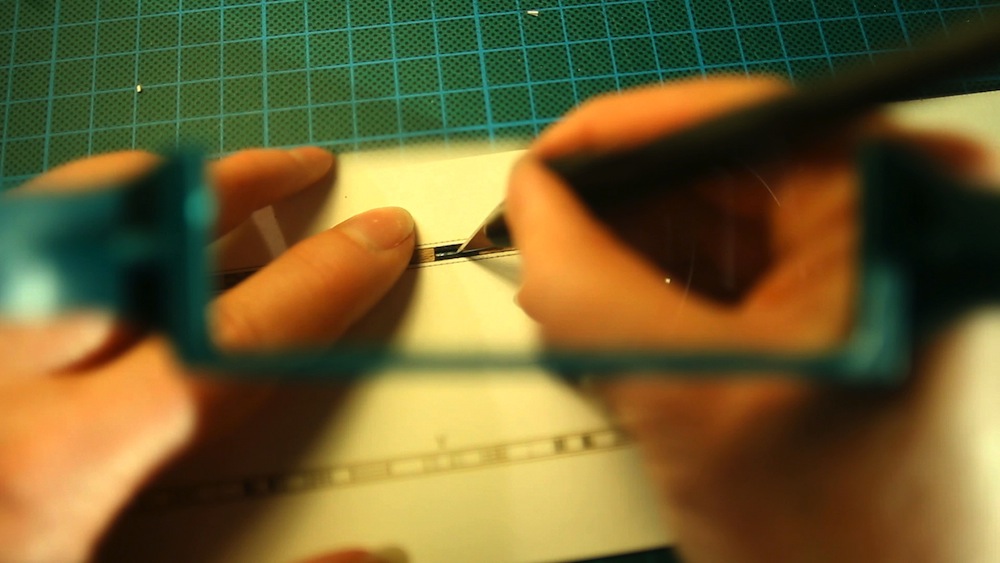
The video marked my first experience of using macro tubes: collars that fit between the lens and camera body to allow the lens to focus on closer objects than it normally can. This was necessary in order to properly capture the fitting of the veneer pieces, some of which are unbelievably tiny. Here is a glimpse of a few of the shots recorded so far.
One of the great things about DSLRs is that, being so small, you can put them in all kinds of unusual places and, being so light, you can rig them to things with relatively little hassle. Stop/Eject is not the sort of film where we’ll being doing a lot of this (unlike Act of Valor, which I strongly suggest you check out), but there is one shot that needs a custom rig…
Shot 69, as drawn by Sophie Black
In this shot, the camera needs to be attached to the bike in some way so it moves with it, maintaining the same framing on the wheel throughout. This is part of the film’s visual theme of circles, which I discussed earlier this year on the blog.
Rigged for the rear wheel
If the shoot had gone ahead last October as originally planned, this shot would probably have got dropped or replaced with a similar but less effective version achieved by simply steadicamming along next to the bike. But one great advantage of a shoot being postponed is the opportunity to prepare so much better.
To that end, Colin and I borrowed his mum’s bike this morning to test the shot. Under the pressure of a low budget filming schedule, you can’t mess around trying to figure out a rig like this. You have to work it out in advance.
My plan was to use a C-stand arm and a cheap tripod to get the camera in the right place. First of all we tried clamping the arm to the frame of the bike, but it was too thick. So then we clamped it to the pedal (which meant roping or clamping the pedal to another part of the bike so it wouldn’t turn). The bottom of the tripod was clamped in turn to this arm. The handy thing about using a tripod, of course, is that you have a pan-and-tilt head for easy adjustments and a quick-release plate too.
Rear wheel shot
Initially we filmed the rear wheel, but then I realised filming the front wheel would allow us to get a wider frame, since the pedals (which had to be framed out because the arm was clamped to one of them) were further away from the front wheel.
The rig worked out really well. We had to use a lens with an image stabiliser, and when we shoot it for real we’ll put someone on the bike to weigh it down and reduce the bumps further. I’d imagined we’d have to use a second clamp and bungee cords to keep the camera in place, but the sturdiness of the C-stand arm and the low weight of the camera made this unnecessary.
Yeah, we got a bit of the pedal in shot, not to mention Col’s feet. But those things are easily fixed.
Just before I sign off, I have to give you a link to Tony Hill Films, a site I came across while researching bike rigs. He’s built a number of unique and fascinating camera rigs which you can see in action on the site: http://www.tonyhillfilms.com/rigs


. Photo: Alex Bender")


 and Alice (Therese Collins) from either side.")


")

")
")

 editing audio on his laptop")


")