“Mission: Impossible” and the Dawn of Virtual Sets

The seventh instalment in the Mission: Impossible franchise was originally scheduled for release this July. It’s since been pushed back to next September, which is a minor shame because it means there will be no release in 2021 to mark the quarter of a century since Tom Cruise first chose to accept the mission of bringing super-spy Ethan Hunt to the big screen.

Today, 1996’s Mission: Impossible is best remembered for two stand-out sequences. The first, fairly simple but incredibly tense, sees Cruise descend on a cable into a high-security vault where even a single bead of sweat will trigger pressure sensors in the floor.

The second, developing from the unlikely to the downright ludicrous, finds Cruise battling Jon Voight atop a speeding Channel Tunnel train, a fight which continues on the skids of a helicopter dragged along behind the Eurostar, ending in an explosion which propels Cruise (somehow unscathed) onto the rear of the train.

It is the second of those sequences which is a landmark in visual effects, described by Cinefex magazine at the time as “the dawn of virtual sets”.

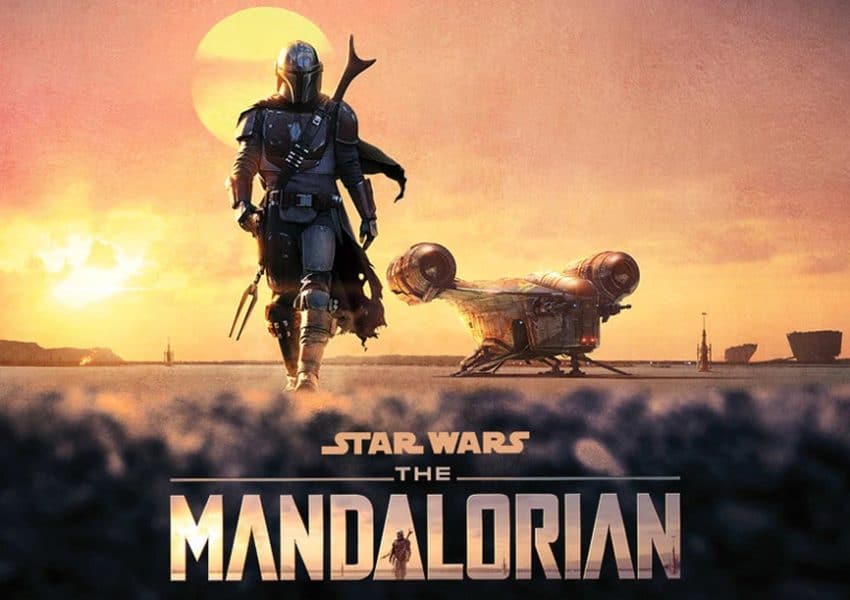
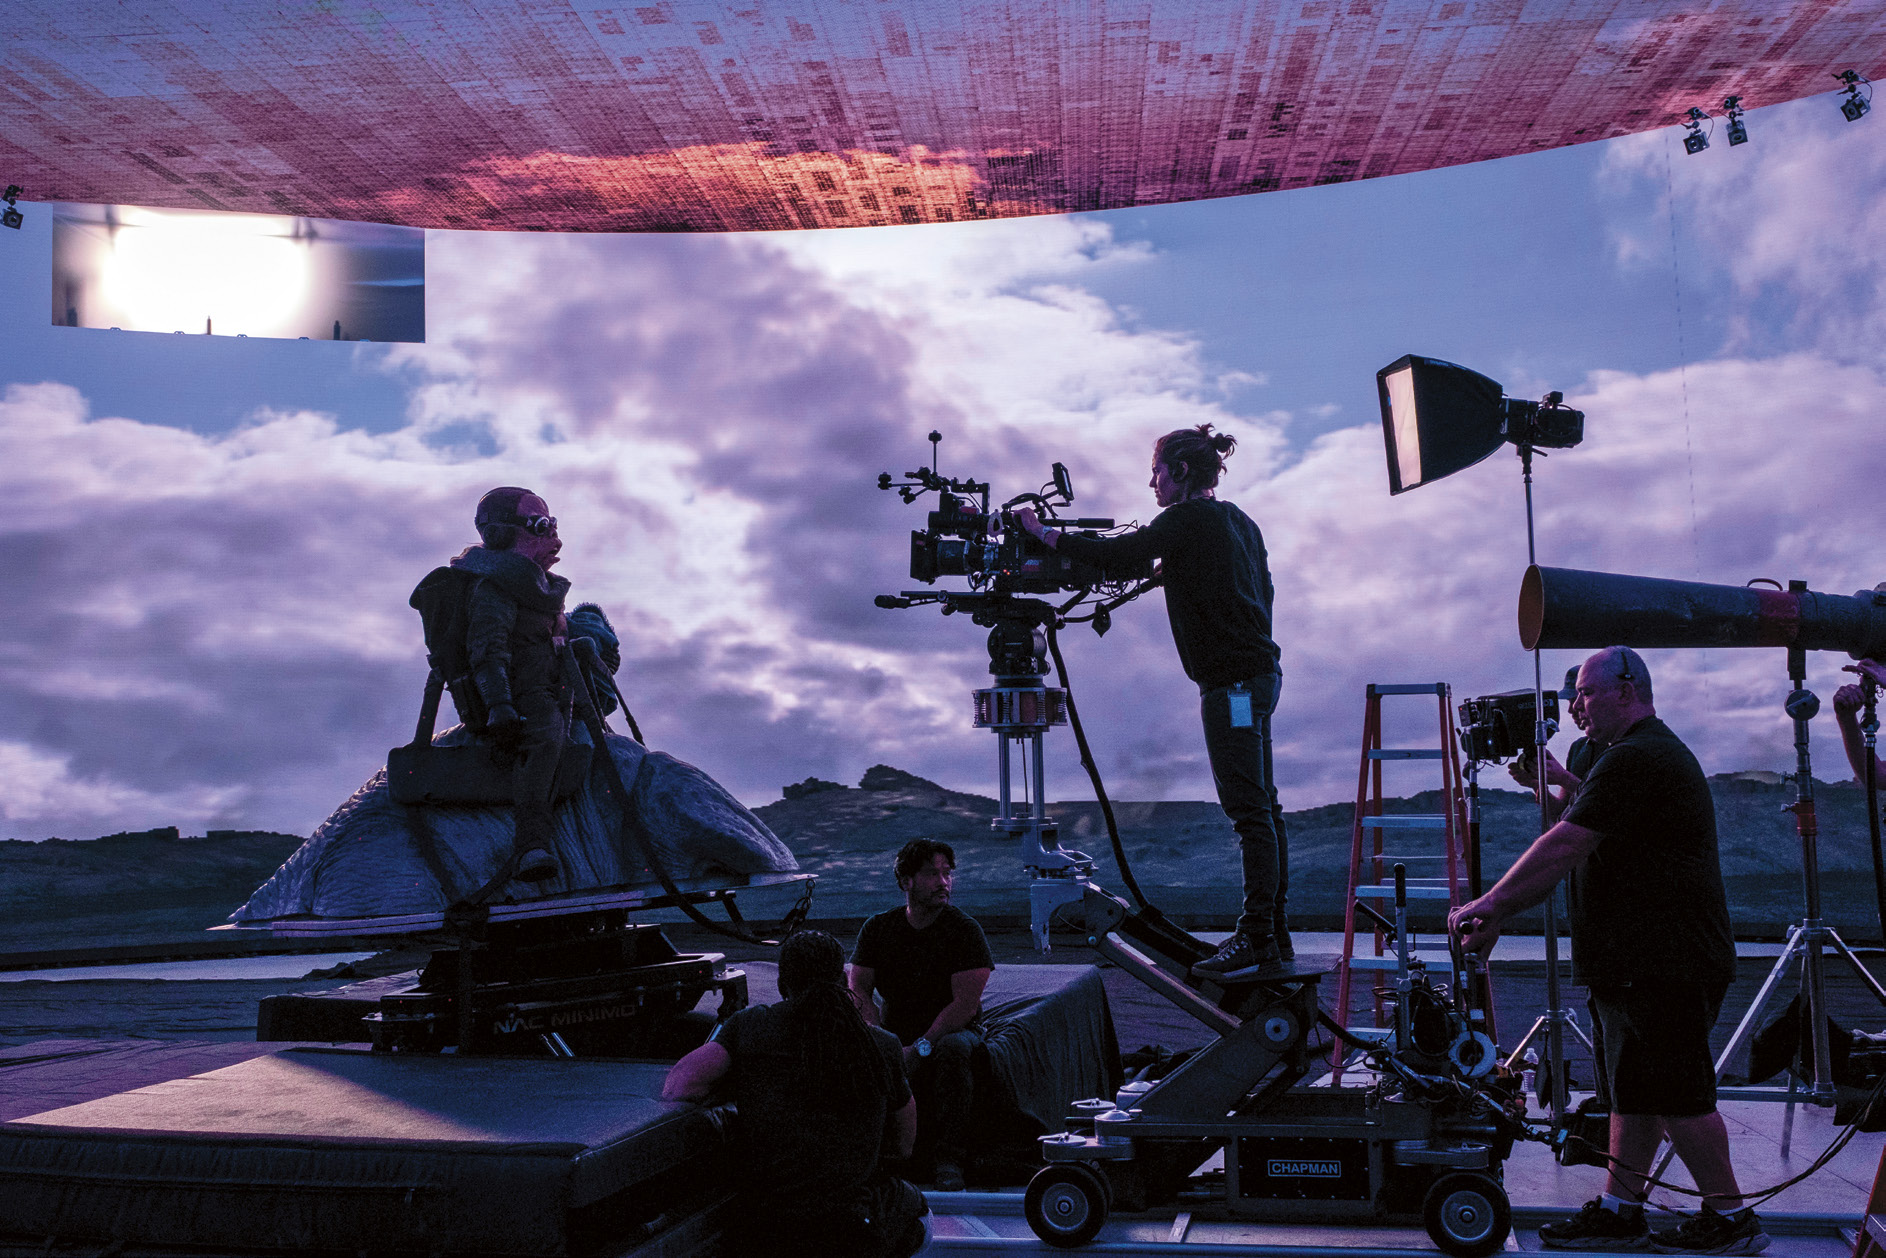
“In Mission: Impossible, we took blue-screen elements of actors and put them into believable CG backgrounds,” said VFX supervisor John Knoll of Industrial Light and Magic. Building on his work on The Abyss and Terminator 2, Knoll’s virtual tunnel sets would one day lead to the likes of The Mandalorian – films and TV shows shot against LED screens displaying CG environments.

Which is ironic, given that if Tom Cruise was remaking that first film today, he would probably insist on less trickery, not more, and demand to be strapped to the top of a genuine speeding Eurostar.

The Channel Tunnel had only been open for two years when Mission: Impossible came out, and the filmmakers clearly felt that audiences – or at least American audiences – were so unfamiliar with the service that they could take a number of liberties in portraying it. The film’s tunnel has only a single bore for both directions of travel, and the approaching railway line was shot near Glasgow.

That Scottish countryside is one of the few real elements in the sequence. Another is the 100ft of full-size train that was constructed against a blue-screen to capture the lead actors on the roof. To portray extreme speed, the crew buffeted the stars with 140mph wind from a parachute-training fan.

Many of the Glasgow plates were shot at 12fps to double the apparent speed of the camera helicopter, which generally flew at 80mph. But when the plate crew tried to incorporate the picture helicopter with which Jean Reno’s character chases the train, the under-cranking just looked fake, so the decision was taken to computer-generate the aircraft in the vast majority of the shots.

The train is also CGI, as are the tunnel entrance and some of its surroundings, and of course the English Channel is composited into the Glaswegian landscape. Once the action moves inside the tunnel, nothing is real except the actors and the set-pieces they’re clinging to.

“We cheated the scale to keep it tight and claustrophobic,” said VFX artist George Hull, admitting that the helicopter could not have fitted in such a tunnel in reality. “The size still didn’t feel right, so we went back and added recognisable, human-scale things such as service utility sheds and ladders.”

Overhead lights spaced at regular intervals were simulated for the blue-screen work. “When compositing the scenes into the CG tunnel months later, we could marry the environment by timing those interactive lights to the live-action plates,” explained Hull.

Employing Alias for modelling, Softimage for animation, RenderMan for rendering, plus custom software like ishade and icomp, ILM produced a sequence which, although it wasn’t completely convincing even in 1996, is still exciting.

Perhaps the best-looking part is the climactic explosion, which was achieved with a 1/8th scale miniature propelled at 55mph through a 120ft tunnel model. (The runaway CGI which followed Jurassic Park’s 1993 success wisely stayed away from explosions for many years, as their dynamics and randomness made them extremely hard to simulate on computers of the time.)

Knoll went on to supervise the Star Wars prequels’ virtual sets (actually miniatures populated with CG aliens), and later Avatar and The Mandalorian. Meanwhile, Cruise pushed for more and more reality in his stunt sequences as the franchise went on, climbing the Burj Khalifa for Ghost Protocol, hanging off the side of a plane for Rogue Nation, skydiving and flying a helicopter for Fallout, and yelling at the crew for Mission: Impossible 7.

At least, I think that last one was real.

“Mission: Impossible” and the Dawn of Virtual Sets

Will “The Mandalorian” Revolutionise Filmmaking?

Last week, Greig Fraser, ASC, ACS and Baz Idoine were awarded the Emmy for Outstanding Cinematography for a Single-camera Series (Half-hour) for The Mandalorian. I haven’t yet seen this Star Wars TV series, but I’ve heard and read plenty about it, and to call it a revolution in filmmaking is not hyperbole.

Half of the series was not shot on location or on sets, but on something called a volume: a stage with walls and ceiling made of LED screens, 20ft tall, 75ft across and encompassing 270° of the space. I’ve written before about using large video screens to provide backgrounds in limited aways, outside of train windows for example, and using them as sources of interactive light, but the volume takes things to a whole new level.

In the past, the drawback of the technology has been one of perspective; it’s a flat, two-dimensional screen. Any camera movement revealed this immediately, because of the lack of parallax. So these screens tended to be kept to the deep background, with limited camera movement, or with plenty of real people and objects in the foreground to draw the eye. The footage shown on the screens was pre-filmed or pre-rendered, just video files being played back.

The Mandalorian‘s system, run by multiple computers simultaneously, is much cleverer. Rather than a video clip, everything is rendered in real time from a pre-built 3D environment known as a load, running on software developed for the gaming industry called Unreal Engine. Around the stage are a number of witness cameras which use infra-red to monitor the movements of the cinema camera in the same way that an actor is performance-captured for a film like Avatar. The data is fed into Unreal Engine, which generates the correct shifts in perspective and sends them to the video walls in real time. The result is that the flat screen appears, from the cinema camera’s point of view, to have all the depth and distance required for the scene.

The loads are created by CG arists working to the production designer’s instructions, and textured with photographs taken at real locations around the world. In at least one case, a miniature set was built by the art department and then digitised. The scene is lit with virtual lights by the DP – all this still during preproduction.

The volume’s 270° of screens, plus two supplementary, moveable screens in the 90° gap behind camera, are big enough and bright enough that they provide most or all of the illumination required to film under. The advantages are obvious. “We can create a perfect environment where you have two minutes to sunset frozen in time for an entire ten-hour day,” Idoine explains. “If we need to do a turnaround, we merely rotate the sky and background, and we’re ready to shoot!”

Traditional lighting fixtures are used minimally on the volume, usually for hard light, which the omni-directional pixels of an LED screen can never reproduce. If the DPs require soft sources beyond what is built into the load, the technicians can turn any off-camera part of the video screens into an area of whatever colour and brightness are required –  a virtual white poly-board or black solid, for example.

A key reason for choosing the volume technology was the reflective nature of the eponymous Mandalorian’s armour. Had the series been shot on a green-screen, reflections in his shiny helmet would have been a nightmare for the compositing team. The volume is also much more actor- and filmmaker-friendly; it’s better for everyone when you can capture things in-camera, rather than trying to imagine what they will look like after postproduction. “It gives the control of cinematography back to the cinematographer,” Idoine remarks. VR headsets mean that he and the director can even do a virtual recce.

The Mandalorian shoots on the Arri Alexa LF (large format), giving a shallow depth of field which helps to avoid moiré problems with the video wall. To ensure accurate chromatic reproduction, the wall was calibrated to the Alexa LF’s colour filter array.

Although the whole system was expensive to set up, once up and running it’s easy to imagine how quickly and cheaply the filmmakers can shoot on any given “set”. The volume has limitations, of course. If the cast need to get within a few feet of a wall, for example, or walk through a door, then that set-piece has to be real. If a scene calls for a lot of direct sunlight, then the crew move outside to the studio backlot. But undoubtedly this technology will improve rapidly, so that it won’t be long before we see films and TV episodes shot entirely on volumes. Perhaps one day it could overtake traditional production methods?

For much more detailed information on shooting The Mandalorian, see this American Cinematographer article.

Will “The Mandalorian” Revolutionise Filmmaking?

“The Little Mermaid”: Boats, Trains and Automobiles

One of the biggest challenges on The Little Mermaid was the amount of material set in moving vehicles at night. Over the course of the story, the heroes travel in two different trains, a pick-up truck and a riverboat, and I knew that lighting large stretches of railway, road or river wasn’t going to be practical on our budget. Ultimately much of it ended up being done against green screen, with the notable exception of the riverboat, the first mode of transport to go before the cameras. Here are the relevant extracts from my diary.


Day 14

Today’s a big day because we’re shooting on a riverboat which has been hired at great expense. We have a huge amount of material to cover and there’s no way we can come back to the boat later if we don’t get it all. Chris and I make a game plan in the afternoon and arrive at the dock in good time.

It feels a lot like a micro-budget movie, shooting on a location that perhaps should have been a set (once we set sail you can’t see anything in the background because it’s night) with a tiny lighting package running off a little genny: some Kinos, two LED panels, and a 1K baby. Out there in the dark river, it is eery watching unfathomably huge container ships pass 50ft from us. We leave ‘B’ camera on the shore and try to co-ordinate with them by walkie as they shoot wide shots of the boat and we try to hide!


Day 16

Night driving scenes in a pick-up truck today. Poor Man’s Process was considered for these, then doing it for real with a low loader (called a process trailer here in the States). But at last green screen was chosen as the way to go.

The period vehicle is wheeled into our studio and parked in front of two 12×12 green screens, which VFX supervisor Rich dots with red tape crosses for tracking markers. Throughout the night he moves them around to make sure there are always a couple in shot. We light the green screen with two Image 80s (4ft 8-bank Kino Flos with integral ballasts) fitted with special chroma green tubes. Rich tells me to expose the screen at key, which in this case is T4.

Captain Dan Xeller, best boy electric, has lit car stuff before, so I give him free reign to establish the ambient level. He does it with 1Ks fired into 8×4 bounce boards, so that any reflections in the car’s bodywork will be large and sky-like, not strips like Kino Flos or points like pars or fresnels.

For shape we add a 5K with a chimera at a three-quarter angle, and a side-on par can with a “branch-a-loris” in front of it. Key grip Jason Batey designs this rig, consisting of two branches on a pivot like a Catherine Wheel, which can be spun at any speed by one of the grips, to simulate movement of the car.

Finally I add a 2K poking over the top of the green screen with Steel Blue gel, as a gratuitous hair-light.

Most of the night’s work is handheld, often with two cameras, but we also get some dolly shots, moving towards or away from the car, again to simulate movement.


Day 17

More green screen work today. At the end of the night we recreate one of the scenes from the boat with a piece of railing against the green screen. I do exactly the same lighting as before – Steel Blue three-quarter backlight, and a tungsten key bounced off polyboard. I love the way the actors’ skin looks under this light. Tungsten bounced off polyboard may just be the best light source ever.


Day 18

Stage scenes on real sets today, one of which is meant to be on the riverboat. The grips come up with a gag where we shine moonlight through an off-camera window gobo, which they handbash back and forth to simulate the boat rocking. We end up dialling it down so it’s very subtle, but still adds a hint of movement.

We move to the caboose (guard’s van), one of the train carriage sets. A second branch-a-loris is constructed so that both windows on one side of the carriage can have the passing trees effect cutting up the hard fresnel “moonlight”. We light from the other side with Kinos, and add a 1K baby bounced off foamcore to represent light from a practical oil lamp. Later the dialogue transitions to a fight scene, and we replace the bounced baby with an LED panel so it’s a little easier to move around and keep out of shot. I get to do some energetic handheld camerawork following the action, which is always fun.


View this post on Instagram


A post shared by Neil Oseman (@neiloseman) on


Day 27

Interiors on stage, followed by night exteriors out the back of the studio. One of these is a shot of the heroes running, supposedly towards the train. It’s shot from the back of the 1st AD’s pick-up truck as we drive next to them. We have no condor today so the 12K backlight is just on a roadrunner stand, flooding out across the marsh between the lamp and the talent. With smoke it looks great, but lens flare keeps creeping in because the lamp’s not high enough.

We also shoot some Poor Man’s Process around a small set of the rear of a train car. Two lamps with branch-a-lorises in front of them, wind, smoke and shaky cameras help sell the movement.

A post shared by Neil Oseman (@neiloseman) on

Later we have a POV shot of a train screeching to a stop in front of the villain. The camera is on a dolly and the G&E team mount a 2K on there as well, to represent the train’s headlight.

Next week I’ll turn my attention to The Little Mermaid‘s smaller scenes, and discuss how the principle of lighting from the back was applied to them. Meanwhile, if you’re interested in some techniques for shooting in genuinely-moving vehicles, check out my blog from week three of Above the Clouds where we shot on Longcross Studios’ test track, and my article “Int. Car – Moving”.

“The Little Mermaid”: Boats, Trains and Automobiles

Book Review: “Green Screen Made Easy”

coverMicro-filmmaker Magazine’s Jeremy Hanke recently got in touch and asked if I would review his book, “Green Screen Made Easy”. I used to make a lot of micro- and no-budget movies packed full of VFX, but I usually avoided green-screen because I could never make it look good. Although those kind of projects are behind me, I agreed to the review because I figured that this book might help others succeed where I’d failed – and also I was interested to find out why I had failed!

What Jeremy and his co-author Michele Terpstra set out to do is to cover the entire process from start to finish: defining chromakeying, buying or building a green screen, lighting and shooting it, sourcing or shooting background plates, choosing keying software, and all aspects of the keying itself.

The book is aimed at no-budget filmmakers, hobbyists or aspiring professionals making self-funded or crowd-funded productions, those digital auteurs who are often their own producers, writers, DPs, editors, colourists and VFX artists. Perhaps you’ve tried green-screening before and been disappointed with the results. Perhaps you’ve always seen it as a bit too “techie” for you. Perhaps the unpaid VFX artist you had lined up for your sci-fi feature just pulled out. Or perhaps you’ve already reached a certain level of competency with keying and now you want to step up a level for your next production. If any of these scenarios ring true with you, I believe you’ll find this book very useful.

“Green Screen Made Easy” is divided into two halves, the first half (by Jeremy) on prepping and executing your green screen shoot, and the second half (by Michele) on the postproduction process. Both authors clearly write from extensive first-hand experience; throughout the text are the kind of tips and work-arounds that only come from long practice. By necessity there is a fair amount of technical content, but everything is lucidly explained and there’s a handy glossary if any of the terms are unfamiliar to you.

camera-techniquesThe section on lighting and shooting green screen material contained few surprises for me as a cinematographer – see my post on green screen for my own tips on this subject – but will be very useful to those newer to the field. The chapters on equipment are very thorough, considering everything from which camera and settings to choose to ensure the best key later on, to buying or building a mobile green screen, or even kitting out your own green screen studio – all with various alternatives to suit any budget.

The postproduction chapters revealed clearly why I struggled with keying in the past. Michele explains how the process is much more than simply pulling a single key, and can involve footage clean-up, garbage matting, a core key and a separate edge key, spill suppression, hold-out matting and light wrapping. The book guides you through all these steps, and outlines the pros and cons of the software and plug-in options for each step.

4picsOnce you’ve read this book, I’d say the only other thing you’ll need before you can start successfully green-screening is to watch some YouTube tutorial videos specific to your software. While the instructions in the book look pretty good (as far as I can tell without attempting to follow them) the medium of text seems a little restrictive in teaching what is inherently a visual process. There are explanatory images throughout “Green Screen Made Easy”, but in the ebook version at least I found it difficult to discern the subtle differences in some of the before-and-after comparisons.

Ultimately what will make you the best “green-screener” is practice, practice, practice, but by reading this book first you’ll give yourself a rock-solid foundation, an appreciation of the entire process from start to finish, and the insider knowledge to avoid a lot of time-sucking pitfalls. And keep it handy, because you’ll be sure to thumb through it and re-read those handy tips throughout your prep, production and post.

“Green Screen Made Easy” is available in paperback and ebook editions from Amazon.

Book Review: “Green Screen Made Easy”