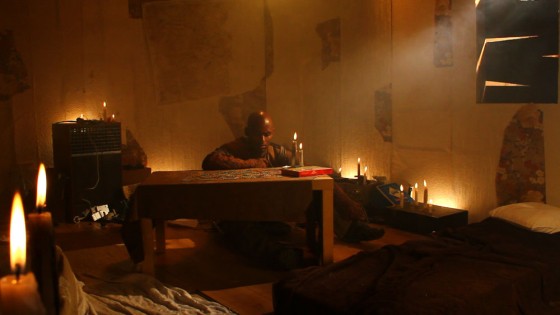
Crash Deconstruction

Sarah on the roof rack

Following on from my last post, let’s take a closer look at how part of The Beacon‘s car chase sequence was created, in particular the bit where Sarah goes flying out through her windscreen during the crash and miraculously lands on the roof rack of the villain’s speeding car. This ridiculous feat garnered a round of applause at the premiere, but how was it done?

The car crash was done for real, as previously explained, but clearly I couldn’t afford the stunt team and wire rigs necessary to catapult someone through the air and then composite in the vehicles below, which is how you would probably do it if you had a proper budget.

In fact there are no visual FX in this sequence at all. The illusion is created entirely through editing, using quick cuts of Sarah (LJ Hamer) leaning through the pre-smashed windscreen, a close-up of her legs being pulled out through the windscreen by a couple of crew members stood on the bonnet, a low angle shot against sky where she’s not moving at all, and a dummy being thrown at the villain’s car. The dummy was pulled together from whatever items we had to hand and looked terrible, but only eight frames of it were needed in the edit before cutting to an angle of LJ (already on the roof rack) dropping from all fours onto her front.

They say a picture is worth a thousand words, so a video must be worth at least a million. So I’ve put together a little compilation of the rushes so you can see exactly what I mean.
Crash Deconstruction

Chasing Cars

A decade ago I was editing The Beacon, my stupid Malvern-based action movie made for about £3,000. The Cardboard Chase is most people’s favourite scene, but a close second for me would have to be the car chase:

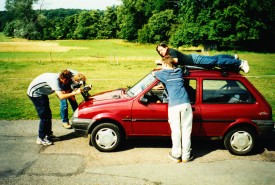
Setting up car-mounted cameras

Pretty silly, huh?

The car chase was shot over three days, mostly on Castlemorton Common in Malvern. It was done totally guerrilla style – no permissions, no insurance, no safety briefings, no stunt co-ordinator. The red car belonged to one of the crew, whilst the blue one was purchased secondhand for the production at a cost of £120, then taxed for £90 and insured for LJ, the lead actress, to drive at £235. (This was just standard car insurance so she could drive it on the road legally, and in no way covered it for film stunt use.)

The crash was shot on private land. The white car belonged to a friend of mine who was going to scrap it anyway. Crazy cast member Si Dovey offered to double for LJ driving the blue car towards the white one (sorry, I know nothing about makes of cars so colours will have to suffice to identify them) and miraculously came out alive, despite not even wearing a seatbelt on the second take. Getting the wrecked cars towed away afterwards (which was a major hassle) cost £75, bringing the grand total for the sequence to £520.

So an action-packed car chase can be shot pretty cheaply, but of course you shouldn’t try it under any circumstances because it’s extremely dangerous and highly illegal on public land.

Additional (27/10/11): By the way, you can download the whole budget for the film, if you’re so inclined, from The Beacon page.

Chasing Cars

Sneak Peak

See how that’s a clever pun? No? Well, if you read on you will discover that this post concerns the PEAK District. Ahahahaha! All must bow down to my comedy genius. Seriously though, my least favourite thing about blogging in WordPress is that it makes you give your posts titles, and I always waste at least five minutes trying to come up with a pun-based title.

Right, so on Monday my wife Katie – who is the costumer and wardrobe supervisor for Stop/Eject – and I travelled to Derbyshire to meet with Tom and production designer Sophie Black, discuss the look of the film and recce locations. Sophie lives in the small town of Belper in the Peak District (Sneak PEAK – remember! Hahahaha!), and it was while dropping her home during the Wasteland trailer shoot that I got my first glimpse of Belper and decided to shoot most of Stop/Eject there.

The village’s most notable landmark is an old redbrick mill which looms over a weir on the River Derwent, and this was our first port of call. We considered the merits of the riverside gardens for happy scenes with the film’s central couple, and scouted about for somewhere they could safely paddle. After looking at a nice cobbled street we travelled on north to Matlock to see Magpie, Sophie’s prime choice for the charity store central to the film. Unfortunately it was closed, but we had a good peer through the window, noting that it had great character but was very small and could prove hard to light.

After lunch we went in some more shops both in Matlock and Belper, and though many were far more suited to the practicalities of filmmaking, none was as visually interesting as Magpie. Next week I’ll get to recce the inside of Magpie and make a decision.

The other location we checked out was Belper Cemetery, which has lovely views across the valley and will add a lot of value to the film, providing of course that we can get permission to shoot there.

All in all, things are going pretty well so far, but since my films are more cursed than Will Turner’s twice-cursed pirate father I’m sure it won’t be long before it all goes spectacularly wrong.  In the meantime, enjoy the second Stop/Eject podcast featuring lead actress Kate Burdette – not that she needs any introduction to followers of The Dark Side of the Earth.

Sneak Peak

The Dark Side Guide to Digital Intermediate

Here is the last of the Dark Side Guides: The Dark Side Guide to Digital Intermediate. I really had to muddle my way through post-production on the pilot, wishing there was somewhere I could get all the information I needed, but there wasn’t – until now!

This step-by-step guide takes you through the complex post-production route known as DI, whereby footage shot on film is transferred to the digital domain for editing, FX and colour grading, before being recorded back to film for distribution and exhibition. Invaluable tips on everything from telecine of your rushes to Dolby authorisation for your soundtrack are complemented by a sample budget laying out all the costs.

As always, if you have any questions that the guide doesn’t answer, please feel free to ask me.

The Dark Side Guide to Digital Intermediate

The Dark Side Guide to Miniature Effects

The DSG-ME, as all the cool kids are calling it, is a ten minute dash through the logistics and fiscalities (if such a word there be) of filming things wot are tiny. For any filmmaker contemplating a traditional models-based approach to special effects, this featurette provides a plethora of practical advice including how to choose a scale, what format to shoot on and how much it will cost. I share everything I learnt about working with miniatures while making the demo sequence for my fantasy-adventure feature The Dark Side of the Earth, starring Benedict Cumberbatch (Sherlock), Kate Burdette (The Duchess) and Mark Heap (Spaced, Green Wing).

What there wasn’t room to include – and also I didn’t want to digress too much into Soul Searcher (a fear I don’t have in this blog, home to many a digression [in fact, case in point, just look at how much parenthetical digression there is in this one sentence]) – were pyrotechnical considerations, since model work and blowing things up go hand in hand. First off, you should always get a properly qualified and licensed pyrotechnician. They will come with their own insurance, and will know the proper procedures, like informing the police and so on. Even if they agree to work for free, you will have to cover the costs of the explosives themselves, and the specialised transport to deliver them.

You will definitely need to shoot on film, as now you’re not just trying to make the thing look full-size, you’re trying to make it look full-size and in slow motion – necessitating ultra-highspeed shooting. Make sure you protect the camera from flying debris; styrene sheeting from a DIY store will do the trick. Build your miniature extra large, since even with the styrene you won’t want to put the camera very close, and a long lens will make the model look smaller.

All in, unless you’re able to borrow the film equipment, expect it to cost about a grand for one or two shots.

The Dark Side Guide to Miniature Effects

The Dark Side Guide to Building a Set

Essential viewing for any producer or director considering shooting their next project on stage, this featurette covers all the issues you’ll encounter in planning, building and striking a set – including the all-important question: how much will it cost? I share everything I learnt about working with sets while making the demo sequence for my fantasy-adventure feature The Dark Side of the Earth, starring Benedict Cumberbatch (Sherlock), Kate Burdette (The Duchess) and Mark Heap (Spaced, Green Wing).

The Dark Side Guide to Building a Set