“The Little Mermaid”: Boats, Trains and Automobiles

One of the biggest challenges on The Little Mermaid was the amount of material set in moving vehicles at night. Over the course of the story, the heroes travel in two different trains, a pick-up truck and a riverboat, and I knew that lighting large stretches of railway, road or river wasn’t going to be practical on our budget. Ultimately much of it ended up being done against green screen, with the notable exception of the riverboat, the first mode of transport to go before the cameras. Here are the relevant extracts from my diary.


Day 14

Today’s a big day because we’re shooting on a riverboat which has been hired at great expense. We have a huge amount of material to cover and there’s no way we can come back to the boat later if we don’t get it all. Chris and I make a game plan in the afternoon and arrive at the dock in good time.

It feels a lot like a micro-budget movie, shooting on a location that perhaps should have been a set (once we set sail you can’t see anything in the background because it’s night) with a tiny lighting package running off a little genny: some Kinos, two LED panels, and a 1K baby. Out there in the dark river, it is eery watching unfathomably huge container ships pass 50ft from us. We leave ‘B’ camera on the shore and try to co-ordinate with them by walkie as they shoot wide shots of the boat and we try to hide!


Day 16

Night driving scenes in a pick-up truck today. Poor Man’s Process was considered for these, then doing it for real with a low loader (called a process trailer here in the States). But at last green screen was chosen as the way to go.

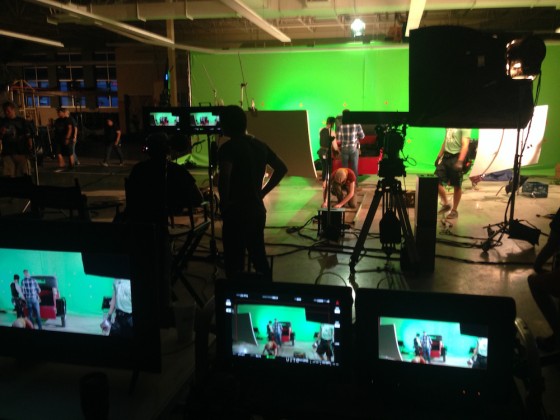
The period vehicle is wheeled into our studio and parked in front of two 12×12 green screens, which VFX supervisor Rich dots with red tape crosses for tracking markers. Throughout the night he moves them around to make sure there are always a couple in shot. We light the green screen with two Image 80s (4ft 8-bank Kino Flos with integral ballasts) fitted with special chroma green tubes. Rich tells me to expose the screen at key, which in this case is T4.

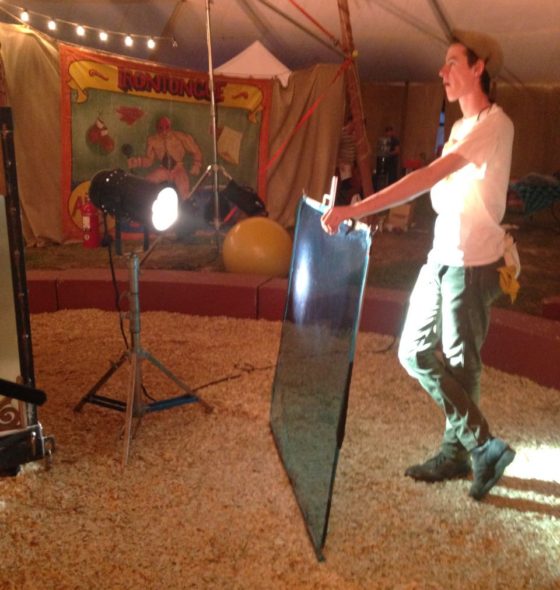
Captain Dan Xeller, best boy electric, has lit car stuff before, so I give him free reign to establish the ambient level. He does it with 1Ks fired into 8×4 bounce boards, so that any reflections in the car’s bodywork will be large and sky-like, not strips like Kino Flos or points like pars or fresnels.

For shape we add a 5K with a chimera at a three-quarter angle, and a side-on par can with a “branch-a-loris” in front of it. Key grip Jason Batey designs this rig, consisting of two branches on a pivot like a Catherine Wheel, which can be spun at any speed by one of the grips, to simulate movement of the car.

Finally I add a 2K poking over the top of the green screen with Steel Blue gel, as a gratuitous hair-light.

Most of the night’s work is handheld, often with two cameras, but we also get some dolly shots, moving towards or away from the car, again to simulate movement.


Day 17

More green screen work today. At the end of the night we recreate one of the scenes from the boat with a piece of railing against the green screen. I do exactly the same lighting as before – Steel Blue three-quarter backlight, and a tungsten key bounced off polyboard. I love the way the actors’ skin looks under this light. Tungsten bounced off polyboard may just be the best light source ever.


Day 18

Stage scenes on real sets today, one of which is meant to be on the riverboat. The grips come up with a gag where we shine moonlight through an off-camera window gobo, which they handbash back and forth to simulate the boat rocking. We end up dialling it down so it’s very subtle, but still adds a hint of movement.

We move to the caboose (guard’s van), one of the train carriage sets. A second branch-a-loris is constructed so that both windows on one side of the carriage can have the passing trees effect cutting up the hard fresnel “moonlight”. We light from the other side with Kinos, and add a 1K baby bounced off foamcore to represent light from a practical oil lamp. Later the dialogue transitions to a fight scene, and we replace the bounced baby with an LED panel so it’s a little easier to move around and keep out of shot. I get to do some energetic handheld camerawork following the action, which is always fun.


View this post on Instagram


A post shared by Neil Oseman (@neiloseman) on


Day 27

Interiors on stage, followed by night exteriors out the back of the studio. One of these is a shot of the heroes running, supposedly towards the train. It’s shot from the back of the 1st AD’s pick-up truck as we drive next to them. We have no condor today so the 12K backlight is just on a roadrunner stand, flooding out across the marsh between the lamp and the talent. With smoke it looks great, but lens flare keeps creeping in because the lamp’s not high enough.

We also shoot some Poor Man’s Process around a small set of the rear of a train car. Two lamps with branch-a-lorises in front of them, wind, smoke and shaky cameras help sell the movement.

A post shared by Neil Oseman (@neiloseman) on

Later we have a POV shot of a train screeching to a stop in front of the villain. The camera is on a dolly and the G&E team mount a 2K on there as well, to represent the train’s headlight.

Next week I’ll turn my attention to The Little Mermaid‘s smaller scenes, and discuss how the principle of lighting from the back was applied to them. Meanwhile, if you’re interested in some techniques for shooting in genuinely-moving vehicles, check out my blog from week three of Above the Clouds where we shot on Longcross Studios’ test track, and my article “Int. Car – Moving”.

“The Little Mermaid”: Boats, Trains and Automobiles

“The Little Mermaid”: Pools of Light

Although The Little Mermaid takes place mostly on dry land, there were some key scenes involving tanks and pools. These include the moment which introduces the audience to the mermaid herself, played by Poppy Drayton. Here are some extracts from my diary covering the challenges of creating a magical, fairytale look while filming in and around water.


Day 10

Today we’re inside the big top all day – actually all NIGHT. We can’t shoot during the day because too much daylight bleeds through the canvas of the tent.

We are setting up when a storm hits. The tent starts to blow about in a slightly alarming fashion, rain lashes down outside (and inside, because the tent isn’t very waterproof) and lightning flashes. We are ordered out of the tent, and I run into a waiting mini-van with Joe from art and some of the camera crew. We sit watching the rain and telling stories for half an hour before we can press on.

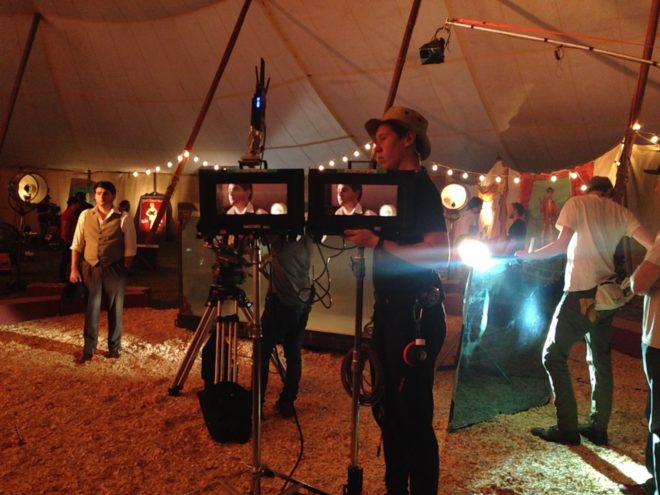
Setting up with a stand-in next to the mermaid tank (centre, behind the monitors). In the top right you can see the 575W HMI backlight for the tank, and below that, grip Sawyer Oubre stands ready to fake watery rippling light with a par can and a blue gel frame.

Around the wall of the tent the art department have hung canvas posters; at the suggestion of gaffer Mike Horton, we uplight these with par cans and par 38s. The design of these fixtures hasn’t changed since the 30s, so we can get away with seeing them in shot. The art dept have sourced four period spotlights which we use as background interest (they’re not powerful enough to really illuminate anything), as well as string-lights.

Ambience comes from a Maxi Brute, with just a couple of bubbles on, firing into the tent roof. After seeing a video test of various diffusers during preproduction, I asked for Moroccan Frost to be added to our consumables list, and we use it for the first time on this Maxi Brute. It gives a lovely muted orangey-pink look to the scene.

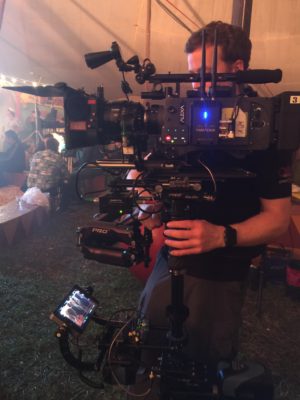
Steadicam operator Chris Lymberis. Photo: Kane Pearson

We’re shooting our mermaid for the very first time, in a tank in the circus ring. The initial plan is to fire a Source Four straight down into the water to create genuine watery rippling light, while bouncing a par can off a wobbling frame of blue gel to beef up the effect. In the end the Source Four isn’t really cutting it, so instead we rig a 575W HMI, gelled with Steel Blue, to a menace arm and fire it into the tank as toppy backlight. This Steel Blue gelled daylight source, blued up slightly further by the water itself, contrasts beautifully with the Moroccan Frost tungsten ambience which the Maxi Brutes are giving us.

In her mermaid tail and costume, Poppy Drayton looks stunning in the tank. We shoot steadicam angles and some slo-mo to get the most out of the set-up.


Day 15

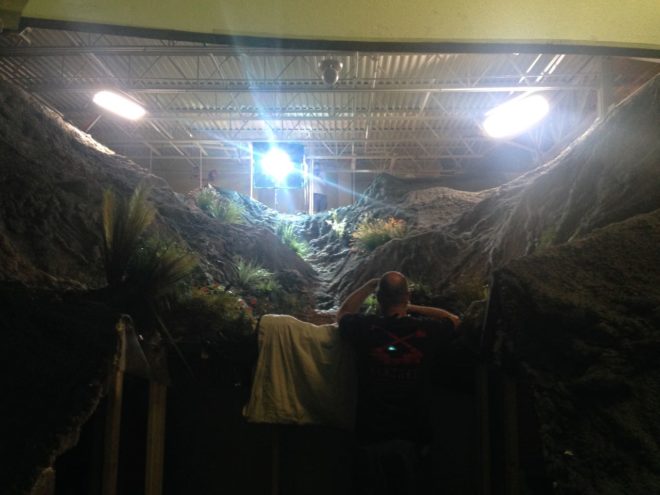
The rocky pool set with two of the side-lighting Kino Flos and the 1.2K HMI backlight (centre) in place

Back on stage, and we’re shooting the rocky pool. This set was built before I even arrived in Savannah, so I’ve been waiting a long time to shoot it. It’s built almost right up to the ceiling of the studio (a former supermarket) so it’s challenging to light. The grips build four menace arms and poke two 4×4 Kinos and two 575W HMIs over the sides to cross-light the set and bring out all the texture in it. Where the set ends they put up a 20×20′ greenscreen, which we light with two Kino Flo Image 80s fitted with special chroma green tubes.

After a wide (which didn’t make the final cut), the next set-up is a 2-shot of our leads in the pool itself. We consider arming the camera out over the pool using a jib, but ultimately decide that it’s better for me to join the cast in the pool, with the camera on my shoulder in a splash bag. 2nd AC Kane Pearson joins the pool party as well, and ends up hand-bashing a monitor for me since the splash bag’s designed for a Panaflex film camera and the viewfinder doesn’t line up. I’m reminded of my frustrating splash bag experience on See Saw back in 2007, but this time at least within a few minutes I’ve found a comfortable and effective way to operate the camera, under-slinging it and allowing it to partially float so I don’t have to support the whole weight.

For this shot we’ve added our par-can-bounced-off-a-wobbling-blue-gel gag for watery light ripples, and combined with the real light ripples and the reflections of a 1.2K HMI backlight, the image looks beautiful.


Day 19

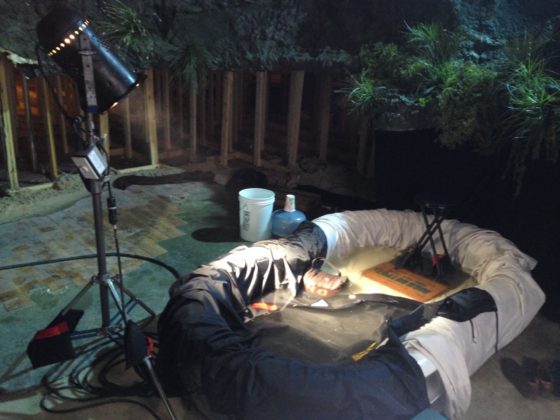
After lunch we shoot the singles for the rocky pool scene. The pool itself has been removed, and the actors sit on stools in a paddling pool, with the set behind them. The paddling pool serves two functions: it catches the water that make-up pours over the actors to make them look wet, and it reflects rippling light onto their faces. This light originates from a par can. At first it flattens out the look, then we figure out that we need to lay black fabric on the bottom of the pool. This stops the par can’s light bouncing directly, while retaining the rippling highlights off the water’s surface. (Check out my article on shooting water for more tips like this.)

The low-tech solution for the pool pick-ups

In the final edit this was all intercut with some beautiful footage by underwater DP Jordan Klein, shot both at a local diving pool in Savannah and at Weeki Wachee Springs State Park in Florida. The main unit shot another scene in the actual ocean, but I’ll cover that later in this series. In the meantime, next week I’ll reveal some of the tricks and techniques used in shooting The Little Mermaid‘s many sequences in moving vehicles.

“The Little Mermaid”: Pools of Light

Lighting I Like: “Breaking Bad”

My YouTube series Lighting I Like is back for a second season of six episodes. It’s a very short and simple show, aimed at raising awareness of the art of lighting amongst non-cinematographers, or those at the very start of their cinematography career. Each week I look at the lighting choices made in one or two scenes of a TV/VOD show and how those choices help tell the story.

First up is Breaking Bad, the critically acclaimed series about a high-school chemistry teacher who, after being diagnosed with leukaemia, resorts to manufacturing drugs to ensure his family’s financial future. All five seasons of the show are available on Netflix in the UK.

Breaking Bad is dark and gritty, shot on 35mm film, and features some beautiful cinematography, one example of which I recently covered in my post on modifying window light. You can read an interesting analysis of the show’s photography on Cinevenger.

In the above video I also provide additions and corrections to some episodes of Lighting I Like‘s first season. Click here to see the playlist of all Lighting I Like episodes.

New episodes of Lighting I Like will be released at 8pm BST every Wednesday. Next week I’ll look at a couple of scenes from The Man in the High Castle.

Lighting I Like: “Breaking Bad”

5 Tips for Shooting Water

As well as the general principles of cinematography like three-point lighting, short key and so on, there are specific principles that apply to certain situations only. Since these situations don’t always come up, it can take a little longer to develop a mental toolkit to get the best out of them. One such situation is shooting water – scenes by riversides, on beaches, beside swimming pools or in bathrooms. What are the tricks you can use to get the most cinematic look?


1. Use a circular polarising filter

4952a23d13929fe1903f601843a9ef4d
Without (left) and with (right) a polarising filter

A polarising filter cuts out all light waves except those travelling in a certain plane. Since reflections are usually only in a single plane, by rotating a circular polariser filter until you hit the right angle, you should be able to reduce the reflections you’re seeing. This can have an impact on how water appears on camera. On an overcast day, a CP will allow you to reduce the reflections of the grey sky, making the water look clearer and bluer.


2. Get sparkly

All the evidence you need that shooting towards the sun is good.
Shooting towards the sun provides both lovely backlight and sparkles on the river in this shot from Stop/Eject.

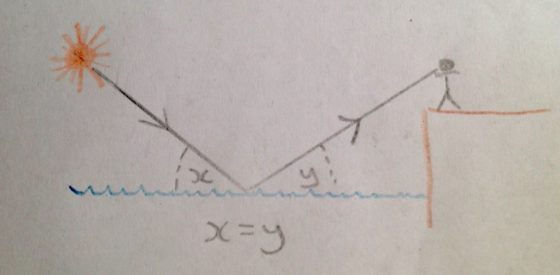
Water will always look prettier, particularly large bodies of it, if the sun is sparkling on it. How do you capture this on camera? Use the principle that the angle of incidence equals the angle of reflection, the same principle you use when positioning a bounce board. As with all day exteriors, shooting at the correct time of day is critical. You want the sun to bounce off the surface of the water and into your lens, which means being on the opposite side of the water to the sun, with the camera facing the sun. Use a top flag on your matte box (a.k.a. “top chop” or “eyebrow”) to prevent lens flare if you so wish.

img_1527


3. Get rippling light

Using a paddling pool and a par can to create a rippling light effect on The Little Mermaid. Note the black fabric as per tip 4 below.
Using a paddling pool and a par can to create a rippling light effect for close-ups on The Little Mermaid.  Note the black fabric as per tip 4 below. At the white end of the paddling pool you can see the stool where the talent sat.

The same principle can be applied to capture rippling light effects on walls, faces, etc. This time you want the sun, or artificial light source, to bounce off the surface of the water and hit your subject. You can suggest an off-camera body of water when there is none by carefully positioning a fish tank, paddling pool or similar in relation to the light and your subject.


4. Kill the bottom bounce

img_1529

Beware that not all the light will bounce off the surface of the water. Some will pass through it, bounce off the bottom of the pool and then hit your subject. If the bottom of the pool isn’t a dark colour, this unmoving bounce light will overpower the rippling light coming off the surface. Lay duvetyne or other black fabric on the bottom of the pool so that the only bounce is from the surface.


5. Fake it

A grip standing by to fake rippling watery light on The Little Mermaid
Grip Sawyer Oubre standing by to fake rippling watery light on The Little Mermaid

If you need to create a rippling light effect without using water, you can fake it with a sheet of blue gel on a frame in place of the water surface. Wobble the frame slightly (only slightly, or the sound department will start to yell at you) and the gel will ripple in the frame, creating a similar effect to water. Thanks to my key grip on The Little Mermaid, Jason Batey, for introducing me to this technique.

Another way to simulate watery light is to bounce a lamp off silver paper or fabric which is being rippled by a fan. More on this technique here.

What about shooting UNDER water? Just one tip for that: hire an underwater DP.

5 Tips for Shooting Water