Understanding Colour Temperature

An updated version of this article is available.

As I was writing my last entry, in which I mentioned the range of colour temperatures in a shot, it occurred to me that some readers might find an explanation of this concept useful. What is colour temperature and why are different light sources different colours?

The answer is more literal than you may expect. It’s based on the simple principal that the hotter something burns, the bluer the light it emits. (Remember from chemistry lessons how the tip of the blue flame was always the sweet spot of the Bunsen Burner?)

Tungsten bulbs emit an orange light - dim them down and it gets even more orangey.
Tungsten bulbs emit an orange light – dim them down and it gets even more orangey.

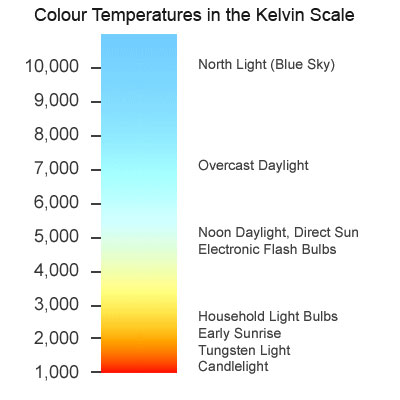
Colour temperature is measured in kelvins, a scale of temperature that begins at absolute zero (-273°C), the coldest temperature physically possible in the universe. To convert centigrade to kelvin, simply add 273. So the temperature here in Hereford right now is 296 kelvin (23°C).

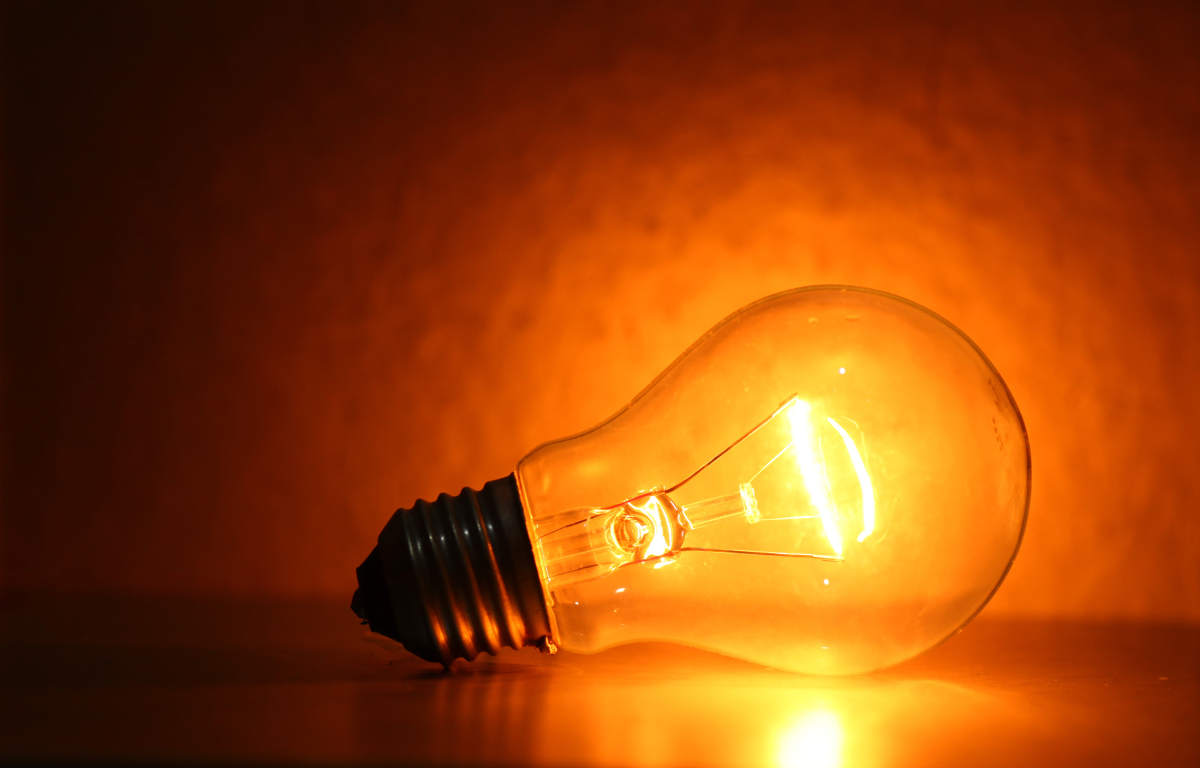
The filament of a tungsten light bulb reaches a temperature of roughly 3,200K (2,927°C). This means that the light it emits is orange in colour. The surface of the sun is about 5,778K (5,505°C), so it gives us much bluer light.

Colour temperature isn’t necessarily the same as actual temperature. The atmosphere isn’t 7,100K hot, but the light from the sky (as opposed to the sun) is as blue as something burning at that temperature would be.

Digital cameras have a setting called “white balance” which compensates for these differing colour temperatures and makes them appear white. Typical settings include tungsten, daylight, shade and manual, which allows you to callibrate the white balance by holding a white piece of paper in front of the lens as a reference.

Colour temperature chart

Today there are many types of artificial light around other than tungsten – fluorescent and LED being the main two. In the film industry, both of these can be obtained in flavours that match daylight or tungsten, though outside of the industry (if you’re working with existing practical sources) the temperatures can range dramatically.

There is also the issue of how green/magenta the light is, the classic example being that fluorescent tubes – particularly older ones – can make people look green and unhealthy. If you’re buying fluorescent lamps to light a scene with, check the CRI (colour rendering index) on the packaging and get the one with the highest number you can find for the fullest spectrum of light output.

The Magic Lantern hacks for Canon DSLRs allow you not only to dial in the exact colour temperature you want, but also to adjust the green/magenta balance to compensate for fluorescent lighting. But if two light sources are giving out different temperatures and/or CRIs, no amount of white balancing can make them the same.

Left: daylight white balance preset (5,600K). Right: tungsten white balance preset (3,200K)

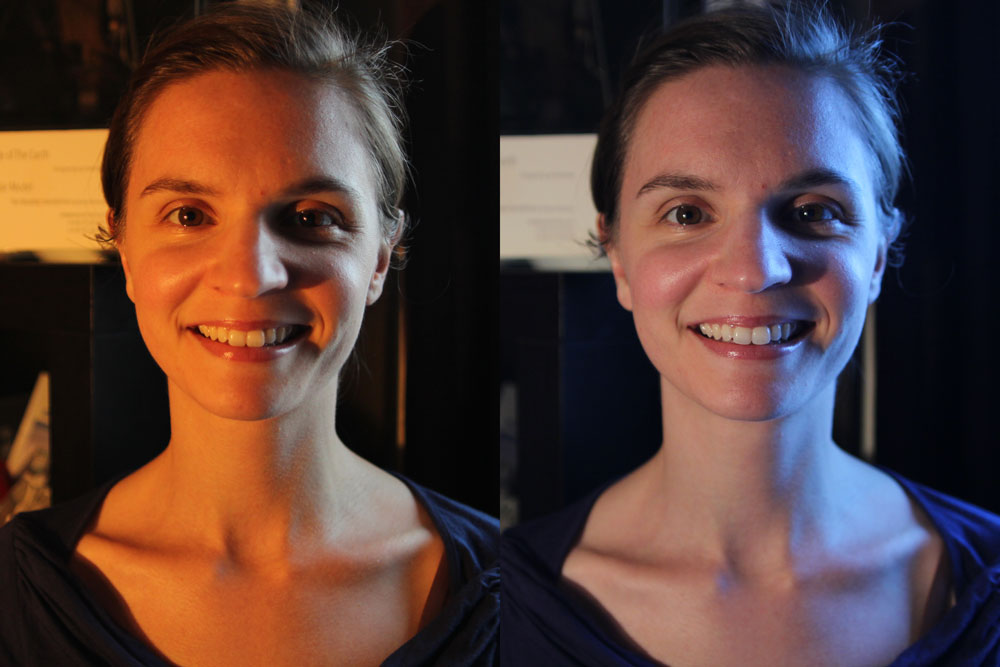
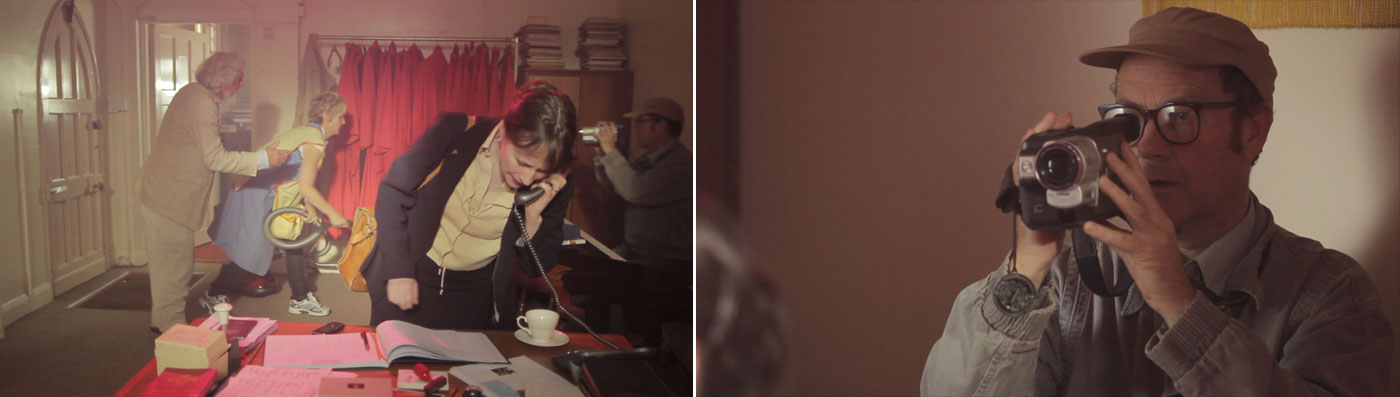
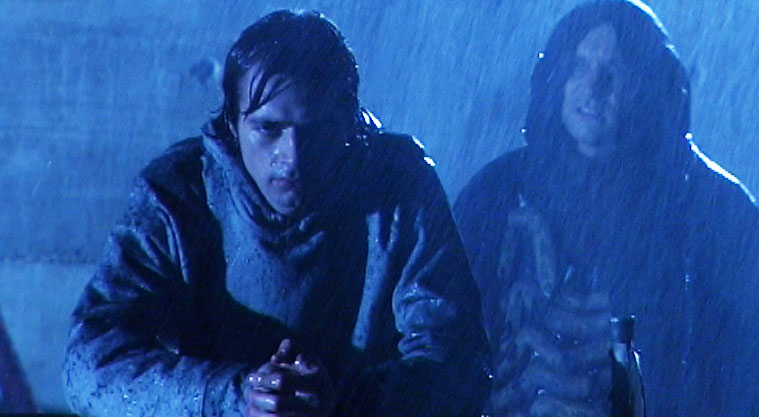
The classic practical example of all this is a person standing in a room with a window on one side of them and a table lamp on the other. Set your camera’s white balance to daylight and the window side of their face looks correct, but the other side looks a nasty orange (above left), or maybe yellowy-green if the lamp has an energy-saving bulb in it. Change the white balance to tungsten or fluorescent and you will correct that side of the subject’s face, but the daylight side will now look blue (above right) or magenta.

This is where gels come in, but that’s a topic for another day.

The beauty of modern digital cinematography is that you can see how it looks in the viewfinder and adjust as necessary. But the more you understand the kind of theory I’ve outlined above, the more you can get it right straight away and save time on set.

Understanding Colour Temperature

Depth Cues in Cinematography

One of the most important jobs of a director of photography is to help the viewer’s brain decode the image. Just as a sound mixer must get the cleanest possible dialogue and ensure that ambience, music and effects don’t distract from it or drown it out, so a cinematographer must ensure the eye is drawn to the character and not distracted by the surroundings.

Depth is a key part of creating this clarity. Christopher Nolan once said: “95 percent of our depth cues come from occlusion, resolution, color and so forth, so the idea of calling a 2-D movie a ’2-D movie’ is a little misleading.”

This week, on The Deaths of John Smith, I photographed a shot that used every trick in the book to create depth. Why? Because it was a one-shot scene, a flashback taken out of context, and the audience needed to “get it” quickly.

When I first set the camera up and we stood John (played by Roy Donoghue) in position, his dark suit melted into the dark wood panelling behind him, so there was clearly some work to do. Once lit, as you can see from these frame grabs, he stands out sharply.

Kirsty Minchella-Storer (Sarah) and Roy Donoghue (John) in The Deaths of John Smith, directed by Roger Harding, copyright 2013 Two Hats Films
frame2 frame3 Kirsty Minchella-Storer (Sarah) and Roy Donoghue (John) in The Deaths of John Smith, directed by Roger Harding, copyright 2013 Two Hats Films

Let’s look at the depth cues going on here.

  1. DEPTH OF FIELD. Although I’m shooting at f1.8, on a 20mm lens nothing is massively out of focus, so that isn’t helping much.
  2. SMOKE. There is more smoke between the camera and a distant object than between the camera and a close object, and therefore smoke aids depth perception.
  3. CONTRAST. The foreground is darker than the background, helping the eye to distinguish between the various layers. In particular, the smoke picks up the light from the windows at the back of the room, creating a blue-white haze against which John’s dark suit stands out clearly, as does Sarah’s silhouette.
  4. COLOUR CONTRAST. The foreground is lit with warm orange, while the background is a cool blue, again enhancing the separation between the layers. (Imagine you’re standing on a hill and looking at another hill in the distance. That distant hill looks much bluer than the one you’re standing on, due to atmospheric haze. The smoke and colour contrast mimic this effect.) For most of this film I kept all the light sources within about 1,500K of each other, but in this scene I deliberately allowed more like 3,000K of difference between warm and cool sources to give the flashback a more stylised look.
  5. BACKLIGHT. John has a little edge-light on his righthand side, ostensibly from the wall sconces, but in reality from a hidden Dedo. This helps to cut him out from the background.
  6. FRAMING. The doorway frames the image, adding an extra layer of depth.
  7. PARALLAX. This is the optical phenomenon whereby, when you move your head (or a camera) things closer to you appear to move more than things further away. By dollying slightly into the room behind Sarah we create a dramatic parallax effect as the doorway grows on camera much more than John and the room behind him.

I’ll leave you with my (retrospective) lighting plan for this scene. Be sure to check out the film’s official website at www.thedeathsofjohnsmith.com

Lighting plan
Lighting plan
Depth Cues in Cinematography

How to Speed Up Your Shoot

Director under pressue. Photo: Paul Bednall

Tomorrow the film I’m currently DPing, The Deaths of John Smith, has an extremely packed schedule. This has got me thinking about how a filmmaker can keep themselves on schedule when faced with a seemingly impossible amount of material to get through.

The most effective action is of course to take out a big red pen and start cutting down the script. I know personally I find this very difficult, particularly if I’m both the writer and the director, because I’ve convinced myself by this point that everything in my shooting draft absolutely has to be there. Even though I know that, when I get to the edit, some scenes will inevitably get deleted and some dialogue will get trimmed. The challenge is to identify those trims now, on set, and save myself the trouble of shooting them.

Beware that simply cutting some dialogue is unlikely to have a signficant effect on your schedule, because most of your time on set is spent not shooting or even rehearsing, but setting up. Take a long, hard look at your shotlist or storyboards. Do you really need all that coverage?

Consider a Single Developing Shot (SDS). This means shooting an entire scene in just one set-up, with some camera movement and perhaps some dynamic blocking to maintain interest. The danger here is of doing a ridiculous number of takes of this one set-up because you know you have nothing to cut to if it’s not perfect (a trap I’ve fallen into more than once). I would advise qualifying your SDS with a cutaway or two to claw back a bit of flexibility in the edit and ease the pressure on the master shot.

A developing wide shot covers a large chunk of a scene from The Deaths of John Smith (copyright 2013 Two Hats Films). A safety cutaway (right) is shot to get the editor out of any tight spots.

If you can’t see a way to reduce the number of shots you need, consider ways to make those shots quicker to film. The most time-consuming shots for a director of photography to light are reverses, where the camera flips around to shoot in the opposite direction to all the previous angles, meaning every light has to be moved, along with the video village and all the piles of idle equipment in the background. Can you get away without a reverse, by changing the blocking a little? That character who has their back to camera – could they cheat their profile towards us a bit? It’s cheesy and not very realistic, but TV shows often achieve this by having one character talk to another’s back.

Ye olde person-talking-to-other-person's-back shot in Soul Searcher, obviating the need for a shot-reverse.
Ye olde person-talking-to-other-person’s-back shot in Soul Searcher, obviating the need for a shot-reverse.

Down-the-line close-ups are also quick to do. This means that, after doing your wide, you leave the camera more or less where it is (and, crucially, the lights too) and put on a longer lens to get your close-ups. Watch your continuity carefully, because down-the-line cuts will really show up any errors.

An example of a down-the-line close-up from Stop/Eject

If all else fails, the wrap time is looming and you’ve still got half a dozen set-ups to get, it’s best if those set-ups are close-ups or even cutaways. Because you and a skeleton crew can come back another day, maybe to a different location, maybe with a stand-in for your lead actor, and shoot tight pick-ups. Clearly this isn’t going to work with a wide master shot, for which you would need your whole cast and crew back, and the same set/location.

In this scene from The Dark Side of the Earth, the insert shot was filmed in a pub function room with a skeleton crew, four months after principal photography.

Finally, when working as a DP I have occasionally been asked to speed up the shoot by not lighting it. It is usually at this point that I feign hearing problems. Yes, not lighting stuff will speed up the shoot enormously. But you’re no longer making a professional film; you’re making a home video with an expensive camera. Don’t ask your DP to do this – you’ll only offend them. Instead, perhaps ask what camera angle would require the least re-lighting.

What tricks and techniques have you used to speed up your shoots?

How to Speed Up Your Shoot

How to Light a Church

Roger Harding (left) and Jeremy Heynes in The Deaths of John Smith.
Roger Harding (left) and Jeremy Heynes in The Deaths of John Smith. A 1.2K HMI punches through the window on the right, while a fluorescent softbox illuiminates the arches on the left. Background light comes from two 500W halogen work-lights rigged to a dimmer, while fill (given that it was getting dark outside at this point) comes from a blue-gelled 1K Arrilite behind and to the left of camera.

This weekend shooting began on Roger Harding and Darren Scott’s feature-length comedy The Deaths of John Smith. As director of photography I was called on to light a beautiful rural church on a limited budget. Here are some tips for ecclesial cinematography:

  • Hire HMIs – powerful, daylight-balanced lamps. Without at least one you will never have enough light to illuminate anything but the tiniest of churches. As a backlight on a mezzanine level, a 2.5K HMI will illuminate most churches. Better still, put them outside the windows and create artificial sunbeams. (A blue-gelled blonde or redhead outside a stained glass window is pretty much useless; those windows cut out so much light.)
  • Use smoke. A £50 disco smoke machine is perfectly sufficient – use it to volumize the light and emphasise the depth and scale of the building. If you’re struggling to expose a bright enough image, smoke helps there too – because it catches the backlight and lightens up the shadows.
  • Candlelight is a good way to introduce colour contrast into your scene. Dedos are the best lamps to fake candelight with, as they can produce a small circular pool of light. Failing that, any tungsten source will do, ideally rigged to a dimmer board for a bit of flickering.
  • Assuming you’ve got your HMIs punching directly in through all the windows on one side of your church (that’s the side the “sun” is on), you now need soft light coming in through the opposite windows. Ideally these would be larger HMIs playing off bounce boards, but you might get away with soft boxes or bounced tungsten sources (gelled blue, of course) hidden behind pillars inside the building.
  • Sellotape together some old bits of coloured gel and rig them in front of a fresnel to simulate daylight through a stained glass window. Note that this doesn’t really work with unfocused lamps like redheads.
Left to right: David Draper, Bryan Ferriman and Adrian Moore.
Left to right: David Draper, Bryan Ferriman and Adrian Moore. Our single HMI shines through the lefthand window, suitably volumized with smoke, leaving natural light to deal with the other two. A blue-gelled 1K Arrilite off to the right of frame creates the edge-light on the righthand side of each character. An existing halogen spotlight over the organ was gelled with half CTB to cool it down a little. I chose to leave the nearside of the characters dark to contrast the foreground with the brighter background.

On The Deaths of John Smith I only had access to one HMI, so for every shot I needed to carefully choose which window to put it outside of for the maximum impact. I relied on natural light as well as blue-gelled redheads and fluorescent softboxes just out of frame for fill light. Nonetheless, I’m very pleased with the results. Next weekend we have to repeat the performance with a large congregation….

All images copyright 2013 Two Hats Films. Visit the Facebook page or the official website for more info on The Deaths of John Smith.

Here the "sun" (HMI) is outside of the lefthand background window.
Here the “sun” (HMI) is outside of the lefthand background window, but I couldn’t resist cheating a little and pushing a 1K Arrilite through a nice yellow stained glass window in the top centre background. Additional backlight comes from a blue-gelled Arrilite off frame right, while a softbox behind and to the left of camera illuminates the actor’s face.
How to Light a Church

How to be a Filmmaker

Business cards are just the beginning

Robert Rodriguez famously said that all you need to do to be a filmmaker is get some business cards printed claiming that you are. Of course there’s more to it than that, so if you’ve just graduated from university or are otherwise starting out in the business, what can you do to get things going?

  1. START MAKING FILMS. Almost everyone now owns a device that can record moving images. Use it. Your first films will be terrible but you’ll learn loads with each one you do.
  2. EDUCATE YOURSELF. Read blogs like this one, like Chris Jones’ and Danny Lacey’s. Watch YouTube channels like Indy Mogul and Film Riot. Devour DVD extras (click here for a list of my favourites). Get yourself books like The Guerilla Filmmakers Handbook, Rebel Without a Crew and The Mind of the Modern Moviemaker.
  3. OBSERVE OTHER FILMMAKERS. This is a crucial one that many people overlook. There’s only so much you can self-teach. You must get onto other people’s sets and see how they do it. The bigger the production the better. You want to learn from the people who are doing it properly, to the high standards of quality and discipline that the top end of the industry demands. In practice this means moving to London or a TV-making hub like Manchester or Cardiff and knocking on lots of doors.
  4. MAKE SOME CORPORATE VIDEOS. Even if you have no interest in these, they bring some money in, help you hone your skills and most importantly the process of dealing with a client’s feedback and requirements will prepare you for producer/studio notes on proper films.
  5. NETWORK. It’s not what you know, it’s who you know, so get to know as many people as you can. Go to events like the London Screenwriters Festival, Cannes, the BAFTA Filmmakers Market, Raindance evening classes. Stick around after the event proper is over and go for a drink with your fellow attendees. Shake lots of hands and give out lots of business cards. Follow up after the event (but don’t pester). Eventually you’ll strike gold when you contact someone at just the moment they have a position to fill.
  6. BUILD A WEBSITE. This is very easy these days with the likes of Wix and WordPress. An online presence will make people take you more seriously, will make you easier to look up online, and can showcase your talents.
  7. WORK SOCIAL MEDIA. The digital equivalent of point 5. When I’m looking for crew these days I’m more likely to do a Facebook shout-out than post on one of the official filmmaking networks. That said, you should still….
  8. JOIN ONLINE FILMMAKING NETWORKS. Shooting People is £30 a year but Mandy and Talent Circle are free. Every day there are several new jobs posted on each one, so get applying.
  9. CUT A GREAT SHOWREEL. Keep it short (3-5 minutes) and punchy. Link to it whenever you apply for a job and keep it on your mobile devices so you can show it at networking events to anyone who displays the slightest interest in you. A great showreel will stick in their mind much better than an eager face.
  10. FIND AN AUDIENCE. This is the tricky one. Once you’ve reached a point where your films are good enough to show the big, wide world, you need to start getting them in front of eyeballs. This means either getting them into festivals, which is largely beyond your control, but still remains the most prestigious route, or posting them online and driving a huge amount of traffic to them (see 6 and 7 above). If you can connect with a significant audience base then congratulations, you’ve made it! Please write in and tell me how to do it.
How to be a Filmmaker

What Could Have Been – or Could It?

A publicity shot of me from 2005

I recently came across some unpublished blog entries I wrote back in April 2005 when I was trying to sell my feature film Soul Searcher. It’s amazing how close I seemed at the time to getting my big break. It just goes to show you how big a pinch of salt you have to take what sales agents tell you with.

The Secret Diary of Neil Oseman, aged 24¾

April 26th 2005

I’ve decided to start up this secret parallel journal because distributors are now getting interested in the film and from a business point of view it’s not a good idea to be putting too much info about offers and stuff on the website. Hopefully this journal will one day see the light of day.

Today the number of sales agents/distributors planning to make an offer on the film went up to four. Echelon Entertainment (Burbank, sales agents) and Foundation Films (also California, sales agents) joined Third Millennium (London – the only UK distributor interested so far) and CinemaVault Releasing (Toronto, sales agent) in the ranks of the keen. CinemaVault sent me through the official Offer paperwork today but I haven’t read it yet.

The main reason I wanted to write this secret journal is to tell you about the e-mail I just got from Echelon. They reckon there’s a US TV show called Soul Searchers and they want to change my movie’s title to “Grim”. Who the hell’s going to buy a film called Grim? I politely replied that I couldn’t find any mention of this TV series on the net and that it might not be wise to change the film’s title after all the publicity it has had.

Another great story of sales agent stupidity which I couldn’t possibly put on the site is that CinemaVault reckoned SS cost $500,000 USD to make. Hahahahaha! Christ, I’d be seriously worried if SS was the best I could do for half a million bucks. [It actually cost £28,000.]

I just read the CinemaVault contract [see my previous post for an analysis of this]. The list of delivery requirements is five pages long. I estimate producing all the materials to be a two month full-time job. Most ludicrous of all is they want a “cut by cut description of the action in the Picture” and T/C in & outs for EVERY LINE OF DIALOGUE.

April 28th 2005

I just found out that CinemaVault want to push for a theatrical release. Fucking YEAAAH!!!

[An hour or so later…]

Okay, now I’ve calmed down a bit.  I’ve recorded my thoughts on video for Going To Hell and I thought I should put some more in writing, only now I don’t know what to write.

Alright, here are the thoughts going round in my head right now:

  1. This is the FIRST company to make me a formal offer. They’re talking about probably a small US release, but what if another company proposes something bigger?
  2. SS hasn’t been to any festivals except Borderlines yet. That could be where the big boys pick it up. Surely I shouldn’t sign before it’s had a chance to go to Telluride, Raindance, etc? Though who knows if it’ll get in.
  3. Cannes of course is coming up. Perhaps I can meet Michael Paszt [from CinemaVault] face to face there. Should I fess up about the budget? (He thinks it cost nearly US$500,000.) After all, the fact that I made it for so little is a major publicity point.
  4. What will happen when I tell CinemaVault that there’s no 35mm print? Surely they’ve guessed that already, but what if they’re not prepared to bear the cost of it? Can I raise the necessary funds to pay for it, even with a sales agent behind me?
  5. These are HUGE, HUGE things I’m dealing with. Should I get someone who’s business savvy to negotiate this stuff?
  6. Who framed Roger Rabbit?
  7. Doesn’t the fact that I’ve had this offer mean I should be able to get more? I mean, now I can say I’ve been offered a theatrical release – surely other sales agents/distributors will come running? Can  I somehow use this to break into Hollywood?

The journal also includes a few previously unpublished thoughts from my trip to Cannes the following month.

I was feeling frustrated that I must seem to buyers like another punk kid with another lame movie. I had to tell them it cost $400,000 to make – if I’d have told them the truth they would either have ripped me off or not given me the time of day. The problem is that it’s not a good advert for me. If SS was the best film I could make for $400,000 I’d be seriously worried. I want to show them the Guardian article – explain how the fact that it was made for so little should be the cornerstone of the publicity campaign – the double-disc DVD, the making-of book. The El Mariachi effect. This is NOT just another low budget film. But I know that just another low budget film was all these people wanted.

Ultimately most of the interest trickled away. After initial enthusiasm and talk of theatrical releases, the sales agents retreated to much smaller offers (“maybe we’ll do a theatrical but probably not”) or stopped returning my calls. Soul Searcher failed to get into any major festivals and was released only on DVD and VOD by a small UK company that went bust shortly before the distribution term expired last year.

The moral of the story is that it can be extremely exciting to be offered a distribution deal, but these companies will have no qualms about leading you on. Most hope you’ll sign quickly, but you should never do that. Ask them tough questions – many won’t even reply and the rest probably won’t give you the answers you want, but you must know what you’re getting into when you sign away your baby.

What Could Have Been – or Could It?

What to Look For in a Distribution Contract

Should you sign?
Should you sign?

What follows should not be construed as legal advice, and you should ALWAYS get legal advice before signing a contract. However, if you’ve been offered your first distribution deal and money is tight, these basic tips might help you reach a rough understanding of what exactly is on the table before you splash out on a solicitor.

rAs an example I’m going to use one of the contracts I was offered for my feature Soul Searcher, but not the one I signed.

Download the contract (PDF, 143KB) – I cannot be held responsible for any losses arising from the use of this contract or the following blog post.

Grant of Rights

Producer hereby grants to Distributor, with respect to the Term and the Territory set out below, the exclusive distribution and exhibition rights in all media now known or devised later including, but not limited to Theatrical, and Non Theatrical rights, Video/DVD rights, rights pertaining to all forms of Television syndicated or non syndicated, ancillary rights, and all kinds of internet rights pertaining to the feature film entitled “SOUL SEARCHER” (the “Picture”) a film by Neil Oseman, shot in Mini DV.

Territory: The World excluding U.K.

Term: Commencing immediately and expiring 25 years from the Date of Complete Delivery.

First of all check out the TERRITORY and MEDIA, i.e. what countries are you allowing the sales agent to distribute the film in and in what form (theatrical, DVD, TV, VOD…), but be aware that just because the contract grants them the right to release your film in cinemas, for example, it doesn’t mean they are under any obligation to do that. Also check out the TERM – how long will they get these rights for? The 25 year term in this contract is unusually long; five would be more typical.

Minimum Guarantee (“ Advance”)

Distributor agrees to pay Producer Fifteen thousand dollars ($15,000.00 USD) as a Minimum Guarantee of Producer’s share of Gross Receipts payable 20% on signing of this agreement and approval of Chain of title. The remaining 80% balance will be on complete delivery and acceptance, in terms of technical specifications, of all the items noted under Schedule “ A”. 

This contract offers an ADVANCE – meaning that they pay you upfront, later recouping this advance out of the profits. But if your film doesn’t make any profits you’ve still got the advance. This is a great deal for a low budget filmmaker.

Distribution Fees, Expenses and Reporting

Distributor shall be entitled to a distribution fee of 25% of gross receipts net of withholding tax from exploitation of the Rights. 

The crux of the contract is the PERCENTAGE of any earnings that the sales agent will pass on to you the producer, the higher the better. Here they are proposing to take 25%. That leaves 75% for me –  pretty good, huh? But wait….

Distributor shall also be entitled to distribution expenses to a maximum cap of U.S. $ 75,000.00 excluding deliverables, unless additional expenses are approved in writing by Producer, which approval will not be unreasonably withheld (“Distribution Expenses”). Distribution Expenses mean out-of-pocket costs incurred by the Distributor, directly or indirectly, in specific connection with distribution, promotion, and marketing of the Picture including any costs which can reasonably and proportionately be allocated to the Picture in accordance with normal accounting practices of the motion picture industry.

Gross receipts shall be disbursed in the following order: (1) Distributor’s fee (2) To recoup Distributor’s costs for creating or correcting any deficient materials as set forth above (3) Distribution Expenses (4) Balance to Producer

Check out that last paragraph. When the money comes in, the sales agent creams off their 25%, then they recoup any costs in correcting the delivery materials (more on that later), then they recoup their EXPENSES, and only then does the producer get what’s left of the pie. So they can swan off to Cannes, Berlin, the American Film Market and so on, to promote their catalogue of films, and take the cost of all their lunches and air fares and slap-up dinners out of the profits before the producers of those films get to see a penny.

You should look for an EXPENSES CAP in the contract, limiting the amount the sales agent can claim out of the profits before they’re passed to you. Here it’s $75,000. The chances of a microbudget film ever making more than that are extremely slim. Result? You never see any money (except the advance, if you’re lucky enough to have been offered one).

Representations and Warranties

Producer warrants, represents and agrees that it is the holder of the copyright, and has the right to convey all of the rights, licenses and privileges granted herein; that it has not entered and will not enter into any agreement, commitment, arrangement or other grant of rights competing with, interfering with, affecting or diminishing any of the rights and licenses granted herein, and that the Picture, insofar as the Rights granted herein are concerned, are free and clear of any encumbrance and do not infringe upon the rights of any party or parties whomsoever. 

If you sign this contract, what you’re saying via the paragraph above is that you haven’t already sold the rights to anyone else and that your film doesn’t infringe anyone else’s copyright. You’re WARRANTING that you’ve cleared all the music and branding that appears in your film. You got Apple’s permission to show that logo on the iPhone your lead character’s always using, right? And you got WHSmith’s permission to have their shopfront in the background of that highstreet scene?

Now we come to the reason I didn’t sign this contract: the DELIVERY MATERIALS, the list of which occupies five full pages of this contract, so check out the PDF download above to see them.

When you sell a film, you can’t just hand over one master copy of it. The sales agent wants all kinds of different versions – eleven different submasters in this contract, plus all the film elements (those would have been expensive – I didn’t shoot on film!), sound elements, press kits…. And then the documents. Some of the things listed on pages eight and nine (especially the E&O insurance) are serious legal documents that could have cost thousands of pounds to have drawn up. The delivery materials could easily have eaten up the whole $15,000 advance and might even have cost more than the whole production budget of the film. I recommend getting quotes for all delivery materials before signing any distribution deal.

I hope this has given you some idea of what to look for, but let me say again, GET PROFESSIONAL LEGAL ADVICE BEFORE YOU SIGN ANYTHING!

What to Look For in a Distribution Contract