Synced: The Japan Shoot – Part 4

Setting up in front of Himeji Castle

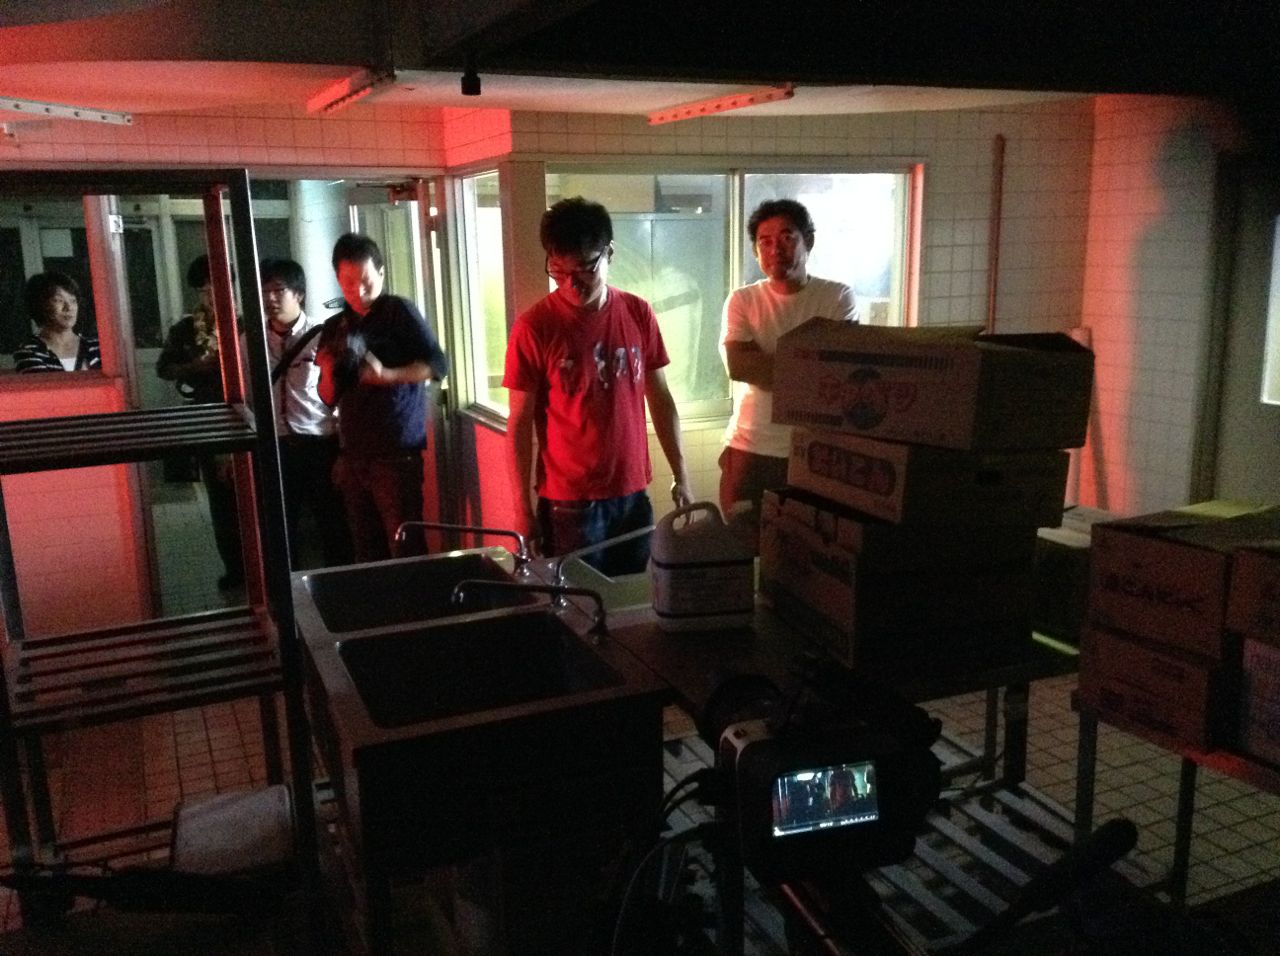
This is the final instalment looking back at the whirlwind shoot I DPed in Japan at the start of this month. Part 1 looked at the equipment package, Part 2 covered an interior scene, and Part 3 covered night exteriors.

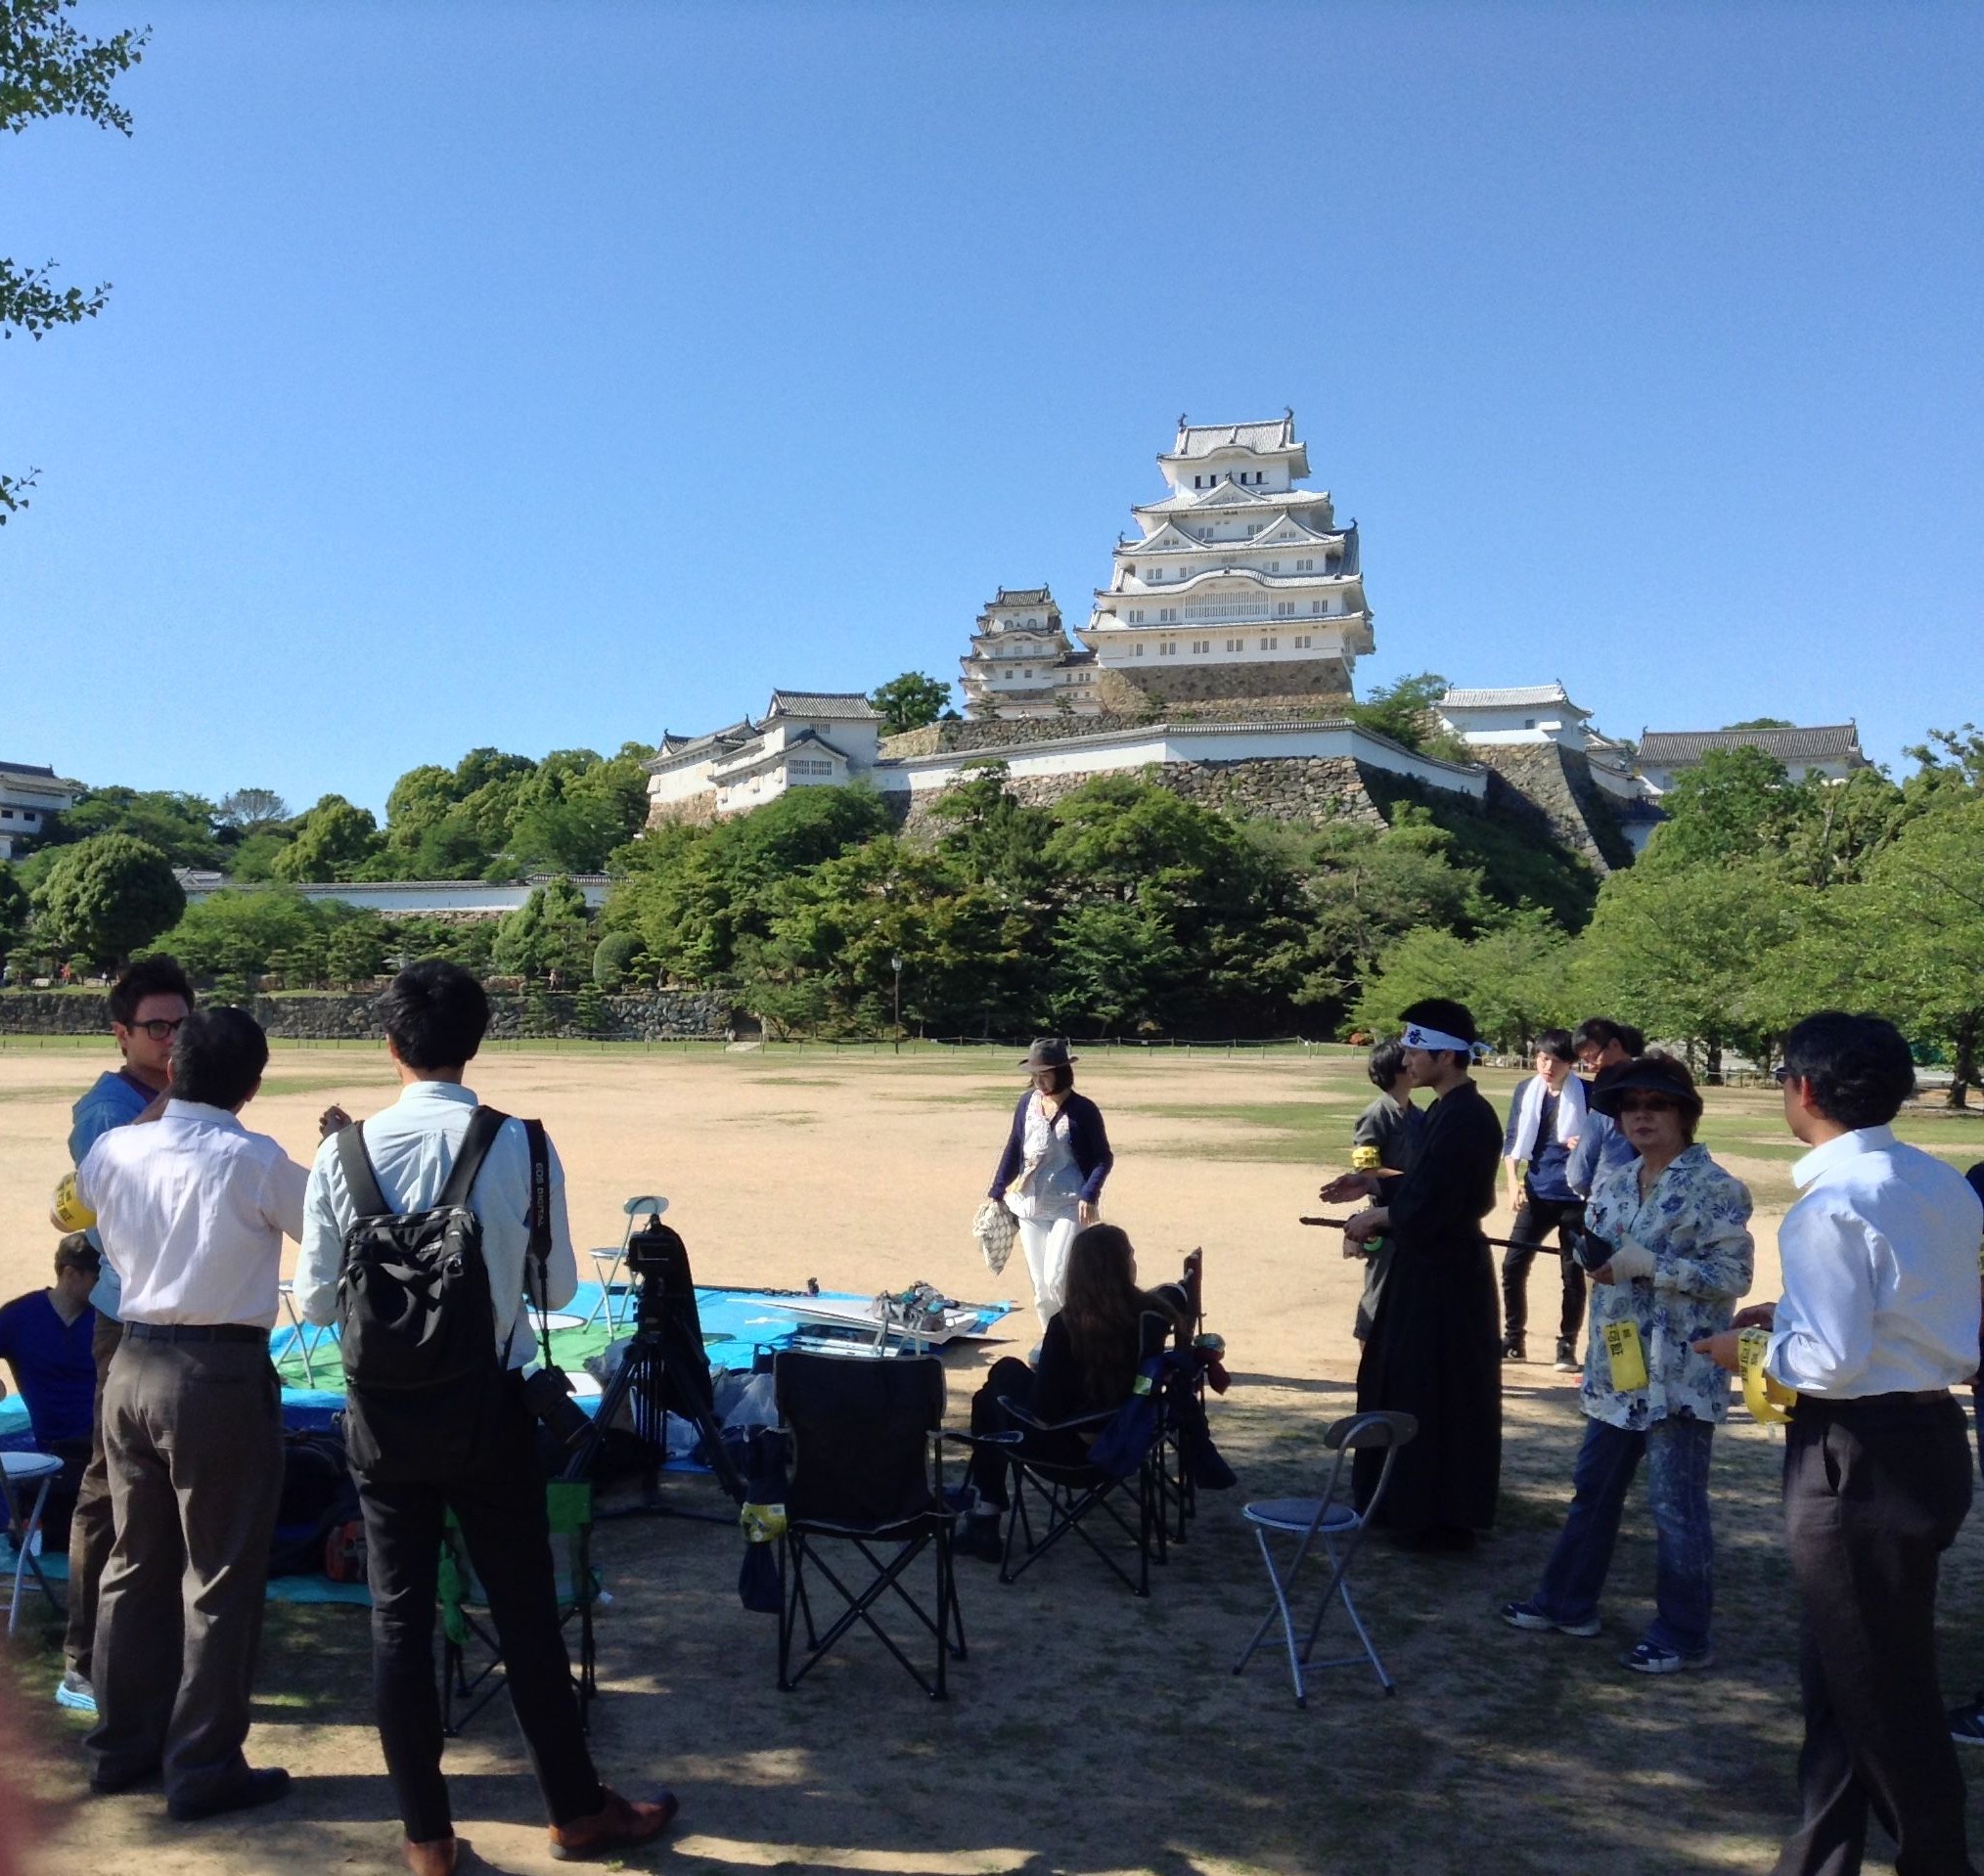
By the time we wrapped those night exteriors it was about 4:30am and starting to get light. After some well-earned sleep, we reconvened at 3pm to shoot the daylight exterior scene in front of Himeji Castle – featured in You Only Live Twice as a Ninja training school.

The first shot had to start with a picture postcard composition of the castle and a martial artist, then pan to reveal Daisy and a crowd watching her, while still keeping the castle in. This took some considerable time to set up, carefully placing all the extras. To balance the opening composition, I framed it with a tree in the foreground. This is the kind of thing you have to look out for as cinematographer, because simply shooting your cast in front of a landmark can result in a very flat image if there aren’t other elements in the frame to add depth.

Yurijo shades the actors between takes. You can see the bounce board being held by another crew member on frame  right, and how effectively this is filling in everyone's faces.
Yurijo shades the actors between takes. You can see the bounce board being held by another crew member on frame right, and how effectively this is filling in everyone’s faces.

After watching the initial blocking, I requested that everything be flopped in order to place Sydney in direct sunlight and Daisy in backlight. I knew that the backlight would look fantastic on Daisy’s hair – especially as the sun was very low by the time we got to her CU – and we could fill in her face with flattering bounce from a big white sign that the ever-resourceful Keisuke had brought along.

Ollie and the crew very kindly built me a sunshade.

Masculine facial features tend to look better in harder, direct light, which is why I was happy to face Sydney into the sun. (There’s more to it than that though, and I’ll be debating the ethics of lighting men and women differently in an upcoming post.) However, for the first take of Sydney’s CU, worried about shine and squinting, I chickened out of the hardlight and put up a sheet of Full Frost to soften it. For the second take I got rid of it, which made for better lighting continuity with the wider shots, but left Sydney looking very shiny. There’s only so much powder can do when someone’s looking straight into the setting sun. I’ll be interested to see which one Devon prefers in the edit, although his decision will likely be based on performance rather than light and shine! A good colourist can probably reduce the shine anyway. If only I’d had 1/4 or 1/2 Frost to get the best of both worlds.

Judging when to shoot the various angles in your scene is an important part of a DP’s job for day exterior work, and especially so at Golden Hour. Devon wanted to shoot Sydney’s CU before Daisy’s, his logic being that if we lost the sun before we shot Daisy then it wouldn’t matter because her face was in shadow anyway. Knowing that I was probably going to diffuse Sydney’s light, I felt the greater priority was capturing the lovely backlight on Daisy, and so asked to shoot her first.

Anyway, when the sun went down, that was a wrap for the brief but intense Japan shoot. Many thanks to Devon and co for bringing me along, and to the people of Himeji for welcoming us so warmly.

Synced: The Japan Shoot – Part 4

Synced: The Japan Shoot – Part 3

Shooting tracking shots from the back of a pick-up. Above me is camera assistant Yujiro Matsumoto with a diffused LitePanel which provides fill during the move.

Continuing the story of lensing the sci-fi feature Synced’s Japanese scenes earlier this month. In part 1 I looked at the prep, and part 2 covered an interior scene.

Next up, after dark, was a street scene with the beautiful Himeji Castle visible in the distance. The castle was already lit up by spotlights, but while the street had a fair bit of existing lighting, that wasn’t bright enough to shoot under. The scene was a slow chase in which the trio of heroes, one of them wounded, is slowly but menacingly pursued by the limping villain. This would be captured primarily in tracking shots, filmed from the back of a small pick-up truck pushed by the crew to avoid engine noise spoiling the soundtrack.

Wide-street
The set-up for the street scene
Exisiting practical lighting around the doorway the characters enter at the end of the scene

Employing my standard approach to night exteriors, I had the crew set up the 575W HMI as backlight, tucked around a corner. When we came to do the reverse shot, the HMI was moved to the opposite end of the street. It glared horrendously off some windows and shiny tiling, but with the time and equipment available I could see no way to remedy this. The lamp really needed more height, but I hadn’t hired a double wind-up stand because it wouldn’t have fitted in the car.

Three of the LitePanels were spaced along the street as sidelights, suggesting additional off-camera streetlamps. The furthest one, illuminating the villain on his first appearance, I gelled with Light Straw to separate him from the heroes.

The fourth LitePanel, with diffusion and egg crate fitted, was mounted on the pick-up truck behind the camera, providing a constant low level of fill.

Keisuke’s little LED panel was gelled red and wedged into a shop doorway to lend a sinister tone to a key moment in the scene.

The scene ends with two of the heroes entering a building. There was some existing practical lighting around this doorway which I asked to be turned on, and this proved sufficient to illuminate the characters as they approached and entered the door.

The set-up for the alley scene

The final scene of the night took place in a quaint little alleyway. Cool blue streetlamps contrasted nicely with a halogen security light, but the former were too frontal and flat, while the latter was triggered by an infrared sensor – meaning it could go on and off annoyingly during takes.

So we flagged the main streetlamp and disabled the security light by gaffering the sensor, and I recreated the colour contrast of that lighting using our own lamps.

The houses on either side had convenient ledges above the windows, perfect for placing LitePanels on. So two panels became 3/4 quarter backlights from either side, set to 5,600K.

The third panel, set to 3,200K, was hidden behind a gate to light some of the background and edge the actors a little before they got in front of the other backlights. (I left the existing practicals to light the deep background.)

The fourth and final panel, set to 4,500K and gelled with Light Straw, blasted out of the door the actors came out of, matching to the light in the last part of the kitchen scene.

Near the end of the scene, the master shot becomes a two-shot of Ollie and Daisy, and the two 3/4 quarter backlights serve as a classic cross-backlighting set-up.

For Daisy’s close-up, since she was quite close to the wall and therefore quite dark, I tweaked the lights heavily. I brought one of the backlight panels much closer, bouncing it off the cream-coloured wall next to Ollie to serve as her key, and switched the second backlight to the opposite side of camera to balance it out. I also added a ‘health bounce’ reflector, ensuring she had a nice big eyelight to underline her vulnerability in the scene.

In the fourth and final part I’ll be looking at the day exterior scene we shot in the grounds of Himeji Castle.

Synced: The Japan Shoot – Part 3

Synced: The Japan Shoot – Part 2

Setting up for the kitchen shoot

In part 1 I described how we arrived at a lighting package and monitoring solution for the Japanese leg of this sci-fi feature shoot.

The first scene to go before the camera was the night interior, set in a hospital kitchen. The location was blacked out by the Japanese crew with incredible efficiency, so we could shoot it in the afternoon. Unable to light through the windows, I hid LitePanels in alcoves and around corners. They were all set to 5,600K and most were gelled with half CTB to appear very cool when shot with a white balance of 4,500K. The idea was to give the impression of streetlights – many of which are cool blue in Himeji – spilling into the dark, abandoned kitchen.

But Japan is a colourful place, and at night all hues of lighting are seen from signs and shopfronts as well as streetlamps. So, behind the frosted glass door of a locker room at the back of the master shot, I set up the HMI, gelled with Light Straw to suggest an older sodium vapour streetlight.

For a third layer of colour, I gelled one of the LitePanels red.

The kitchen had big hooded vents above the cookers, and for certain shots I was able to clamp the red panel inside one of these using a C-stand knuckle.

Sketch 2015-06-06 11_02_46

As the action progressed around the room, shot by shot, I moved the panels to new areas when the old areas ceased to be in frame, always taking care that the light was hitting the actors from the sides or from behind, never from the direction of the camera. (This would have made for flat lighting, a massive no-no in cinematography.) At one point I needed one more lamp than we had, and Keisuke saved the day with a small but very bright LED panel of his own.

This iPad photo gives a rough idea of how the lighting in the above diagram will appear in the movie.

In part 3 I’ll be breaking down the night exterior scenes.

Synced: The Japan Shoot – Part 2

Synced: The Japan Shoot – Part 1

cast-and-crew
Actor Shigeki Maegawa, director Devon Avery, actor Oliver Park with Justine Avery in front of him, actress Daisy Hainsworth, actor Sydney Jay, me and gaffer Keisuke Ueda, at Himeji Castle
575W HMI
575W HMI

On Wednesday May 27th I got a call from my friend and actor Oliver Park, saying he was flying to Japan on Sunday for a shoot and did I want to come as DP? He was playing the leading man in Synced, a sci-fi feature film directed and co-written by Devon Avery, and after a month of shooting in Glasgow, the existing DP had opted not to take part in the Asian shoot.

On Friday night my plane ticket came through, at midnight on Sunday I was changing planes in Qatar, and on Monday afternoon (local time) I was in Osaka. The following morning saw me at Arc System, a very helpful lighting rental house, with Devon, his wife/multi-talented assistant Justine and a couple of the Japanese crew. With two night exteriors and a night interior as well as a day exterior scene, a reasonable amount of kit was needed.

The mains electricity in Japan is 100V, 60Hz, so very similar to the US – and indeed the plugs and sockets are identical. But the killer is that you can only draw 7A per socket. That’s a maximum of 700W, as opposed to over 3,000W from a UK socket.

Canon Ultrasonic 24-70mm f2.8

So the biggest lamp we could hire without needing a generator was a 575W HMI. With one of those in the bag, I figured it was best to fill out the package with battery-powered lamps, and so hired four 1’x1′ Bi-Color LitePanels. Although I’m still not 100% sold on the colour rendition of any LED panels (even LitePanels, which are amongst the best), there’s no denying they’re incredibly handy and quick to set up.

Pentax 50mm f1.4
Pentax 50mm f1.4

I would be shooting in 4K ProRes 422 HQ on my Blackmagic Production Camera, at 23.976fps. I initially stuck to two Canon L series lenses for continuity: Devon’s 24-70mm f2.8 and crew member Keisuke Ueda’s Canon L 50mm f1.4. Since I was constantly struggling to expose an image at the BMPC’s native 400 ISO, I later employed my Sigma 20mm f1.8 for faster wide shots, and I couldn’t resist trying my new Pentax 50mm f1.4, which performed beautifully at f1.7 and above, but did seem a touch soft when wide open.

Thunderbolt
Monitoring via Thunderbolt cable to Blackmagic Ultrascopes on a Powerbook

Regular readers will know of the trials and tribulations I’ve experienced getting a monitor signal out of my BMPC, with the result that I bought a 17″ Blackmagic SDI monitor last year. It was impossible to bring this to Japan, so instead – for the first time – I experimented with Thunderbolt monitoring. A runner was dispatched to buy a cable, and Devon installed the Blackmagic Camera package on his Macbook. This package includes Ultrascopes, which provides a live video view amongst other things, though annoyingly only in a pretty small window.

Whenever I turned the camera off or played anything back, the signal would be lost. To get it back, Devon would have to quit Ultrascopes and I’d have to switch to 25fps before he re-opened it. Only once it was re-opened could I switch back to 23.976fps. Please sort out that little bug, Blackmagic Design!

With the kit and workflow sorted, we travelled to Himeji (by bullet train, no less) ready to start shooting on Wednesday. Watch this space for part 2: shooting the kitchen scene.

Synced is copyright 2015 Empty Box Productions LLC.

Synced: The Japan Shoot – Part 1

The First Musketeer is Online Now!

11053883_759009810885699_5425239994580240133_n

Strap on your scabbard and saddle your horse – The First Musketeer has arrived! After 21 months in postproduction, the action-adventure web series shot in the south of France is finally out on YouTube. I served as director of photography on the show, written and directed by Harriet Sams. Watch all six episodes now!

I’ve written several blog posts about lighting and shooting the show, and there are more to come. Here are the best of the ones currently available:

Know Your Lights – a video blog in which I show you the lamps in our lighting package and explain the advantages of each.

Week Two on The First Musketeer – featuring on-set video blogs in which I explain how a couple of key scenes were lit.

Period Cinematography – what I learnt from doing The First Musketeer about the best ways to light and lense material set in the past.

Athos and Marion – a light-hearted look back at the lighting and shooting of a scene in Rocamdour, a medieval town built into the side of a ravine.

Candlelight – describing the various methods of simulating candlelight which I used on the show.

The First Musketeer is Online Now!

Soft Wrapping Backlight on The Shepherds’ Play

The Second Shepherds’ Play, the medieval comedy which I lensed last week, had several scenes in “the Mak Shack”, the grotty home of the antagonists. The set posed an interesting problem in that – apart from the door, which wouldn’t always be open – it contained no light sources. No windows, no lamps, no candles. Given the wordy script and the tight schedule, I needed to light it in a way that would not need tweaking between set-ups, and which would work for one particular scene that director Doug Morse wanted to film as a single developing shot showing about 180º of the set.

One option would have been to posit a window in the off-screen 180º, but that would have resulted in very flat illumination, all lit from the front like a photo taken with flash.

I wanted to create a cross-backlighting set-up (Lighting Technique #2), but it was impossible to hang lamps above the rear of the set without damaging the location’s brickwork. So instead I had Colin rig two pieces of Celotex (matte silver bounce board) above the back two corners. Into these I fired Source Fours, peeking over the front walls of the set. These lamps, designed for theatre use, are relatively cheap to hire and have lenses and cutters which provide a great deal of control over where the light does and doesn’t go, meaning you can ensure it all goes onto a bounce board and nowhere else. Using Source Fours as sources for bounced light is a tip I picked up from David Vollrath‘s talk in the Big League Cine Summit in January.

Here you can see a Source Four Junior peeking over a wall at the front of the set to hit a bounceboard at the back.
Viewed from the back of the set, both Source Fours can be seen firing over the front walls.
Viewed from the back of the set, both Source Fours can be seen firing over the front walls. The lamps are high enough that their beams go completely over the heads of the talent.
This reverse angle shows the two bounce boards above the back corners of the set, which you'll have to trust me is directly underneath them in the darkness.
This reverse angle shows the two bounce boards above the back corners of the set, which you’ll have to trust me is directly underneath them in the darkness.

This set-up enabled me to execute the 180º handheld shot without casting any shadows myself, and without the actors casting hard shadows (which would have been inappropriate for a period piece), while still primarily lighting the downsides of their faces to give depth and shape to the image. It also provided backlight to ensure the actors stood out.

I’ll leave you with some frame grabs (courtesy of Grandfather Films) and a floor plan of the set-up. Visit Grandfather Films on Facebook for more on the Shepherds’ Play.

longtake2

longtake1a

longtake1

Diagram2

Soft Wrapping Backlight on The Shepherds’ Play

The First Musketeer: Join the Thunderclap

10947237_703907393062608_5512442058382461441_n

In September 2013 I was lucky enough to serve as the director of photography on The First Musketeer, an action-adventure web series based on the famous novels of Alexandre Dumas. Telling the story of how Athos, Porthos and Aramis first meet and become the heroes we know and love, the show was shot in castles and chateaus in the Lot and Dordogne regions of southern France.

On Monday June 1st, at 8pm BST, the series will be released free on YouTube at www.youtube.com/TheFirstMusketeerWeb

A web series, more than any other medium, lives and dies by its viewing figures. You can help the show succeed and go forward into future seasons by sharing that link or better still by joining our Thunderclap campaign. Thunderclap is a service which automatically posts a one-off message to your Facebook, Twitter and/or Tumblr accounts at a prearranged time, so at 8pm on June 1st a huge number of people will all hear about The First Musketeer simultaneously. Follow this link to join the Thunderclap.

The other exciting news is that both The First Musketeer and Ren will be part of the New British Web Series panel at London ComicCon tomorrow, Friday May 22nd. I’ll be joining actress Jessica Preddy on the panel to represent The First Musketeer. I hope to see some of you there!

The First Musketeer: Join the Thunderclap

Giving Yourself Somewhere to Go

On the recce for The Second Shepherd's Play. Photo: Douglas Morse
On the recce for The Second Shepherd’s Play. Photo: Douglas Morse

As a cinematographer, it can often be tempting to make your shots look as slick and beautiful as possible. But that’s not always right for the story. And sometimes it can leave you nowhere to go.

Currently I’m shooting The Second Shepherds’ Play, a medieval comedy adaptation, for director Douglas Morse. The story starts in the mud and drizzle of three shepherds’ daily drudge, and in a Python-esque twist ends up in the nativity. The titular trio develop from a base, selfish, almost animalistic state to something much more divine.

So, much as my instincts filming the opening scenes yesterday were to have a shallow depth of field and bounce boards everywhere to put a sparkle in the shepherds’ eyes, this wouldn’t have been right for this stage of the film. We had to have somewhere to go, so I shot at around f9 all day with unmodified natural, overcast light. As we get towards the end of the story – we’re shooting roughly in story order – I’ll start to use eyelight and more sculpted illumination and reduce the depth of field, as well as switching from handheld to sticks.

Grading episode one of Ren

Similarly, grading episode one of Ren the other day, it was important to keep things bright and cheerful, so that later episodes could be colder and darker by comparison when things go wrong for our heroes. And playing the long game, I lit Ren herself with soft, shadowless light for most of the first season, so that as she develops from innocence to more of an action heroine in later seasons, her lighting can get harder and moodier.

Like all heads of department on a production, DPs are storytellers, and it all comes down to doing what’s right for the story, and what’s right for that moment in the story.

Giving Yourself Somewhere to Go

How to Cut a Behind-the-Scenes Featurette

Cast&Crew_RAU_4273_20Sept_Unger copy copy
Cameras roll on the set of Kate Madison’s web series, Ren. Photo: Richard Unger

Despite my big plan to quit editing last year, I somehow ended up cutting nearly all the behind-the-scenes material for Ren, including a dozen YouTube videos and 30-odd exclusive set diaries which have just been released for sale. Guess I just have a fondness for BTS stuff.

Brett Chapman shoots B roll on Stop/Eject as Hadrian Cawthorne looks on. Photo: Paul Bednall
Brett Chapman shoots B-roll on Stop/Eject as Hadrian Cawthorne looks on. Photo: Paul Bednall

So here are some tips for editing BTS videos for the web. Many of these apply equally to any talking-head-based documentary.

  • Plan for it before the shoot by lining up a competent BTS camera crew and being clear about the kind of material you need. Here are some tips for shooting B-roll.
  • Start the edit by creating a new timeline and putting in some text generators with category headings you think you’ll want to cover, e.g. “plot”, “characters”, “casting”, “action scenes”, “concluding remarks”.
  • Watch through all the interview material. Every time you hear something you think you can use, dump it on the timeline after the relevant text.
  • Play back your timeline. You’ll immediately see that some of the material you’ve included is dull or repetitious. Whittle down the material until your timeline is only a little longer than you intend the finished piece to be. (I suggest 2-3 minutes should be your target length for a web piece.)
  • Pay attention to your in and out points. Don’t cut while someone is drawing breath – cut before or after. Beware of breathing time if you’re hacking someone’s sentences around. If your editing makes a couple of words sound unnaturally close together, interpose a few frames of atmos or silence. If you cut someone off in the middle of a sentence, firstly be sure the intonation doesn’t make it sound cut off, then add in some silence or atmos before the next clip, and paper over the edit with B-roll as the interviewee’s face will often give away that they’re not finished speaking.
  • Speaking of papering over the talking heads with B-roll, it’s time to do that now. I often start with the obvious stuff. Clearly shots of the fight scenes being rehearsed need to go over the actors talking about fight scenes. Then I’ll move onto the less obvious stuff – an actor talking about their character might go with almost any shot of that actor on set, so I’ll see what’s left at the end.
  • Avoid cutting in the middle of quick movements – an arm going up, a head turning- unless that action will be continued in the next shot. This goes for the talking heads too – don’t cut on or close to a blink. Also avoid cutting on an emphasised or particularly loud syllable, because this too will jar.
  • Take out the text generators and replace them with a few seconds of B-roll that doesn’t have any interview sound under it. This gives you dividers between topics without blatantly signposting them, and allows the audience a breather. You could bring up the audio on the B-roll, or put in a bit of music. Usually it’s best for this B-roll to serve as an introduction to the topic that’s up next. For example, if the next topic is “what it was like working with the director”, kick it off with B-roll of the director explaining the next scene to the actors. After hearing him or her talk for a sentence or so, fade down the audio and bring in the interview sound.
  • Get some music from somewhere like incompetech.com, if your composer hasn’t started work yet, and cut opening and closing montages of B-roll to it.
  • Put in your lower thirds and opening and closing titles. If the video’s going on You Tube, it’s a good idea to allow for annotations linking viewers to other videos on your channel. Do not put in credits – sorry, but no-one cares who made this.
  • Watch the whole thing through and try to take out another 10-30 seconds. Remember, pace is everything. Do not give people the slightest excuse to stop watching.
  • Do a colour correction pass so everything matches.
  • Go through again balancing the audio. People start their sentences loudly and get quieter as their lungs deflate, so counter this by ramping the audio up over the course of the sentence. Use EQ filters if necessary to counter tinny or boomy sound, or reduce hiss or wind noise. See this Nofilmschool article for some handy audio tips. If any of the audio cuts are popping or clicking, put on a 1 frame cross fade. If you don’t have decent speakers, do this on every cut because you won’t know which ones are dodgy.
  • If any of the speech is still hard to make out – and remember that your viewers haven’t heard it a million times like you have – then subtitle it.
  • Watch it one last time to check everything’s smooth, then compress and upload it. You’re done!

If you’ve found this post useful, please consider supporting Ren by purchasing or sharing the trailer for the Daily Diary videos. Buyers get the first 7 videos now and the remaining 29 when the series is released this summer. They’re all different, some following the above pattern and others being much more candid, fly-on-the-wall affairs. There are plenty of bloopers, interviews and filmmaking tips to be enjoyed throughout. Or check out our free behind-the-scenes videos on YouTube.

How to Cut a Behind-the-Scenes Featurette

How to Make an Electronic Press Kit (EPK)

Lately I’ve been working on the electronic press kit for Kate Madison’s web series, Ren. An EPK is a collection of footage that a broadcaster can use to edit their own piece about your film or series. It should contain:

  • a trailer (optionally with versions without music and without dialogue, so it can be dubbed);
  • clips from the show (again, versions without dialogue are handy if you’re expecting foreign coverage);
  • interviews with the director and principal cast;
  • B-roll, i.e. behind-the-scenes footage.

You may also want to include a short (5 minutes max) ‘making of’ featurette.

The whole thing should be about 20-30 minutes long.

You need to think about your EPK in preproduction. Assign someone with camera and editing experience to film behind-the-scenes material on a few key days of the shoot. This post has lots of tips for shooting good B-roll.

Here’s some B-roll from the Avengers: Age of Ultron EPK.

Personally, I think that putting black slugs between every shot is excessive. With the Ren EPK I loosely edited half a dozen montages and titled them ‘Filming crowd scenes in the village’, ‘Filming fight scenes in Epping Forest’ and so on.

Here’s another example, this time from the Chappie EPK.

When shooting the interviews, encourage people to keep their answers brief. Answers of about 30-45 seconds are ideal. Remember that an EPK is not a finished product: you can’t have jump cuts or paper over edits with B-roll, which means you can’t cut stuff out of the middle of people’s answers; all you can do is trim the beginning and end.

Typical EPK questions are:

  • What’s the film about?
  • Who is your character?
  • What was it like working with the other actors and the director?
  • What was it like filming the action scenes / scary scenes / romantic scenes / scenes where you had to be painted blue from head to toe?
  • Why should people go and see this film?

Put a title card before each answer, giving the question (or a brief description of what the person talks about in their answer), the duration of the clip, and the person’s name and role.

Here’s an example, again from Age of Ultron.

See how the picture kicks in before the sound? That’s to give someone editing the clip into their show more flexibility – they could dissolve into the shot, for example.

Here’s another example, this one from Far from the Madding Crowd.

Once upon a time you would deliver an EPK on Beta SP, but clearly those days are gone. For Ren I’ll probably put the clips up on VHX, a VOD platform we’ve been using for our behind-the-scenes Kickstarter rewards. We can create a package of videos which people can be invited to, with a nice, slick interface, and the videos – one for each interview answer and B-roll segment – will all be downloadable by invitees as 1080P H.264 MP4 files. If anyone wants less compressed versions, they can contact us directly.

If you missed it, check out my post on lighting the Ren EPK interviews.

And for another perspective on making an EPK, you can read Sophie Black’s guest blog from 2012 in which she talks about making the one for Stop/Eject.

Find out more about Ren at rentheseries.com

How to Make an Electronic Press Kit (EPK)