I eat breakfast at the hotel with the co-writer. We talk about dodgy Alan Moore adaptations and the perfection of Die Hard. When we get to the production office I’m still trying to figure out the lighting list, which is tricky because my gaffer is in transit from Poland! The office is in a castle, which is very cool but you have to go outside to make phone calls; the thick stone walls cut out all reception.
Paul is sitting doing storyboards, and he talks me through what he’s drawn for the first few days. They’re crude, but they give me an idea of how flexible I’ll have to be on lighting to accommodate the roving Steadicam moves he wants. I show him my blog post on 2.39:1 composition to see how he feels about things like short-siding, formal composition, squeezing people into the edges of frame. He’s up for all of it, which is great.
Julian, the production designer, takes me around the rooms we’ll be shooting in at the castle. We talk about where we can help each other out.
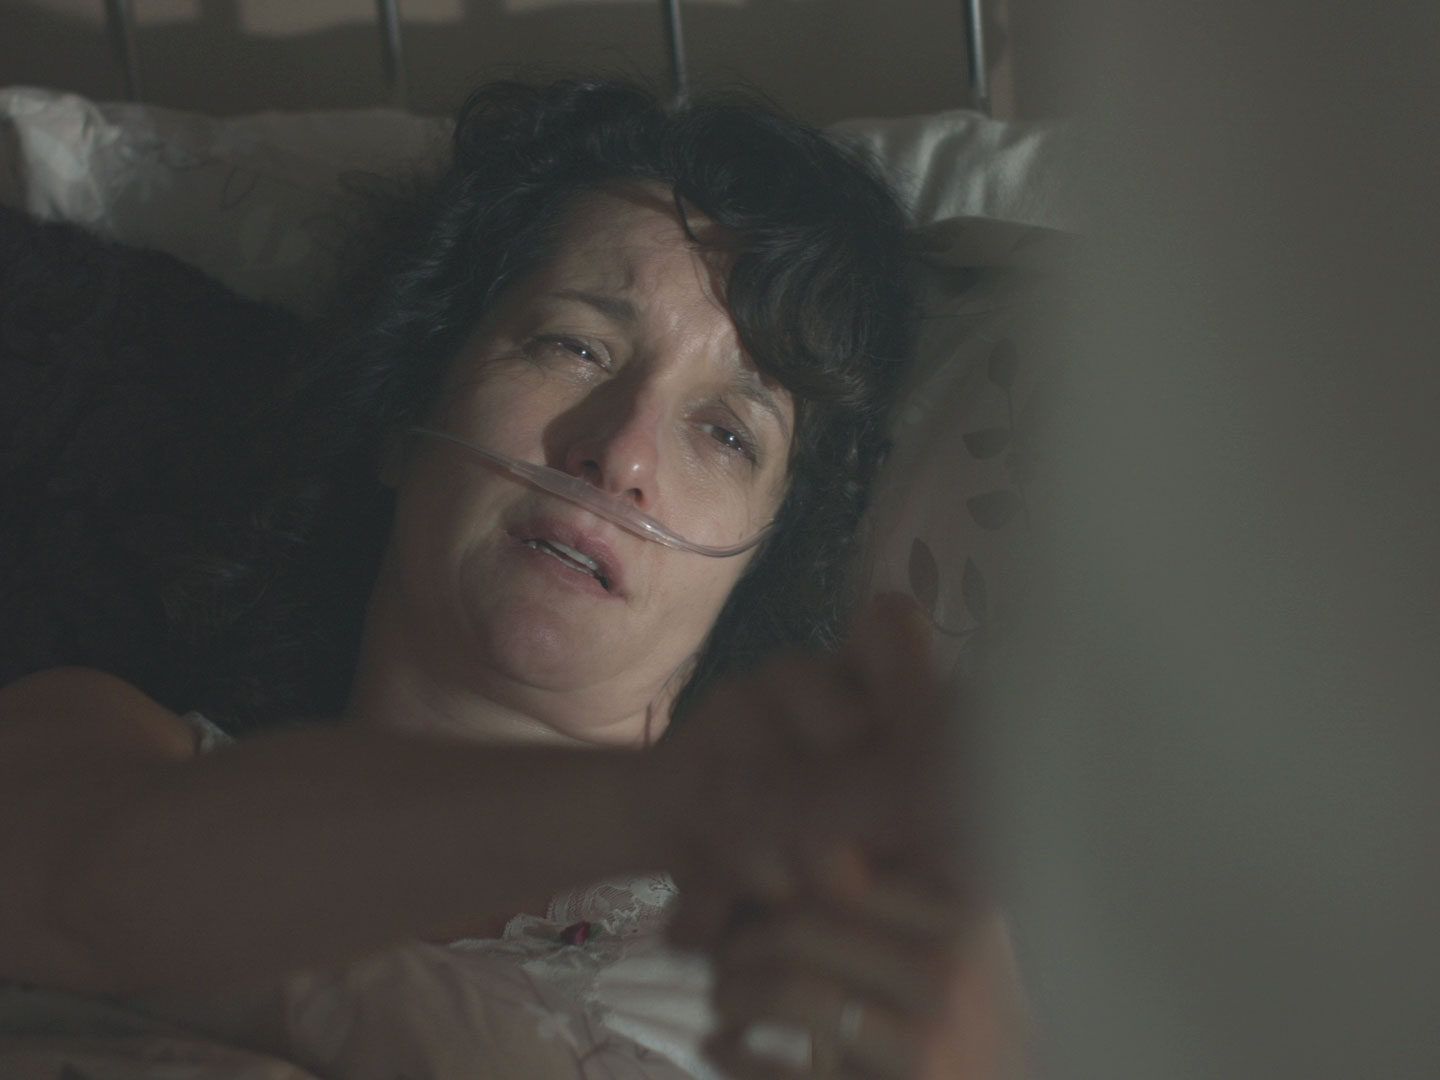
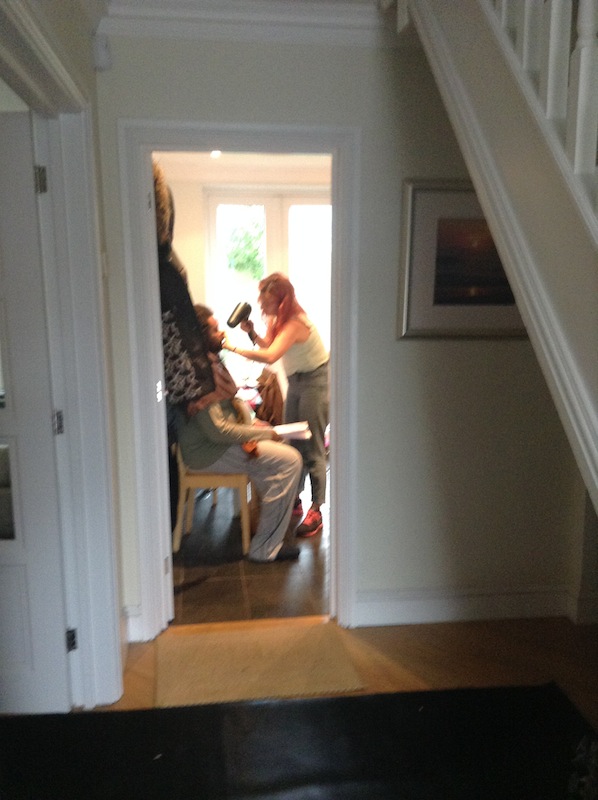
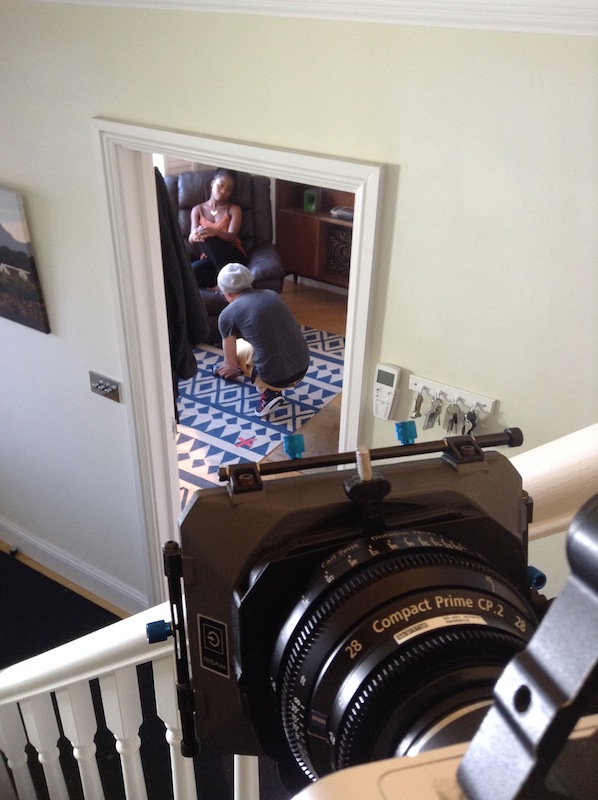
After lunch it’s time to set up for the make-up tests. An Alexa, the Cooke S4 primes, a monitor and some basic lighting gear has been delivered for this. I pick a room in the castle from which I can easily eliminate the natural light and while Rudy, my AC for the afternoon, sets up the camera, I establish a 3-point lighting set-up. We have three actors and four make-ups in total to test. I also want to test Soft FX filters and see if any of them will work for the show. We try different strengths (1/2, 1 and 2) on the first actor and quickly we all agree on 1/2. It gives the image a filmic softness without looking cheesy.
Leaving the 1/2 Soft FX in for the rest of the tests, I experiment with different lighting to see how the prosthetics and straight make-up react. I try four different keys: a 650W tungsten fresnel bounced from the side, the 650 bounced from above, the 650 direct and a kinoflo direct. I had issues on Ren with kinoflos causing shine, but here we seem to be fine. I test with and without fill, with hard and diffused backlights, and with bounce from below. We also look at cooler and warmer white balances to see how moonlight and candlelight will affect the make-up. What’s great about these tests is that I can play with the looks and get immediate feedback from Paul as he stands at the monitor. He really responds to the moodier looks, which makes me very happy.
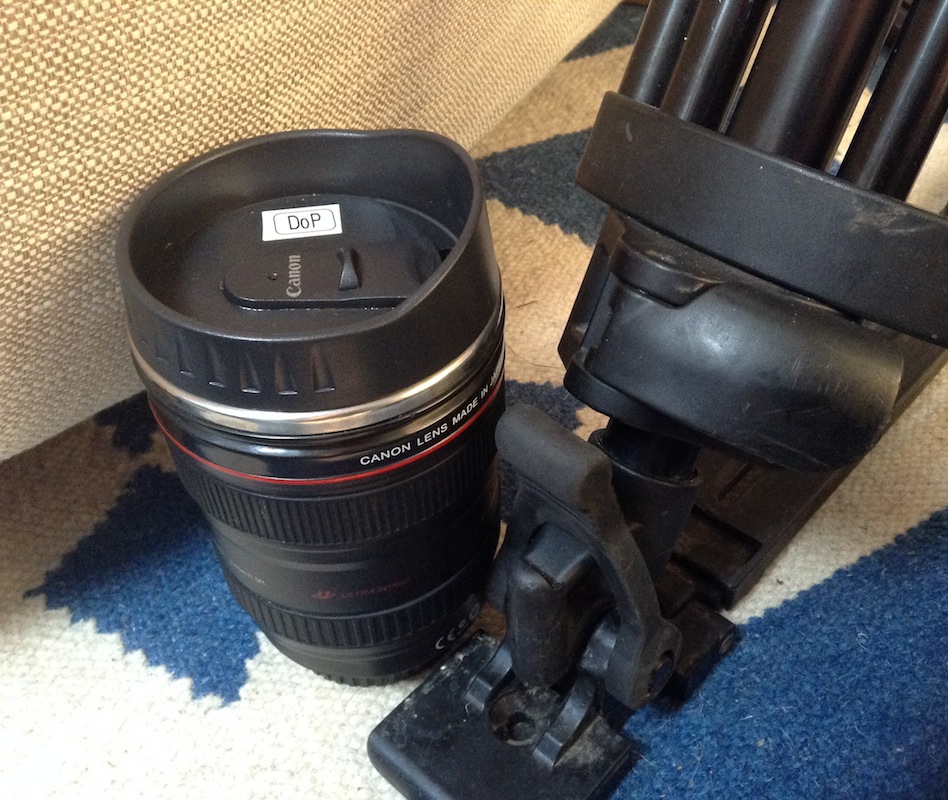
Cinematographed by Neil
Heretiks: Day -2
Up at the crack of dawn to travel back to Wales, armed with a nice new warm coat, ski socks and thermals! On the train I read some relevant American Cinematographer articles and watch Ida. Stylistically it’s nothing like Heretiks will be, but I want to see how they handle some similar themes visually. It is as beautifully shot as everyone says it is.
I arrive at the production office…
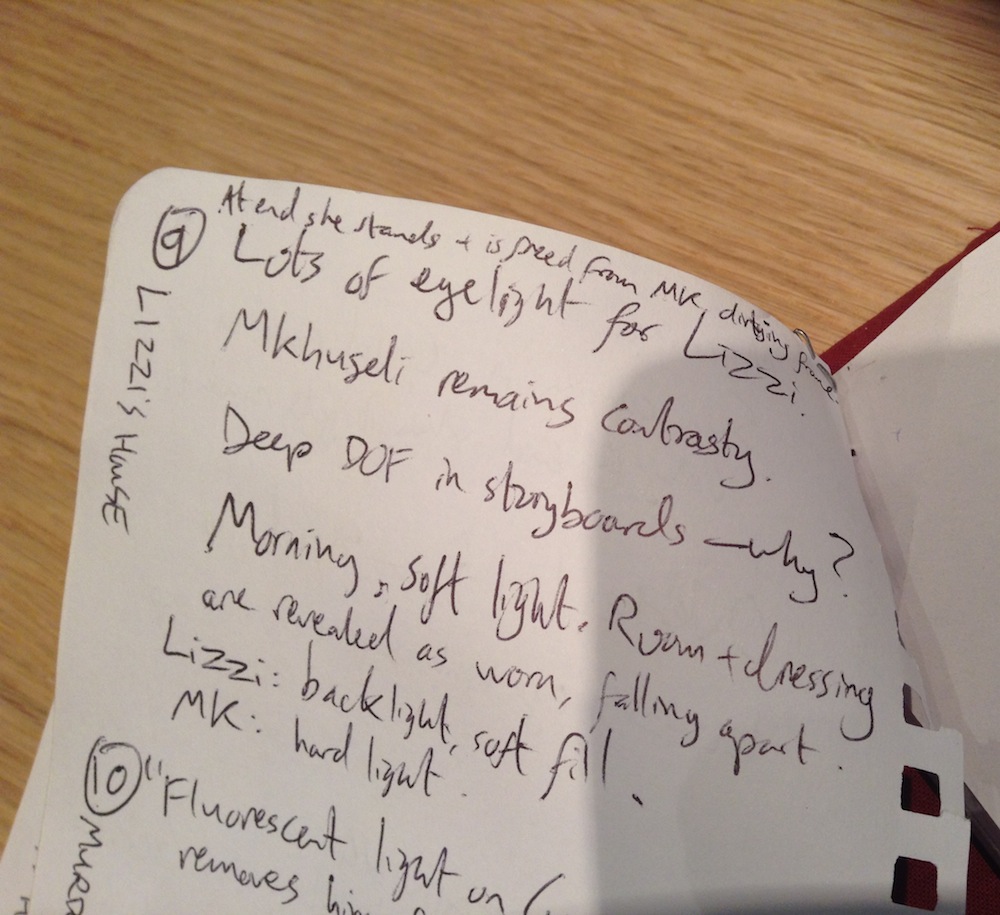
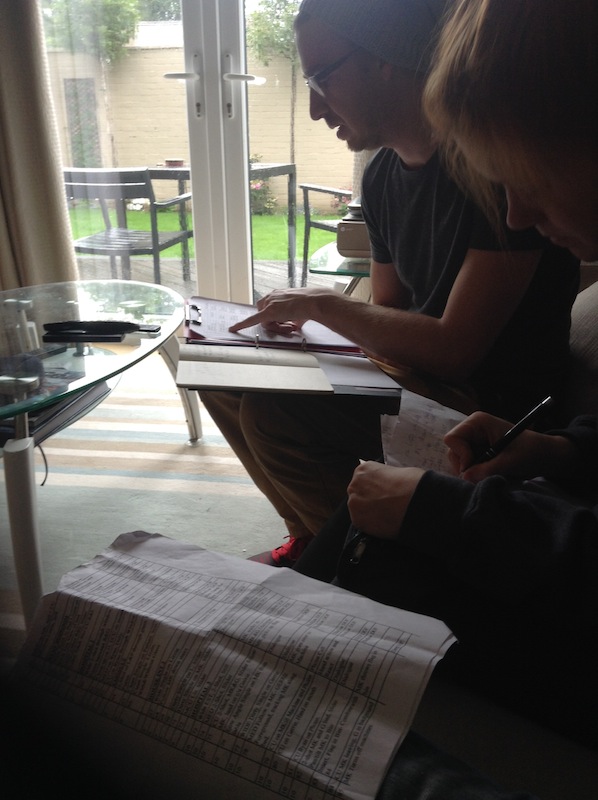
We have a big production meeting, going through the schedule day by day to address the concerns of the various departments. Naked flames vs. LED candles are discussed again. Having dealt extensively with the latter on The First Musketeer, I’m keen not to go down that route again. I get to see some initial make-up tests, and there’s lots of back-and-forth with me, Ben (the gaffer), the rental house and production about the lighting list, trying to get it down to a level that works for the budget and the size of our lighting crew.
Back at the hotel I write a risk assessment – urgh – apparently insurance companies expect these from all HoDs now. Dinner with one of the writers and one of the producers – they’re very nice, as is everyone on the team. Then I get to work on some lighting plans.
Heretiks: Hitting the Ground Running
 I just got hired last-minute to photograph a 17th Century supernatural thriller feature. At this stage I don’t know how much time I’ll have and how much I’ll be allowed to say about it, but I thought I would try a daily blog. It might make a nice change to “bring you along” on a shoot. So let’s dive right in.
November 11th
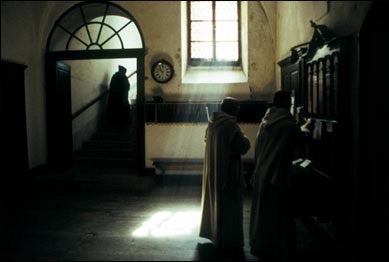
I’m one of several DPs to meet with Paul, the director, about the project. Since first being contacted about it yesterday (sound recordist David kindly recommended me) I’ve only had time to read the script, watch the trailers for Paul’s last two films and do a quick google for some reference images. Several of those images are from The Devil’s Backbone, a film that sprung to mind as I read the script for Heretiks. Another image is the one in this post. I love the idea of the God rays coming in but not hitting the characters; they’re trying to be divine but falling short. I suggest to Paul that this could be a visual theme, and he seems enthusiastic. The meeting goes very well.
Paul’s keen on using a lot of Steadicam, so even though I haven’t got the gig yet I call Rupert (my 1st AC and Steadicam op on Exile Incessant) and sound him out.
November 12th
Mid-morning I get a call from the producer, offering me the job. I immediately confirm Rupert and spend the next few hours trying to fill out the rest of the camera, grip and lighting crew. After a brief discussion with Paul about shooting format, we quickly settle on the Alexa. I call the rental house, 180 Degrees in Bristol, to introduce myself, confirm the camera package and Cooke S4 lenses, and add an extra item or two.
Around 5pm I set off for South Wales, to be ready for tech scouts the next day. Rammed into a rush-hour train from Paddington, I go through a hardcopy of the script with a biro and two highlighter pens: blue for lighting, pink for camera. I also compile a character cheat sheet, because the script has a lot of characters and I know I’ll get them mixed up otherwise. It will also help to track their journeys through the story.
November 13th
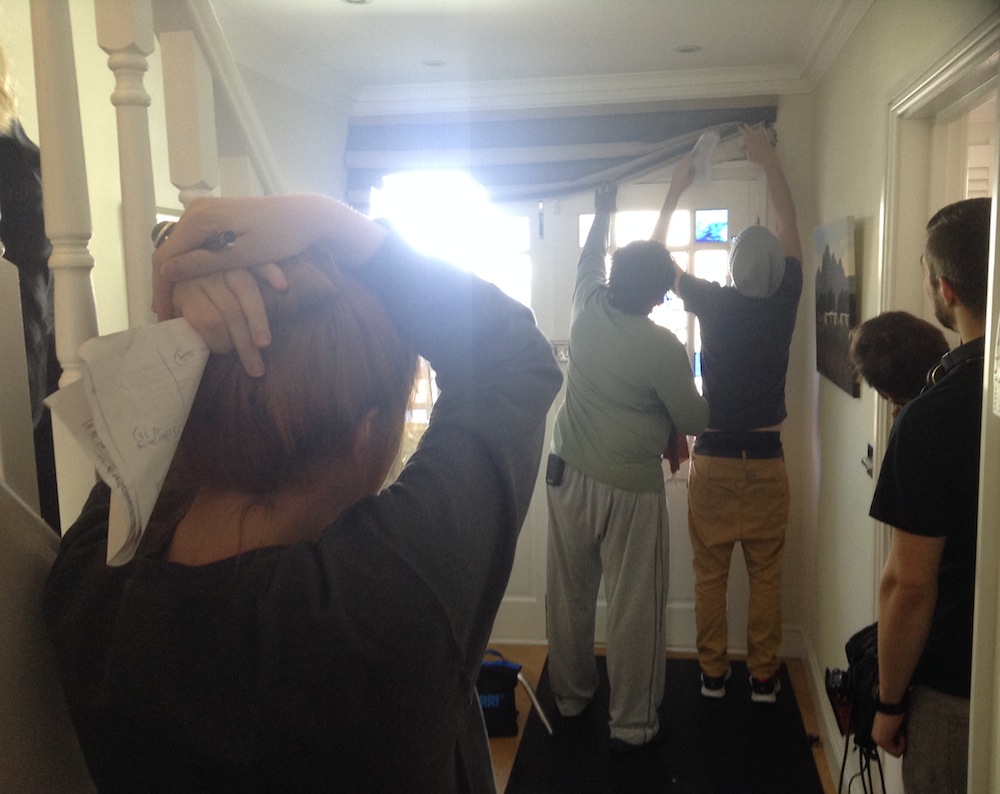
I wake up to a wet, windy and bitterly cold Welsh morning. I’m going to need to buy thermal underwear before the shoot starts. A dozen of us pile into a minibus and drive to the first of our two main locations. As Paul talks everyone through the scenes, I struggle to keep up, being less familiar with the script than the others, some of whom have already been on the project for weeks. We don’t have a gaffer for the shoot yet, but a friend of the production manager’s has come along to draw up a lighting list. I’m also liasing with the effects supervisor and the production designer as we consider the requirements of each room. The first location is home to a protected bat colony, so only a specific type of bat-friendly smoke can be used.
After a very welcome pub dinner, we proceed to the second location. By this time it’s much clearer what Paul and Justin (the production designer) are aiming for. I can’t wait to see Justin’s plans come to life. When the recce is finished, we go through the schedule to determine which days will require naked flames – requiring an additional effects person on set. Then I head home, finishing my script mark-up on the way. I have the weekend off, then it’s back to Wales on Monday to start prep in earnest.
Crossing Paths: Daylight Interior
The final scene of Crossing Paths to go before the camera was a sombre daylight interior in a bedroom. If you’ve read my last two blog posts you’ll know that backlight is the central pillar of my approach to lighting both day exteriors and night exteriors. Daylight interiors are no different.
For day exteriors your backlight is the sun. For night exteriors it’s usually the moon. For day interiors it’s windows.
On the location recce I’d agreed with director Ben Bloore and production designer Sophie Black that we were going to shoot mostly towards the bedroom’s window. Given that the bed was the focal point of the scene, this decision was also cinematographically sound because it made for the most depth in the image, the window being in a dormer that distanced it from the bed.
To punch up the natural light coming in through the window – which was on the second floor – I had my crew clamber up on the flat roof of the extension and erect our Arri M18 on a double wind-up stand. Luckily the geography of the room and the blocking permitted the M18’s light to hit Tina’s face as she lay in the bed.
Sophie had dressed a floor lamp in next to the bed, which gave me the perfect motivation to clamp a dedo to the bedframe, uplighting Phil’s face. The cool M18 coming in from the rear right and the warm dedo coming in from the rear left picked out the actors’ profiles nicely, as you can see below. This is a kind of cross-backlight set-up, as explained in Lighting Techniques #2.

Immediately above the camera position there was a skylight with a roller blind. By opening or closing the blind I could effectively increase or decrease the level of fill in the lighting. For most of the scene I chose none. Some would argue that it’s best to add fill and then crush it out in post if you don’t like it, but I like to make decisions on the set wherever possible, to deliver the most cinematic image straight out of the camera.

To soften the scene I pumped in lots of smoke. Col had kindly gifted me a Magnum 650 (to fill the smoke machine void in my life since my Magnum 550 packed up last year) and we let that baby rip in that tiny little room! The smoke helped add to the sense of decay and reacted beautifully to the curtains being opened mid-scene.
That’s all from the set of Crossing Paths. I believe the edit is now underway, and I look forward to seeing how this lovely little short film turns out.
Crossing Paths is a B Squared production (C) 2015. Find out more at facebook.com/Crossing-Paths-Short-Film-697385557065699/timeline/
Crossing Paths: Night Exterior

After a morning of playing with the sun, the next task on Crossing Paths was to light a night exterior scene.
The Blackmagic Production Camera, with a native ISO of 400, is not the most sensitive of cameras. But with this scene being a flashback, I gained a stop of light by changing my shutter angle to 360 degrees and making that extra motion blur part of the film’s flashback look. (Click here to read my post on Understanding Shutter Angles.)

Just as a DP normally looks to orientate a daylight scene to use the sun as backlight, so they often aim to do the same with the moon at night. Except of course, unless you’re shooting on a Sony A7S, the actual position of the moon is irrelevant because it’s too dim to shed any readable light. Instead you set up a fake moon – usually an HMI – in the position that works best for you.
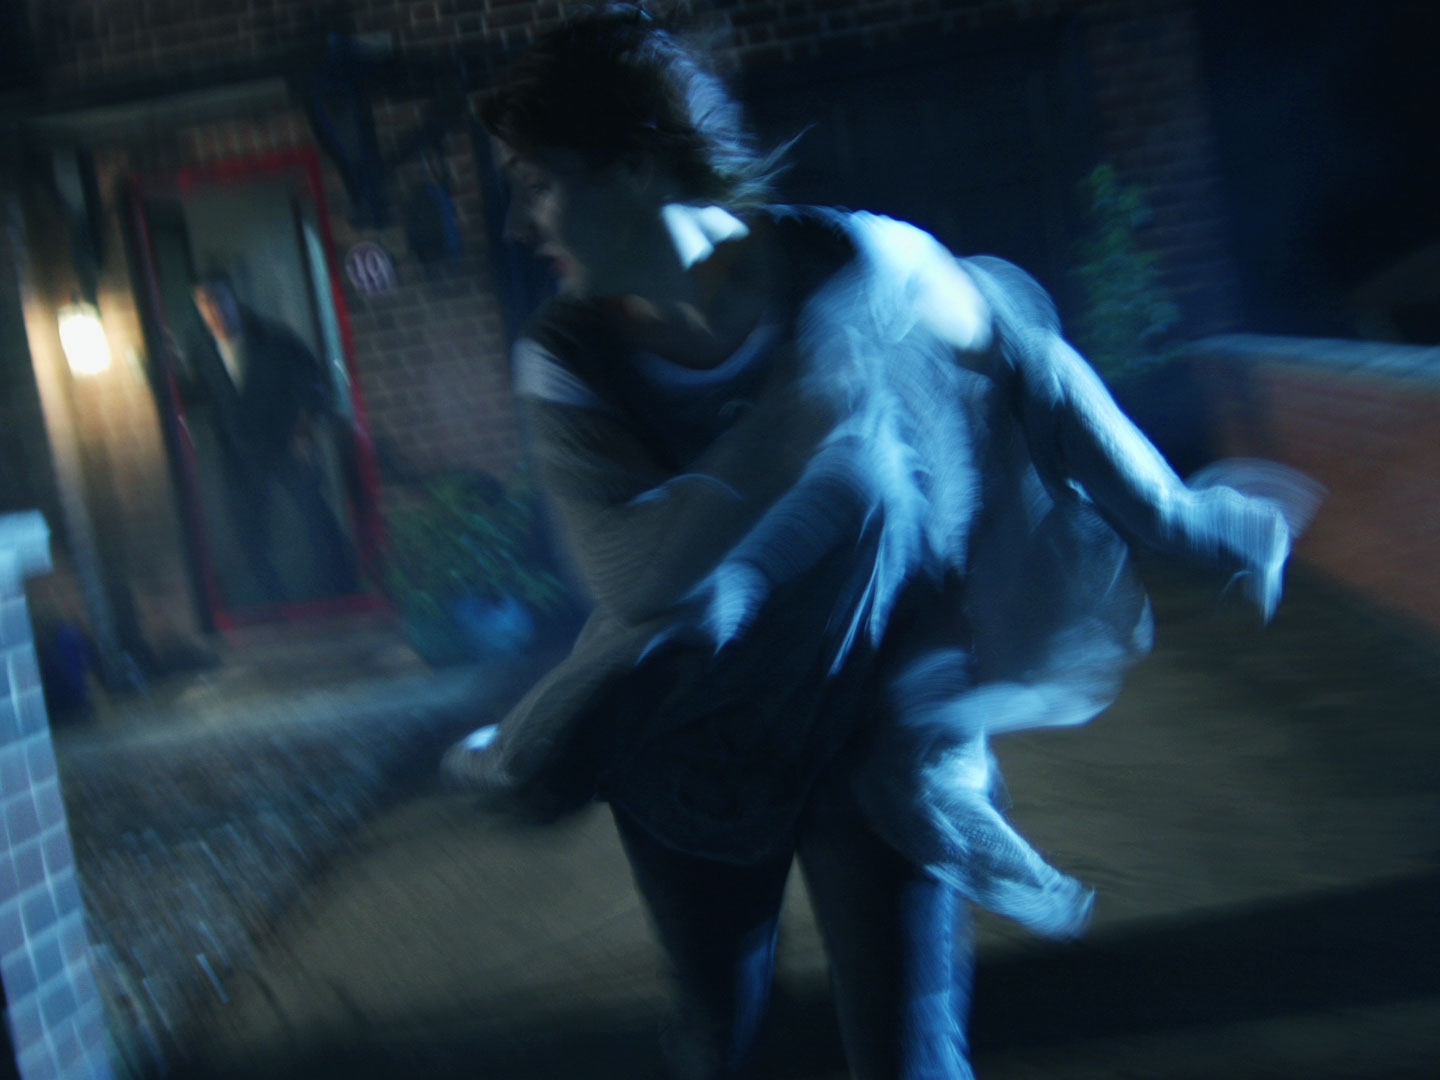
I knew that there would be two main camera angles for this scene, in which Michelle runs out of her house and across the road. One would be a handheld tracking shot, leading Michelle as she runs. The other would be an angle looking up the road. So the first angle would be looking towards the house and the second would be at 90 degrees to that.

Where to put the backlight? (I was going to use an ArriMax M18 for the moon.) Clearly not behind the house, because I didn’t have a massive crane to put it on! Similarly I could not put it at the end of the road without it being in shot. The clear solution was to put it mid-way between these two positions, in a neighbour’s garden. From there it would provide 3/4 backlight (from the left) for the view down the road, and side-light (from the right) for the view towards the house, developing to 3/4 backlight as Michelle crosses the road.
To get my backlight fix at the start of the handheld leading shot, I placed a Dedo at the top of the stairs shining down.
3 x 300W Gulliver lamps, kindly supplied by spark Colin Stannard, were also used in the scene. Two were hidden behind trees down the road, pointing at parts of the background to stop it being black. (The road’s sodium streetlamps provided some nice bokeh as they reflected in parked cars, but did nothing to illuminate the scene.)

The third Gulliver was used to 3/4 front-light Michelle in the first half of the leading shot. I put it on a C-stand, nice and high, shining through a tree so as to break up the light – always a good trick for frontal light sources at night.
To ensure Michelle’s face was visible in the second half of the leading shot, an 8’x4′ poly was used to bounce some of the “moonlight” back at her.
Here’s a lighting diagram of the whole set-up…
 Crossing Paths is a B Squared production (C) 2015. Find out more at facebook.com/Crossing-Paths-Short-Film-697385557065699/timeline/
Crossing Paths: Day Exterior

The sun is an awesome light source, but you’re not alone as a DP if you sometimes feel it’s the enemy. Shooting Ben Bloore’s Crossing Paths at the weekend, I was very lucky to be met with a perfect blue sky, but even so there was work to do in maintaining and sculpting the light.
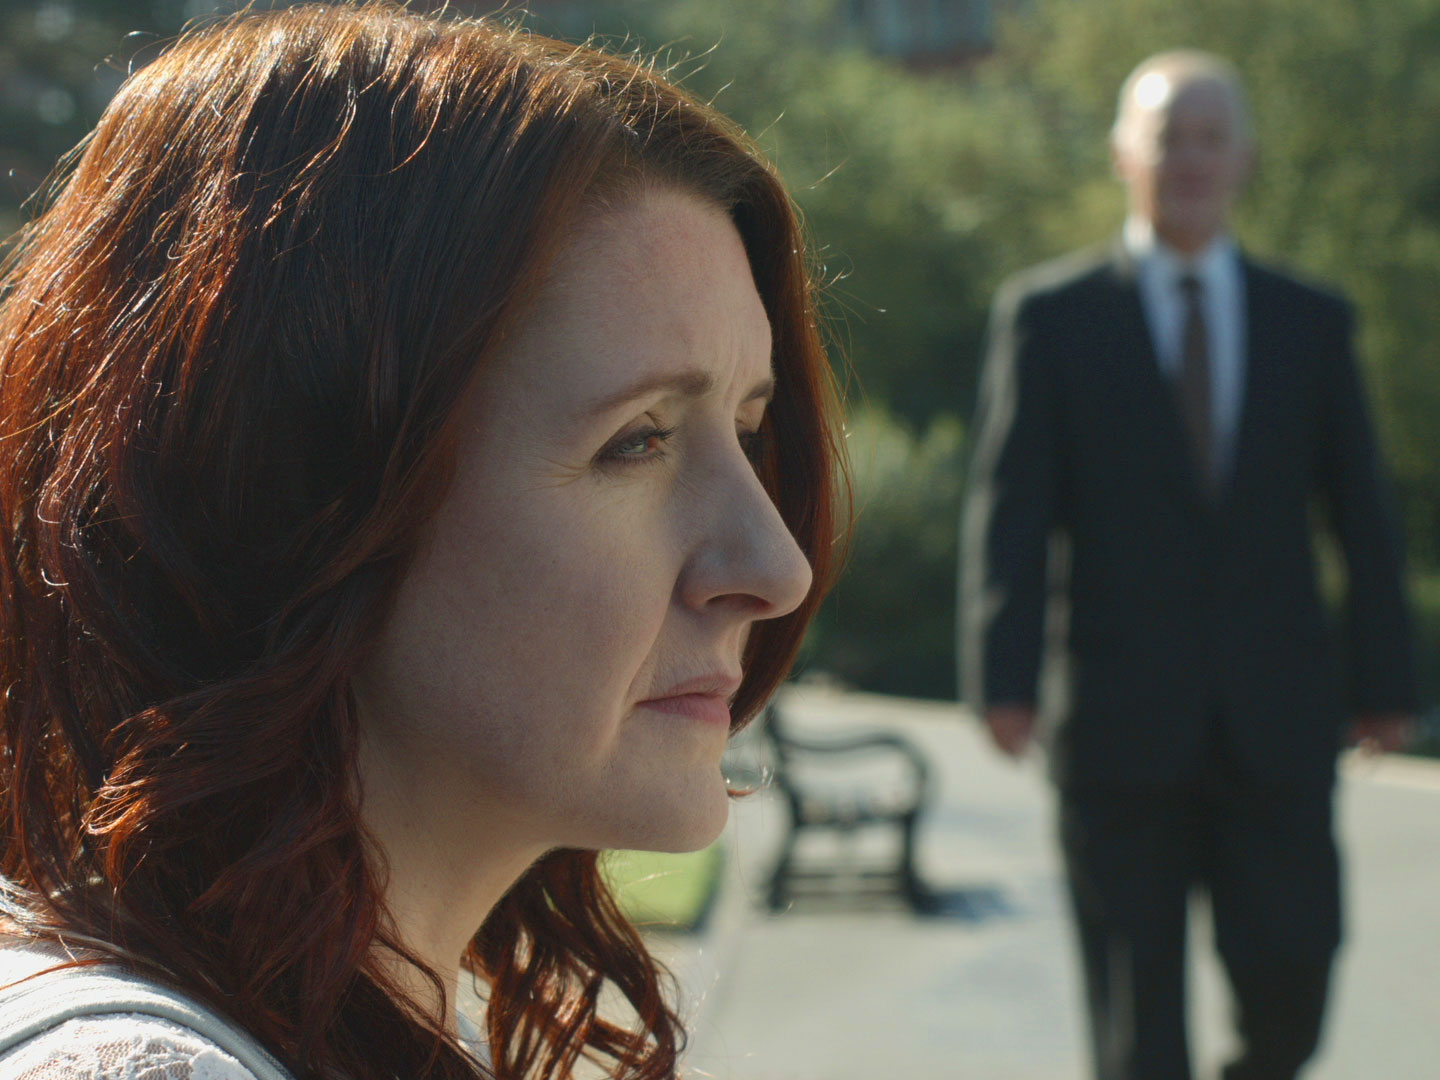
The first step on the road to succesfully photographing day exterior scenes is choosing the right location. Crossing Paths is mostly about two characters sitting on a park bench. It needed to look serene and beautiful – which means backlight.
The initial location had an east-facing bench, so I asked for the scene to be scheduled in the evening. That way the characters would be backlit by the sun as it set in the west.

The location was later changed to Belper River Gardens (where, three years earlier, I had shot scenes from Stop/Eject). The new bench faced west, which meant shooting in the morning so it would be backlit from the east.
In a rare instance of nature co-operating, the sun blazed out over the trees at about 8am and perfectly backlit the actors as we set up for the master shot. I used an 8’x4′ poly to bounce the light back and fill in their faces.
As we moved into the coverage, a very tall tree started to block some of the sunlight. This was where our hard reflector came in. This is a 3’x3′ silver board mounted in a yoke so that it can easily be panned and tilted.
Col set up this reflector in a patch of sunlight, ricocheting it onto the back of the actors’ heads, maintaining the look of the master shot.

Later one of the characters stands up and looks down on the bench. We needed to shoot his CU for this moment without him squinting into the sun, and without harsh shadows on his face. Cue the next tool in our sun control arsenal: the silk. Stretched across a 6’x6′ butterfly frame, the silk acted like a cloud and softened the sunlight passing through it.


You need to think carefully about what order to do your coverage in with natural light, particularly if the day is as sunny as this one was. I asked to leave the shots looking south last, so that the sun would have moved round to backlight this angle.
What if it had been an overcast day? Well, it wouldn’t have looked as good, but we were tooled up for that eventuality too. We had an ArriMax M18 which could have backlit the actors in all but the widest shots (for which we would have had to wait for a break in the clouds) and a 4’x4′ floppy for negative fill if the light was too flat. More on those some other time.
Related posts:
Lighting ‘3 Blind Mice’ – using positive and negative fill and artificial backlight for day exterior scenes
Sun Paths – choosing the right locations for The Gong Fu Conection
Moulding Natural Light – shooting towards the sun and modifying sunlight
Crossing Paths is a B Squared production (C) 2015. Find out more at facebook.com/Crossing-Paths-Short-Film-697385557065699/timeline/
5 Tips for Successful Pick-ups

Recently I’ve been involved in pick-ups shoots for a couple of projects I lensed last year: action-comedy feature The Gong Fu Connection and fantasy series Ren. Both pick-up shoots were strange experiences, featuring some very familiar aspects of the original shoot – locations, sets, costumes – but noticeably lacking others – certain actors, crew members and so on. The Ren pick-ups in particular were like re-living principal photography in microcosm, with stressful crowd shoots followed by more relaxed, smaller scenes and finally night shots with flaming arrows again!

I’ve blogged previously about how a director/producer can prepare for pick-ups – by keeping certain key props and costumes, for example – but today I have a few thoughts from a DP’s perspective.
1. Keep a record of lighting plans. I have a pretty good memory for my lighting set-ups, but not everyone does, so keeping notes is a good idea. Your gaffer may even do this for you. I frequently use this blog as a means of recording lighting set-ups, and indeed tried to access it during the Ren pick-ups shoot but was foiled by dodgy wifi.
2. Keep camera logs. On a properly crewed shoot this will be the 2nd AC’s job. The logs should include at least the following info for each slate: lens, aperture, ASA, white balance and shutter angle. This can be useful in principal photography too, for example if you shoot the two parts of a shot-reverse at different ends of the day or different days all together, and need to make sure you use the same lens.

3. Have the original scene handy when you shoot the pick-ups. Load the edit onto a laptop or tablet so that you can compare it on set to the new material you’re framing up.
4. Own a bit of lighting kit if you can. In the shed I have some battered old Arrilites and a few other bits and pieces of gear that has seen better days. On a proper shoot I would leave this at home and have the production hire much better kit. But for pick-ups, when there’s often no money left, this stuff can come in handy.
5. Keep gels. If you employ an unusual colour of gel during principal photography, try to keep a piece of it in case you need to revisit that lighting set-up in pick-ups. Production will have to pay for the gel once it’s been used anyway. On the Ren pick-ups shoot, after pulling all of my gels out of the plastic kitchen bin I keep them in, I was relieved to find that I still had two pieces of the Urban Sodium gel I used in the flaming arrows scene the first time around.
A Day in the Life of a DP
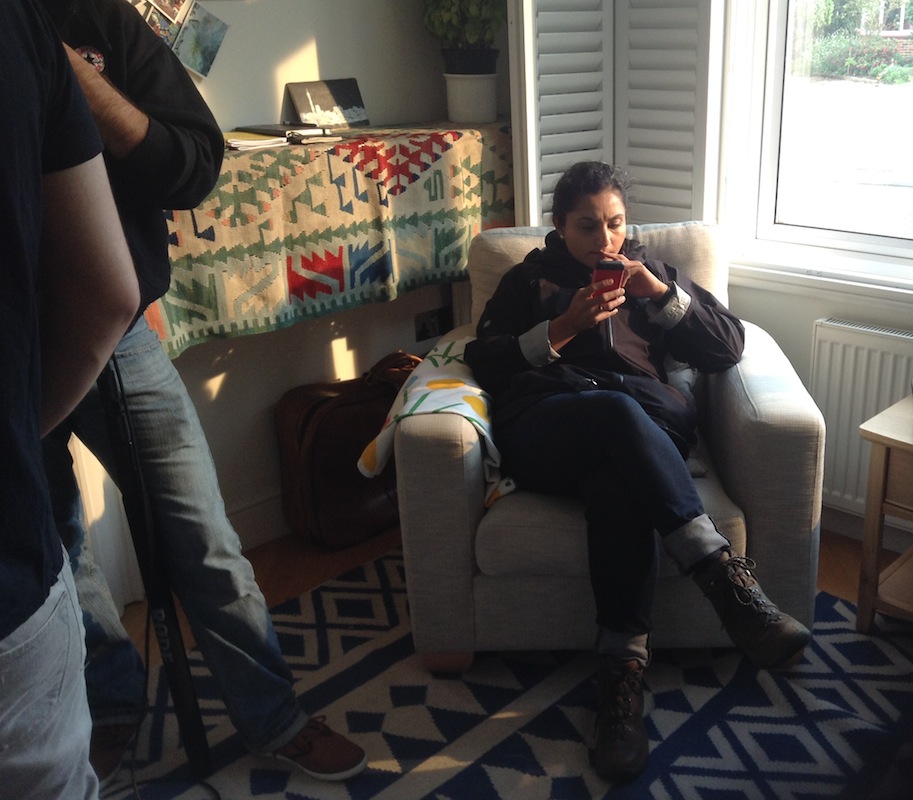
What does a cinematographer’s working day look like? Here’s a snapshot of last Wednesday, the fifth shooting day of six on a short film in south London. It’s a split day, with one daylight and one night scene scheduled, so the call time is 2pm.
 1:48pm As the cast and crew begin to arrive (I’m being accommodated at the location, conveniently) I check my notes for the upcoming scene. These were written during my second reading of the script, a few weeks previously, and include my thoughts and ideas on camerawork and lighting.
 1:54pm I sit down with James the director and Mari the 1st AD to decide what order the day’s set-ups will be shot in. Generally shots are grouped by the rough direction the camera is pointing in, to minimise lighting resets.
 2:13pm Mari assembles the crew to watch a block through of the scene, so everyone knows what they’re doing. Using Artemis, the virtual viewfinder app, James and I select the lens and camera positions for the first set-up. It’s a Steadicam shot, so my 1st AC and Steadicam operator Rupert is in on this conversation.
 2:24pm The cast go into make-up and it’s time for my department to swing into action.
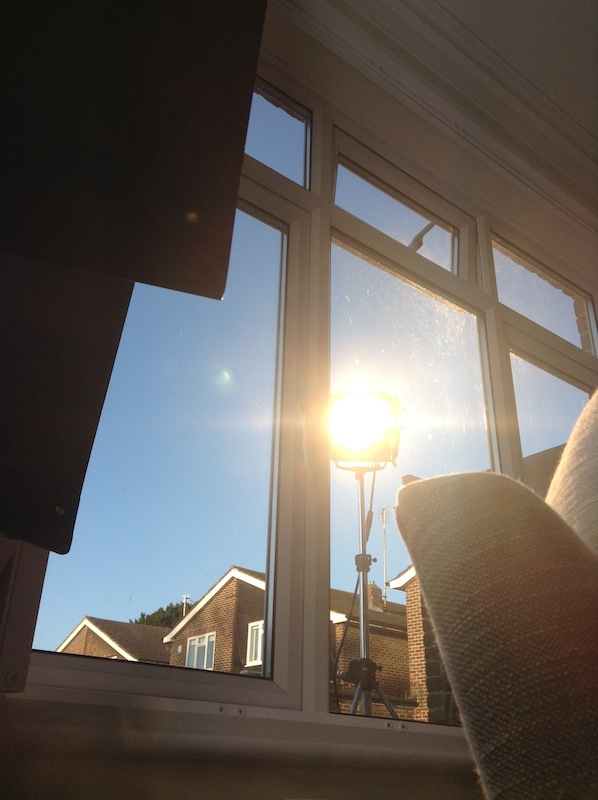
 2:26pm On the recce the previous week I had broadly decided how to light this scene. I confirm the details with Ben, my gaffer, and he and the spark begin setting up the key light outside, a 2.5K HMI, and a kinoflo for fill.
  2:31pm I go and set up an Arrilite to shine down the stairs.
 2:31pm The ACs rig the Steadicam and put on my chosen lens.
 2:32pm Meanwhile, DIT and standby 1st AC Max sets up the director’s monitor and focus monitor, which are connected wirelessly to the camera with a Teradek Bolt system.
 3:09pm Rupert rehearses the Steadicam move using a crew member as a stand-in.
 3:13pm 2nd AC Nat marks positions to aid Max in pulling focus.
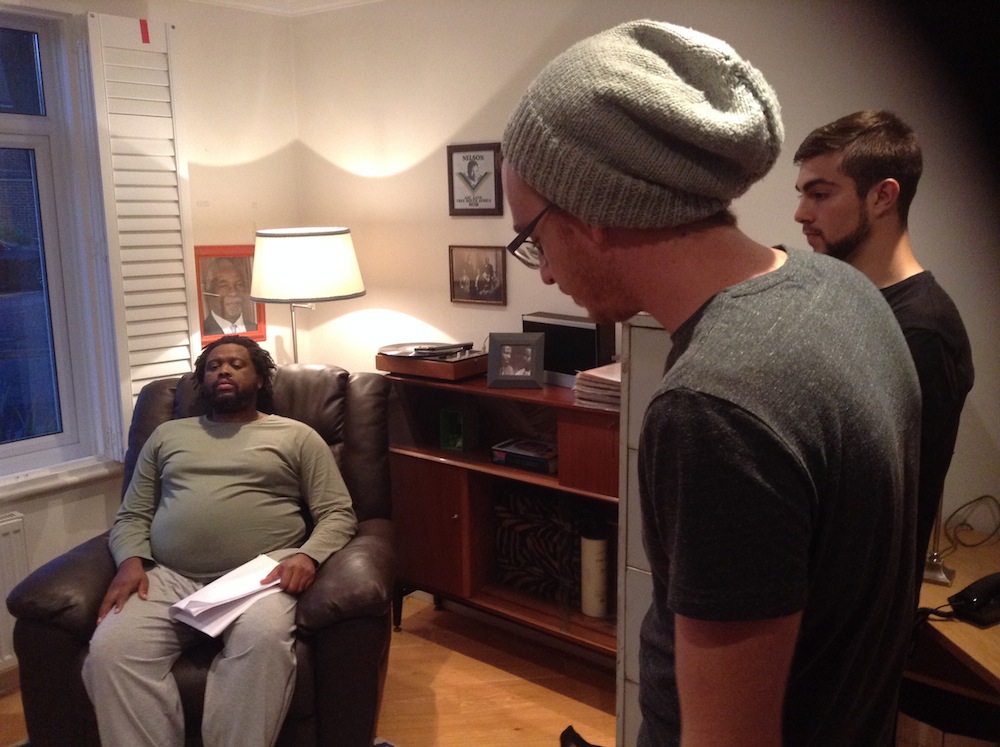
 3:47pm With camera and lighting set, we get a break waiting for a tricky ageing make-up to be finished. We are completely professional during this hiatus.
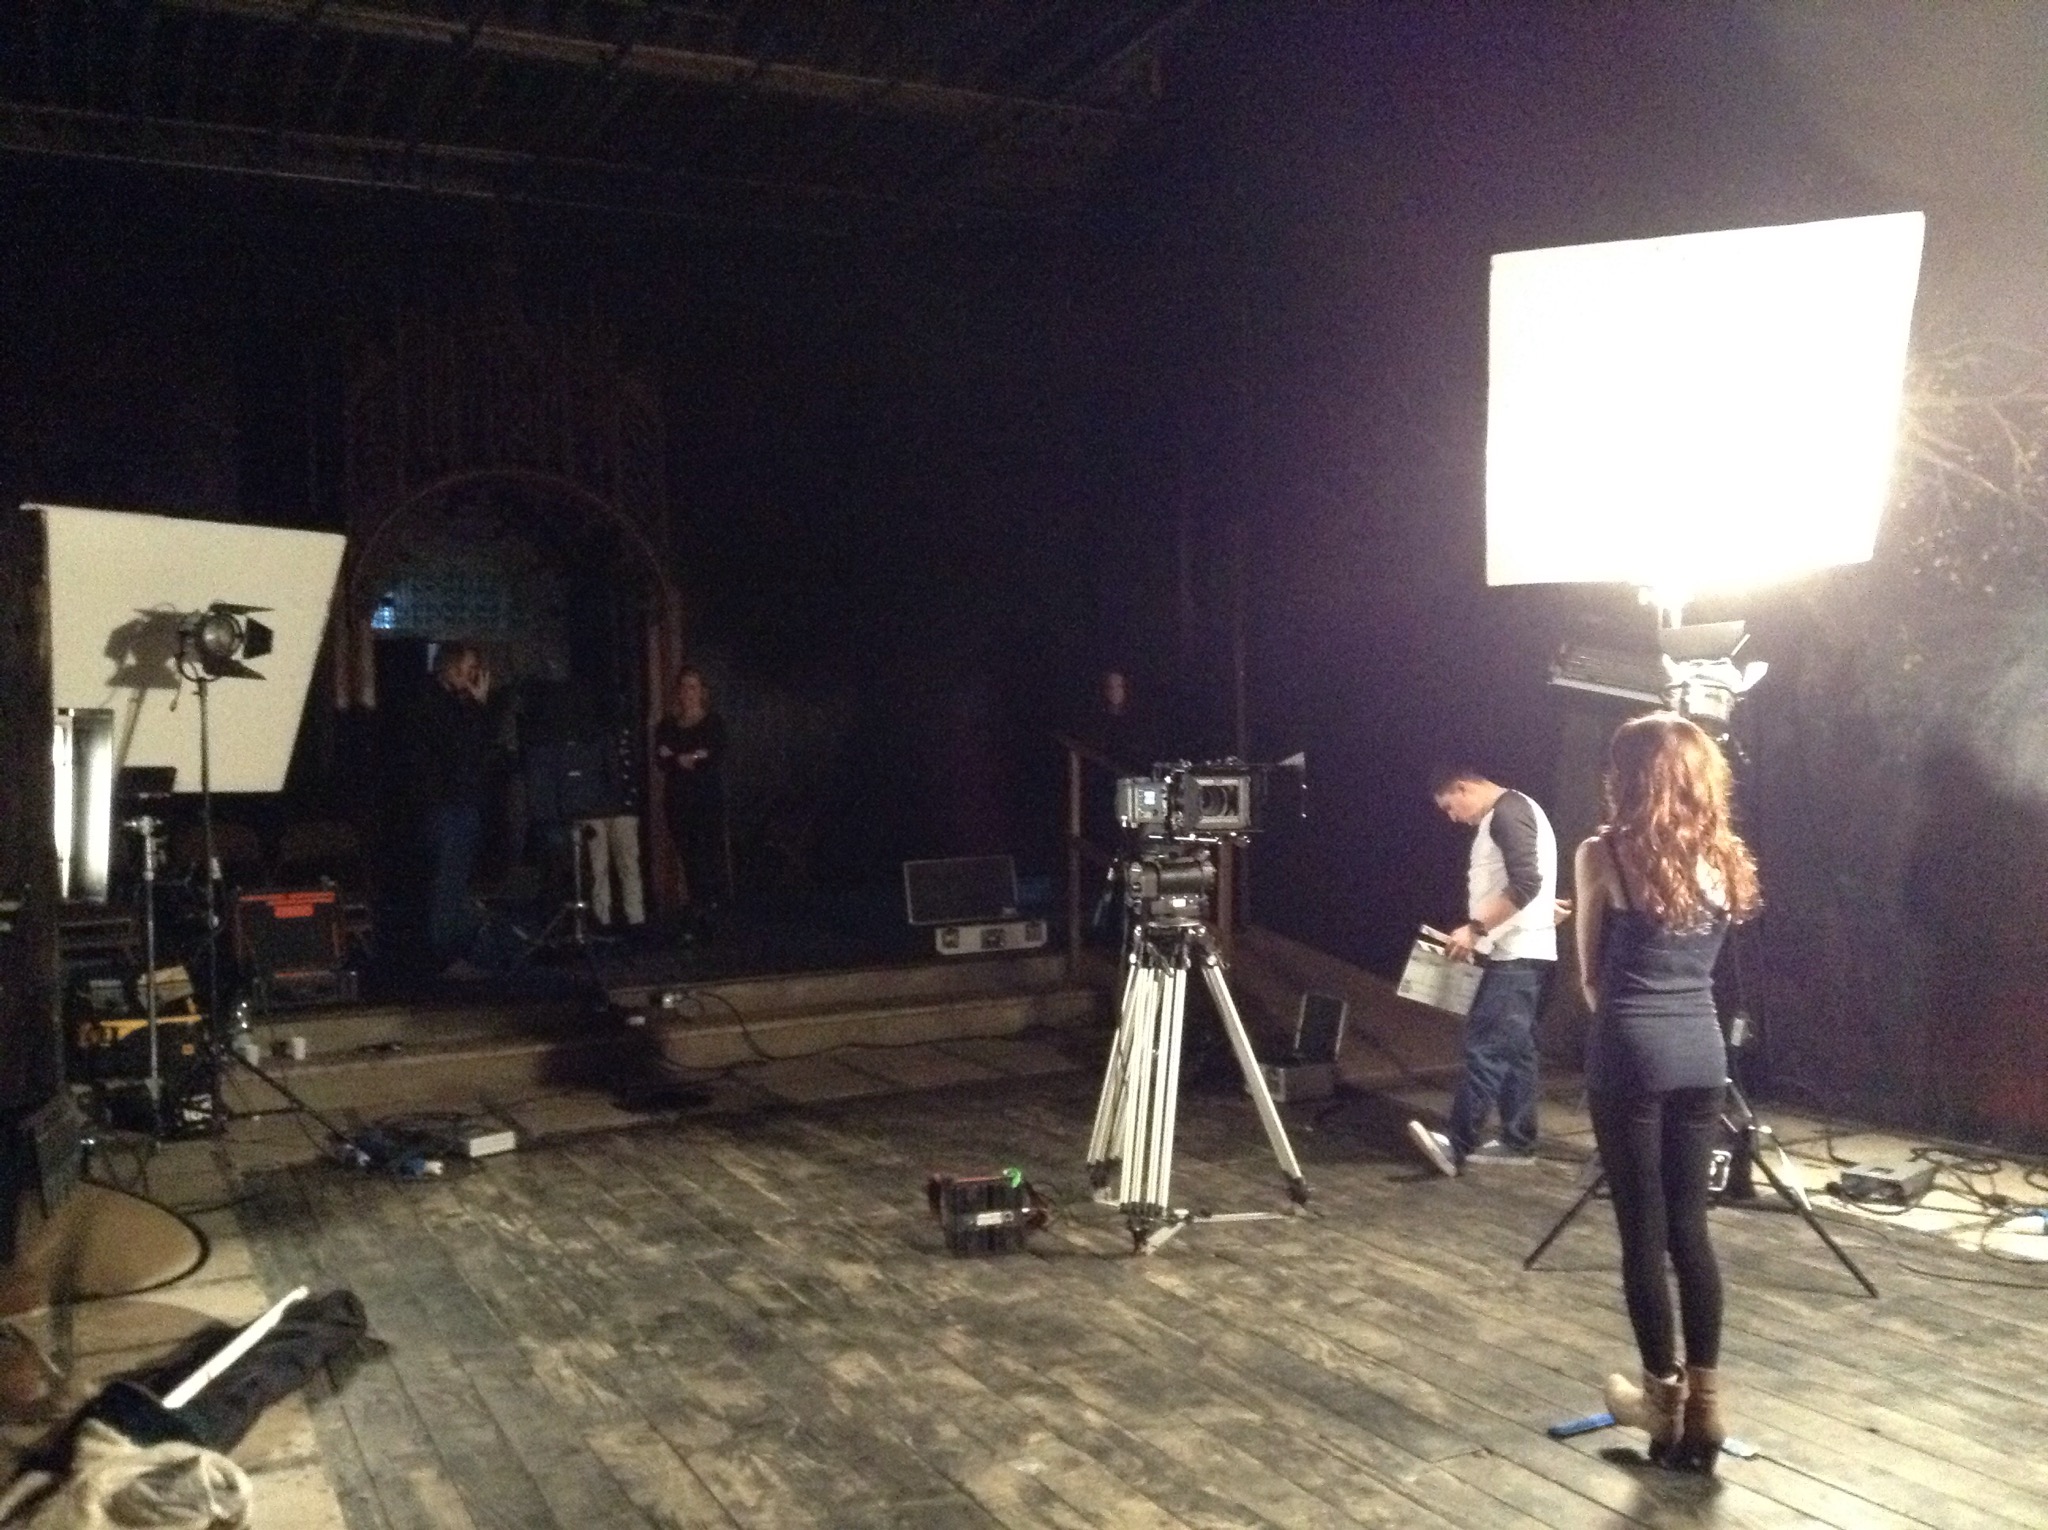
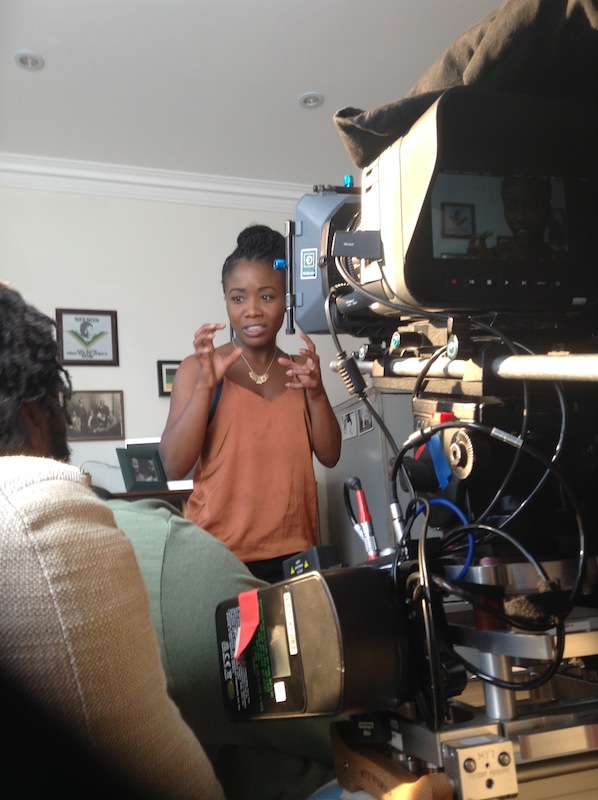
 4:31pm We frame up the actor, Sibusiso, in position to check how the make-up looks under the right lighting.
 4:38pm Dimple, the spark, sits in while Sibusiso returns to make-up for tweaks, and I tweak my lighting.
 4:41pm I decide that the morning sunlight look I’m going for is too subtle, so I have Ben replace the HMI’s half CTO gel with full CTO.
 4:44pm Rupert and James finesse the camera move. When the make-up artist, Carly, is happy, we start shooting.
 4:44pm I sit back and watch the monitor, giving a note or two to Rupert after the first take.
 4:57pm With the Steadicam shot in the can, we select a lens and position for the next shot, a wide.
 4:59pm Activity on set pauses while James catches a spider that is freaking out some of the crew.
 5:04pm I squeeze myself in behind the camera, which is set up on sticks on the stairs, ready to shoot the wide. James gives some final direction to Lasharne, the actress, before we shoot the first take.
 5:05pm Nat prepares the clapperboard for the next take.
 5:12pm The camera team set up the slider for the third set-up.
 5:32pm Carly does final checks on Lasharne’s make-up.
 5:32pm For this set-up I’m using a polyboard under the camera in an effort to raise the room’s ambient light level closer to the burnt-out view through the window.
 6:25pm Mari and James adjust an armchair to better suit the next set-up, another slider shot.
 7:12pm Cunningly disguised as a lens, my cup of tea sits in easy reach beside the tripod.
 7:12pm We do a camera rehearsal to see if the set-up can accommodate Lasharne standing up, and it can. Max will move the slider while I control pan and tilt, and Rupert pulls focus remotely.
 8:13pm As the daylight starts to fade, we complete the scene and break for ‘lunch’. The food is quickly devoured.
 8:14pm We assemble on set again to watch a block through of the nighttime scene.
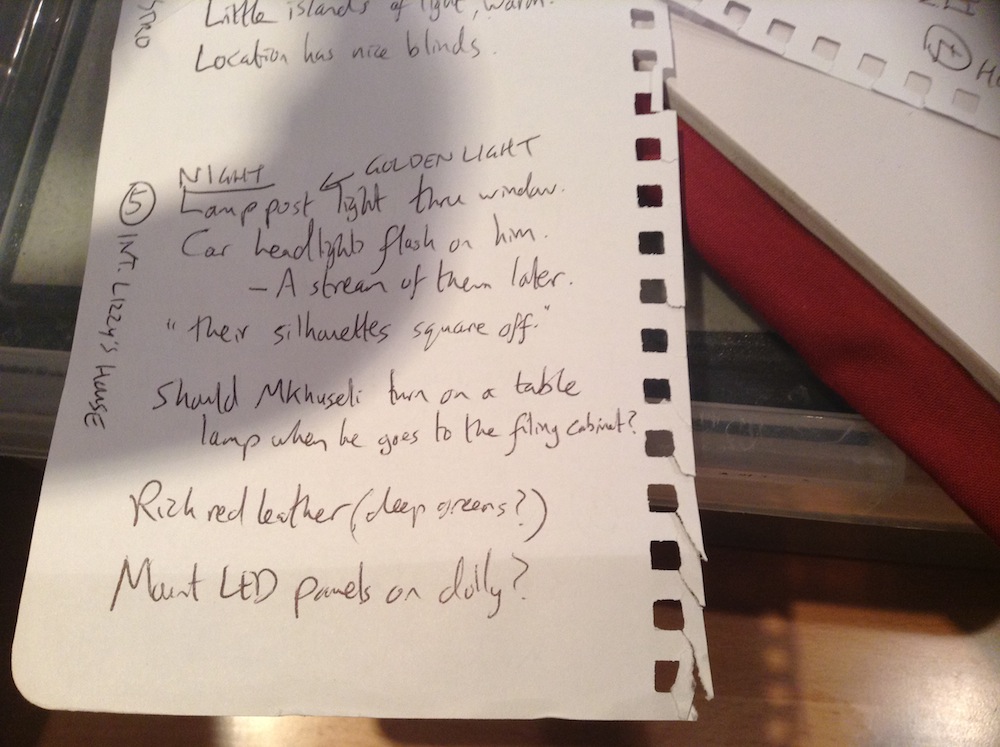
 8:21pm Ben discusses a car headlight effect which James wants for the scene.
 8:24pm We clear the set to allow Jorge, the art director, to dress it. I check my notes for the scene.
 8:29pm Once Jorge has done his thing, James and I pick a lens and position for the first set-up. By this point most of the lighting has been done, except this…
 8:50pm Ben and Dimple construct a car headlight rig using two 300W tungsten fresnels mounted on a camera a dolly.
 9:10pm The 300s prove too dim and the dolly too flimsy, so instead a Source 4 is rigged to Rupert’s Magliner.
 10:29pm The night scene is deliberately designed to echo the day scene, so I’m soon back on the stairs for a wide shot.
 12:46am We carry on with the scene, getting some very cool shots in the can, before wrapping a little after midnight. The kit is packed away in the living room, ready to load into the van tomorrow. Cider and sleep beckon.
Lighting Techniques #6: Cross-light
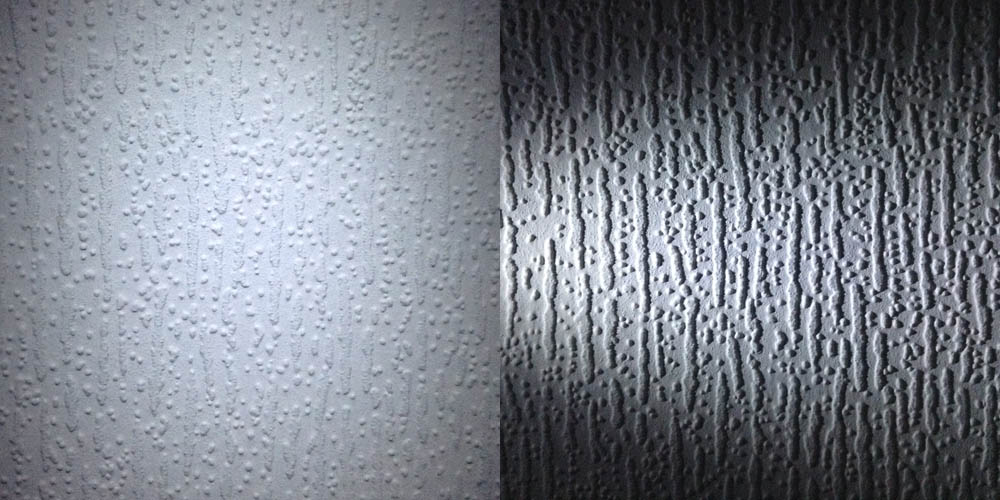
Cross-light is illumination which comes in from the side, raking across a surface. At this angle, every last bump and imperfection in a surface will cast a big shadow. Terrible for beauty lighting, but brilliant for emphasising textures.
And emphasising textures is a key part of photographing period pieces, as I learnt on The First Musketeer. In this post I’ll highlight a few examples of this technique throughout the show. (The whole series is on YouTube now so you can enjoy all six action-packed episodes at your leisure.)
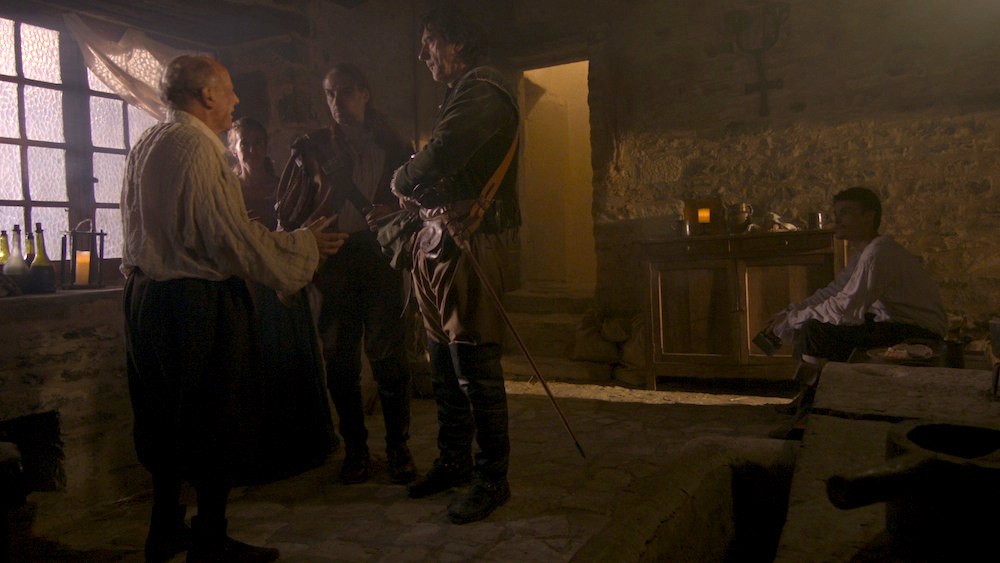
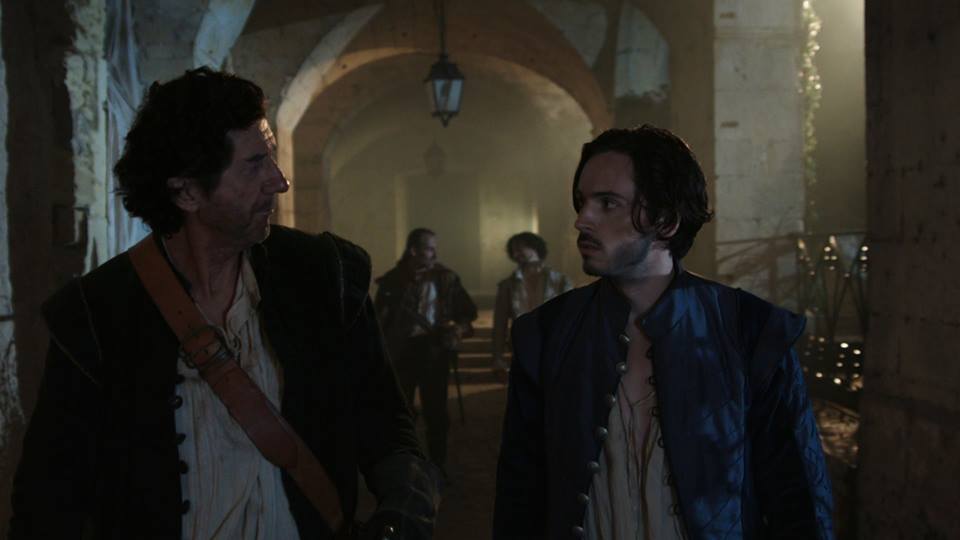
At 2:27 in episode 1, Lazare and Ghislain enter an inn. Most of the scene is lit very simply with two cross-lights. One is an open-face 800W tungsten lamp coming in through a doorway off camera right; this bring outs all the texture in the back wall. The other is a 2.5K HMI coming in through the beautiful purple-tinted window on camera left; this also brings out texture – in the men’s faces! Cross-lighting is well suited to these characters, who (I hope they won’t mind me saying) are grizzled old soldiers.
(At 8:20 in episode 1 you can see what can happen when you don’t cross-light. Part of the reason that the location here looks like a flat, painted set is that the lighting is all frontal.)
The first scene of episode 3, at 0:33, is one of my favourites for lighting. The angle on Ghislain and Porthos practicing is lit by just two Kinoflo Barflies hung from the ceiling at the back of shot. These backlight the characters while also cross-lighting (vertically rather than horizontally) the stonework nicely.

In the reverse (above) a 1.2K HMI outside the door rakes across the wall. A little smoke adds additional texture, while the Barflies (now above Athos and Lazare) provide backlight again.
There’s a shot at 5:12 in episode 5 where, again, a 1.2K HMI outside the door rakes across a wall, showing up the folds in an old tapestry.
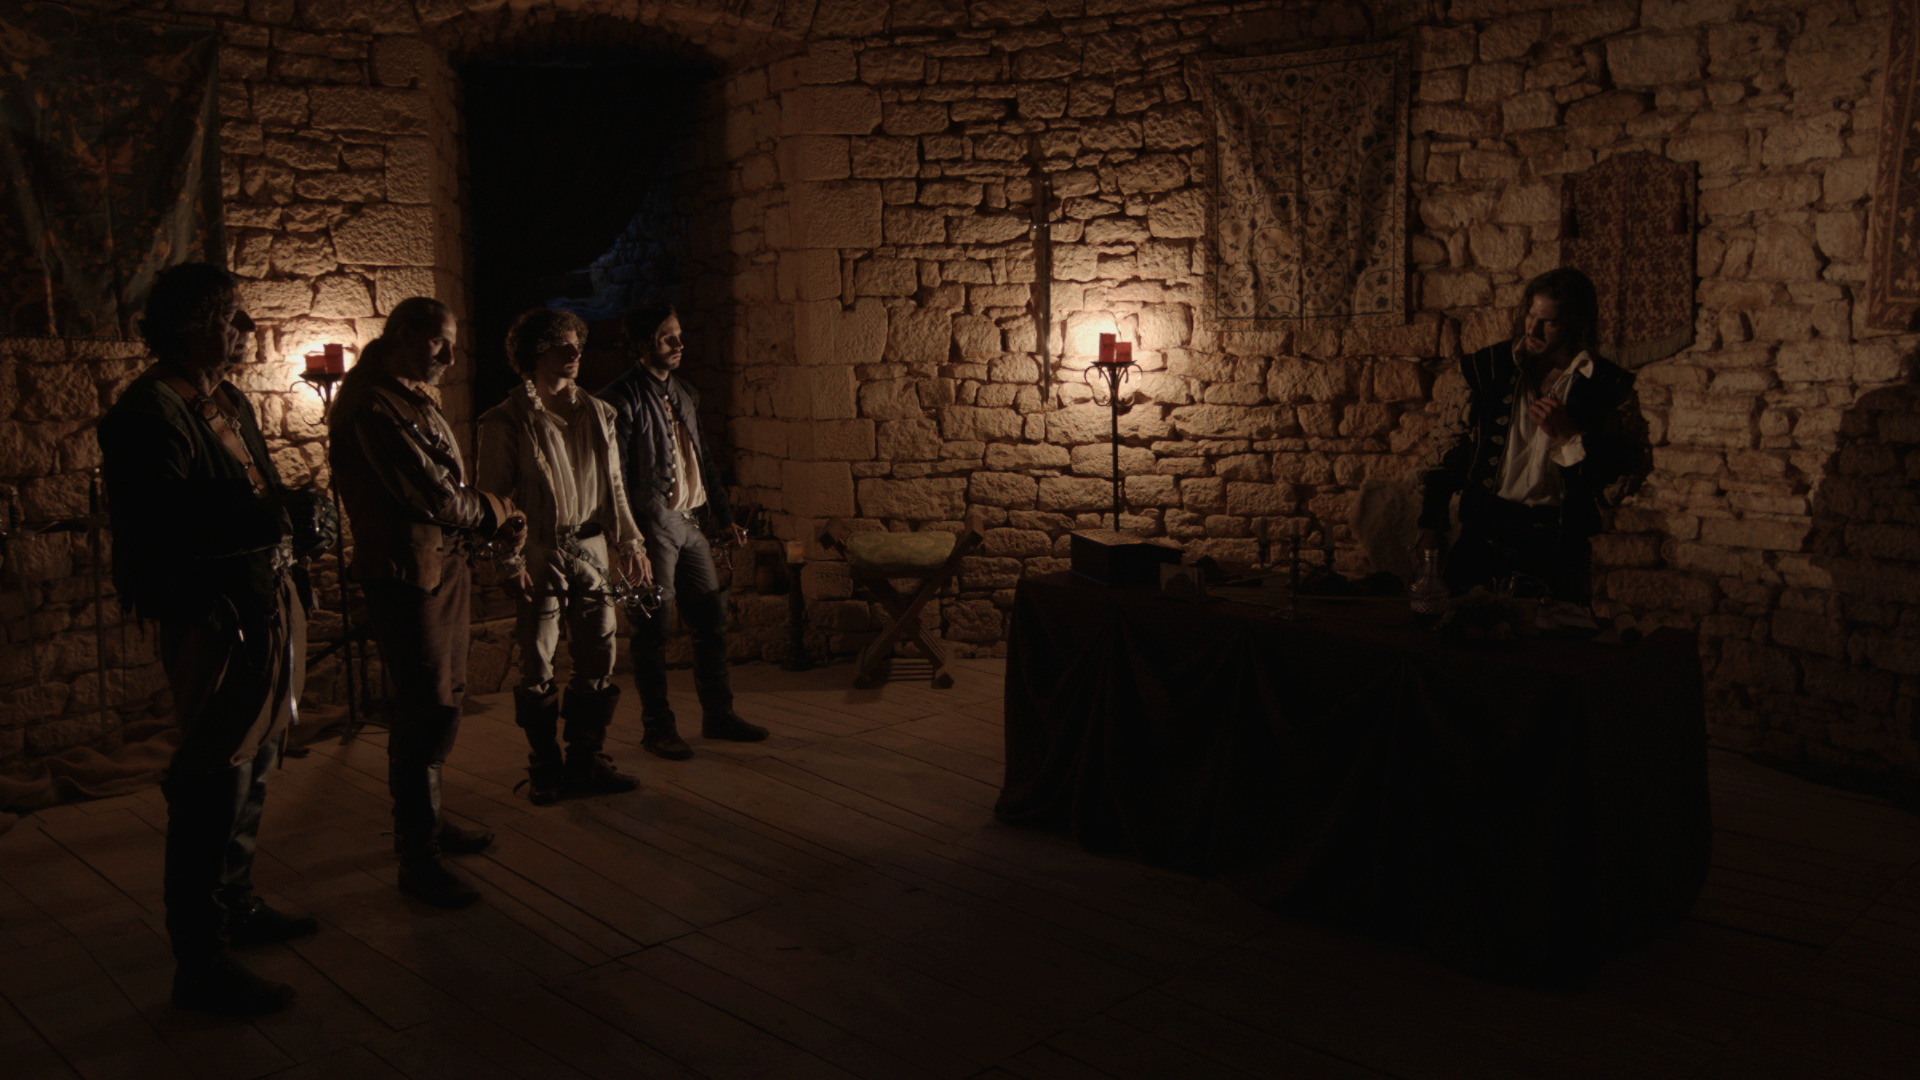
Finally, in the secret room, seen in episodes 4 and 6 (at 6:41), 100W bulbs hidden behind the candles cross-light the surrounding stonework.
The First Musketeer (C) 2014 First Musketeer Ltd. Written, directed & produced by Harriet Sams.
The First Musketeer: Lighting the Barracks
Creator Harriet Sams and some of The First Musketeer cast presented a panel at ExiliCon, a gaming and genre convention, last weekend, and their discussion of the Fumel scenes brought back some memories of lighting it which I’d like to share. The Chateau de Fumel stood in for the musketeers’ barracks, appearing most prominently at the end of episode three from 8:32 onwards. (Click here for a playlist of the whole season.)

Set at night, like most of the show, the scene involved two major steadicam shots tracking up and down a covered walkway. This walkway was essentially a corridor which, save for pillars, was open along one side.
One of the steadicam shots was a walk-and-talk dialogue scene, the other an epic single shot fight scene. Tracking shots in corridors are always a pain to light because there’s never anywhere to put backlight without it coming into frame. Ideally you use practicals in the ceiling, but despite scratching our heads over it for a while, gaffer (and Steadicam op) Richard “Squish” Roberts and I couldn’t figure out any way to rig lights to the ceiling without damaging the historical building or getting some part of the rigging in shot.
In fact, the only possible place to hide lights – except behind camera, which would have made for a flat, boring image – was in the garden outside the walkway. So all the light would be side-light, broken up the pillars and the bushes between those pillars.
Here’s the lighting scheme I arrived at:

I decided to fire in “moonlight” from our 2.5K HMI, positioned on the far side of the garden. Shooting at a white balance of 3,200K, this would appear blue on camera. (We were shooting on Squish’s Blackmagic Cinema Camera, using a Tokina 11-16mm f2.8 zoom or a Sigma 20mm f1.8 for wide shots.)

Then I had Squish set up two or three 800W open-face tungsten lamps as 3/4 backlights, spaced evenly along the run. We gelled these with CTO so that they’d appear orange on camera, suggesting firelight sources of some kind. (The First Musketeer is full of implied firelight sources, because we were never able to have naked flames in the locations!)

The final touch was to light the far end of the corridor, to give the shot some deep background. We tucked a 2′ 4-bank Kinoflo (with tungsten tubes) into a little alcove and shone it at the back wall. To provide a third layer of colour to the image, while still staying within the palette of firelight, I gelled this with Straw. When the smoke catches the light, it gives a nice bright patch in the background which is great for the depth of the image.

Later in the scene we moved out to the far side of the garden, shooting back towards the building as the Duke de Luynes thanks Athos and friends for their help.
The 2.5K stayed in the the same place, 3/4 backlighting the heroes, side-lighting the duke and 3/4 front-lighting the building. The 800s were moved inside the walkway and hidden behind pillars.
Another source was required to rake the heroes’ profiles and backlight the duke. This was another 800, gelled with half CTB for a vaguely starlight look, placed at the top of the steps. When I have stairs in a shot I always like to put a lamp at the top and fire it down so that it catches the top of every step, as it does here.
We were all set up and ready to turn over on this wide shot, when suddenly the building’s automatic floodlights came on. We hunted high and low, but couldn’t find the switch to turn them off. Instead, I placed a piece of CTO over each of the floodlights and assigned members of the crew to hold their hands over the lights, wiggling their fingers. The result is that the front of the building appears to be uplit by brazieres. It works beautifully and adds another layer of depth which we couldn’t have created otherwise, because all our film lamps were already in use.
You should always be ready to improvise like this when shoots throw you a curve ball.

Visit The First Musketeer’s YouTube channel to view the whole series for free. The show is © First Musketeer Ltd 2014.