Back to Back: The Making of the “Back to the Future” Sequels

With the runaway success of the first instalment, there was no way that Universal Pictures weren’t going to make another Back to the Future, with or without creators Bob Gale and Robert Zemeckis. So after confirming that Michael J. Fox and Christopher Lloyd were willing to reprise their roles as Marty McFly and Doc Emmett Brown, the producer and director got together to thrash out story ideas.

They knew from the fan mail which had been pouring in that they had to pick up the saga where they had left off: with Doc, Marty and his girlfriend Jennifer zooming into the future to do “something about your kids!” They soon hit upon the idea of an almanac of sport results being taken from 2015 into the past by Marty’s nemesis Biff Tannen (Thomas F. Wilson), resulting in a “Biff-horrific” alternate 1985 which Marty and Doc must undo by journeying into the past themselves.

Gale’s first draft of the sequel, written up while Zemeckis was away in England shooting Who Framed Roger Rabbit?, had Biff giving the almanac to his younger self in 1967. Marty would don bell-bottom trousers and love beads to blend into the hippy culture, meet his older siblings as very young children and his mother Lorraine as an anti-war protestor, and endanger his own existence again by preventing his parents going on the second honeymoon during which he was conceived.

Upon returning from England and reading the draft, Zemeckis had two main notes: add a fourth act set in the Wild West, and how about 1955 again instead of 1967? “We could actually do what the audience really, really wants, which is to go back and revisit the movie they just saw,” Zemeckis later explained. “That is the thing that excited me most, this idea of seeing the same movie from a different angle.”

Adding the Wild West act ballooned the script to over two-and-a-half hours with an estimated budget of $60 million, far more than Universal wanted to spend. So Gale revised the screenplay, expanding it further with a neat point in the middle where it could be split in half. As two films, each budgeted at $35 million but shot back-to-back over 11 months, the project was much more appealing to the studio. However, it was still a bold and unusual move for Universal to green-light two sequels simultaneously, something that it’s easy to forget in these days of long-form movie franchises planned out years in advance.

A sticking point was Crispin Glover. As Marty’s father George McFly he had been a difficult actor to work with on the first film, and now he was demanding more than a ten-fold pay increase to appear in the sequels. “Crispin… asked for the same money that Michael J. Fox was receiving, as well as script approval and director approval,” according to Gale. He gave Glover’s agent two weeks to come back with a more realistic offer, but it didn’t come. Glover would not be reprising his role.
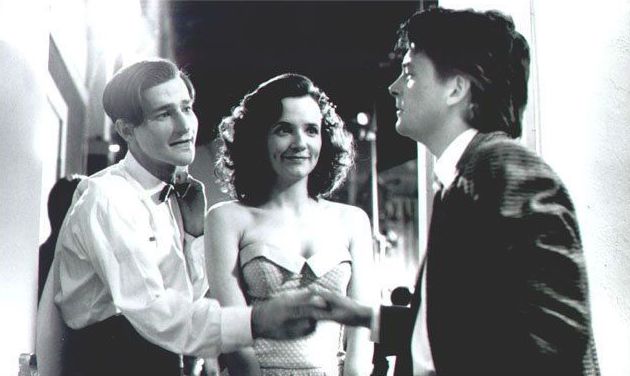
Jeffrey Weissman in prosthetic make-up as George McFly

Gale accordingly made George dead in the Biff-horrific 1985, and Zemeckis employed several tricks to accomplish his other scenes. These included the reuse of footage from Part I, and hanging cheap replacement actor Jeffrey Weissman upside-down in a futuristic back brace throughout the 2015 scenes. Life casts of Glover’s face taken for the ageing effects in Part I were even used to produce prosthetic make-up appliances for Weissman so that he would resemble Glover more closely. “Oh, Crispin ain’t going to like this,” Fox reportedly remarked, and he was right. Glover would go on to successfully sue the production for using his likeness without permission, with the case triggering new Screen Actors Guild rules about likeness rights.

Make-up was a huge part of the second film, since all the main actors had to portray their characters at at least two different ages, and some played other members of the family too. A 3am start in the make-up chair was not unusual, the prosthetics became hot and uncomfortable during the long working days, and the chemicals used in their application and removal burnt the actors’ skin. “It was a true psychological challenge to retain enough concentration to approach the character correctly and maintain the performance,” said Wilson at the time.

Filming began in February 1989 with the ’55 scenes. To save time and money, only one side of the Hill Valley set – still standing on the Universal backlot – was dressed for this period. The company then shot on stage for a few weeks before returning to the backlot in March, by which time production designer Rick Carter and his team had transformed the set into a gangland nightmare to represent Biff-horrific 1985. In May the company revisited the Hill Valley set once more to record the 2015 scenes.

When the real 2015 rolled around, many were quick to compare the film’s vision of the future to reality, but Gale always knew that he would fail if he tried to make genuine predictions. “We decided that the only way to deal with it was to make it optimistic, and have a good time with it.” Microwave meals had begun to compete with home cooking in the ‘80s, so Gale invented a leap forward with the pizza-inflating food hydrator. Kids watched too much TV, so he envisaged a future in which this was taken to a ridiculous extreme, with Marty Jr. watching six channels simultaneously – not a million miles from today’s device-filled reality.

While the opening instalment of the trilogy had been relatively light on visual effects, Part II required everything from groundbreaking split-screens to flying cars and hoverboards. This last employed a range of techniques mostly involving Fox, Wilson and three other actors, plus five operators, hanging from cranes by wires. While every effort was made to hide these wires from camera – even to the extent of designing the set with a lot of camouflaging vertical lines – the film went down in VFX history as one of the first uses of digital wire removal.

But perhaps the most complex effect in the film was a seemingly innocuous dinner scene in which Marty, Marty Jr. and Marlene McFly all share a pizza. The complication was that all three roles were played by Michael J. Fox. To photograph the scene and numerous others in which cast members portrayed old and young versions of themselves, visual effects wizards Industrial Light & Magic developed a system called VistaGlide. 

Based on the motion control rigs that had been used to shoot spaceships for Star Wars, the VistaGlide camera was mounted on a computer-controlled dolly. For the dinner scene, Fox was first filmed as old Marty by a human camera operator, with the VistaGlide recording its movements. Once Fox had switched to his Marty Jr. or Marlene costume and make-up, the rig could automatically repeat the camerawork while piping Fox’s earlier dialogue to a hidden earpiece so that he could speak to himself. Later the three elements were painstakingly and seamlessly assembled using hand-drawn masks and an analogue device called an optical printer.

The technically challenging Part II shoot came to an end on August 1st, 1989, as the team captured the last pieces of the rain-drenched scene in which Marty receives a 70-year-old letter telling him that Doc is living in the Old West. Four weeks later, the whole cast and crew were following Doc’s example as they began filming Part III.

In order to have open country visible beyond the edges of 1885’s Hill Valley, the filmmakers opted to leave the Universal backlot and build a set 350 miles north in Sonora, California. The town – which had appeared in classic westerns like High Noon and Pale Rider – was chosen for its extant railway line and its genuine 19th century steam locomotive which would form a pivotal part of the plot.

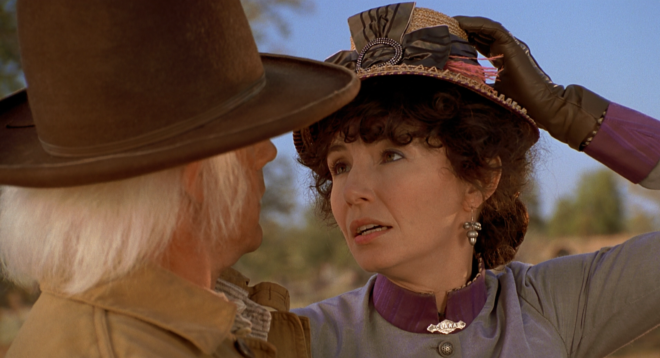
Joining the cast was Mary Steenburgen as Doc’s love interest Clara. Initially unsure about the role, she was persuaded to take it by her children who were fans of the original film. “I confess to having been infatuated with her, and I think it was mutual,” LLoyd later admitted of his co-star. Though the pair never got involved, Part III’s romantic subplot did provide the veteran of over 30 films with his first on-screen kiss.

By all accounts, an enjoyable time was had by the whole cast and crew in the fresh air and open spaces of Sonora. Fox, who had simultaneously been working on Family Ties during the first two films, finally had the time to relax between scenes, even leading fishing trips to a nearby lake. 

The set acquired the nickname “Club Hill Valley” as a volleyball court, mini golf and shooting range were constructed. “We had a great caterer,” recalled director of photography Dean Cundey, “but everybody would rush their meal so that they could get off to spend the rest of their lunch hour in their favourite activity.”

There was one person who was not relaxed, however: Robert Zemeckis. Part II was due for release on November 20th, about halfway through the shoot for Part III. While filming the action-packed climax in which the steam train propels the DeLorean to 88mph, the director was simultaneously supervising the sound mix for the previous instalment. After wrapping at the railway line, Zemeckis would fly to Burbank and eat his dinner on the dubbing stage while giving the sound team notes. He’d then sleep at the Sheraton Universal and get up at 4:30am to fly back to Sonora. 

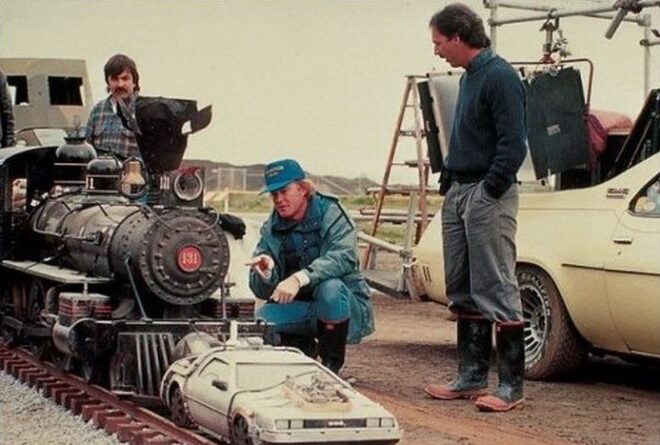
The train sequence had plenty of other challenges. Multiple DeLoreans had been employed in the making of the trilogy so far, including a lightweight fibreglass version that was lifted on cables or hoisted on a forklift for Part II’s flying scenes, and two off-road versions housing Volkswagen racing engines for Part III’s desert work. Another was now outfitted with railway wheels by physical effects designer Michael Lantieri. “One of the scariest things to do was the DeLorean doing the wheelie in front of the train,” he noted in 2015. “We had cables and had it hooked to the front of the train… A big cylinder would raise the front of the car.”

The film’s insurance company was unhappy about the risks of putting Michael J. Fox inside a car that could potentially derail and be crushed by the train, so whenever it was not possible to use a stunt double the action was played out in reverse; the locomotive would pull the DeLorean, and the footage would subsequently be run backwards.

The makers of Mission: Impossible 7 recently drove a full-scale mock-up of a steam locomotive off an unfinished bridge, but Back to the Future’s team opted to accomplish a very similar stunt in miniature. A quarter-scale locomotive was constructed along with a matching DeLorean, and propelled to its doom at 20mph with six cameras covering the action. Marty, of course, has returned safely to 1985 moments earlier.

Part III wrapped on January 12th, 1990 and was released on May 25th, just six months after Part II. Although each instalment made less money than its predecessor, the trilogy as a whole grossed almost $1 billion around the world, about ten times its total production cost. The franchise spawned a theme park ride, an animated series, comics and most recently a West End musical.

But what about Part IV? Thomas F. Wilson is a stand-up comedian as well as an actor, and on YouTube you can find a track of his called “Biff’s Questions Song” which humorously answers the most common queries he gets from fans. The penultimate chorus reveals all: “Do you all hang out together? No we don’t / How’s Crispin Glover? Never talk to him / Back to the Future IV? Not happening / Stop asking me the question!”
Back to Back: The Making of the “Back to the Future” Sequels
10 Clever Camera Tricks in “Aliens”

In 1983, up-and-coming director James Cameron was hired to script a sequel to Ridley Scott’s 1979 hit Alien. He had to pause halfway through to shoot The Terminator, but the subsequent success of that movie, along with the eventually completed Aliens screenplay, so impressed the powers that be at Fox that they greenlit the film with the relatively inexperienced 31-year-old at the helm.

Although the sequel was awarded a budget of $18.5 million – $7.5 million more than Scott’s original – that was still tight given the much more expansive and ambitious nature of Cameron’s script. Consequently, the director and his team had to come up with some clever tricks to put their vision on celluloid.


1. Mirror Image

When contact is lost with the Hadley’s Hope colony on LV-426, Ripley (Sigourney Weaver) is hired as a sort of alien-consultant to a team of crack marines. The hypersleep capsules from which the team emerge on reaching the planet were expensive to build. Production designer Peter Lamont’s solution was to make just half of them, and place a mirror at the end of the set to double them up.


2. Small Screens

Wide shots of Hadley’s Hope were accomplished with fifth-scale miniatures by Robert and Dennis Skotak of 4-Ward Productions. Although impressive, sprawling across two Pinewood stages, the models didn’t always convince. To help, the crew often downgraded the images by showing them on TV monitors, complete with analogue glitching, or by shooting through practical smoke and rain.


3. Big Screens

The filmmakers opted for rear projection to show views out of cockpit windscreens and colony windows. This worked out cheaper than blue-screen composites, and allowed for dirt and condensation on the glass, which would have been impossible to key optically. Rear projection was also employed for the crash of the dropship – the marines’ getaway vehicle – permitting camera dynamics that again were not possible with compositing technology of the time.


4. Back to Front

A highlight of Aliens is the terrifying scene in which Ripley and her young charge Newt (Carrie Henn) are trapped in a room with two facehuggers, deliberately set loose by sinister Company man Carter Burke (Paul Reiser). These nightmarish spider-hands were primarily puppets trailing cables to their operators. To portray them leaping onto a chair and then towards camera, a floppy facehugger was placed in its final position and then tugged to the floor with a fishing wire. The film was reversed to create the illusion of a jump.


5. Upside Down

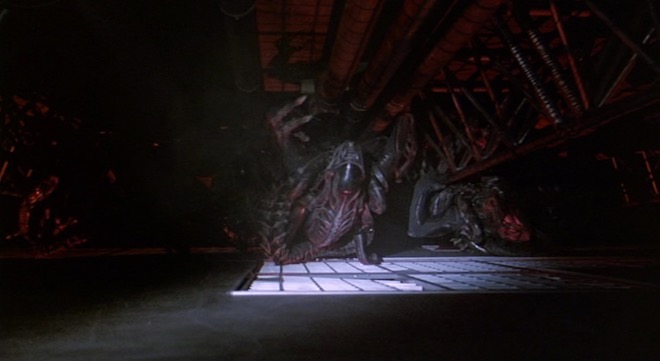
Like Scott before him, Cameron was careful to obfuscate the man-in-a-suit nature of the alien drones wherever possible. One technique he used was to film the creatures crawling on the floor, with the camera upside-down so that they appeared to be hanging from the ceiling. This is seen when Michael Biehn’s Hicks peeks through the false ceiling to find out how the motion-tracked aliens can be “inside the room”.


6. Flash Frames

All hell (represented by stark red emergency lighting) breaks loose when the aliens drop through the false ceiling. To punch up the visual impact of the movie’s futuristic weapons, strobelights were aimed at the trigger-happy marines. Taking this effect even further, editor Ray Lovejoy spliced individual frames of white leader film into the shots. As a result, the negative cutter remarked that Aliens‘ 12th reel had more cuts than any complete movie he’d ever worked on.


7. Cotton Cloud

With most of the marines slaughtered, Ripley heads to the atmospheric processing plant to rescue Newt from the alien nest. Aided by the android Bishop (Lance Henriksen) they escape just before the plant’s nuclear reactor explodes. The ensuing mushroom cloud is a miniature sculpture made of cotton wool and fibreglass, illuminated by an internal lightbulb!


8. Hole in the floor

Returning to the orbiting Sulaco, Ripley and friends are ambushed by the stowaway queen, who rips Bishop in half. A pre-split, spring-loaded dummy of Henriksen was constructed for that moment, and was followed by the simple trick of concealing the actor’s legs beneath a hole in the floor. As in the first movie, android blood was represented by milk. This gradually soured as the filming progressed, much to Henriksen’s chagrin as the script required him to be coated in the stuff and even to spit it out of his mouth.


9. Big Battle

The alien queen was constructed and operated by Stan Winston Studios as a full-scale puppet. Two puppeteers were concealed inside, while others moved the legs with rods or controlled the crane from which the body hung. The iconic power loader was similar, with a body builder concealed inside and a counter-weighted support rig. This being before the advent of digital wire removal, all the cables and rods had to be obfuscated with smoke and shifting shadows, though they can still be seen on frame grabs like this one. (The queen is one of my Ten Greatest Movie Puppets of All Time.)


10. Little Battle

For wide shots of the final fight, both the queen and the power loader were duplicated as quarter scale puppets. Controlled from beneath the miniature set via rods and cables, the puppets could perform big movements, like falling into the airlock, which would have been very difficult with the full-size props. (When the airlock door opens, the starfield beyond is a black sheet with Christmas lights on it!) The two scales cut seamlessly together and produce a thrilling finale to this classic film.

For more on the visual effects of James Cameron movies, see my rundown of the top five low-tech effects in Hollywood films (featuring Titanic) and a breakdown of the submarine chase in The Abyss.

10 Clever Camera Tricks in “Aliens”

“Above the Clouds”: Summer 2017 Pick-ups

This time last year, principal photography had just wrapped on Above the Clouds, a comedy road movie directed by Leon Chambers. We always knew that there would be additional photography, and several days of this have been scattered over the past year.

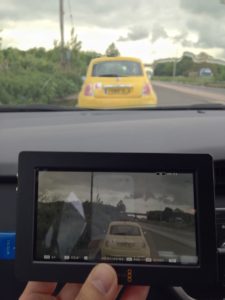
In May I spent a few odd days with Leon and the Yellow Peril, primarily capturing car-to-car tracking shots. Leon had already shot some of these without me up in Cumbria, so he had the technique down. He attached his Blackmagic Micro Cinema Camera to his roof rack with clamps and suction cups – three points of contact in all, to eliminate vibrations.

The focus was left fixed at the approximate distance the cars would be apart, and I could reach out of the passenger window and tweak it, along with the variable ND filter, if necessary. Recording was triggered from the custom remote which Leon had made for the camera last year when we used it for the autumn pick-ups. I monitored on a 5″ Blackmagic Video Assist which – thanks to a firmware update – now has a false colour display, which was very useful for keeping an eye on the exposure.

We had no means of panning or tilting the camera during takes, so we would frame the car centrally, allowing the maximum space to each side for when we went around the bends. This had the nice effect of making the Peril look small in the landscape, surrounded by it on all sides.

And speaking of the Peril looking small, it had shrunk considerably when I next saw it. But so had the landscape.

To keep the audience informed of the characters’ progress across Great Britain, Leon planned to cut to a map at a few strategic moments. At some point the original plan of shooting an Ordnance Survey map on a wall turned into something much more elaborate, a work of art featuring found objects, such as the lead character Charlie might have made herself.

Leon knew he wanted to use his jib to drift the camera over the map. But what camera? We both agreed that these shots needed to have a noticeably different look to the rest of the movie. Both Super-8 and Super-16 were discussed, but ultimately neither were viable. Then I suggested shooting on a full-frame DSLR to get a tiny depth of field. I imagined the camera having fixed focus as it skimmed over the map, with features coming in and out of focus as they passed through the field. We didn’t end up doing that, but Leon did like the DSLR idea.

Asahi Pentax-M 50mm/f1.4

So the decision was made to shoot on a Canon 5D Mk III belonging to focus puller Max Quinton. We ended up shooting everything on a single lens, my Asahi Pentax-M 50mm/f1.4. This is a vintage K-mount stills lens which is beautifully sharp, and we mounted it with a passive EF adapter. 50mm on full-frame is equivalent to 35mm on Super 35, very close to the 32mm which was our most used lens length during principal photography.

I added a half Soft FX filter as I usually do. I had briefly considered omitting it, to further differentiate the map shots from the rest of the film, but undiffused shots in a mostly diffused movie draw attention to the filtration and can be quite jarring.

I offered Leon two options for the lighting. One was to simulate the natural light you would see if shooting the British Isles from a high altitude, i.e. a hard sun source and ambient toplight. The other, which he went for, was to carry on the suggestion of Charlie making the map herself, and make it look like she had lit it herself too, with an eclectic mix of practicals around the edge. A couple of tungsten Chinese lanterns were hung overhead as well for soft fill. To help the camera’s limited dynamic range, I put tough-spun diffuser inside some of the practicals’ shades, on the camera side.

The Blackmagic 5″ Video Assist can be seen here mounted on the back of the camera.

There were a couple of “night” scenes on the shot list. For these we turned off the Chinese lanterns and turned on a desk-lamp practical with a blue-ish LED bulb to suggest moonlight. We also used a string of LED fairy lights to represent a road with streetlights.

For the smallest possible depth of field, everything was shot at f1.4. Even at ISO 320, in the daylight scenes it was necessary to add a 0.45 ND filter to bring the exposure down to f1.4.  We shot on a neutral picture profile, piping the images via HDMI to the Blackmagic Video Assist, where they were recorded in ProRes 422 HQ.

After a few years shooting on Blackmagics, FS7s and Alexas, the 5D’s colour saturation and contrast seemed very pronounced to me, but that really suited the toy-like nature of the map. And the tiny depth of field made everything look even smaller and cuter than it already was.

So, that’s a wrap on Above the Clouds finally and forever. Apparently.

See all my Above the Clouds posts here, or visit the official website..

“Above the Clouds”: Summer 2017 Pick-ups

The Visual Effects of The Abyss

It’s time for one of my occasional asides celebrating the world of traditional visual effects – miniatures, matte paintings, rear projection, stop motion and the like. For a film using all of those techniques, look no further than The Abyss (1989). Arguably James Cameron’s most underrated film, it can also be considered his most ambitious. Whereas Terminator 2 had bigger action scenes, Titanic had a bigger set and Avatar had more cutting edge technology, these concerns all pale in comparison to the sheer difficulty of shooting so much material underwater.

The hour-long documentary Under Pressure makes the risks and challenges faced by Cameron and his crew very clear.

The Abyss won an Oscar for Best Visual Effects, and is remembered chiefly for the then-cutting-edge CG water tentacle. But it also ran the gamut of traditional effects techniques.

The film follows the crew of an experimental underwater drilling platform, led by Bud (Ed Harris), as they are roped into helping a team of navy divers, led by Lt. Coffey (Michael Biehn), investigate the sinking of a submarine. Underwater-dwelling aliens and cold war tensions become involved, and soon an unhinged Coffey is setting off in a submersible to dispatch a nuke to the bottom of the Cayman Trench and blow up the extra-terrestrials.

When Bud and his wife Lindsey (Mary Elizabeth Mastrantonio) give chase in a second submersible, a visual effects tour de force ensues. The following methods were used to build the sequence:

abyss1

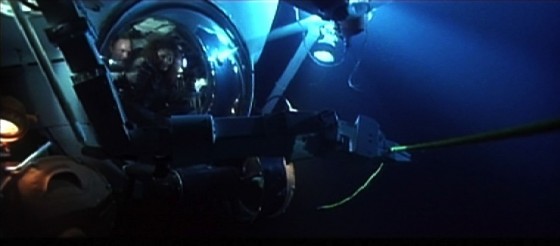
  • Medium-wide shots of the actors in real submersibles shot in an abandoned power station that had been converted by the production into the world’s largest fresh-water filtered tank, equal in capacity to about eleven Olympic swimming pools.

abyss2

  • Close-ups of the actors in a submersible mock-up on stage.

abyss3

  • Over-the-shoulder shots of the actors in the submersible mock-up, with a rear projection screen  outside the craft’s dome, showing miniature footage accomplished with….

abyss4

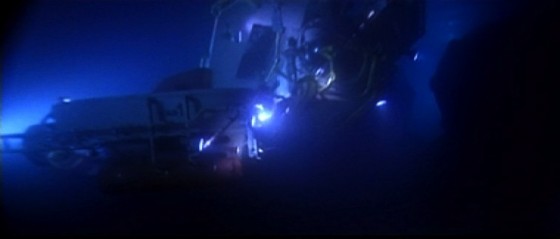
  • Quarter-scale radio-controlled submarines, shot in a smaller tank. These miniatures were remarkably powerful and, due to the lights and batteries on board, weighed around 450lb (204kg). In order to see what they were doing, the operators were underwater as well, using sealed waterproof joysticks to direct the craft. The RC miniatures were used when the craft needed to collide with each other, or with the underwater landscape, and whenever the audience was not going to get a good look at the domes on the front of the submersibles and notice the lack of actors within.

abyss5

  • One of the custom film projectors inserted into the miniature subs
    One of the custom film projectors inserted into the miniature subs

    Where a more controlled camera move was required, or the actors needed to be visible inside the subs, but it was not practical to shoot full-scale, motion control was used. This is the same technique used to shoot spaceships in, for example, the original Star Wars trilogy. A computer-controlled camera moves around a static model (or vice versa), exposing film very slowly in order to maintain a large depth of field. The move is repeated several times for each different vehicle under different lighting conditions, before compositing all of the “passes” together on the optical printer in the desired ratios, to achieve the final look. For The Abyss’s motion control work, the illusion of being underwater was created with smoke. In shots featuring the submersibles’ robot arms, stop motion was employed to animate these appendages. But perhaps the neatest trick was in making the miniature subs appear to be inhabited; the models were fitted with tiny projectors which would throw pre-filmed footage of the actors onto a circular screen behind the dome.

The sub chase demonstrates perfectly how visual effects should work: mixing a range of techniques so that the audience never has time to figure out how each one is done, and using an appropriate technique for each individual shot so that you’re making things no more and no less complicated than necessary to tell that little piece of the story.

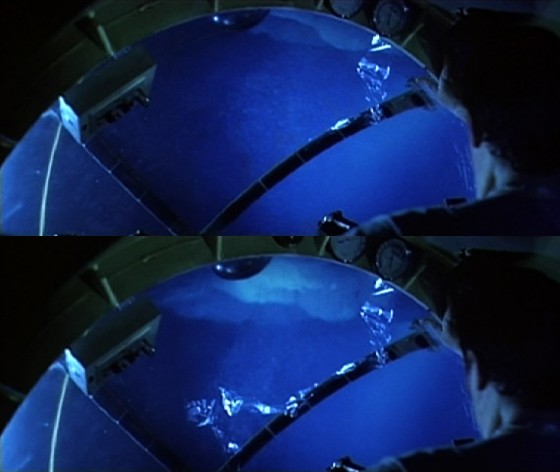
My favourite effect in the sequence is near the end, when the dome of Coffey’s sub cracks under the water pressure. This was filmed over-the-shoulder using rear projection for the view outside of the dome. But the dome was taken from a real submersible, and as such was too thick and too valuable to be genuinely cracked. So someone, and whoever he or she is is an absolute genius, came up with the idea of using an arrangement of backlit sellotape on the dome to create the appearance of a crack. A flag was then set in front of the backlight, rendering the sellotape invisible. On cue, the flag was slid aside, gradually illuminating the “crack”.

crack

Now that, my friends, is thinking outside the box.

The Visual Effects of The Abyss

Five Simple But Effective Camera Tricks

Today I’m running down the five simplest yet most effective camera tricks I’ve used in my films. These are all techniques that have been used on the biggest Hollywood productions as well.

1. Looming Hollywood Sign (The Beacon)

Building Moon's forced perspective corridor
Building Moon’s forced perspective corridor

In amongst all the terrible CGI, The Beacon did feature the odd moment of low-tech triumph. As a damaged helicopter dives towards the Hollywood hills, the famous sign is reflected in the sunglasses of the injured pilot, played by my friend and fellow filmmaker Rick Goldsmith. The letters were actually 2″ high cardboard cut-outs stuck to a black piece of card, and Rick himself is holding it at arm’s length and moving it slowly towards his face.

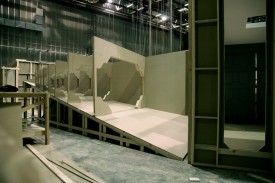
This is a type of forced perspective shot, which I covered in my previous post. Die Hard 2’s airport control tower set was surrounded by a forced perspective miniature of the runways, complete with model planes, and more recently Duncan Jones and his team used the technique to create an endless corridor of clone drawers in Moon.

Colin Smith readies the watering can for Jonny Lewis's close-up, while Chris Mayall steadies the ladder.
Colin Smith readies the watering can for Jonny Lewis’s close-up, while Chris Mayall steadies the ladder. Photo: Simon Ball

2. Rain Fight Close-ups (Soul Searcher)

While most of this fight sequence was shot under the downpour created by an industrial hosepipe fired into the air, this wasn’t available when extra close-ups were required later. Instead a watering can was used.

It’s not uncommon for close-ups in a scene to be achieved much more simply than their corresponding wide shots. NASA allowed Bruce Willis and Ben Affleck to be filmed in their training tank for Michael Bay’s Armageddon, but CUs of the other actors had to be shot dry-for-wet with a fishtank in front of the lens and someone blowing bubbles through it.

3. The Wooden Swordsman Catches His Sword (The Dark Side of the Earth)

Getting the puppet to genuinely catch his sword was likely to require a prohibitive number of takes. (We were shooting on 35mm short ends.) So instead we ran the action in reverse, ending with with the sword being pulled up out of the puppet’s hand. When the film is run backwards, he appears to be catching it.

Backwards shots have been used throughout the history of cinema for all kinds of reasons. Examples can be seen in the Face Hugger sequence in Aliens (the creature’s leaps are actually falls in reverse) and in John Carpenter’s The Thing (tentacles grabbing their victims). At the climax of Back to the Future Part III, the insurers refused to allow Michael J. Fox to sit in the DeLorean while it was pushed by the train, in case it crushed him, so instead the train pulled the car backwards and the film was reversed.

4. Distortion of Tape and Time (Stop/Eject)

A classic Who extermination

At a crucial point in this fantasy-drama about a tape recorder that can stop and rewind time, I needed to show the tape getting worn out and images of the past distorting. I combined two techniques to create a distorted image of Dan (Oliver Park) without any manipulation in post. One was lens whacking, whereby the lens is detached from the camera and held in front of it, moving it around slightly to distort the focal plane. (See this episode of Indy Mogul and this article by Philip Bloom for more on lens whacking.) The other was to shake the camera (and lens) rapidly, to deliberately enhance the rolling shutter “jello” effect which DSLRs suffer from.

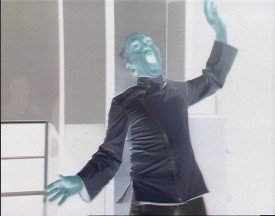
Flaws in camera technology can often lead to interesting effects if used appropriately. Let’s not forget that lens flares, which many filmmakers love the look of, are actually side-effects of the optics which lens manufacturers have worked for decades to try to reduce or eliminate. And in the early days of Doctor Who, the crew realised that greatly over-exposing their Marconi TV cameras caused the image to become a negative, and they put this effect to use on the victims of Dalek extermination.

Shooting The One That Got Away. A row of 100W bulbs can be seen on the right.

5. Sunset (The One That Got Away)

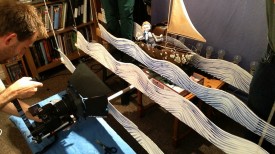
A painted sunset would have been in keeping with the style of this puppet fairy tale, but it was quicker and more effective to peek an ordinary 100W tungsten bulb above the background waves. Click here for a complete breakdown of the lighting in The One That Got Away.

Using an artificial light to represent the sun is extremely common in cinematography, but showing that lamp in shot is less common. For another example, see the opening Arctic sequence of Captain America: The First Avenger, in which a large HMI stands in for a low sun at the back of the mist-shrouded set.

Click here for my rundown of the top five low-tech effects in Hollywood blockbusters.

Five Simple But Effective Camera Tricks

Forced Perspective

The Ark
The Ark

The other day I watched a 1966 Doctor Who story called The Ark. It’s easy to look at a TV show that old and laugh at the stilted acting, rubber monsters and crude effects. But given the archaic and draconian conditions the series was made under back then, I can only admire the creativity displayed by the director and his team in visualising a script which was scarcely less demanding than a contemporary Who story.

Studio floor plan from the very first episode of Doctor Who, showing camera positions (coloured circles)

In the sixties, each Doctor Who episode was recorded virtually as live on a Friday evening, following a week of rehearsals. BBC rules strictly limited the number of times the crew could stop taping during the 90 minute recording session, which was to produce a 22 minute episode. Five cameras would glide around the tightly-packed sets in a carefully choroegraphed dance, with the vision mixer cutting between them in real-time as per the director’s shooting script. (Interesting side note: some of Terminator 2 was shot in a very similar fashion to maximise the number of angles captured in a day.) It’s no wonder that fluffed lines and camera wobbles occasionally marred the show, as there was rarely time for re-takes.

But what’s really hard for anyone with a basic knowledge of visual effects to get their head around today is that, until the Jon Pertwee era began in 1970, there was no chromakey (a.ka. blue- or green-screening) in Doctor Who. Just think about that for a moment: you have to make a science fiction programme without any electronic means of merging two images together, simple dissolves excepted.

Setting up a foreground miniature for a later Who story, Inferno (1970)

So the pioneers behind those early years of Doctor Who had to be particularly creative when when they wanted to combine miniatures with live action. One of the ways they did this in The Ark was through forced perspective.

Forced perspective is an optical illusion, a trick of scale. We’ve all seen holiday photos where a friend or relative appears to be holding up the Eiffel Tower or the Leaning Tower of Pisa. The exact same technique can be used to put miniature spaceships into a full-scale live action scene.

In these frames from The Ark, two miniature landing craft are lowered into the background before the camera pans to a full-size craft in the foreground:

The camera pans from a miniature descending in the background to a full-scale craft in the foreground.

And in these later frames, another miniature craft is placed much closer to the camera than the Monoid (a.k.a. a man in a rubber suit). The miniature craft takes off, pulled up on a wire I presume – a feat which time, money and safety would have rendered impossible with the full-size prop:

The camera pulls focus from a foreground miniature taking off to an actor in the background. A greater depth of field would have made the shot more convincing, but  the principle is sound.
The camera pulls focus from a foreground miniature taking off to an actor in the background. A greater depth of field would have made the shot more convincing, but the principle is sound.

Of course, Doctor Who was not by any means the first show to use forced perspective, nor was it the last. This nineties documentary provides a fascinating look at the forced perspective work in the Christopher Guest remake of Attack of the 50 Ft. Woman, and other films…

And Peter Jackson famously re-invented forced perspective cinematography for the Lord of the Rings trilogy, when his VFX team figured out a way to maintain the illusion during camera moves, by sliding one of the actors around on a motion control platform…

So remember to consider all your options, even the oldest tricks in the book, when you’re planning the VFX for your next movie.

Forced Perspective

The Miniature Effects of “The Day of the Doctor”

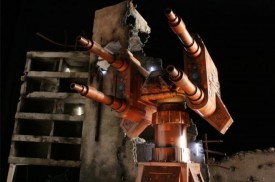
The cannon miniature

The fiftieth anniversary special of Doctor Who has been lauded for its cinema quality FX; indeed, I saw it in a cinema and at no point did I feel like I was just watching a TV show on a big screen. The Time War sequence was particularly impressive, and in amongst the CGI and special effects you may be surprised to learn there were some miniature effects which helped to up the ante. These were created by Mike Tucker and his team at The Model Unit, who a few years back did such a brilliant job of building the Wooden Swordsman for my Dark Side of the Earth pilot. This press release from the Model Unit reveals their contribution and how it was done.

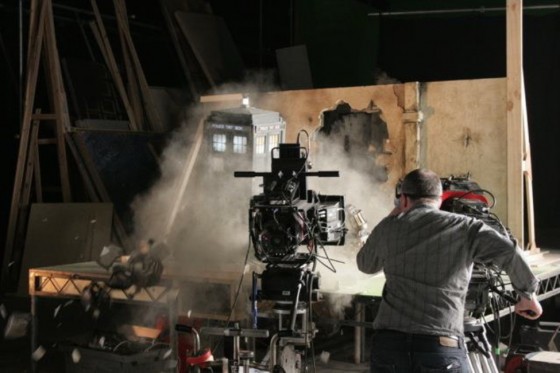
The Model Unit’s involvement in Doctor Who: Day of the Doctor was for the Time War section of this historic episode, providing several cutaways of the Time Lord staser cannon (including its destruction) and a longer sequence showing John Hurt’s TARDIS crashing through a wall and destroying several Daleks that are unlucky enough to be in its path.

Model Unit supervisor Mike Tucker working on the Wooden Swordsman for The Dark Side of the Earth back in 2008

Following an initial discussion with producer Marcus Wilson to establish the sort of shots that might be needed Miniature Effects Supervisor Mike Tucker met up with stereo supervisors Adam Sculthorp and David Wigram to work through the practicalities of shooting high speed miniature effects sequences in 3D – a first for a British television drama production.

A proof of concept test utilising an existing miniature established that the models shouldn’t be smaller than 1/6th scale, and ideally at 1⁄4 scale. Further research established that the miniature effects sequences for the Martin Scorsase movie ‘Hugo’ had been done at 1⁄4 scale and with the same Alexa high speed camera rigs that we were planning to use, and so we were able to proceed with a certain amount of confidence that what we were about to do was realistically achievable.

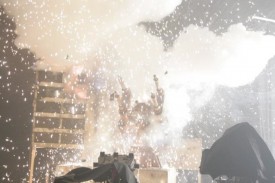
Blowing up the cannon

With a five-week lead-time and a two-day shoot in Cardiff in April of this year model construction was split between several Model Unit regulars. Alan ‘Rocky’ Marshal was given the task of constructing the staser cannon, Nick Kool took on the TARDIS model and associated rigs and Colin Mapson worked with new recruit Paul Jarvis on the ruined Arcadian buildings and breakaway wall sections.

In a nod to past effects sequences, the Dalek miniatures were achieved in the time honoured way by utilising off-the-shelf toys (in this case the 18 inch voice- interactive toys that had been produced by Character Options a few years back), albeit with a few careful modifications in order to match them more closely to the actual props. Further detail was added to the interiors, including a scaled model of the mutant creature.

Model Unit DoP Peter Tyler worked closely with main unit DoP Neville Kidd to establishing a lighting design for the miniatures as, due to camera rig availability, we were shooting our miniatures in advance of the live action unit – a complete reversal of how things are usually done.

Close collaboration was also needed with the production design team with Mike and assistant art director Richard Hardy constantly swapping notes about the final design details of both Time Lord machinery and architecture to ensure a seamless blend with the location.

Day one of the shoot concentrated on the shooting of the cannon allowing the more complex rig of the TARDIS to be set up and tested, whilst the second day took in several takes of the TARDIS shots. The 1⁄4 scale TARDIS miniature was fixed to a steel rig mounted on a trolley system that allowed us to fire it at the wall using bungee cord.

Filming the Tardis breaking through the wall

Two takes of each set up were shot on two high speed Alexa stereo rigs shooting at 120fps.

Mike and his crew watched the completed episode at the Doctor Who Celebration at Excel with an audience of 2000 fans.

Visit The Model Unit’s website at www.themodelunit.co.uk

The Miniature Effects of “The Day of the Doctor”

Soul Searcher: Low Tech FX

In this 2005 featurette I break down many of the visual effects in my feature film Soul Searcher, revealing how they were created using old school techniques, like pouring milk into a fishtank for apocalyptic clouds. Watch the shots being built up layer by layer, starting with mundane elements like the water from a kitchen tap or drinking straws stuck to a piece of cardboard.

Soul Searcher: Low Tech FX

HENRi

I have to share this amazing short film I discovered recently thanks to nofilmschool.com. HENRi is a 20 minute crowd-funded sci-fi movie about a computer that builds a robot body for itself and tries to become human. It stars Margot Kidder (best known as Lois Lane in the original Superman movies) and Keir Dullea, who flips his famous role as David Bowman in 2001: A Space Odyssey to play the titular computer. But the human characters are only a small part of this film. Shot on beautiful quarter-scale sets, the real star is the HENRi robot, realised through a combination of rod puppetry and first rate CGI. Trust me, this is one of the most unique and awesome shorts you will ever see and well worth every penny of the £1.19 rental fee.

HENRi

Planning VFX: Traditional Techniques

Over a month ago I wrote a post about the advantages of computer generated imagery over more traditional ways of creating visual effects. Apologies for the delay, but here at last is the flipside of that coin: the advantages of old-school technqiues.

Here’s an alternate ending from Blade (1998)….

It was ditched after test audiences responded poorly to it. They had invested in the film’s villain throughout the movie and they felt cheated to see him turn into a CGI blobby thing for the final battle. The filmmakers cut the scene and replaced it with a sword duel between Blade and the baddie in human form.

This highlights CGI’s chief difficulty – it’s unreality. There is something disappointing about being served up an image that has been created with ones and zeros. It feels like a cheat. And that can take an audience out of the story.

In contrast to CGI, model shots tend to look more realistic but move less realistically, due to the unavoidable physics involved. But there can often be a charm to this motion that allows us to forgive it. Indeed, I think the best reason to use traditional effects today is when you want things to look unreal in a very appealing way. Take for example Lemony Snicket’s A Series of Unfortunate Events, which used forced perspective and painted backdrops to create a beautiful fantasy world. Or The Life Aquatic’s stop motion marine creatures…. except that the animation was so good they looked real.

Some other advantages of traditional techniques over CGI:

  • Some techniques, like puppetry, can be achieved in camera, giving the actors something real to react to.
  • All the randomness of nature is automatically built in.
  • Effects like fire and water are theoretically easier, though in practice can be difficult to control and to scale correctly.
  • Today’s audiences are used to CGI and can generally recognise it, but model shots are perhaps more likely to fool them.

In writing this post I’ve realised how CGI has advanced even in the few years since I stopped actively developing The Dark Side of the Earth (an ambitious fantasy feature intended to include stop motion, puppetry, miniatures and matte paintings).

Almost no-one today is still shooting miniatures without enhancing them digitally. Savvy filmmakers like Peter Jackson, Duncan Jones and Sam Mendes combine models and CGI to get the best of both worlds. It seems traditional techniques alone can really only be used now as a deliberate stylistic choice. That saddens me. I’d be delighted if anyone can prove me wrong.

If anyone out there is contemplating using miniatures in their indie film, here are some tips…

Planning VFX: Traditional Techniques