“Harvey Greenfield is Running Late”: October 2022 Pick-ups

Day 25

14 months ago production began on the comedy feature Harvey Greenfield is Running Late. Most of the editing is done, and yesterday a reduced crew assembled to shoot one final scene and few odd shots to plug holes.

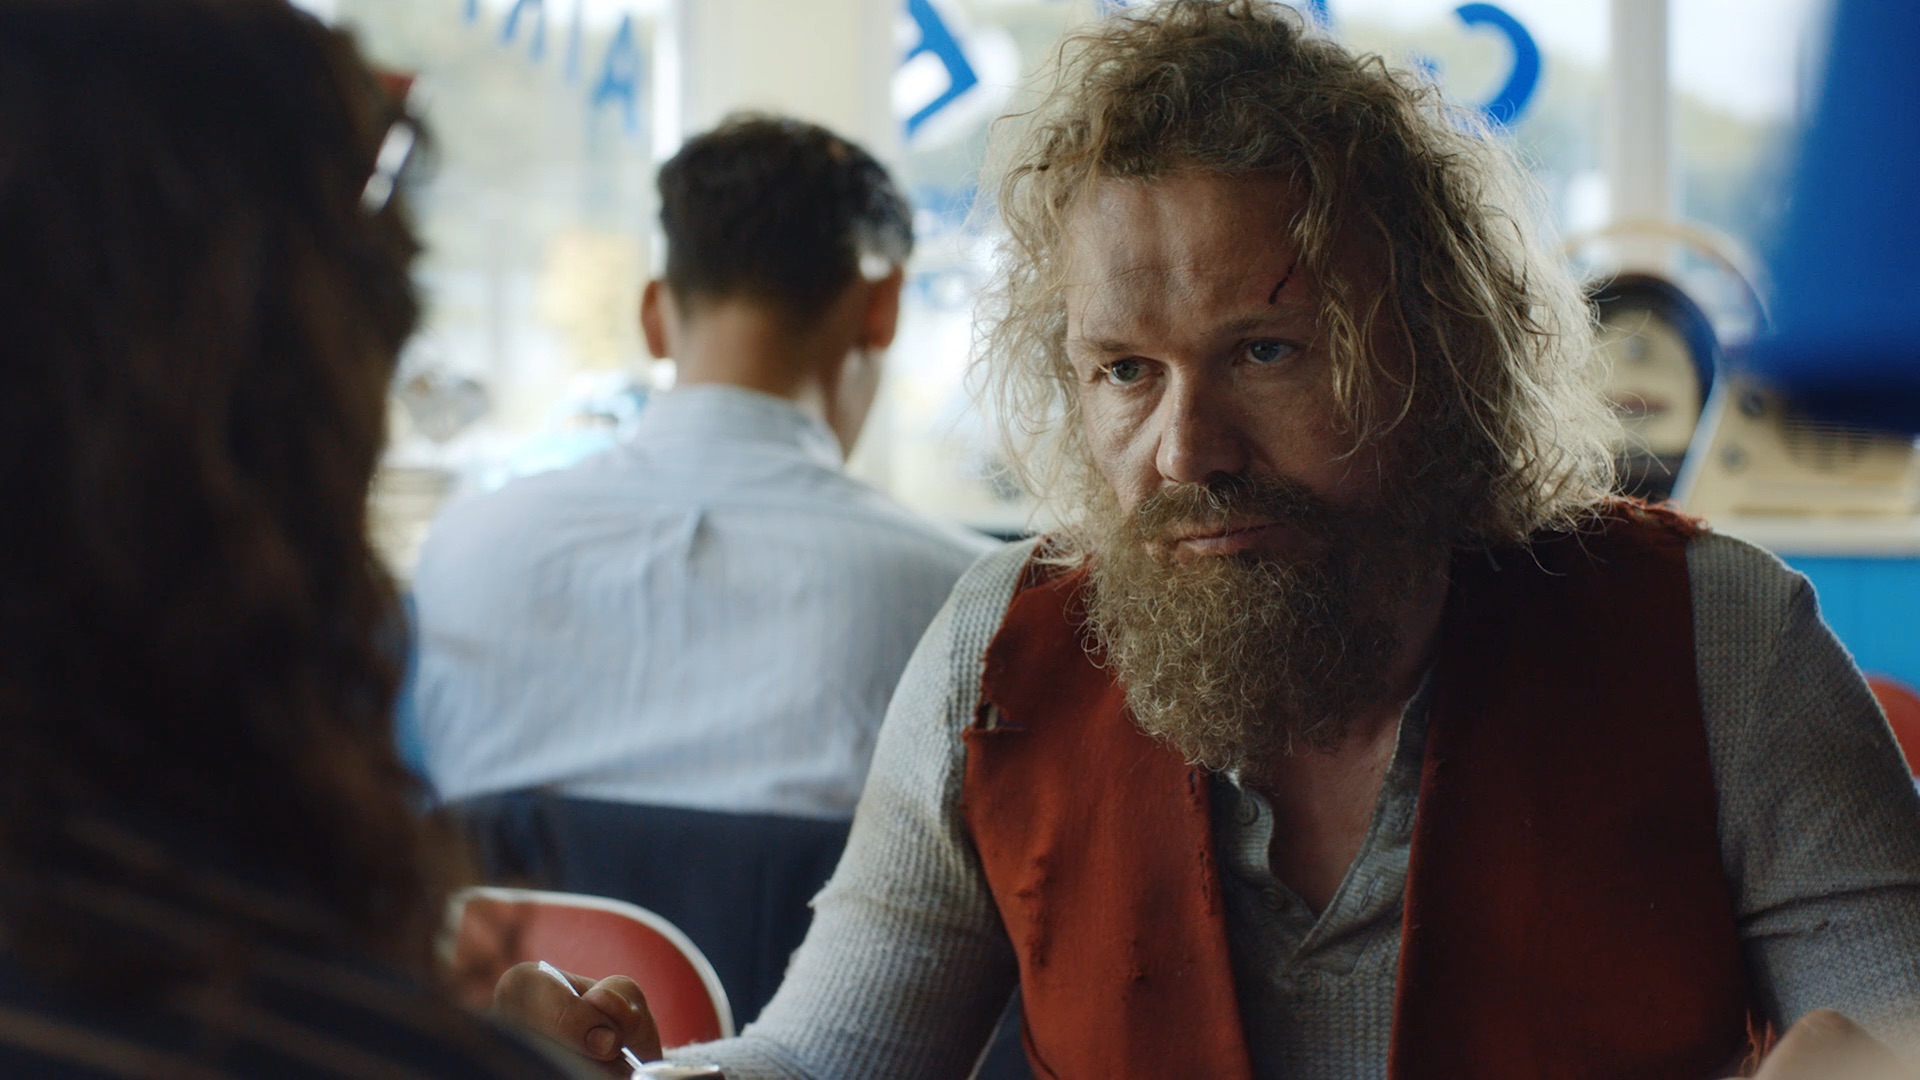
The crew may have been reduced, but the cast was bigger than it’s ever been. Jonnie and the team managed to pack out Sessions House, a historic courthouse in Ely, with about 60 extras to watch Harvey (Paul Richards) present a case against Choice. Also not reduced was the shot list, an ambitious 21 set-ups to be accomplished in just a few hours. I’m not sure how many we got in the end, but we covered everything so we must have got close.

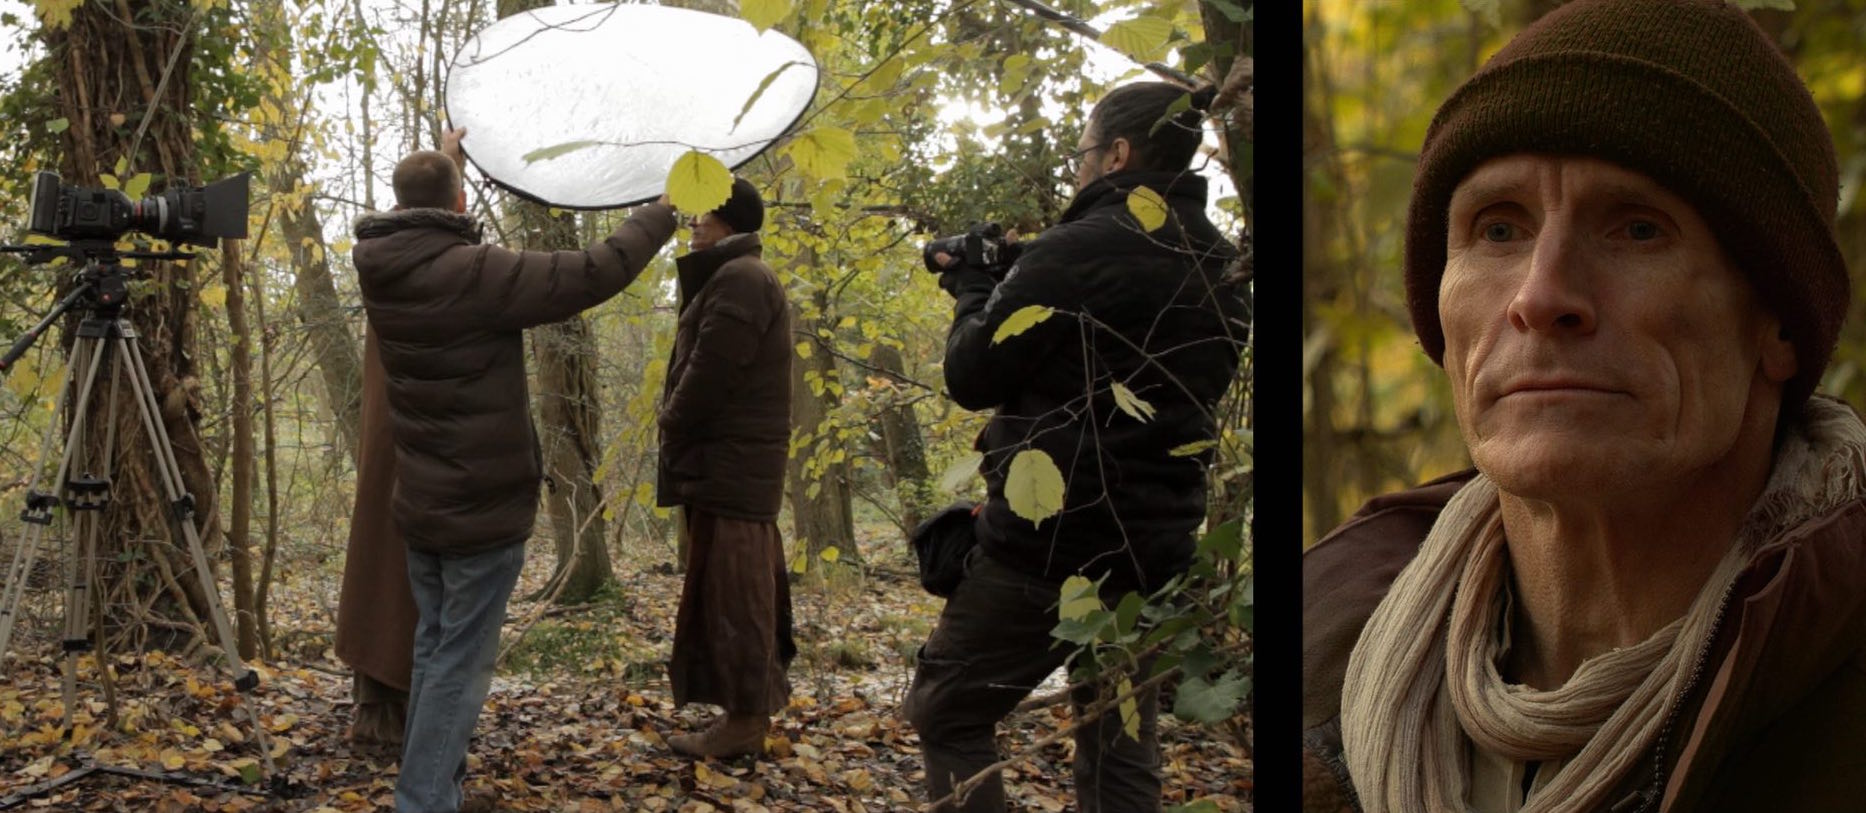
Since the budget was a dim and distant memory, I shot on Jonnie’s own Canon C200 and lenses. An important part of Harvey‘s visual grammar is the use of wide lenses for stressy scenes, with a 14mm having been the apotheosis throughout production. For this reason, but also for speed, we shot almost everything in the courthouse on Jonnie’s Samyang 14mm, swinging to an L-series 24-70mm zoom right at the end. We couldn’t get hold of a Soft/FX filter to perfectly match with principal photography, but we were able to borrow a 1/8th Black Pro Mist to provide a little diffusion at least.

Photo: Cambridge News

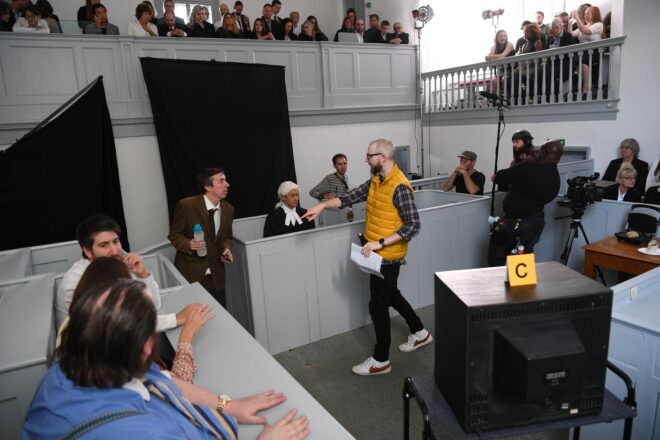
For lighting, Jeremy set up his Aputure 300D and 600D in an upper gallery at the side of the courtroom, firing into the wall to provide a soft side-light throughout the room. We’d hoped not to have to tweak it much from shot to shot, but it did prove necessary, not least because we needed to look up to that gallery in a couple of set-ups. I wanted to use a lot of negative fill to bring down the ambient bounce off the walls, which had evidently been repainted at some point in the recent past by someone with an Ideal Home subscription. But the 14mm doesn’t leave much room to hide things, so there was a limit to the contrast we could introduce. Adjusting the blinds over the main windows – whenever they were out of frame – became one of our major methods of controlling the light.

Once Harvey had rested his case we moved out into the carpark to get Bryan’s “manic wides”. These grotesque caricatures of the supporting characters, imagined by Harvey at the climax of the film, required each actor, in this case Alan, to deliver key lines from their earlier scenes while I shoved the 14mm lens in their face and dutch-tilted like crazy. We recreated the day-for-night shot grabbed with the limo back on Day 13, covering the car in black drapes and firing the 300D with Urban Sodium gel through a side window – orange being another symbol of stress in the movie.

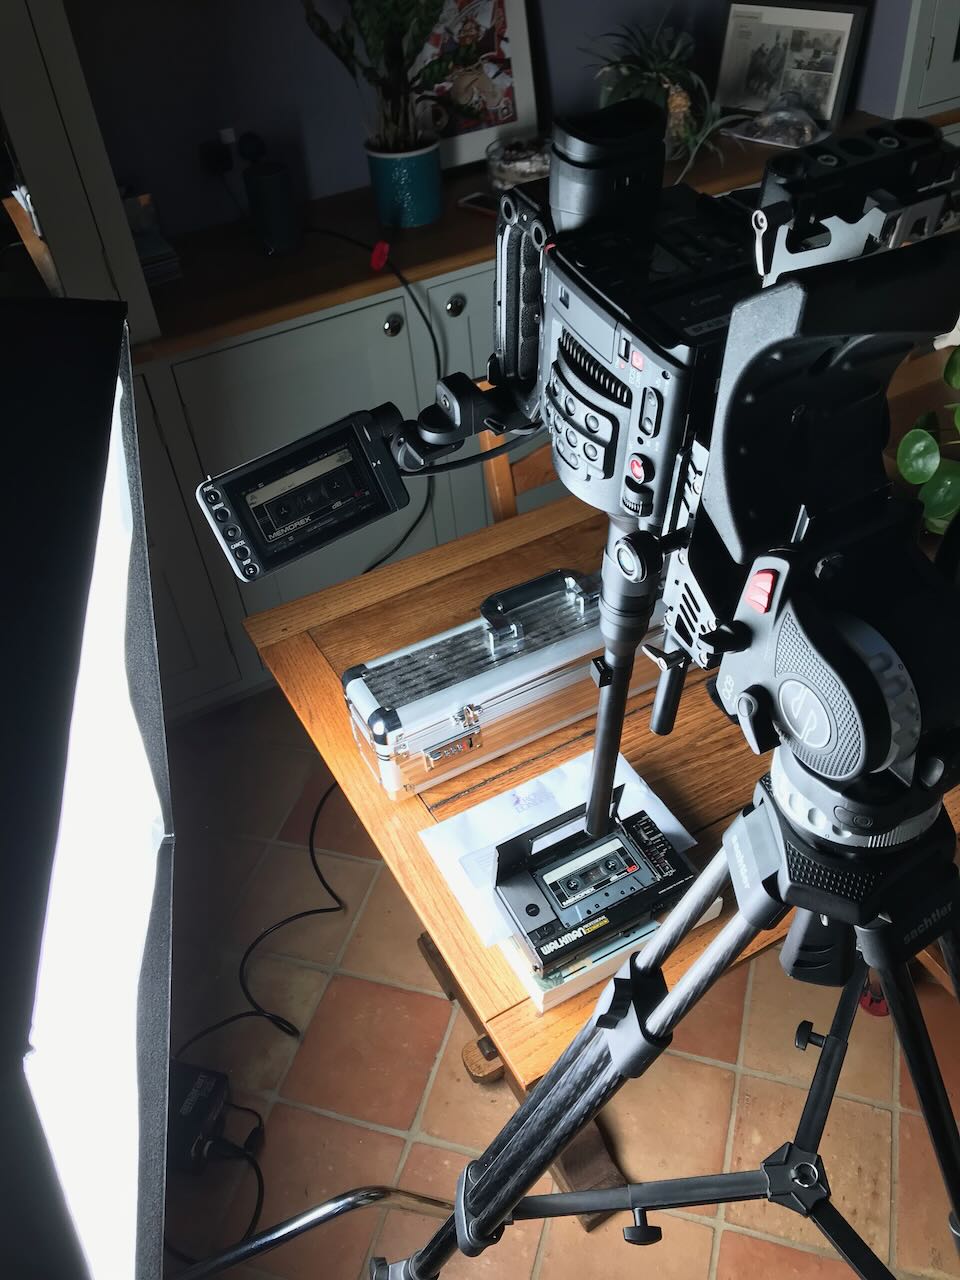
The few of us that were left then regrouped at Jonnie’s house for some ADR and a handful of inserts. The probe lens got another airing to capture a macro shot of a tape recorder, and I got to double as Harvey’s hands flicking through a book. In Paul’s very last shot he was out of focus, due to a lack of continuity-matching make-up, with the book sharp in the foreground.

The final shot of all was Cat, the editor, dropping some Post-its into frame and Jonnie, clad in Harvey’s jacket, picking them up. Not a grand shot to go out on, but one that nicely sums up the collaborative, all-hands-on-deck nature of no-budget filmmaking. It’s been a fun ride.

Read all my Harvey Greenfield is Running Late posts:

“Harvey Greenfield is Running Late”: October 2022 Pick-ups

How to Work with Natural Light

Poppy Drayton in a scene from “The Little Mermaid” where we were blessed with beautiful evening light

Natural light can be beautiful, but it is not easy for a cinematographer to work with. Continuity, dynamic range, hardness and intensity are all potential challenges.

The most obvious difficulty with natural light is that it is forever changing. It can do stunning and unexpected things, but if you don’t move quickly it’s gone. Anyone who’s ever filmed a sunset scene and had the director push for another take after the perfect light has gone knows the disappointment it can bring.

Preparation is key. Previewing the sun path using an app like Helios Pro or Sun Seeker is essential, as is working out the blocking to make the best use of the light. For The Little Mermaid I shot a sunset scene with three actors up to their waists in the Atlantic Ocean. I had to make sure, through rehearsals on dry land, that they would end up with their backs to the sun so that I would be shooting towards it.

Shooting the ocean scene for “The Little Mermaid”

I also had a grip next to me with a poly-board to bounce some of the sunlight back into the actors’ faces. This brings us to dynamic range, the fact that there may be too much or too little difference between the brightest and darkest areas. Too much contrast is common with exteriors under direct sun, or interiors with small windows or dark walls. Too little is often the case with overcast exteriors, or interiors with large windows or white walls.

As in my Mermaid example, shadows can be filled in using a reflector, be that the 5-in-1 collapsible kind that are widely and cheaply available, a white poly-board, a frame of Ultrabounce or even a white bedsheet. These will be much less effective indoors, where you may well need to add an artificial fill light, perhaps bounced off the ceiling.

If the light is too flat, contrast can be reduced using negative fill. Anything black can be used for this – a flag, a bedsheet, or the black side of a poly-board or 5-in-1 reflector. Typically this is placed to cut the light on the side of the talent’s face nearest camera to get the most shape in the image.

A demo of negative fill from my online course, “Cinematic Lighting”, available on Udemy

Direct sun is often too hard to be flattering, particularly in closer shots. The solution is to introduce some kind of diffusion between the actor and the sun. This could be anything from a shower curtain to a 12×12’ frame of Full Silk. 5-in-1 reflectors can be stripped down to a translucent white disc that works well for tight shots.

Indoors the trouble with natural light is that there might not be enough of it. If you like what it’s doing but just need more, try setting up a soft artificial source outside the window. A bigger production will often use 12K or 18K HMIs firing into Ultrabounce, but that requires a serious rental budget and a big generator. A smaller HMI pushing through a diffusion frame won’t be quite as soft but will be much cheaper. 

If that’s not possible either, the next best thing is a soft source like an LED panel rigged indoors above the window. By having the source indoors you will lose the natural shaping of the light that the window frame gives you, but some of this can be regained by fitting a honeycomb or egg-crate.

Hard reflector

Another option is to place a hard reflector – essentially a mirror on a C-stand – outside the window and angle it to reflect the brightest part of the sky, or even direct sun, into the room. The great news for anyone working on a tight budget is that any old mirror will do, so long as you can find a way to position and angle it conveniently.

The opposite problem is one all DPs have to tackle at some point – namely direct sun coming into a room and moving across it, spoiling continuity. Choosing a north-facing location will save a lot of trouble here, otherwise flags will need to be rigged and regularly adjusted as the sun moves, unless you can move quickly enough to shoot everything before the light has noticeably changed.

Natural light can be one of the biggest challenges for a cinematographer, but also one of the greatest gifts and highest goals to emulate.

How to Work with Natural Light

What is Negative Fill and How Do You Use It?

The 4×4 flags and matt silver bounce board used to shape the “Heretiks” shot later in the article.

If you’ve ever learnt anything about lighting, you’ll have heard of the Three Point System: key, backlight and fill. That last one is a soft light which raises the shadows and reduces contrast in the image.

As you might expect, negative fill is the exact opposite. It brings the shadows down, increasing contrast. It’s a big part of cinematography today because the dynamic range of digital cameras is so wide and their light sensitivity is so high that taking away light has become just as important as adding it.

Negative fill – neg fill or just neg for short – can be accomplished with anything black, most commonly a polystyrene board (American name: bead-board), blackout material (usually bolton in the UK or duvetyne in the US) or a flag. 5-in-1 reflectors have a black side that can be used for neg fill too. The term solids or black solids can be applied to any of these tools, indicating that they are completely opaque, as opposed to nets.

When DPs talk about neg fill you often hear the word “shape” come up in their reasoning. Neg fill is typically applied to the camera side (broad side) of the talent, allowing their other side (short side) to remain bright. This has the effect of making the face – or any other object – look more three-dimensional. Hence “shape”. (This is all part of the theory of short key lighting, which I’ve covered in detail before.)

Below is an example from my online course, Cinematic Lighting. In these before and after shots, I use the black side of a 5-in-1 reflector (though you see silver facing camera) to neg-fill Ivan’s short side, adding mood and contrast.

We made it more permanent by replacing the reflector with a 4×4′ floppy flag on a C-stand.

Here’s an example from Heretiks where I chose to put a glint of light back into the darkness created by the neg fill, by using a matt silver reflector to create a rim-light. (There are many more diagrams like this on my Instagram feed.)

Neg fill is most commonly used outdoors, but it can be desirable indoors too, for example when white walls are bouncing light around everywhere. For the shot below from Exit Eve, I had the white wall behind camera covered with bolton so that the light would all be coming from behind the talent. (See my article on lighting from the back.)

In the café scene from Above the Clouds we shot towards the windows, but there was still too much ambience (mainly from skylights in the roof) on the camera sides of the actors for my taste. We only had a limited supply of flags, so we pressed the sides of the Easy-Up tent into service too!

I’ll leave you with this extreme example of negative fill from Instagram.


View this post on Instagram


A post shared by Shane Ellis (@gameoverman47)

What is Negative Fill and How Do You Use It?