9 Tips for Easier Sound Syncing

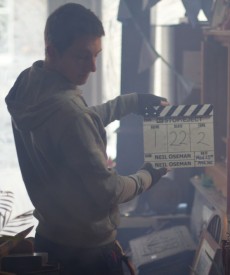
Colin Smith slates a shot on Stop/Eject
Colin Smith slates a shot on Stop/Eject. Photo: Paul Bednall

While syncing sound in an edit recently I came across a number of little mistakes that cost me time, so I decided to put together some on-set and off-set tips for smooth sound syncing.

On set: tips for the 2nd AC

  1. Get the slate and take number on the slate right. This means a dedicated 2nd AC (this American term seems to have supplanted the more traditional British clapper-loader), not just any old crew member grabbing the slate at the last minute.
  2. Get the date on the slate right. This can be very helpful for starting to match up sound and picture in a large project if other methods fail.
  3. Hold the slate so that your fingers are not covering any of the info on it.
  4. Make MOS (mute) shots very clear by holding the sticks with your fingers through them.
  5. Make sure the rest of the cast and crew appreciate the importance of being quiet while the slate and take number are read out. It’s a real pain for the editing department if the numbers can’t be heard over chit-chat and last-minute notes from the director.
  6. Speak clearly and differentiate any numbers that could be misheard, e.g. “slate one three” and “slate three zero” instead of the similar-sounding “slate thirteen” and “slate thirty”.
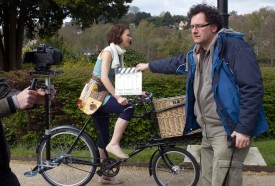
Rick Goldsmith slates a steadicam shot on Stop/Eject. Photo: Paul Bednall

For more on best slating practice, see my Slating 101 blog post.

Off set: tips for the DIT and assistant editor

  1. I recommend renaming both sound and video files to contain the slate and take number, but be sure to do this immediately after ingesting the material and on all copies of it. There is nothing worse than having copies of the same file with different names floating around.
  2. This should be obvious, but please, please, please sync your sound BEFORE starting to edit or I will hunt you down and kill you. No excuses.
  3. An esoteric one for any dinosaurs like me still using Final Cut 7: make sure you’ve set your project’s frame rate correctly (in Easy Setup) before importing your audio rushes. Otherwise FCP will assign them timecodes based on the wrong rate, leading to errors and sound falling out of sync if you ever need to relink your project’s media.

Follow these guidelines and dual system sound will be painless – well, as painless as it can ever be!
9 Tips for Easier Sound Syncing

5 Tips for Perfect Shafts of Light

There’s nothing like a good shaft of light to add production value to your cinematography. But you can’t just shine a lamp through a window and expect to get Hollywood shafts. Here are the essential conditions you need:

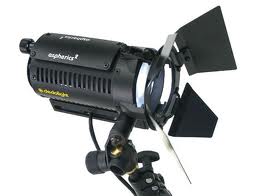
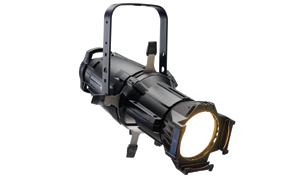
1. You need focused light, i.e. a lamp with a lens. Source 4s work extremely well. HMI or tungsten fresnels will also do the job, and sometimes Dedos.

A Source 4 and Source 4 Junior firing beams through smoke
A Source 4
Source 4
HMI fresnel
HMI fresnel
Dedo, de-e-edo. Dedo come and me want go home.
Dedo

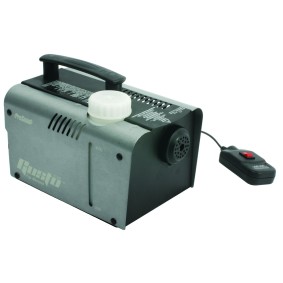
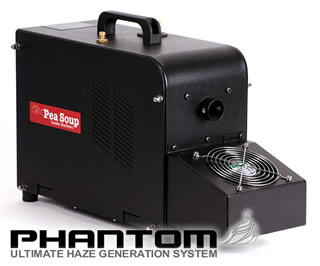
2. You need a smoke machine or hazer to volumise the light. A cheap one from Maplin will work, but as a general rule the cheaper the machine, the more its output will be wreaths of smoke rather than just thickening up the atmosphere. However, given time to disperse and some vigorous wafting with a flag or the clapperboard, any smoke will work.

ProSound GT-800 fog machine from Maplin
Phantom Pea Soup hazer

3. The smoke/haze needs to be backlit. The closer the light source is to being directly behind the smoke, the more the smoke will show up. So shoot towards windows.

These frames are the start and end positions of a tracking shot from Ren (with a top secret make-up effect!). Note how the shafts of light from the window are much more prominent when the camera is pointed more towards the light source.

www.rentheseries.com

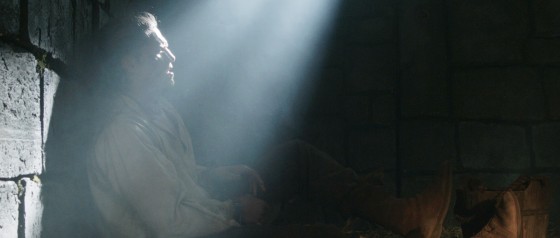
4. A dark background will show up the smoke best. If you’re shooting in a house with white walls then you’re probably flogging a dead horse.

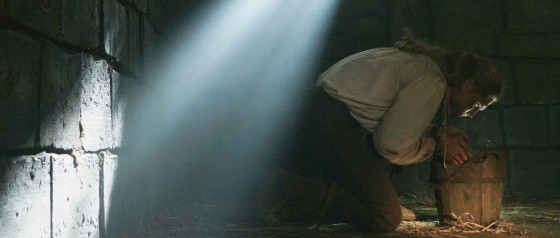
The dark prison walls here show up the shaft of light very nicely.

5. Keep other light sources away from the shaft. Competing lamps can muddy the shaft of light or maybe make it disappear altogether. Often I find that shafts of light work well as background interest, with the actors well in front of it, lit by other sources.

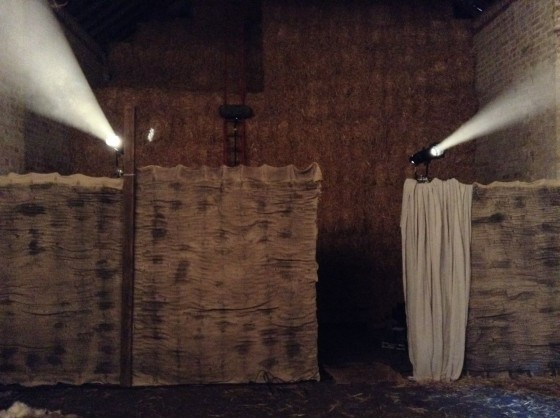
In this set-up for Ballet Pointe Shoes (dir. Gisela Pereira), I'm using the layers of scenery on the stage to separate layers. In the back layer there's a pair of cool, high Source 4s creating the crossed beams, while in the front layer warmer Dedos create shorter shafts of light.
In this set-up for Ballet Pointe Shoes (dir. Gisela Pereira), I’m using the layers of scenery on the stage to separate layers of lighting. In the back layer there’s a pair of cool, high Source 4s creating the crossed beams, while in the front layer warmer Dedos create shorter shafts of light.

Follow all these guidelines and you’ll get lovely shafts of light every time!

5 Tips for Perfect Shafts of Light

Lighting Techniques #7: Gobos and Shadows

Gobos are shapes that you fit onto a lamp in order to break up the light. If you’re using Source 4s you can get gobos especially for the purpose, which slot into the front of the lamp.

Gobos
Gobos
matthews_wood_cucoloris_3
A cucoloris

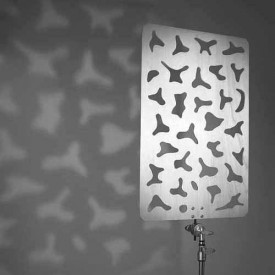
A cucoloris is a piece of wood or metal with vaguely leaf-life shapes cut into it. You would mount this on a C-stand or clamp of some kind. You can easily make your own cucoloris by punching holes in black-wrap or cardboard.

In fact you can create patterns of light and shadow by placing almost anything in front of a light, varying the distance from the source to make the pattern sharper or softer. Be careful to observe the minimum safe distances printed on the side of the lamphead though, or you might set fire to your shadow-maker.

Here are some examples of breaking up the light that I’ve tried over the years…

On more than one occasion I’ve taped up some of the PVC pipes which my dolly uses as tracks, to create the impression of vertical bars or pillars. In the below example the French windows (when closed) didn’t have enough bits of frame to break up the light sufficiently, so I had my spark tape a pipe to the window…

IMG_2464

I don’t have a picture, but I remember once on a horror feature sticking lots of blobs of gaffer tape to a window.

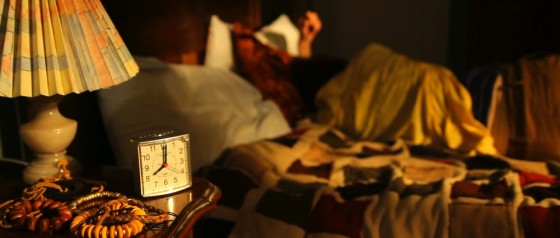
In this shot from Stop/Eject I blacked out the room’s real window and rigged a fold-up director’s chair in front of a 1K Arrilite to cast a window frame-like shadow…

The bedroom by sunlight

Look for things in the set that you can shine lights through, like this partition window….

Creating interesting shadows by using a partition window at the location.

or a fence…

ss2

or blinds…

IMG_2531

If you want the venetian blinds effect and you don’t have any, stick strips of gaffer tape to the window.

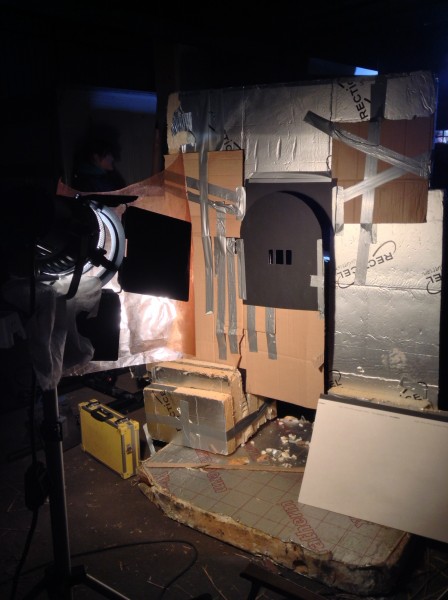
On Ren I built an openable and closable little door (complete with tiny barred window) for light to shine through, since the set didn’t have a door.

image

On the same show, the roof of Karn’s house became a giant gobo for the 2.5K HMI placed above and behind the set, creating these incredible God rays when smoke was added. The roof was made of interlocking branches and had been covered by sheets by the art department – presumably to block light – but I removed the sheets because I wanted this lighting effect…

image

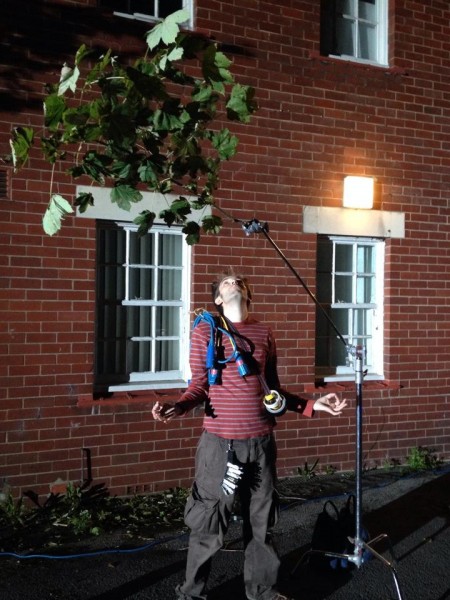
Branches make great gobos. I often sneakily break one off a nearby tree and rig it to a C-stand to cast some summery shadows or break up a moonlight or streetlamp source that’s looking too bright and flat.

IMG_1029-1.JPG

If you’ve missed the other posts in my Lighting Techniques series so far, here are the links:

#1: Three Point Lighting

#2: Cross-backlighting

#3: The Window Wrap

#4: Health Bounce

#5: Smoke

#6: Cross-light

Lighting Techniques #7: Gobos and Shadows

5 Ways to Use LED Panels

LED technology is transforming the way cinematographers can light. Running off batteries and not getting hot are two of their biggest advantages over other sources, making them much more flexible. I tend to avoid keying with them, because even the most expensive brands don’t render skintones as accurately as incandescent sources, but there are many other uses they can be put to. Here are a few of my favourite.

1. Eye-light on overcast day exteriors

If it’s one of those dark days when reflectors just don’t seem to do anything, or you’re under the tree canopy of a forest, an LED panel can give you a bit of fill and eye-light.

An LED panel over camera provides fill in this shot from Ren © 2015 Mythica Entertainment
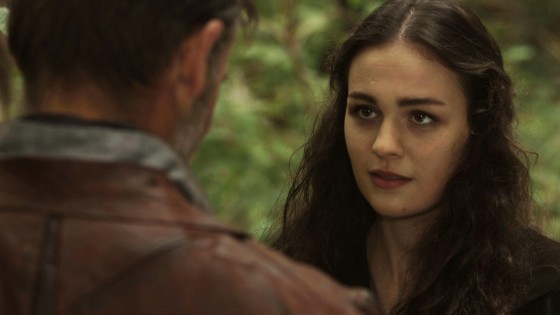
An LED panel over camera provides fill and eye-light in this shot from Ren © 2015 Mythica Entertainment

Visit rentheseries.com to learn more about Ren, or read my blog post about lighting the above scene.

2. Background spots on night exteriors

So you’ve spent a while lighting the master shot of your big night exterior scene, and everyone’s ready to shoot. Then you notice that there’s an area in the background of frame which looks dark and empty, and you’d love a bit of extra light in there. Just slap a battery on your LED panel and run over there with it. No need to run power cables!

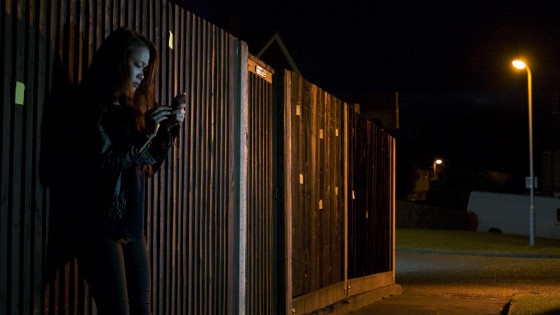
The orange backlight on Faith (Haruka Abe) and the fence, although apparently from the streetlamp in the background, is actually from an Arrilite 650 out of frame right, gelled with Urban Sodium. A daylight-balanced LED panel, also out of frame right but closer to camera, keys Faith. A second panel hidden behind the end of the fence lights the van and the rest of the deep background.
An LED panel lights the van and grass in the background of this shot from Forever Alone (dir. Jordan Morris)

Read my blog post about lighting the above scene.

3. Off-screen TV set

An LED panel makes a good “TV” source because during the take your spark can mess with not only the brightness control but the colour balance as well, to suggest changing images on the screen.

An LED panel simulates an off-screen TV set in this frame from The Gong Fu Connection © 2015 Cannon Fist Pictures
An LED panel simulates an off-screen TV set in this frame from The Gong Fu Connection © 2015 Cannon Fist Pictures. The panel was gelled green to match reverse shots in which the TV screen is shown to be dominated by the green grass of a racecourse.

Browse the blog posts about my cinematography on The Gong Fu Connection.

4. Mobile fill

If you’re shooting a long scene with your talent on the move and you need to maintain a little fill when they’re between lamps, an LED panel is easy for your spark to hand bash as they walk with the actors.

Under the black bag is an LED panel to keep some consistency to the light on the actors as the car moves.
Under the black bag is an LED panel to keep some consistency to the light on the actors as the car moves, in a scene from The Gong Fu Connection (dir. Ted Duran)
In a scene from Synced (dir. Devon Avery), we tracked the actors from the back of a pick-up truck, using the LED panel above me as fill.

Read my blog post about the above scene from Synced.

5. Hidden sources

Because they don’t get hot, and you don’t need power cables to them, it’s easy to hide LED panels behind bits of furniture or set dressing, to give interesting pools of light or punch up practicals.

In this frame from Ren, Hunter's face is lit by a small LED reporter light hidden behind the bucket to suggest a reflection off the water.
In this frame from Ren, Hunter’s face is lit by a small LED reporter light hidden behind the bucket to suggest a reflection off the water.

Read my blog post about lighting the above scene from Ren.

What interesting uses have you found for LED panels?

5 Ways to Use LED Panels

How to Cut a Behind-the-Scenes Featurette

Cast&Crew_RAU_4273_20Sept_Unger copy copy
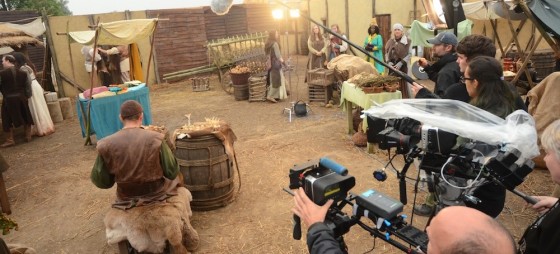
Cameras roll on the set of Kate Madison’s web series, Ren. Photo: Richard Unger

Despite my big plan to quit editing last year, I somehow ended up cutting nearly all the behind-the-scenes material for Ren, including a dozen YouTube videos and 30-odd exclusive set diaries which have just been released for sale. Guess I just have a fondness for BTS stuff.

Brett Chapman shoots B roll on Stop/Eject as Hadrian Cawthorne looks on. Photo: Paul Bednall
Brett Chapman shoots B-roll on Stop/Eject as Hadrian Cawthorne looks on. Photo: Paul Bednall

So here are some tips for editing BTS videos for the web. Many of these apply equally to any talking-head-based documentary.

  • Plan for it before the shoot by lining up a competent BTS camera crew and being clear about the kind of material you need. Here are some tips for shooting B-roll.
  • Start the edit by creating a new timeline and putting in some text generators with category headings you think you’ll want to cover, e.g. “plot”, “characters”, “casting”, “action scenes”, “concluding remarks”.
  • Watch through all the interview material. Every time you hear something you think you can use, dump it on the timeline after the relevant text.
  • Play back your timeline. You’ll immediately see that some of the material you’ve included is dull or repetitious. Whittle down the material until your timeline is only a little longer than you intend the finished piece to be. (I suggest 2-3 minutes should be your target length for a web piece.)
  • Pay attention to your in and out points. Don’t cut while someone is drawing breath – cut before or after. Beware of breathing time if you’re hacking someone’s sentences around. If your editing makes a couple of words sound unnaturally close together, interpose a few frames of atmos or silence. If you cut someone off in the middle of a sentence, firstly be sure the intonation doesn’t make it sound cut off, then add in some silence or atmos before the next clip, and paper over the edit with B-roll as the interviewee’s face will often give away that they’re not finished speaking.
  • Speaking of papering over the talking heads with B-roll, it’s time to do that now. I often start with the obvious stuff. Clearly shots of the fight scenes being rehearsed need to go over the actors talking about fight scenes. Then I’ll move onto the less obvious stuff – an actor talking about their character might go with almost any shot of that actor on set, so I’ll see what’s left at the end.
  • Avoid cutting in the middle of quick movements – an arm going up, a head turning- unless that action will be continued in the next shot. This goes for the talking heads too – don’t cut on or close to a blink. Also avoid cutting on an emphasised or particularly loud syllable, because this too will jar.
  • Take out the text generators and replace them with a few seconds of B-roll that doesn’t have any interview sound under it. This gives you dividers between topics without blatantly signposting them, and allows the audience a breather. You could bring up the audio on the B-roll, or put in a bit of music. Usually it’s best for this B-roll to serve as an introduction to the topic that’s up next. For example, if the next topic is “what it was like working with the director”, kick it off with B-roll of the director explaining the next scene to the actors. After hearing him or her talk for a sentence or so, fade down the audio and bring in the interview sound.
  • Get some music from somewhere like incompetech.com, if your composer hasn’t started work yet, and cut opening and closing montages of B-roll to it.
  • Put in your lower thirds and opening and closing titles. If the video’s going on You Tube, it’s a good idea to allow for annotations linking viewers to other videos on your channel. Do not put in credits – sorry, but no-one cares who made this.
  • Watch the whole thing through and try to take out another 10-30 seconds. Remember, pace is everything. Do not give people the slightest excuse to stop watching.
  • Do a colour correction pass so everything matches.
  • Go through again balancing the audio. People start their sentences loudly and get quieter as their lungs deflate, so counter this by ramping the audio up over the course of the sentence. Use EQ filters if necessary to counter tinny or boomy sound, or reduce hiss or wind noise. See this Nofilmschool article for some handy audio tips. If any of the audio cuts are popping or clicking, put on a 1 frame cross fade. If you don’t have decent speakers, do this on every cut because you won’t know which ones are dodgy.
  • If any of the speech is still hard to make out – and remember that your viewers haven’t heard it a million times like you have – then subtitle it.
  • Watch it one last time to check everything’s smooth, then compress and upload it. You’re done!

If you’ve found this post useful, please consider supporting Ren by purchasing or sharing the trailer for the Daily Diary videos. Buyers get the first 7 videos now and the remaining 29 when the series is released this summer. They’re all different, some following the above pattern and others being much more candid, fly-on-the-wall affairs. There are plenty of bloopers, interviews and filmmaking tips to be enjoyed throughout. Or check out our free behind-the-scenes videos on YouTube.

How to Cut a Behind-the-Scenes Featurette

How to Correct Cosmetic Issues with Lighting

Redheads draw 800W eachEvery cinematographer needs to make the cast look good. Here are some quick tips for minimising blemishes and undesirable physical attributes. To any readers who have been lit by me, please don’t get a complex! These techniques can also be used to make someone who’s already flawless look even more amazing. Conversely, if you have a bad guy, or a character who needs to look ill, or a prosthetic monster make-up, you might want to do the opposite of what I suggest below.

  • Thinning hair – Avoid toplight and strong backlight, which will show up the scalp under the hair.
  • Wrinkles, spots and scars – Avoid lighting that will throw shadows from these features, e.g. cross-light (meaning light from the side). Instead put the key light as close to the camera as possible. Ideally use a soft source. If you’re still seeing shadows, add more fill.
  • Double chins, bags under the eyes, general appearance of tiredness – Use Health Bounce – a reflector placed under the talent’s face to eliminate shadows cast from above.
  • Small or deep-set eyes – Again, use Health Bounce. It will help get light into the eye sockets and put a sparkle of reflection in the eyeballs.
  • Weak jawline – Use three-quarter backlight (a.k.a. “kicker”) to create a rim along the jawline on one side.
  • Shiny skin – This may be a make-up issue, but you can help by using bounced light. Kinoflos, though they are soft sources, are amongst the worst culprits for creating shine.
  • Big nose – Keep the key light close to the camera to minimise the shadow the nose casts.

To learn more about lighting, check out my post on key light angles and my series of lighting techniques.

How to Correct Cosmetic Issues with Lighting

How to Make Chase Scenes Look Fast

Sarah on the roof rackThere are many ways to shoot a chase scene, but not all of them will give a sense of speed. Today I’m going to look at the chases in a couple of my old films and see what we can learn from them about enhancing the impression of speed.

First of all, here is the car chase from my silly 2002 action movie, The Beacon. (You may notice I’ve tried to increase the sense of speed through extremely fast editing, with only limited success.)

I think the least successful part of that chase, in terms of conveying speed, is the section between 0:20 and 0:45. Why? Because the cars are driving along open road with little except the occasional telegraph pole passing close to them. Parallax is incredibly important when shooting action – the concept that objects closer to the camera seem to move faster than those further away. So the hills and fields in the background seem to move quite slowly, even though the cars were going at a fair old lick. If there had been bushes or poles in the foreground, zipping past close to camera all the time, the side-on tracking shots would have been much more effective.

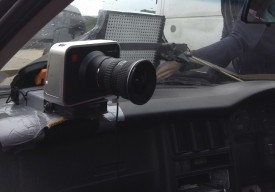
The Blackmagic, mounted on the dashboard with an old Hama suction mount, some cardboard, some gaffer tape, a wing and prayer
My Blackmagic, mounted for a driving shot in The Gong Fu Connection last year

The shots where the camera was mounted to the outside of the car look better, because we are close to the surface of the road, which therefore appears to zip by very quickly. Similarly, when the cars enter the narrow, wooded lane at 0:50, there is a great sense of speed because the passing greenery is only a foot or two from the car.

From around 1:20, as the cars cross an open field again, I took a different approach. I shot the vehicles on a very long lens, handheld, panning with them. Because panning – especially on a long lens – is a two-dimensional movement, it completely eliminates parallax. Everything that passes in the background moves at the same speed, determined entirely by the speed of the pan, which is in turn determined by the speed of the person or vehicle you’re panning to follow.

I applied some of these lessons to the foot chase in Soul Searcher, beginning at 1:08:30. Note the use of long lens pans, and tracking through narrow aisles for maximum parallax.

Speed is all relative, so it’s important to cut every now and then to a shot where your camera isn’t moving, giving the maximum relative velocity to your chaser and chasee as they zip past. Actually that’s not the maximum relative velocity; in the Soul Searcher chase you may have noticed  the odd  shot where someone runs towards camera as the camera simultaneously moves towards them.

So, in summary, here are my tips to satisfy your need for speed:

  1. Set the chase in narrow aisles, alleys, country lanes or roads with lots of streetlamps and telegraph poles, to maximise parallax.
  2. For side-on tracking shots, have plenty of foreground.
  3. When mounting a camera on a vehicle, get it as close as safely possible to the road or passing obstacles.
  4. Long lens pans give a great impression of speed, regardless of the setting.
  5. Let the characters pass a static camera occasionally, or counter-track towards them to increase their relative velocity.
  6. And one extra tip: if possible, have small patches of light and shade for the characters or vehicles to pass in and out of; this will further increase the impression of speed.

Want to know more about how The Beacon’s car chase was shot? Read this retrospective blog post.

Need your car chase to end with a crash? Here’s how I staged the car crash in The Beacon.

Want more tips for shooting in a moving car? Here’s how I did it last summer on The Gong Fu Connection.

How to Make Chase Scenes Look Fast

Blogging Tips

wordpress-bloggingI recently passed the milestone of my 1,000th blog post, and many people have asked me how I have the discipline to keep writing posts week in, week out. I think the key is to see it as an opportunity, not an obligation: an opportunity to connect with and help others in your field; an opportunity to promote yourself; an opportunity to marshal your thoughts and solidify things you’ve learnt by communicating them to others. Sometimes I see my blog as a giant virtual notebook – I’m just keeping my notes publicly – and I often refer back to my own posts to remind myself how I did something or what mistakes I need to avoid this time around.

“But I don’t have anything to write about,” is a common refrain. I doubt this is true. I’m constantly surprised that I manage to keep coming up with ideas for posts, but there is nothing special about me. If I can do it, you can do it too.

Here are some suggestions.

  • Whenever you do something you’re at all proud of, or which someone else compliments, or where someone enquires about how you did it, consider this a potential subject for a blog.
  • Read other blogs, not necessarily on the same sort of subject as yours. Look at the types of posts they do and think about how you can apply those formats to your own area of expertise.
  • Posts like this one, which consist largely of a bullet-pointed or numbered list, are easier to write, and more digestible and less daunting for a reader than a big block of solid text. (Here’s another example.)
  • Review books, films or other websites. (Example)
  • ‘Top ten’ posts can be a quick way to generate content, being a sort of cross between brief reviews and a numbered list. (Example)
  • Write about projects you’re working on and what you’re learning from them. (Example)
  • Break down the steps involved in creating something – a lighting set-up, a prop, a poster, whatever it is you do. Illustrate the steps with photos. (Example)
  • Write about trends you have observed in your field, and what readers could do to buck or conform to them. (Example)
  • Discuss your mistakes and how you plan to avoid making them again. (Example)
  • If you witness someone doing something badly, it can be tempting to write a blog about how it should be done. It’s advisable, however, to let some time elapse first, and you should never name names. (There are examples on this site, but I’m not going to point them out!)
  • Be aware of what’s in the news and what’s trending on social media. Could you blog about your take on these issues? (Example)
  • If the written word isn’t your thing, consider video blogging, or podcasting, but be careful not to ramble. (Example)
  • If you’re really convinced you have no useful knowledge to share, that in itself could be the basis for a blog: your quest for knowledge. You could do posts such as:
    • re-blogging material from other sites (but get permission first) (example);
    • interviews (example);
    • guest blogs, where you ask someone else to write a post for you (example);
    • embedding an interesting video you’ve seen, and summarising the tips you gleaned from it. (Here’s an example on NoFilmSchool.com.)
Blogging Tips

Shooting in Rain

Il pleut dans la nuit. Ce n'est pas jolie.
The rain in France falls mostly on the crew of The First Musketeer.

Rain. How we’d love to go inside and have a cup of tea when the old British precipitation interrupts a shoot, but quite often the schedule demands that we carry on regardless. Here are a few tips for filming in the wet stuff.

Cover the Camera

If you don’t have a proper rain cover, a transparent recycling bag with a couple of holes cut in it will usually do the job, but have someone hold an umbrella over the camera at all times as added protection. If you have them, put on a matte box and top flag to keep rain off the lens.

Check the Lens

Condensation may well be an issue. Have an assistant with a ready supply of dry lens tissues (in a ziplock bag), because a cloth will quickly get too damp to be of any use.

In this photo by Miriam Davies from a location shoot on Ren, you can see a bagged LED panel on the left of frame.

Look After the Lighting

Transparent recycling bags are perfect for covering LED panels, which don’t get hot.

Tungsten lamps get so hot that they burn off any water before it can do any damage, so as long as they’re switched on you don’t need to worry about them getting wet, but you should wrap the switch in a plastic bag.

The same goes for HMIs, though you’ll need to put a bin bag over the ballast. Make sure the bag is loose at the top, so that the heat from the ballast can inflate it and then dissipate through the bag; if you wrap the bag on tightly, the ballast will overheat and cut out.

People can be understandably concerned about mixing water with electricity, but honestly, I’ve run tungsten and HMI lamps in the pouring rain for hours without covering them, and never had any problems. If you’re really worried, clip a sheet of gel over the lamphead to make a little hood.

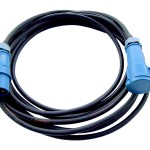
16A cable
16A cable

Use Outdoor Cabling

Ideally you should use only 16A (and above) cabling with C-form sockets (the round blue ones); these are rainproof. If you have to use domestic 13A extensions, wrap all the connections in plastic bags.

Seeing the Rain

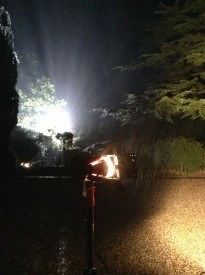
The key to making rain show up on camera is backlight. If you want it to look like a real downpour, get your biggest HMI at the back of shot and blast it towards camera. Or maybe you don’t want to see the rain, maybe it’s bad for continuity, in which case you should avoid backlight at all costs.

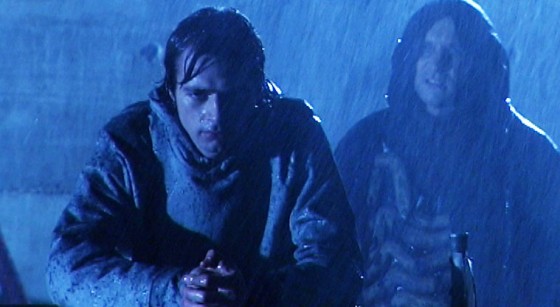
Ye olde person-talking-to-other-person's-back shot in Soul Searcher, obviating the need for a shot-reverse.
The rain in this shot from Soul Searcher is fake, but it’s backlight that makes it show up.

Need rain for your shoot but the sky is cloudless? Read my post on faking precipitation.

Got precipitation of a more wintry nature? Check out my tips for shooting in snow.

I’ll leave you with the latest Ren behind-the-scenes video, which is all about rain and shooting – or not shooting – in it. Subscribe to get the Mythica Entertainment channel to see all the latest Ren videos as they’re released.

Shooting in Rain

How to Black Out Windows

Blacking out a window
Blacking out a window on Beyond Recognition

Sometimes when shooting indoors, you need to make day look like night. And believe it or not, there’s an art to blacking out windows. Light is like water: it leaks in through the tiniest crack, and you need to appreciate that if you’re going to black out a window successfully. Here are my tips.

  1. Don’t do it. Shoot at night; it’s quicker and easier. It will also look much better because you can light the view outside for added depth in the background of frame.
  2. Ignored rule one? Well, at least do a split shoot so that you only shoot away from the windows during daylight, and shoot towards them after dark. If the windows aren’t actually in frame, your light seal doesn’t need to be 100%.
  3. Ignored rule two as well? Unquestionably the best way to black out a window is to gaffer tape black drapes or bin bags to the outside of the window frame. Don’t try to tape to the surrounding brickwork; it won’t hold. The gaffer tape needs to go in an unbroken line all the way around the edges, or light will leak in through the cracks.
  4. If you have large windows to black out, it may be tempting to rig drapes on stands. OK, fine, but you still need to gaffer tape all the edges. And make sure the stands are well sandbagged in case the wind gets up.
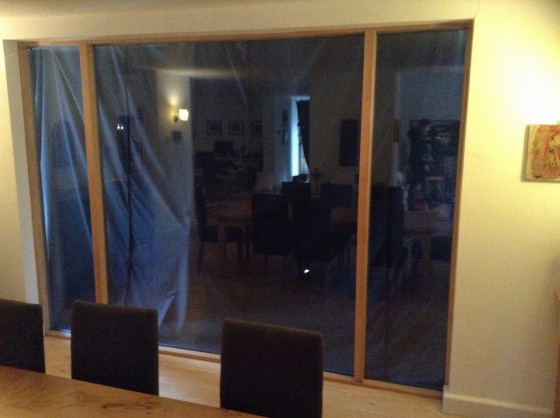
  5. Here’s an example where the lefthand side hasn’t been taped. As you can see, the daylight comes in and nicely cross-lights the drapes, showing up every wrinkle and utterly destroying the illusion of a dark sky. (Fortunately, in this instance the window wasn’t going to be in shot, and the amount of light leaking in wasn’t sufficient to contaminate the DP’s lighting design.)
    image
  6. When you’re outside doing the blacking-out, it is impossible to judge the quality of your work. You need to go inside and see what it looks like. You’ll probably get a nasty shock.
  7. Beware that some things that seem opaque from the outside – bin bags or fabric – actually let light through. Hold them up to the light to check this before you waste time gaffering them up. These drapes looked completely opaque from outside…
    image
  8. Sometimes the DP will want to put a lamp outside to simulate moonlight, and this will need to be tented around. This is extremely difficult and can waste a lot of time. The lamp will spill light onto the drapes, showing them up for what they are. Black wrap the lamphead as much as you can (without covering any vents) and don’t use a tarpaulin as black-out material because it will reflect the light.
  9. Finally, remember to put any stands holding up the drapes BEHIND the drapes, so they’re hidden from camera. (I’ve seen this mistake made, and made it myself, several times – see picture above!

UPDATE: Karl Poyzer has this great tip: “A much easier way to black out windows not in shot or behind a curtain is to spray them with water and roll tin foil over them, stays stuck there indefinitely, blocks out 100% of the light, is cheap and won’t fall down.” Thanks Karl!

How to Black Out Windows