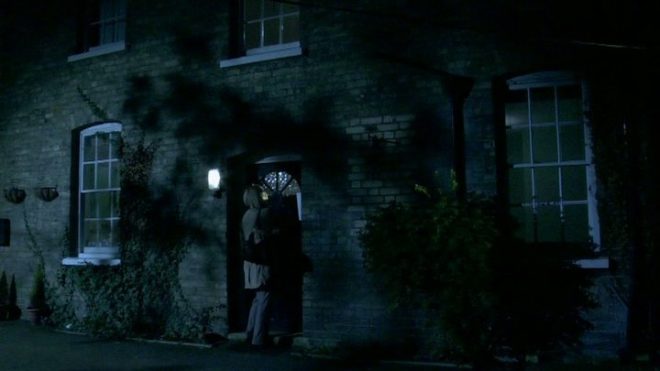
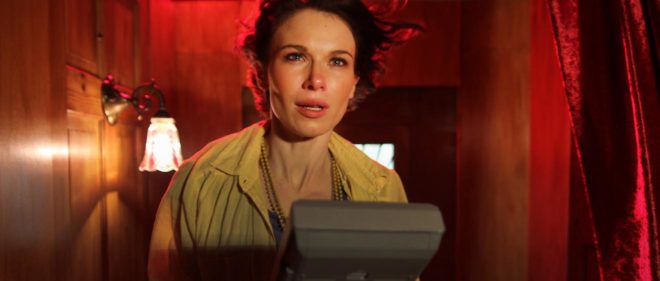
The First Light a Cinematographer Should Put Up

Where do you start, as a director of photography lighting a set? What should be the first brushstroke when you’re painting with light?

I believe the answer is backlight, and I think many DPs would agree with me.

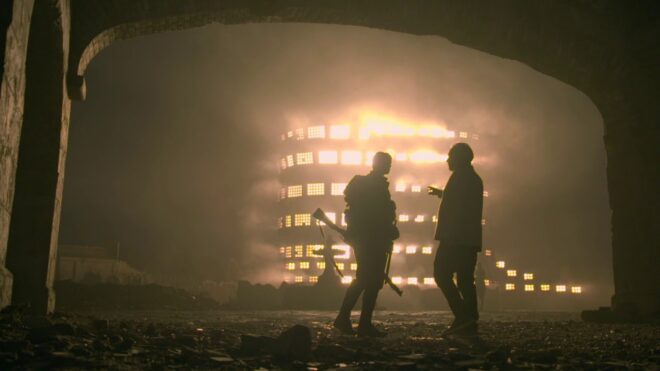
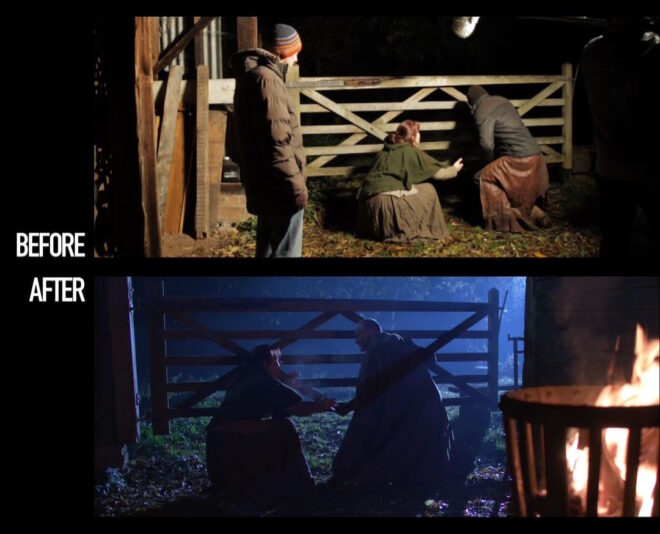
Let’s take the example of a night exterior in a historical fantasy piece, as featured in my online course, Cinematic Lighting. The main source of light in such a scene would be the moon. Where am I going to put it? At the back.

The before image is lit by an LED panel serving purely as a work-light while we rehearsed. It’s not directly above the camera, but off to the right, so the lighting isn’t completely flat, but there is very little depth in the image. Beyond the gate is a boring black void.

The after image completely transforms the viewer’s understanding of the three-dimensional space. We get the sense of a world beyond the gate, an intriguing world lighter than the foreground, with a glimpse of trees and space. Composing the brazier in the foreground has added a further plane, again increasing the three-dimensional impression.

Here is the lighting diagram for the scene. (Loads more diagrams like this can be seen on my Instagram feed.)

The “moon” is a 2.5KW HMI fresnel way back amongst the trees, hidden from camera by the wall on the right. This throws the gate and the characters into silhouette, creating a rim of light around their camera-right sides.

To shed a little light on Ivan’s face as he looks camera-left, I hid a 4×4′ Kino Flo behind the lefthand wall, again behind the actors.

The LED from the rehearsal, a Neewer 480, hasn’t moved, but now it has an orange gel and is dimmed very low to subtly enhance the firelight. Note how the contrasting colours in the frame add to the depth as well.

So I’ll always go into a scene looking at where to put a big backlight, and then seeing if I need any additional sources. Sometimes I don’t, like in this scene from the Daylight Interior module of the course.

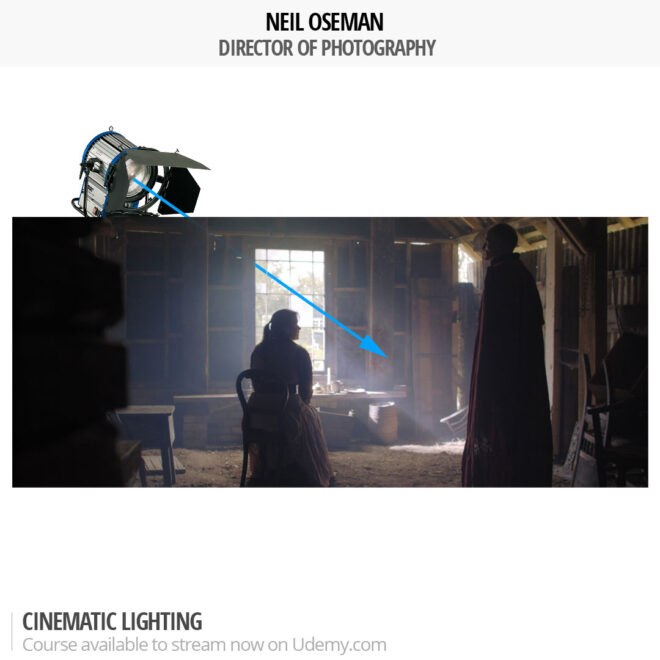
Backlight for interior scenes is different to night interiors. You cannot simply put it where you want it. You must work with the position of the windows. When I’m prepping interiors, I always work with the director to try to block the scene so that we can face towards the window as much as possible, making it our backlight. If a set is being built, I’ll talk to the production designer at the design stage to get windows put in to backlight the main camera positions whenever possible.

In the above example, lit by just the 2.5K HMI outside the window, I actually blacked out windows behind camera so that they would not fill in the nice shadows created by the backlight.

Daylight exteriors are different again. I never use artificial lights outdoors in daytime any more. I prefer to work with the natural light and employ reflectors, diffusion or negative fill to mould it where necessary.

So it’s very important to block the scene with the camera facing the sun whenever possible. Predicting the sun path may take a little work, but it will always be worth it.

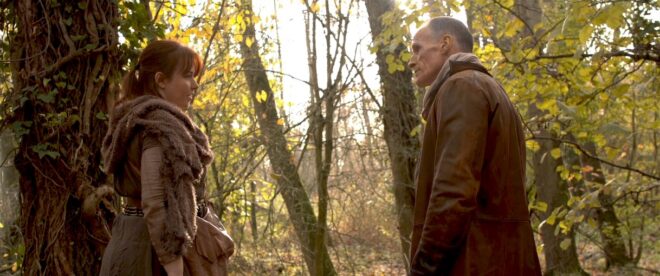
Here I’ve shot south, towards the low November sun, and didn’t need to modify the light at all.

Shooting in the opposite direction would have looked flat and uninteresting, not to mention causing potential problems with the cast squinting in the sunlight, and boom and camera shadows being cast on them.

You can learn much more about the principles and practice of cinematic lighting by taking my online course on Udemy. Currently you can get an amazing 90% off using the voucher code INSTA90 until November 19th.

For more examples of building a scene around backlight, see my article “Lighting from the Back”.
The First Light a Cinematographer Should Put Up

5 Ways to Fake Firelight

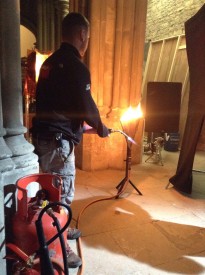
Real SFX run a fishtail on the set of “Heretiks”

Firelight adds colour and dynamism to any lighting set-up, not to mention being essential for period and fantasy films. But often it’s not practical to use real firelight as your source. Even if you could do it safely, continuity could be a problem.

A production that can afford an experienced SFX crew might be able to employ fishtails, V-shaped gas outlets that produce a highly controllable bar of flame, as we did on Heretiks. If such luxuries are beyond your budget, however, you might need to think about simulating firelight. As my gaffer friend Richard Roberts once said while operating an array of flickering tungsten globes (method no. 3), “There’s nothing like a real fire… and this is nothing like a real fire.”


1. Waving Hands

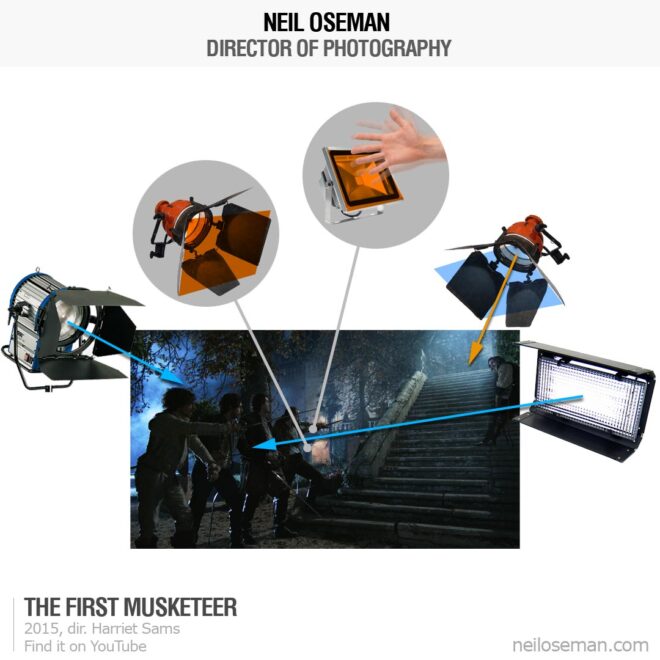
The simplest way to fake firelight is to wave your hands in front of a light source. This will work for any kind of source, hard or soft; just experiment with movements and distances and find out what works best for you. A layer of diffusion on the lamp, another in a frame, and the waving hands in between, perhaps?

Visit my Instagram feed for loads more diagrams like this.

One of my favourite lighting stories involves a big night exterior shot from The First Musketeer which was done at the Chateau de Fumel in the Lot Valley, France. We were just about to turnover when a bunch of automatic floodlights came on, illuminating the front of the chateau and destroying the period illusion of our scene. We all ran around for a while, looking for the off switch, but couldn’t find it. In the end I put orange gel on the floodlights and had someone crouch next to each one, wiggling their hands like a magician, and suddenly the chateau appeared to be lit by burning braziers.


2. Wobbling Reflector

This is my go-to technique – quick, easy and effective. It’s demonstrated in my Cinematic Lighting course on Udemy and also in this episode of Lensing Ren:

All you need is a collapsible reflector with a gold side, and an open-face tungsten fixture. Simply point the latter at the former and wobble the reflector during the take to create the flickering effect.


3. Tungsten Array

If you want to get more sophisticated, you can create a rig of tungsten units hooked up to a dimmer board. Electronic boxes exist to create a flame-like dimming pattern, but you can also just do it by pushing the sliders up and down randomly. I’ve done this a lot with 100W tungsten globes in simple pendant fittings, clipped to parts of the set or to wooden battens. You can add more dynamics by gelling the individual lamps with different colours – yellows, oranges and reds.

John Higgins’ 2MW firelight rig from “1917”

Larger productions tend to use Brutes, a.k.a. Dinos, a.k.a. 9-lights, which are banks of 1K pars. The zenith of this technique is the two megawatt rig built by gaffer John Higgins for Roger Deakins, CBE, BSC, ASC on 1917.


4. Programmed L.E.D.

Technological advances in recent years have provided a couple of new methods of simulating firelight. One of these is the emergence of LED fixtures with built-in effects programmes like police lights, lightning and flames. These units come in all shapes, sizes and price-ranges.

Philip Bloom’s budget fire-effect rig on location for “Filmmaking for Photographers”

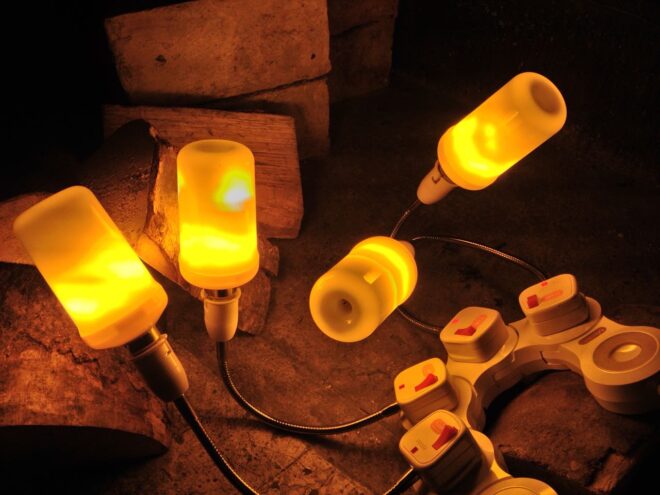
On War of the Worlds: The Attack last year, gaffer Callum Begley introduced me to Astera tubes, and we used their flame effect for a campfire scene in the woods when we were having continuity problems with the real fire. For the more financially challenged, domestic fire-effect LED bulbs are cheap and screw into standard sockets. Philip Bloom had a few of these on goose-neck fittings which we used extensively in the fireplaces of Devizes Castle when shooting a filmmaking course for Mzed.


5. L.e.D. Screen

A logical extension of an LED panel or bulb that crudely represents the pattern of flames is an LED screen that actually plays video footage of a fire. The oil rig disaster docu-drama Deep Horizon and Christoper Nolan’s Dunkirk are just two films that have used giant screens to create the interactive light of off-camera fires. There are many other uses for LED screens in lighting, which I’ve covered in detail before, with the ultimate evolution being Mandalorian-style virtual volumes.

You don’t necessarily need a huge budget to try this technique. What about playing one of those festive YouTube videos of a crackling log fire on your home TV? For certain shots, especially given the high native ISOs of some cameras today, this might make a pretty convincing firelight effect. For a while now I’ve been meaning to try fire footage on an iPad as a surrogate candle. There is much here to explore.

So remember, there may be no smoke without fire, but there can be firelight without fire.

5 Ways to Fake Firelight

Front-light

A front-lit shot of mine from “The First Musketeer” (2015, dir. Harriet Sams)

Front-light is a bit of a dirty word in cinematography. DPs will commonly be heard rhapsodising about beautiful backlight or moody sidelight, but rarely does the humble front-light get any love. But there is no right or wrong in cinematography. Just because front-light is less popular, doesn’t mean it can’t make a great shot.

Why do we avoid front-light so often? Because it usually flattens things out, reducing or eliminating any sense of depth in the image, and giving no shape to faces or objects. Sometimes this might be the perfect look: for a character who is shallow, or who feels like their life is dull and uneventful, perhaps; a live-action scene to be intercut with two-dimensional animation; or a stylised flashback like the image above. And sometimes, of course, front-light is unavoidable for logical reasons – if a character is looking out of a window, say. The trouble is, it can make for un-engaging or un-cinematic images, and that’s when you may want to pull some other tricks out of the box.

Here are six ways to bring some interest back into a frontally-lit frame.


1. Cut the light.

A shot of mine from “Crossing Paths” (2015, dir. Ben Bloore)

If you can flag some of the front-light, reducing the area of the frame it’s hitting, and leave the rest to the fill light or to fall into shadow, you’ll get some contrast back into your image.


2. Use a gobo.

Another shot of mine, this one from “Lebensraum” way back in 2007.

If it doesn’t make sense to cut the light, try breaking it up with a gobo. You can make a gobo from almost anything. Commonly on night exteriors I send a spark off to liberate a branch from a nearby tree and rig that in front of the key-light. If I need to create a window-frame effect I’ve been known to clamp a chair or stool to a C-stand to get a suitable pattern of perpendicular lines.


3. Add dynamics.

Front-light is often more interesting if it’s not there all the time. If you can find an excuse to have it flicker or move somehow, you’ll get a lot more mood and shape in your shot. Firelight, TVs, rippling water, panning searchlights or the headlights of a passing car can all safely come from the front and remain dramatic. Create a moving gobo and you’ve got something really interesting. The tree branch example from earlier – if that blows around in the wind then it will add a lot of tension to the visuals. Here’s a firelight example from Ren: The Girl with the Mark

(Check out my Instagram feed for more lighting breakdowns like this.)


4. Darken the background.

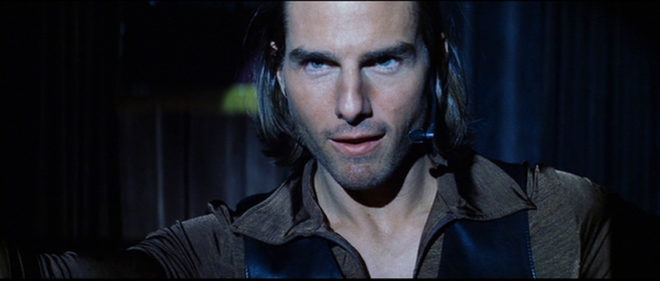
“Magnolia” (DP: Robert Elswit, ASC)

You can combat the lack of depth by keeping the background dark, so that the front-lit subject stands out against it. This will happen automatically due to the Inverse-square Law (a post on that is coming soon) if the subject is close to the source, e.g. standing right by a window. Due to the nature of front-light, you probably can’t flag the background without flagging the subject too, so bringing your source closer to the subject or redressing the background may be your only options.


5. Make a virtue of the subject’s shadow.

“The Shadow of Death” by William Holman Hunt, 1873

One reason to avoid front-light is the distracting shadow which the subject will cast on the background. But sometimes this can be a great benefit to the shot, almost becoming another character, or adding subtext as in this painting.


6. Use a strong backlight.

A still of mine from “Stop/Eject”. The red backlight and the kicker from the practical help mitigate the flat front-light.

If there’s nothing you can do to modify the front-light, then pumping up the backlight might well save the day. The most flatly-illuminated shots suddenly become deep and appealing when the subject has a halo of over-exposed light. Indeed, this is what commonly happens with day exteriors: you shoot into the sun to get the nice backlight, and ambient light flatly fills in the faces.

So next time you’re faced with front-light, remember, it’s not the end of the world!

Front-light

Lighting I Like: “Ripper Street”

The second episode of Lighting I Like looks at a scene from the season four premiere of Victorian crime drama Ripper Street, available on Amazon Prime in the UK.

On closer inspection, the “tungsten fill” I mention in the video is more of a soft tungsten toplight – perhaps a Chimera Pancake – rigged to the ceiling in the centre of the room. When Jackson exits at 2:00 you can see him walk under it.

Here’s some further reading if you want to know more about using practicals, and candlelight in particular:

5 Tips for Working With Practicals

Candlelight – how I tackled multiple candlelight scenes in my first period production, The First Musketeer, including a video blog from the set.

I hope you enjoyed the show. Episode three goes out at the same time next week: 8pm GMT on Wednesday, and will cover a scene from the 2001 movie Harry Potter and the Philosopher’s Stone. Subscribe to my YouTube channel to make sure you never miss an episode.

Lighting I Like: “Ripper Street”