Mini-DV Memories

Goodbye, Mini-DV
Goodbye, Mini-DV

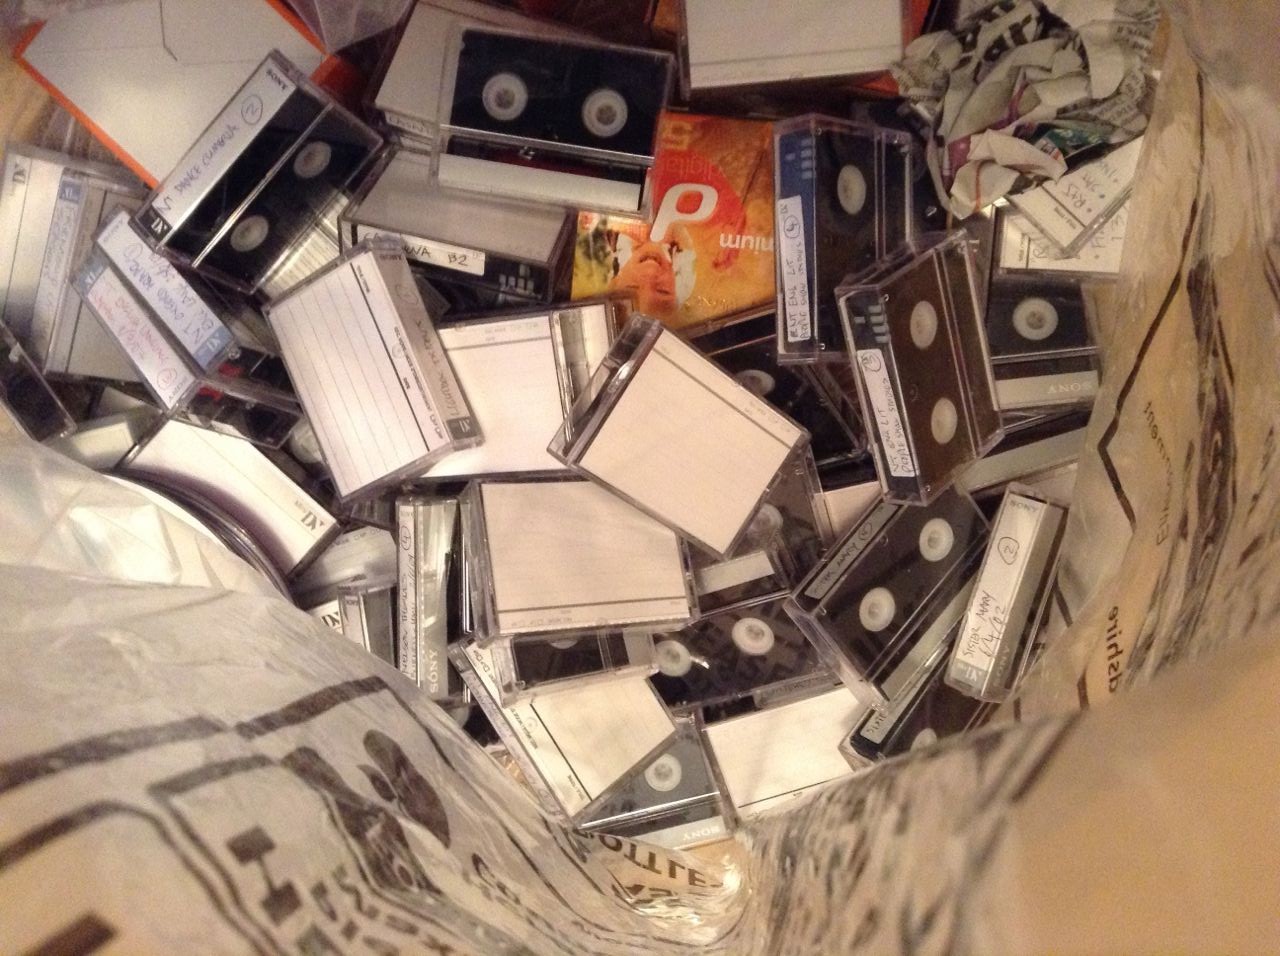
I’m moving soon, to a much smaller place, and lots of my stuff has to go. Amongst the things going into bin bags at the moment is a large number of Mini-DV tapes. Funny to think how ubiquitous they were in the micro-budget movie world just a few years ago, and now they’re a thing of the past.

How could a mere 720 x 576 pixels ever have looked good? (I frequently deinterlaced my DV footage and cropped it to 16:9, which must have reduced the vertical resolution to about 200 lines!) Cathode ray tubes certainly helped. CRT screens have a lovely softness, which I still prefer to LCDs, and that softness blurred the limited number of pixels into one organic image. Bright colours were particularly softened, a fact which Mini-DV compression exploited by devoting little data to chrominance, resulting in blocky saturated colours that looked terrible on your computer, but which blurred magically back into acceptability on your CRT TV.

An example of very blocky saturated colours in Soul Searcher

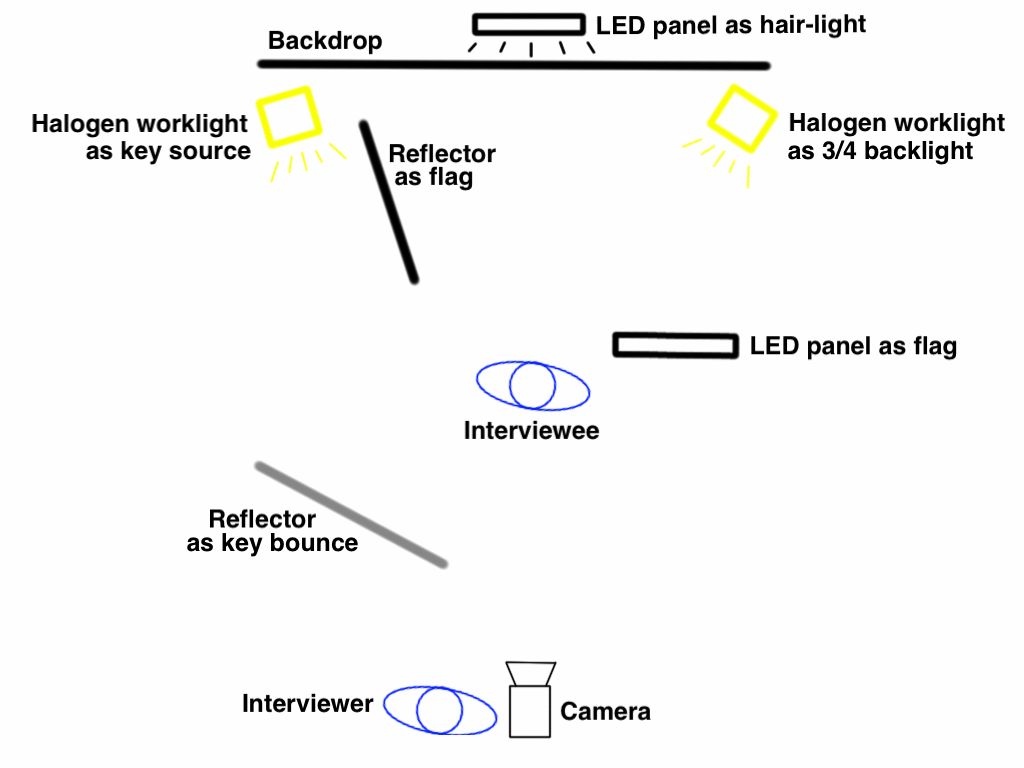
I don’t know how many stops of dynamic range a typical DV camera had, but it wasn’t many. Shooting in daylight was a nightmare; you could never find an aperture setting where you weren’t losing loads of detail in blown-out whites and/or crushed blacks. I embraced the contrast, lighting everything like film noir, which the format handled pretty well. In this 2005 featurette I outline the lighting techniques I learnt for Mini-DV. While incredibly crude by today’s standards, the underlying principles are still sound.

Shooting Soul Searcher on my XL1

The video bitrate of DV was just 25mbps. By comparison, my Blackmagic Production Camera shoots at 880mbps – that’s 35 times more detail per frame. Despite this, there were a few big theatrical films shot on DV, Lars von Trier’s The Idiots being first. Perhaps the best known is 28 Days Later, shot on a Canon XL1, a camera I owned for several years.

I loved that camera! And in some ways it was better than today’s ultra-HD cinema cameras. It was so light and comfy to put on your shoulder. You didn’t need a rig – it actually had a bloody hand grip next to the lens! And get this – it had a viewfinder! That came with it, no extra charge! There was no DITing, no dual system sound to sync. How easy it all was!

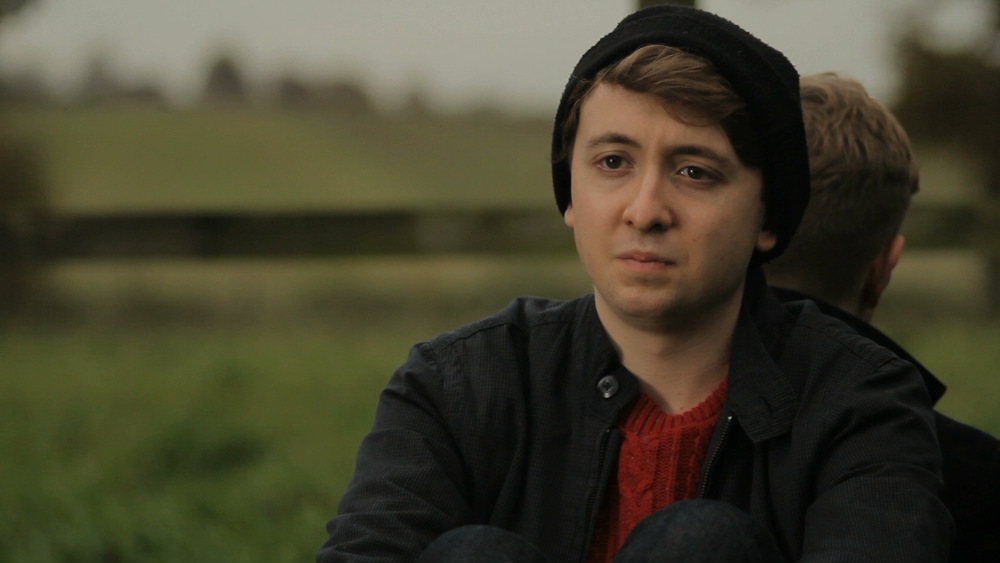
A nice bit of noir lighting from Soul Searcher

After shooting my feature film Soul Searcher and countless other projects I DPed, my XL1 met an ignoble end, its lenses Ebayed and its malfunctioning body Freecycled. I’d foolishly bought a Sony A1, an awful, awful HDV camera that I was stuck with until I joined the DSLR revolution in 2011.

minidvThat A1 will not survive my moving cull either. It’s languished in a drawer for the last few years, my sole remaining means of playing back old DV tapes. Now the tapes are going, so will the camera.

So goodbye, Mini-DV. I cut my teeth on you. Your accessibility allowed me to learn my craft, and your shonky dynamic range forced me to learn to control light. For that I will always be grateful.

Mini-DV Memories

Blogging Tips

wordpress-bloggingI recently passed the milestone of my 1,000th blog post, and many people have asked me how I have the discipline to keep writing posts week in, week out. I think the key is to see it as an opportunity, not an obligation: an opportunity to connect with and help others in your field; an opportunity to promote yourself; an opportunity to marshal your thoughts and solidify things you’ve learnt by communicating them to others. Sometimes I see my blog as a giant virtual notebook – I’m just keeping my notes publicly – and I often refer back to my own posts to remind myself how I did something or what mistakes I need to avoid this time around.

“But I don’t have anything to write about,” is a common refrain. I doubt this is true. I’m constantly surprised that I manage to keep coming up with ideas for posts, but there is nothing special about me. If I can do it, you can do it too.

Here are some suggestions.

  • Whenever you do something you’re at all proud of, or which someone else compliments, or where someone enquires about how you did it, consider this a potential subject for a blog.
  • Read other blogs, not necessarily on the same sort of subject as yours. Look at the types of posts they do and think about how you can apply those formats to your own area of expertise.
  • Posts like this one, which consist largely of a bullet-pointed or numbered list, are easier to write, and more digestible and less daunting for a reader than a big block of solid text. (Here’s another example.)
  • Review books, films or other websites. (Example)
  • ‘Top ten’ posts can be a quick way to generate content, being a sort of cross between brief reviews and a numbered list. (Example)
  • Write about projects you’re working on and what you’re learning from them. (Example)
  • Break down the steps involved in creating something – a lighting set-up, a prop, a poster, whatever it is you do. Illustrate the steps with photos. (Example)
  • Write about trends you have observed in your field, and what readers could do to buck or conform to them. (Example)
  • Discuss your mistakes and how you plan to avoid making them again. (Example)
  • If you witness someone doing something badly, it can be tempting to write a blog about how it should be done. It’s advisable, however, to let some time elapse first, and you should never name names. (There are examples on this site, but I’m not going to point them out!)
  • Be aware of what’s in the news and what’s trending on social media. Could you blog about your take on these issues? (Example)
  • If the written word isn’t your thing, consider video blogging, or podcasting, but be careful not to ramble. (Example)
  • If you’re really convinced you have no useful knowledge to share, that in itself could be the basis for a blog: your quest for knowledge. You could do posts such as:
    • re-blogging material from other sites (but get permission first) (example);
    • interviews (example);
    • guest blogs, where you ask someone else to write a post for you (example);
    • embedding an interesting video you’ve seen, and summarising the tips you gleaned from it. (Here’s an example on NoFilmSchool.com.)
Blogging Tips

Shooting in Rain

Il pleut dans la nuit. Ce n'est pas jolie.
The rain in France falls mostly on the crew of The First Musketeer.

Rain. How we’d love to go inside and have a cup of tea when the old British precipitation interrupts a shoot, but quite often the schedule demands that we carry on regardless. Here are a few tips for filming in the wet stuff.

Cover the Camera

If you don’t have a proper rain cover, a transparent recycling bag with a couple of holes cut in it will usually do the job, but have someone hold an umbrella over the camera at all times as added protection. If you have them, put on a matte box and top flag to keep rain off the lens.

Check the Lens

Condensation may well be an issue. Have an assistant with a ready supply of dry lens tissues (in a ziplock bag), because a cloth will quickly get too damp to be of any use.

In this photo by Miriam Davies from a location shoot on Ren, you can see a bagged LED panel on the left of frame.

Look After the Lighting

Transparent recycling bags are perfect for covering LED panels, which don’t get hot.

Tungsten lamps get so hot that they burn off any water before it can do any damage, so as long as they’re switched on you don’t need to worry about them getting wet, but you should wrap the switch in a plastic bag.

The same goes for HMIs, though you’ll need to put a bin bag over the ballast. Make sure the bag is loose at the top, so that the heat from the ballast can inflate it and then dissipate through the bag; if you wrap the bag on tightly, the ballast will overheat and cut out.

People can be understandably concerned about mixing water with electricity, but honestly, I’ve run tungsten and HMI lamps in the pouring rain for hours without covering them, and never had any problems. If you’re really worried, clip a sheet of gel over the lamphead to make a little hood.

16A cable
16A cable

Use Outdoor Cabling

Ideally you should use only 16A (and above) cabling with C-form sockets (the round blue ones); these are rainproof. If you have to use domestic 13A extensions, wrap all the connections in plastic bags.

Seeing the Rain

The key to making rain show up on camera is backlight. If you want it to look like a real downpour, get your biggest HMI at the back of shot and blast it towards camera. Or maybe you don’t want to see the rain, maybe it’s bad for continuity, in which case you should avoid backlight at all costs.

Ye olde person-talking-to-other-person's-back shot in Soul Searcher, obviating the need for a shot-reverse.
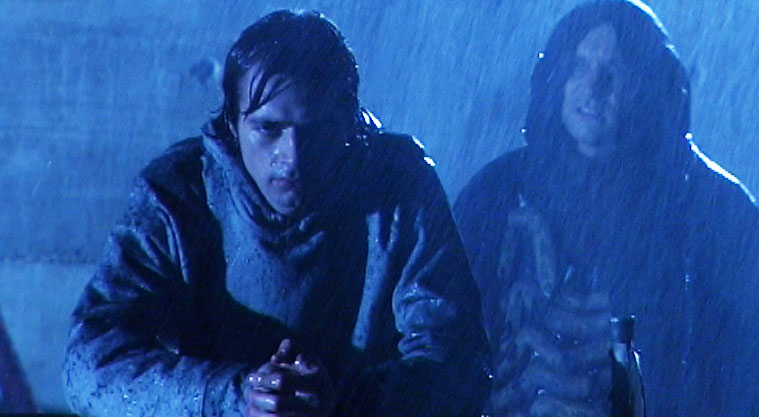
The rain in this shot from Soul Searcher is fake, but it’s backlight that makes it show up.

Need rain for your shoot but the sky is cloudless? Read my post on faking precipitation.

Got precipitation of a more wintry nature? Check out my tips for shooting in snow.

I’ll leave you with the latest Ren behind-the-scenes video, which is all about rain and shooting – or not shooting – in it. Subscribe to get the Mythica Entertainment channel to see all the latest Ren videos as they’re released.

Shooting in Rain

Mixing Amelia’s Letter

IMG_1841
Nico Metten works on the mix of Amelia’s Letter

Yesterday I attended the final sound mix for Amelia’s Letter, the short supernatural drama I directed last year for writer Steve Deery and producer Sophia Ramcharan. This is always one of my favourite parts of the filmmaking process; all the hard work of generating the material is done, and it’s just about arranging those materials in the right proportions to create a whole larger than the sum of its parts.

Mixing is harder the more tracks of sound you have. It took Neil Douek and I forever to wrangle the layers and layers of audio I’d laid into a decent mix for Soul Searcher (listen to a breakdown here), and The Dark Side of the Earth‘s pilot was a delicate balancing act with swordfight SFX, dialogue and a big orchestral score all going on at the same time (watch an interview with the mixer here). Stop/Eject, being quieter and less complex, was a breeze to mix (read the blog post here).

Amelia’s Letter was a little more complex than Stop/Eject, but not much. It was my third collaboration with gifted sound designer Henning Knoepfel, and my fourth with the equally gifted composer Scott Benzie, who both gave us excellent material to work with. In the pilot’s seat for the mix was Nico Metten of Picture Sound. Although I hadn’t worked with him before, he was very much in tune with what I wanted from the mix. In a nutshell, the brief was: make it scary.

If Amelia’s Letter succeeds, and I think it does, it should be by turns unnervingly scary and heart-breakingly sad. I did research the horror genre when I embarked on the project, but for the latter stages of preproduction and during the shoot (basically, whenever I was dealing with the actors) the important thing was that the characters worked and were empathetic; the sadness would naturally follow. I tried to avoid thinking of the film in horror terms at all during that stage.

Recording one last sound effect...
Recording one last sound effect…

But once we got to post, it was time to start thinking about creeping out the audience, and downright scaring them. As the last stage in the audio chain, the mix needed to play a big part in this. Nico agreed, and had already added some extra creepy sounds by the time I arrived. As we went through, we added in more impacts to the jumpy moments, not forgetting to keep things quiet in the run-up to those moments to make them seem even louder by comparison.

Just as, during the picture edit, Tristan and I had been reminded of the power of NOT cutting, during the sound mix I was reminded of the power of subtracting sound, rather than always adding it. In a couple of key places we discovered that muting the first few bars of a music cue to let the SFX do the job made for much more impact when the music did come in.

But the mix wasn’t just about making it scary. The film climaxes with a sequence of flashbacks and revelations that was tricky to edit and still wasn’t quite doing what I wanted. It was only at the scoring and mixing stage that I was finally able to realise that a clear transition was needed halfway through the sequence; as I said to Nico, “At this point it needs to stop being scary and become sad.” In practice this meant dropping out the dissonant sounds and the ominous rumbling, even dropping out the ambience, and letting Scott’s beautifully sad music carry the rest of the scene.

It never ceases to amaze me how the story shines through in the end. You hack away at this lump of stone all through production and post, and at the end you’ve revealed a sculpture that – though in detail it may be different – follows all the important lines of the writer’s original blueprint.
Now begins the process of entering Amelia’s Letter into festivals…

Amelia’s Letter is a Stella Vision production in association with Pondweed Productions. Find out more at facebook.com/ameliasletter

Mixing Amelia’s Letter

Lighting ‘X, Y & Z Rays’ by Revenge of Calculon

Stage-bound music promos can be an interesting challenge for a cinematographer. Often there is no set that has any basis in reality, no windows, no starting point for lighting. This should be very freeing but is actually pretty scary. Where to start?

This is X, Y & Z Rays by Revenge of Calculon, my latest music video for director Tom Walsh of Polymath Pictures

Nick Pylypiuk did an awesome job of building and programming the LED panels, and Amy Nicholson did a great job of dressing the gadgets and cables. How did I go about lighting it?

2 of the 800W tungsten Arrilites hidden behind the big LED panels
2 of the 800W tungsten lamps hidden behind the big LED panels

Well, cinematography isn’t just about mimicking natural light. It’s about depth and contrast, to name just two things. And depth was where I started. If I didn’t want the LEDs to float in a black background, then it was necessary to light the cyclorama to reveal it as a separate layer behind the LED panels. But leaving the cyc dark would give the image more contrast. I wanted to have my cake and eat it. So the lamps I lit the cyc with had to be dimmable so that they could be off at some points during the track and on at others.

I placed 800W tungsten lamps on the floor behind the central and outermost LED panels, uplighting the cyc. Poor Emma, the art assistant and the smallest member of the crew, was assigned to hide behind one of the panels, pulsing the 800s on a dimmer board in time with the music.

Next I needed to light the musicians. We didn’t have access to the studio grid, the LED panels were providing plenty of light from behind, and any light from the front would have polluted the panels, so my only option was to light from the sides. I placed a Dedolite off to each side, gelled with different varieties of blue/green gel to make this layer of the image stand out from the warm, ungelled tungsten of the 800s.

The 4 Dedolites can be seen here, gelled blue-green, blue-green, purple and yellow.

This was all very well, but it left a lot of the art department’s nice foreground dressing in complete darkness. So I set up a second Dedolite on each side, crosslighting the amps and other gubbins. I gelled one of these yellow and the other pinky-purple. Normally I prefer to use a narrower palette of colours, but since the patterns programmed into the LED panels used all the colours of the rainbow, I felt I had license to do the same.

After a couple of run-throughs, I decided on an alternating, pulsing pattern for the four Dedolites at half the speed of the 800s. My initial instinct had been towards something more sophisticated, but there was plenty going on on the LED panels without needing to make the foreground too manic.

Clockwise from top right: a blue-green-gelled LED panel, a tungsten-tubed Kinoflo and a daylight-tubed Kinoflo Divalite amongst the set dressing

Amy was still looking to add to the set dressing, so I suggested putting our battered old Kinoflo into shot for a bit of extra interest. This left only a Kinoflo Divalite and a 1×1′ LED panel in my arsenal. “What the hell,” I thought, and hid them behind a couple of the amps to pick out some more of the set dressing.

Despite all this, I still think the strongest bits of the video are those where all my lights are off, leaving just the patterns on the large LED panels. With a bit of dispersed smoke in the studio, the LEDs give off a lovely glow, and the dynamic wrapping backlight they shed on the performers is really beautiful.

And we quickly found that they looked great out of focus, and went with that for a few set-ups. In fact, much of the single day of shooting was spent experimenting and going with the flow. Tom trusted me to get interesting coverage while he helped operate the LED panels, and I found the electronic music guiding me into Wes Anderson-style camera moves: lateral tracks, and bold, simple pans and tilts.

Find out more about Polymath Pictures at www.polymathematics.co.uk.

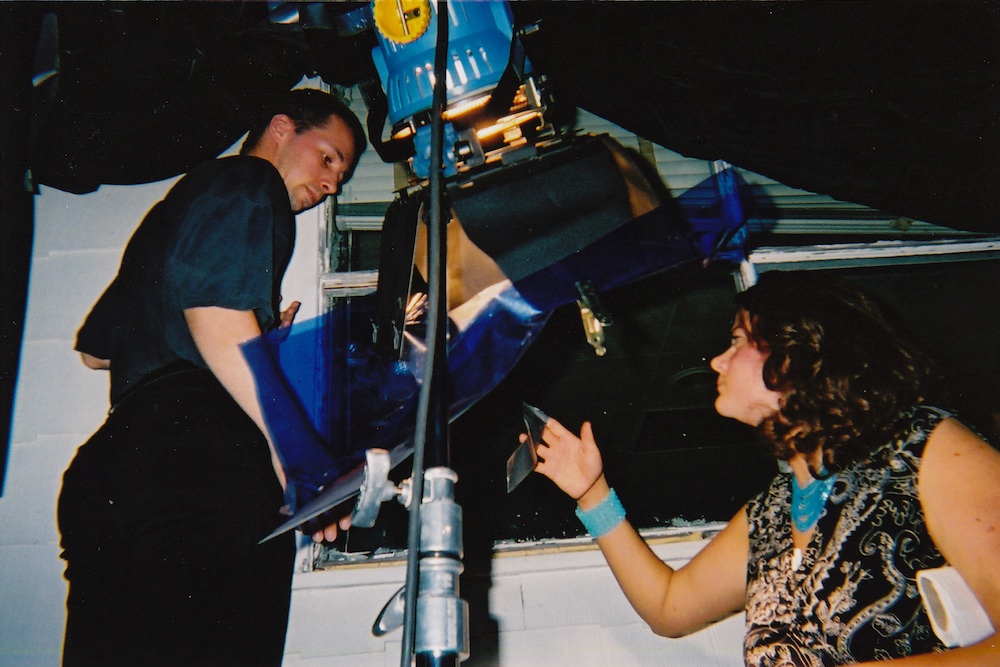
Photo by Amy Nicholson


Lighting ‘X, Y & Z Rays’ by Revenge of Calculon

How to Black Out Windows

Blacking out a window
Blacking out a window on Beyond Recognition

Sometimes when shooting indoors, you need to make day look like night. And believe it or not, there’s an art to blacking out windows. Light is like water: it leaks in through the tiniest crack, and you need to appreciate that if you’re going to black out a window successfully. Here are my tips.

  1. Don’t do it. Shoot at night; it’s quicker and easier. It will also look much better because you can light the view outside for added depth in the background of frame.
  2. Ignored rule one? Well, at least do a split shoot so that you only shoot away from the windows during daylight, and shoot towards them after dark. If the windows aren’t actually in frame, your light seal doesn’t need to be 100%.
  3. Ignored rule two as well? Unquestionably the best way to black out a window is to gaffer tape black drapes or bin bags to the outside of the window frame. Don’t try to tape to the surrounding brickwork; it won’t hold. The gaffer tape needs to go in an unbroken line all the way around the edges, or light will leak in through the cracks.
  4. If you have large windows to black out, it may be tempting to rig drapes on stands. OK, fine, but you still need to gaffer tape all the edges. And make sure the stands are well sandbagged in case the wind gets up.
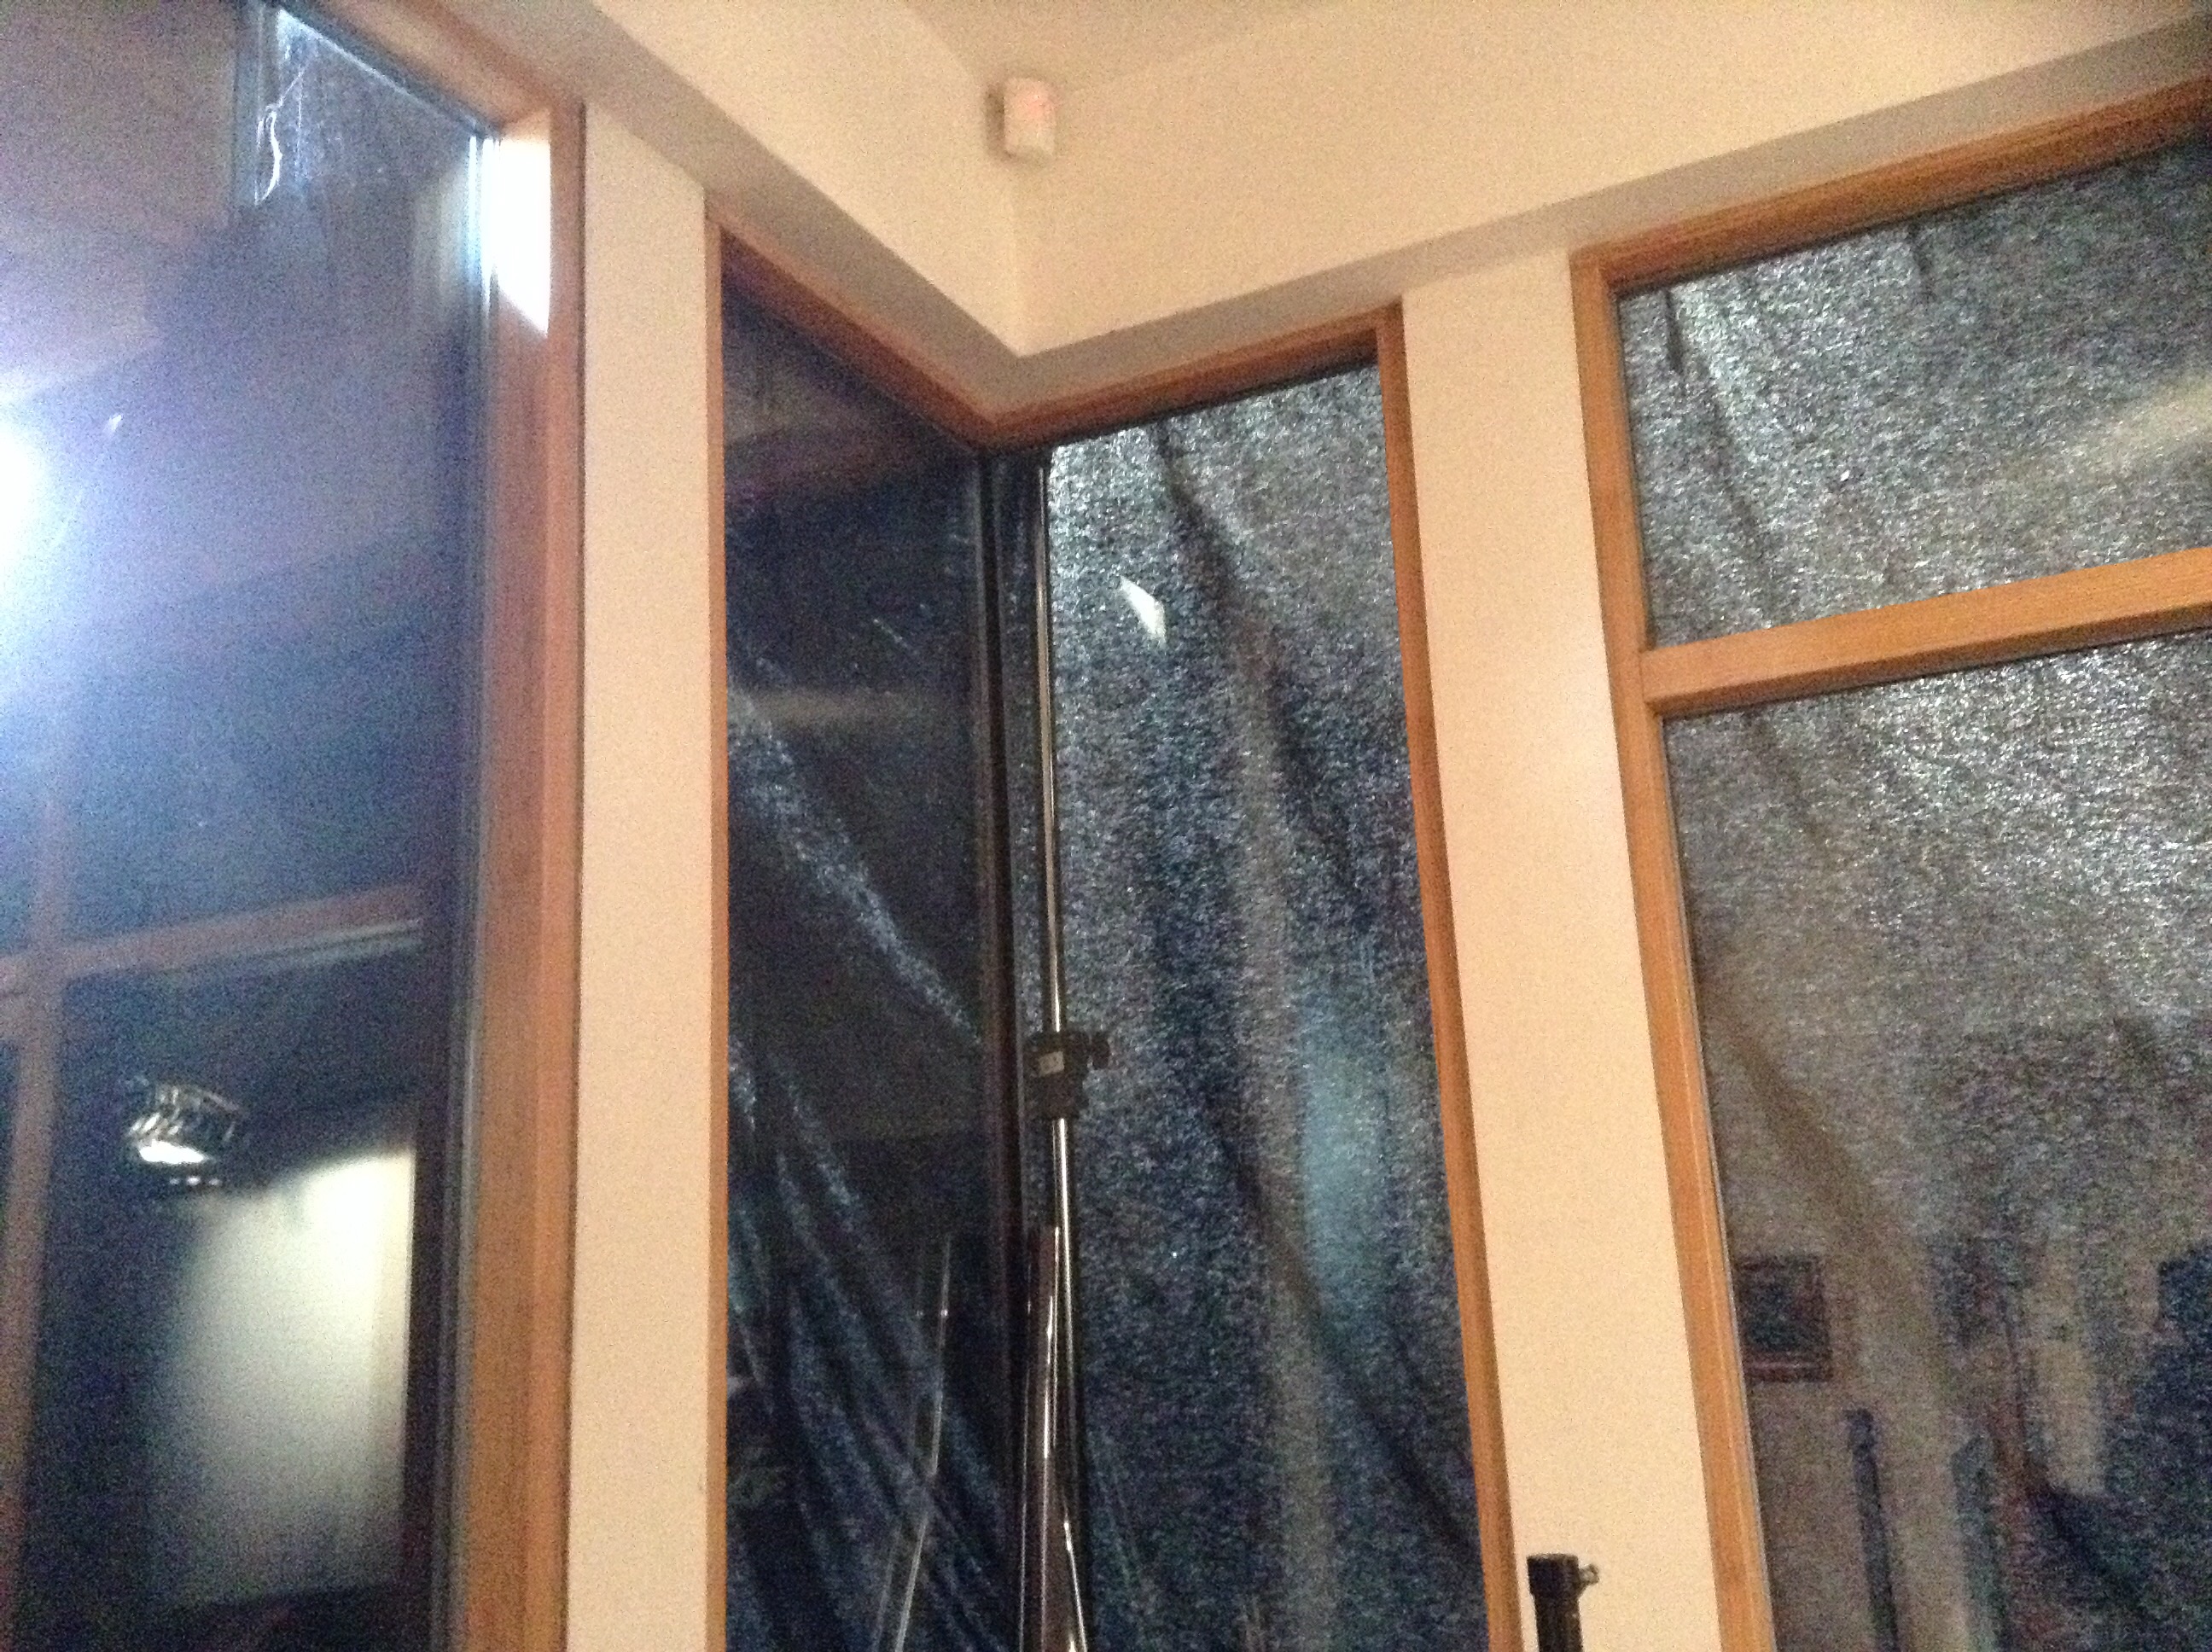
  5. Here’s an example where the lefthand side hasn’t been taped. As you can see, the daylight comes in and nicely cross-lights the drapes, showing up every wrinkle and utterly destroying the illusion of a dark sky. (Fortunately, in this instance the window wasn’t going to be in shot, and the amount of light leaking in wasn’t sufficient to contaminate the DP’s lighting design.)
    image
  6. When you’re outside doing the blacking-out, it is impossible to judge the quality of your work. You need to go inside and see what it looks like. You’ll probably get a nasty shock.
  7. Beware that some things that seem opaque from the outside – bin bags or fabric – actually let light through. Hold them up to the light to check this before you waste time gaffering them up. These drapes looked completely opaque from outside…
    image
  8. Sometimes the DP will want to put a lamp outside to simulate moonlight, and this will need to be tented around. This is extremely difficult and can waste a lot of time. The lamp will spill light onto the drapes, showing them up for what they are. Black wrap the lamphead as much as you can (without covering any vents) and don’t use a tarpaulin as black-out material because it will reflect the light.
  9. Finally, remember to put any stands holding up the drapes BEHIND the drapes, so they’re hidden from camera. (I’ve seen this mistake made, and made it myself, several times – see picture above!

UPDATE: Karl Poyzer has this great tip: “A much easier way to black out windows not in shot or behind a curtain is to spray them with water and roll tin foil over them, stays stuck there indefinitely, blocks out 100% of the light, is cheap and won’t fall down.” Thanks Karl!

How to Black Out Windows

What I Learnt from Ren

This coming week the core team from Ren, the fantasy adventure web series I lensed last autumn, will meet for a de-brief. We’ll discuss the challenges of season one and how we can meet those going forward to season two and beyond. And we’ll probably drink wine.

So I thought now would be a good time to reflect on what I personally learnt from Ren: Season One, and where I’d like to improve for season two.

“People talk about lighting, but the hardest thing to do [for a cinematographer] is to shoot a day exterior over an extended period… especially in England.” – Roger Deakins

The biggest challenge I was plunged straight into was the fact that most of the season was set outdoors on a single day. How could I maintain a consistency of lighting without huge cranes, silks and big HMIs, or without demanding the production grind to a halt whenever the light didn’t match (something the schedule couldn’t accommodate)? Quite simple, I couldn’t. Perhaps if I’d been involved in preproduction, I could have helped shaped the schedule so that certain scenes were only being shot at certain times of day, but given how much the schedule changed during shooting, this probably wouldn’t have helped.

Colin Smith slates a shot of RIchard Zeman as the Kah'nath Commander
Colin Smith slates a shot of Richard Zeman as the Kah’nath Commander

But being forced to leave lighting the set to Mother Nature had its advantages. Whereas indoors, or at night, the cinematographer must light the set and the actors, for daylight exteriors the only thing you have the ability to light is the actors. That really focused my attention on the faces and telling the story through the way light hit them.

I was able to compile a mental dossier of what works well for each actor – and each character. So I knew that Ren (Sophie Skelton) looked best with a soft front- or side-on key, but not three-quarter, that Hunter (Duran Fulton Brown) looked best in toplight, that Karn (Christopher Dane), the Commander (Richard Zeman) and Lyanna (Dita Tantang) all looked great with a hard side key. I knew that Baynon’s (James Malpas) eyes looked extra expressive with a large bounce board under his face, whereas Hunter only needed a little dot of an eyelight. And so on, and so forth. In the future I want to get better and faster at compiling these ‘dossiers’.

Setting an eyelight under the camera
Setting an eyelight under the camera. Photo: Richard Roberts

Despite gathering all this info during the exterior shoots, it was a still a bit of a shock when week six hit and I suddenly had to light these familiar faces entirely artificially. In the past I’ve often seen natural light as more of a hindrance than a help, but working with it for five weeks solid gave me a new respect for it, and I found myself more critical of my own lighting than ever.

The main challenge indoors was achieving the soft, innocent look I’d established for the title character without a skyfull of natural light to bounce around. The kinoflos I used to key Sophie often made her look very shiny, much to the exasperation of make-up artist Becca Youngs, who had to keep slathering more powder on her. (Which is one of many reasons why camera and make-up tests in pre-production would be beneficial for future seasons.)

In fact it wasn’t until the very last day of the shoot when I discovered that the best soft sources were actually hard sources – like 800W tungsten lamps or even the 2.5K HMI – bounced off Celotex (matte silver bounce board). If you read things like American Cinematographer you start to realise that most DPs create soft sources this way, bouncing par or fresnel fixtures off poly, foamcore, Ultrabounce or the like and often pushing it through diffuser of some kind as well. Stephen Murphy and Ed Moore conducted a great test of various bounce and diffusion materials on their blog recently. The problem with this kind of lighting for a low budget DP is that you need to hire larger lamps, because bouncing and diffusing really dilute a lamp’s power. Though in last month’s Cine Summit, DP David Vollrath recommended cheap-to-hire Source 4 Leikos as bounce sources, so that’s worth looking into.

Shooting on my Sigma 50mm f1.4 from under my signature Stealth Cloth, to keep sunlight off the Blackmagic's screen
Shooting on my Sigma 50mm f1.4 from under my signature Stealth Cloth, to keep sunlight off the Blackmagic’s screen

The other thing I’d love to spend money on next time, if at all possible, is a set of cine lenses. Season one was shot with my three Sigma DSLR primes and some legacy Pentax primes belonging to gaffer Richard Roberts. While the Pentax glass looks great, and the Sigma glass is fine at f4 – the stop I shot most of the show at – when it starts to get wide open it goes a bit soft (not that the average viewer would notice). Inevitably some of the night and interior scenes had to be shot wider than f4, and everything shot on the B camera – Richard’s Blackmagic Cinema Camera, with its smaller 16mm sensor – was exposed at f2.8 to match the depth of field. Plus I deliberately used an ultra-shallow depth of field for certain scenes in which Ren is feeling the effects of the spirit within her. So lenses that hold their sharpness better at wide apertures, and which are easier to pull focus on, would be great for season two.

Whatever level of resources we can get for future seasons, I know it will be a fantastic experience and I’ll learn a whole lot more, so bring it on!

Filming Ren's death scene. Just kidding…. or am I? Photo: Michael Hudson
Filming Ren’s death scene. Just kidding…. or am I? Photo: Michael Hudson
What I Learnt from Ren

What Does it Take to be a Cinematographer?

Adrian Biddle
Adrian Biddle

Being a director of photography is not just about having an eye for composition and understanding light. There are many other skills a DP needs. Today I’ll discuss what some of those are, in my opinion, and in the opinions of some top Hollywood DPs.

“Obviously you have to know what you are doing, have an eye for photography, and know about film and composition. But it’s a team effort.” – Adrian Biddle (Aliens, Event Horizon)

Shane Hurlbut (Need for Speed, Terminator: Salvation) says that 33% of a cinematographer’s job is managing their crew. You need to pick great people to work with, nurture them, share your knowledge with them, and trust them to deliver the goods.

Frankie DeMarco (Mad Men, All is Lost) advises trying to think like an editor: what specific shots do you need to tell the story? Editing is one of the areas it’s most useful to have experience of, as a DP. Knowing whether what you’re shooting will cut together is vitally important. I often find myself suggesting to a director that we run a scene from a little earlier, have someone come into shot at the start, or cut it later so they exit shot, knowing how useful that stuff can be in post.

Understanding the jobs of other departments is very useful. The more you know about production design, costume and make-up, the better you can light it. The more you know about acting, the better you can appreciate the impact your decisions – equipment placement, the strictness of adherence to marks you demand, the lenses and angles you select – have on an actor’s work. This doesn’t mean that you have to do all these jobs at some point, but try reading the occasional book or watching the odd YouTube video about the subject, or better still, forge great relationships with other heads of departments and pick their brains.

Douglas Slocombe
Douglas Slocombe

There are of course many rules to cinematography – the line of action, Golden Thirds, lighting the downside – but how many of them do you need to know?

“To any aspiring cinematographer, I’d say learn the rules before you try and bend or break them. You need a foundation on which to build.” – Douglas Slocombe (Indiana Jones trilogy)

You should take every opportunity to learn; read every blog, every book that you can, go to workshops, to masterclasses; watch behind-the-scenes videos. The more knowledge you have to fall back on in a crisis, the better.

“You always try to create a certain style for each film but there are times when you have to make it up as you go along.” – Jan de Bont (Die Hard, Flatliners)

Flexibility is key. You have to do what’s right for the scene, what’s right for the set and the talent, what the director wants, and what works for the schedule. Sometimes this means changing tack at the last minute. You can’t throw a hissy fit and weep for the lighting set-up you’d imagined; you have to get on with it. Corporate videos, in which you often have to sacrifice your photographic ideals for the mundane needs of the client, are great training for this.

You have to be a storyteller; all heads of department have to be. As DP, your tools for telling the story are lights and lenses. You need to absorb the script, appreciate the narrative beats and come up with creative ways to accent those beats using your tools.

Perhaps the most important thing to have is life experience.

“It’s my personal interpretation of a script that allows me to create the visuals. That interpretation is based on my own life experiences, aesthetics, education, and knowledge, all of which help to shape my understanding of a story.” – Janusz Kaminski (Saving Private Ryan, Lincoln)

Thanks to Stephen Murphy and his DOP Documents for the block quotes.

Janusz Kaminski
Janusz Kaminski
What Does it Take to be a Cinematographer?

My Two Cents on the Bafta Best Picture Nominations

Looking at this year’s Bafta Best Picture nominations, I realised there was only one that I hadn’t seen, so I headed off to the cinema to complete the set. For what they’re worth, here are my thoughts on the five nominated films.

_TFJ0226.NEFTHE IMITATION GAME is the story of Alan Turing, the man who helped shorten World War II by breaking the Nazis’ Enigma code, but was driven to suicide after being convicted of indecency for homosexual acts. The film takes numerous liberties with the truth – creating conflict where none existed, and ignoring other people who contributed to the code-breaking success – but such liberties are often necessary in adapting reality to the needs of cinema.

As played by the ever-brilliant Benedict Cumberbatch, Turing is arrogant and socially inept to the extreme, like a wartime Sheldon Cooper. Keira Knightley turns in a solid performance as Turing’s friend and confidant, as do Mark Strong and the rest of the supporting cast. With great design and beautiful 35mm cinematography, the film is a treat for the eyes.

Of all the nominated films, this is the one that got me most, emotionally. I rooted for Turing and his much-doubted Bombe machine to work, and when it does the film really soars. Then begins the plunge to the opposite end of the emotional scale. It is truly tragic what this country did to Turing, and I felt the shame of that keenly as the film drew to a close.

video-undefined-24475D3100000578-421_636x358THE THEORY OF EVERYTHING is similar in many ways, the story of another brilliant Englishman whose life is marred by tragedy. Eddie Redmayne is Stephen Hawking, the theoretical physicist who defied time in more ways than one. Diagnosed with motor neurone disease in the sixties and given two years to live, Hawking went on to model the origins of the universe.

The film is based on the autobiography of Hawking’s wife Jane, played by the very talented Felicity Jones. But inevitably it’s Redmayne who provides the tour de force performance, reportedly exhausting himself on every take as he maintained Hawking’s contorted postures.

Director James Marsh peppers the film with galactic spirals, from the simple joy of the Hawking kids playing around a circular fountain, to the profound mundanity of UHT milk swirling in a British Rail coffee. Like The Imitation Game, The Theory of Everything looks great, though its digital crispness can’t quite match the beauty of the former film’s 35mm images.

While both of these films are extremely well made and engaging, neither demonstrates a particularly unique cinematic voice, which would seem to be necessary to justify the winning of a Best Picture Bafta.

1398885003815THE GRAND BUDAPEST HOTEL, on the other hand, is stamped with the unmistakable style of auteur Wes Anderson. Formal compositions, deliberate lateral tracks, stop motion FX, intertitles, neo-fetish costumes and quirky characters all abound in this tale of hotel concierge Gustave H. (Ralph Fiennes) and his young apprentice Zero (Tony Revolori).

Book-ended by scenes in the present day (shot in 1.85:1), the film quickly moves to 1968, which depicts the titular hotel in decay, the 2.39:1 frame literally revealing the fraying edges as they bow under the distortion of Anderson’s super-wide lenses. Conversely, the main narrative, set during the hotel’s heyday of 1932, is seen only through the blinkered eye of a 4:3 frame, all flawless straight lines, as slick as Gustave.

As in all of Anderson’s best work, every situation comes across as hilariously ridiculous, and every character is memorable. Fiennes is delightfully arrogant and self-involved, Revolori is charmingly earnest, and the supporting cast are clearly having the time of their lives. The ski/sledge chase is a particular highlight, the stop motion wide shots looking joyously like something out of a seventies kids’ TV show. (I had the pleasure of working with lead animator Andy Biddle many years ago on Soul Searcher.)

But while The Grand Budapest Hotel is the quirkiest of the nominations, this quirkiness has been well practiced by Anderson throughout his career. He’s not pushing himself, and so this film does not, to my mind, merit a Best Picture win.

The last two nominations, however, both push the artform of cinema by challenging the conventions of how films are made.

boyhood_hires_3BOYHOOD, directed by Richard Linklater, was filmed in annual stages over twelve years, in order to capture the genuine ageing of its young protagonist (Ellar Coltrane). I don’t know about you, but I’m often distracted from the storyline of a movie by unconvincing ageing make-up or the substitution of what is clearly a different actor to play a character at a different age, so it was great to see a movie that finally showed real ageing.

The film stays close to reality in other aspects, too. None of the cast look like (or are, for the most part) movie stars. It’s unusual to see a spotty face or an overweight leading lady in a Hollywood movie, but Linklater does not shy away from these things. The performances are all naturalistic, even when the kids are very young; Samantha’s teasing of her younger brother will be recognisable to anyone who’s not an only child, and provides an early highlight in the film. The look of Boyhood is equally raw; its 35mm images are dirty, and you can feel the stock being pushed in the night scenes.

Unfortunately, Linklater also chose to be true to life in the narrative: there isn’t one. A burst of story a third of the way through sees the family suffer as mum (Patricia Arquette) marries a violent alcoholic, but otherwise it is, like life, a series of unconnected events. Characters show up and disappear without explanation, like the friends we lose touch with. Towards the end, Mom monologues about the futility of life, and that’s the theme I took away from this unique, accomplished but unsatisfying movie.

birdman_aFinally we have BIRDMAN, in which Michael Keaton gets near the knuckle as Riggan Thomas, a has-been actor most famous for playing a Batman-esque superhero. Riggan is now trying to reinvent himself as a serious thesp by writing, directing and starring in a Broadway play.

Apart from a brief montage near the end, Birdman echoes its theatrical setting by appearing to consist of one continuous shot. Although this isn’t unprecedented in movies, nowhere has it been done as effectively. The technical and logistical challenges of shooting a movie like this – with grips dancing around behind the camera and technicians dimming lamps up and down to maintain shape in the lighting – God knows how the boom op got in there – would overwhelm most directors, but not Alejandro G. Iñárritu.

DP Emmanuel Lubezki’s roving camera puts you right inside the action. His wide lenses, pushing incredibly close to the actors’ faces, provide a level of intimacy unparalleled in my experience of cinema. That the performances not only stand up to this minute scrutiny, but positively shine, and that the pace never flags despite the impossibility of trimming scenes in post, is evidence of a tremendous talent and skill from director and cast alike. Both Keaton and Emma Stone, as his daughter, turn in career-high performances, extending their range beyond what we have previously seen from them.

But most importantly, Birdman tells a great story with strong and interesting characters. It’s essentially a portrait of a man’s mental breakdown, and it uses the simplest techniques – arresting performances, honestly photographed – and the most complex ones – elaborate hallucination VFX within a single-shot framework – to paint this portrait.

So, because it tells a strong story, and because it does that through the highly effective use of a challenging and near-unique production methodology, BIRDMAN would be my choice to win this year’s Bafta for Best Picture.

birdman_still_3

My Two Cents on the Bafta Best Picture Nominations

Top Tips from Day Two of the Big League Cine Summit 2015

blcs-blue-on-whiteLast week I published the best tips I culled from day one of the 2015 Big League Cine Summit. To complete the set, here are the top tips from day two, starting with that legendary teacher of cinematography, Shane Hurlbut, ASC. Since Shane is so good at sharing his knowledge on the Hurlblog, I’ve only listed a few tips from him; I strongly recommend you check out his site for many, many more gems.

Shane Hurlbut – “Delivering Storytelling Impact with Light, Lens and Camera”

  • On the visual grammar of Crazy/Beautiful: controlled camera moves represent Jay’s controlling mother.
  • Shane likes to use the work of stills photographers as inspiration.
  • He added extra 400W sodium vapour fixtures to the existing 100W sodium vapour streetlights for night exteriors in Crazy/Beautiful.
  • He used a “damaged key” in Crazy/Beautiful to represent Kirsten Dunst’s flustered state. It’s messy, doesn’t quite reach both eyes.

David Vollrath – “Motivated Lighting”

  • “I don’t want to light their faces and bodies specifically. I like to light the space.” – Harris Savides
  • Stand where your subject will be to see what reflective objects are affecting your lighting.
  • Tabletops can be great bounce-boards for toplight. Maybe put muslim or paper on the table to enhance it.
  • Look for things to motivate light: windows, practicals, overhead fixtures, sconces, etc.
  • Once you’ve lit the space, it will become clearer how to light the faces.
  • Work with the art department in preproduction to make sure you get the practicals you need.
  • Flag your other sources off your practical so that excess light isn’t falling on them and washing them out.
  • You can use the reflection of a softbox to create a nice shine on a dark surface or even on a face.
  • A roll of duvetyne armed off a C-stand makes a fair stand-in for a 4×4 floppy flag.
  • “Beadboard” is just another name for polyboard. (I genuinely didn’t know that!)
  • Other bounceboards include foamcore and showcard.
  • Use Source 4 Leikos to fire into your bounce, because they’re easily cut and focused. They’re cheap to rent too.
  • It’s easier to rig a bounce card overhead than a softbox or a kinoflo.
  • Plus Green and Minus Green gels – to match or correct fluorescents – are useful in subtle 1/8th flavours.
  • “Lighting is in the gripping.” Taking away light can be more effective than adding it.
  • A “cocktail” is a layering of multiple gels.
  • A simple black card over a shiny piece of furniture can cut bounce and bring back contrast.
  • Hazers add great atmosphere, but they raise the fill level. To see shafts of light, use a dark background.

Caleb Pike – “Everything You Need to Know About Lenses”

  • A good set of primes will last you decades.
  • Lens choice affects: 1. Field of view, 2. Depth of field, 3. Compression (amount of perspective).
  • Use compression to isolate a subject, or to crop out equipment.
  • Use wide lenses to open up a space, exaggerate expressions or get the most out of camera moves.
  • Longer lenses are more flattering for close-ups. Short lenses can distort the face unpleasantly.
  • Don’t always shoot with your aperture wide open. Choose an appropriate depth of field for your story.
  • Generally it’s best to keep your aperture the same throughout a scene.
  • Avoid non-constant aperture zoom lenses for video work.
  • Primes (fixed focal length lenses) are generally faster, cheaper, lighter and sharper than zooms.
  • Cine lenses are heavier than stills lenses, do not breathe (zoom slightly when focusing), and have fixed filter rings.
  • Cine lenses have hard stops on the focus rings, so you can set focus marks on the lens.
  • Cine lenses have longer throws on the focus rings, so that follow focusing can be more precise.
  • Wide cine lenses have less distortion than their stills counterparts.
  • Passive lens adapters are cheap and simple; smart adapters maintain the electronic connection for autofocus etc.
  • Lens boosters can solve cropping problems caused by using a lens with a sensor size it’s not designed for.
  • Throttle adapters are passive adapters with neutral density fader filters built in.
  • Caleb’s budget lens recommendations:
    1. Nikon 35-70mm f3.5 macro
    2. Olympus 50mm zuiko f1.4 and 1.8 versions – sharp, with long focus throw – around $30
    3. Canon 40mm f2.8 pancake prime
    4. Nikon 100mm F2.8 E series – around $99
    5. Canon 28-80mm F2.8-4.0 L series – well built, very sharp – around $500

Matt Workman – “Camera Moves That Matter”

  • A camera “hand off” is a move that starts focused on one thing and then transitions to focus on another.
  • A classic establisher might start on a mysterious insert then pull back – “hand off” – to reveal the scene.
  • Spielberg, Scorsese, Luhrmann, Singer and Bay all use camera hand-offs frequently.
  • Camera moves increase production value and can cover multiple story beats in one shot.
  • Doing the same thing in cuts reduces your audience’s understanding of the scene’s geography.
  • Crane-ups give you a privileged view, a sense of power.
  • Write down the beats of the scene, then storyboard or previz. All departments can benefit from the previz.
  • Beware of boring bits in the middle of camera moves. Is it better to do it in cuts so you can speed it up?
  • Use Autodesk Maya for previz. Build a library of accurate grip equipment models.
  • Check out Matt’s other site which uses previz tools to illustrate other DPs’ set-ups.
Top Tips from Day Two of the Big League Cine Summit 2015