Poor Man’s Process II

Back in 2013 I wrote a blog about Poor Man’s Process, a low-tech method of faking shots inside a supposedly moving car, using lighting gags and camera movement to sell the illusion. But Poor Man’s Process doesn’t have to be limited to cars.

While gaffering for DP Paul Dudbridge on By Any Name, we had to tackle a nighttime scene in which the hero flees through a forest. Rather than trying to get close-ups with any kind of tracking rig, Paul decided to use a technique apparently favoured on Lost, whereby the actor and camera are stationary, and lights and branches are moved around them to create the impression of movement.

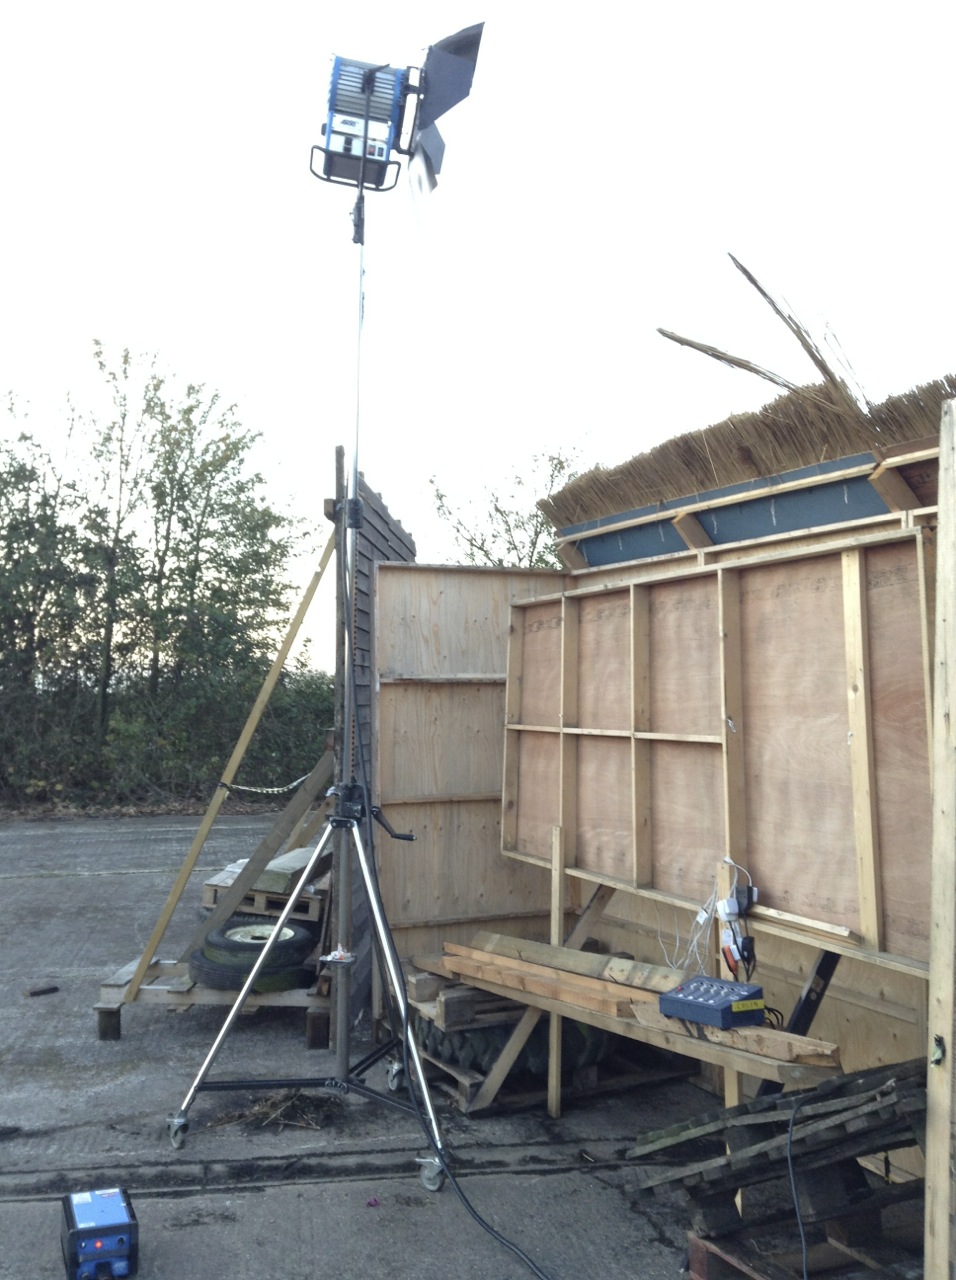
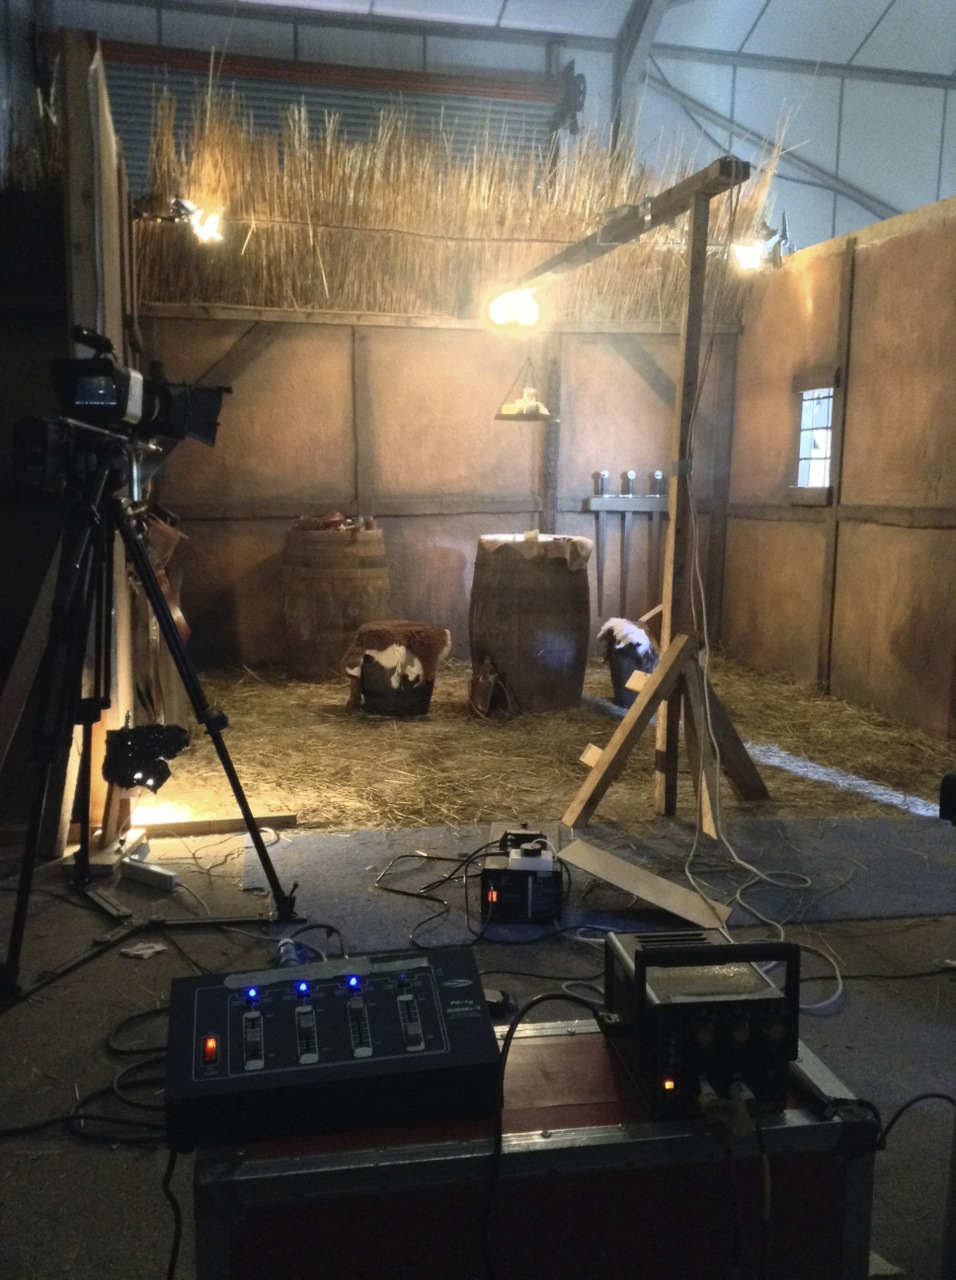
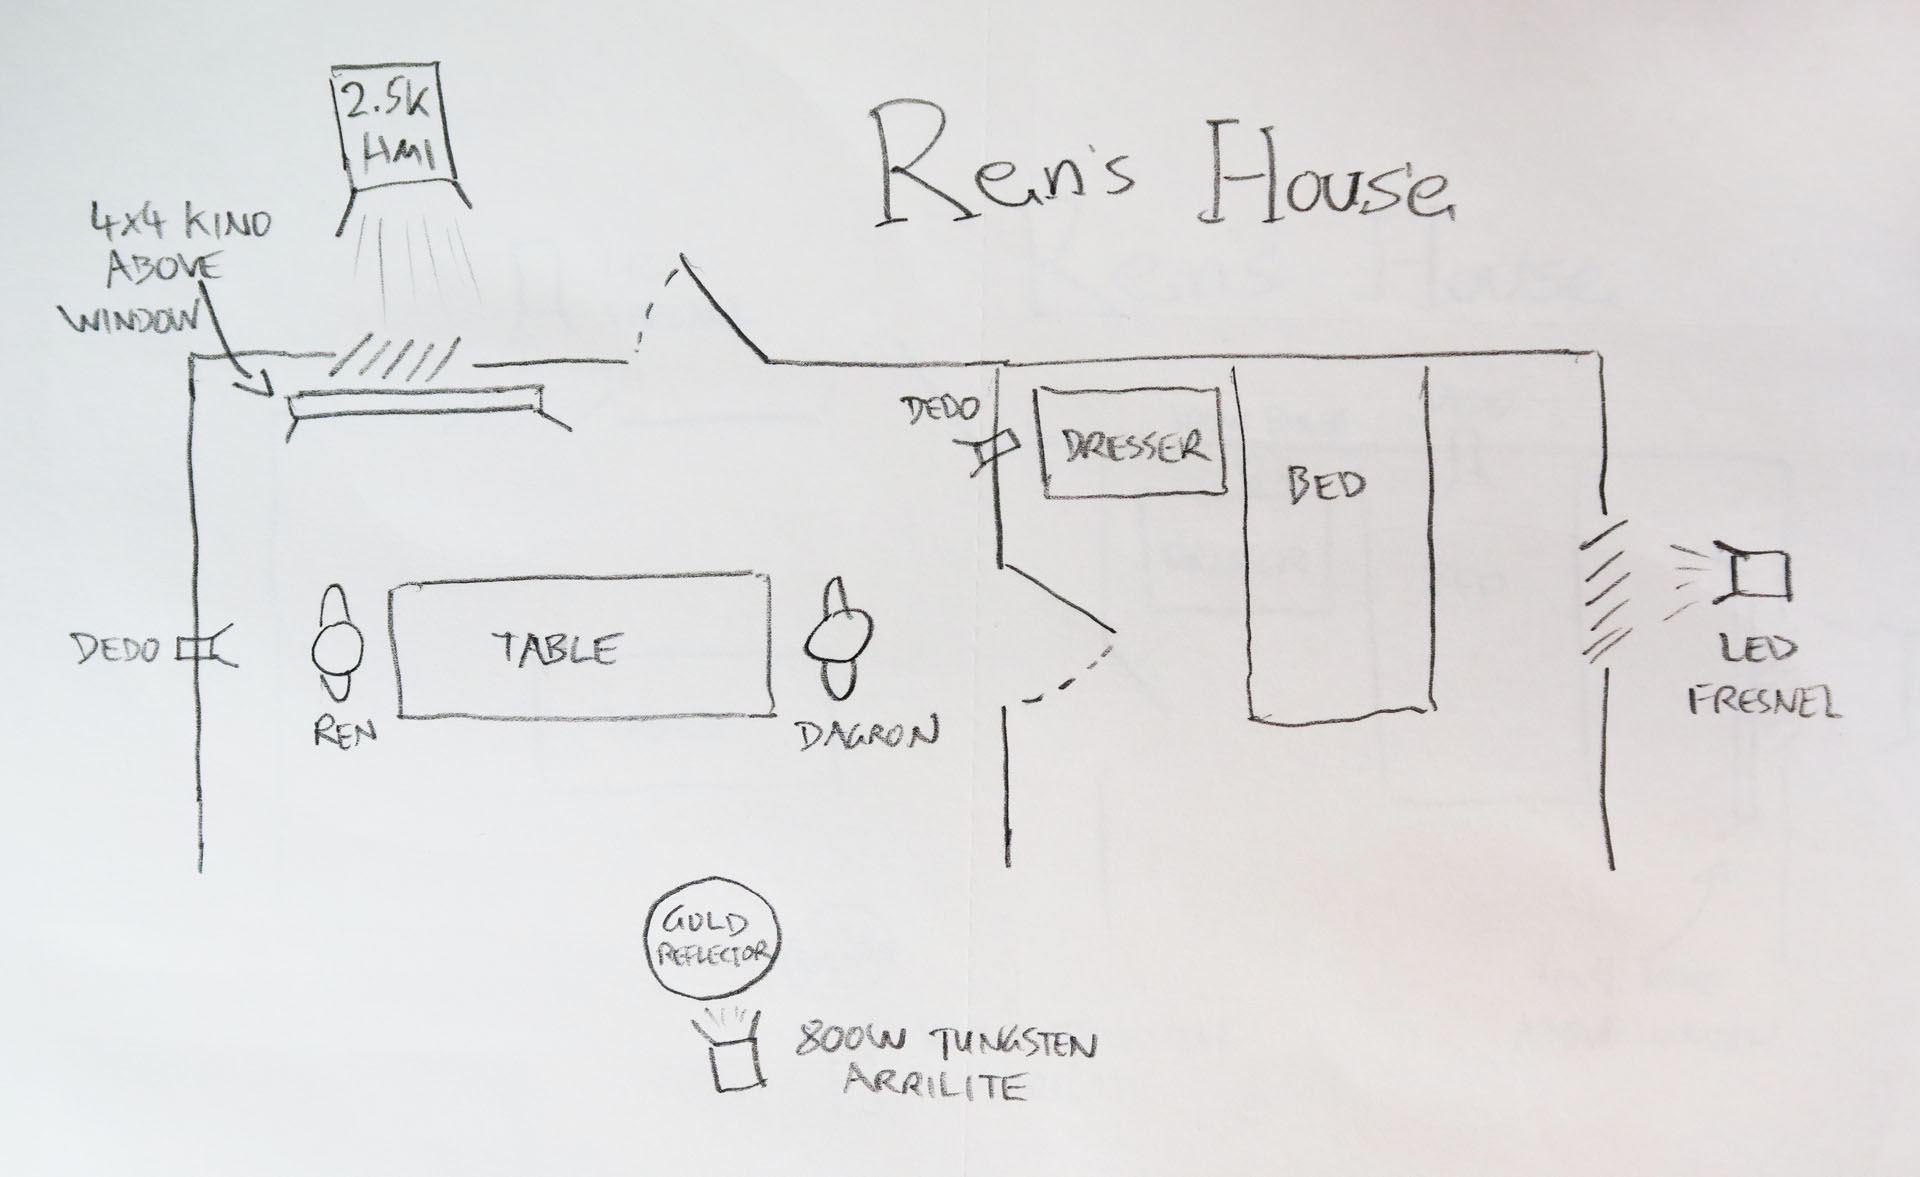
It worked a treat, so when faced with a very similar scene on Ren, I shamelessly ripped Paul off. The actors weren’t sure; they felt pretty silly running on the spot, but we persevered. My lighting set-up used the 2.5K HMI, already rigged for earlier shots, as a side key, and an LED panel as three-quarter backlight. Branches were waved in front of both to throw shadows, and I shook the camera a lot.

Poor Man’s Process was required a second time on the series, in the very last scene, on the very last day of the shoot.

Sophie Skelton (Ren) and Duran Fulton Brown (Hunter) ride Tony the Phony Pony. Photo: Miriam Spring Davies

By this time we were one big happy family and we were all having far too much fun. Gaffer Squish was singing “One Day More” from Les Miserables, actor Duran was riding Tony The Phony Pony like a rodeo champ, candy was being freely imbibed and marshmallows were being toasted. The Poor Man’s shot seemed more like an extension of us all just larking about than anything else.

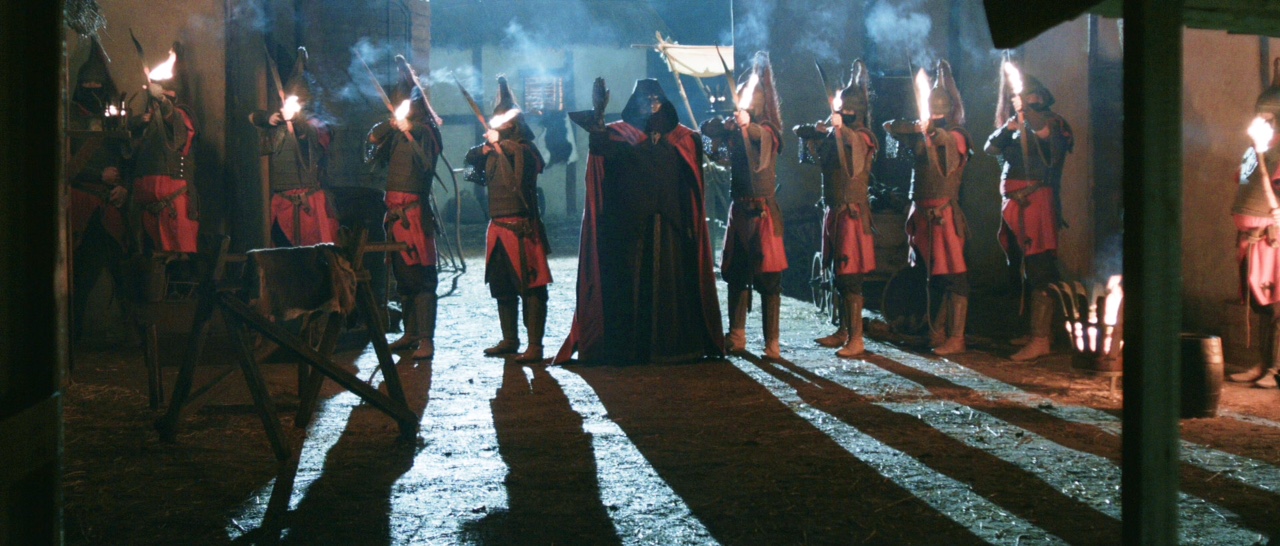
Ren and Hunter were required to ride off into the moonlight on a single horse, but the horse in question was quite jumpy and not safe for the actors to ride. Designer Chris and production assistant Claire knocked up the highly impressive phony pony, which was used extensively, but moving it fast enough for the final shot was out of the question.

Claire Finn prepares for some arboreal lighting action. Photos: Miriam Spring Davies
Claire Finn prepares for some arboreal lighting action.

So Tony remained stationary while Claire, her sister Alex and producer Michelle threw dignity to the wind and ran around with bits of trees.

I was using the 2.5K HMI as backlight, and a 1.2K HMI bounced off Celotex as a side key. Claire, I think, was on the 2.5K, jiggling a branch about to create some nice dynamism cutting up the hard backlight. Alex, if I recall rightly, was doing a windmill action with her branch in front of the Celotex. Michelle, meanwhile, stood ready with her branch until director Kate called “Tree!”, at which point Michelle would run past at full pelt and Sophie (Ren) would duck under the branch she was supposedly riding by.

You can see some behind-the-scenes footage in Lensing Ren episode 5.

Aided by smoke, a wind machine and the obligatory camera shake, the whole thing was quite effective. Less so the Epping Forest shots, which didn’t make the final cut. Somehow the running-on-the-spot was never quite convincing. Not enough choppy shadows, maybe?

My last project was a $4 million feature, but even that called for Poor Man’s in one instance. A small train carriage set piece had to appear to be moving as our heroes jumped onto it, so in front of each light we placed a ‘branch-a-loris’, a kind of man-powered windmill made from scaff tube and branches. Again lots of smoke, wind and camera shake were employed to sell the illusion.

I think Poor Man’s Process is one of my favourite techniques. It doesn’t always work, but if there’s enough movement in the camera and the lighting, and it’s cut in with genuine wide shots, it can often be extremely effective.

If you’ve enjoyed this post, please do me a little favour and vote for Ren: The Girl with the Mark in the Melbourne Web Fest Audience Award Poll (find us in the drama section). It only takes a moment!

Poor Man’s Process II

Choosing an ND Filter: f-stops, T-stops and Optical Density

A revised and updated version of this article can be found here (aperture) and here (ND filters).

Imagine this scenario. I’m lensing a daylight exterior and my light meter gives me a reading of f/11, but I want to shoot with an aperture of T4, because that’s the depth of field I like. I know that I need to use a .9 ND (neutral density) filter. But how did I work that out? How on earth does anyone arrive at the number 0.9 from the numbers 11 and 4?

Let me explain from the beginning. First of all, let’s remind ourselves what f-stops are. You have probably seen those familiar numbers printed on the sides of lenses many times…

1      1.4      2      2.8      4      5.6      8      11      16      22

They are ratios: ratios of the lens’ focal length to its iris diameter. So a 50mm lens with a 25mm diameter iris is at f/2. If you close up the iris to just under 9mm in diameter, you’ll be at f/5.6 (50 divided by 5.6 is 8.93).

A stills lens with its aperture ring marked in f-stops
A stills lens with its aperture ring (top) marked in f-stops

But why not label a lens 1, 2, 3, 4? Why 1, 1.2, 2, 2.8…? These magic numbers are f-stops. A lens set to f/1 will let in twice as much light as (or ‘one stop more than’) one set to f/1.4, which in turn will let in twice as much as one set to f/2, and so on. Conversely, a lens set to f/2 will let in half as much light as (or ‘one stop less than’) one set to f/1.4, and so on.


If you think back to high school maths and the Pi r squared formula for calculating the area of a circle from its radius, the reason for the seemingly random series of numbers will start to become clear. Letting in twice as much light requires twice as much area for those light rays to fall on, and remember that the f-number is the ratio of the focal length to the iris diameter, so you can see how square roots are going to get involved and why f-stops aren’t just plain old round numbers.

A Zeiss Compact Prime lens with its aperture ring marked in T-stops

Now, earlier I mentioned T4. How did I get from f-stops to T-stops? Well, T-stops are f-stops adjusted to compensate for the light transmission efficiency. Two different f/2 lenses will not necessarily produce equally bright images, because some percentage of light travelling through the elements will always be lost, and that percentage will vary depending on the quality of the glass and the number of elements. A lens with 100% light transmission would have the same f-number and T-number, but in practice the T-number will always be a little higher than the f-number. For example, Cooke’s 15-40mm zoom is rated at a maximum aperture of T2 or f/1.84.

So, let’s go back to my original scenario and see where we are. My light meter reads f/11. However,  I expressed my target stop as a T-number though, T4, because I’m using cinema lenses and they’re marked up in T-stops rather than f-stops. (I can still use the f-number my meter gives me though; in fact if my lens were marked in f-stops then my exposure would be slightly off because the meter does not know the transmission efficiency of my lens.)

By looking at the series of f-numbers permanently displayed on my light meter (the same series listed near the top of this post, or on any lens barrel) I can see that f/11 (or T11) is 3 stops above f/4 (or T4) – because 11 is three numbers to the right of 4 in the series. I can often be seen on set counting the stops like this on my light meter or on my fingers. It is of course possible to work it out mathematically, but screw that!

CameraZOOM-20140309092150072_zps94e90ea4
A set of Tiffen 4×4″ ND filters

So I need an ND filter that cuts 3 stops of light. But we’re not out of the mathematical woods yet.

The most popular ND filters amongst professional cinematographers are those made by Tiffen, and a typical set might be labelled as follows:

.3      .6      .9      1.2

Argh! What do those numbers mean? That’s the optical density, a property defined as the natural logarithm of the ratio of the quantity of light entering the filter to the quantity of light exiting it on the other side. A .3 ND reduces the light by half because 10 raised to the power of -0.3 is 0.5, or near as damn it. And reducing light by half, as we established earlier, means dropping one stop.

If that fries your brain, don’t worry; it does mine too. All you really need to do is multiply the number of stops you want to drop by 0.3 to find the filter you need. So to drop three stops you pick the .9 ND.

And that’s why you need a .9 ND to shoot at T4 when your light meter says f/11. Clear as mud, right? Once you get your head around it, and memorise the f-stops, this all becomes a lot easier than it seems at first glance.

Here are a couple more examples:

  • Light meter reads f/8 and you want to shoot at T5.6. That’s a one stop difference. (5.6 and 8 are right next to each other in the stop series, as you’ll see if you scroll back to the top.) 1 x 0.3 = 0.3 so you should use the .3 ND.
  • Light meter reads f/22 and you want to shoot at T2.8. That’s a six stop difference (scroll back up and count them), and 6 x 0.3 = 1.8, so you need a 1.8 ND filter. If you don’t have one, you need to stack two NDs in your matte box that add up to 1.8, e.g. a 1.2 and a .6.


Choosing an ND Filter: f-stops, T-stops and Optical Density

4 Reasons to Use a Light Meter

lightmeterIn the celluloid era, light meters were essential to ensure proper exposure of the film negative. In today’s digital world, where you can immediately see your images on a monitor, it may seem like light meters are obsolete.

But these devices still have their place in modern cinematography. On a bigger production, when you may not be at the camera the whole time, they can be very useful. Interrupting your ACs (as they set up the sticks, swing the lens, put on the eyepiece extension, balance the fluid head, run cables to the monitors, etc.) in order to see if your image is correctly exposed on camera can be inefficient.

And having the reliable, hard number a light meter gives you can be more reassuring than judging false colours or histograms.

Here are four ways in which I used my brand new light meter on my last production, The Little Mermaid:

  1. To call ND filters. When shooting outdoors, I would take light readings in the sun and in the shade, and when then the sun was in, to understand the range of light levels I was dealing with. I could then pick an ND filter that would put me at a stop at where I would still have the room to adjust the iris a little either way if the light got brighter or darker. This was particularly important when we were shooting on water in a splash bag, when changing NDs or even just adjusting the iris was a longer process. (In my next post I’ll look deeper into stop maths and ND filters to demonstrate exactly how to select an ND filter based on a light reading.)
  2. To measure contrast ratios. The Alexa can handle up to seven stops of over-exposure and eight stops of under-exposure. Knowing this, I could use my meter to see if certain areas were going to blow out or crush, before the camera was even set up. I could also measure how many stops the key side of an actor’s face was above the fill side, and thus work out the key-to-fill ratio. At present this is still something I judge by eye on the monitor, but the more I get to know the numbers, the more I suspect I will start determining it in advance.
  3. To check green-screens are properly lit. The visual effects supervisor, Jafar, told me that green-screens should be exposed at key, or up to half a stop over key. So if I was shooting at T4, I would walk along the green-screen and take readings at various points to make sure the meter was generally giving me between f4 and f4½.
  4. To schedule a dusk shot. For a twilight scene on a beach, I needed to know in advance exactly what our window of opportunity was. Looking up the sunset time is all well and good, but it doesn’t help you figure out how long afterwards there will be enough ambient light left to shoot with. So while at location the day before, I went out onto the beach and took light readings every few minutes after sundown. These told me I had 20 minutes from sunset until the ambient light dropped below what the lenses could expose.

Do you use a light meter? And if so, how?

4 Reasons to Use a Light Meter

Lensing Ren – episode 5

Season one of Ren: The Girl with the Mark has come to an end, and to ease the pain a little, here’s one last video breakdown of the show’s cinematography. This week I talk about the exterior scenes from daylight through sunset to night.

Here is the lighting plan for the final scene:

Village-night-1080p

Check out the article I wrote during the shoot about the sunset scene if you’re still hungry for details. And here is an unpublished blog post I wrote during the shoot about the village night exteriors…

The 2.5K HMI backlight
The 2.5K HMI backlight. The dimmer board for the Cyclotron can be seen in the lower right.

The last two days of principal photography on Ren were actually night shoots. It was great to take the village set that I’d shot in natural light for five weeks and chuck some of my own light at it.

In his American Cinematographer interview about The Monuments Men (February 2014), Phedon Papamichael said, “My big night-exterior lighting setups usually have one source” – often a backlight, judging by the examples given in the article – “and then I use whatever practicals are in the shot.” My approach is much the same, though a big source for me is a 2.5K HMI, not an Arri T12, sadly!

One of the Urban Sodium-gelled 800W Arrilites beefing up the braziers

I knew our key shot was going to be Ren’s POV looking up the street to the Kah’Nath Master flanked by several archers, with Karn and Baynon in the background. I set up my 2.5K dead in the back of the shot, its stand hidden by the furthest house facade.

Another of the Urban Sodium-gelled 800W Arrilites beefing up the braziers
One of the Urban Sodium-gelled 800W Arrilites beefing up the braziers

The plan was for the archers to light their arrows from two braziers, one either side of the street, so Chris Dane and Amanda Stekly dressed these in accordingly. I set up an Arrilite 800 near each one, choosing Urban Sodium gel to give the “firelight” a grungy colour appropriate to the bad guys. (I was shooting on a tungsten white balance to turn the HMI moonlight blue.)

The dimmers controlling the Arrilites

Chris – by this time well-attuned to my lighting needs – also rigged a third brazier to act as the key light for himself (Karn) and James Malpas (Baynon), towards the back of the set. The Arrilite for this one I gelled with full CTO for a yellower, friendlier colour.

All three Arrilites were run through in-line dimmers, and various bystanders were co-opted to flicker them throughout the evening.

Bulbs
The Cyclotron

I rigged a Cyclotron behind the window of the background house – four 100W bulbs under a sheet of CTO, wired to Colin’s dimmer board so they too could be flickered, suggesting firelight inside the house.

The Celotex bounce board

I figured that the front of this house would still be very dark, being out of range of the Arrilites and facing away from the HMI, so I had gaffer Richard Roberts rig a Celotex board to bounce some of the HMI light back onto it. As it turned out, when it got dark and we fired everything up, there was lots of bounce off the set pieces closest to the HMI anyway. This was a nice bonus that gave us more options when blocking Karn and Baynon’s actions, without having to set up extra lamps.

A sunset view of the lighting set-up from roughly the master camera position. The LED panel on the right was used only as a work light.
A sunset view of the lighting set-up from roughly the master camera position. The LED panel on the left was used only as a work light.

When the braziers were lit and the Master and soldiers strode onto the set in their awesome costumes (courtesy of Miriam Spring Davies and stand-in wardrobe supervisor Claire Finn), we all felt we had a truly epic sequence in the can.

Ren archers

If you’ve missed any of Lensing Ren or Ren itself, here’s a playlist featuring every episode of the fantasy series, interspersed with the corresponding cinematography breakdowns:

Lensing Ren – episode 5

Lensing Ren – episode 4

On Tuesday the penultimate episode of Ren: The Girl with the Mark was released and so here’s my video breaking down the cinematography of that fourth episode. This week I cover lighting the guardroom and the prison cell, and demonstrate cross-backlighting.

Here are the lighting plans for the guardroom and the cell:

Guard-room-1080p Cell-1080p

You may also be interested to read the blog I wrote during the shoot about Lighting the Prison Cell, and my post explaining the technique of Cross-backlighting. And here is an unpublished post I wrote during the shoot about the guardroom….

33_GuardRoomWide1

The guard room shoot came at the end of a long and intense week of shooting interiors. By Sunday most of the lead actors had left, we had crested the hill and the end of principal photography was in sight. The atmosphere was even more relaxed and informal than usual, particularly as everyone’s favourite spouter of inappropriate comments, Richard “Squish” Roberts, was playing the lead jailor.

A behind-the-scenes view of the lighting set-up for the window and swords

Ren’s bedroom had been repainted and redressed to be the Kah’Nath guard room. This meant a single, small window again, and as usual I couldn’t resist blasting a 2.5K HMI through there for a shaft of hot, smoky sunlight.

The Window Wrap in action on the swords

I wanted to highlight the rack of swords next to the window, which the shaft of light wasn’t catching, so I used a variant on my Window Wrap technique. I put a 2′ 4-bank kinoflo outside the window at such an angle as to light up the swords without blocking any of the HMI light.

I was interested to find that the art team had done something a bit different with the room’s candles, hanging a cluster of them from an overhead beam. I asked for the “table” (actually a barrel) – where the guards would be playing a board game – to be placed directly under that.

The Dedos (left and right of the picture) and 100W globes used to enhance the light from the candles

The candles wouldn’t shed light directly down on the game in the classic single-light-source-coming-straight-down-onto-the-poker-table style, but I felt it would give me an excuse to cross-backlight. I clamped a Dedo to the top of each side of the set, each one spotted on one of the two characters who would face each other across the barrel.

A view of the finished lighting set-up from over the dimmer boards
A view of the finished lighting set-up from over the dimmer boards. On the floor to the right can be seen the shaft of light from the LED fresnel coming through the fake door (off right).

These Dedos couldn’t be flickered, being the kind which go into a single control box with only three discreet settings for brightness. So to introduce some dynamics, and soften the light a bit, I clipped a dimmable 100W bulb to either side of the beam from which the candles hung. This would also ensure that Hunter would be lit when he stood next to the barrel.

An additional light source in the set was a small brazier on the wall next to the dungeon door. This seemed bright enough to shed plenty of light by itself, particularly as Squish would be standing right next to it for a large part of the scene.

The final touch for lighting was to re-use the fake door to create the effect of daylight spilling in as characters exited and entered from off camera. This time I placed an LED fresnel behind it.

41_GuardsHunter

Check back next Saturday for another instalment of Lensing Ren, and meanwhile watch the next episode of Ren itself from Tuesday at 8pm GMT at rentheseries.com

Lensing Ren – episode 4

Lensing Ren – episode 3

It’s the mid-point of season one of Ren: The Girl with the Mark and here’s my video breaking down the cinematography of that third episode. Topics covered this week include grip equipment, aspect ratio, smoke and faking candlelight.

Here is the lighting plan for Ren’s bedroom:

Rens-bedroom-1080p

There is more on simulating firelight in my First Musketeer blog post Candlelight.

For my thoughts on composing for the cinemascope aspect ratio, take a look at 2.39:1 Composition.

Want to know more about smoke? Check out Lighting Techniques #5: Smoke.

Check back next Saturday for another instalment of Lensing Ren, and meanwhile watch the next episode of Ren itself from Tuesday at 8pm GMT at rentheseries.com

Lensing Ren – episode 3

Lensing Ren – episode 2

Here’s my video breaking down the cinematography of episode two of Ren: The Girl with the Mark. This week I discuss lighting Ren’s house, tweaking wide-shot lighting for close-ups, and depth of field.

Here is the lighting plan for Ren’s house:

Rens-house-1080

And here is a video blog from the set of Ren’s house:

Check out the article I wrote during the shoot about lighting Ren and Dagron’s house if you’re still hungry for details.

If you want to know more about using kinoflos as indirect window light, have a look at Lighting Technique #3: The Window Wrap.

Want to know more about Depth of Field? This post will give you the basics.

Check back next Saturday for another instalment of Lensing Ren, and meanwhile watch the next episode of Ren itself from Tuesday at 8pm GMT at rentheseries.com

Lensing Ren – episode 2

Lensing Ren – episode 1

Here is the first in a series of cinematography videos I’m publishing to compliment the five episodes of Ren: The Girl with the Mark as they are released over the coming weeks. These videos will tell you the how, what and why of photographing the show. This week I discuss the camera equipment used, differentiating characters photographically, and lighting Karn’s magical woodland house.

Here is the lighting plan for Karn’s house:

Karns-house-1080p

And here is a video blog from the set of Karn’s house:

You may be interested to read my article on Masculine and Feminine Lighting, which gives some more detail on the techniques used to light Ren and Karn in the riverside scene.

See also: 5 Tips for Perfect Shafts of Light and Lighting Techniques #6: Cross-light.

Check back next Saturday for another instalment of Lensing Ren, and meanwhile watch the next episode of Ren itself from Tuesday at 8pm GMT at rentheseries.com

Lensing Ren – episode 1

10 Things to Look for in a Schedule

scheduleThe director of photography is one of the crew members who has the greatest influence over the pace of a shoot. How long you take to light each set-up has a huge impact on how much gets done in a day. So it’s only natural that you are usually consulted on the shooting schedule during preproduction. More often than not, your pleas for more shooting days will be ignored because there simply isn’t the money. Nonetheless, it’s your duty to feedback on the schedule, and if you can be specific about your concerns then you may occasionally succeed in getting tweaks made. And if not, at least you can say, “I told you so.”

Here are some things I’m looking for when I assess a schedule.

  1. Length of shoot. Are there enough days? Is there a second unit to mop up up anything you drop, or do you have to cover everything on every day yourself?
  2. Turnarounds. Is there a full day of daylight exterior immediately after a night shoot, for example?
  3. Night scenes scheduled during daylight hours. Is the AD expecting you to black out windows, or is this a mistake? I hate blacking out windows; it robs the visuals of depth.
  4. Stunts, VFX, make-up gags etc. Has the AD factored in the extra set-up time that comes with these things? Again, if there’s a second unit for this stuff then it may not affect you.
  5. Nightmare shots. Has adequate time been allowed for any special, fancy shots that might take longer than usual to set up?
  6. Location moves. Are there any location moves during the day, even just between rooms in the same house? Has time been allowed for these moves? Has extra time been allowed for the first scene in each location, to allow it to be lit properly? This may be less of an issue if you have a pre-rig crew.
  7. Easing into it. Does the shoot start off a little easier to give the crew time to get into the swing of things?
  8. Movie star shots. Are there any big heroic or romantic moments late in the schedule? Towards the end of the shoot, everyone will be tired, and this will show on the actors’ faces. Try to have key close-ups brought forward in the schedule, or warn the AD that lighting and make-up will take longer than normal.
  9. Seasonal variations. On long shoots, there may be noticeable changes in season (trees in leaf/not in leaf, for examples) during production, and the available hours of daylight may change. Has this been taken into consideration?
  10. Cover sets. Has the AD got contingency plans if the weather is bad?

A good 1st AD should have thought of most if not all of these things, but it never hurts to check them out yourself.

Want to learn more about scheduling? Check out my posts on scheduling my feature film Soul Searcher and my short film Stop/Eject.

production-schedule

10 Things to Look for in a Schedule

10 Ways Low Budget Shoots Differ from Micro Budget Ones

My camera and lighting crew for last year's feature
My camera and lighting crew for last year’s feature

I’ve been working in the film business for 16 years now, but until very recently I hadn’t really worked on a ‘proper’ production, one that had a budget above five figures. Here are some differences I noticed stepping up from micro-budget to low budget…

  1. Formal crew structure. There is a proper separation between departments, even between camera and lighting (which is quite strange for the DP, in charge of both). Woe betide anyone who moves set dressing without asking the art department, or who plugs something in without checking with the sparks, or who stores equipment in a room without asking locations.
  2. Proper production and locations departments. The feature I worked on last year had two producers, a line producer, a production manager and a production co-ordinator, plus a locations department. I’m used to productions where one person does all those jobs, and often directs as well. Figuring out which person to approach about any given issue was fun! (Creative Skillset’s website is a good place to check if you’re not sure who does what.)
  3. Advance prep. With a large crew, time cannot be wasted waiting for things that could have been pre-rigged. Heads of department are expected to think ahead and splinter their crew if necessary to be ready for things coming later in the day or week. For a DP this most commonly means pre-rigging distro and/or lighting.
  4. Delegation. Aside from operating the camera, I did little hands-on work on the recent feature shoot. Lens changes, grip rigging and lighting set-ups are all handled by other people on the instructions of me, and of the gaffer and the 1st AC. Sometimes this means the DP can go and have a cup of tea, but often it provides important thinking and planning time – an opportunity to reccie the next set and design the lighting, or to review footage in the edit room, or reccie a possible location with other HoDs, or discuss the afternoon’s shots with the director. It’s impossible to do this sort of forward planning if you’re changing your own lenses and setting your own lamps up.
  5. Hard wrap times. On micro-budget shoots the wrap time is a theoretical concept, with no more relevance to reality than an episode of Sponge Bob Square Pants. On a bigger production, you wrap at wrap time, because if you don’t then the gaffer might pull the plug. Occasionally the crew will be asked if they are willing to go over by half an hour, say, in order to complete a scene. But everyone must agree, and that half hour must be deducted from the next day.
  6. Lunch break, not just lunch. In micro-budget land, getting lunch at all is not a given. But when you do get it, you’re often expected to eat as quickly as possible and get straight back to work. On a bigger production you get your hour lunch break come hell or high water. And there’s proper catering. With desserts!
  7. Reliance on the crew. If you’re working with a small camera and mains power, you can stay late with the director and steal a few extra shots, if necessary. But when everything’s run off a generator, which only the gaffer is qualified to operate, and your camera package is almost too heavy to lift onto your own shoulder, and you have no idea how half the bits and bobs connected to it work because your ACs always deal with it, you really can’t do anything on your own.
  8. Permissions and qualifications. For insurance reasons you must have qualified people overseeing the electrics and the rigging. You must also check with the locations department before using any space or equipment or filming in any area that was not discussed and signed off in preproduction.
  9. Paperwork. Most HoDs seem to have some kind of daily paperwork to do on a larger production.The DP happily escapes this (the ACs handle the camera reports), though they do have to complete a risk assessment before shooting commences.
  10. People management. Because of the size of the team under you, people management becomes a major part of an HoD’s job. I’ll go into more detail on this in a future post.
10 Ways Low Budget Shoots Differ from Micro Budget Ones