The Pros and Cons of Master Shots

A master is a wide shot that covers all the action in a scene. The theory is that, should you run out of time or your lead actor suddenly gets injured or some other calamity prevents you shooting any coverage, at least you’ve captured the whole scene in a useable, if not ideal, form.

I have always been a fan of shooting masters. I remember once reading about a Hollywood film with a lot of puppets – it might have been Walter Murch’s 1985 Return to Oz – which fell seriously behind schedule. A producer or consultant was dispatched to the set to get things back on track, and concluded that part of the problem was a lack of masters. The director had been avoiding them because it was impossible to hide the puppeteers and rigging in wide shots, and instead was shooting scenes in smaller, tighter pieces. As a consequence, the cast and crew never saw the whole scene played out and struggled to understand how each piece fitted in, causing mistakes and necessitating time-consuming explanations.

For me, that’s the key benefit of masters: getting everyone on the same page so that the coverage goes faster.
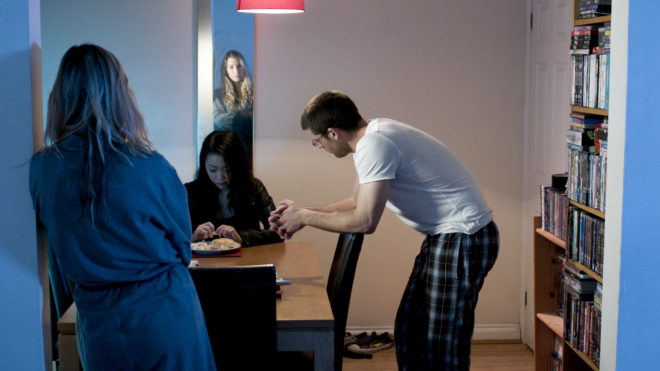
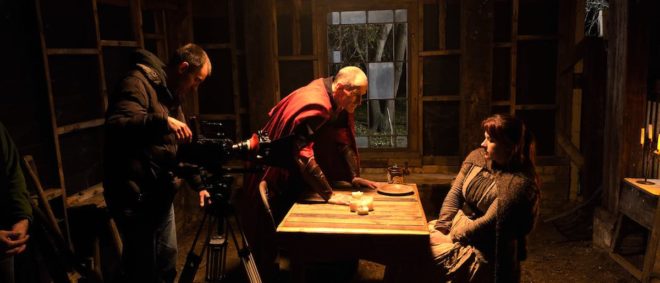
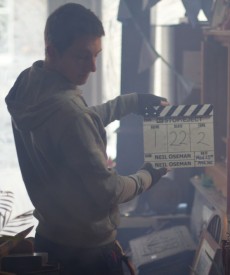
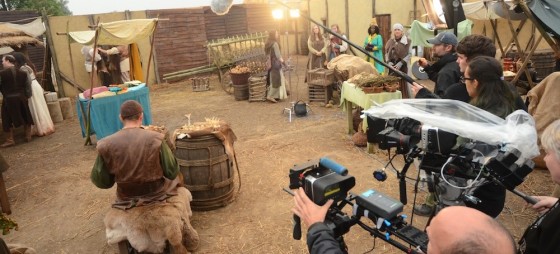
A master shot of mine from “Forever Alone”, a student film I helped out on several years back 

You can dig yourself into holes if you don’t start with a wide. A small part of the set gets dressed and lit, a small part of the scene gets rehearsed, and then when you come to do the next part you realise it’s not going to fit together. A key prop that should have been in the background was forgotten because it wasn’t relevant to the first small piece; now you can’t put it in because you’ll break continuity. A light source that looked beautiful in that mid-shot is impossible to replicate in a later wide without seeing lamps or rigging. However much you might plan these things, inevitably in the heat of filming you get tunnel vision about the shot in front of you and everything else fades away. And it’s easy for a director, who has the whole film running on a cinema screen in their head, to forget that everyone else can’t see it as clearly.

Not starting with a wide also robs a DP of that vital, low-pressure time to light the whole set, getting all the sources in place that will be needed for the scene, so that re-lights for coverage can be quick and smooth. It also ties the editor’s hands somewhat if they haven’t got a wide shot to fall back on to get around problems.

So there are many benefits to masters. But lately I’ve been wondering if it’s dogmatic to say that they’re essential. I’ve worked with a few directors who have shot scenes in small, controlled pieces with great confidence and success.
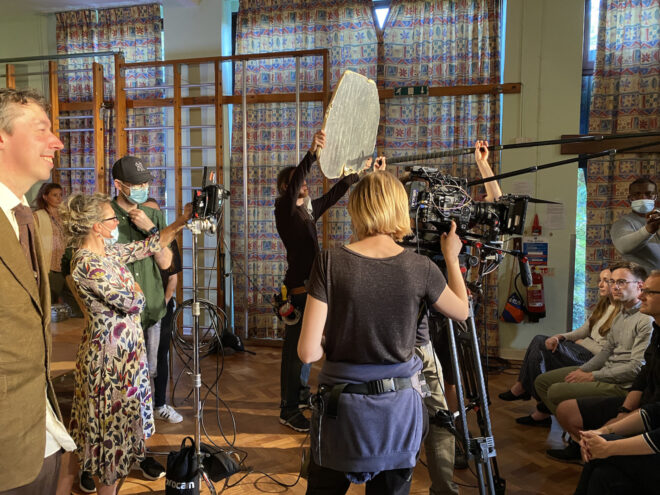
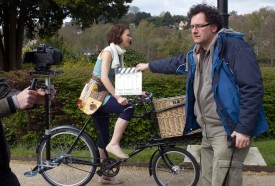
Not shooting a master on “Harvey Greenfield is Running Late”. Photo: Mikey Kowalczyk

Last year I worked on a comedy that has a scene set at a school play, the main action taking place in the audience. Jonnie Howard, the director, was not interested in shooting a master of the hall showing the audience, the stage and the whole chunk of play that is performed during the action. All he wanted of the play was to capture certain, specific beats in mid-shots. He didn’t even know what was happening on stage the rest of the time. He knew exactly when he was going to cut to those shots, and more importantly that it would be funnier to only ever see those random moments. He also recognised that it was easier on the child actors to be given instructions for short takes, shot by shot, rather than having to learn a protacted performance.

Not shooting masters saved us valuable time on that film. It’s not the right approach for every project; it depends on the director, how well they’re able to visualise the edit, and how much flexibility they want the editor to have. It depends on the actors too; some are more able to break things down into small pieces without getting lost, while others always like to have the run-up of “going from the top”.

There is a halfway house, which is to rehearse the whole scene, but not to shoot it. This requires clear communication with the 1st AD, however, or you’ll find that certain actors who aren’t in the first shot are still tied up in make-up when you want to rehearse. Like any way of working, it’s always best to be clear about it with your key collaborators up front, so that the pros can be maximised, the cons can be minimised, and everyone does their best work most efficiently.
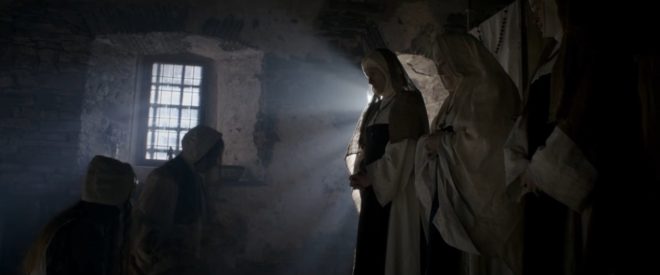
A rare master shot from “Heretiks”
The Pros and Cons of Master Shots

“Red Dwarf VI”: Making a Sci-fi Sitcom in 1993

I have been a huge fan of the British sci-fi sitcom Red Dwarf since the age of 12 or 13. The show has undergone many changes over the years, and every fan has their own view about which era is the best, but for me seasons V and VI will always be my favourites. I discovered the show during season V and I remember the huge anticipation for the next season. During this time the show’s production values were very high but it was still extremely funny, with the main characters all well established and well rounded.

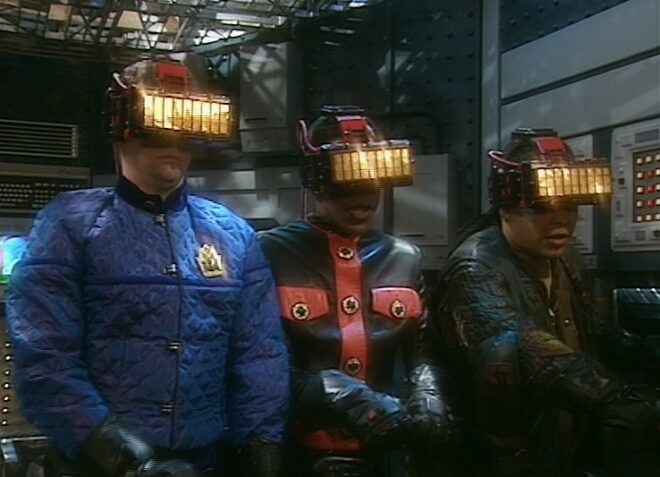
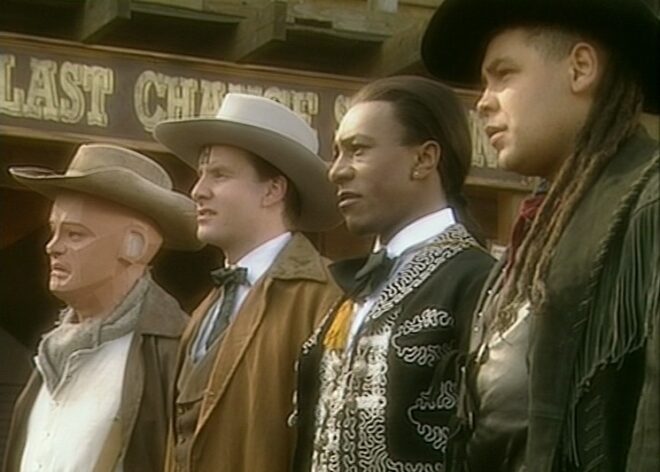
So I was delighted to come across Joe Nazzaro’s book The Making of Red Dwarf in a charity shop recently. It focuses on the production of the series’ most lauded episode, the International Emmy-winning “Gunmen of the Apocalypse” from 1993. The episode sees mechanoid Kryten deliberately contract a computer virus in order to save the Red Dwarf posse, and their efforts to help him battle the infection within the framework of a Wild West VR game representing his consciousness.

What I find fascinating is that the series, at that time at least, was made in such a different way to modern high-end TV or film, following instead the multi-camera sitcom pattern of rehearsing all week and recording in the evening on Saturday.

The cycle began on a Sunday, with production designer Mel Bibby removing the previous episode’s sets from Stage G at Shepperton and installing the new ones.

On Monday the director, writers and cast rehearsed on the set while certain crew members travelled to location – the Laredo Western Club in Kent – to pre-rig. A British sitcom at this time had no director of photography; instead the camera angles were chosen purely by the director and technically executed under the purview of the camera supervisor, while illumination was provided by the lighting director, in this case John Pomphrey. His work at Laredo included putting warm lights inside the buildings to match the look of the interiors which he planned for the studio.

Pomphrey lit a lot of rock and pop shows, and was inspired by concert lighting for such bands as Iron Maiden:

“If you look at them they’re into the same colours I am: oranges, deep blues; powerful colours. I don’t believe in understating something, because you’re generally watching it on a small screen in a well-lit room, so you’ve got to overstate the colours. In the cinema, you can get away with subtle tones, but I don’t think you can on this show… I’m a frustrated cinematographer: I want to make ‘Aliens’.”

Tuesday was the location shoot, conducted with multiple cameras (though not for every set-up) as director Andy DeEmmony worked through his storyboards. At this time all UK TV was 4:3 standard definition. While a high-end drama would have used 16mm film, most shows, including Red Dwarf, were captured on a tape format like Betacam SP. “Gunmen of the Apocalypse” saw the series make rare use of a crane, and behind-the-scenes photos also show at least one HMI shining through a diffusion frame. It was common practice at this time to use large HMIs to fill in shadows on sunny day exteriors.

On Wednesday rehearsals continued on stage, culminating in a tech run during which camera supervisor Rocket previewed shots using the classic hand-framing method. In the evening the production team convened to discuss the next episode, “Polymorph II: Emohawk”.

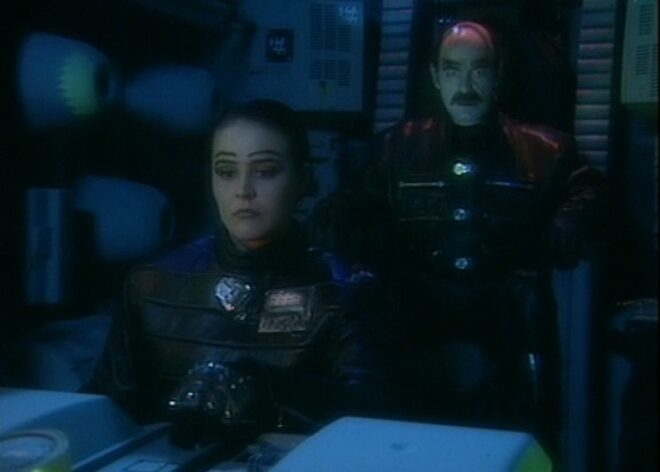
Thursday was known as the Pre-VT day: the day when all scenes too complex to shoot in front of the live audience must be recorded. With “Gunmen” this meant scenes inside the Last Chance Saloon which required such camera tricks as pulling knives out of antagonist Jimmy’s jacket on nylon wires so that in reverse it looked like the knives were pinning him to the wall, Rimmer’s bar fight with four cowboys, and a scene aboard the Simulant ship which is the source of Kryten’s infection.

Pomphrey would communicate by radio with Dai Thomas, who spent studio days in a darkened cabin operating a lighting desk while watching the action on two monitors.

Friday saw more rehearsals, while Tuesday and Thursday’s footage was edited to show to the live audience tomorrow.

Saturday began with blocking and camera rehearsals, before the doors opened to the public at 7pm and recording commenced at 7:30.

It seems that Shepperton Stage G was not equipped with a gallery like a dedicated TV studio; instead, vision mixing was done from the scanner – an outside broadcast truck. For those who don’t know, vision mixing is live editing, cutting from one camera to another in real time as a production assistant calls the shots from the director’s camera script. Elsewhere in the scanner, an engineer monitored the images, doing something akin to the job of a modern DIT, adjusting colours, sharpness and even remotely controlling the cameras’ irises. (Zoom and focus were controlled by the camera operators.)

It’s a testament to all concerned that the show looked so cinematic despite being made this way. Later seasons became even more cinematic, doing away with the live audience for a little while, then bringing it back and later kick-starting Ed Moore BSC’s career when he shot seasons XI and XII beautifully. By this time the show was produced by Dave (a channel named, appropriately enough, after Red Dwarf‘s slobbish hero Dave Lister). It was now captured in HD, on Red cameras of some flavour if I remember rightly, with a focus puller for each one and a more film-like crew structure .

It’s unclear at present if any more seasons will follow 2020’s “The Promised Land”, but if they do I’m sure the series will continue to evolve and embrace new technologies and working practices. Which is a very dull way to end a post about a very funny show, so instead I’ll leave you with one of my favourite jokes from the series, which will make no sense whatsoever unless you remember the set-up.

Kryten, no kitchen appliance should give a human being a double polaroid.

“Red Dwarf VI”: Making a Sci-fi Sitcom in 1993

Cinematic Lighting Course: Coming Soon

I’m using my time in Covid-19 lockdown for a few different things, some more worthy than others. Lying-in is a big one. Watching all of Lost again. Exercising more. But also I’ve got a big editing project to complete, a project of my own, the perfect task to get me through the long days at home.

Last November I shot Cinematic Lighting, a four-hour online course. It’s something I’d been thinking about for a while, especially over the last year or so as my Instagram following has sky-rocketed (about 33,000 at the time of writing). DPs and cinematography students follow my feed for the lighting diagrams I post every Friday, showing exactly how a lighting set-up was achieved, but some commenters had started to ask why I made certain creative decisions. So the idea for the course was born.

Lighting diagram for the Night Exterior module’s master shot

Cinematic Lighting consists of four modules: day exterior, day interior, night interior and night exterior. In each module I light and shoot a half-page scene with two actors, Kate Madison and Ivan Moy, with behind-the-scenes cameras following my every move. As I do it – with the assistance of gaffer Jeremy Dawson and spark Gareth Neal – I explain how and why I’m doing it. Sometimes I demonstrate alternative options I could have chosen. I talk about characterisation and how to match it with lighting. I quote John Alton and Christopher Nolan. I show clips from other productions I’ve shot and tell the stories behind them. I explain how to use a light meter and get your head around f-stops, T-stops and ND filters. I demonstrate the power of smoke. But most importantly I lay my creative process bare as I work.

Setting up a single in the Night Interior module. Photo: Ashram Maharaj

The original intention was for the course to be a reward on the Kickstarter campaign for Ren: The Girl with the Mark‘s second season, but sadly that campaign was unsuccessful. Over the next couple of months I’ll be investigating my options for releasing this course, and rest assured that I’ll let you know as soon as it’s available.

Meanwhile, postproduction work continues on it. The main thing left to do is the grading of the finished dramatic scenes; each module concludes with a polished edit of the scene which I’ve shot. Rather than hire a colourist, I’ve decided it’s time to finally learn a few things about grading myself. To that end, I’ve purchased a Udemy course and am currently learning how to do fancy secondaries in Davinci Resolve – another good use of my lockdown time, I feel. More on this in a future post.

Meanwhile, stay safe and REMAIN INDOORS.

Filming the introduction to the Day Exterior module. Photo: Colin Ramsay
Cinematic Lighting Course: Coming Soon

5 Things I Learnt from Editing

I used to do a lot of editing work alongside DPing, and although those days are now behind me, their influence lives on. Every day that I work as a cinematographer, I use some of the knowledge I gained while slaving over a multi-coloured keyboard. Here are some of the most important things I learnt from editing.


1. Performance always wins.

The editor will always use the take with the best performance. What this means for the DP is that there is really no point requesting another take because of a missed focus pull, bumpy dolly move or dodgy pan, because inevitably the performance will not be as spontaneous and engaging as it was when you cocked up the camerawork, so the editor will use the first take.

Of course you need to make the director aware of any significant technical issues, and if they want to do another take, that’s absolutely their prerogative. But the editor will still use the first take. So get it right on the first take, even if that means pushing for another rehearsal.


2. Your darlings will die.

You know all your favourite shots? All the ones you’ve been mentally ear-marking for your showreel? The beautifully-lit wides, the fancy camera moves, that cool scene with the really interesting set? Yeah, half of those won’t make the final cut.

That wide shot is used for a single second before they cut into the meaty mid-shots. The camera move slowed the scene down too much so they chopped it up. That scene with the cool set looked great but didn’t advance the plot.

Two things to learn from this: 1. Do a great job, but don’t be a perfectionist, because you might be wasting everyone’s time on something that is destined for the cutting room floor. 2. If you want that shot for your showreel, grab it from the DIT, otherwise you might never see it again.


3. Bring ’em in, let ’em leave.

I can’t count the number of times, when shooting a close-up, I’ve advised the director to run the whole scene. They just wanted to pick up a few lines, but I convince them to let the talent walk in at the start and walk out at the end. That way the editor has much more flexibility on when to cut, a flexibility which I know that I appreciated when I was the one wrangling the timeline.

Any angle you shoot, push to cover the entire scene from it. In most cases it takes only slightly more time, and it’s easier for the actors because they get to do the whole emotional arc. And the editor will have many more options.


4. Spot the Missing Shot.

The ability to edit in your head is incredibly useful on set. If you can mentally assemble the coverage you’ve just shot, you can quickly identify anything that’s missing. Years of editing trained me to do this, and it’s saved annoying pick-ups several times. Officially this is the script supervisor’s job, but smaller productions may not always have someone in this capacity, and even when they do, another person keeping track can’t hurt.


5. Respect the slate.

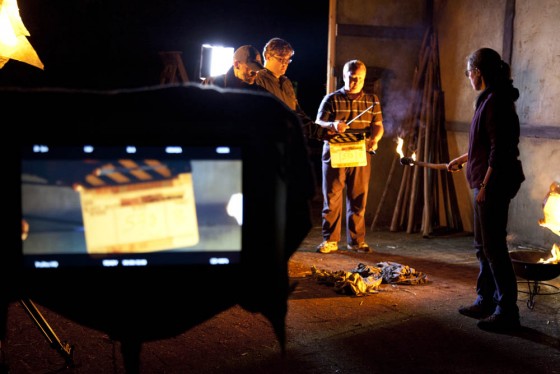
On smaller productions, the clapperboard is often treated as an inconvenience. People sometimes chat over it, directors giving last-minute instructions, or actors finishing their showbiz anecdotes before getting into character, rendering the audio announcement unintelligible. On no- or micro-budget productions there might not be a 2nd AC, so the board gets passed to whoever’s handy at the time, who has no idea what the current slate or take number are, and the whole thing becomes a meaningless farce.

Which is fine for everyone except the poor bastard in the edit suite who’s got to figure out which audio clip goes with which video clip. It can add hours of extra work for them. I’ve been there, and it ain’t pretty. So, for the sanity of the (assistant) editor, please respect the slate.

5 Things I Learnt from Editing

Goodbye Final Cut Pro

Recently, having put it off for as long as possible, I upgraded to MacOS High Sierra, the first new OS to not support Final Cut Pro 7. It was a watershed moment for me. Editing used to comprise at least half of my work, and Final Cut had been there throughout my entire editing career.

I first heard of Final Cut in early 2000, when it was still on version one. The Rural Media Company in Hereford, which was my main client at the start of my freelance career, had purchased a copy to go with their shiny Mac G3. The problem was, no-one at the company knew how to use it.

Meanwhile, I was lobbying to get some time in the Avid edit suite (a much hallowed and expensive room) to cut behind-the-scenes footage from Integr8, a film course I’d taken part in the previous summer. The course and its funding were long finished, but since so much BTS footage had been shot, I felt it was a shame not to do something with it.

Being 19 and commensurately inexperienced, I was denied time on the Avid. Instead, the head of production suggested I use the G3 which was sitting idle and misunderstood in one of the offices. Disappointed but rising to the challenge, I borrowed the manual for Final Cut Pro, took it home and read it cover to cover. Then I came back in and set to work cutting the Integr8  footage.

Editing in 2000 was undergoing a huge (excuse the pun) transition. In the back of the equipment storeroom, Rural Media still had a tape-to-tape editing system, but it had already fallen almost completely out of use. Editing had gone non-linear.

In a room next to the kitchen was the Optima suite. This was a computer (I forget what type) fitted with a low resolution analogue video capture card and an off-line editing app called Optima. In this suite you would craft your programme from the low-rez clips, exporting an EDL (Edit Decision List) onto a floppy disc when you were done. This you took into the Avid suite to be on-lined – recapturing just the clips that were needed in full, glorious, standard definition. You could make a few fine adjustments and do a bit of grading before outputting the finished product back to tape.

It wasn’t practical to do the whole edit on the Avid because (a) hard drives big enough to store all the media for a film at full rez weren’t really available at that time, and (b) the Avid system was hellishly expensive and therefore time on it was charged at a premium rate.

As I edited the Integr8 BTS on Final Cut Pro, I believed I was using an off-line system similar to the Optima. The images displayed in the Viewer and Canvas were certainly blocky and posterised. But when I recorded the finished edit back to tape, I couldn’t quite believe what I was seeing. Peering through the viewfinder of the Mini-DV camera which I was using as a recording deck, I was astonished to see the programme playing at the exact same quality it had been shot at. This little G3 and the relatively affordable app on it were a complete, professional quality editing system.

I looked across the office to the sign on the Avid suite’s door. It might as well have read: “DINOSAUR”.

Within a few months I had invested in my own Mac – a G4, no less – and was using FCP regularly. The next year I used it to cut my first feature, The Beacon, and three more feature-length projects followed in the years after that, along with countless shorts and corporates. Using FCP became second nature to me, with the keyboard shortcuts hard-wired into my reflexes.

And it wasn’t just me. Final Cut became ubiquitous in the no-/low-budget sector. Did it have its flaws? Definitely. It crashed more often than Richard Hammond. I can think of no other piece of software I’ve screamed so much at (with the exception of a horrific early desktop publishing app which I masochistically used to create some Media Studies GCSE coursework).

And of course Apple shat all over themselves in 2011 when they released the much-reviled Final Cut X, causing many loyal users to jump ship. I stayed well away from the abomination, sticking with the old FCP 7 until I officially quit editing in 2014, and continuing to use it for personal projects long after that.

So it was quite a big deal for me to finally let it go. I’ve got DaVinci Resolve installed now, for the odd occasion when I need to recut my showreel. It’s not the same though.

Timelines aren’t my world any more, light is, but whenever I look back on my years as an editor, Final Cut Pro’s brushed-aluminium interface will always materialise in my mind’s eye.

Goodbye Final Cut Pro

9 Tips for Easier Sound Syncing

Colin Smith slates a shot on Stop/Eject
Colin Smith slates a shot on Stop/Eject. Photo: Paul Bednall

While syncing sound in an edit recently I came across a number of little mistakes that cost me time, so I decided to put together some on-set and off-set tips for smooth sound syncing.

On set: tips for the 2nd AC

  1. Get the slate and take number on the slate right. This means a dedicated 2nd AC (this American term seems to have supplanted the more traditional British clapper-loader), not just any old crew member grabbing the slate at the last minute.
  2. Get the date on the slate right. This can be very helpful for starting to match up sound and picture in a large project if other methods fail.
  3. Hold the slate so that your fingers are not covering any of the info on it.
  4. Make MOS (mute) shots very clear by holding the sticks with your fingers through them.
  5. Make sure the rest of the cast and crew appreciate the importance of being quiet while the slate and take number are read out. It’s a real pain for the editing department if the numbers can’t be heard over chit-chat and last-minute notes from the director.
  6. Speak clearly and differentiate any numbers that could be misheard, e.g. “slate one three” and “slate three zero” instead of the similar-sounding “slate thirteen” and “slate thirty”.
Rick Goldsmith slates a steadicam shot on Stop/Eject. Photo: Paul Bednall

For more on best slating practice, see my Slating 101 blog post.

Off set: tips for the DIT and assistant editor

  1. I recommend renaming both sound and video files to contain the slate and take number, but be sure to do this immediately after ingesting the material and on all copies of it. There is nothing worse than having copies of the same file with different names floating around.
  2. This should be obvious, but please, please, please sync your sound BEFORE starting to edit or I will hunt you down and kill you. No excuses.
  3. An esoteric one for any dinosaurs like me still using Final Cut 7: make sure you’ve set your project’s frame rate correctly (in Easy Setup) before importing your audio rushes. Otherwise FCP will assign them timecodes based on the wrong rate, leading to errors and sound falling out of sync if you ever need to relink your project’s media.

Follow these guidelines and dual system sound will be painless – well, as painless as it can ever be!

9 Tips for Easier Sound Syncing

5 Tips for Successful Pick-ups

Discussing the next set-up on the Ren pick-ups shoot with director Kate Madison. Photo: Michael Hudson

Recently I’ve been involved in pick-ups shoots for a couple of projects I lensed last year: action-comedy feature The Gong Fu Connection and fantasy series Ren. Both pick-up shoots were strange experiences, featuring some very familiar aspects of the original shoot – locations, sets, costumes – but noticeably lacking others – certain actors, crew members and so on. The Ren pick-ups in particular were like re-living principal photography in microcosm, with stressful crowd shoots followed by more relaxed, smaller scenes and finally night shots with flaming arrows again!

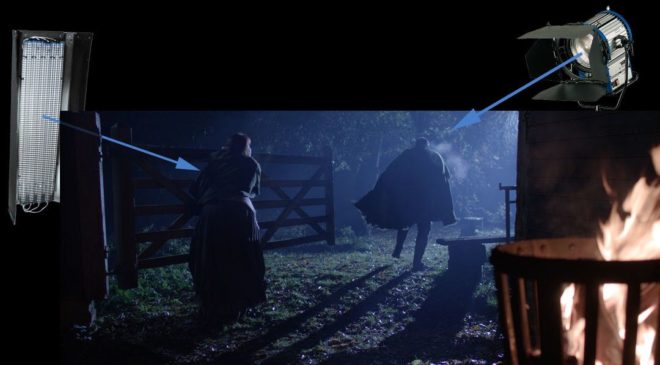
A CTB-gelled Arrilite 1000 stands in for the 2.5K we used for backlight during principal photography on Ren! Photo: Michael Hudson
A CTB-gelled Arrilite 1000 stands in for the 2.5K HMI used for backlight during principal photography on Ren! Photo: Michael Hudson

I’ve blogged previously about how a director/producer can prepare for pick-ups – by keeping certain key props and costumes, for example – but today I have a few thoughts from a DP’s perspective.

1. Keep a record of lighting plans. I have a pretty good memory for my lighting set-ups, but not everyone does, so keeping notes is a good idea. Your gaffer may even do this for you. I frequently use this blog as a means of recording lighting set-ups, and indeed tried to access it during the Ren pick-ups shoot but was foiled by dodgy wifi.

2. Keep camera logs. On a properly crewed shoot this will be the 2nd AC’s job. The logs should include at least the following info for each slate: lens, aperture, ASA, white balance and shutter angle. This can be useful in principal photography too, for example if you shoot the two parts of a shot-reverse at different ends of the day or different days all together, and need to make sure you use the same lens.

Production assistant Claire Finn tends the brazier which provides smoke in the absence of the Artem smoke gun we used during principal photography. Photo: Michael Hudson
Production assistant Claire Finn tends the brazier which provides smoke in the absence of the Artem smoke gun used during principal photography. Photo: Michael Hudson

3. Have the original scene handy when you shoot the pick-ups. Load the edit onto a laptop or tablet so that you can compare it on set to the new material you’re framing up.

4. Own a bit of lighting kit if you can. In the shed I have some battered old Arrilites and a few other bits and pieces of gear that has seen better days. On a proper shoot I would leave this at home and have the production hire much better kit. But for pick-ups, when there’s often no money left, this stuff can come in handy.

5. Keep gels. If you employ an unusual colour of gel during principal photography, try to keep a piece of it in case you need to revisit that lighting set-up in pick-ups. Production will have to pay for the gel once it’s been used anyway. On the Ren pick-ups shoot, after pulling all of my gels out of the plastic kitchen bin I keep them in, I was relieved to find that I still had two pieces of the Urban Sodium gel I used in the flaming arrows scene the first time around.

Urban Sodium gel provides the grungy orange light for the flaming arrows scene, just as it did last November. Photo: Hermes Contreras
5 Tips for Successful Pick-ups

How to Cut a Behind-the-Scenes Featurette

Cast&Crew_RAU_4273_20Sept_Unger copy copy
Cameras roll on the set of Kate Madison’s web series, Ren. Photo: Richard Unger

Despite my big plan to quit editing last year, I somehow ended up cutting nearly all the behind-the-scenes material for Ren, including a dozen YouTube videos and 30-odd exclusive set diaries which have just been released for sale. Guess I just have a fondness for BTS stuff.

Brett Chapman shoots B roll on Stop/Eject as Hadrian Cawthorne looks on. Photo: Paul Bednall
Brett Chapman shoots B-roll on Stop/Eject as Hadrian Cawthorne looks on. Photo: Paul Bednall

So here are some tips for editing BTS videos for the web. Many of these apply equally to any talking-head-based documentary.

  • Plan for it before the shoot by lining up a competent BTS camera crew and being clear about the kind of material you need. Here are some tips for shooting B-roll.
  • Start the edit by creating a new timeline and putting in some text generators with category headings you think you’ll want to cover, e.g. “plot”, “characters”, “casting”, “action scenes”, “concluding remarks”.
  • Watch through all the interview material. Every time you hear something you think you can use, dump it on the timeline after the relevant text.
  • Play back your timeline. You’ll immediately see that some of the material you’ve included is dull or repetitious. Whittle down the material until your timeline is only a little longer than you intend the finished piece to be. (I suggest 2-3 minutes should be your target length for a web piece.)
  • Pay attention to your in and out points. Don’t cut while someone is drawing breath – cut before or after. Beware of breathing time if you’re hacking someone’s sentences around. If your editing makes a couple of words sound unnaturally close together, interpose a few frames of atmos or silence. If you cut someone off in the middle of a sentence, firstly be sure the intonation doesn’t make it sound cut off, then add in some silence or atmos before the next clip, and paper over the edit with B-roll as the interviewee’s face will often give away that they’re not finished speaking.
  • Speaking of papering over the talking heads with B-roll, it’s time to do that now. I often start with the obvious stuff. Clearly shots of the fight scenes being rehearsed need to go over the actors talking about fight scenes. Then I’ll move onto the less obvious stuff – an actor talking about their character might go with almost any shot of that actor on set, so I’ll see what’s left at the end.
  • Avoid cutting in the middle of quick movements – an arm going up, a head turning- unless that action will be continued in the next shot. This goes for the talking heads too – don’t cut on or close to a blink. Also avoid cutting on an emphasised or particularly loud syllable, because this too will jar.
  • Take out the text generators and replace them with a few seconds of B-roll that doesn’t have any interview sound under it. This gives you dividers between topics without blatantly signposting them, and allows the audience a breather. You could bring up the audio on the B-roll, or put in a bit of music. Usually it’s best for this B-roll to serve as an introduction to the topic that’s up next. For example, if the next topic is “what it was like working with the director”, kick it off with B-roll of the director explaining the next scene to the actors. After hearing him or her talk for a sentence or so, fade down the audio and bring in the interview sound.
  • Get some music from somewhere like incompetech.com, if your composer hasn’t started work yet, and cut opening and closing montages of B-roll to it.
  • Put in your lower thirds and opening and closing titles. If the video’s going on You Tube, it’s a good idea to allow for annotations linking viewers to other videos on your channel. Do not put in credits – sorry, but no-one cares who made this.
  • Watch the whole thing through and try to take out another 10-30 seconds. Remember, pace is everything. Do not give people the slightest excuse to stop watching.
  • Do a colour correction pass so everything matches.
  • Go through again balancing the audio. People start their sentences loudly and get quieter as their lungs deflate, so counter this by ramping the audio up over the course of the sentence. Use EQ filters if necessary to counter tinny or boomy sound, or reduce hiss or wind noise. See this Nofilmschool article for some handy audio tips. If any of the audio cuts are popping or clicking, put on a 1 frame cross fade. If you don’t have decent speakers, do this on every cut because you won’t know which ones are dodgy.
  • If any of the speech is still hard to make out – and remember that your viewers haven’t heard it a million times like you have – then subtitle it.
  • Watch it one last time to check everything’s smooth, then compress and upload it. You’re done!

If you’ve found this post useful, please consider supporting Ren by purchasing or sharing the trailer for the Daily Diary videos. Buyers get the first 7 videos now and the remaining 29 when the series is released this summer. They’re all different, some following the above pattern and others being much more candid, fly-on-the-wall affairs. There are plenty of bloopers, interviews and filmmaking tips to be enjoyed throughout. Or check out our free behind-the-scenes videos on YouTube.

How to Cut a Behind-the-Scenes Featurette

How to Make an Electronic Press Kit (EPK)

Lately I’ve been working on the electronic press kit for Kate Madison’s web series, Ren. An EPK is a collection of footage that a broadcaster can use to edit their own piece about your film or series. It should contain:

  • a trailer (optionally with versions without music and without dialogue, so it can be dubbed);
  • clips from the show (again, versions without dialogue are handy if you’re expecting foreign coverage);
  • interviews with the director and principal cast;
  • B-roll, i.e. behind-the-scenes footage.

You may also want to include a short (5 minutes max) ‘making of’ featurette.

The whole thing should be about 20-30 minutes long.

You need to think about your EPK in preproduction. Assign someone with camera and editing experience to film behind-the-scenes material on a few key days of the shoot. This post has lots of tips for shooting good B-roll.

Here’s some B-roll from the Avengers: Age of Ultron EPK.

Personally, I think that putting black slugs between every shot is excessive. With the Ren EPK I loosely edited half a dozen montages and titled them ‘Filming crowd scenes in the village’, ‘Filming fight scenes in Epping Forest’ and so on.

Here’s another example, this time from the Chappie EPK.

When shooting the interviews, encourage people to keep their answers brief. Answers of about 30-45 seconds are ideal. Remember that an EPK is not a finished product: you can’t have jump cuts or paper over edits with B-roll, which means you can’t cut stuff out of the middle of people’s answers; all you can do is trim the beginning and end.

Typical EPK questions are:

  • What’s the film about?
  • Who is your character?
  • What was it like working with the other actors and the director?
  • What was it like filming the action scenes / scary scenes / romantic scenes / scenes where you had to be painted blue from head to toe?
  • Why should people go and see this film?

Put a title card before each answer, giving the question (or a brief description of what the person talks about in their answer), the duration of the clip, and the person’s name and role.

Here’s an example, again from Age of Ultron.

See how the picture kicks in before the sound? That’s to give someone editing the clip into their show more flexibility – they could dissolve into the shot, for example.

Here’s another example, this one from Far from the Madding Crowd.

Once upon a time you would deliver an EPK on Beta SP, but clearly those days are gone. For Ren I’ll probably put the clips up on VHX, a VOD platform we’ve been using for our behind-the-scenes Kickstarter rewards. We can create a package of videos which people can be invited to, with a nice, slick interface, and the videos – one for each interview answer and B-roll segment – will all be downloadable by invitees as 1080P H.264 MP4 files. If anyone wants less compressed versions, they can contact us directly.

If you missed it, check out my post on lighting the Ren EPK interviews.

And for another perspective on making an EPK, you can read Sophie Black’s guest blog from 2012 in which she talks about making the one for Stop/Eject.

Find out more about Ren at rentheseries.com

How to Make an Electronic Press Kit (EPK)

Traction: A First Time for Everything

Me (far right) with the cast and crew of Traction in December 1999

Fifteen years ago I made my first professional film, Traction. Okay, it wasn’t professional in the strictest sense – I wasn’t paid – but I racked up a number of important firsts on the project and learnt a lot. Based on a true story, it’s about a teenaged boy undergoing traction for his juvenile arthritis.

Today you can go out and make a film on your smartphone and reach an instant audience via YouTube, which is great, but you need to collaborate with others if your work is ever going to reach its full potential. Here’s how Traction challenged and improved me.

  • First time having a production company to answer to. Traction was produced by The Rural Media Company as part of its youth media programme, in which I was a participant. It was a completely new experience for me to have to submit a draft script and take on board the feedback of the company’s senior staff. I was probably resistant at first, but their advice was good. You’re not compromising your artistic vision by asking for and acting on feedback from others, you’re making it stronger. And when you work with a budget, you will always have to answer to the people supplying that budget, so get used to arguing your case and sometimes losing.
  • First time directing anyone other than my friends. I had to learn to be clearer and more communicative to get the best out of the other young people who were acting as my crew. They were all into the project far more than my corralled schoolfriends had ever been into my amateur films, which was great and really energising for me as a director.
  • First time directing anyone with acting experience. How to work with actors is something I’m still learning to this day, but the process started right there in 1999 when I ran my very first audition at Hereford College of Art and then directed Rowan Middleton for the two days of the shoot. It’s been said many times by many people, but don’t just cast your mates in your films. Unless your mates are really good actors and right for the parts. Obviously.
  • First time having to stick to a schedule. Although the only costs of Traction’s production were travel and catering expenses, and the youth worker’s fee, I still had a responsibility to ensure that Rural Media did not have to pay for more than the agreed two days’ worth of those costs. This forced me to be prepared, disciplined and ready to compromise when time ran short. Staying on schedule is always a challenge for a director, and the sooner you can start to learn this skill, the better.
  • First time shooting on digital video. Traction was a great opportunity for me to learn a new medium, having worked exclusively on the analogue Video-8 format up to that point. Most filmmakers own a camera, but have you considered hiring or borrowing a better model for your next project? Push yourself, learn to use a new bit of kit and raise your production values at the same time.
  • First time using lighting. Many new filmmakers are scared of lighting, and I probably was too before Traction. Don’t be afraid to experiment; it’s one of the best ways to learn.
  • First time having to use only copyright-cleared music. If you’re only posting your films on YouTube, you can get away with using copyrighted tracks and the system will just put an iTunes link under your video. But dipping into the vast catalogue of pre-existing music can make you lazy. Why not advertise for a composer – there are so many out there desperate to get a start in film scoring – and get some original music for your piece?
  • First time being limited to a final running time. Traction was made for a competition which had a strict five minute time limit. Nothing sharpens your editing skills more than a hard running time limit, and for that reason I’d recommend that every filmmaker try entering a competition at some point in their career.

If you’re a new filmmaker trying to raise your game, ask yourself if you’ve pushed in every direction you can to improve your work, or are you stuck in your comfort zone?

traction6
Left to right: sound recordist John Galloway, me, and actors Rowan Middleton and Rosie Laws
Traction: A First Time for Everything