Corridors and Kitchens

I’ve been shooting films for Rick Goldsmith and his company Catcher Media for over 20 years now. “That’s longer than I’ve been alive,” said the make-up artist on U & Me, Catcher’s latest, when I told her. Ouch.

Like most of the films I’ve done with Rick, U & ME is a drama for schools, about healthy relationships. These projects are as much about giving young people a chance to be involved in the making of a film as they are about the finished product. This means that we have to be pretty light on our feet as a crew – always a good challenge.

One of the main scenes was in the corridor of a school, or “academy” as they all seem to be called now (have we established yet that I’m old?). Rick had picked a corridor that was relatively quiet, though it was still impossible to film when kids were moving between lessons. It had a nice double-door fire exit at the end with diffuse glass. Any corridor/tunnel benefits from having light at the end of it. That’s not a metaphor; light in the deep background is a staple of cinematography, and this light kicked nicely off the shiny floor as well. Whenever framing permitted, I beefed up the light from the doors with one of Rick’s Neewer NL-200As, circular LED fixtures.

For the key light there was a convenient window above the hero lockers. The window looked into an office which – even more conveniently – was empty. In here I put an open-face tungsten 2K pointing at the ceiling. This turned the ceiling into a soft source that spilled through the window. I added another Neewer panel when I needed a bit more exposure.

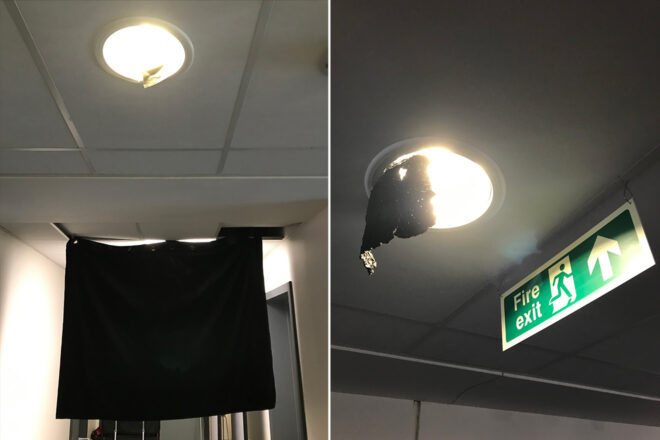
I also wanted to control the existing overhead lights in the corridor. They couldn’t be turned off – I don’t think there were even any switches – so I flagged the ones I didn’t like using black wrap and a blackout curtain hung from the drop ceiling. I taped diffusion over another light, one that I didn’t want to kill completely.

It looked nice and moody in the end.

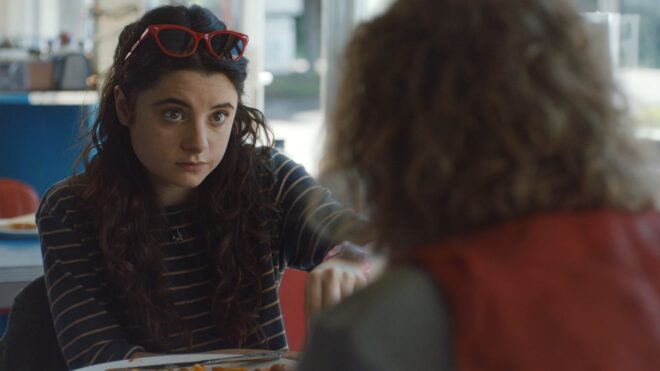
A brighter scene was shot in the kitchen of an AirBnB that doubled as accommodation for us crew. Here I used the 2K outside the window to fire in a hot streak of sunlight that spilt across the worktops, the actor’s clothes and the cupboards (bouncing back onto her face when she looked towards them).

The 2K would have been too hard to light her face with. Instead I fired one of the Neewers into the corner next to the window, creating a soft source for her key. The only other thing I did was to add another Neewer bouncing into the ceiling behind camera for later scenes, when the natural light outside was falling off and it was starting to look too contrasty inside.

It might not have been rocket science, but it was quite satisfying to get an interesting look out of ordinary locations and limited kit.

Corridors and Kitchens

What is Negative Fill and How Do You Use It?

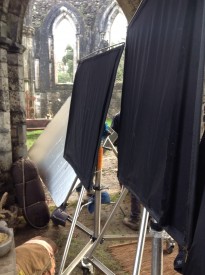
The 4×4 flags and matt silver bounce board used to shape the “Heretiks” shot later in the article.

If you’ve ever learnt anything about lighting, you’ll have heard of the Three Point System: key, backlight and fill. That last one is a soft light which raises the shadows and reduces contrast in the image.

As you might expect, negative fill is the exact opposite. It brings the shadows down, increasing contrast. It’s a big part of cinematography today because the dynamic range of digital cameras is so wide and their light sensitivity is so high that taking away light has become just as important as adding it.

Negative fill – neg fill or just neg for short – can be accomplished with anything black, most commonly a polystyrene board (American name: bead-board), blackout material (usually bolton in the UK or duvetyne in the US) or a flag. 5-in-1 reflectors have a black side that can be used for neg fill too. The term solids or black solids can be applied to any of these tools, indicating that they are completely opaque, as opposed to nets.

When DPs talk about neg fill you often hear the word “shape” come up in their reasoning. Neg fill is typically applied to the camera side (broad side) of the talent, allowing their other side (short side) to remain bright. This has the effect of making the face – or any other object – look more three-dimensional. Hence “shape”. (This is all part of the theory of short key lighting, which I’ve covered in detail before.)

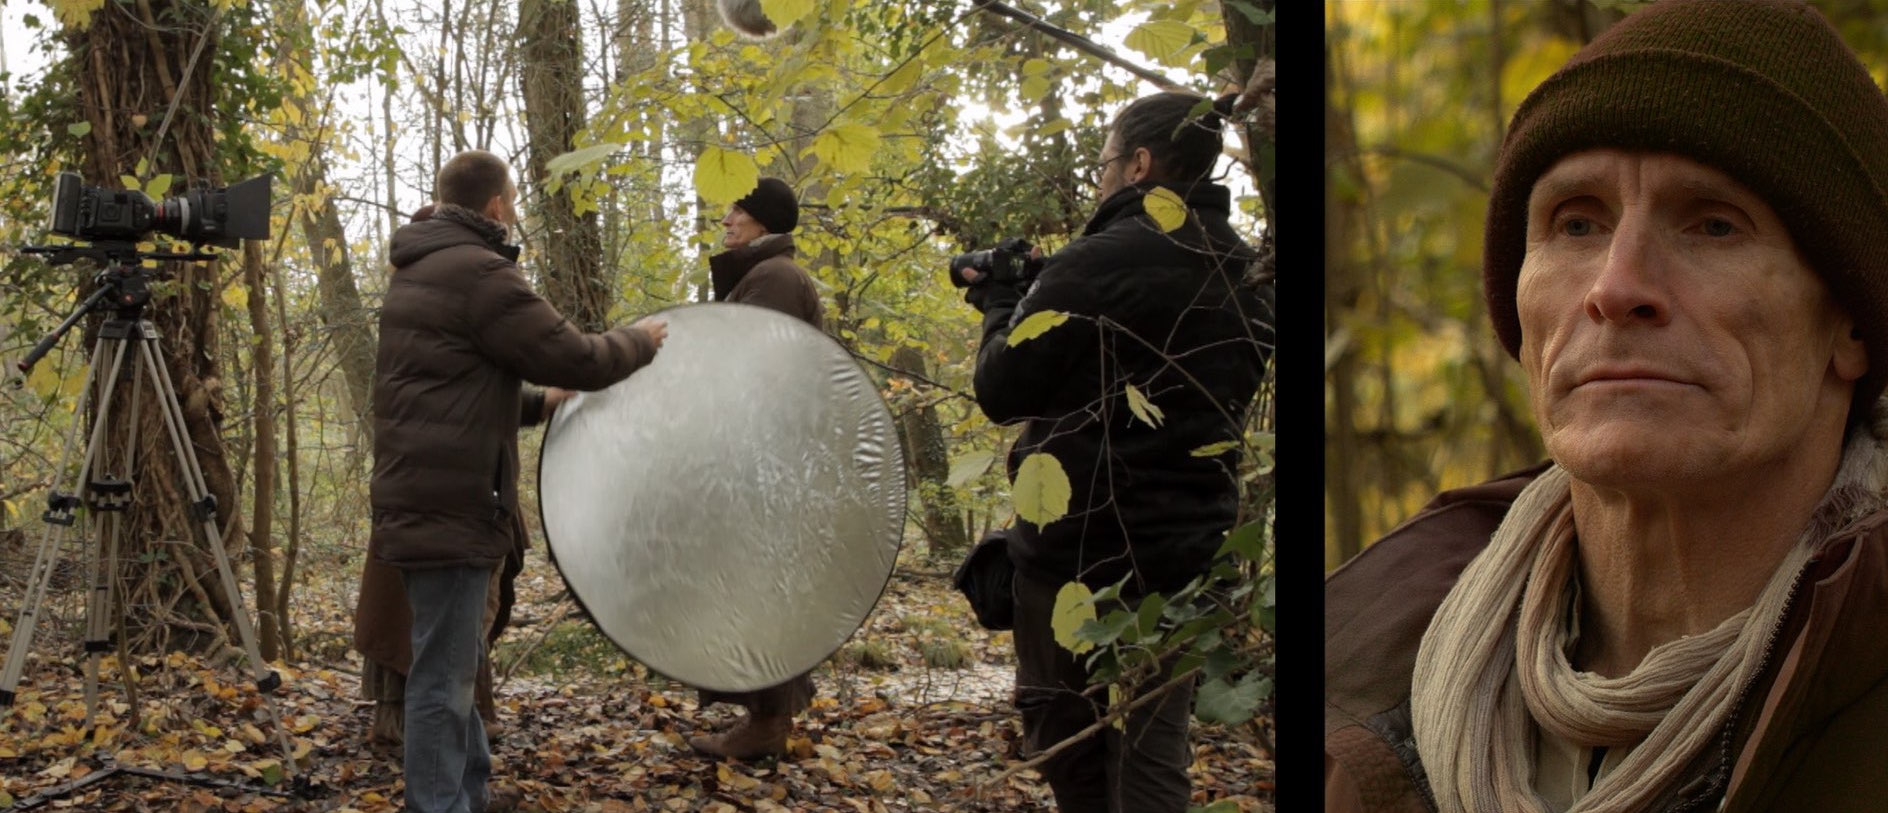
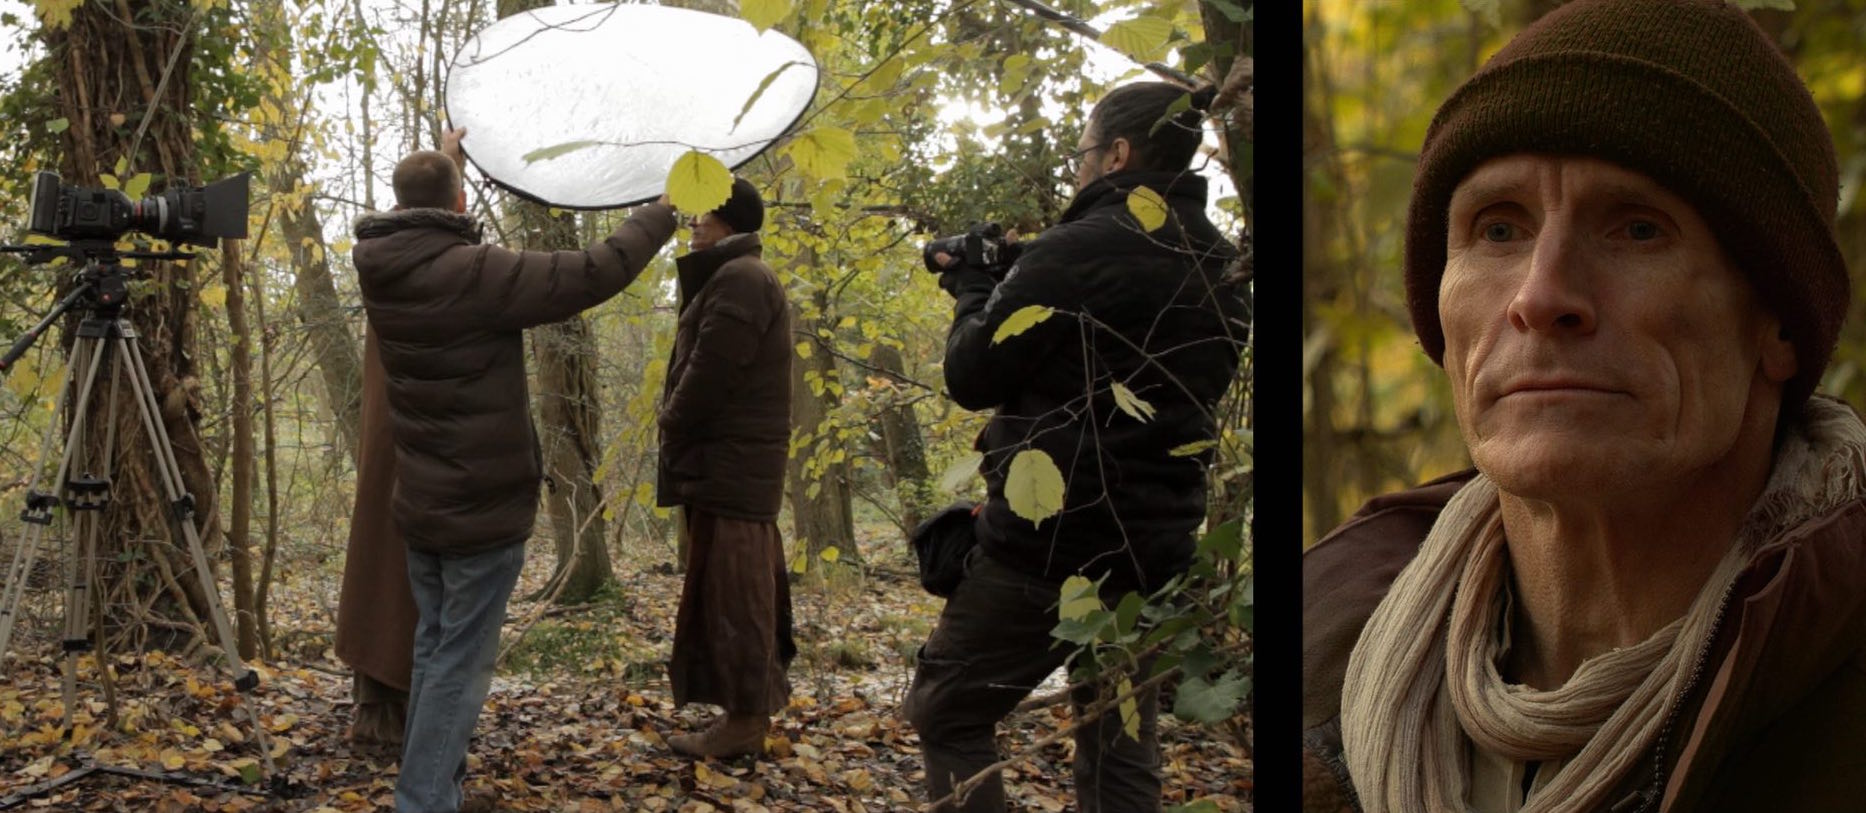
Below is an example from my online course, Cinematic Lighting. In these before and after shots, I use the black side of a 5-in-1 reflector (though you see silver facing camera) to neg-fill Ivan’s short side, adding mood and contrast.

We made it more permanent by replacing the reflector with a 4×4′ floppy flag on a C-stand.

Here’s an example from Heretiks where I chose to put a glint of light back into the darkness created by the neg fill, by using a matt silver reflector to create a rim-light. (There are many more diagrams like this on my Instagram feed.)

Neg fill is most commonly used outdoors, but it can be desirable indoors too, for example when white walls are bouncing light around everywhere. For the shot below from Exit Eve, I had the white wall behind camera covered with bolton so that the light would all be coming from behind the talent. (See my article on lighting from the back.)

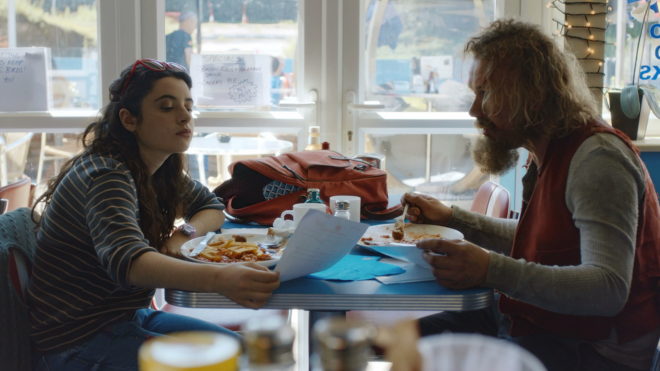
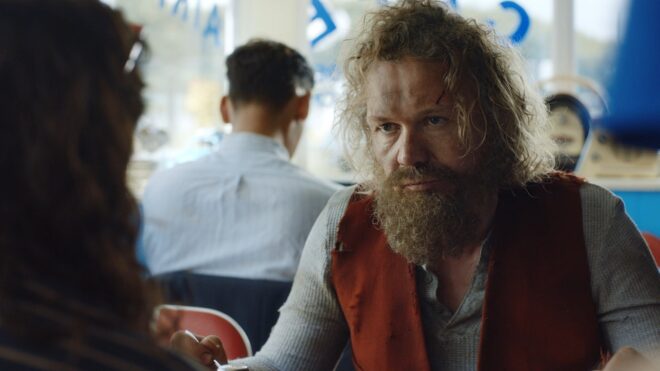
In the café scene from Above the Clouds we shot towards the windows, but there was still too much ambience (mainly from skylights in the roof) on the camera sides of the actors for my taste. We only had a limited supply of flags, so we pressed the sides of the Easy-Up tent into service too!

I’ll leave you with this extreme example of negative fill from Instagram.


View this post on Instagram


A post shared by Shane Ellis (@gameoverman47)

What is Negative Fill and How Do You Use It?

6 Tips for Making DIY Lighting Look Pro

Good lighting can boost the production values of a film tremendously, making the difference between an amateur and a professional-looking piece. For filmmakers early in their careers, however, the equipment typically used to achieve these results can be prohibitively expensive. Far from the Hollywood productions attended by trucks full of lights, a micro-budget film may be unable to rent even a single HMI. Do not despair though, as there are ways to light scenes well without breaking the bank. Here are my top six tips for lighting on the cheap.


1. Make the most of natural light

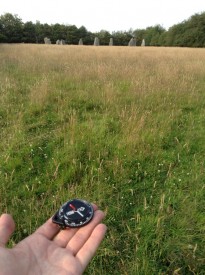
Checking my compass at the stone circle
Guesstimating the sun path on location

The hardest shots to light without the proper equipment are wide shots. Where a fully-budgeted production would rig Maxi Brutes on cherry-pickers, or pound HMIs through windows, a filmmaker of limited means simply won’t have access to the raw power of such fixtures. Instead, plan your day carefully to capture the wide shots at the time when natural light gives you the most assistance. For a day interior, this means shooting when the sun is on the correct side of the building.

See also: “Sun Paths”


2. Keep L.E.D.s to the background

£2 LED camping light

There are a plethora of LED fixtures on the market, designed for all kinds of applications, some of them very reasonably priced. It might be tempting to purchase some of these to provide your primary illumination, but I advise against it. Cheap LED units (and fluorescents) have a terrible Colour Rendering Index (CRI), making for unnatural and unappealing skintones. Such units are therefore best restricted to backgrounds, accent lighting and “specials”. For example, I purchased a little LED camping light from a charity shop for about £2, and I often use it to create the blue glow from computer screens or hang it from the ceiling to produce a hint of hair-light.

See also my article on LEDs from my “Know Your Lights” series.


3. Key with tungsten or halogen

Worklight
Halogen floodlight

By far the best solution for a high output, high CRI, low cost key is a halogen floodlight; 500W models are available for as little as £5. Their chief disadvantage is the lack of barn doors, making the light hard to control, though if you can stretch to a roll of black wrap you can fashion a kind of snoot. Alternatively, consider investing in a secondhand tungsten movie fixture. With many people switching to LEDs, there are plenty of old tungsten units out there. Try to get a reputable brand like Arri or Ianiro, as some of the unbranded units available on Ebay are poorly wired and can be unsafe.

See also: “DIY Interview Lighting for the ‘Ren’ EPK”


4. Control the light

Lace curtains used to break up light in a Camerimage workshop last year

Flooding a halogen light onto a scene is never going to look good, but then the same is often true of dedicated movie fixtures. Instead it’s more how you modify the light that creates the nuanced, professional look. Improvise flags from pieces of cardboard to stop the light spilling into unwanted places – but be VERY careful how close you put them to a tungsten or halogen source, as these get extremely hot. For example, when shooting indoors, flag light off the background wall (especially if it’s white or cream) to help your subject stand out.

See also “Lighting Micro-sets” for an example of this.


5. Soften the light

Almost all cinematographers today prefer the subtlety of soft light to the harshness of hard light. You can achieve this by bouncing your fixture off a wall or ceiling, or a sheet of polystyrene or card. Or you could hang a white bedsheet or a shower curtain in front of the light as diffusion, but again be sure to leave a safe distance between them. Professional collapsible reflectors are available very cheaply online, and can be used in multiple ways to diffuse or reflect light.

Hot tub cover = bounce board
Hot tub cover = bounce board. Towel = flag

See also: “How to Soften Harsh Sunlight with Tinfoil and a Bedsheet”; and to read more about the pictured example: “Always Know Where Your Towel Is”


6. Make use of practicals

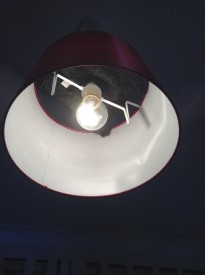
Black-wrapped ceiling light

Finally, don’t be afraid to use existing practical lighting in your scene. Turning on the main overhead light usually kills the mood, but sometimes it can be useful. You can generate more contrast and shape by covering up the top of the lampshade, thus preventing ceiling bounce, or conversely use the ceiling bounce to give some ambient top-light and cover the bottom of the lampshade to prevent a harsh hotspot underneath it. Table lamps and under-cupboard kitchen lights can add a lot of interest and production value to your backgrounds. If possible, swap out LED or fluorescent bulbs for conventional tungsten ones for a more attractive colour and to eliminate potential flickering on camera.

See also: “5 Tips for Working with Practicals”, and for an example of the above techniques, my blog from day two of the Forever Alone shoot.

6 Tips for Making DIY Lighting Look Pro

Lighting Micro-sets

From time to time I help out my friend Kate Madison shooting show reels for actors. The fun and the challenge is in creating and lighting little micro-sets to capture angles that look like they might be lifted out of a scene from a much larger production, all with limited equipment.

lawyer-grade-moresat
Here’s an interesting shot from a recent showreel for Dana Hajaj. This was intended to resemble a Good Wife style legal drama, though actually the first reference that the lawyer’s office setting brought to my mind was Ally McBeal. I remember how they often had hot sunlight coming in through their office windows which would hit the talent from the chest down, while softer, indirect daylight would illuminate the faces.

Clearly this technique wasn’t exactly going to work for an MCU, but it did get me thinking about windows as two-in-one sources: a hard source which adds interest and ‘sheen’ to the image but is too harsh to hit faces with, and a soft sources for faces. Often cinematographers will use two different lights through the same window to achieve these two distinct effects. (I sometimes employ what I call a “Window Wrap” to this end.)

Now, the set for this showreel shot was just a red wall and sconce. (We tried a plant in the corner but couldn’t get it to work.) I wanted to suggest what the rest of the set might be, beyond the borders of this MCU, and simulating a window seemed like a natural choice. Furthermore, a window with Venetian blinds would help sell what was really a living room as a place of business. But this was not film noir; I didn’t want stripes of light on Dana’s face. Instead I used them to add interest to the wall.

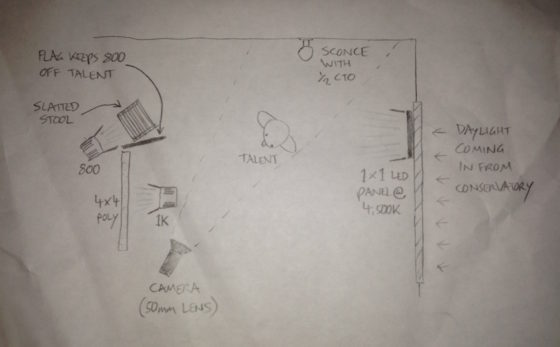
Kate had a slatted-top stool in the hall which threw convincing “blinds” shadows when clamped to a C-stand in front of an 800W Arrilite. Ideally the shadows would have been sharper, but without a Dedo or a par this was the best I could do.

To get the maximum richness from the practical, I put a topper (black wrap clipped to the stool!) on the 800 to keep it off the sconce, and placed CTO inside the lampshade to warm up the fluorescent bulb.

To key Dana, I fired a 1K Arrilite into a 4’x4′ polyboard which was positioned next to the stool. Tungsten bounced off poly gives a beautiful soft, matt quality of light, and is a great way to key talent.

The backlight comes from a 1’x1′ LED panel set to about 4500K. What is the motivation for this source? North light coming from another window maybe? The great thing about micro-sets is there’s no wide shot so I don’t have to worry about that if I don’t want to! The motivation is that cold backlight looks good on black hair, and that’s that.

img_1344

As we prepared to roll, I wondered if I should increase the contrast more. I could have done this by (a) flagging the poly bounce to prevent it filling in the “blinds” shadows on the wall and (b) bringing in negative fill on the talent’s camera right side to kill the ambience. But I decided that more contrast was not appropriate for this kind of piece.

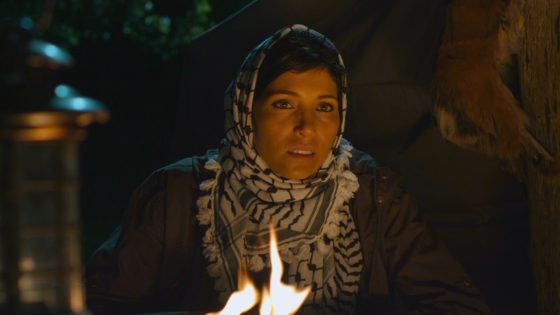
For another scene for Dana’s reel, we mocked up a remote Arabian campsite on Kate’s patio! Kate used a piece of fabric hung from a post and two light stands to represent the tent.

campsite-grade-moresat

I wanted to give the impression that if we cut to a wide shot – which of course we never do, but if we did – that it would show a vast landscape, perhaps a desert, all backlit by moonlight. On this hypothetical production, I would generate that moonlight with 18Ks on condor cranes, gelled with Steel Blue.

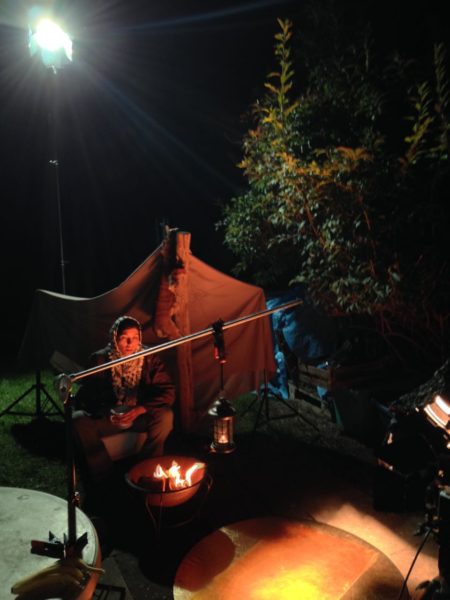
But on this tight shot I was able to achieve the same effect with two far smaller sources, both gelled with Steel Blue. (This is a blue with more green in it than CTB. It’s prettier and has connotations of many 80s and 90s thrillers and action movies that seemed to use copious amounts of this gel.) In the deep background is an LED panel, 3/4 backlighting a couple of blurry apple trees that could maybe play as vegetation around an oasis. Immediately behind the “tent” is a 40″ C-stand, top floor, with a 1K Arrilite on it. So close to the talent, the 1K comes down at a steep enough angle to imply moonlight, or an 18K on a condor, depending on how you want to look at it.

The flames from the fire pit weren’t doing much to light Dana, so I bounced another 1K off a gold reflector on the floor next to the fire. During takes I wiggled the reflector to add dynamics to the light.

To add a final touch of production value, I suggested a foreground practical. Kate found a candle lantern which we hung from a flag arm just in front of camera. Every frame of a Blockbuster movie is packed with details, so things like this help a lot to sell the scale.

img_1308
The 1K “moon” backlight is at top left. The gold reflector for the fire source is in the bottom centre, with the 1K bouncing into it visible two-thirds of the way down the right-hand edge of this image. The camera is just out of the bottom right corner of this frame. Not pictured is the LED background light, way back off left of this frame.

For more on shooting micro-sets, check out my blog from Above the Clouds, a feature that had several of them. Visit actorsatworkproductions.co.uk for showreel info.

Lighting Micro-sets