I’ve been thinking lately that I should learn more about what goes on inside a lens, so I looked around online and found this great series of YouTube videos. Warning: there’s a fair amount of maths!
tutorial
How to Process Black-and-White Film
 A few weeks ago, I came very close to investing in an Ilford/Paterson Starter Kit so that I could process film at home. I have four exposed rolls of 35mm HP5+ sitting on my shelf, and I thought that developing them at home might be a nice way to kill a bit of lockdown time. However, I still wouldn’t be able to print them, due to the difficulties of creating a darkroom in my flat. And with lockdown now easing, it probably won’t be long until I can get to Holborn Studios and hire their darkroom as usual.
So in this article I’ll talk through the process of developing a roll of black-and-white 35mm, as I would do it in the Holborn darkoom. If you haven’t already, you might want to read my post about how film works first.
You will need
- Exposed roll of 35mm, with the tail of the film still sticking out of the cassette
- Changing bag, or a room that you can completely eliminate ALL light from
- Paterson tank, or similar developing tank
- Scissors
- Measuring cylinders
- Thermometer
- Drying hooks
- Squeegee
- Developer, e.g. Kodak HC-110
- Fixer
- Washing-up liquid
- Negative storage sheet
- Easy access to running water
- Somewhere dust-free to dry the negatives
Loading the developing tank
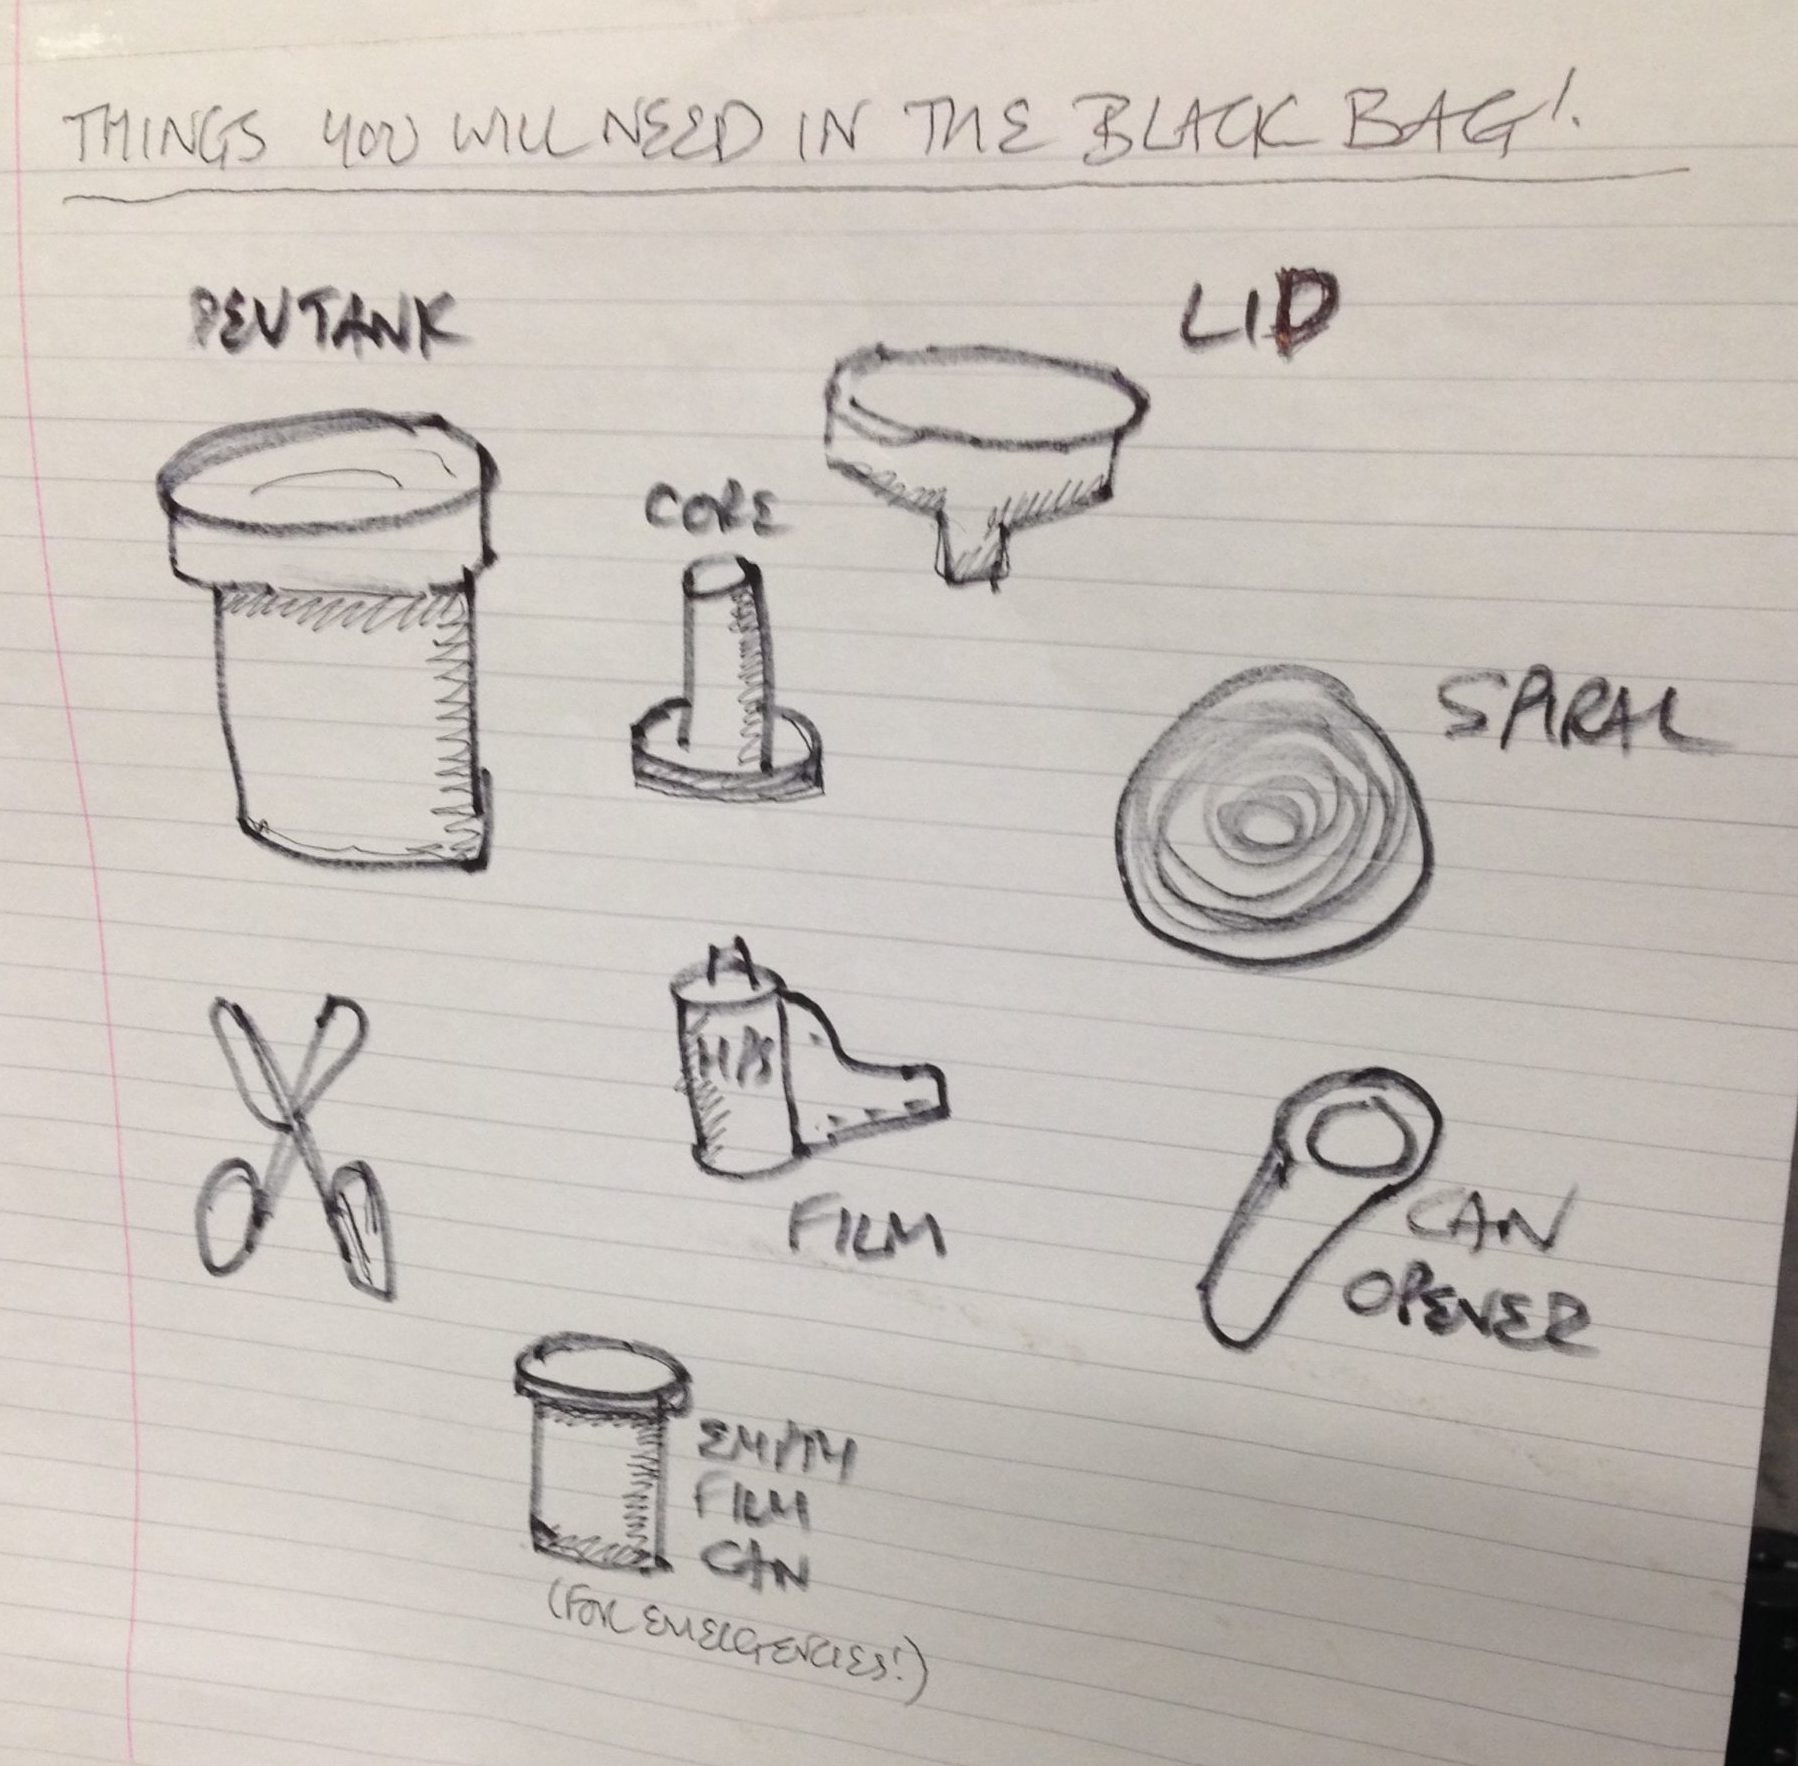
The first step is to transfer the exposed film from its cassette – which is of course light-proof – into the Paterson tank, which is designed to admit the developing chemicals but not light. This transfer must take place in complete darkness, to avoid fogging the film. I’ve always done this using a changing bag, which is a black bag with a double seal and elasticated arm-holes.
Start by putting the following items into the bag: the film cassette, scissors and the various components of the Paterson tank, including the spiral. It’s wise to put in an empty film canister too, in case something goes wrong, and if the tail of your film isn’t sticking out of the cassette then you’ll need a can opener as well.
Seal the bag, put your arms in, and pull all the film out of the cassette. It’s important NOT to remove your arms from the bag now, until the film is safely inside the closed tank, otherwise light can get in through the arm-holes and fog the film.
Use the scissors to cut the end of the film from the cassette, and to trim the tongue (narrower part) off the head of the film.

Now we come to the most difficult part, the part which always has me sweating and swearing and regretting all my life choices: loading the film onto the spiral. I have practised this with dead film many times, but when I’m fumbling around in the dark of the changing bag it’s a hundred times harder.
It’s hard to describe loading the spiral verbally, but this blog post by Chris Waller is very clear and even includes pictures. (Chris recommends cutting a slight chamfer onto the leading corners of the film, which I shall certainly try next time, as well as using your thumbs to keep the film flat on its approach to the reel.)
If you’re working with 120 film, the loading process is very slightly different, and this video describes it well.
Once the spiral is loaded, you can thread it onto the core, place the core inside the tank, and then put the lid on. It is now safe to open the bag.
Developing

Holborn Studios’ darkroom is stocked with a working solution of Kodak HC-110 developer, but if you don’t have this luxury, or you’re not using the Ilford Simplicity packs, then you’ll need to make up a working solution yourself by diluting the developer according to the manufacturer’s instructions. For HC-110 dilution B, which is what Holborn uses, it’s 1+31, i.e.one part concentrated developer to 31 parts water. The working solution has a limited shelf life, so again consult the manufacturer’s instructions.
Further dilution is required at the point of development, at a ratio of 1+7 in this case, but once more this may vary depending on the chemicals you choose. For one roll of 35mm, you need 37.5ml of the HC-110 dilution B, and 262.5ml of water for a total of 300ml.
The developing time depends on the type of film stock, the speed you rated it at, the type of developer and its dilution, and the temperature of the chemicals. Digital Truth has all the figures you need to find the right development time.

I was taught to ensure my water is always at 20°C before mixing it with the developer, to keep the timing calculations a little simpler. At this temperature, a roll of Ilford HP5+ rated at its box speed of ISO 400 needs five minutes to develop in HC-110 dilution B. Ilford Delta, on the other hand, needs a whopping 14.5 minutes to process at its box speed of 3200.
Once your diluted developer is ready, pour it into the Paterson tank and put on the cap. It is now necessary to agitate the chemicals in order to distribute them evenly around the film. My technique is inversion, i.e. turning the tank upside-down and back again. Do this continuously for the first 30 seconds, then for 10 seconds every minute after that.
Inside the tank, your latent image is being transformed into an image proper, wherein every exposed silver halide crystal is now black metallic silver.
Fixing
Once the developing time is up, remove the cap from the tank, and pour away the developer immediately. At this point some people will say you need to use a stop bath to put a firm halt to the developing process, but I was taught simply to rinse the tank out with tap water and then proceed straight to fixing. This method has always worked fine for me.
After rinsing the tank, pour in enough fix solution (again prepared to the manufacturer’s instructions) to fill it completely. Put the cap back on, agitate it for 30 seconds, then leave it for ten minutes.
During this time, the fixer renders the film’s unexposed crystals inactive and water soluble. When the ten minutes is up, pour the fixer back into its container (it’s reuseable) and leave the tank under running water for a further ten minutes. This washes away the unused silver halide crystals, leaving only the exposed black silver corresponding with light areas of the scene, and just the transparent plastic base corresponding with the dark areas.
Squirt a little diluted washing-up liquid into the tank to prevent drying rings, then drain it. You can now open the tank and see your negative for the first time.

Drying
Remove the film from the developing spiral, taking care to only touch the ends and the edges. Squeegee the top part of the film, dry your hands, then squeegee the rest. This removes droplets which can otherwise mark the negative.
Now attach two hooks to the film, a light one at the top to hang it from, and a heavy one at the bottom to stop the film curling as it dries. Holborn Studios is equipped with a heated drying cabinet, but with patience you can hang a film to dry in any dust-free area.
When your film is dry, you can cut it into strips of six frames and insert them into a negative storage sheet.
You can now scan your negatives, or better still print them photo-chemically, as I’ll describe in a future post.
Cinematic Lighting Course: Coming Soon

I’m using my time in Covid-19 lockdown for a few different things, some more worthy than others. Lying-in is a big one. Watching all of Lost again. Exercising more. But also I’ve got a big editing project to complete, a project of my own, the perfect task to get me through the long days at home.
Last November I shot Cinematic Lighting, a four-hour online course. It’s something I’d been thinking about for a while, especially over the last year or so as my Instagram following has sky-rocketed (about 33,000 at the time of writing). DPs and cinematography students follow my feed for the lighting diagrams I post every Friday, showing exactly how a lighting set-up was achieved, but some commenters had started to ask why I made certain creative decisions. So the idea for the course was born.
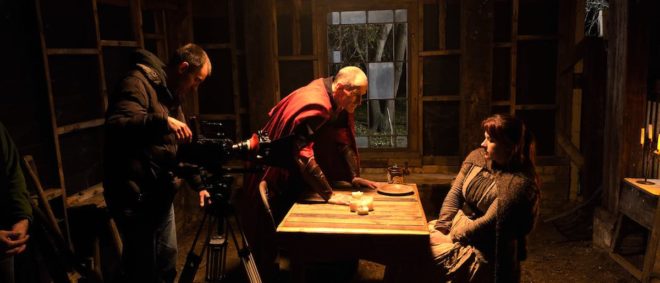
Cinematic Lighting consists of four modules: day exterior, day interior, night interior and night exterior. In each module I light and shoot a half-page scene with two actors, Kate Madison and Ivan Moy, with behind-the-scenes cameras following my every move. As I do it – with the assistance of gaffer Jeremy Dawson and spark Gareth Neal – I explain how and why I’m doing it. Sometimes I demonstrate alternative options I could have chosen. I talk about characterisation and how to match it with lighting. I quote John Alton and Christopher Nolan. I show clips from other productions I’ve shot and tell the stories behind them. I explain how to use a light meter and get your head around f-stops, T-stops and ND filters. I demonstrate the power of smoke. But most importantly I lay my creative process bare as I work.
The original intention was for the course to be a reward on the Kickstarter campaign for Ren: The Girl with the Mark‘s second season, but sadly that campaign was unsuccessful. Over the next couple of months I’ll be investigating my options for releasing this course, and rest assured that I’ll let you know as soon as it’s available.
Meanwhile, postproduction work continues on it. The main thing left to do is the grading of the finished dramatic scenes; each module concludes with a polished edit of the scene which I’ve shot. Rather than hire a colourist, I’ve decided it’s time to finally learn a few things about grading myself. To that end, I’ve purchased a Udemy course and am currently learning how to do fancy secondaries in Davinci Resolve – another good use of my lockdown time, I feel. More on this in a future post.
Meanwhile, stay safe and REMAIN INDOORS.

Choosing an ND Filter: f-stops, T-stops and Optical Density
A revised and updated version of this article can be found here (aperture) and here (ND filters).
Imagine this scenario. I’m lensing a daylight exterior and my light meter gives me a reading of f/11, but I want to shoot with an aperture of T4, because that’s the depth of field I like. I know that I need to use a .9 ND (neutral density) filter. But how did I work that out? How on earth does anyone arrive at the number 0.9 from the numbers 11 and 4?
Let me explain from the beginning. First of all, let’s remind ourselves what f-stops are. You have probably seen those familiar numbers printed on the sides of lenses many times…
1 1.4 2 2.8 4 5.6 8 11 16 22
They are ratios: ratios of the lens’ focal length to its iris diameter. So a 50mm lens with a 25mm diameter iris is at f/2. If you close up the iris to just under 9mm in diameter, you’ll be at f/5.6 (50 divided by 5.6 is 8.93).
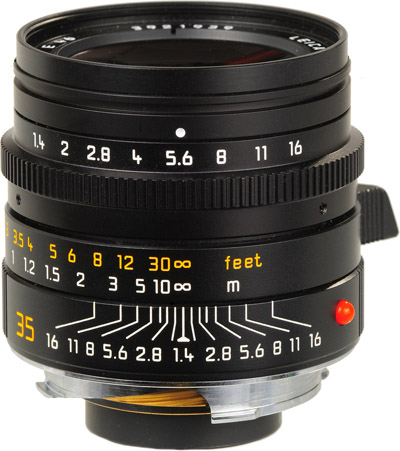
But why not label a lens 1, 2, 3, 4? Why 1, 1.2, 2, 2.8…? These magic numbers are f-stops. A lens set to f/1 will let in twice as much light as (or ‘one stop more than’) one set to f/1.4, which in turn will let in twice as much as one set to f/2, and so on. Conversely, a lens set to f/2 will let in half as much light as (or ‘one stop less than’) one set to f/1.4, and so on.
If you think back to high school maths and the Pi r squared formula for calculating the area of a circle from its radius, the reason for the seemingly random series of numbers will start to become clear. Letting in twice as much light requires twice as much area for those light rays to fall on, and remember that the f-number is the ratio of the focal length to the iris diameter, so you can see how square roots are going to get involved and why f-stops aren’t just plain old round numbers.

Now, earlier I mentioned T4. How did I get from f-stops to T-stops? Well, T-stops are f-stops adjusted to compensate for the light transmission efficiency. Two different f/2 lenses will not necessarily produce equally bright images, because some percentage of light travelling through the elements will always be lost, and that percentage will vary depending on the quality of the glass and the number of elements. A lens with 100% light transmission would have the same f-number and T-number, but in practice the T-number will always be a little higher than the f-number. For example, Cooke’s 15-40mm zoom is rated at a maximum aperture of T2 or f/1.84.
So, let’s go back to my original scenario and see where we are. My light meter reads f/11. However, I expressed my target stop as a T-number though, T4, because I’m using cinema lenses and they’re marked up in T-stops rather than f-stops. (I can still use the f-number my meter gives me though; in fact if my lens were marked in f-stops then my exposure would be slightly off because the meter does not know the transmission efficiency of my lens.)
By looking at the series of f-numbers permanently displayed on my light meter (the same series listed near the top of this post, or on any lens barrel) I can see that f/11 (or T11) is 3 stops above f/4 (or T4) – because 11 is three numbers to the right of 4 in the series. I can often be seen on set counting the stops like this on my light meter or on my fingers. It is of course possible to work it out mathematically, but screw that!

So I need an ND filter that cuts 3 stops of light. But we’re not out of the mathematical woods yet.
The most popular ND filters amongst professional cinematographers are those made by Tiffen, and a typical set might be labelled as follows:
.3 .6 .9 1.2
Argh! What do those numbers mean? That’s the optical density, a property defined as the natural logarithm of the ratio of the quantity of light entering the filter to the quantity of light exiting it on the other side. A .3 ND reduces the light by half because 10 raised to the power of -0.3 is 0.5, or near as damn it. And reducing light by half, as we established earlier, means dropping one stop.
If that fries your brain, don’t worry; it does mine too. All you really need to do is multiply the number of stops you want to drop by 0.3 to find the filter you need. So to drop three stops you pick the .9 ND.
And that’s why you need a .9 ND to shoot at T4 when your light meter says f/11. Clear as mud, right? Once you get your head around it, and memorise the f-stops, this all becomes a lot easier than it seems at first glance.
Here are a couple more examples:
- Light meter reads f/8 and you want to shoot at T5.6. That’s a one stop difference. (5.6 and 8 are right next to each other in the stop series, as you’ll see if you scroll back to the top.) 1 x 0.3 = 0.3 so you should use the .3 ND.
- Light meter reads f/22 and you want to shoot at T2.8. That’s a six stop difference (scroll back up and count them), and 6 x 0.3 = 1.8, so you need a 1.8 ND filter. If you don’t have one, you need to stack two NDs in your matte box that add up to 1.8, e.g. a 1.2 and a .6.
Lensing Ren – episode 2
Here’s my video breaking down the cinematography of episode two of Ren: The Girl with the Mark. This week I discuss lighting Ren’s house, tweaking wide-shot lighting for close-ups, and depth of field.
Here is the lighting plan for Ren’s house:
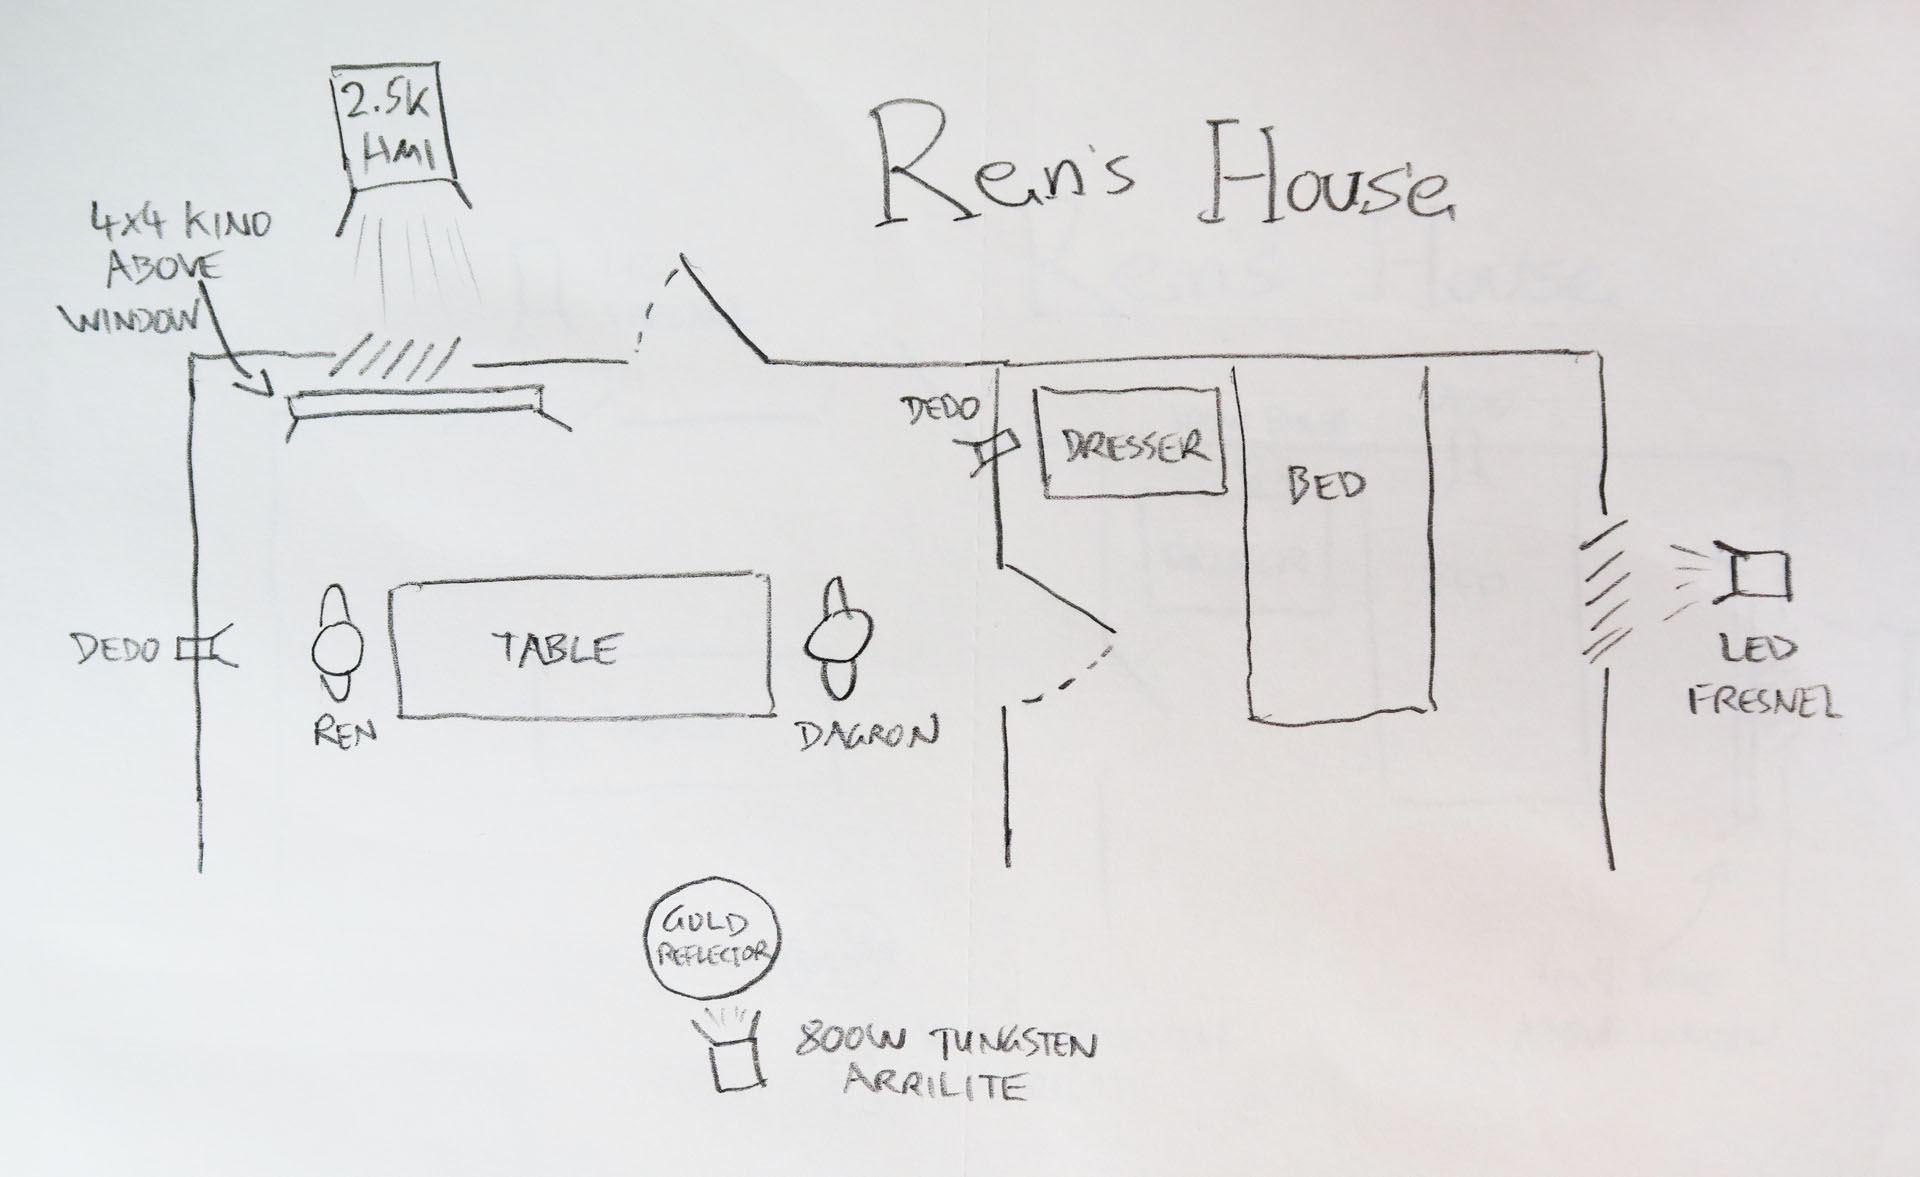
And here is a video blog from the set of Ren’s house:
Check out the article I wrote during the shoot about lighting Ren and Dagron’s house if you’re still hungry for details.
If you want to know more about using kinoflos as indirect window light, have a look at Lighting Technique #3: The Window Wrap.
Want to know more about Depth of Field? This post will give you the basics.
Check back next Saturday for another instalment of Lensing Ren, and meanwhile watch the next episode of Ren itself from Tuesday at 8pm GMT at rentheseries.com
Black-screen & White-screen: The Best Kept Secrets in Compositing

When it comes to shooting elements for VFX, green-screen gets all the press. But certain kinds of elements can be tricky to key well, and sometimes it’s not the right look. In the last few days Kate Madison and I have needed to shoot last-minute elements for some shots in Ren: The Girl with the Mark, and we turned to monochromatic backgrounds.
Why? How does it work? Well certainly you can key out black or white just like you’d key out green, but the most powerful way to use these backgrounds is not with keying at all, but by a bit of basic maths. And don’t worry, the computer does the maths for you.
If you’ve ever used Photoshop, you’ll have noticed some layer modes called Screen and Multiply. Final Cut Pro has the same modes (it also has Add, which to most intents and purposes is the same as Screen) and so do all the major editing and FX packages.
Screen adds the brightness of each pixel of the layer to the layer underneath. Since black has a brightness of zero, your black screen disappears, and the element in front of it is blended seamlessly into the background image, with its apparent solidity determined by its brightness.
Multiply, as the name suggests, multiplies the brightness of each pixel with the layer underneath. Since white has a brightness of one, and any number multiplied by one is that same number, your white screen vanishes. Whatever element is in front of your screen is blended into the background image, with darker parts of the element showing up more than lighter parts.
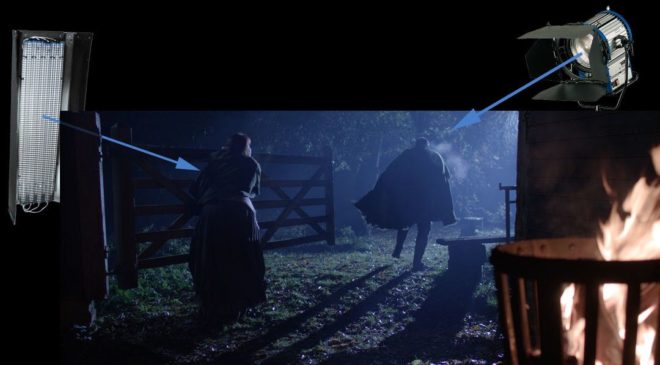
One of the elements Kate and I needed to shoot was a flame, to be comped onto a torch. We lit a torch and clamped it to a stand, shooting at night with the pitch black garden in the background. It was the work of moments to comp this element into the shot using Screen mode.


Fire is the perfect partner for black-screen shooting, because it generates its own light and it’s not solid. Solid objects composited using Screen/Add or Multiply take on a ghostly appearance – perfect for, er, ghost effects – but not ideal in other situations; because of the way Screen mode works, anything that’s not peak white will be transparent to some degree.
We shot some fast-moving leaves and debris against black, but only the high level of motion blur allowed us to get away with it. In fact, if you know you’re going to have a lot of motion blur, black-screen might be the ideal method, because it will be tricky to get a clean key off a green-screen.

Other things that work well against black-screen are sparks, smoke and water/rain, again because they’re not solid. If you want to add rain or snow to a shot, black-screen is the way to go – check out my post about that here.
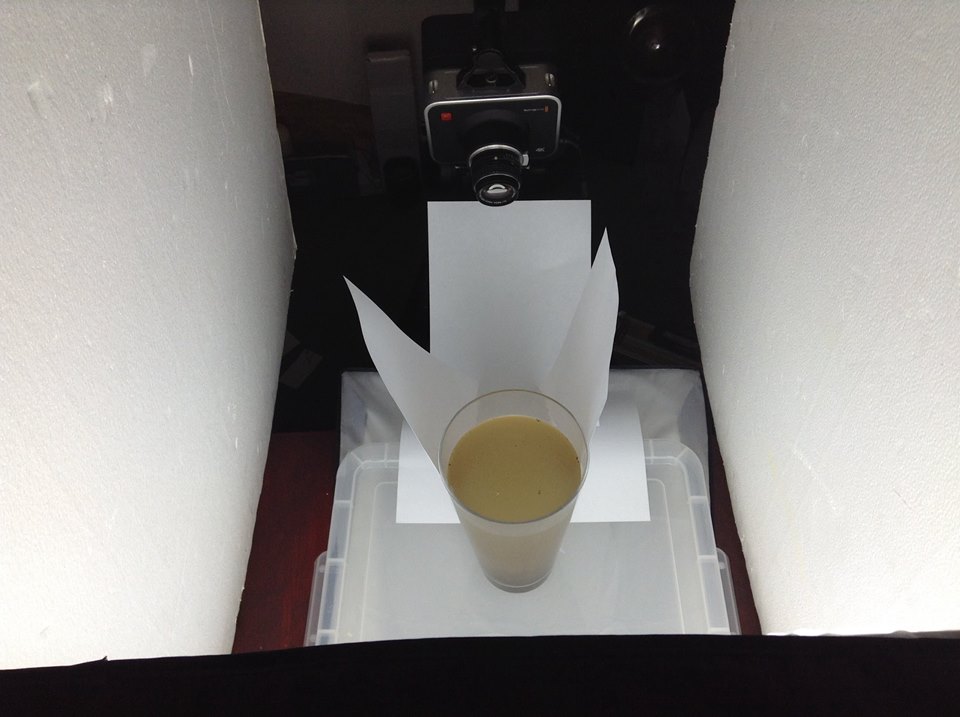
Yesterday Kate and I needed to shoot a whirlwind element. One of the VFX team suggested swirling sand in a vase of water. After a few experiments in the kitchen, we ended up using dirt from the garden. We used fluorescent softboxes for the background, ensuring we got a bright white background, and made weird arrangements of white paper to eliminate as many of the dark reflections in the vase as we could.

A few weeks back we shot hosepipe water against black, inverted it and used Multiply to superimpose it as blowing dirt.
With a little thinking outside the box, you can shoot all kinds of elements against white or black to meet your VFX needs. I’ll leave you with this featurette I made in 2006, breaking down the various low-tech FX – many of them black-screen – that I employed on my feature film Soul Searcher.
How to Cut a Behind-the-Scenes Featurette

Despite my big plan to quit editing last year, I somehow ended up cutting nearly all the behind-the-scenes material for Ren, including a dozen YouTube videos and 30-odd exclusive set diaries which have just been released for sale. Guess I just have a fondness for BTS stuff.

So here are some tips for editing BTS videos for the web. Many of these apply equally to any talking-head-based documentary.
- Plan for it before the shoot by lining up a competent BTS camera crew and being clear about the kind of material you need. Here are some tips for shooting B-roll.
- Start the edit by creating a new timeline and putting in some text generators with category headings you think you’ll want to cover, e.g. “plot”, “characters”, “casting”, “action scenes”, “concluding remarks”.
- Watch through all the interview material. Every time you hear something you think you can use, dump it on the timeline after the relevant text.
- Play back your timeline. You’ll immediately see that some of the material you’ve included is dull or repetitious. Whittle down the material until your timeline is only a little longer than you intend the finished piece to be. (I suggest 2-3 minutes should be your target length for a web piece.)
- Pay attention to your in and out points. Don’t cut while someone is drawing breath – cut before or after. Beware of breathing time if you’re hacking someone’s sentences around. If your editing makes a couple of words sound unnaturally close together, interpose a few frames of atmos or silence. If you cut someone off in the middle of a sentence, firstly be sure the intonation doesn’t make it sound cut off, then add in some silence or atmos before the next clip, and paper over the edit with B-roll as the interviewee’s face will often give away that they’re not finished speaking.
- Speaking of papering over the talking heads with B-roll, it’s time to do that now. I often start with the obvious stuff. Clearly shots of the fight scenes being rehearsed need to go over the actors talking about fight scenes. Then I’ll move onto the less obvious stuff – an actor talking about their character might go with almost any shot of that actor on set, so I’ll see what’s left at the end.
- Avoid cutting in the middle of quick movements – an arm going up, a head turning- unless that action will be continued in the next shot. This goes for the talking heads too – don’t cut on or close to a blink. Also avoid cutting on an emphasised or particularly loud syllable, because this too will jar.
- Take out the text generators and replace them with a few seconds of B-roll that doesn’t have any interview sound under it. This gives you dividers between topics without blatantly signposting them, and allows the audience a breather. You could bring up the audio on the B-roll, or put in a bit of music. Usually it’s best for this B-roll to serve as an introduction to the topic that’s up next. For example, if the next topic is “what it was like working with the director”, kick it off with B-roll of the director explaining the next scene to the actors. After hearing him or her talk for a sentence or so, fade down the audio and bring in the interview sound.
- Get some music from somewhere like incompetech.com, if your composer hasn’t started work yet, and cut opening and closing montages of B-roll to it.
- Put in your lower thirds and opening and closing titles. If the video’s going on You Tube, it’s a good idea to allow for annotations linking viewers to other videos on your channel. Do not put in credits – sorry, but no-one cares who made this.
- Watch the whole thing through and try to take out another 10-30 seconds. Remember, pace is everything. Do not give people the slightest excuse to stop watching.
- Do a colour correction pass so everything matches.
- Go through again balancing the audio. People start their sentences loudly and get quieter as their lungs deflate, so counter this by ramping the audio up over the course of the sentence. Use EQ filters if necessary to counter tinny or boomy sound, or reduce hiss or wind noise. See this Nofilmschool article for some handy audio tips. If any of the audio cuts are popping or clicking, put on a 1 frame cross fade. If you don’t have decent speakers, do this on every cut because you won’t know which ones are dodgy.
- If any of the speech is still hard to make out – and remember that your viewers haven’t heard it a million times like you have – then subtitle it.
- Watch it one last time to check everything’s smooth, then compress and upload it. You’re done!
If you’ve found this post useful, please consider supporting Ren by purchasing or sharing the trailer for the Daily Diary videos. Buyers get the first 7 videos now and the remaining 29 when the series is released this summer. They’re all different, some following the above pattern and others being much more candid, fly-on-the-wall affairs. There are plenty of bloopers, interviews and filmmaking tips to be enjoyed throughout. Or check out our free behind-the-scenes videos on YouTube.
Converting Blackmagic Raw Footage to ProRes with After Effects
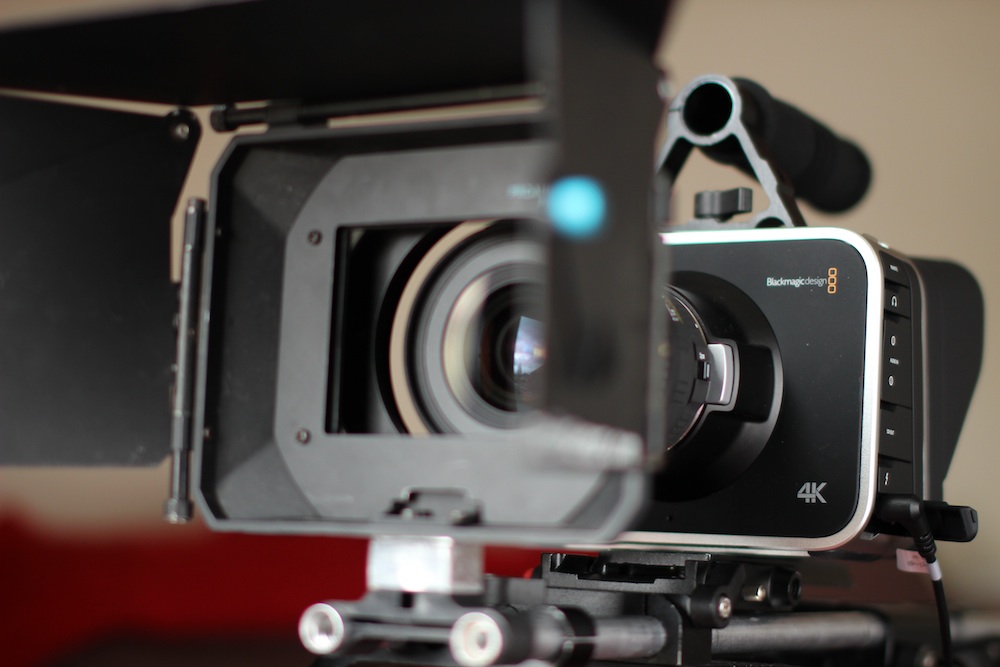
One of the big benefits of the Blackmagic cameras is their ability to shoot raw – lossless Cinema DNG files that capture an incredible range of detail. But encoding those files into a useable format for editing can be tricky, especially if your computer won’t run the processor-intensive DaVinci Resolve which ships with the camera.
You can usually turn to the Adobe Creative Suite when faced with intractable transcoding problems, and sure enough After Effects provides one solution for raw to ProRes conversion.
I’ll take you through it, step by step. Let’s assume you’ve been shooting on a Blackmagic Cinema Camera and you have some 2.5K raw shots which you want to drop into your edit timeline alongside 1080P ProRes 422HQ material.
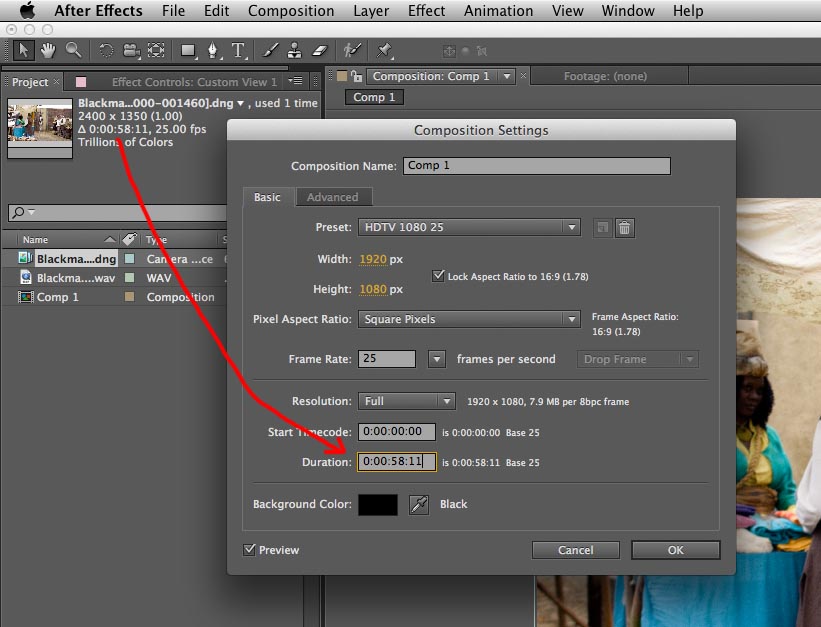
1. In After Effects’ launch window, select New Composition. A dialogue box will appear in which you can spec up your project. For this example, we’re going to choose the standard HDTV resolution of 1920×1080. It’s critical that you get your frame rate right, or your audio won’t sync. Click OK once you’ve set everything to your liking.

2. Now go to the File menu and select Import > File. Navigate to the raw material on your hard drive. The BMCC creates a folder for each raw clip, containing the individual Cinema DNG frames and a WAV audio file. Select the first DNG file in the folder and ensure that Camera Raw Sequence is ticked, then click OK.

3. You’ll then have the chance to do a basic grade on the shot – though with only the first frame to judge it by.

4. Use Import > File again to import the WAV audio file.

5. Your project bin should now contain the DNG sequence – shown as a single item – along with the WAV audio and the composition. Drag the DNG sequence into the main viewer window. Because the BMCC’s raw mode records at a resolution of 2.5K and you set your composition to 1080P, the image will appear cropped.
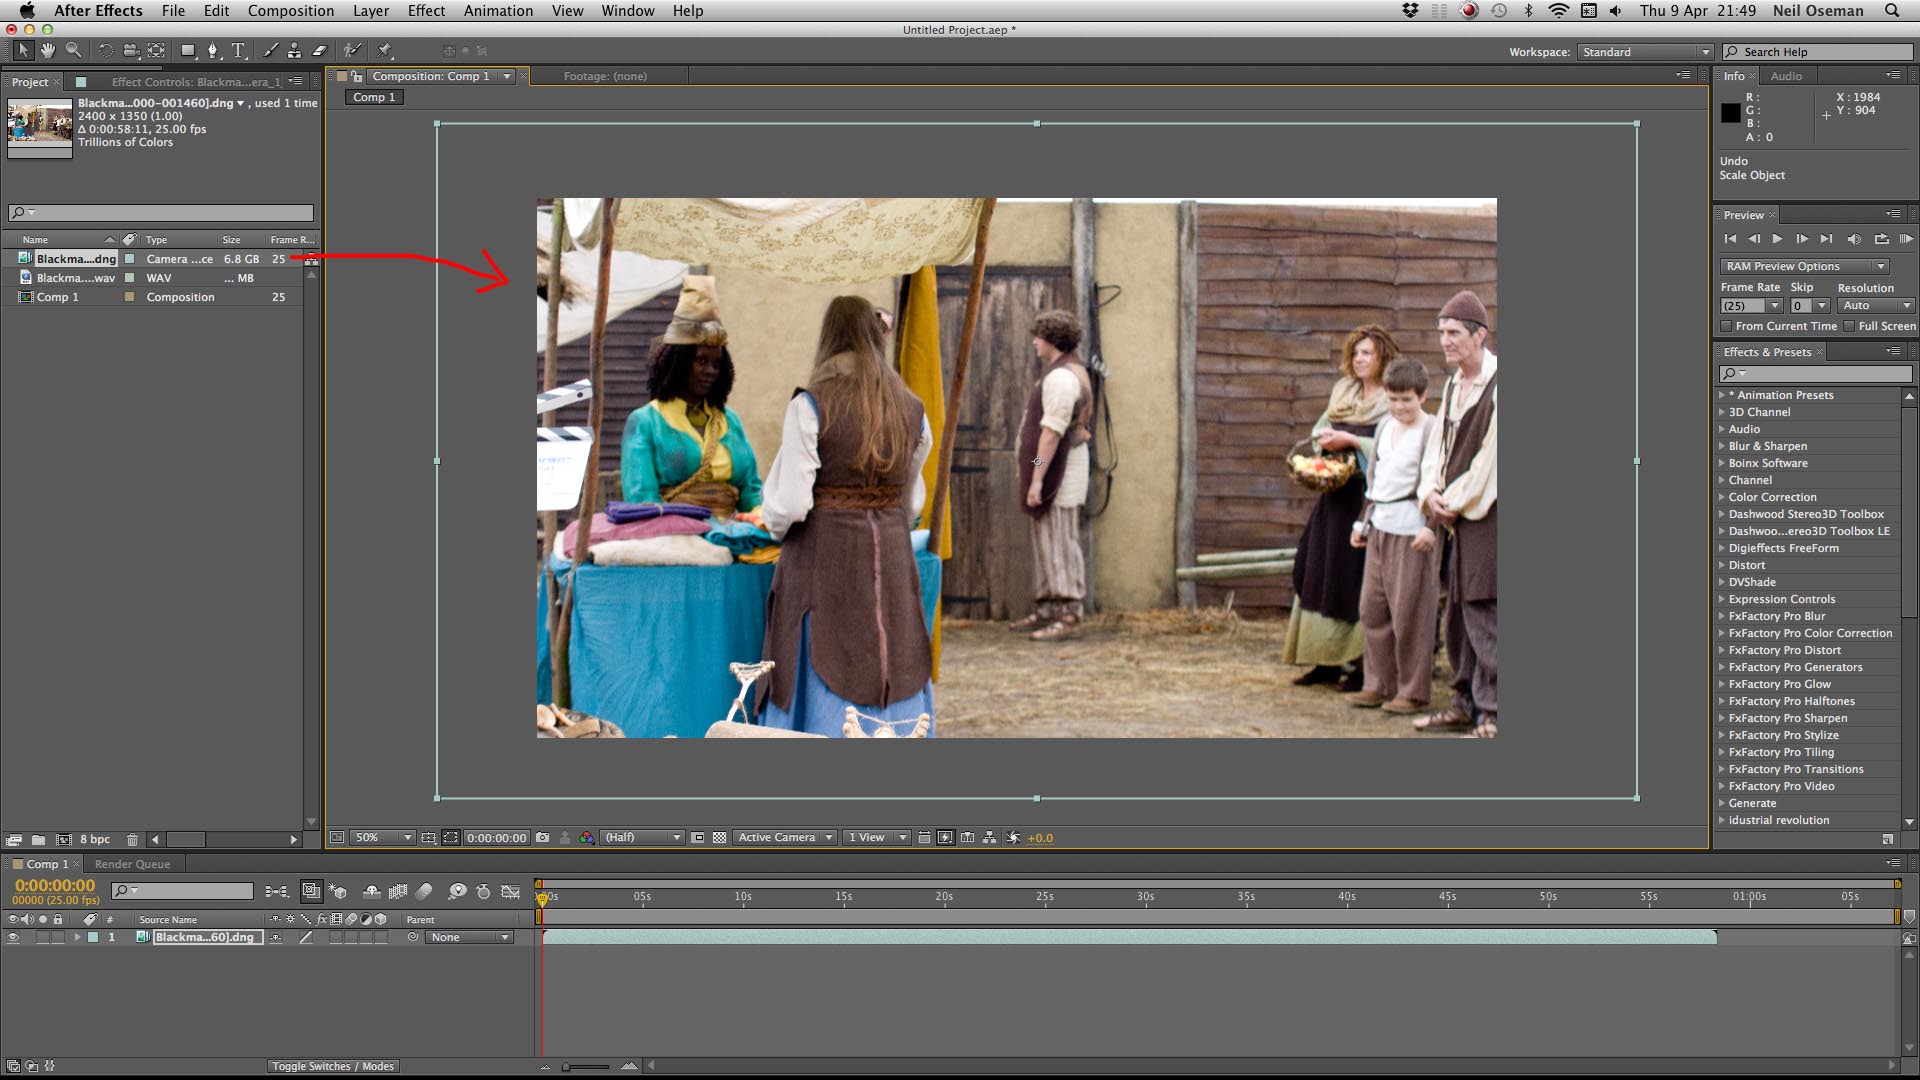
6. If necessary, zoom out (using the drop-down menu in the bottom left of the Composition window) so you can see the wireframe of the 2.5K image. Then click and drag the bottom right corner of that wireframe to shrink the image until it fits into the 1080P frame. Hold down shift while dragging to maintain the aspect ratio.

7. Drag the WAV audio onto the timeline, taking care to align it precisely with the video.

8. Go to Composition Settings in the Composition menu and alter the duration of the composition to match the duration of the clip (which you can see by clicking the DNG sequence in the project bin).
9. Go to the Composition menu again and select Add to Render Queue. The composition timeline will give way to the Render Queue tab.

10. Next to the words Output Module in the Render Queue, you’ll see a clickable Lossless setting (yellow and underlined). Click this to open the Output Module Settings.

11. In the Video Output section, click on Format Options… We’re going to pick ProRes 422 HQ, to match with the non-raw shots we hypothetically filmed. Click OK to close the Format Options.
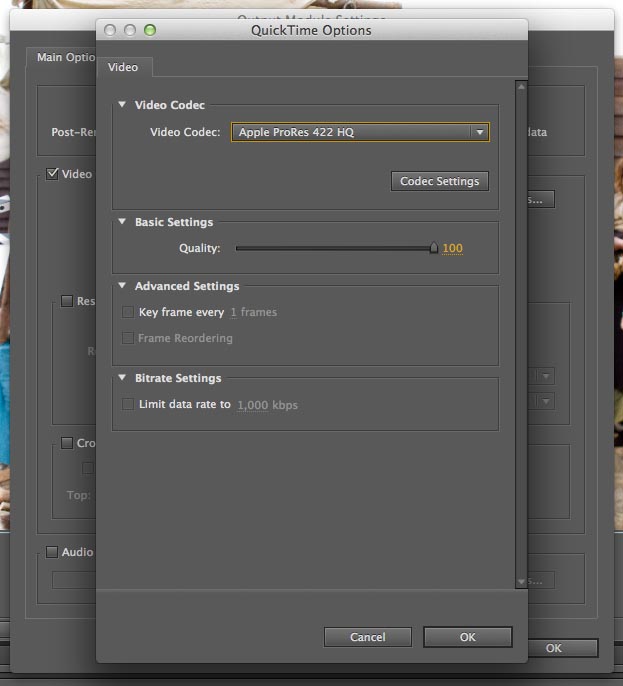
12. You should now be back in Output Module Settings. Before clicking OK to close this, be sure to tick the Audio Output box to make sure you don’t end up with a mute clip. You should not need to change the default output settings of 48kHz 16-bit stereo PCM.

13. In the Render Queue tab, next to the words Output to you’ll see a clickable filename – the default is Comp1.mov. Click on this to bring up a file selector and choose where to save your ProRes file.

14. Click Render (top far right of the Render Queue tab). Now just sit back and wait for your computer to crunch the numbers.

I’ve never used After Effects before, so there are probably ways to streamline this process which I’m unaware of. Can anyone out there suggest any improvements to this workflow? Is it possible to automate a batch?
How to Soften Harsh Sunlight with Tinfoil and a Bedsheet
On a pick-up shoot a couple of months back I found myself in the position of needing to mould the natural light without any equipment whatsoever. The sun was shining brightly with no clouds in sight, and we needed to shoot a close-up that would match an existing overcast wide shot. Fortunately there was a B&M just around the corner. Unfortunately no-one took any pictures of the ridiculous set-up that ensued, hence the comedy illustration.

Here’s how to do it:
- Get yourself round to B&M. (Other depressing discount stores are available.)
- Purchase a white bedsheet (£3.99) and a roll of foil (79p).
- The sheet is going to be your “silk”. First of all, cut the elastic corners to make it easier to wrangle.
- Assign Unfortunate Crewmember #1 to hold up the sheet so that it casts a shadow on the talent. It will soften the direct sunlight falling on the them, but there will probably still be darker shadows on their face than you want, so…
- Unroll a couple of feet of the foil. This is going to be your bounce card.
- Assign Unfortunate Crewmember #2 to stand on the shade side of the talent and use the foil to reflect some direct sunlight into that side their face.
- Hope that this is not the day the photographer from the local paper visits the set.
Even if you’re not matching to overcast shots, this softening of harsh sunlight is usually desirable to some degree when shooting CUs. Click here for more on moulding natural light.
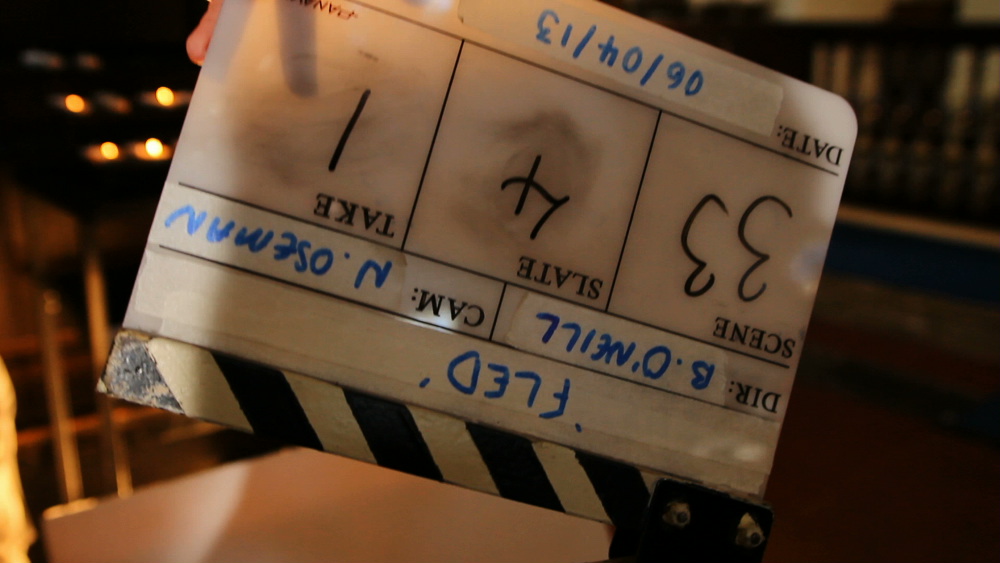
Slating 101
With dual system sound now the norm for even micro-budget shoots, a clapperboard (or slate as they call them in the US) is an indispensable bit of kit. It’s always best to keep this under the purview of the clapperloader or 2nd AC, rather than giving it to whichever crew member is free at the time. Otherwise you often end up with the camera operator calling “mark it” followed by an awkward pause because that crew member has left the set to perform some other duty, or has been too busy with other duties and is now scrambling to update the numbers on the slate. Incorrect slates can give the editor headaches down the line, so it’s important to get it right.

With that in mind, here are the basic rules of slating.
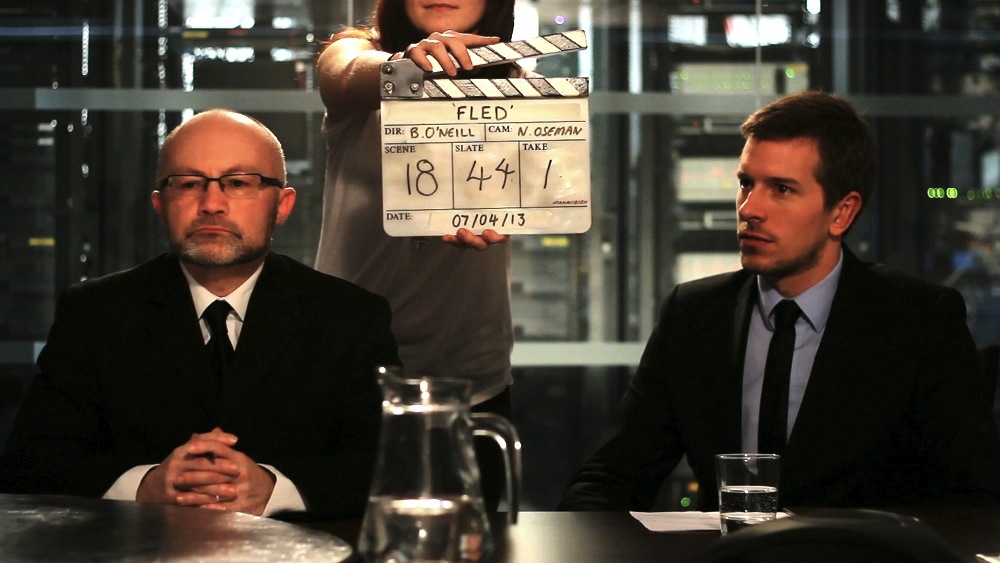
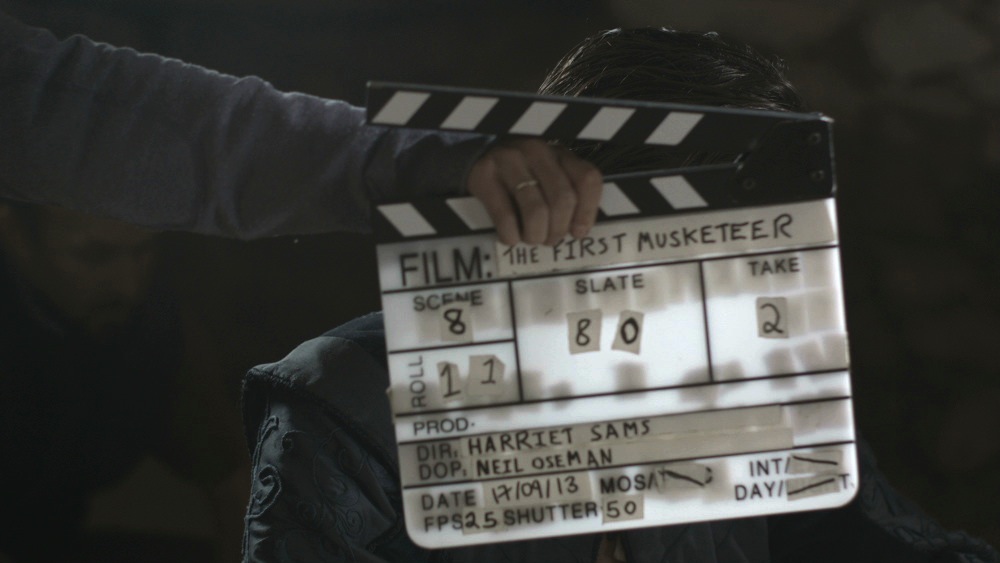
Labelling the Board
The production name, scene number, DP’s and director’s names and the date are self-explanatory. DAY/NIGHT and INT/EXT (interior/exterior) are intended to ensure the labs process the film footage correctly, but should still be circled appropriately on a digital shoot. Shutter and frame rate information can be obtained from the camera operator or DP. Some slates will have a space for a roll number, and since “rolls” (memory cards) are recycled on a modern shoot, it is best to ask the DIT (Digital Imaging Technician, or data wrangler) how they would like these numbered.
Slates and Takes
The slate number should start at 1 for the first shot of the first day, and increment every time the camera position and/or lens is changed. Sometimes a director will ask instead for the slate number to match the numbers on their shotlist or storyboards, but this is a bad idea because inevitably shots will be dropped or added and it becomes very confusing. Besides, if the slate number simply starts at 1 and goes up, the DIT can easily tell if a shot is missing from their hard drive due to a card being overlooked or some technical fault.
The take number should reset to 1 each time the slate number changes, and increment every time the camera stops rolling, with certain exceptions and variations outlined below.
(The American system differs in that it omits slate numbers. Instead a letter is appended to the scene number, so the first shot filmed of scene 7 would be 7, then 7A, 7B, 7C, etc.)
Procedure
The clapperloader should always have the board up to date and ready to go. He or she should have checked the length of the lens being used and found a position for the slate in which it’s fully in frame and legibile. A torch may be required if the set is moodily lit.
The sound mixer will roll their device and announce “sound speed”. The camera operator will then roll and ask the clapperloader to mark it. By this point the slate should already be in frame so that the first frame recorded, when the DIT looks at it as a thumbnail on their hard drive, has the slate on it.
Only the slate and take number need be announced, e.g. “30 take 3”. The board should then be clapped nice and cleanly to produce a sharp click on the soundtrack that is easy for the DIT or assistant editor to sync. If it’s necessary to clap a second time, the clapperloader should announce “second clap” or “second sticks” immediately before.

PU and AFS
If the director decides to do another take but to begin the action part way through rather than from the top, the take number should still increase but pick-up (PU for short) should be appended to the number. For example: take one, take two, take three pick-up, take four pick-up.
If camera and/or sound roll but cut before the board is clapped, the take number remains the same for the next attempt.
If camera and sound roll, the board is read and clapped, but the crew cuts before action is called, the take number remains the same but AFS (After a False Start) is appended.
If action is called, even if it’s immediately followed by cut, the take number always increases for the next attempt.
MOS
Sometimes the camera rolls without sound, if the mixer feels he or she cannot get any useful sound. In these cases the clapperloader should circle MOS (Mute Of Sound) on the slate. They don’t need to clap the board or announce the slate and take number; they simply need to hold the board up long enough for it to be read by the editor. As an additional indicator that there is no accompanying sound file, the clapperloader should hold the board with their fingers between the sticks.
End Board
Sometimes it’s impractical or inconvenient to shoot the slate at the start of a take, so instead it’s shot at the end. At the start of the take the camera operator announces “end board” instead of “mark it”. When the action is finished, the director typically forgets that it’s an end board (American term: tail slate) and calls “cut”. Hopefully the sound mixer and camera operator remember not to obey this command, and the latter calls “mark it”. The clapperloader should then mark the take in the usual manner, except that the board should be held upside-down. They should conclude their verbal announcement with “end board” or “on the end”, e.g. “27 take 2 on the end”. Only then can camera and sound cut.