5 Tips for Perfect Shafts of Light

There’s nothing like a good shaft of light to add production value to your cinematography. But you can’t just shine a lamp through a window and expect to get Hollywood shafts. Here are the essential conditions you need:

1. You need focused light, i.e. a lamp with a lens. Source 4s work extremely well. HMI or tungsten fresnels will also do the job, and sometimes Dedos.

A Source 4 and Source 4 Junior firing beams through smoke
A Source 4
Source 4
HMI fresnel
HMI fresnel
Dedo, de-e-edo. Dedo come and me want go home.
Dedo

2. You need a smoke machine or hazer to volumise the light. A cheap one from Maplin will work, but as a general rule the cheaper the machine, the more its output will be wreaths of smoke rather than just thickening up the atmosphere. However, given time to disperse and some vigorous wafting with a flag or the clapperboard, any smoke will work.

ProSound GT-800 fog machine from Maplin
Phantom Pea Soup hazer

3. The smoke/haze needs to be backlit. The closer the light source is to being directly behind the smoke, the more the smoke will show up. So shoot towards windows.

These frames are the start and end positions of a tracking shot from Ren (with a top secret make-up effect!). Note how the shafts of light from the window are much more prominent when the camera is pointed more towards the light source.

www.rentheseries.com

4. A dark background will show up the smoke best. If you’re shooting in a house with white walls then you’re probably flogging a dead horse.

The dark prison walls here show up the shaft of light very nicely.

5. Keep other light sources away from the shaft. Competing lamps can muddy the shaft of light or maybe make it disappear altogether. Often I find that shafts of light work well as background interest, with the actors well in front of it, lit by other sources.

In this set-up for Ballet Pointe Shoes (dir. Gisela Pereira), I'm using the layers of scenery on the stage to separate layers. In the back layer there's a pair of cool, high Source 4s creating the crossed beams, while in the front layer warmer Dedos create shorter shafts of light.
In this set-up for Ballet Pointe Shoes (dir. Gisela Pereira), I’m using the layers of scenery on the stage to separate layers of lighting. In the back layer there’s a pair of cool, high Source 4s creating the crossed beams, while in the front layer warmer Dedos create shorter shafts of light.

Follow all these guidelines and you’ll get lovely shafts of light every time!

5 Tips for Perfect Shafts of Light

Lighting Techniques #7: Gobos and Shadows

Gobos are shapes that you fit onto a lamp in order to break up the light. If you’re using Source 4s you can get gobos especially for the purpose, which slot into the front of the lamp.

Gobos
Gobos
matthews_wood_cucoloris_3
A cucoloris

A cucoloris is a piece of wood or metal with vaguely leaf-life shapes cut into it. You would mount this on a C-stand or clamp of some kind. You can easily make your own cucoloris by punching holes in black-wrap or cardboard.

In fact you can create patterns of light and shadow by placing almost anything in front of a light, varying the distance from the source to make the pattern sharper or softer. Be careful to observe the minimum safe distances printed on the side of the lamphead though, or you might set fire to your shadow-maker.

Here are some examples of breaking up the light that I’ve tried over the years…

On more than one occasion I’ve taped up some of the PVC pipes which my dolly uses as tracks, to create the impression of vertical bars or pillars. In the below example the French windows (when closed) didn’t have enough bits of frame to break up the light sufficiently, so I had my spark tape a pipe to the window…

IMG_2464

I don’t have a picture, but I remember once on a horror feature sticking lots of blobs of gaffer tape to a window.

In this shot from Stop/Eject I blacked out the room’s real window and rigged a fold-up director’s chair in front of a 1K Arrilite to cast a window frame-like shadow…

The bedroom by sunlight

Look for things in the set that you can shine lights through, like this partition window….

Creating interesting shadows by using a partition window at the location.

or a fence…

ss2

or blinds…

IMG_2531

If you want the venetian blinds effect and you don’t have any, stick strips of gaffer tape to the window.

On Ren I built an openable and closable little door (complete with tiny barred window) for light to shine through, since the set didn’t have a door.

image

On the same show, the roof of Karn’s house became a giant gobo for the 2.5K HMI placed above and behind the set, creating these incredible God rays when smoke was added. The roof was made of interlocking branches and had been covered by sheets by the art department – presumably to block light – but I removed the sheets because I wanted this lighting effect…

image

Branches make great gobos. I often sneakily break one off a nearby tree and rig it to a C-stand to cast some summery shadows or break up a moonlight or streetlamp source that’s looking too bright and flat.

IMG_1029-1.JPG

If you’ve missed the other posts in my Lighting Techniques series so far, here are the links:

#1: Three Point Lighting

#2: Cross-backlighting

#3: The Window Wrap

#4: Health Bounce

#5: Smoke

#6: Cross-light

Lighting Techniques #7: Gobos and Shadows

5 Tips for Successful Pick-ups

Discussing the next set-up on the Ren pick-ups shoot with director Kate Madison. Photo: Michael Hudson

Recently I’ve been involved in pick-ups shoots for a couple of projects I lensed last year: action-comedy feature The Gong Fu Connection and fantasy series Ren. Both pick-up shoots were strange experiences, featuring some very familiar aspects of the original shoot – locations, sets, costumes – but noticeably lacking others – certain actors, crew members and so on. The Ren pick-ups in particular were like re-living principal photography in microcosm, with stressful crowd shoots followed by more relaxed, smaller scenes and finally night shots with flaming arrows again!

A CTB-gelled Arrilite 1000 stands in for the 2.5K we used for backlight during principal photography on Ren! Photo: Michael Hudson
A CTB-gelled Arrilite 1000 stands in for the 2.5K HMI used for backlight during principal photography on Ren! Photo: Michael Hudson

I’ve blogged previously about how a director/producer can prepare for pick-ups – by keeping certain key props and costumes, for example – but today I have a few thoughts from a DP’s perspective.

1. Keep a record of lighting plans. I have a pretty good memory for my lighting set-ups, but not everyone does, so keeping notes is a good idea. Your gaffer may even do this for you. I frequently use this blog as a means of recording lighting set-ups, and indeed tried to access it during the Ren pick-ups shoot but was foiled by dodgy wifi.

2. Keep camera logs. On a properly crewed shoot this will be the 2nd AC’s job. The logs should include at least the following info for each slate: lens, aperture, ASA, white balance and shutter angle. This can be useful in principal photography too, for example if you shoot the two parts of a shot-reverse at different ends of the day or different days all together, and need to make sure you use the same lens.

Production assistant Claire Finn tends the brazier which provides smoke in the absence of the Artem smoke gun we used during principal photography. Photo: Michael Hudson
Production assistant Claire Finn tends the brazier which provides smoke in the absence of the Artem smoke gun used during principal photography. Photo: Michael Hudson

3. Have the original scene handy when you shoot the pick-ups. Load the edit onto a laptop or tablet so that you can compare it on set to the new material you’re framing up.

4. Own a bit of lighting kit if you can. In the shed I have some battered old Arrilites and a few other bits and pieces of gear that has seen better days. On a proper shoot I would leave this at home and have the production hire much better kit. But for pick-ups, when there’s often no money left, this stuff can come in handy.

5. Keep gels. If you employ an unusual colour of gel during principal photography, try to keep a piece of it in case you need to revisit that lighting set-up in pick-ups. Production will have to pay for the gel once it’s been used anyway. On the Ren pick-ups shoot, after pulling all of my gels out of the plastic kitchen bin I keep them in, I was relieved to find that I still had two pieces of the Urban Sodium gel I used in the flaming arrows scene the first time around.

Urban Sodium gel provides the grungy orange light for the flaming arrows scene, just as it did last November. Photo: Hermes Contreras
5 Tips for Successful Pick-ups

A Day in the Life of a DP

What does a cinematographer’s working day look like? Here’s a snapshot of last Wednesday, the fifth shooting day of six on a short film in south London. It’s a split day, with one daylight and one night scene scheduled, so the call time is 2pm.

IMG_2494
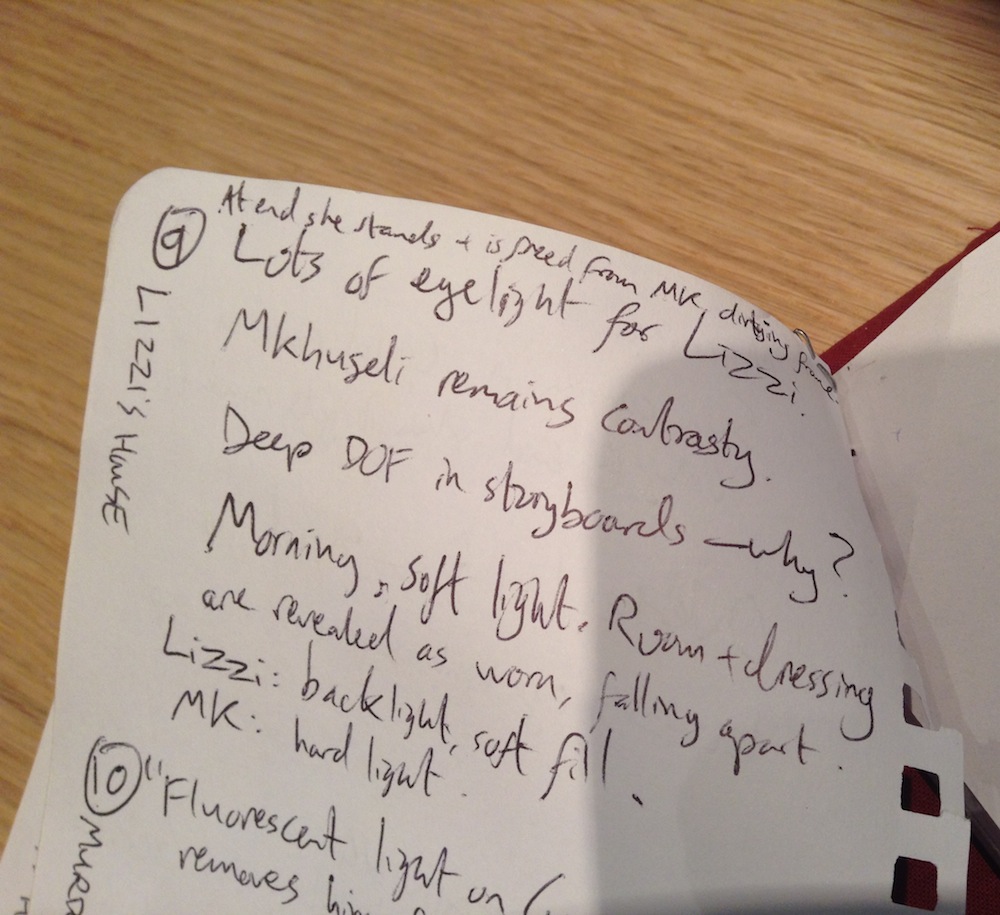
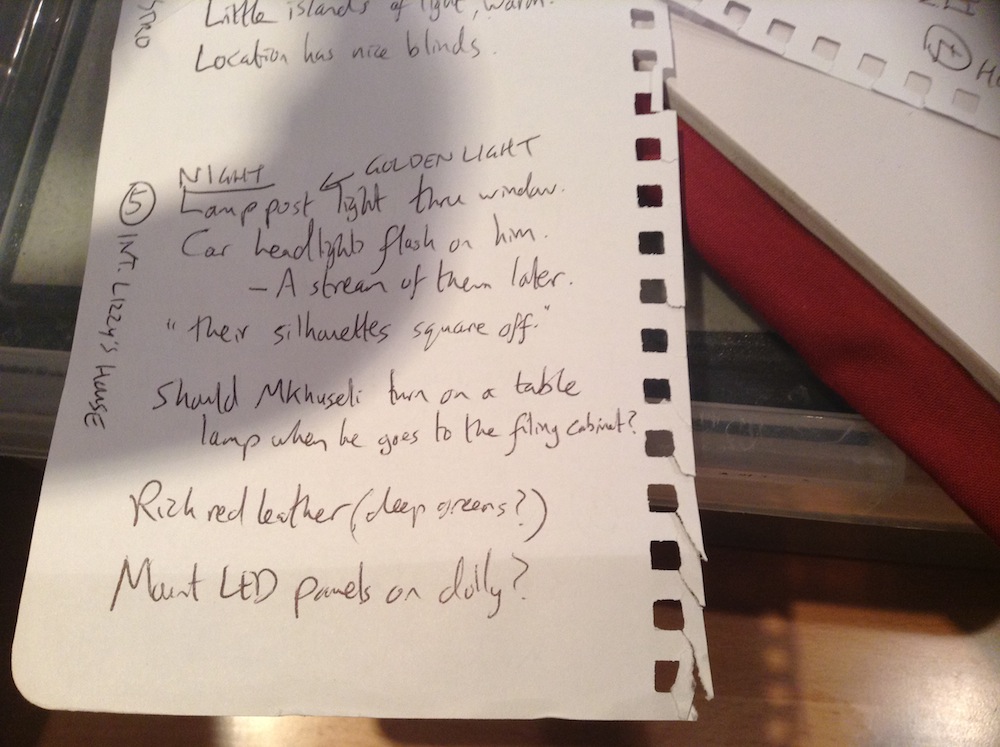
1:48pm As the cast and crew begin to arrive (I’m being accommodated at the location, conveniently) I check my notes for the upcoming scene. These were written during my second reading of the script, a few weeks previously, and include my thoughts and ideas on camerawork and lighting.

IMG_2496
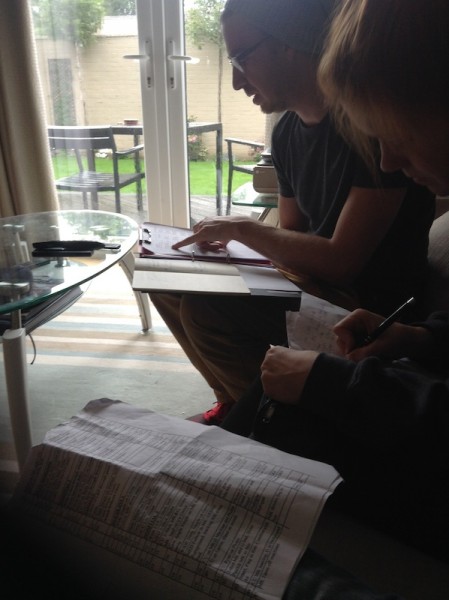
1:54pm I sit down with James the director and Mari the 1st AD to decide what order the day’s set-ups will be shot in. Generally shots are grouped by the rough direction the camera is pointing in, to minimise lighting resets.

IMG_2497
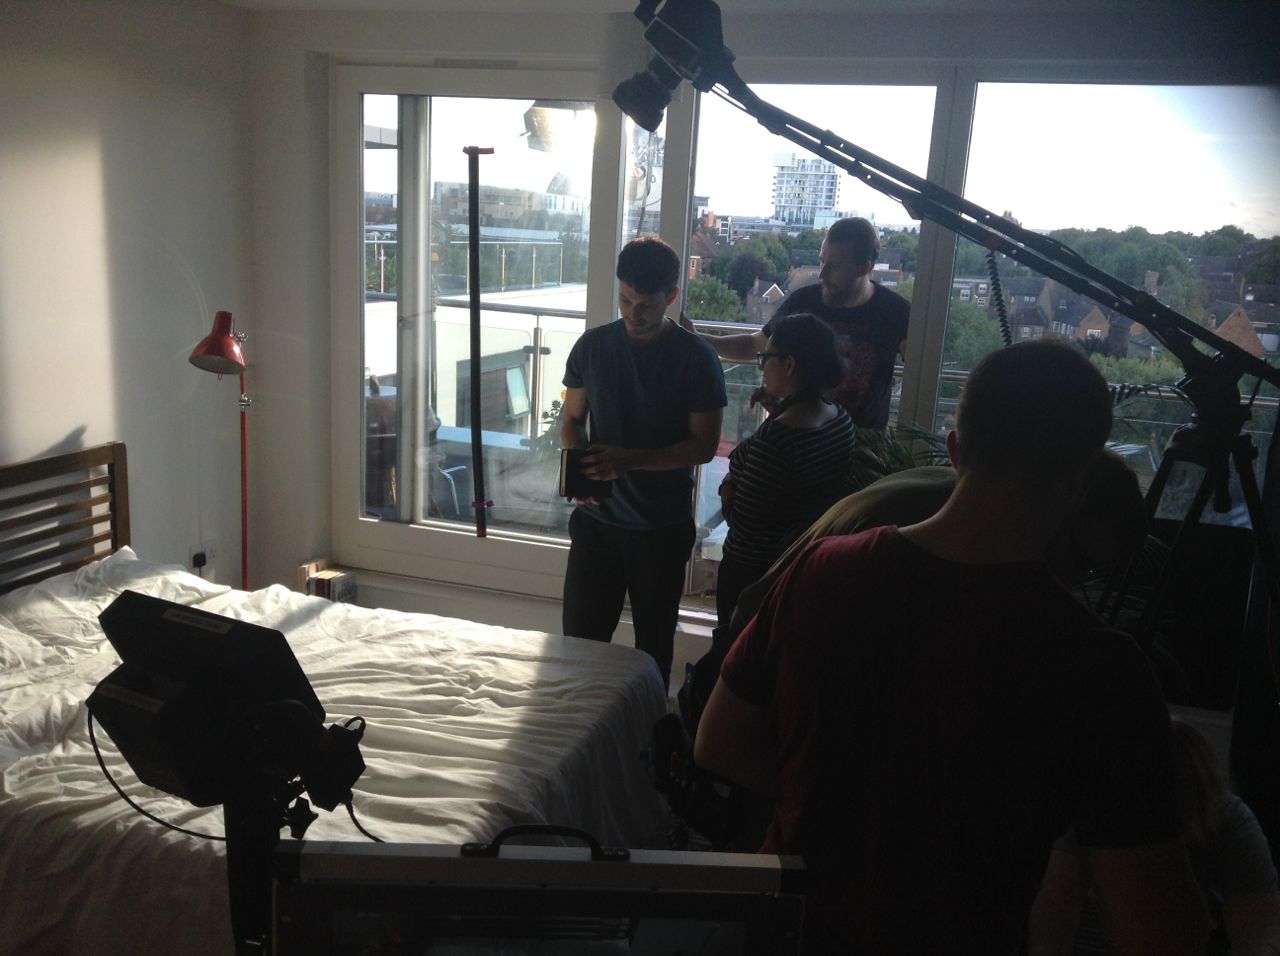
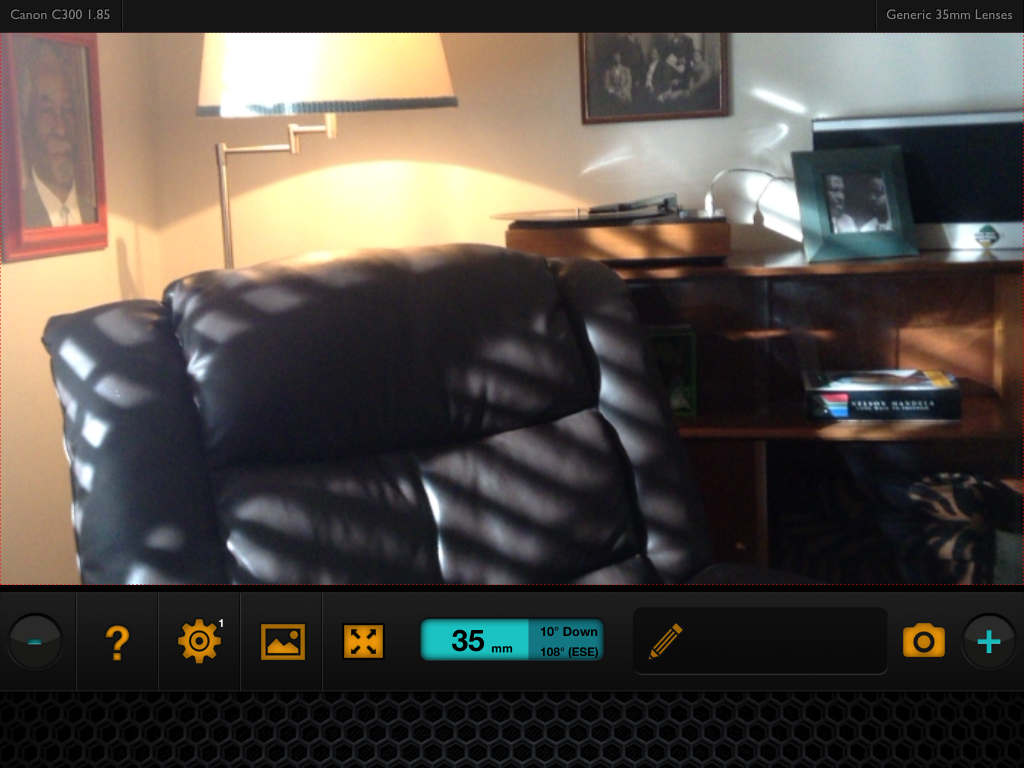
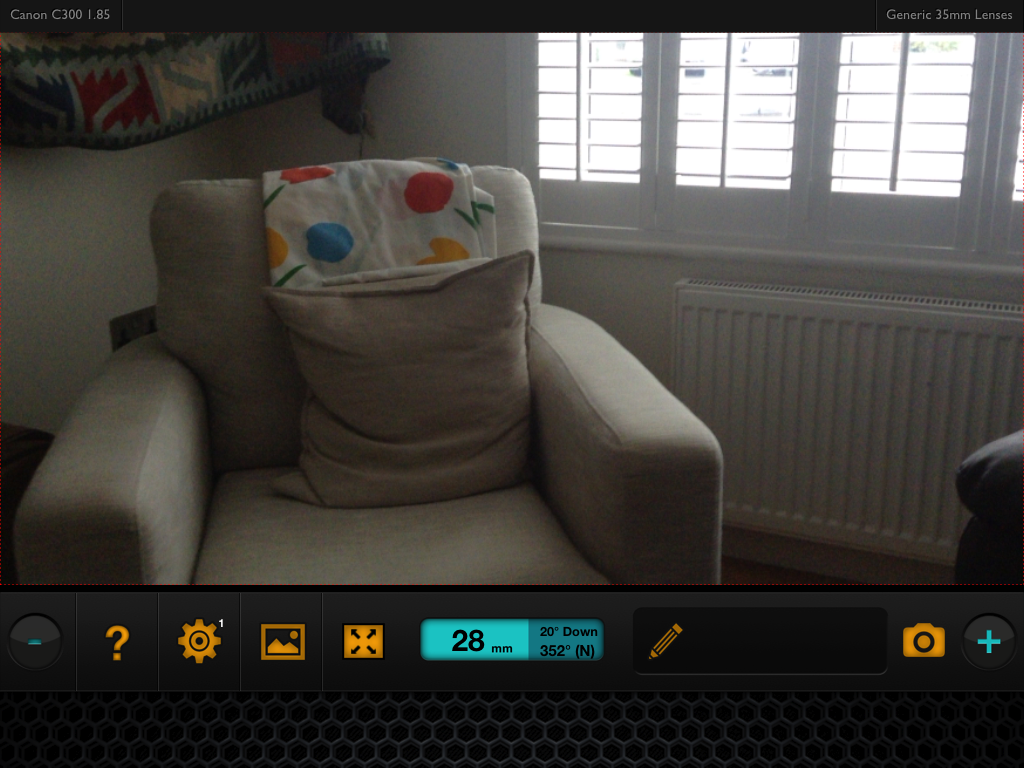
2:13pm Mari assembles the crew to watch a block through of the scene, so everyone knows what they’re doing. Using Artemis, the virtual viewfinder app, James and I select the lens and camera positions for the first set-up. It’s a Steadicam shot, so my 1st AC and Steadicam operator Rupert is in on this conversation.

IMG_24982:24pm The cast go into make-up and it’s time for my department to swing into action.

IMG_2499
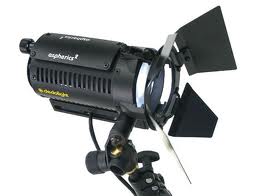
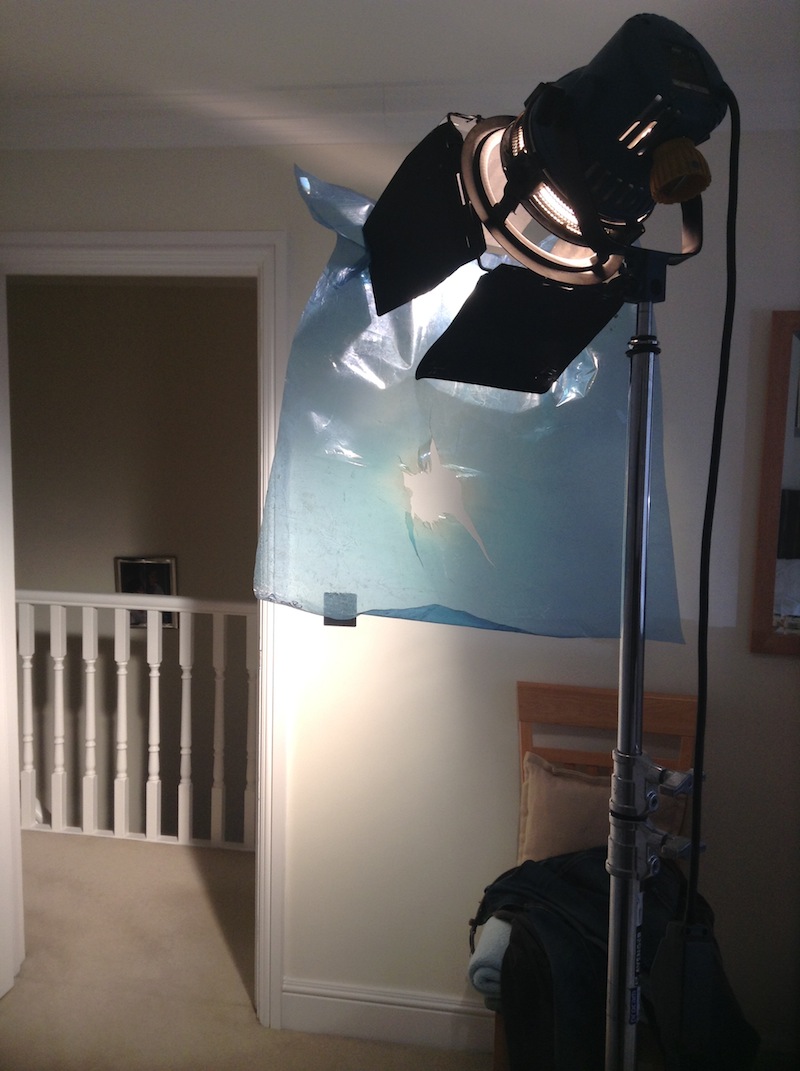
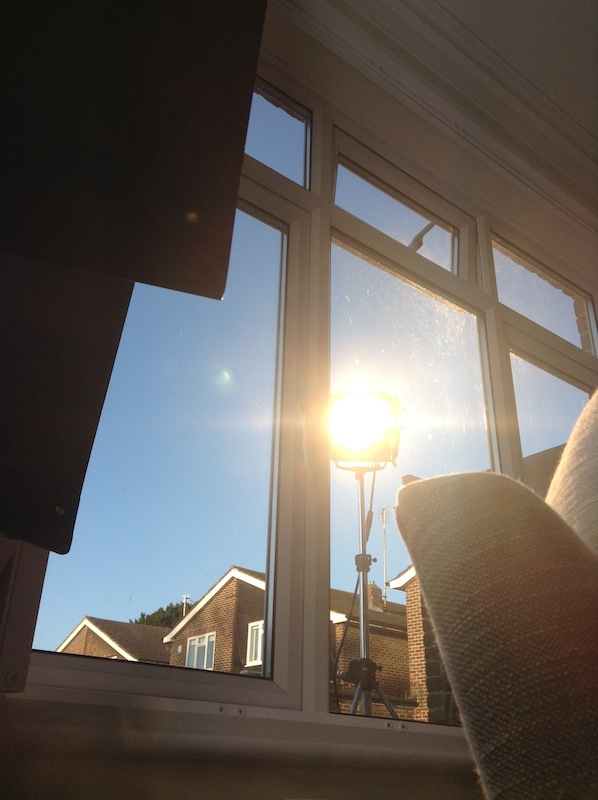
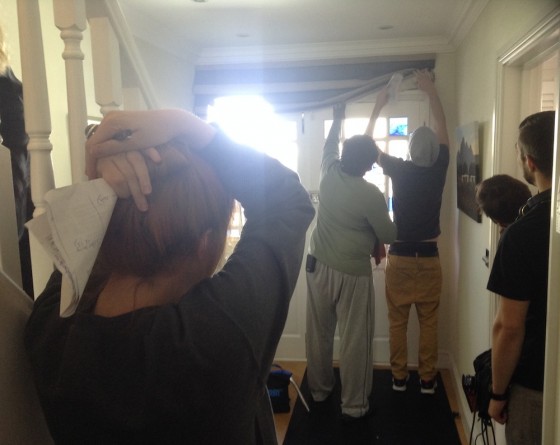
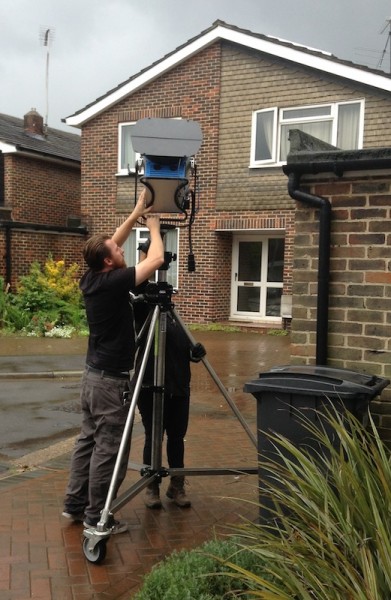
2:26pm On the recce the previous week I had broadly decided how to light this scene. I confirm the details with Ben, my gaffer, and he and the spark begin setting up the key light outside, a 2.5K HMI, and a kinoflo for fill.  IMG_25012:31pm I go and set up an Arrilite to shine down the stairs.

IMG_2502
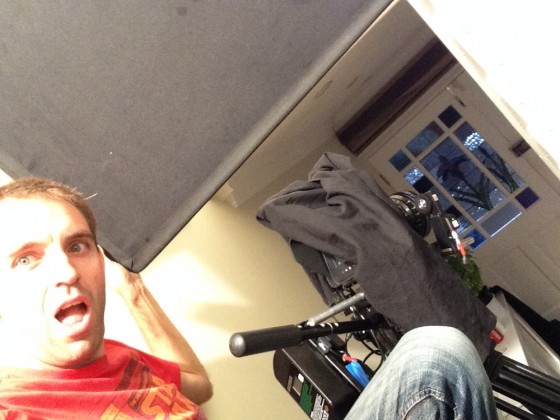
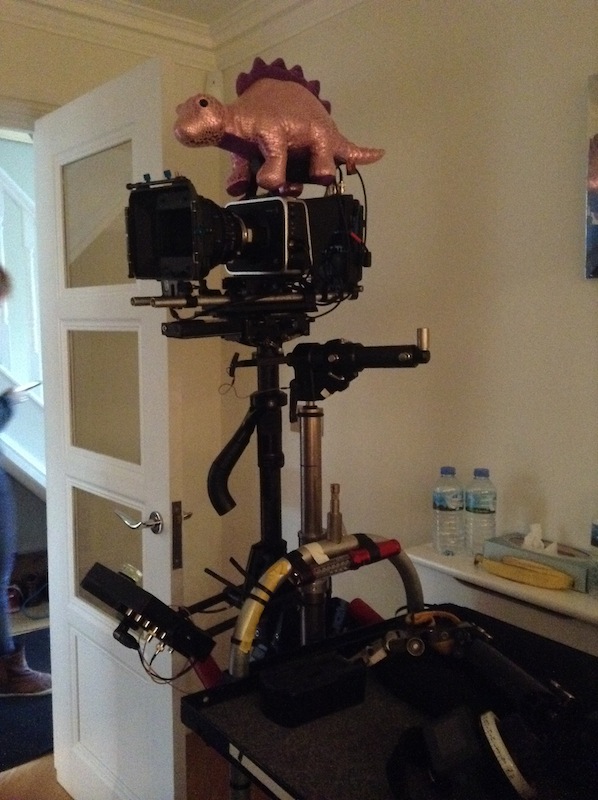
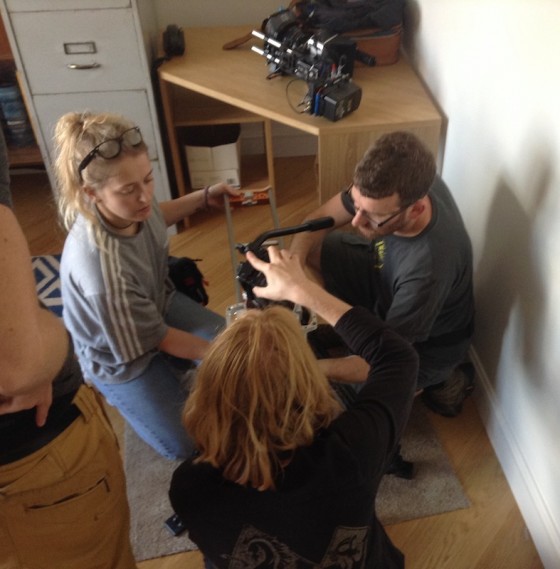
2:31pm The ACs rig the Steadicam and put on my chosen lens.

IMG_2503
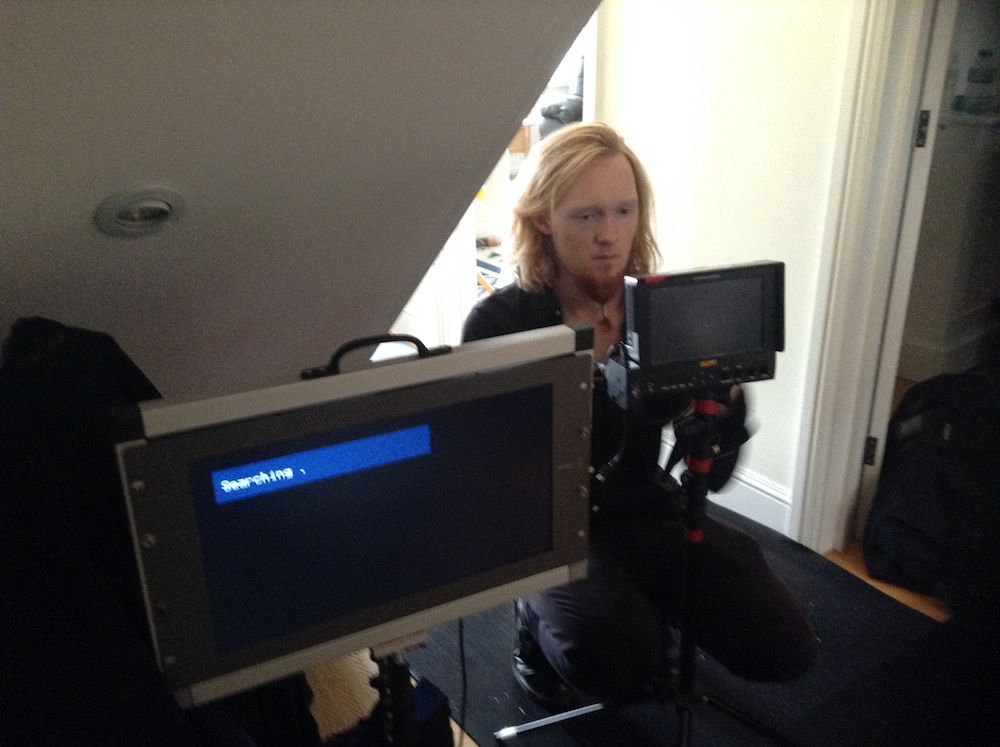
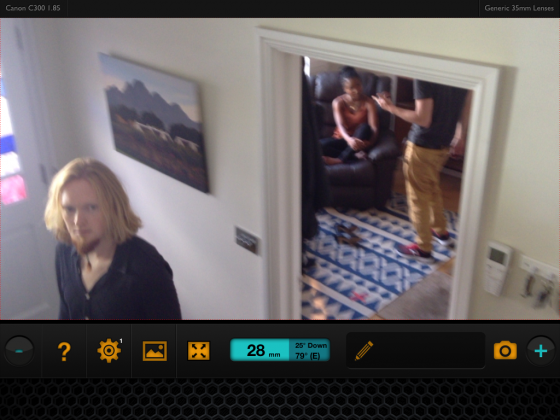
2:32pm Meanwhile, DIT and standby 1st AC Max sets up the director’s monitor and focus monitor, which are connected wirelessly to the camera with a Teradek Bolt system.

IMG_2506
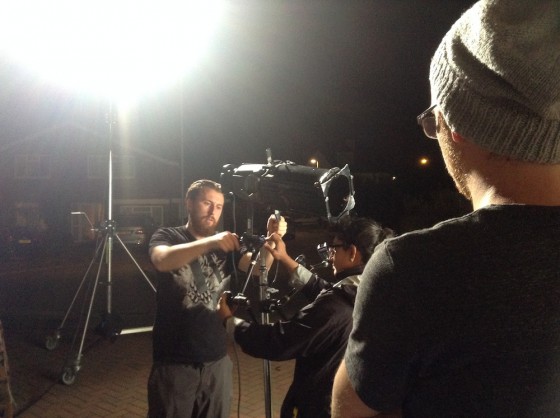
3:09pm Rupert rehearses the Steadicam move using a crew member as a stand-in.

IMG_25073:13pm 2nd AC Nat marks positions to aid Max in pulling focus.

IMG_25083:47pm With camera and lighting set, we get a break waiting for a tricky ageing make-up to be finished. We are completely professional during this hiatus.

IMG_2510
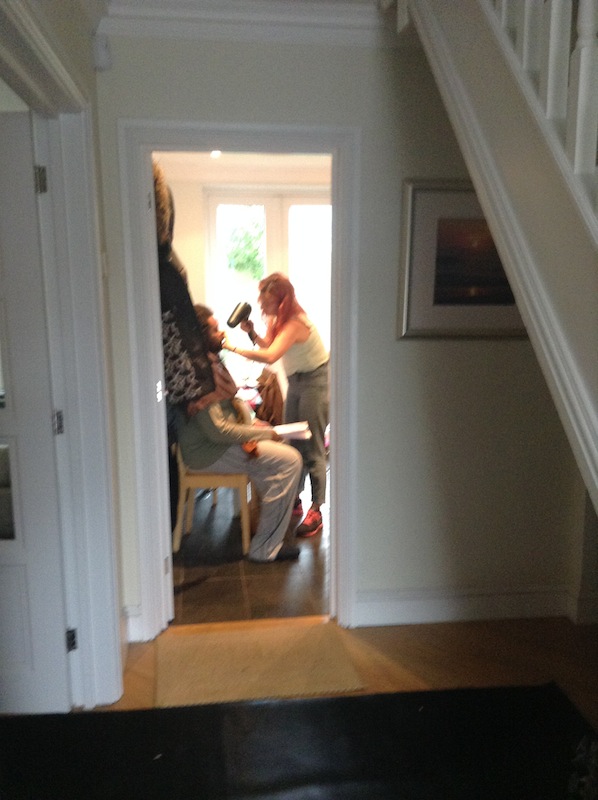
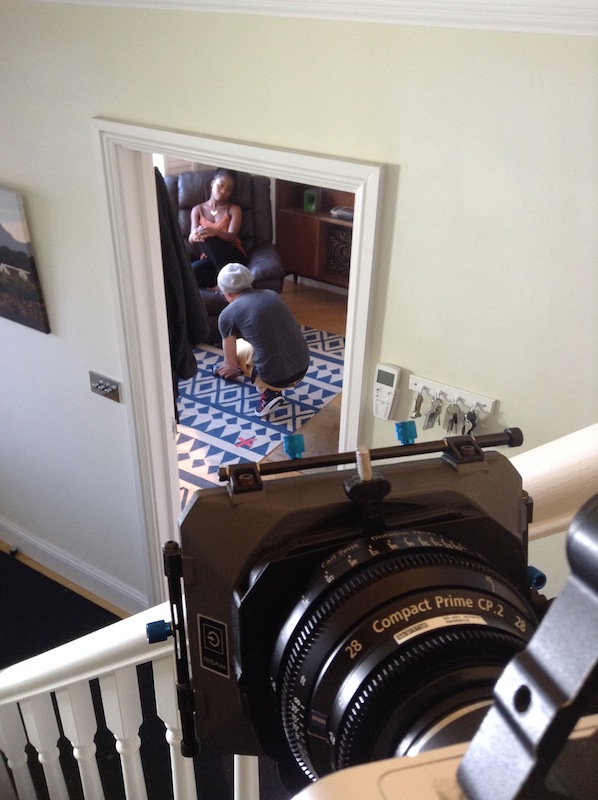
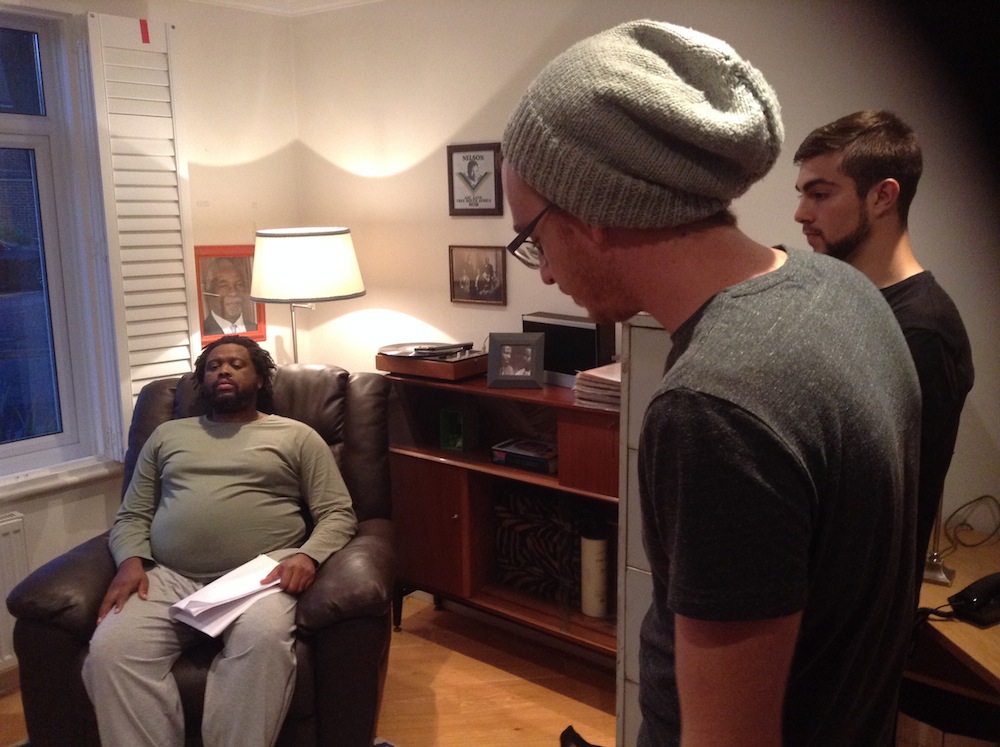
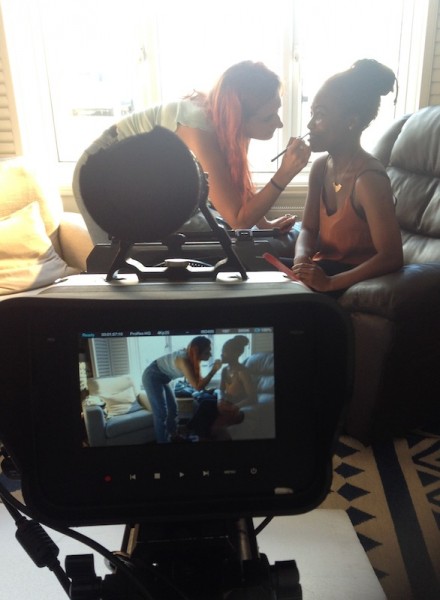
4:31pm We frame up the actor, Sibusiso, in position to check how the make-up looks under the right lighting.

IMG_25114:38pm Dimple, the spark, sits in while Sibusiso returns to make-up for tweaks, and I tweak my lighting.

IMG_25264:41pm I decide that the morning sunlight look I’m going for is too subtle, so I have Ben replace the HMI’s half CTO gel with full CTO.

IMG_25124:44pm Rupert and James finesse the camera move. When the make-up artist, Carly, is happy, we start shooting.

IMG_25134:44pm I sit back and watch the monitor, giving a note or two to Rupert after the first take.

IMG_25144:57pm With the Steadicam shot in the can, we select a lens and position for the next shot, a wide.

IMG_2516
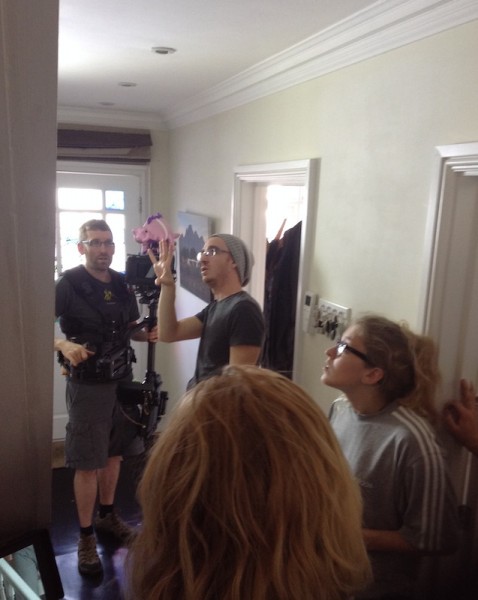
4:59pm Activity on set pauses while James catches a spider that is freaking out some of the crew.

IMG_2518
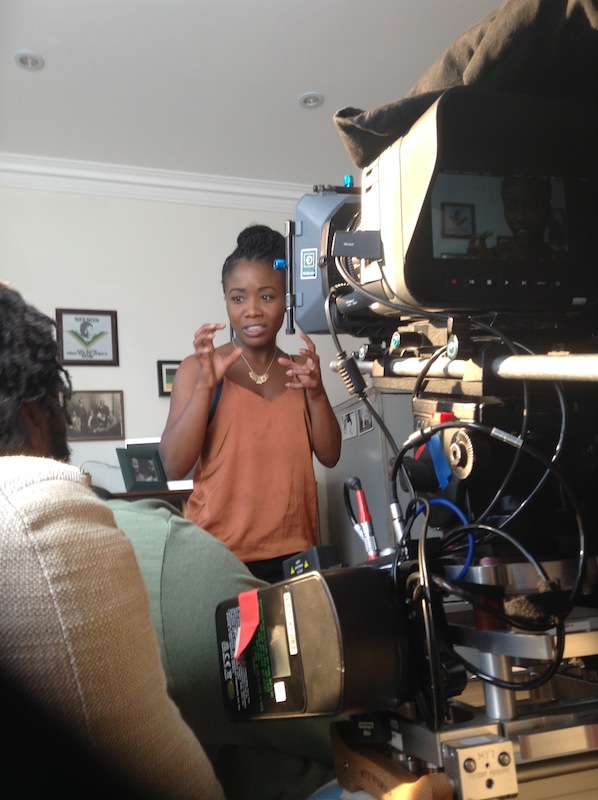
5:04pm I squeeze myself in behind the camera, which is set up on sticks on the stairs, ready to shoot the wide. James gives some final direction to Lasharne, the actress, before we shoot the first take.

IMG_2519
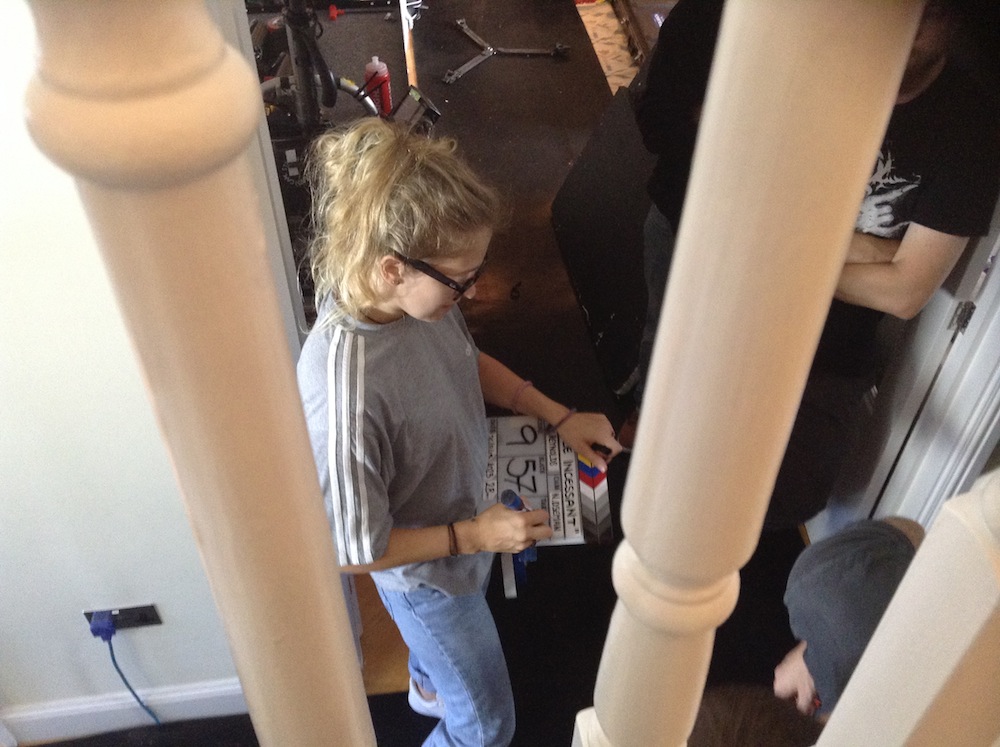
5:05pm Nat prepares the clapperboard for the next take.

IMG_2520
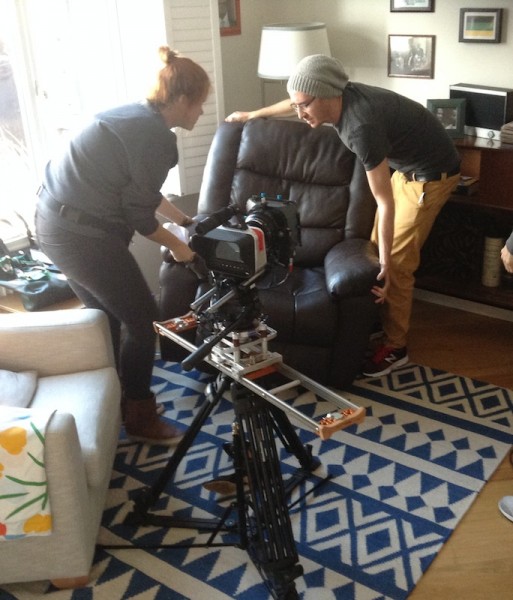
5:12pm The camera team set up the slider for the third set-up.


IMG_25215:32pm Carly does final checks on Lasharne’s make-up.

IMG_2522
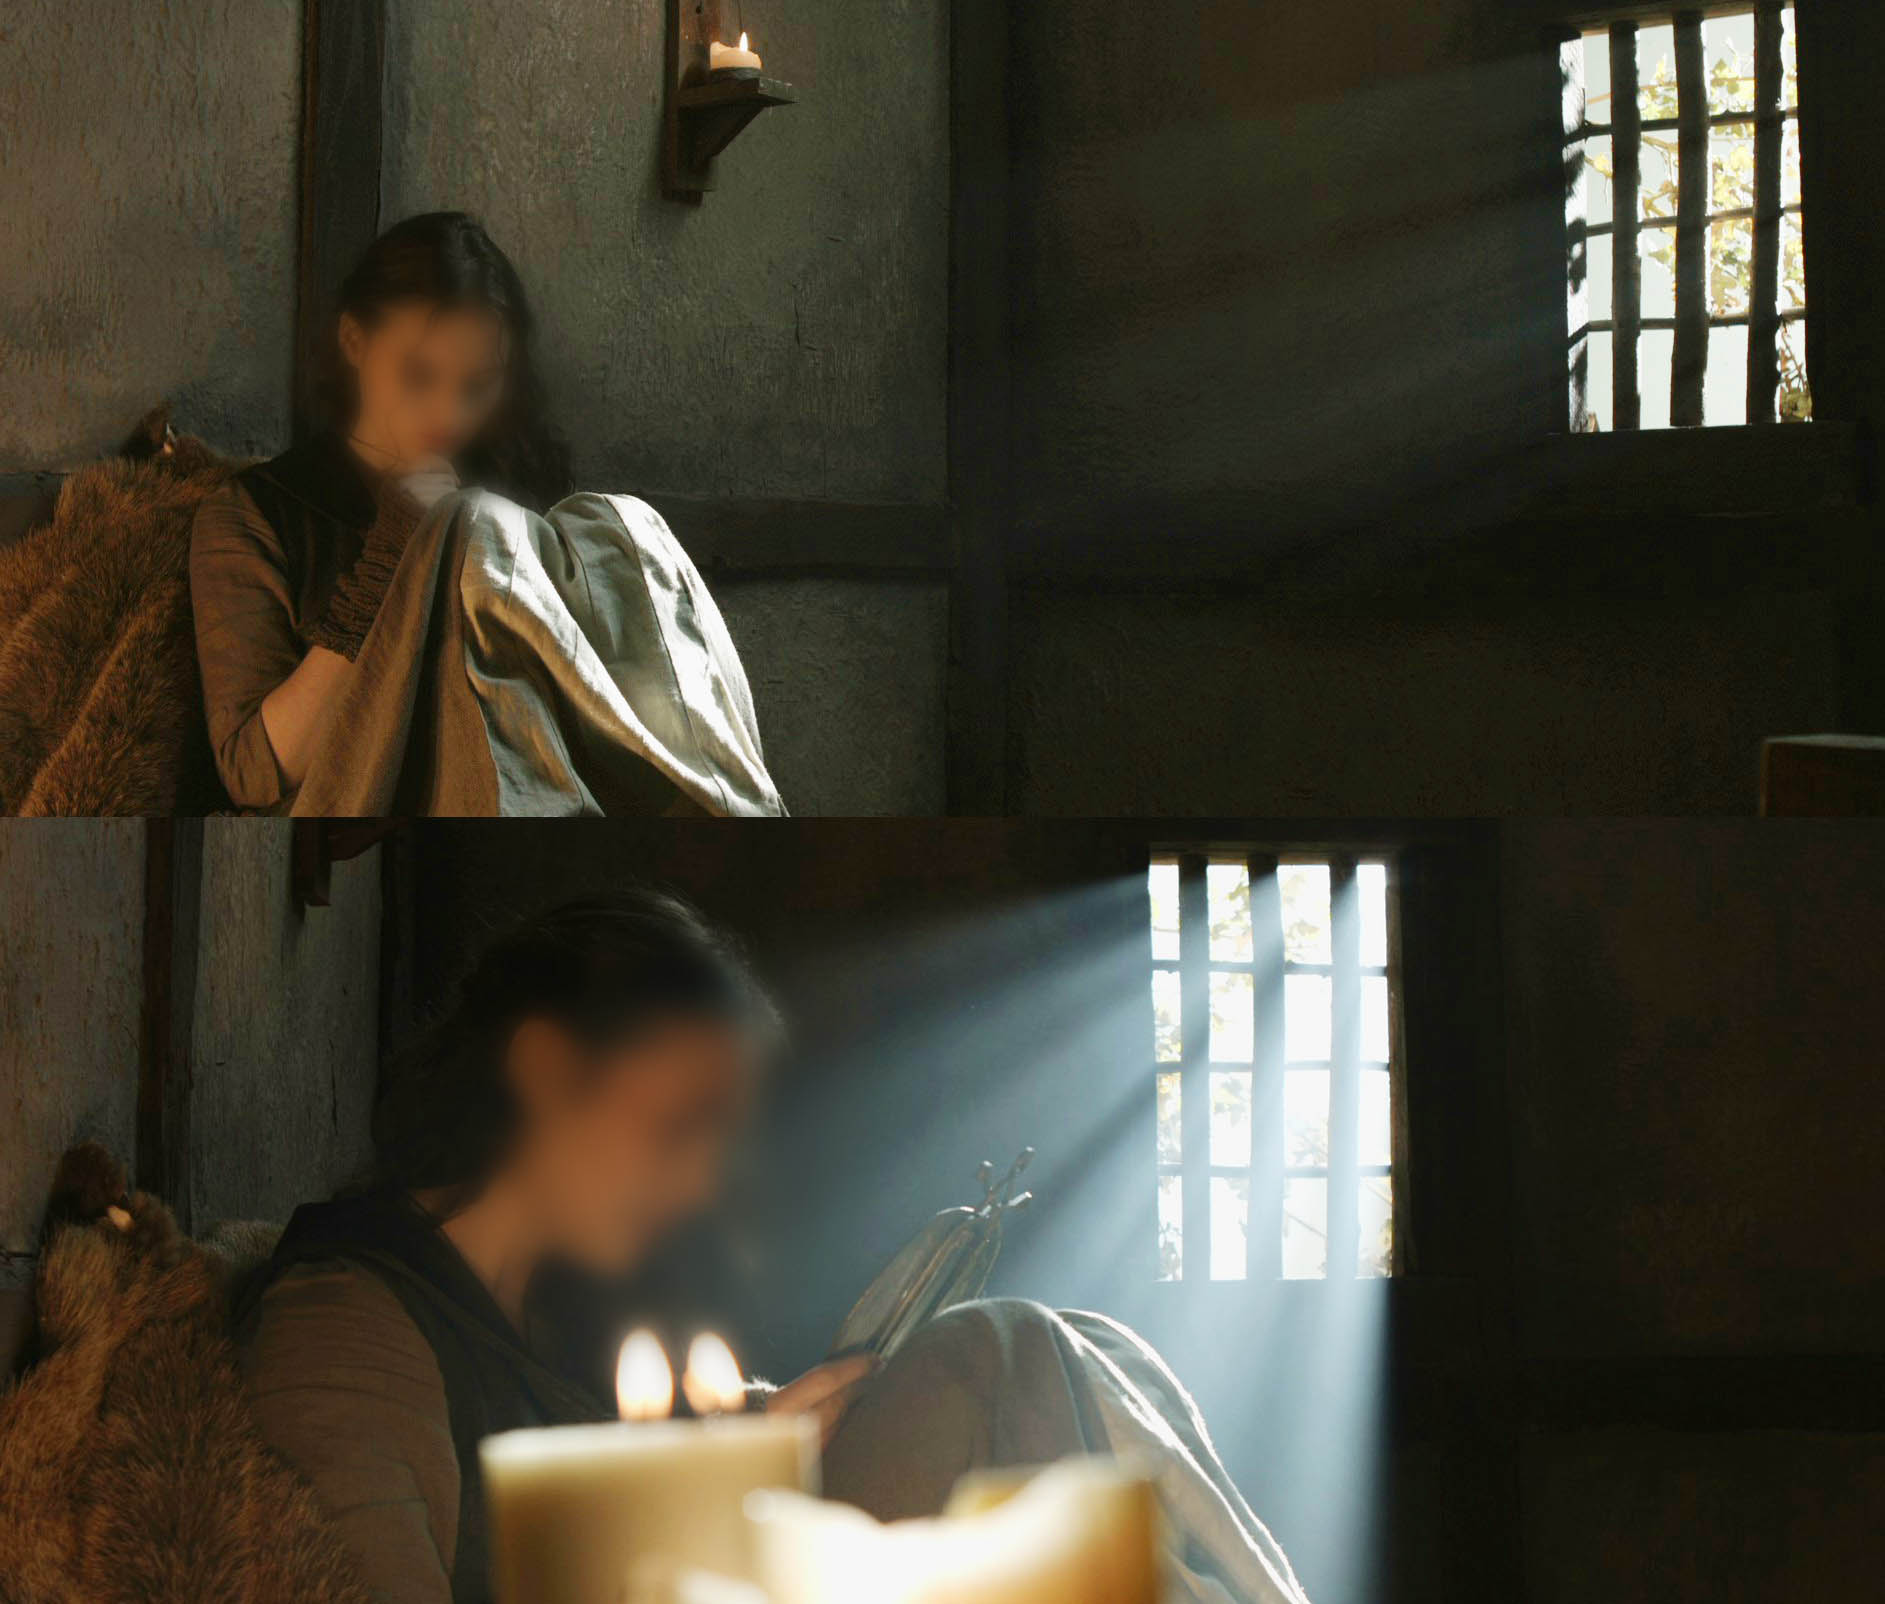
5:32pm For this set-up I’m using a polyboard under the camera in an effort to raise the room’s ambient light level closer to the burnt-out view through the window.

IMG_25236:25pm Mari and James adjust an armchair to better suit the next set-up, another slider shot.

IMG_2524
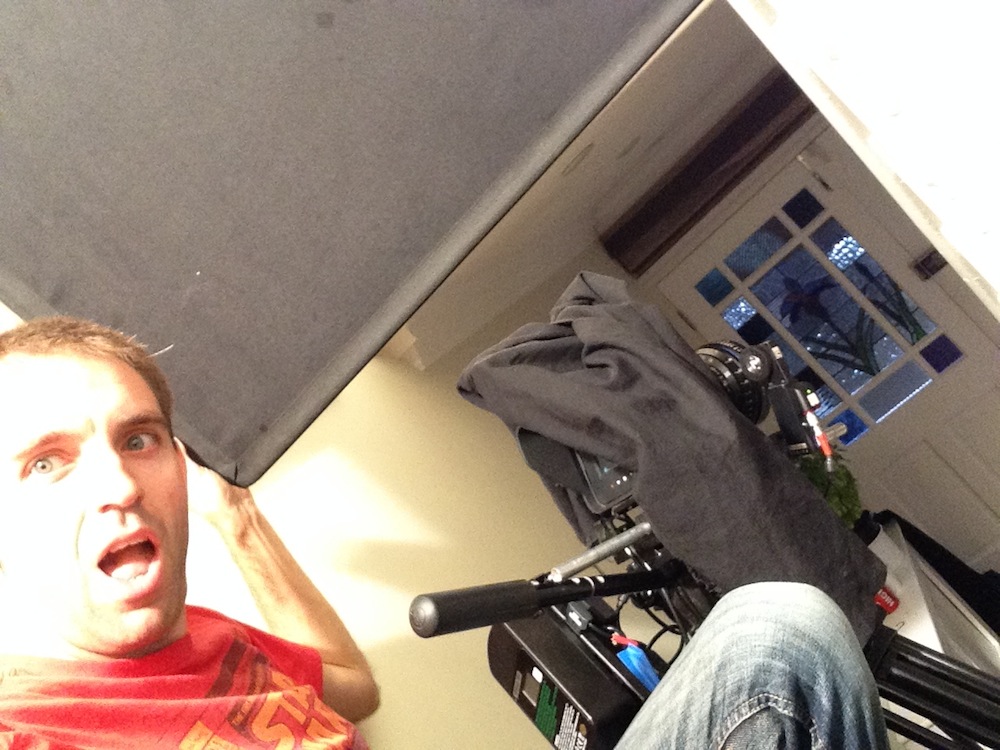
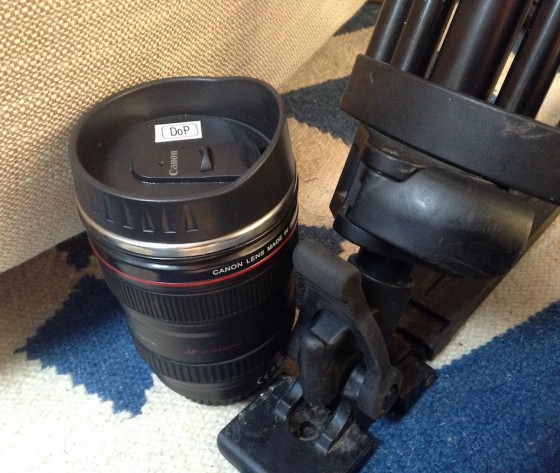
7:12pm Cunningly disguised as a lens, my cup of tea sits in easy reach beside the tripod.

IMG_25257:12pm We do a camera rehearsal to see if the set-up can accommodate Lasharne standing up, and it can. Max will move the slider while I control pan and tilt, and Rupert pulls focus remotely.

IMG_25278:13pm As the daylight starts to fade, we complete the scene and break for ‘lunch’. The food is quickly devoured.

IMG_25288:14pm We assemble on set again to watch a block through of the nighttime scene.

IMG_25298:21pm Ben discusses a car headlight effect which James wants for the scene.

IMG_2530
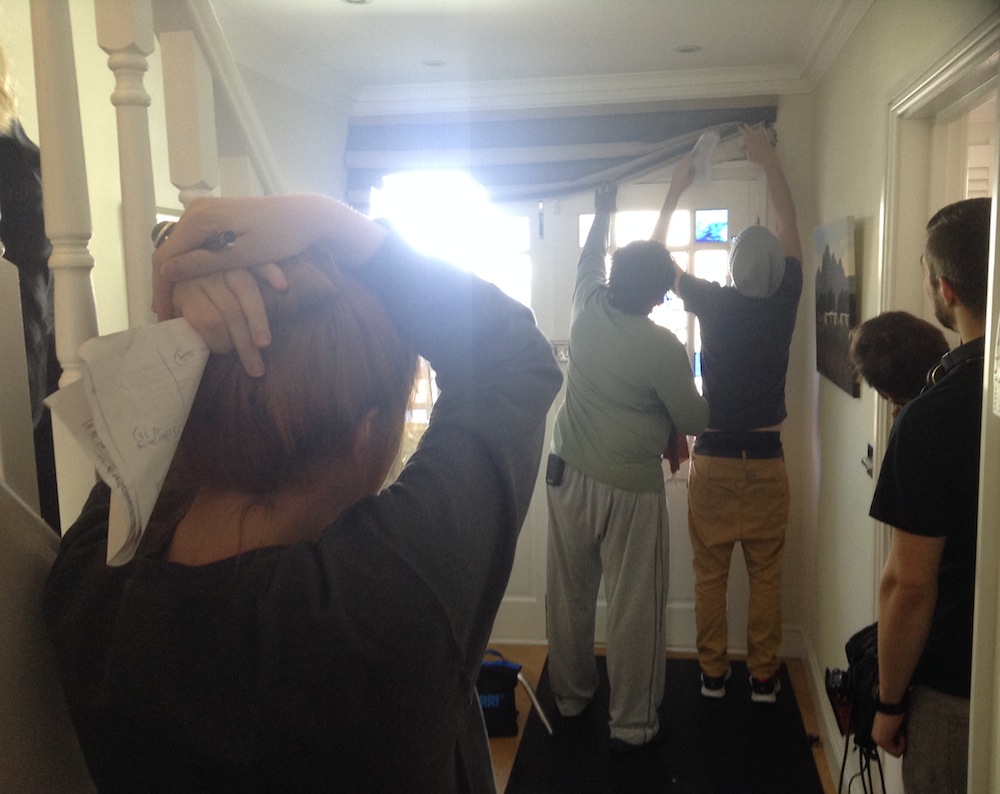
8:24pm We clear the set to allow Jorge, the art director, to dress it. I check my notes for the scene.

IMG_25318:29pm Once Jorge has done his thing, James and I pick a lens and position for the first set-up. By this point most of the lighting has been done, except this…

IMG_2533
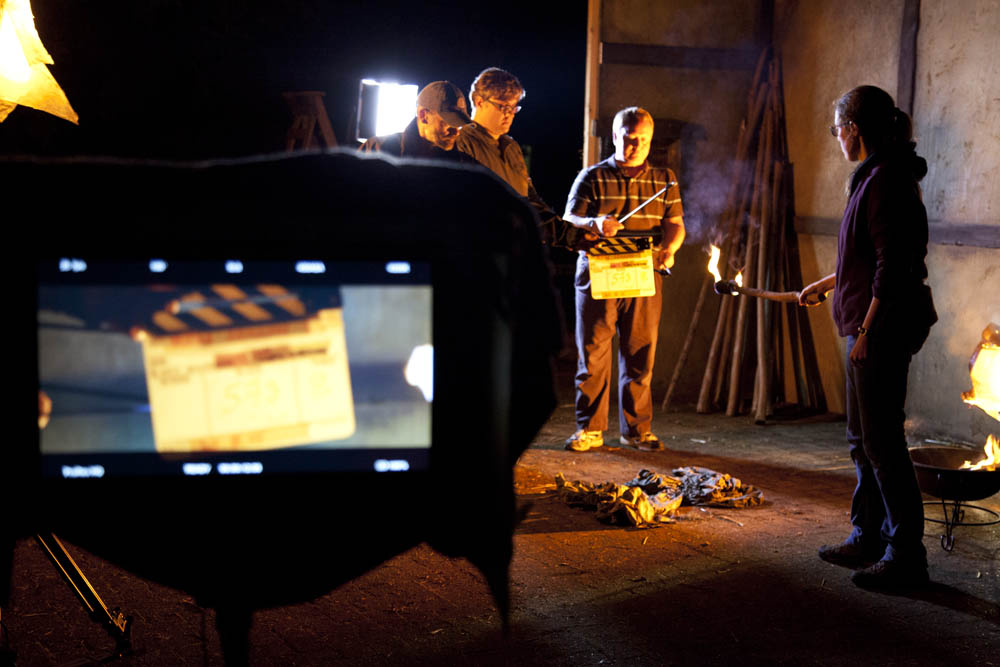
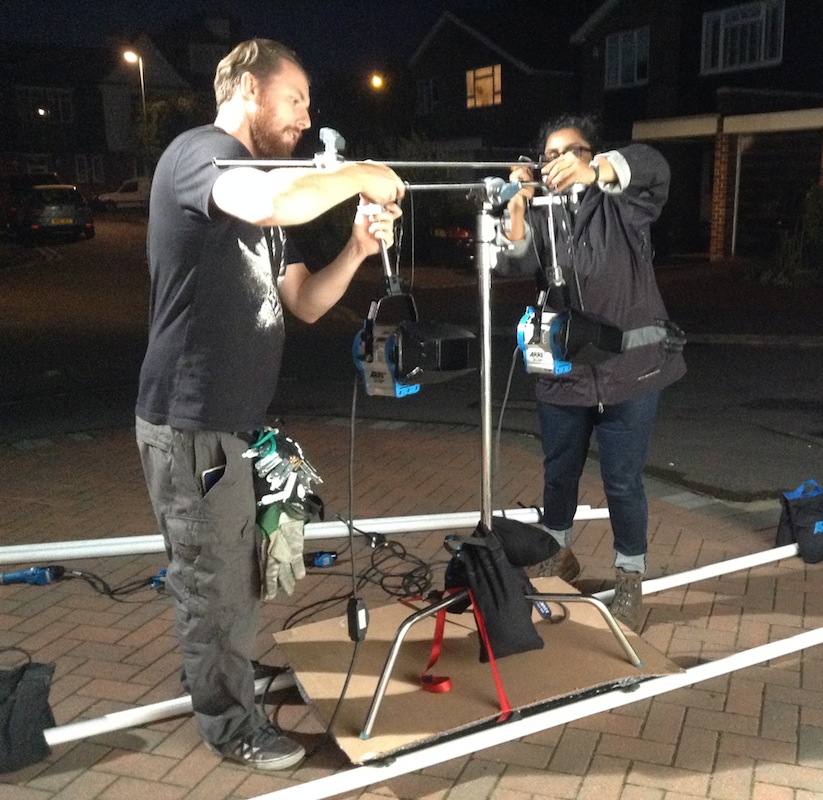
8:50pm Ben and Dimple construct a car headlight rig using two 300W tungsten fresnels mounted on a camera a dolly.

IMG_2534
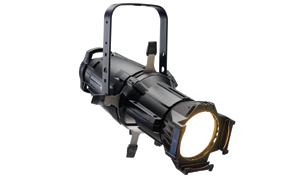
9:10pm The 300s prove too dim and the dolly too flimsy, so instead a Source 4 is rigged to Rupert’s Magliner.

IMG_2535
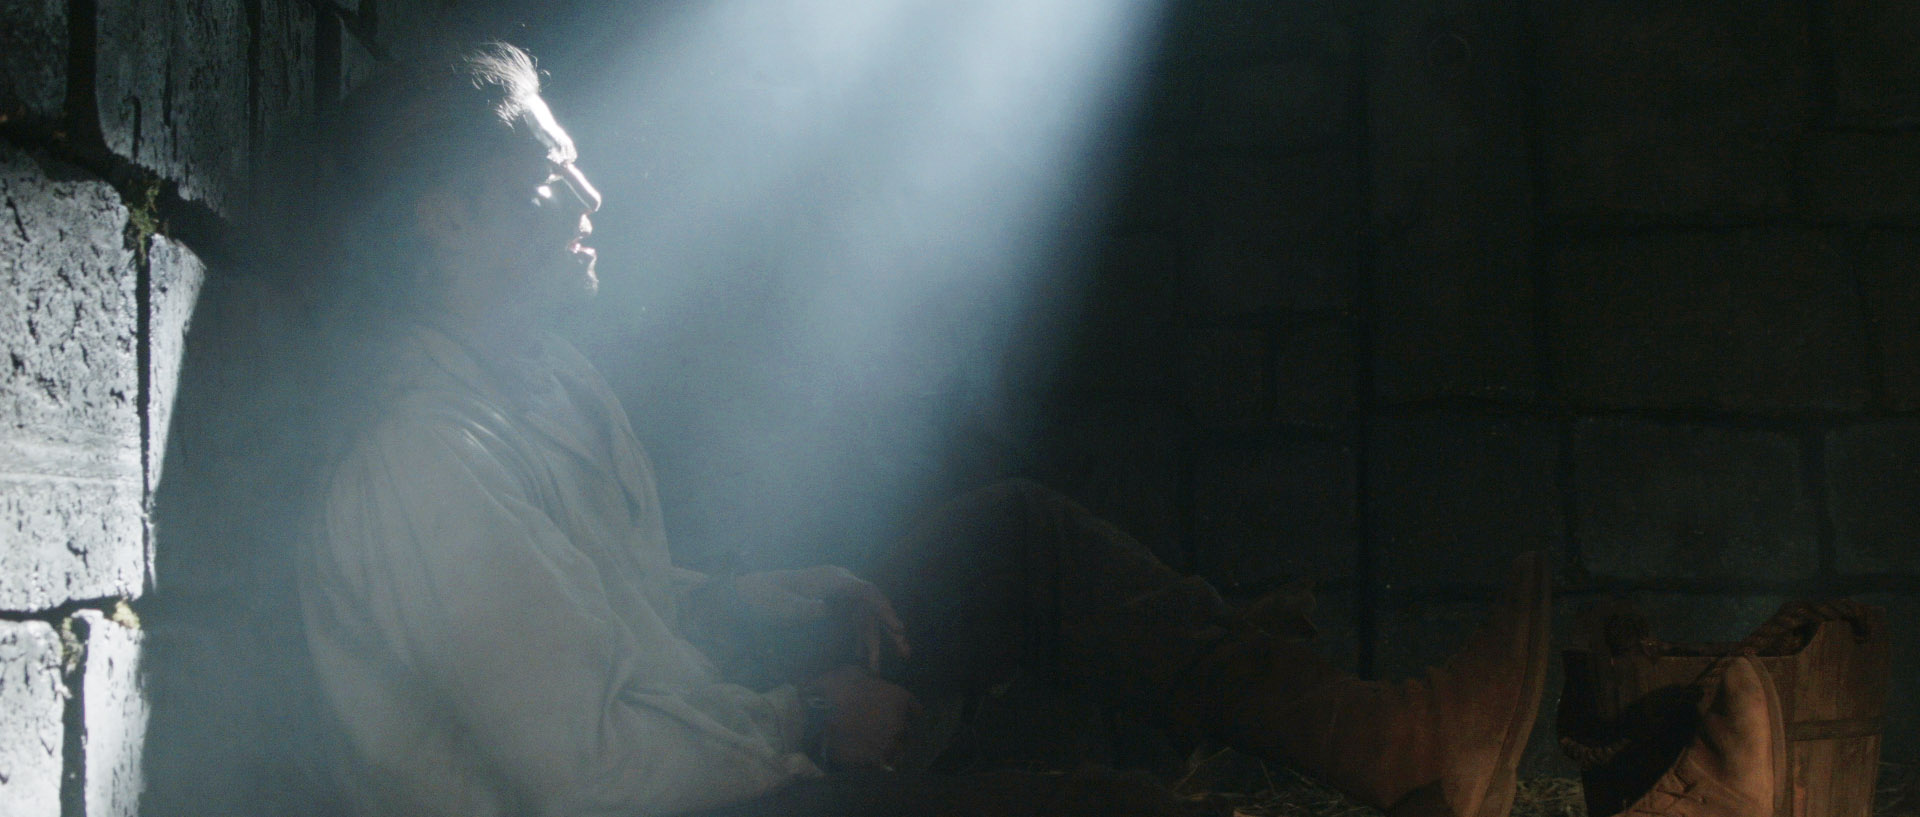
10:29pm The night scene is deliberately designed to echo the day scene, so I’m soon back on the stairs for a wide shot.

IMG_253612:46am We carry on with the scene, getting some very cool shots in the can, before wrapping a little after midnight. The kit is packed away in the living room, ready to load into the van tomorrow. Cider and sleep beckon.

A Day in the Life of a DP

Stop/Eject Will Share a Screen with Back to the Future

versus Great Scott! My time travel short Stop/Eject (watch the trailer here) is set to share a cinema screen with the movie that made me want to make movies, Back to the Future. No, there’s nothing wrong with the earth’s gravitational pull – this really is heavy!

On Monday October 26th, a few days after the fabled future date of 21/10/15 that Doc and Marty travel to in Part II, the Arts PictureHouse in Cambridge is set to host a screening of Part I. This will be a special event featuring live music and a short film ahead of the main feature. And what more appropriate short film than one about time travel, featuring several Back to the Future references?

There’s just one catch: this is an OurScreen event, meaning a certain number of tickets have to be reserved before the cinema officially greenlights the screening. At the time of writing just 12 more seats need to be booked before Doc, Marty, Kate, Dan and Alice can coincide on the time-space continuum. So if you’re in the Cambridge area, crank up your flux capacitor and fire-trail over to OurScreen to book now! Tickets are just £10, and in the unlikely event that the screening doesn’t get enough bookings to go ahead, you won’t be charged a penny.

This is just one of four Stop/Eject screenings coming up. Here are the details of them all…


Leicester, England – Friday August 28th

Event: The Shortish Cinema

Address: Phoenix Cinema, Leicester, LE1 1TG

Time: Red carpet walk from 6pm, films start at 7pm

Stop/Eject is one of three “shortish” Midlands films that will be screened, followed by a Q&A with me and the other filmmakers. Producer Sophie Black and make-up artist Deborah Bennett will also be attending.

Book tickets here.


Cork, Ireland – Friday August 28th

Event: The Underground Film Festival

Address: Camden Palace Hotel, Camden Quay, Cork City, Ireland

Time: 8pm

As an official selection of the 2015 Underground Film Festival, Stop/Eject will screen in the Drama Shorts programme.

Book tickets here.


Birmingham, England – Thursday September 24th

Event: Birmingham Young Professionals Short Film Night

Address: Mockingbird Theatre and Bar, Gibb Street, Birmingham B9 4AA, UK

Time: Doors open 7pm, films from 8pm

Organised by the West Midlands’ foremost champion of independent filmmaking, Brendan O’Neilll, this evening of short film screenings aims to build links between the filmmaking and business communities in Birmingham. As well as Stop/Eject, my 2013 puppet movie The One That Got Away will be shown.

Ticket info TBC.


Cambridge, England – Monday October 26th (We Hope!)

Event: Back to the Future screening

Address: The Arts PictureHouse, 38-39 St Andrew’s Street, Cambridge CB2 3AR, UK

Time: 9pm

Stop/Eject will be screened before the 80s classic to get punters in the time travel movie mood, and there will also be live music and “sensory treats”.

Book tickets here.

BTTF2-2015

Stop/Eject Will Share a Screen with Back to the Future

Lighting Techniques #6: Cross-light

Cross-light is illumination which comes in from the side, raking across a surface. At this angle, every last bump and imperfection in a surface will cast a big shadow. Terrible for beauty lighting, but brilliant for emphasising textures.

The same wallpaper lit by front-light (left) and cross-light (right).

And emphasising textures is a key part of photographing period pieces, as I learnt on The First Musketeer. In this post I’ll highlight a few examples of this technique throughout the show. (The whole series is on YouTube now so you can enjoy all six action-packed episodes at your leisure.)

At 2:27 in episode 1, Lazare and Ghislain enter an inn. Most of the scene is lit very simply with two cross-lights. One is an open-face 800W tungsten lamp coming in through a doorway off camera right; this bring outs all the texture in the back wall. The other is a 2.5K HMI coming in through the beautiful purple-tinted window on camera left; this also brings out texture – in the men’s faces! Cross-lighting is well suited to these characters, who (I hope they won’t mind me saying) are grizzled old soldiers.

A 2.5 HMI comes in through the window at left, while an 800W open-face tungsten rakes in through a doorway just off frame right. A second 800 lights the hall in the background.

(At 8:20 in episode 1 you can see what can happen when you don’t cross-light. Part of the reason that the location here looks like a flat, painted set is that the lighting is all frontal.)

The first scene of episode 3, at 0:33, is one of my favourites for lighting. The angle on Ghislain and Porthos practicing is lit by just two Kinoflo Barflies hung from the ceiling at the back of shot. These backlight the characters while also cross-lighting (vertically rather than horizontally) the stonework nicely.

A 1.2K HMI outside the door cross-lights the stonework, while smoke volumizes this light, resulting in a very satisfying depth and texture. The only other light sources are two kinoflo Barflies hanging from polecats above the bench at the back of shot. This backlight is reflected back at the foreground characters by a sheet of silver foamcore beneath the camera.

In the reverse (above) a 1.2K HMI outside the door rakes across the wall. A little smoke adds additional texture, while the Barflies (now above Athos and Lazare) provide backlight again.

There’s a shot at 5:12 in episode 5 where, again, a 1.2K HMI outside the door rakes across a wall, showing up the folds in an old tapestry.

This scene is lit purely by a 1.2K HMI out in the corridor.

Finally, in the secret room, seen in episodes 4 and 6 (at 6:41), 100W bulbs hidden behind the candles cross-light the surrounding stonework.

The two candle stands in the background have 100W bulbs hidden behind them. 40W bulbs would have been more suitable, but unfortunately we didn't have any. The light supposedly cast by these candles actually comes from two dedos. The first is at ceiling height off frame left, aimed at the Duke de Luyne (Toby Lorde) on frame right. The second is hidden behind the duke's desk and lights the heroes on frame left
The two candle stands in the background have 100W bulbs hidden behind them. 40W bulbs would have been more suitable, but unfortunately we didn’t have any. The light supposedly cast by these candles actually comes from two dedos. The first is at ceiling height off frame left, aimed at the Duke de Luyne (Toby Lorde) on frame right. The second is hidden behind the duke’s desk and lights the heroes on frame left

The First Musketeer (C) 2014 First Musketeer Ltd. Written, directed & produced by Harriet Sams.

Lighting Techniques #6: Cross-light

Cinemasogyny?

Carole Landis
Carole Landis

We’ve all seen old movies in which the ladies’ close-ups are shot through a soft focus filter. What may surprise you is that many DPs still do this, only the filters are much subtler. And even if they don’t do this, almost all DPs will light women differently to men. Softer light sources, more flattering key angles and higher levels of fill are some of the typical differences employed in order to beautify an actress. I’ve done it myself.

The question is: is it misogynous?

Women tend to have softer facial features than men. So I could argue that by giving an actress softer lighting than an actor, I’m simply playing to the strengths of their respective physical features. And after all, it’s my job to make everyone look good, male or female. But I know that I’ve often spent longer lighting the leading lady’s CU than the leading man’s, because I’m trying to make it as flattering as possible, and I know that many other DPs do the same. There seems to be a consensus amongst cinematographers that men can be lit more for character, lit appropriately for who they are within the story, whereas women have to be lit primarily for beauty.

John Schwartzman, ASC on the cast of Armageddon: “They’re easy to shoot, easy to light. They’re mainly men. Men, you’re not worried about, ‘Is there a bag or a shadow here?'”

Liv Tyler in Armageddon (DP: John Schwartzman)

There was understandable outrage about Frozen when head of animation Lino DiSalvo was quoted as saying that the female characters’ facial expressions were more restricted than the men’s because of the need to “keep them pretty”. It’s the same kind of thing. The message here seems to be that it’s more important for women to look good than to have character. Undoubtedly this contributes on some level to the general lack of substance that female characters have in cinema.

This issue must also be seen in the context of the punishing beauty standards which women are held to in our society. Most moviegoers will not think about the lighting and filters that may have been employed to make actresses look better. Many women watching will simply see an image of beauty which society tells them they must aspire to. But they can never reach it, not without a DP following them around everywhere, any more than they can reach the standards of beauty set by Photoshopped magazine covers.

Douglas Slocombe, BSC: “Cameramen have always been obliged to make the leads as beautiful as possible. This can create problems because sometimes the ideal lighting for the actress might mean spilling unwanted light over other parts of the set, compromising the mood you are trying to create. I generally favour mood over actors in wider shots, and then concentrate on the face in the close-ups.”

Allison Doody in Indiana Jones and the Last Crusade (DP: Douglas Slocombe)

The standards cut both ways. If all women are pressurised to look beautiful, actresses are doubly so. You have only to look at the casting breakdowns, one of which Rose McGowan called out recently, to see that.

So let’s imagine I ignored beauty concerns and lit an actress purely for character. What might happen? The director and producer, whether male or female, might not be happy. (“Her face is one of our biggest selling points,” I once heard a producer say of her lead actress.) The actress herself may not be happy. Her agent may not be happy. An actress who does not look good onscreen may well find it harder to get work. I don’t think I have the right to subject the actress to these possible negative consequences.

And what about the make-up artist, who probably spent much longer making up the actresses than the actors, and may not get hired again if the actresses don’t look beautiful on camera? Or the colourist, who could track a softening filter to the actress’s face in post without my knowledge or consent? Is there any point in me bucking the system if they don’t too? Would I find it harder to get hired if the women on my showreel didn’t look beautiful?

M. David Mullen, ASC: “The sad truth is that most (not all) women look good with a flat, frontal key light – sometimes soft, sometimes hard. Look at most head shots that actresses carry around – they all look like they have no nose, only two eyes and a smile… There is usually a happy medium where the lighting can look good and dramatically correct and the actress looks good as well – but sometimes I get asked to ‘cross the line’ and glamourize a close-up beyond what is correct for the scene.”

Amanda Seyfried in Jennifer's Body (DP: M. David Mullen)
Amanda Seyfried in Jennifer’s Body (DP: M. David Mullen)

Maybe it’s not my problem? It’s my job to make people look good, but it’s society that tells me what constitutes looking good for a man and for a woman. But of course I’m part of society, and if we all shirk responsibility like that, nothing will ever change. And any situation where a man (92% of DPs are men) has control of how a woman looks is a potential arena for misogyny.

Undoubtedly it’s a grey area, walking the line between character and beauty which no metric can ever define, and perhaps I’m worried about nothing. But since this issue is rarely discussed, I’m very interested to know what people think.

Your thoughts please (via Twitter or Facebook).

Cinemasogyny?

Distribution and the M&E (Music and Effects) Mix

The Japanese cover of Soul Searcher / Blade X

While in Japan recently, I was finally able to get hold of that country’s version of my 2005 feature film, Soul Searcher. I thought this would be a good opportunity to talk a little bit about international distribution and the mysterious M&E mix.

The story of an ordinary guy who gets trained to be the new Grim Reaper, Soul Searcher was picked up for distribution by a small UK company called Wysiwyg Films (now defunct). After releasing it on DVD in the UK, they sold all the foreign rights (much to my chagrin) to American sales agents Loose Cannon. Loose Cannon put out a US DVD, aiming to misleadingly tap the horror market by adding a splash of blood to the cover art, along with a stock photo of a random hooded guy with glowing eyes.

Loose Cannon then sub-sub-licensed the rights to five other territories: Benelux, Russia, Argentina, Thailand and Japan. Russian pirates hilariously dubbed the film into their own language (see some clips here), but the only territory to officially dub rather than subtitle the movie was Japan.

Presumably because of the film’s numerous martial arts fights, the Japanese distributors paid more for the film than any other country: $24,750. I know this from the Loose Cannon sales reports that were eventually forwarded to me by Wysiwyg. The only reason I know anything else about the Japanese release is from extensive googling (using the actors’ names as search terms proved most fruitful) which led me to the Amazon.jp page for the DVD a few years ago.

At first I thought I’d made a mistake. The cover art displayed on the page was completely new to me, showing an unfamiliar man holding a huge sword (a weapon never used by Soul Searcher’s hero). Beneath that was the title, in both Japanese and English: Blade X. It was only after Google Translating the page that the customer reviews confirmed this was indeed my very own Soul Searcher. Perhaps unsurprisingly, the reviews complained of the film’s lack of Wesley Snipes, the lack of correlation between the movie’s scythe-wielding hero and the cover’s sword-bearing imposter, plus many other flaws that are common to the English version!

Sadly, this is how low budget film sales work. The distributors know that the films are unlikely to generate much positive word of mouth, so they resort to tricking consumers into buying them with misleading covers and references to more successful films.

Left to right: the UK, US and Russian covers for Soul Searcher
Left to right: the UK, US and Russian covers for Soul Searcher. The Russian one is my favourite.

Anyway, when I saw that Amazon’s tech specs listed a Japanese audio track, I was desperate to get my hands on the DVD. But I could never find a seller who would import it for less than an eye-watering £40, so I waited, and in June this year I finally visited Japan and bought a copy.

But how does dubbing work? Well, amongst the delivery materials that a sales agent will require when you sell them your film will be an M&E mix – that’s Music and Effects. What this means is that you supply a version of the film which contains music, sound effects, foley, atmospheres, everything except the dialogue. This is one of the reasons for the existence of foley (footsteps, clothing rustles and other mundane sounds added to the film in postproduction); if you relied on the footsteps recorded along with the dialogue on set, those footsteps would disappear when you muted the dialogue tracks to produce the M&E mix.

Some of the buses in the Logic mix of Soul Searcher

It’s always worth running off an M&E version when mixing a feature, whatever you feel its chances of achieving distribution are. Trying to create an M&E track after the fact, when the mixer has moved on to other projects, the source files may no longer exist, etc, etc, is likely to be a real headache. Instead, take five minutes in your mixing session to mute the dialogue tracks and bounce it out.

Along with the M&E mix, sales agents will require a dialogue list – essentially a transcription of the film, so it can be translated ready for dubbing or subtitling.

The following video compares some clips from Soul Searcher, showing the original English versions, followed by the M&E track, then the Japanese dub.

The Japanese distributors made a good job of dubbing Soul Searcher. As far as I can tell, the voice cast seem to give decent performances, and the mixer has blended everything carefully together. I wonder how much this dub cost them? Undoubtedly, factoring in the manufacturing and advertising costs, and the $24,750 they paid to Loose Cannon for the rights, they will have spent more on the film than my investors and I did in making it (£28,000).

If you want to know more about distribution contracts, check out my post on what to look for in one, and for the full story of Soul Searcher’s financing, expenditure, and distribution revenue, look no further than this exhaustive, no-holds-barred video…

Distribution and the M&E (Music and Effects) Mix

4 Cunning Substitution Effects in Labyrinth

After countless viewings on VHS and DVD over my lifetime, I finally got to see Labyrinth on the big screen today. The imagination and detail in this film are just astonishing. Every scene has little puppet creatures wandering or flying about in the background to bring the sets to life. In today’s screening I noticed, for the first time, that there are two bottles of milk – presumably delivered by the Goblin Milkman – outside the door of Jareth’s castle. How brilliant is that?

"Where did she learn that rubbish? It doesn't even start with 'I wish'!"
“Where did she learn that rubbish? It doesn’t even start with ‘I wish’!”

Anyway, while there are many awesome things about Labyrinth, one of the techniques that I think is put to particularly good effect in the film is in-camera substitution. Typically this involves one type of puppet leaving frame briefly, and a second puppet – of the same character – reappearing in its place. Puppets are often limited in the actions that they can perform, and while scenes will commonly use different versions of the puppet in different shots to cover the full range of actions, Henson sometimes uses different versions of the puppet in the same shot to sell the illusion of a single, living creature. And though many of these effects are fairly obvious to a modern audience, you can still admire their ingenious design and perfect timing.

Skip through the movie to the timecodes listed below to see some of the best substitution effects.

1. Goblin Under the Bedclothes – 11:40

In the film’s first puppet scene, Sarah’s parent’s bedroom becomes infested with goblins, building up to David Bowie’s big oh-so-eighties entrance. One goblin crawls along the bed, under the sheets, before emerging. It looks like the initial crawling is achieved by pulling a rough goblin shape along on a wire under the sheets. The shape then drops out of the end of the bedclothes, behind a chest, and a moment later a puppet pops up from behind the same chest. This substitution effect obviates the need for a custom-built or chopped-up bed, which would have been necessary to permit the passage of the proper puppet and its puppeteer under the bedclothes.

Sirdidymus
Sir Didymus

2. Sir Didymus’ Acrobatics – 58:35

This shot appears to employ three different models of Sir Didymus, the honourable but fighting-crazed guardian of the bridge over the Bog of Eternal Stench. The first is a floppy version which is thrown behind some rocks by Ludo. After a practical puff of dusk, a second Sir Didymus – this one in a more rigid, leaping position – is launched from some kind of catapult hidden behind the rocks. He flies out of frame, to be replaced a moment later by the Muppet-style hand- and rod-puppet which is used for the majority of Sir Didymus’ shots.

3. Cowardly Ambrosius – 1:16:25

To his infinite chagrin, Sir Didymus’ bravery is not matched by that of his canine steed, Ambrosius. During the battle with Humongous, the petrified pooch rears up, throwing off his valiant rider, and retires shamelessly into hiding. The rearing up is accomplished with a rather unconvincing puppet dog. After he drops back down out of frame (aided by a slight zoom in to help lose him), a real dog enters in the background, running into hiding.

"I can't live within you." Not at all creepy, Dave.
“I can’t live within you.” Not at all creepy, Dave.

4. Double David – 1:27:53

In the film’s finale number, “Within You”, David Bowie’s Goblin King messes with our sense of direction as he jumps and flips around the disorientating Escher artwork brought to life. Early in the sequence he jumps off a ledge, only to reappear simultaneously in a background doorway, now seemingly obeying a pull of gravity at 90° to that which acted on his leap. A shot of Bowie jumping off the ledge cuts to another of him coming through the doorway. The doorway is filmed with the camera on its side, and to finish the action of the first Bowie’s leap, a body double is pulled across frame on a dolly. This can be seen at 25:36 in the behind-the-scenes documentary:

This kind of low-tech but ingenious filmmaking is in danger of dying, as CGI is perceived as the only tool to create illusions. But with a little thought, a little planning, cunning framing, and a knowledge of how to use editing (or lack thereof) to your advantage, very effective illusions can still be created in camera.

If you enjoyed this post, you may also like:

The 10 Greatest Movie Puppets of All Time – including the aforementioned Humongous

Double Vision – five ways of having one actor play two characters in the same scene

Top Five Low Tech Effects – tipping my hat to the cheekiest in-camera effects used in big Hollywood movies

Five Simple But Effective Camera Tricks – revealing some simple camera tricks I’ve used in my own films

4 Cunning Substitution Effects in Labyrinth

5 Ways to Use LED Panels

LED technology is transforming the way cinematographers can light. Running off batteries and not getting hot are two of their biggest advantages over other sources, making them much more flexible. I tend to avoid keying with them, because even the most expensive brands don’t render skintones as accurately as incandescent sources, but there are many other uses they can be put to. Here are a few of my favourite.

1. Eye-light on overcast day exteriors

If it’s one of those dark days when reflectors just don’t seem to do anything, or you’re under the tree canopy of a forest, an LED panel can give you a bit of fill and eye-light.

An LED panel over camera provides fill in this shot from Ren © 2015 Mythica Entertainment
An LED panel over camera provides fill and eye-light in this shot from Ren © 2015 Mythica Entertainment

Visit rentheseries.com to learn more about Ren, or read my blog post about lighting the above scene.

2. Background spots on night exteriors

So you’ve spent a while lighting the master shot of your big night exterior scene, and everyone’s ready to shoot. Then you notice that there’s an area in the background of frame which looks dark and empty, and you’d love a bit of extra light in there. Just slap a battery on your LED panel and run over there with it. No need to run power cables!

The orange backlight on Faith (Haruka Abe) and the fence, although apparently from the streetlamp in the background, is actually from an Arrilite 650 out of frame right, gelled with Urban Sodium. A daylight-balanced LED panel, also out of frame right but closer to camera, keys Faith. A second panel hidden behind the end of the fence lights the van and the rest of the deep background.
An LED panel lights the van and grass in the background of this shot from Forever Alone (dir. Jordan Morris)

Read my blog post about lighting the above scene.

3. Off-screen TV set

An LED panel makes a good “TV” source because during the take your spark can mess with not only the brightness control but the colour balance as well, to suggest changing images on the screen.

An LED panel simulates an off-screen TV set in this frame from The Gong Fu Connection © 2015 Cannon Fist Pictures
An LED panel simulates an off-screen TV set in this frame from The Gong Fu Connection © 2015 Cannon Fist Pictures. The panel was gelled green to match reverse shots in which the TV screen is shown to be dominated by the green grass of a racecourse.

Browse the blog posts about my cinematography on The Gong Fu Connection.

4. Mobile fill

If you’re shooting a long scene with your talent on the move and you need to maintain a little fill when they’re between lamps, an LED panel is easy for your spark to hand bash as they walk with the actors.

Under the black bag is an LED panel to keep some consistency to the light on the actors as the car moves.
Under the black bag is an LED panel to keep some consistency to the light on the actors as the car moves, in a scene from The Gong Fu Connection (dir. Ted Duran)
In a scene from Synced (dir. Devon Avery), we tracked the actors from the back of a pick-up truck, using the LED panel above me as fill.

Read my blog post about the above scene from Synced.

5. Hidden sources

Because they don’t get hot, and you don’t need power cables to them, it’s easy to hide LED panels behind bits of furniture or set dressing, to give interesting pools of light or punch up practicals.

In this frame from Ren, Hunter's face is lit by a small LED reporter light hidden behind the bucket to suggest a reflection off the water.
In this frame from Ren, Hunter’s face is lit by a small LED reporter light hidden behind the bucket to suggest a reflection off the water.

Read my blog post about lighting the above scene from Ren.

What interesting uses have you found for LED panels?

5 Ways to Use LED Panels