Roger Deakins’ Oscar-winning Cinematography of “Blade Runner 2049”

After fourteen nominations, celebrated cinematographer Roger Deakins, CBE, BSC, ASC finally won an Oscar last night, for his work on Denis Villeneuve’s Blade Runner 2049. Villeneuve’s sequel to Ridley Scott’s 1982 sci-fi noir is not a perfect film; its measured, thoughtful pace is not to everyone’s taste, and it has serious issues with women – all of the female characters being highly sexualised, callously slaughtered, or both – but the Best Cinematography Oscar was undoubtedly well deserved. Let’s take a look at the photographic style Deakins employed, and how it plays into the movie’s themes.

Blade Runner 2049 returns to the dystopian metropolis of Ridley Scott’s classic three decades later, introducing us to Ryan Gosling’s K. Like Harrison Ford’s Deckard before him, K is a titular Blade Runner, tasked with locating and “retiring” rogue replicants – artificial, bio-engineered people. He soon makes a discovery which could have huge implications both for himself and the already-strained relationship between humans and replicants. In his quest to uncover the truth, K must track down Deckard for some answers.

Villeneuve’s film meditates on deep questions of identity, creating a world in which you can never be sure who is or isn’t real – or even what truly constitutes being “real”. Deakins reinforces this existential uncertainty by reducing characters and locations to mere forms. Many scenes are shrouded in smog, mist, rain or snow, rendering humans and replicants alike as silhouettes.

K spends his first major scene seated in front of a window, the side-light bouncing off a nearby cabinet the only illumination on his face. Deakins’ greatest strength is his ability to adapt to whatever style each film requires, but if he has a recognisable signature it’s this courage to rely on a single source and let the rest of the frame go black.
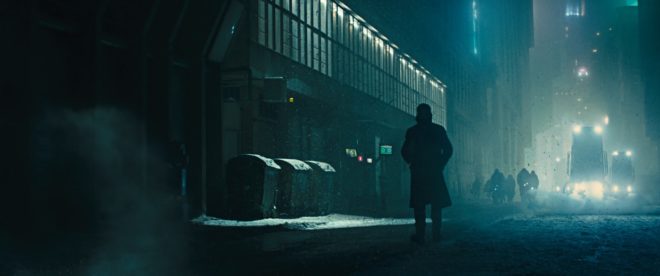
Whereas Scott and his DP Jordan Cronenweth portrayed LA mainly at night, ablaze with pinpoints of light, Villeneuve and Deakins introduce it in daylight, but a daylight so dim and smog-ridden that it reveals even less than those night scenes from 1982.

All this is not to say that the film is frustratingly dark, or that audiences will struggle to make out what is going on. Shooting crisply on Arri Alexas with Arri/Zeiss Master Primes, Deakins is a master of ensuring that you see what you need to see.

A number of the film’s sequences are colour-coded, delineating them as separate worlds. The city is mainly fluorescent blues and greens, visually reinforcing the sickly state of society, with the police department – an attempt at justice in an insane world – a neutral white.

The Brutalist headquarters of Jared Leto’s blind entrepreneur Wallace are rendered in gold, as though the corporation attempted a friendly yellow but was corrupted by greed. These scenes also employ rippling reflections from pools of water. Whereas the watery light in the Tyrell HQ of Scott’s Blade Runner was a random last-minute idea by the director, concerned that his scene lacked enough interest and production value, here the light is clearly motivated by architectural water features. Yet it is used symbolically too, and very effectively so, as it underscores one of Blade Runner 2049’s most powerful scenes. At a point in the story where more than one character is calling their memories into question, the ripples playing across the walls are as intangible and illusory as those recollections. “I know what’s real,” Deckard asserts to Wallace, but both the photography and Ford’s performance bely his words.
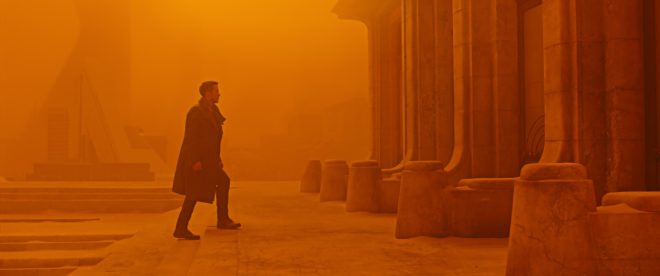
The most striking use of colour is the sequence in which K first tracks Deckard down, hiding out in a Las Vegas that’s been abandoned since the detonation of a dirty bomb. Inspired by photos of the Australian dust storm of 2009, Deakins bathed this lengthy sequence in soft, orangey-red – almost Martian – light. This permeating warmth, contrasting with the cold artificial light of LA, underlines the personal nature of K’s journey and the theme of birth which is threaded throughout the film.

Deakins has stated in interviews that he made no attempt to emulate Cronenweth’s style of lighting, but nonetheless this sequel feels well-matched to the original in many respects. This has a lot to do with the traditional camerawork, with most scenes covered in beautifully composed static shots, and movement accomplished where necessary with track and dolly.

The visual effects, which bagged the film’s second Oscar, also drew on techniques of the past; the above featurette shows a Canon 1DC tracking through a miniature landscape at 2:29. “Denis and I wanted to do as much as possible in-camera,” Deakins told Variety, “and we insisted when we had the actors, at least, all the foreground and mid-ground would be in-camera.” Giant LED screens were used to get authentic interactive lighting from the advertising holograms on the city streets.

One way in which the lighting of the two Blade Runner movies is undeniably similar is the use of moving light sources to suggest an exciting world continuing off camera. (The infamous lens flares of J.J. Abrahms’ Star Trek served the same purpose, illustrating Blade Runner’s powerful influence on the science fiction genre.) But whereas, in the original film, the roving searchlights pierce the locations sporadically and intrusively, the dynamic lights of Blade Runner 2049 continually remodel the actors’ faces. One moment a character is in mysterious backlight, the next in sinister side-light, and the next in revealing front-light – inviting the audience to reassess who these characters are at every turn.

This obfuscation and transience of identity and motivation permeates the whole film, and is its core visual theme. The 1982 Blade Runner was a deliberate melding of sci-fi and film noir, but to me the sequel does not feel like noir at all. Here there is little hard illumination, no binary division of light and dark. Instead there is insidious soft light, caressing the edge of a face here, throwing a silhouette there, painting everyone on a continuous (and continuously shifting) spectrum between reality and artificiality.

Blade Runner 2049 is a much deeper and more subtle film than its predecessor, and Deakins’ cinematography beautifully reflects this.

Roger Deakins’ Oscar-winning Cinematography of “Blade Runner 2049”

A Cinematograper Prepares

One of the things which I believe separates a good director of photography from a bad one is preparation. On a big production you may have weeks of paid, full-time prep, but on a micro-budget movie you may be lucky to have a single meeting before the shoot. In the latter case you’ll have to use your initiative, put in the time for free, and use Skype a lot, but either way the quality of the prep can make or break the production.

Here are ten things a DP should do to set themselves up for success before the camera rolls. This is not intended to be an exhaustive list, rather it’s a run-down of the things which I have found to bear most fruit later on in the production.


1. Get inside the director’s head.

Some directors will come to you with a beautiful set of storyboards, concept art and reference images, but many won’t. Many will simply have an idea in their head of how they want it to look, and it’s your job to find out what that vision is. Often this will happen before full-time prep begins. It will consist of watching movies together, pouring over books of photos, sharing Pinterest boards or Dropboxes full of images, all the while discussing what they do and don’t like. The aim is to get such a clear idea of their vision that when you set up a shot you’ll deliver the mood they’re looking for first time.


2. Work with the art department.

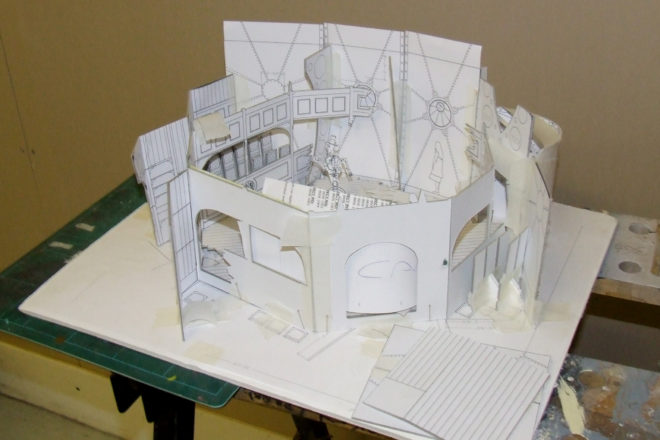
Chatting over a set model helps identify potential lighting or lensing problems before construction begins.

The next person to get in sync with is the production designer. This is an incredibly important and symbiotic relationship; you have the power to completely destroy each others’ work, or to make each other look like geniuses! Two things you should talk about early on with the designer are the colour palette of the film (and any palettes specific to certain locations, plot threads or characters) and the aspect ratio: does the shape of the sets being designed fit the shape of the frame you’re planning to compose? Next you’ll want to discuss each set and the position of windows and practicals within it, to ensure that you’ll be able to get the lighting angles you need. For their part, the designer will want to quiz you on where the key camera positions will be, and the rough lens lengths you’ll be using, so they know where to put in the most detail and the important bits of dressing.


3. Get to know the needs of the other H.o.D.s.

Although the production designer is the most important head of department for a DP to work with, they are by no means the only one. The visual effects supervisor is increasingly a key collaborator; you should discuss the look you’re going for and how that will integrate with the VFX, and whether plates need to be shot at a higher resolution, in RAW, or any other technical requirements. You should familiarise yourself with the costume designs and discuss how those will integrate with the overall look. Similarly the make-up department will want to talk about about lens filtration, coloured lighting and anything else that may affect how their work looks. The line producer is a crucial person to get on the good side of. Sooner or later you’ll have to ask them for something expensive and unexpected, and they’re much more likely to say yes if you have tried to help them earlier on, by reducing your equipment list for example, or by hiring local camera assistants to save on accommodation costs.

Read my article on collaborating with other departments for more on this topic.


4. Check sun paths at locations.

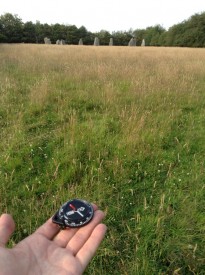
Checking my compass at the stone circleWhen you start to scout the locations, you’ll want to pay careful attention to the direction of the sun. Which windows will it come through as it moves around over the course of the day? Are those trees or buildings likely to shadow that park bench where the characters will be sitting? With a bit of experience – and a compass, if it’s cloudy – you can estimate this, or use apps like Sun Tracker and Helios which are designed for exactly this purpose. For interiors, windows that never get direct sunlight are most convenient, allowing you to light them artificially, and thus constantly, without having to flag the real sun. For exteriors, shooting into the sun is generally most desirable, for the beauty of the backlight and the softness of the reflected fill. Of course, there will always be compromises with the other demands of the production.

See my article on sun paths for more on this.
 

5. Develop the shot list with the director.

Each director has a different process, but often they will draft a shot list on their own before passing it to you for feedback. There are many things for a DP to consider when going through this list. Do the shots reflect the style and visual grammar you both discussed earlier? (If not, has the director had a change of heart, or have they simply forgotten? Directors have a lot to think about!) Do the shots provide enough coverage for the editor? Are there too many shots to realistically accomplish on schedule? (Very often there are!) What grip equipment will the camera movements require? Are any special lenses or filters required, e.g. a macro lens for an extreme close-up of an eye?


6. Shoot tests.

Testing is a crucial part of the prep for both technical and creative reasons. Usually you will want to test a few different cameras and lens sets, to see which best serve the story. For example, a period film lit with a lot of genuine candlelight may work best on a sensitive camera like the Panasonic Varicam combined with soft fall-off lenses like Cooke S4s, while a sci-fi thriller might be suited to a Red or Alexa and a set of anamorphics for those classic flares. Until you’ve tested them and compared the images side by side though, you can’t be sure, and neither can the director and producers. Often costume and make-up tests will be requested, which may be combined with the camera tests to see how the different sensors render them, or maybe done separately once the camera kit is locked down. These tests are also a great opportunity for the DP to demonstrate for the director the type of lighting you plan to use to, and to make sure you really are on the same page. Ideally a DIT (digital imaging technician) will be available to grade the test footage, developing LUTs (look-up tables) if required, and providing proof of concept for the finished look of the movie.

Check out my tests of Alexa ISO settings, spherical lenses and anamorphic lenses.


7. Discuss the schedule.

Once the 1st AD has drafted the shooting schedule, they will show it to the DP for feedback. When determining how much can be done in a day, the 1st AD is thinking of the script page count, and they may not have seen a shot list at this point. Along with the director, the DP must bring any concerns they have about the schedule to the 1st AD in prep, or forever hold your peace! Is there enough time to get those tricky camera moves you’ve planned? Has the re-light time for the reverse been factored in? Have things been arranged in a logical order for lighting, or will things have to be torn down and put back up again later? Does the schedule permit things to be shot at the best time of day for light? Are the night scenes actually scheduled at night or will the windows have to be blacked out? Are there critical close-ups towards the end of the schedule, when the cast will be tired and no longer look their best?

For more detail on this, check out my article about things to look for in a schedule.


8. Get to know the faces of your cast.

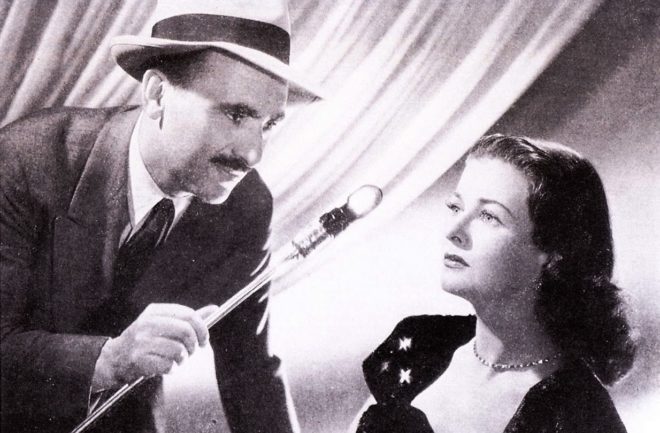
Legendary DP John Alton, ASC tests lighting angles with Joan Bennett

However good-looking the talent may be, they will always look better under certain types of lighting than others. Often you will figure out what suits each actor after a week or so of shooting, but ideally you want to find out before principal photography begins. You can do this during testing, if the cast are available and you have enough time – trying out different key angles, fill levels, backlight and lenses to see what works best for their individual faces. Apart from anything else, this is a great way to establish trust with the cast right from the start, assuring them that they are in safe hands. If testing isn’t possible, watch some of their previous work, looking carefully at how they have been photographed.


9. Mark up your script.

There’s no point in having lots of great ideas in preproduction if you forget them when you’re on set. Everyone has a different system, but you may wish to mark up your script and/or shot list. This could include using coloured highlighters to differentiate day and night scenes at a glance, underlining any references to mood or camera angles in the stage directions, or indicating beats in the development of the story or characters which need to be reflected in how things are lit or shot.


10. Plan your lighting.

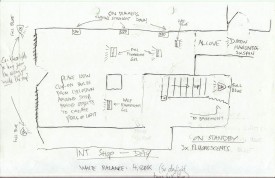
Shop lighting planEveryone likes to get rolling as soon as possible after call time, and a big factor in achieving this is how quickly you can light. Ideally you will have planned the broad strokes of the lighting in preproduction, and communicated that plan to the gaffer. Budget permitting, the lighting crew can even pre-rig the set so that only tweaking is required when the whole unit arrives. In this case you’ll need to have been very clear and specific about what you want set up and where, drawing diagrams or approving those which the gaffer has drawn up. Often you’ll need to know the rough blocking of the scene before you can plan the lighting, so you should make sure the director indicates their intentions for this during scouts.


Every film is different, but follow the steps above and you’ll be well on your way to an efficient and productive shoot in 2018. Happy new year!

A Cinematograper Prepares

How to do Scenes on a Moving Train

Behind the scenes of “Last Passenger”

The publicity machine is ramping up for Kenneth Branagh’s Murder on the Orient Express remake, and it’s got me thinking about the challenges of a script set largely on a moving train. There are a number of ways of realising such scenes, and today I’m going to look at five movies that demonstrate different techniques. All of these methods are equally applicable to scenes in cars or any other moving vehicle.

1. For Real: “The Darjeeling limited”

https://www.youtube.com/watch?v=S92KktyxGY0

Wes Anderson’s 2007 film The Darjeeling Limited sees three brothers embarking on a spiritual railway journey across India. Many of the usual Anderson tropes are present and correct – linear tracking shots, comical headgear, Jason Schwartzman – but surprisingly the moving train wasn’t done with some kind of cutesy stop-motion. Production designer Mark Friedberg explains:

The big creative decision Wes made was that we were going to shoot this movie on a moving train. And all that does is complicate life. It makes it more expensive, it makes the logistics impossible. It made it incredibly difficult to figure out how many crew, what crew, what gear… but what it did do is it made it real.

Kenneth Branagh has stated that at least some of Murder on the Orient Express was shot on a real moving train too:

They painstakingly built a fully functioning period authentic locomotive and carriages from the Orient Express during the golden, glamorous age of travel. It was a train that moved… All of our actors were passengers on the train down the leafy lanes of Surrey, pretending to be the former Yugoslavia.


2. Poor Man’s Process: “The Double”

Director Richard Ayoade

Although best known as The IT Crowd‘s Moss and the new host of the Crystal Maze, Richard Ayoade is also an accomplished director. His last feature was a darkly beautiful adaptation of Dostoyevsky’s classic identity-crisis novella The Double. 

Unlike the other movies on this list, The Double only has short sequences on a train, and that’s a key point. So named because it’s a cheap alternative to rear projection (a.k.a. process photography), Poor Man’s Process is a big cheat. In order to hide the lack of motion, you keep the view outside your vehicle’s windows blank and featureless – typically a night sky, but a black subway tunnel or a grey daytime sky can also work. Then you create the illusion of motion with dynamic lighting, a shaky camera, and grips rocking the carriage on its suspension. Used judiciously, this technique can be very convincing, but you would never get away with it for a whole movie.

Poor Man’s works particularly well in The Double, the black void outside the subway car playing into the oppressive and nightmarish tone of the whole film. In an interview with Pushing Pixels, production designer David Crank explains how the subway carriage set was built out of an old bus. He goes on to describe how the appearance of movement was created:

We put the forks of a forklift under the front of the bus, and shook it… For the effect of moving lights outside the train, it was a combination of some spinning lights on stands, as well as lights on small rolling platforms which tracked back and forth down the outside of the bus.

Part 2 of the Darjeeling Limited featurette above reveals that Poor Man’s Process was also used occasionally on that film, when the train was stuck in a siding due to heavy rail traffic. I used Poor Man’s myself for night-time train sequences in two no-budget features that I made in the early noughties – see the BTS clip below – and I’ve also written a couple of blog posts in the past about my use of the same technique on a promotional video and in a fantasy web series.


3. Green screen: “Source Code”

https://www.youtube.com/watch?v=ildCiVpLM8s

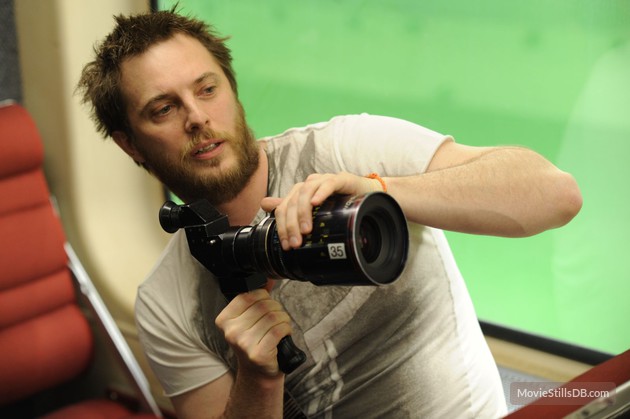
Duncan “Zowie Bowie” Jones followed up his low-budget masterpiece Moon with Hollywood sci-fi thriller Source Code, a sort of mash-up of Quantum Leap and Groundhog Day with a chilling twist. It takes place predominantly on a Chicago-bound commuter train, in reality a set surrounded by green screen. In the featurette above, Jones mentions that shooting on a real moving train was considered, but ultimately rejected in favour of the flexibility of working on stage:

Because we revisit an event multiple times, it was absolutely integral to making it work, and for the audience not to get bored, that we were able to vary the visuals. And in order to do that we had to be able to build platforms outside of the train and be able to really vary the camera angles.

In the DVD commentary, Jones also notes that the background plates were shot in post from a real train “loaded up with cameras”.

Director Duncan Jones on the set of “Source Code”

Cinematographer Don Burgess, ASC discusses lighting the fake train in a Panavision article:

It’s difficult to make it feel like natural light is coming in and still get the sense of movement on a train… We worked with computer programs where we actually move the light itself, and brighten and dim the lights so it feels as if you are travelling… The lights are never 100% constant.

When I shot The Little Mermaid last year we did some train material against green screen. To make the lighting dynamic, the grips built “branch-a-loris” rigs: windmills of tree branches which they would spin in front of the lamps to create passing shadows.


4. Rear projection: “Last Passenger”

Perhaps the most low-budget film on this list, Last Passenger is a 2013 independent thriller set aboard a runaway train. Director Omid Nooshin and DP Angus Hudson wanted a vintage look, choosing Cooke Xtal anamorphic lenses and a visual effects technique that had long since fallen out of favour: rear projection.

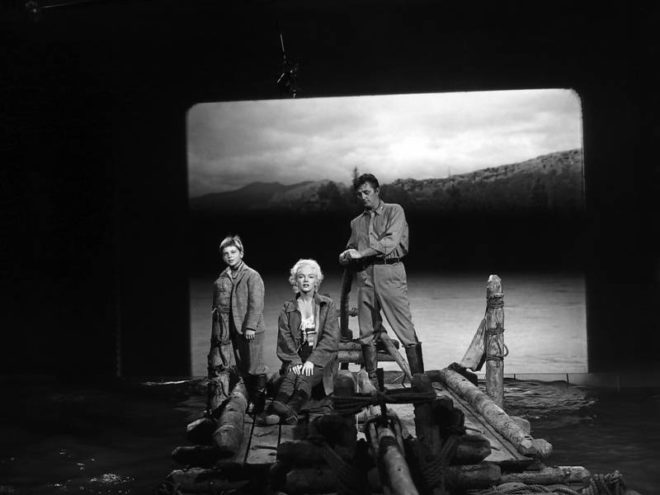
Before the advent of optical – and later digital – compositing, rear projection was commonly used to provide moving backgrounds for scenes in vehicles. The principle is simple: the pre-recorded backgrounds are projected onto a screen like this…

Rear projection in use on “River of no Return” (1954)

Hudson goes into further detail on the technique as used for the Last Passenger:

To capture [the backgrounds] within our limited means, we ended up shooting from a real train using six Canon 5D cameras, rigged in such a way that we got forward, sideways and rear-facing views out of the train at the same time. We captured a huge amount of footage, hours and hours of footage. That allowed us to essentially have 270 degrees of travelling shots, all of which were interlinked.

Because rear projection is an in-camera technique, Nooshin and Hudson were able to have dirt and water droplets on the windows without worrying about creating a compositing nightmare in postproduction. Hudson also notes that the cast loved being able to see the backgrounds and react to them in real time.


5. L.E.D. Panels: “Train to Busan”

https://www.youtube.com/watch?v=3nKVBSHvxi8

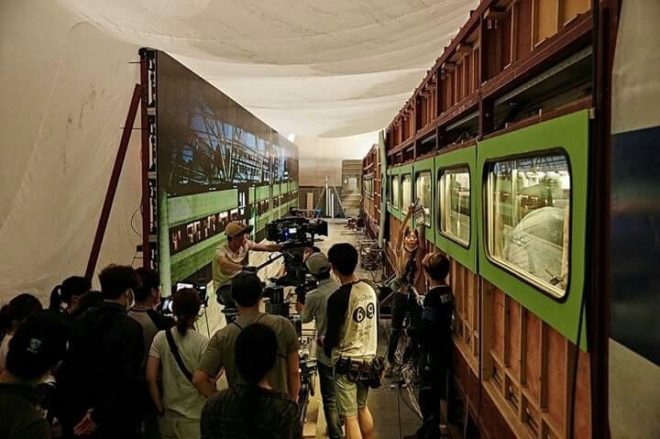
Enabling the actors to see the background plates was also a concern for Yeon Sang-ho, director of the hit Korean zombie movie Train to Busan. He felt that green screen would make it “difficult to portray the reality”, so he turned to the latest technology: LED screens. This must have made life easier not just for the cast, but for the cinematographer as well.

You see, when you travel by train in the daytime, most of the light inside the carriage comes from outside. Some of it is toplight from the big, flat sky, and some of it is hard light from the sun – both of these can be faked, as we’ve seen – but a lot of the light is reflected, bouncing off trees, houses, fields and all the other things that are zipping by. This is very difficult to simulate with traditional means, but with big, bright LED screens you get this interactive lighting for free. Because of this, and the lack of postproduction work required, this technique is becoming very popular for car and train scenes throughout the film and TV industry.

This brings us back to Murder on the Orient Express, for which 2,000 LED screens were reportedly employed. In a Digital Spy article, Branagh notes that this simulated motion had an unintended side effect:

It was curious that on the first day we used our gimballed train sets and our LED screens with footage that we’d gone to great trouble to shoot for the various environments – the lowlands and then the Alps, etc… people really did feel quite sick.

I’ll leave you with one final point of interest: some of the above films designed custom camera tracks into their train carriage sets. On Last Passenger, for example, the camera hung from a dolly which straddled the overhead luggage racks, while The Darjeeling Limited had an I-beam track designed into the centre of the ceiling. Non-train movies like Speed have used the same technique to capture dolly shots in the confines of a moving vehicle.

“Last Passenger”s luggage rack dolly
How to do Scenes on a Moving Train

8 Ways “Barry Lyndon” Emulates Paintings

Stanley Kubrick’s 1975 period epic Barry Lyndon, although indifferently received upon its original release, is considered a masterpiece by many today. This is largely due to its painterly photography with strong, precisely composed frames that leave the viewer feeling more like they’ve wandered through an art gallery than watched a movie. Today I’m going to look at eight methods that Kubrick and his team used to create this feel. It’s an excellent example of how a director with a strong vision can use the many aspects of filmmaking to realise that vision.


1. Storytelling

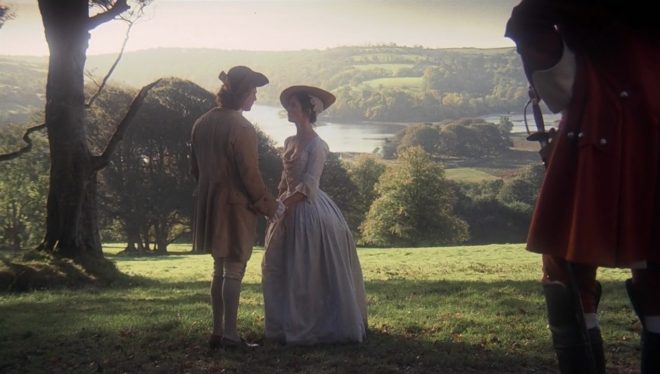
The American Cinematographer article on Barry Lyndon notes that “Kubrick has taken a basically talky novel and magically transformed it into an intensely visual film.” You have only to look at a series of frame-grabs from the movie to see just how much of the story is contained in the images. Just like a painter, Kubrick reveals a wealth of narrative within a single frame. The shot above, for example, while recalling the landscapes of artists like Constable in its background and composition, also clearly tells the story of a courtship threatened by a third party with violent designs.


2. Design

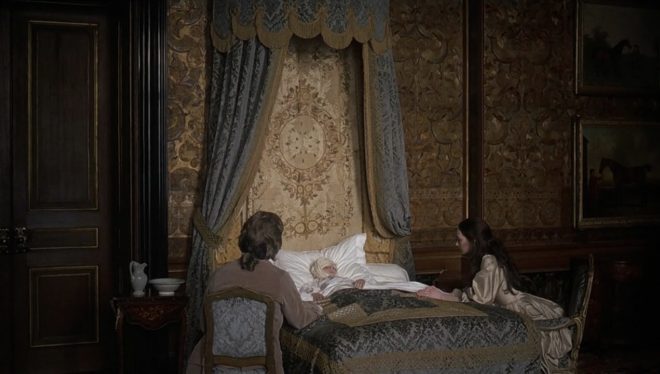
Kubrick was keen for Lyndon to feature the type of rich fabrics which are often seen in 18th century art. He referred costume designer Milena Canonero to various painters of the period. “Stanley wanted beautiful materials,” she recalls in the documentary Stanley Kubrick: A Life in Pictures, “because as he quite rightly said, that’s why in those paintings they gave that wonderful light.”


3. Aspect ratio

There was much confusion and controversy surrounding Kubrick’s intended ratio for Lyndon. The negative was apparently hard-masked to 1.6:1, with the result that VHS and DVDs used this ratio, while the images were vertically cropped to 1.78:1 for the later Blu-ray release. However, the discovery in 2011 of a letter from Kubrick to cinema projectionists finally proved that 1.66:1 was the ratio he wanted audiences to see the film in.

1.66:1 was a standard ratio in parts of Europe, but unusual in the UK and USA. It’s not far off the golden ratio (1.6180:1) – a mathematically significant ratio which some artists believe to be aesthetically pleasing. There is evidence that Kubrick was not a fan of wide aspect ratios in general, perhaps because of his background as a photographer, but it can be no coincidence that Lyndon distances itself from the cinematic ratios of 1.85 and 2.39, and instead takes a shape closer to that of a typical painting.

(Most of the images in this post come from Evan Richards’ Cinematographers Index, and he in turn grabbed them from the 1.78:1 Blu-ray. The image above is in 1.66:1 but shows the 1.78:1 crop-lines.)


4. Composition

“The actual compositions of our setups were very authentic to the drawings of the period,” says DP John Alcott, BSC in his interview with American Cinematographer. Perhaps the film’s most obvious compositional nod to classical art is the large amount of headroom seen in the wide shots. As this article by Art Adams explains, the concept of placing the subject’s head at the top of the frame is fairly new in the history of image creation. Plenty of traditional art includes lots of headroom, and Lyndon does the same.


5. Camera movement

There is little camera movement in Barry Lyndon, but there are 36 zoom shots. Unlike a physical dolly move, in which the parallax effect causes different planes of the image to shrink or enlarge at differing rates, a zoom merely magnifies or reduces the whole image as a single element. This of course only serves to enhance the impression of a two-dimensional piece of art. In fact, the zooms resemble nothing so much as the rostrum camera moves a documentary filmmaker might make across a painting – what today we’d call a Ken Burns effect.

It’s interesting to note that, although Barry Lyndon is famous for its fast lenses – the f/0.7 Zeiss Planar primes – the movie also used a very slow lens, a custom-built T9 24-480mm zoom. From various accounts, other zooms used seem to include a Cooke T3.1 20-100mm and possibly a 25-250mm of some description. Of course, none of the zoom lenses were anywhere near fast enough for the candlelit scenes, so in those instances the filmmakers were forced to use a Planar and pull back physically on a dolly.


6. Lighting

“In preparation for Barry Lyndon we studied the lighting effects achieved in the paintings of the Dutch masters,” Alcott says. “In most instances we were trying to create the feeling of natural light within the houses, mostly stately homes, that we used as shooting locations.”  The DP closely observed how natural light would come in through the windows and emulate that using diffused mini-brutes outside. This made it possible to shoot long days during the British winter when natural light was in short supply. Last week I covered in detail the technical innovations which allowed Alcott and Kubrick to shoot night scenes with just genuine candlelight, as 18th century painters would have seen and depicted them.


7. Contrast

Film stock in the seventies was quite contrasty, so Alcott employed a few methods to adjust his images to a tonal range more in keeping with 18th century paintings. He used a Tiffen No. 3 Low Contrast Filter at all times, with an additional brown net for the wedding scene “where I wanted to control the highlights on the faces a bit more,” he explains. He also used graduated ND filters (as in the above frame) both outdoors and indoors, if one side of the room was too bright. Most interestingly, he even went so far as to cover white fireplaces and doorways with fine black nets – not on the lens but on the objects themselves.


8. Blocking

The blocking in Barry Lyndon is often static. While this is certainly a creative decision by Kubrick, again recalling painted canvases and their frozen figures, it was also technically necessary in the candlelit scenes. Whenever the f/0.7 lenses were in use, the cast were apparently instructed to move as little as possible, to prevent them going out of focus. As one YouTube commenter points out, the stillness imposed by these lenses mirrors the stillness required of a painter’s model.

8 Ways “Barry Lyndon” Emulates Paintings

Kate Madison Interview

Kate demonstrates the action. Photo: Laura Radford

In the autumn of 2014 I served as director of photography on Ren: The Girl with the Mark, an incredibly ambitious short-form fantasy series, and have since been assisting with postproduction in various ways. Now that season one of the show is complete and ready to show to the public at last, I took the opportunity to sit down with director Kate Madison and ask her about some of the unique aspects of the show’s production…

Kate, many people will know you as the director, producer, co-writer, actor and general driving force behind Born of Hope, a Lord of the Rings fan film with over 35 million YouTube views. Did that film’s success open any doors for you, and what was the journey from there that led you to want to make a web series?

Born of Hope potentially opened doors even if they weren’t visible doors, in the sense that although it didn’t result in Hollywood coming calling, it created a a bit of a buzz and it became known in the industry. Myself and Christopher Dane [the lead actor] did start work on a fantasy feature film script called The Last Beacon and spent time trying to pursue that avenue. That then led into another feature film idea, so we were looking down the route of a feature film rather than anything else, and spent what felt like a number of years just not going anywhere.

I started thinking, what can we actually do when we don’t know investors or people with money. We concluded that with the internet – there’s an audience there, our audience is there. The crowdfunding thing which worked for Born of Hope is online, so we need to go back to that.

Many people will ask, “Why fantasy when there are so many cheaper and easier genres?” How do you respond to that?

For me, film and TV is about escapism, so I enjoy action-adventures and comedies and historical stuff – things that are not Eastenders. Fantasy is a huge genre. To me it’s a way to have the freedom to do whatever you want. I can take things I like – historical things, costumes, set design – and the joy of fantasy over period is, you can go, “I’m going to use this Viking purse with this medieval-looking helmet!” I like the freedom of fantasy. You can still have a character-driven, interesting story, set in somewhere fantastical, or even just a forest. There’s no dragons or creatures in Ren – so far – but the options are there, that’s the joy of it.

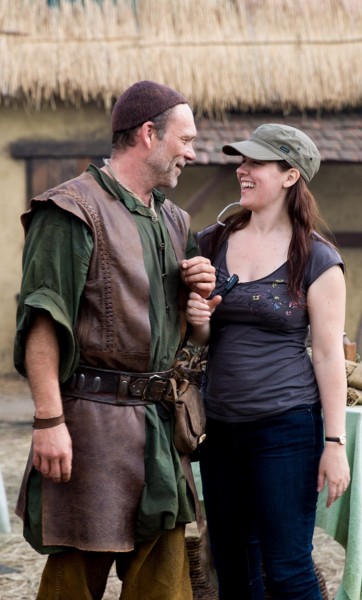
Having a laugh on set with Nick Cornwall (Dagron). Photo: Laura Radford

There was an enormous amount of goodwill and legions of volunteers who helped with Born of Hope. How important were those people, and finding others like them, when it came to making Ren?

Hugely important! Born of Hope could not have been made without a ton of volunteers, having no budget at all. With Ren, because we were in a similar position – which was a shame really, after all that time we still hadn’t got a big enough budget – we again had to rely on volunteers to make it possible!

There was an incredible sense of community, of shared ownership and very high morale throughout the production of Ren. Was it important to you to foster those things?

It’s incredibly important to keep morale high. I think it’s slightly easier when people are volunteering because they’re there because they want to be there and not just for the pay cheque. I was very keen to let everyone have fun on the project and also to have fun myself, because these projects are incredibly hard. So if the work was all done for the day, OK, I’m allowed to switch off now and grab a Nerf gun! People were staying there [at the studio], so they wanted to have a good time in the evening.

If we work a little later because there’s a break in the middle where we’re having a laugh, that means you can go later because everyone’s chilled rather than slogging away and not feeling like they’re enjoying themselves.

When people are volunteering, it feels like [the project] is everybody’s, and it is. People would come in and help and maybe end up designing a dress. The joy of filmmaking for me is the collaborative nature of it. There’s always someone behind you with an idea. You don’t feel like you’re ever on your own completely. If you’re at a loss, then someone else – whether it’s the DoP or the runner – [can suggest things].
A panoramic view of Ren's village set. Photo: Michael Hudson
A panoramic view of Ren’s village set. Photo: Michael Hudson

Very few micro-budget productions have their own studio, but Ren took over a disused factory for several months. How did that come about, and what were the benefits of it?

The benefits were through the roof, I’d say! We wonder if the project would have happened without it.

As we were going through budgets and scouting locations, we realised how difficult it was going to be [to shoot on location] – the logistics of making the village look like the village in the script and what if it rained for that week [the location was booked for]? It was just terrifying.

We started to think, is there another option here? It was just luck that Michelle [Golder, co-producer], on a dog walk, got talking to someone who knew someone. He mentioned this place in Caxton which was really big but we wouldn’t be in anyone’s way and we could just take it over. We were going to get a really good deal because it was sitting empty. It was twice as much for six months in Caxton in comparison with six days on location. And we would have the freedom to build whatever we wanted! There was all this interior space we could build in but also have costume rooms and production offices.

I’ve always loved the idea of having a place to work where everyone can come together. It’s fantastic nowadays that you can communicate with people all over the world, but you can’t beat a face-to-face conversation with someone and being able to look at the same picture and point at it and talk about it. It meant we were able to achieve a lot more in scope but also in quality.

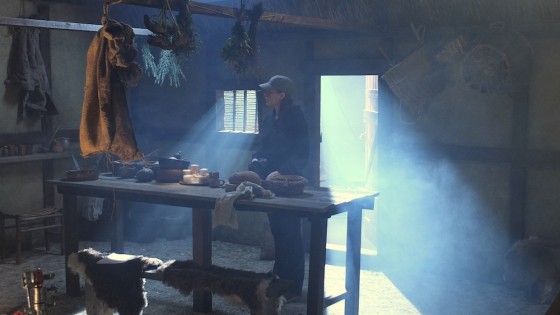
Kate contemplates one of the interior sets. Photo: Ashram Maharaj

Perhaps the greatest achievement of the production was creating a medieval village from scratch. Building the set, sourcing enough extras and costuming everybody were three massive challenges. How did you tackle those?

I live in Cloud Cuckoo land sometimes I guess! The set build, I thought, “It’s fine, we can do this, we can build this circular wall essentially with a few alleyways going off it and fill it with some market stalls.” Chris was in charge of building the set, and did an amazing job with a bunch of volunteers that came back over and over again. Although we bought a bunch of materials we made use of an amazing site called Set Exchange which is a sort of Freecycle for sets and we found a bunch of flats on there – that helped a lot.

Populating the village was always going to be challenging. Suzanne [Emerson] who also played the role of Ida got heavily involved in helping to find extras. She’s involved in a lot of the amateur dramatics in Cambridge. It was probably horrible [for Suzanne and Michelle] but an amazing miracle for us that we’d finish shooting one day and go, “You know we’re actually going to shoot that tomorrow and we need some people,” and then the next morning you’d turn up and people would show up to do it. We had varying numbers, but there was never a day when no-one showed up.

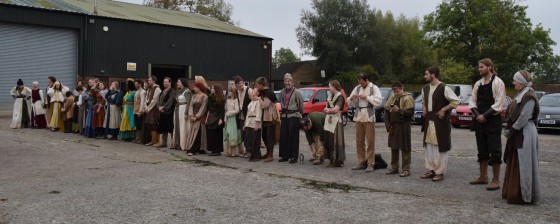
Supporting artists line up for a costume inspection in the car park of the Caxton studio. Photo: Michael Hudson

As for dressing them – we grabbed all of the Born of Hope costumes, Miriam [Spring Davies, costume designer] had a bunch of stock stuff as well. We ended up buying a bunch of things from New Zealand, from a costume house called Shed 11 that did Legend of the Seeker. The Kah’Nath armour came from Norton Armouries; John Peck – who had been involved with Born of Hope supplying stuff for orcs – I called on his good will again.

It was lovely to make the hero costumes from scratch. Miriam and I would go through the costume designs and then we went and looked at material. Chris and I randomly on a holiday to Denmark found some material we really liked for Karn’s tunic. Ren’s dress – I bought that material ages ago and it had been sitting around. Miriam and I took a trip to the re-enactors’ market as well. And we went to Lyon’s Leathers, spent what felt like a whole day wandering his amazing storeroom and picking out stuff for different characters, for Hunter’s waistcoat and Ren’s overdress, and we got the belts made there.

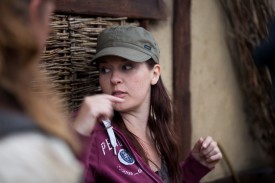
Discussing shots with me on set. Photo: Michael Hudson

I’ve heard you say more than once, “If it’s not right, it’s not worth doing.” How important is quality to you, and how do you balance that with the budgetary and scheduling pressures of such a huge project?

I’m not very good at compromising. If we’re going to spend months and months working on something that none of us are going to be happy with or proud of then it’s a waste of time and we might as well stop now. I think it’s probably that I’d like to be off in New Zealand making Legend of the Seeker, so I treat it as if I’m doing that I suppose, and I try not to let the budget or circumstances stop us from doing that.

I knew that most of the things are achievable. You know, to put together a costume that’s weathered well and looks really interesting is not hard to do, it just takes more time to do than buying it off the shelf and sticking it on, but the quality difference is so extreme. People will be much happier with you in the end if you’ve worked them hard for an amazing outcome than if you’ve worked them hard and it looks rubbish.

Sophie Skelton as the eponymous Ren. Photo: Alex Beckett

Most filmmakers are making stand-alone shorts or features, though the medium of web series is growing. Do you think it’s the way forward? Do you think there can be a sustainable career in it?

Ren is going to be an interesting experiment – can people watch something that, if we stuck [all the 10-minute episodes] together would be a pilot for TV – will they watch that on the web in the same way they would watch a TV thing or will they get bored and go and watch cats?

It is a new field. Although web series have been going on a long time, it’s still growing, there’s no funding in the UK, there’s no obvious way of having revenue from it, because the online platforms like YouTube, the advertising revenue is absolutely minimal as a percentage of views, and there’s only so many t-shirts you can sell. We struggled to raise money for the first season and we only raised enough to barely scrape our way through while putting in our own money.

Unless it does amazingly and maybe garners the interest of a big brand or sponsorship, if we’re having to crowdfund every time and we can’t crowdfund the huge figures that we’d need to make this, then it might not be the way forward for Ren and we might need to figure out a different thing… [unless] we get picked up by a bigger corporation like Amazon or Netflix.

We’ll see how this first season goes. We’d love it to become sustainable and a show that we can keep putting out and people can enjoy, but this is the experiment for that I suppose.

You can watch Ren: The Girl with the Mark for free, Tuesdays at 8pm GMT from March 1st, at rentheseries.com or on the Mythica Entertainment channel on YouTube.

Kate Madison Interview

Stop/Eject with Filmmakers Commentary

My award-winning short fantasy-drama Stop/Eject is just coming to the end of its festival run, and soon I’ll be publishing a breakdown of that run, how much it cost and how many festivals it got into. But in the meantime, here’s the director and producer’s commentary which Sophie Black and I recorded at the Cannes Film Festival in 2013.

If you haven’t seen the film, you can watch it without commentary below.

Next week I’ll be posting the cast commentary with Georgina Sherrington, Oliver Park and Therese Collins.

Stop/Eject with Filmmakers Commentary

5 Things Directors Should Know About Cinematography

IMG_4793_2watermark-1000pxAny director worth their salt will be skilled in telling a story with the camera. But, quite understandably, they’re not familiar with the key concepts of cinematography – particularly the lighting side of cinematography – which a DP employs every day to create images that have impact, mood and production value. For the most part, directors don’t need to know these things – after all, that’s what the DP’s there for – but understanding a few of the basic concepts can help set up your film for visual excellence before the DP even gets involved.

1. We don’t light from the front.

It is logical to assume that light coming from behind the camera will give the best illumination to a scene. And on a purely cold, scientific level, it’s true. But on an aesthetic level, it couldn’t be more wrong. Quite apart from the practical issues of boom shadows and actors squinting in the sun, frontlight gives a flat, depthless image similar to a photo taken with flash.

Lighting from behind. Gotta love it.

Similarly, anyone who has taken photos with a camera in automatic mode will have been told – or quickly learnt – that shooting towards the sun, or when indoors, towards a window, is a bad idea, resulting in silhouettes and/or blown-out skies. So directors are often surprised when towards the sun (or a window) is EXACTLY the direction I want to shoot in, because it supplies beautiful backlight and allows me to fill in the shadow side – the side towards camera – as I see fit. No, it’s not going to be a silhouette (unless that’s what we’re going for) because I have a lamps and I have manual control of my iris.

2. Dark scenes do not require a camera with good low light sensitivity.

It depends what you mean by dark. A scene that is dark as a creative decision won’t actually be dark in reality because it will still be lit, perhaps highly lit, to create a moody, contrasty look. Therefore the camera’s sensitivity is not much of an issue.

A scene that is dark because you don’t have the budget to light it properly – yes, that’s going to need a sensitive camera if you’re going to see anything but noise.

3. You can’t fix everything in the grade.

It is truly amazing what can be done with today’s colour correction software, but there are two things it can’t do: it can’t save an image that was seriously underlit or underexposed, and it can’t change the angle or quality of light. Colour and intensity, yes. Angle and quality (soft/hard), no. And since these are the main things a DP determines, grading can never replace a good cinematographer. If it doesn’t look good on the monitor on the day, it will probably never look good.

4. We can’t light without seeing the blocking.

I can’t count the number of times I’ve turned up on set and asked to see the blocking, and been told no because the actors actors are in make-up, “but they’re going to stand kind of here.” In most circumstances, the first scene of the day should be blocked BEFORE the actors go to make-up. That way the DP can be lighting while the cast is getting made up, which is much more time efficient. Otherwise the DP tinkers about trying to light the space and looking at their watch, then when the talent comes out everyone is kept waiting while the DP changes all the lighting. Because inevitably the actors will want to do something different than what the director had in mind, or the director forgot to mention that one of the actors has to be seen coming through the door at the start, etc, etc. Blocking can also throw up problems with the scene which can be solved by various other departments while make-up is going on.

Great costume - check. Great location - check. (Photo from The First Musketeer by Jessica Ozlo)
Great costume – check. Great location – check. (Photo from The First Musketeer by Jessica Ozlo)

5. A good camera and a good DP are not substitutes for good design.

Light and lensing can only do so much. If what’s put in front of the camera doesn’t look good to start with, there’s very little I can do about it. Get an art director. Please, please, please, get an art director. They will do much more for the look of your film than I can. I don’t care if it’s a futuristic sci-fi movie or a gritty drama shot in a student flat, you need an experienced person with an artistic eye adding character to the sets and locations, developing a palette and composing everything beautifully for the camera.

5 Things Directors Should Know About Cinematography

Classic Single Developing Shot in Back to the Future: Part II

“What the hell’s going on, Doc? Where are we? When are we?”

“We’re descending towards Hill Valley, California, on Wednesday, October 21st, 2015.”

“2015? You mean we’re in the future?”

Yep, we’re all in the future now.

The Back to the Future trilogy are the films that made me want to be a filmmaker, and 30 years has not dulled their appeal one bit. In a moment I’ll give a single example of the brilliance with which Robert Zemeckis directed the trilogy, but first a reminder…

If you’re in the Cambridge area, you can see Back to the Future along with my short film Stop/Eject at the Arts Picturehouse next Monday, Oct 26th, 9pm. You need to book in advance here.

If you can’t make it, I’m pleased to announce that Stop/Eject will be released free on YouTube on November 1st.

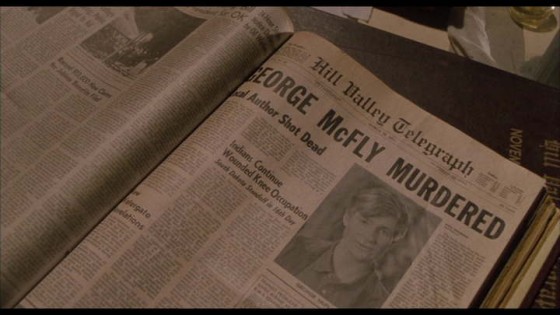
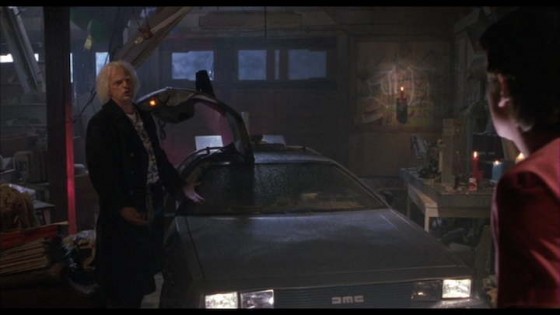
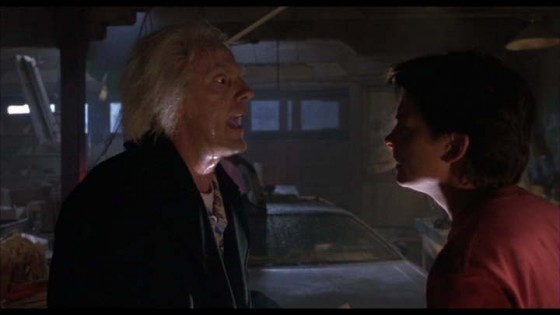
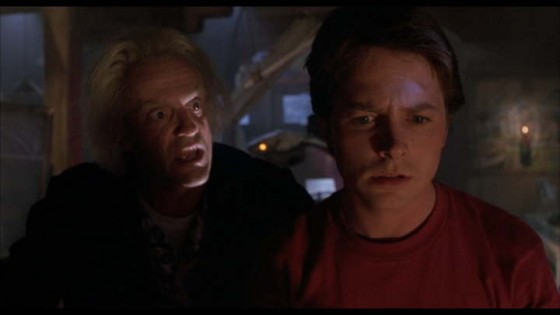
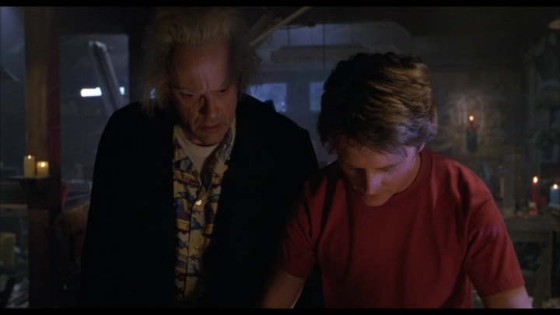
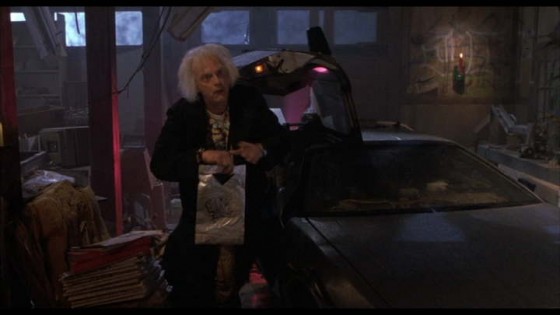
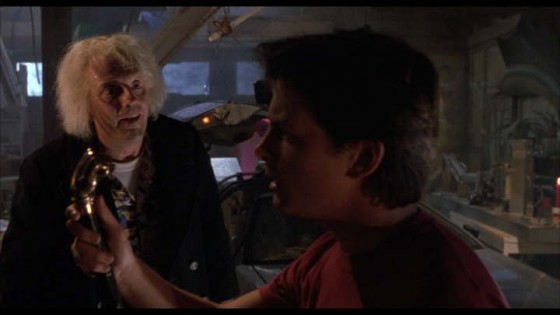
Stop-Eject release poster RGBAnyway, back to Back to the Future. Robert Zemeckis is a major proponent of the Single Developing Shot – master shots that use blocking and camera movement to form multiple framings within a single take. Halfway through BTTF: Part II comes a brilliant example of this technique. Doc has found Marty at his father’s graveside, the pair having returned from 2015 to a nightmarish alternate 1985. In an exposition-heavy scene, Doc explains how history has been altered and what they must do to put it right.

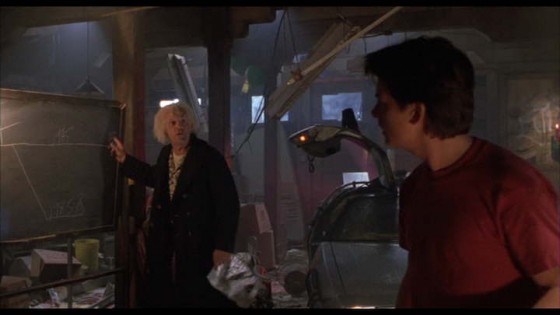
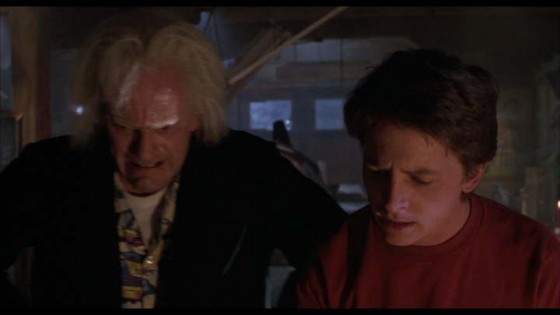
It could have been very dull if covered from a lot of separate angles (and not acted by geniuses). Instead Zemeckis combines many of the necessary angles into a single fluid take, cutting only when absolutely necessary to inserts, reverses and a wide. Here are the main framings the shot moves through.

It starts on a CU of the newspaper…

Screen Shot 2015-10-19 at 21.30.42

…then pulls out to a 2-shot…Screen Shot 2015-10-19 at 21.31.22

…which becomes a deep 2 as Doc walks away…Screen Shot 2015-10-19 at 21.31.47

…before pushing in to Doc at the blackboard…Screen Shot 2015-10-19 at 21.32.07

…and panning with him to the DeLorean…Screen Shot 2015-10-19 at 21.32.25

…then pulls back out to include Marty again…Screen Shot 2015-10-19 at 21.32.41

…rests briefly on another 2-shot…Screen Shot 2015-10-19 at 21.32.46

…then becomes a deep 2 once more as Doc moves away…Screen Shot 2015-10-19 at 21.32.55

…then a flat 2 again…Screen Shot 2015-10-19 at 21.33.16

…then a deep 2 again…Screen Shot 2015-10-19 at 21.33.33

…then pushes in to a tighter 2 as Marty realises it’s all his fault…Screen Shot 2015-10-19 at 21.33.40

…then it becomes an over-the-shoulder as Marty turns to Doc at the DeLorean…Screen Shot 2015-10-19 at 21.33.49

…then a 50/50 as they face each other…Screen Shot 2015-10-19 at 21.33.59

…then it tracks back to the blackboard…Screen Shot 2015-10-19 at 21.34.03

…and tracks in further to emphasise the reveal of the second newspaper…Screen Shot 2015-10-19 at 21.34.16

…then dollies back with Marty as he takes it into the foreground…Screen Shot 2015-10-19 at 21.34.26

…then dollies into a tight 2 to end.Screen Shot 2015-10-19 at 21.34.41I wonder how many takes they did of this, and how many different takes are used in the edit. Just after the reveal of the second paper there’s a cut to Einstein the dog, and when we come back to the developing shot the framing is slightly different, suggesting the dog shot is there to allow a splicing of takes more than anything else. All the other cuts in the scene are strongly motivated though, and seem to be there for narrative reasons rather than take-hopping.

Given the shortness of the lens – not more than a 35mm, I reckon – it’s likely that Michael J. Fox had to deliberately move out of the camera’s way at certain points, and the table seen in the opening frame may have been slid out by grips early on in the take to facilitate camera movement. I’d love to see some behind-the-scenes footage from this day on set, but none seems to exist.

So there you have it, one small example of the inventiveness which makes these films so enduring. Now stop reading this and get back to your trilogy marathon!

Classic Single Developing Shot in Back to the Future: Part II

Directing Amelia’s Letter

Georgia Winters as Amelia. Photo: Colin Smith

Amelia’s Letter premiered last week at the Cincinnati Film Festival. It’s the first official selection in what we hope will be a long festival run for this moving little ghost story written by Steve Deery and produced by Sophia Ramcharan. Here’s the synopsis:

Amelia receives a letter from her publisher. Over one hundred years later its legacy still haunts writers who visit her Lodge. Gordon discovers the letter and thinks there is a story to be told. It would be better for him if he didn’t try and tell it.

I want to say a bit about my directing process on the film, but beware – this post contains spoilers!

In a preproduction blog entry I talked about writing backstories for the characters, and touched on the films I’d been watching as research. Today I’ll pick up where I left off and carry on through to production.

The backstories, by the way, were really useful to me throughout the process. They provided a filter through which I could view the script, focusing in on what the characters wanted and where they were coming from. And they made it easy to answer many of the questions the actors had about their characters.

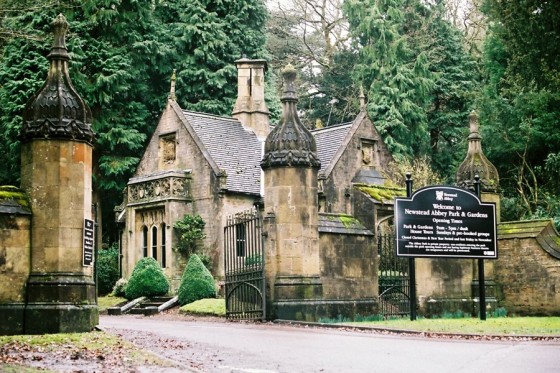
The gatehouse of Newstead Abbey, the film's location. Photo: Colin Smith
The gatehouse of Newstead Abbey, the film’s location. Photo: Colin Smith

I decided early on to give the film overtones of gothic horror. This can be seen most clearly in the location and costume design. I watched several horror films, gothic and otherwise, as well as ghost stories, during preproduction. The Awakening (2011, dir. Nick Murphy) and The Woman in Black (2012, dir. James Watkins) proved to me the importance of building a strong emotional spine before bringing in the scares, and the latter film along with The Innocents (1961, dir. Jack Clayton) showed how effective a slow, subtle reveal of a ghost in a corner of the frame can be.

However, as the shoot got closer, I realised I had been too fixated on the genre, and had neglected the very emotional spine I’d admired in the above films. At its core, Amelia’s Letter is about a woman committing suicide. I therefore set out to watch some films that dealt with this topic. First up was Seven Pounds (2008, dir. Gabriele Muccino) – for a Hollywood film starring Will Smith, it’s quite dark and thought-provoking – followed by Wristcutters: A Love Story (2006, dir. Goran Dukic) – an inventive and darkly humourous American indie set in a suicides’ afterlife which is just like the real world, only everything’s a bit more rubbish – and finally Veronika Decides to Die (2009, dir. Emily Young) – in which Sarah Michelle Gellar gives a surprisingly good portrayal of a failed suicide learning to love life again.

I can’t point to any specific tips I gleaned from those films, but they certainly made me think more about the issue. Indeed, during Veronika Decides to Die, I had a breakthrough regarding Amelia. I recalled a Richard Herring podcast I’d listened to in which Stephen Fry, Herring’s interviewee, had talked very openly about his bipolar disorder and a recent suicide attempt he had made. I realised that Amelia should be bipolar. Sufferers are often highly creative people, like Amelia, and sadly have a much higher rate of suicide. Actress Georgia Winters embraced the idea, and although it’s not at all explicit from watching the film that Amelia is bipolar, the highs and lows she goes through while reading the letter are a result of this behind-the-scenes decision.

Tina Harris as Barbara. Photo: Colin Smith

Another thing that was a big influence on my interpretation of the script was a tome which a relative bought me one Christmas during my early teens. The Giant Book of Mysteries (edited by Colin, Rowan and Damon Wilson) features a memorable chapter in which several ghost-hunters theorise that spooks are actually something akin to tape recordings. When a tragic event happens, the theory goes, the emotions of the people involved – emitted as electromagnetic waves from the brain – can be  “recorded” by the electrical field of any water nearby, in the same way that sounds can be recorded on the iron oxide of a cassette tape.

I seized this idea as a way of explaining, to the actors if not to the audience, how the supernatural events in Amelia’s Letter function. Once the various authors in the film glimpse Amelia’s ghost and are drawn out of the cottage, it would have been easy to say that these authors are in a trance, but this seemed too easy. Instead I decided that the emotions which Amelia felt when she jumped into the lake were recorded by the water and radiate out from it. The closer they get to the lake, the more their own emotions are taken over by hers until eventually they’re feeling exactly what she did, with the inevitable consequence that they kill themselves too.

Carrying this theory throughout the film, it meant that the glimpses which the authors see of Amelia from the cottage window are simply “recordings” of moments in her life – perhaps a surge of creativity, or depression. By coincidence, the art department had painted fake mould into the corners of the study, which tied in beautifully with the water recording theory and helped explain the supernatural events that occur at the cottage.

Frank Simms as Gordon, with Amelia. Photo: Colin Smith
Frank Simms as Gordon, by the lake with Amelia. Photo: Colin Smith

Although much of the above will not be directly apparent to the viewer, I hope that it gave extra depth and veracity to the performances and so makes the film more effective overall.

Amelia’s Letter is a Stella Vision production in association with Pondweed Productions. Find out more at facebook.com/ameliasletter

Directing Amelia’s Letter

Why Make Films?

Mini-DV
Shooting Mini-DV in 2003

When I went freelance at the end of the last century, it felt like anything was possible.  If you had the talent, you could go out there and make a great short that could win awards at festivals and get you a good agent, or you could go out and make a feature which made the industry sit up and take notice and hire you on a fully-budgeted production. Call me old and cynical, but that now feels like a ridiculous pipe-dream.

15 years ago, the Mini-DV revolution was just kicking off. Since then we’ve had the DSLR revolution, not to mention the collapse of expensive celluloid as the only accepted acquisition and distribution format for “proper” movies. The technology has removed every barrier to entry, and now the world is swamped with filmmakers.

This is great, but it has had two highly destructive side effects.

Firstly, as a filmmaker, it’s virtually impossible to stand out any more amongst the thousands of micro-budget movies that get made every year, short-form and long. Would I get coverage in The Guardian today for making a fantasy feature on £20,000? I think not.

Shooting on a DSLR in 2013

And although there is now a huge number of film festivals around the world, there are so many people entering them, that the odds of getting in are tiny, and the odds of winning awards even smaller. So once you’ve made a film, what do you do with it? Putting it online is the only option left. Except there are so many films, and other forms of video content, on the internet that you have to be incredibly lucky to get any reasonable number of people to watch yours.

Secondly, as jobbing crew, though there are plenty of productions to work on, most of them are unpaid. Because there’s no more money to go around than there was 15 years ago – it’s just more thinly spread. When I started out, unpaid work was something you did for a couple of years until you could get enough paid work to live on. Now it’s entirely possible to do unpaid gigs for decades without it ever leading to enough paid work to quit your day job.

In a nutshell, the industry has become a farce.

Which brings me back to my question, “Why make films?”

The only answer left, and perhaps the only one that ever truly mattered, is, “Because I love it.”

Do not become a filmmaker because you think you can break into Hollywood. Don’t do it because you want to get rich. Don’t expect to see your work on cinema release, to win Oscars, or to work with the stars. Don’t even expect to reach wide audiences or make a good living.

Just do it because it’s the only thing you want to do with your life, and be happy with that. I know I am.

Why Make Films?