12 Tips for Better Instagram Photos

I joined this social media platform last summer, after hearing DP Ed Moore say in an interview that his Instagram feed helps him get work. I can’t say that’s happened for me yet, but an attractive Instagram feed can’t do any creative freelancer any harm. And for photographers and cinematographers, it’s a great way to practice our skills.

The tips below are primarily aimed at people who are using a phone camera to take their pictures, but many of them will apply to all types of photography.

The particular challenge with Instagram images is that they’re usually viewed on a phone screen; they’re small, so they have to be easy for the brain to decipher. That means reducing clutter, keeping things bold and simple.

Here are twelve tips for putting this philosophy into practice. The examples are all taken from my own feed, and were taken with an iPhone 5, almost always using the HDR (High Dynamic Range) mode to get the best tonal range.


1. choose your background carefully

The biggest challenge I find in taking snaps with my phone is the huge depth of field. This makes it critical to have a suitable, non-distracting background, because it can’t be thrown out of focus. In the pub photo below, I chose to shoot against the blank pillar rather than against the racks of drinks behind the bar, so that the beer and lens mug would stand out clearly. For the Lego photo, I moved the model away from a messy table covered in multi-coloured blocks to use a red-only tray as a background instead.


2. Find Frames within frames

The Instagram filters all have a frame option which can be activated to give your image a white border, or a fake 35mm negative surround, and so on. An improvement on this is to compose your image so that it has a built-in frame. (I discussed frames within frames in a number of my recent posts on composition.)


3. try symmetrical composition

To my eye, the square aspect ratio of Instagram is not wide enough for The Rule of Thirds to be useful in most cases. Instead, I find the most arresting compositions are central, symmetrical ones.


4. Consider Shooting flat on

In cinematography, an impression of depth is usually desirable, but in a little Instagram image I find that two-dimensionality can sometimes work better. Such photos take on a graphical quality, like icons, which I find really interesting. The key thing is that 2D pictures are easier for your brain to interpret when they’re small, or when they’re flashing past as you scroll.


5. Look for shapes

Finding common shapes in a structure or natural environment can be a good way to make your photo catch the eye. In these examples I spotted an ‘S’ shape in the clouds and footpath, and an ‘A’ shape in the architecture.


6. Look for textures

Textures can add interest to your image. Remember the golden rule of avoiding clutter though. Often textures will look best if they’re very bold, like the branches of the tree against the misty sky here, or if they’re very close-up, like this cathedral door.


7. Shoot into the light

Most of you will not be lighting your Instagram pics artificially, so you need to be aware of the existing light falling on your subject. Often the strongest look is achieved by shooting towards the light. In certain situations this can create interesting silhouettes, but often there are enough reflective surfaces around to fill in the shadows so you can get the beauty of the backlight and still see the detail in your subject. You definitely need to be in HDR mode for this.


8. Look for interesting light

It’s also worth looking out for interesting light which may make a dull subject into something worth capturing. Nature provides interesting light every day at sunrise and sunset, so these are good times to keep an eye out for photo ops.


9. Use lens flare for interest

Photographers have been using lens flare to add an extra something to their pictures for decades, and certain science fiction movies have also been known to use (ahem) one or two. To avoid a flare being too overpowering, position your camera so as to hide part of the sun behind a foreground object. To get that anamorphic cinema look, wipe your finger vertically across your camera lens. The natural oils on your skin will cause a flare at 90° to the direction you wiped in. (Best not try this with that rented set of Master Primes though.)


10. Control your palette

Nothing gives an image a sense of unity and professionalism as quickly as a controlled colour palette. You can do this in-camera, like I did below by choosing the purple cushion to photograph the book on, or by adjusting the saturation and colour cast in the Photos app, as I did with the Canary Wharf image. For another example, see the Lego shot under point 3.


11. Wait for the right moment

Any good photographer knows that patience is a virtue. Waiting for pedestrians or vehicles to reach just the right spot in your composition before tapping the shutter can make the difference between a bold, eye-catching photo and a cluttered mess. In the below examples, I waited until the pedestrians (left) and the rowing boat and swans (right) were best placed against the background for contrast and composition before taking the shot.


12. Quality control

One final thing to consider: is the photo you’ve just taken worthy of your Instagram profile, or is it going to drag down the quality of your feed? If it’s not good, maybe you should keep it to yourself.

Check out my Instagram feed to see if you think I’ve broken this rule!

12 Tips for Better Instagram Photos

5 Tips for Working with Practicals

As the sensitivity and dynamic range of cameras has increased, practicals have become a more and more important and popular tool in the cinematographer’s arsenal. A practical is any light source that appears in the frame. It could be a fluorescent strip-light, a table lamp, car headlights, candles, a fireplace, an iPad, fairy lights, street lamps, a torch, a security light… any light that could be realistically found in the place where your scene is set.

Here are five pieces of advice I’ve put together from my own experiences working with practical lights.


1. Liaise continually with the director and art department.

Production Designer Stuart Craig and Cinematographer Slawomir Idziak PSC confer on the set of Harry Potter and the Order of the Phoenix.

Although the bulb, wiring and power supply are the responsibility of the lighting department, the fixture itself falls under the purview of the art department. A good production designer will be thinking of light sources from the very beginning of their set design process. This is the start of a conversation which will continue throughout preproduction, as you the DP ask for fixtures in certain positions to make the set and actors look good, and the designer either says yes or asks for compromises so as not to ruin the aesthetics or believability (or budget!) of their design. The places a DP wants light sources in order to get the best modelling of the talent are often not the places a real human being would choose to install a light source in their home/office/dungeon etc. Some designers will demand realism and fight you on these decisions; others are open to artistic license. Either way, you must respect the symbiotic relationship between your two departments and do your best to reach a solution that works for both of you.

Keeping the director in the loop is also very important. When it comes to lighting, practicals are one of the things most likely to cause disagreement between the director and DP. You may have spent an hour lighting the set to be motivated by the candles all around, only for the director to walk onto set and say that they feel it makes no sense within the story for someone to have lit the candles in this scene. At which point, if you can’t change the director’s mind, you will find yourself hastily relighting the set while the 1st AD shakes their head in despair.


2. Sometimes it’s as simple as turning it on.

A Serious Man (DP: Roger Deakins CBE, ASC, BSC)

Earlier in my career, whenever I saw a practical, I felt that I had to set up a movie light somewhere out of frame in order to beef up the amount of light apparently coming from that practical. And traditionally, this is indeed the way DPs have worked, because film stocks weren’t sensitive enough to get an acceptable exposure from typical practicals like table lamps. Or it was impossible to find a level for the practical where it was bright enough to expose the talent but dim enough that the lamp itself didn’t read on camera as an ugly, over-exposed white blob.

But today’s digital cameras have a wider dynamic range, making it much easier to expose both the source and the subject acceptably. So ask yourself, do you really need that movie light? Roger Deakins, the world’s most celebrated living cinematographer, says he commonly lights his sets now with predominantly practical sources. Take a look at your scene without any additional lights, and only add extra sources if your practical’s illumination isn’t reaching the distance it needs to.

And practicals don’t even need to light the talent. Sometimes you have a scene perfectly well illuminated with other sources, but turning on a practical in the background just adds the icing on the cake. It may not illuminate anything but a small pool immediately around itself, but that little pool of orange light might add colour contrast, production value and interest. I’ve often seen daylight interior scenes on TV or in movies where bright shafts of “sunlight” are blasting in through a window, and no-one would realistically need to turn an artificial light on, but nonetheless several table lamps are glowing away in the background – because it looks great!


3. Always use dimmers.

As I’ve already said, finding that perfect brightness for your practical can be a delicate balancing act, so always have your crew put practicals on dimmers (a.k.a. “squeezers”) to make it easy to find that right level. Besides, practicals often look best with a warmer colour temperature, and you can get that by dimming them down, if they’re tungsten, adding to the cosy feel.


4. Keep other sources off the practical.

One of the reasons practicals look good is because they create contrast in the frame: a bright patch spreading out into darkness. If other light is falling on the practical, this effect will be washed out and reduced. If the other source is bright, it may even make the practical look like it’s not switched on. (Just like if you take a torch outside in daylight and turn it on, it doesn’t look like it’s on at all because the sun is so overpowering.)

If possible, other sources should be flagged so that they don’t hit the practical. This is something that an experienced gaffer will often have done as a matter of course.


5. Dim the camera side of the practical.

O Brother, Where Art Thou? (DP: Roger Deakins CBE, ASC, BSC)

Even with the wide dynamic range of today’s cameras, the flame or bulb of a practical may still look unpleasantly bright on camera. To deal with this, depending on the design of the fixture, you may be able to hide a small piece of ND gel inside it on the camera side. If properly arranged, this will cut the light travelling directly into the camera lens, but not the light shining in other directions and illuminating the talent.

Alternatively, the glass case of a lantern can be sprayed black on the camera side. The paint will not be picked up by the camera because there will still be a lot of light coming through it, but it should cut enough brightness to eliminate lens flare and reduce highlight clipping.


I hope these tips are helpful next time you shoot with practicals. Happy lighting, and merry Christmas!

5 Tips for Working with Practicals

5 Ways to Use Hard Light Through a Window

The first step in lighting a daytime interior scene is almost always to blast a light through the window. Sometimes soft light is the right choice for this, but unless you’re on a big production you simply may not have the huge units and generators necessary to bounce light and still have a reasonable amount of it coming through the window. So in low budget land, hard light is usually the way we have to go.

Now, I used to think that this hard window light had to hit the talent’s faces, otherwise what’s the point? But eventually I learnt that there are many things you can do with this light….


1. Light the talent directly.

This is what I always used to do. The problem is that the light will be very harsh. If there is a good amount of natural light coming in through the window too, that might soften the look enough. If not, slipping a diffusion frame in front of the light will take the edge off the hardness. And it depends which way the talent is facing. If the hard light is backlighting or edging them, the effect might well be beautiful.

prison2
Ren: The Girl with the Mark, S1 E4, director: Kate Madison, DP: Neil Oseman
Hard side light from an Arri M18 outside the window, combined with a 4x4 kino from a 3/4 angle inside the room
The Gong Fu Connection, director: Ted Duran, DP: Neil Oseman


2. Light part of the talent directly.

This is a nice way to get the best of both worlds. You hit their clothes with the hard light, maybe a bit of their chin too; it creates contrast, brings out the texture in the costume, and adds dynamics because as the talent moves, the edge of the hard light will move around on them. To light the parts which the hard source doesn’t hit you can use bounce, or a kinoflo Window Wrap.

ren4-commander-house
Ren: The Girl with the Mark, S1 E4, director: Kate Madison, DP: Neil Oseman
Ren: The Girl with the Mark (Mythica Entertainment, dir. Kate Madison)
Ren: The Girl with the Mark, S1 E2, director: Kate Madison, DP: Neil Oseman


3. Light the floor.

Arrange the light so it hits the floor, creating a skip bounce. Unless the floor’s a very dark colour, the light will bounce back up and light your talent softly from below. While some people are afraid of the “monster” look of lighting from below, it can often produce a very beautiful look. It’s well worth exploring. Alternatively, bounce the hard window light off a wall to create a soft side light.

Manure, director: Michael Polish, DP: M. David Mullen
This photo from the set of Above the Clouds (director: Leon Chambers) shows a white sheet which I laid on the floor to skip-bounce the HMI outside the window. Some of its effects can be seen on Rupert's face (right)!
This photo from the set of Above the Clouds (director: Leon Chambers) shows a white sheet which I laid on the floor to skip-bounce the HMI outside the window.


4. Light the background.

A hot splash of “sunlight” on the background is a common way to add interest to a wide shot. It can show off the production design and the textures in it, or help frame the talent or separate them from the background.

The Crown, S1 E10 "Gloriana", dir.
The Crown, S1 E10 “Gloriana”, director: Philip Martin, DP: Ole Bratt Birkeland
My Utopia, director: Patrick Moreau, DP: Joyce Tsang


5. Light nothing.

Sometimes the most effective way to use a shaft of light through a window is simply as background interest. Volumize the light using smoke, and it creates a nice bit of contrast and production value in the scene. Silhouetting characters in front of the beam can be very effective too. 

33_GuardRoomWide1
Ren: The Girl with the Mark, S1 E4, director: Kate Madison, DP: Neil Oseman
Big Sur, director: Michael Polish, DP: M. David Mullen


Any that I’ve missed? What are your techniques for lighting through windows?

5 Ways to Use Hard Light Through a Window

5 Tips for Shooting Water

As well as the general principles of cinematography like three-point lighting, short key and so on, there are specific principles that apply to certain situations only. Since these situations don’t always come up, it can take a little longer to develop a mental toolkit to get the best out of them. One such situation is shooting water – scenes by riversides, on beaches, beside swimming pools or in bathrooms. What are the tricks you can use to get the most cinematic look?


1. Use a circular polarising filter

4952a23d13929fe1903f601843a9ef4d
Without (left) and with (right) a polarising filter

A polarising filter cuts out all light waves except those travelling in a certain plane. Since reflections are usually only in a single plane, by rotating a circular polariser filter until you hit the right angle, you should be able to reduce the reflections you’re seeing. This can have an impact on how water appears on camera. On an overcast day, a CP will allow you to reduce the reflections of the grey sky, making the water look clearer and bluer.


2. Get sparkly

All the evidence you need that shooting towards the sun is good.
Shooting towards the sun provides both lovely backlight and sparkles on the river in this shot from Stop/Eject.

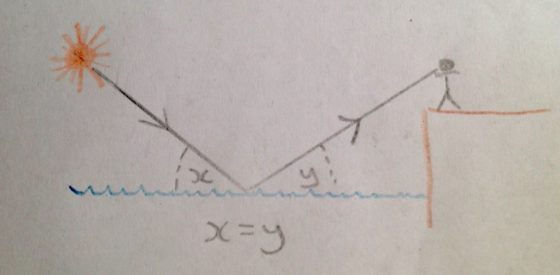
Water will always look prettier, particularly large bodies of it, if the sun is sparkling on it. How do you capture this on camera? Use the principle that the angle of incidence equals the angle of reflection, the same principle you use when positioning a bounce board. As with all day exteriors, shooting at the correct time of day is critical. You want the sun to bounce off the surface of the water and into your lens, which means being on the opposite side of the water to the sun, with the camera facing the sun. Use a top flag on your matte box (a.k.a. “top chop” or “eyebrow”) to prevent lens flare if you so wish.

img_1527


3. Get rippling light

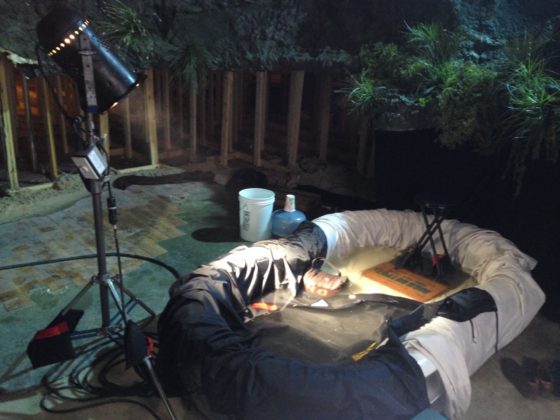
Using a paddling pool and a par can to create a rippling light effect on The Little Mermaid. Note the black fabric as per tip 4 below.
Using a paddling pool and a par can to create a rippling light effect for close-ups on The Little Mermaid.  Note the black fabric as per tip 4 below. At the white end of the paddling pool you can see the stool where the talent sat.

The same principle can be applied to capture rippling light effects on walls, faces, etc. This time you want the sun, or artificial light source, to bounce off the surface of the water and hit your subject. You can suggest an off-camera body of water when there is none by carefully positioning a fish tank, paddling pool or similar in relation to the light and your subject.


4. Kill the bottom bounce

img_1529

Beware that not all the light will bounce off the surface of the water. Some will pass through it, bounce off the bottom of the pool and then hit your subject. If the bottom of the pool isn’t a dark colour, this unmoving bounce light will overpower the rippling light coming off the surface. Lay duvetyne or other black fabric on the bottom of the pool so that the only bounce is from the surface.


5. Fake it

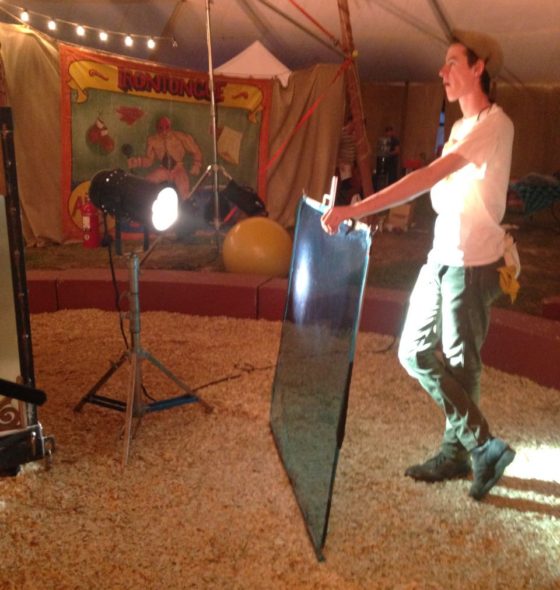
A grip standing by to fake rippling watery light on The Little Mermaid
Grip Sawyer Oubre standing by to fake rippling watery light on The Little Mermaid

If you need to create a rippling light effect without using water, you can fake it with a sheet of blue gel on a frame in place of the water surface. Wobble the frame slightly (only slightly, or the sound department will start to yell at you) and the gel will ripple in the frame, creating a similar effect to water. Thanks to my key grip on The Little Mermaid, Jason Batey, for introducing me to this technique.

Another way to simulate watery light is to bounce a lamp off silver paper or fabric which is being rippled by a fan. More on this technique here.

What about shooting UNDER water? Just one tip for that: hire an underwater DP.

5 Tips for Shooting Water

24 Things I Learnt from CineFest

img_1220Last week I was fortunate enough to attend the Bristol International Festival of Cinematography: five days of masterclasses and panel discussions with a range of DPs from Oscar-winners like Chris Menges, ASC, BSC and Billy Williams, BSC, OBE to emerging cinematographers like Rina Yang. It was fascinating to watch the likes of Williams lighting the purpose-built set and explaining his decisions as he went. I learnt a huge amount, so I decided to share some of the opinions and nuggets of wisdom I collected.

  • Everyone agrees that the role of the DP is being diminished. Films are more collaborative than they used to be, often with lots of input from the VFX team right from the start.

Getting Work

  • You have to create your own luck. (Rina Yang)
  • Going to LA parties and schmoozing helps. (Roberto Schaefer, AIC, ASC)
  • Each clip on your showreel should make the viewer feel something. (Matt Gray, BSC)

Prep

  • Director Philippa Lowthorpe and Gray, her DP, spent weeks of prep getting on the same page when they worked together – chatting, exchanging photos, films, and so on.
  • Spend as much time as you can with the director in the early stages of prep, because as you get closer to the shoot they will be too busy with other stuff. (Schaefer)
  • Start with ten ideas about how you want to approach the cinematography of the film. If you hang onto five of them throughout the shoot you’re doing well. (Gray)
  • Hire a gaffer who knows more than you do. (Schaefer)

Equipment

  • On Gandhi, co-cinematographer Billy Williams, BSC, OBE was granted only half of the lighting kit he asked for. That was a $22 million movie which won eight Oscars!
  • Schaefer usually carries a 24’x30′ mirror in his kit, in case he needs to get an angle from somewhere where the camera won’t fit.
  • Schaefer doesn’t used OLED monitors to light from, because the blacks are richer than they will ever be seen by an audience on any other device, including in a cinema. He won’t judge the lighting by the EVF either, only a monitor calibrated by the DIT.
  • Focus drop-off is faster on digital than on film. Hence the current popularity of Cooke lenses, which soften the drop-off.
  • Nic Knowland, BSC uses a DSLR as a viewfinder to pick his shots. He also likes to record takes on his Convergent monitor so he can review them quickly for lighting issues.

On Set

  • You have to give the actors freedom, which may mean compromising the cinematography. (Nigel Waters, BSC)
  • Gray would never ask an actor to the find the light. The light needs to find them! As soon as actors are freed from marks, they can truly inhabit the space. [Note: in my experience, some actors absolutely insist on marks. Different strokes for different folks.]
  • On digital, everyone wants to shoot the rehearsal. (Schaefer)
  • Digital encourages more takes, but more takes use up time, drains actors’ energy and creates more work for the editor. Doing fewer takes encourages people to bring their A game to take one. (Williams)
  • Director Philippa Lowthorpe prefers a DP who operates because there is no filter between the ideas you’ve discussed in prep and the operation of the camera.

Lighting

  • Sometimes when you start lighting a set, you don’t where you’re going with it. You build a look, stroke by stroke, and see where it takes you. (Knowland)
  • Williams advocates maintaining the same stop throughout a scene, because your eye gets used to judging that exposure.
  • Knowland relies more on false colours on his monitor than on his light meter.
  • Schaefer often foregoes his traditional light and colour meters for an iPad app called Cine Meter III.
  • Knowland will go to 359º on the shutter if he’s struggling for light.
  • It’s worth checking the grade on a cheap monitor or TV. That’s how most people will watch it. (Schaefer)
24 Things I Learnt from CineFest

5 Tips for Lighting a Green Screen

Green screen work is almost unavoidable for a modern cinematographer. In an age when even the most basic of corporates might use the technique, and big blockbusters might never leave the green screen stage, knowing how to light for it is essential. The following tips apply equally to blue screen work….

IMG_0837 1. Light the screen at key.

Or to put it another way, your screen should not be over- or under-exposed. If you use a light meter, you can hold it at various spots on the screen (taking care not to block any light with your body) and check that the reading always matches what the iris of your lens is set to. If your camera or monitor has a false colours option, you can use this to check the level and consistency of the exposure across the screen.

2. Use soft sources.

Bouncing tungsten lamps off polyboard is a cheap and effective way to spread soft light across a green screen. Typically you will want two sources, one to each side of the screen. They will need to be well flagged so that their light does not spill onto the subject.

On larger budgets, Kinoflo Image 85s or 87s are often used to illuminate green screens. They are 4ft 8-bank units which put out a large amount of soft light. Ask your hire company to supply them with spiked green tubes; designed especially for green screen work, these tubes help to increase the colour saturation of the screen. (Spiked blue tubes are also available.)

3. Control spill.

As far as possible, reflected green light from the screen should not fall on the subject. The main way to ensure this is to put as much distance as possible between the screen and the subject.

I learnt a great tip recently which also helps reduce spill: once the exact camera position is known, bring in 4×4 floppy flags slightly behind the subject, one either side, just out of frame.

IMG_31674. Avoid dark shadows.

Green spill will bleed most easily into the dark areas on your subject, especially if you’re shooting with a wide aperture. Clipped (or ‘crushed’) blacks are particularly undesirable. The solution is to use more fill light, even if this goes against the mood and contrast levels you’re using in non-VFX shots. If you use LUTs, you should consider creating a custom one for green screen work which pushes the contrast further to compensate for this flatter starting point. If not, you will have to work with the colourist in post to ensure that the shadows are restored to their usual levels once the VFX are complete.

5. Add tracking markers.

Camera movement against green screen isn’t the no-no that it used to be, with any VFX team worth their salt being able to deal with handheld shots, pans, tilts and push-ins. If there isn’t a VFX supervisor on set, you can help them out by taping crosses to a few points on the screen. There should always be at least one marker in shot throughout the camera move (more if it’s a multi-axis move), and they shouldn’t stay put behind any tricky edges (e.g. long hair) for long.

5 Tips for Lighting a Green Screen

Choosing an ND Filter: f-stops, T-stops and Optical Density

A revised and updated version of this article can be found here (aperture) and here (ND filters).

Imagine this scenario. I’m lensing a daylight exterior and my light meter gives me a reading of f/11, but I want to shoot with an aperture of T4, because that’s the depth of field I like. I know that I need to use a .9 ND (neutral density) filter. But how did I work that out? How on earth does anyone arrive at the number 0.9 from the numbers 11 and 4?

Let me explain from the beginning. First of all, let’s remind ourselves what f-stops are. You have probably seen those familiar numbers printed on the sides of lenses many times…

1      1.4      2      2.8      4      5.6      8      11      16      22

They are ratios: ratios of the lens’ focal length to its iris diameter. So a 50mm lens with a 25mm diameter iris is at f/2. If you close up the iris to just under 9mm in diameter, you’ll be at f/5.6 (50 divided by 5.6 is 8.93).

A stills lens with its aperture ring marked in f-stops
A stills lens with its aperture ring (top) marked in f-stops

But why not label a lens 1, 2, 3, 4? Why 1, 1.2, 2, 2.8…? These magic numbers are f-stops. A lens set to f/1 will let in twice as much light as (or ‘one stop more than’) one set to f/1.4, which in turn will let in twice as much as one set to f/2, and so on. Conversely, a lens set to f/2 will let in half as much light as (or ‘one stop less than’) one set to f/1.4, and so on.


If you think back to high school maths and the Pi r squared formula for calculating the area of a circle from its radius, the reason for the seemingly random series of numbers will start to become clear. Letting in twice as much light requires twice as much area for those light rays to fall on, and remember that the f-number is the ratio of the focal length to the iris diameter, so you can see how square roots are going to get involved and why f-stops aren’t just plain old round numbers.

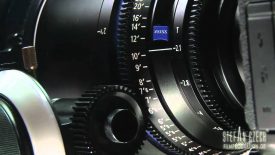
A Zeiss Compact Prime lens with its aperture ring marked in T-stops

Now, earlier I mentioned T4. How did I get from f-stops to T-stops? Well, T-stops are f-stops adjusted to compensate for the light transmission efficiency. Two different f/2 lenses will not necessarily produce equally bright images, because some percentage of light travelling through the elements will always be lost, and that percentage will vary depending on the quality of the glass and the number of elements. A lens with 100% light transmission would have the same f-number and T-number, but in practice the T-number will always be a little higher than the f-number. For example, Cooke’s 15-40mm zoom is rated at a maximum aperture of T2 or f/1.84.

So, let’s go back to my original scenario and see where we are. My light meter reads f/11. However,  I expressed my target stop as a T-number though, T4, because I’m using cinema lenses and they’re marked up in T-stops rather than f-stops. (I can still use the f-number my meter gives me though; in fact if my lens were marked in f-stops then my exposure would be slightly off because the meter does not know the transmission efficiency of my lens.)

By looking at the series of f-numbers permanently displayed on my light meter (the same series listed near the top of this post, or on any lens barrel) I can see that f/11 (or T11) is 3 stops above f/4 (or T4) – because 11 is three numbers to the right of 4 in the series. I can often be seen on set counting the stops like this on my light meter or on my fingers. It is of course possible to work it out mathematically, but screw that!

CameraZOOM-20140309092150072_zps94e90ea4
A set of Tiffen 4×4″ ND filters

So I need an ND filter that cuts 3 stops of light. But we’re not out of the mathematical woods yet.

The most popular ND filters amongst professional cinematographers are those made by Tiffen, and a typical set might be labelled as follows:

.3      .6      .9      1.2

Argh! What do those numbers mean? That’s the optical density, a property defined as the natural logarithm of the ratio of the quantity of light entering the filter to the quantity of light exiting it on the other side. A .3 ND reduces the light by half because 10 raised to the power of -0.3 is 0.5, or near as damn it. And reducing light by half, as we established earlier, means dropping one stop.

If that fries your brain, don’t worry; it does mine too. All you really need to do is multiply the number of stops you want to drop by 0.3 to find the filter you need. So to drop three stops you pick the .9 ND.

And that’s why you need a .9 ND to shoot at T4 when your light meter says f/11. Clear as mud, right? Once you get your head around it, and memorise the f-stops, this all becomes a lot easier than it seems at first glance.

Here are a couple more examples:

  • Light meter reads f/8 and you want to shoot at T5.6. That’s a one stop difference. (5.6 and 8 are right next to each other in the stop series, as you’ll see if you scroll back to the top.) 1 x 0.3 = 0.3 so you should use the .3 ND.
  • Light meter reads f/22 and you want to shoot at T2.8. That’s a six stop difference (scroll back up and count them), and 6 x 0.3 = 1.8, so you need a 1.8 ND filter. If you don’t have one, you need to stack two NDs in your matte box that add up to 1.8, e.g. a 1.2 and a .6.


Choosing an ND Filter: f-stops, T-stops and Optical Density

4 Reasons to Use a Light Meter

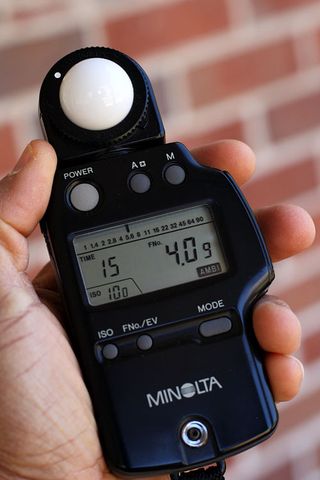
lightmeterIn the celluloid era, light meters were essential to ensure proper exposure of the film negative. In today’s digital world, where you can immediately see your images on a monitor, it may seem like light meters are obsolete.

But these devices still have their place in modern cinematography. On a bigger production, when you may not be at the camera the whole time, they can be very useful. Interrupting your ACs (as they set up the sticks, swing the lens, put on the eyepiece extension, balance the fluid head, run cables to the monitors, etc.) in order to see if your image is correctly exposed on camera can be inefficient.

And having the reliable, hard number a light meter gives you can be more reassuring than judging false colours or histograms.

Here are four ways in which I used my brand new light meter on my last production, The Little Mermaid:

  1. To call ND filters. When shooting outdoors, I would take light readings in the sun and in the shade, and when then the sun was in, to understand the range of light levels I was dealing with. I could then pick an ND filter that would put me at a stop at where I would still have the room to adjust the iris a little either way if the light got brighter or darker. This was particularly important when we were shooting on water in a splash bag, when changing NDs or even just adjusting the iris was a longer process. (In my next post I’ll look deeper into stop maths and ND filters to demonstrate exactly how to select an ND filter based on a light reading.)
  2. To measure contrast ratios. The Alexa can handle up to seven stops of over-exposure and eight stops of under-exposure. Knowing this, I could use my meter to see if certain areas were going to blow out or crush, before the camera was even set up. I could also measure how many stops the key side of an actor’s face was above the fill side, and thus work out the key-to-fill ratio. At present this is still something I judge by eye on the monitor, but the more I get to know the numbers, the more I suspect I will start determining it in advance.
  3. To check green-screens are properly lit. The visual effects supervisor, Jafar, told me that green-screens should be exposed at key, or up to half a stop over key. So if I was shooting at T4, I would walk along the green-screen and take readings at various points to make sure the meter was generally giving me between f4 and f4½.
  4. To schedule a dusk shot. For a twilight scene on a beach, I needed to know in advance exactly what our window of opportunity was. Looking up the sunset time is all well and good, but it doesn’t help you figure out how long afterwards there will be enough ambient light left to shoot with. So while at location the day before, I went out onto the beach and took light readings every few minutes after sundown. These told me I had 20 minutes from sunset until the ambient light dropped below what the lenses could expose.

Do you use a light meter? And if so, how?

4 Reasons to Use a Light Meter

10 Ways Low Budget Shoots Differ from Micro Budget Ones

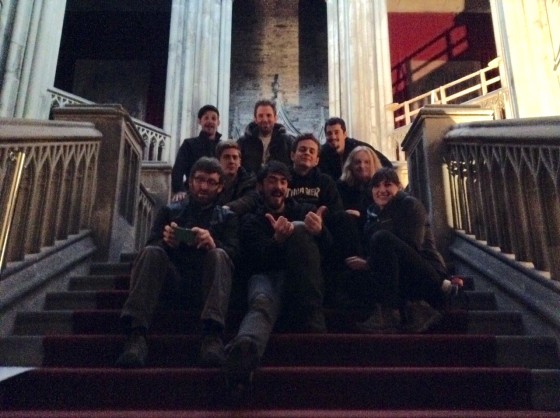
My camera and lighting crew for last year's feature
My camera and lighting crew for last year’s feature

I’ve been working in the film business for 16 years now, but until very recently I hadn’t really worked on a ‘proper’ production, one that had a budget above five figures. Here are some differences I noticed stepping up from micro-budget to low budget…

  1. Formal crew structure. There is a proper separation between departments, even between camera and lighting (which is quite strange for the DP, in charge of both). Woe betide anyone who moves set dressing without asking the art department, or who plugs something in without checking with the sparks, or who stores equipment in a room without asking locations.
  2. Proper production and locations departments. The feature I worked on last year had two producers, a line producer, a production manager and a production co-ordinator, plus a locations department. I’m used to productions where one person does all those jobs, and often directs as well. Figuring out which person to approach about any given issue was fun! (Creative Skillset’s website is a good place to check if you’re not sure who does what.)
  3. Advance prep. With a large crew, time cannot be wasted waiting for things that could have been pre-rigged. Heads of department are expected to think ahead and splinter their crew if necessary to be ready for things coming later in the day or week. For a DP this most commonly means pre-rigging distro and/or lighting.
  4. Delegation. Aside from operating the camera, I did little hands-on work on the recent feature shoot. Lens changes, grip rigging and lighting set-ups are all handled by other people on the instructions of me, and of the gaffer and the 1st AC. Sometimes this means the DP can go and have a cup of tea, but often it provides important thinking and planning time – an opportunity to reccie the next set and design the lighting, or to review footage in the edit room, or reccie a possible location with other HoDs, or discuss the afternoon’s shots with the director. It’s impossible to do this sort of forward planning if you’re changing your own lenses and setting your own lamps up.
  5. Hard wrap times. On micro-budget shoots the wrap time is a theoretical concept, with no more relevance to reality than an episode of Sponge Bob Square Pants. On a bigger production, you wrap at wrap time, because if you don’t then the gaffer might pull the plug. Occasionally the crew will be asked if they are willing to go over by half an hour, say, in order to complete a scene. But everyone must agree, and that half hour must be deducted from the next day.
  6. Lunch break, not just lunch. In micro-budget land, getting lunch at all is not a given. But when you do get it, you’re often expected to eat as quickly as possible and get straight back to work. On a bigger production you get your hour lunch break come hell or high water. And there’s proper catering. With desserts!
  7. Reliance on the crew. If you’re working with a small camera and mains power, you can stay late with the director and steal a few extra shots, if necessary. But when everything’s run off a generator, which only the gaffer is qualified to operate, and your camera package is almost too heavy to lift onto your own shoulder, and you have no idea how half the bits and bobs connected to it work because your ACs always deal with it, you really can’t do anything on your own.
  8. Permissions and qualifications. For insurance reasons you must have qualified people overseeing the electrics and the rigging. You must also check with the locations department before using any space or equipment or filming in any area that was not discussed and signed off in preproduction.
  9. Paperwork. Most HoDs seem to have some kind of daily paperwork to do on a larger production.The DP happily escapes this (the ACs handle the camera reports), though they do have to complete a risk assessment before shooting commences.
  10. People management. Because of the size of the team under you, people management becomes a major part of an HoD’s job. I’ll go into more detail on this in a future post.
10 Ways Low Budget Shoots Differ from Micro Budget Ones

10 Tips for Meetings

Did this t-shirt get me the job?

Late last year I secured a great feature film job as DP, on the basis of a personal recommendation followed by a meeting with the director which went really well. Making a good impression at a meeting like this is clearly crucial. But although such meetings are essentially job interviews, they are much less formal and rely much more heavily on the director and DP having similar tastes. Here are a few tips to help you give your next one your best shot.

  1. Be prepared. This means reading the script and any other documents provided, ideally more than once if you have the time and you’re serious about wanting the job. Look up the director’s previous work to get a sense of their tastes.
  2. Dress to impress. What you wear to a meeting can influence its outcome, just as wearing a smart suit to a traditional job interview can. During the shooting of the feature, the director commented that the Highlander t-shirt I wore to the meeting reassured him that my cinematic tastes were broadly in line with his own.
  3. Be willing to travel. If you don’t live in London, you’re going to have to travel there for most meetings. Don’t complain about it, don’t even mention it if you can avoid it. But also don’t do it if you have doubts about the quality of the production and what it’s going to do for your career.
  4. Bring showreel footage. The director will likely have seen your showreel before you meet, but it doesn’t hurt to bring additional clips or stills that are particularly relevant to this project. In my feature meeting, frame grabs from Ren: The Girl with the Mark helped demonstrate what I could do with a period setting.
  5. Bring some creativity to the table. Put some reference images together to show the visual ideas that came to your mind when you read the script, and how you think the cinematography of the project could be approached. I found an image of some monks with a shaft of light coming in the window that perfectly summed up how I saw the feature, and the director really responded to it.
  6. Be flexible. Be prepared to listen to the director’s vision and bounce off their ideas.
  7. Bring people and/or kit to the table. What do you have access to that puts you ahead of other applicants? Often in the micro-budget world this will be your camera, or maybe a drone or a jib, but once you get into the realm of more reasonable budgets, directors and producers appreciate skilled crew more. The feature director really wanted to use a lot of steadicam in the film, so before being offered the job I contacted a talented steadicam op I knew and got an expression of interest from him which I was then able to go back to the director with. I think this was a big part of the reason I got the job.
  8. Be OK with the budget. If it’s late enough in preproduction that the crew fees and the kit hire budget are fixed, don’t grumble about them. All you will achieve is to make the director think you’re going to be difficult to work with. Instead cite examples of how you achieved great results with similarly limited resources in the past.
  9. Don’t be cheap. Offer to pay for the drinks. I’d probably take it as a bad sign if the director allowed me to, but offer nonetheless!
  10. Follow up. We all think of great things we should have said when we’re halfway home. Send an email with those extra thoughts, any links you may have discussed in the meeting, and a thank you for their time taken in meeting you.
10 Tips for Meetings