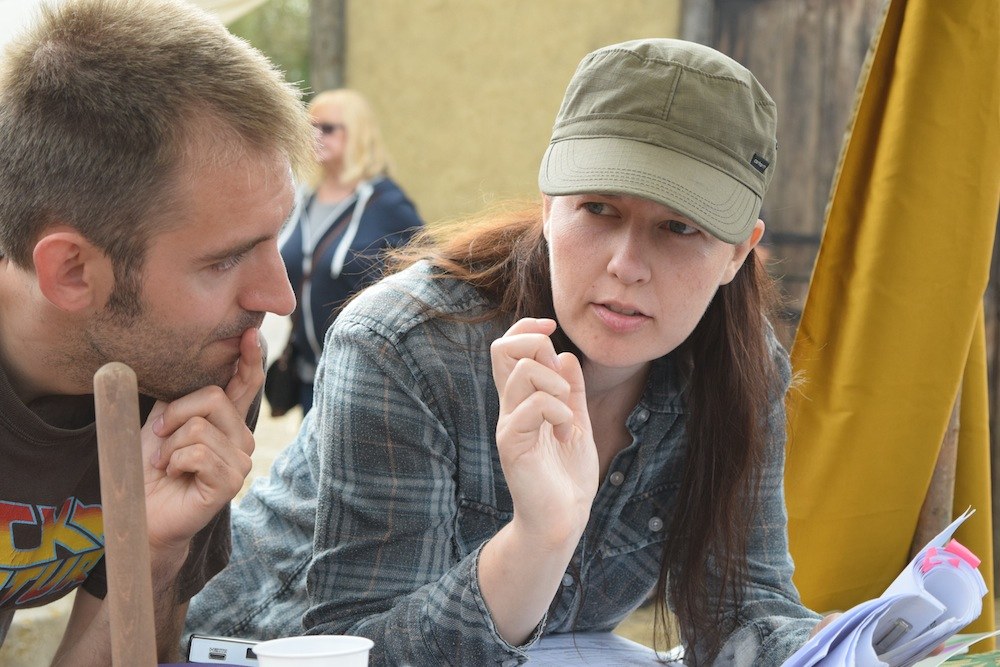
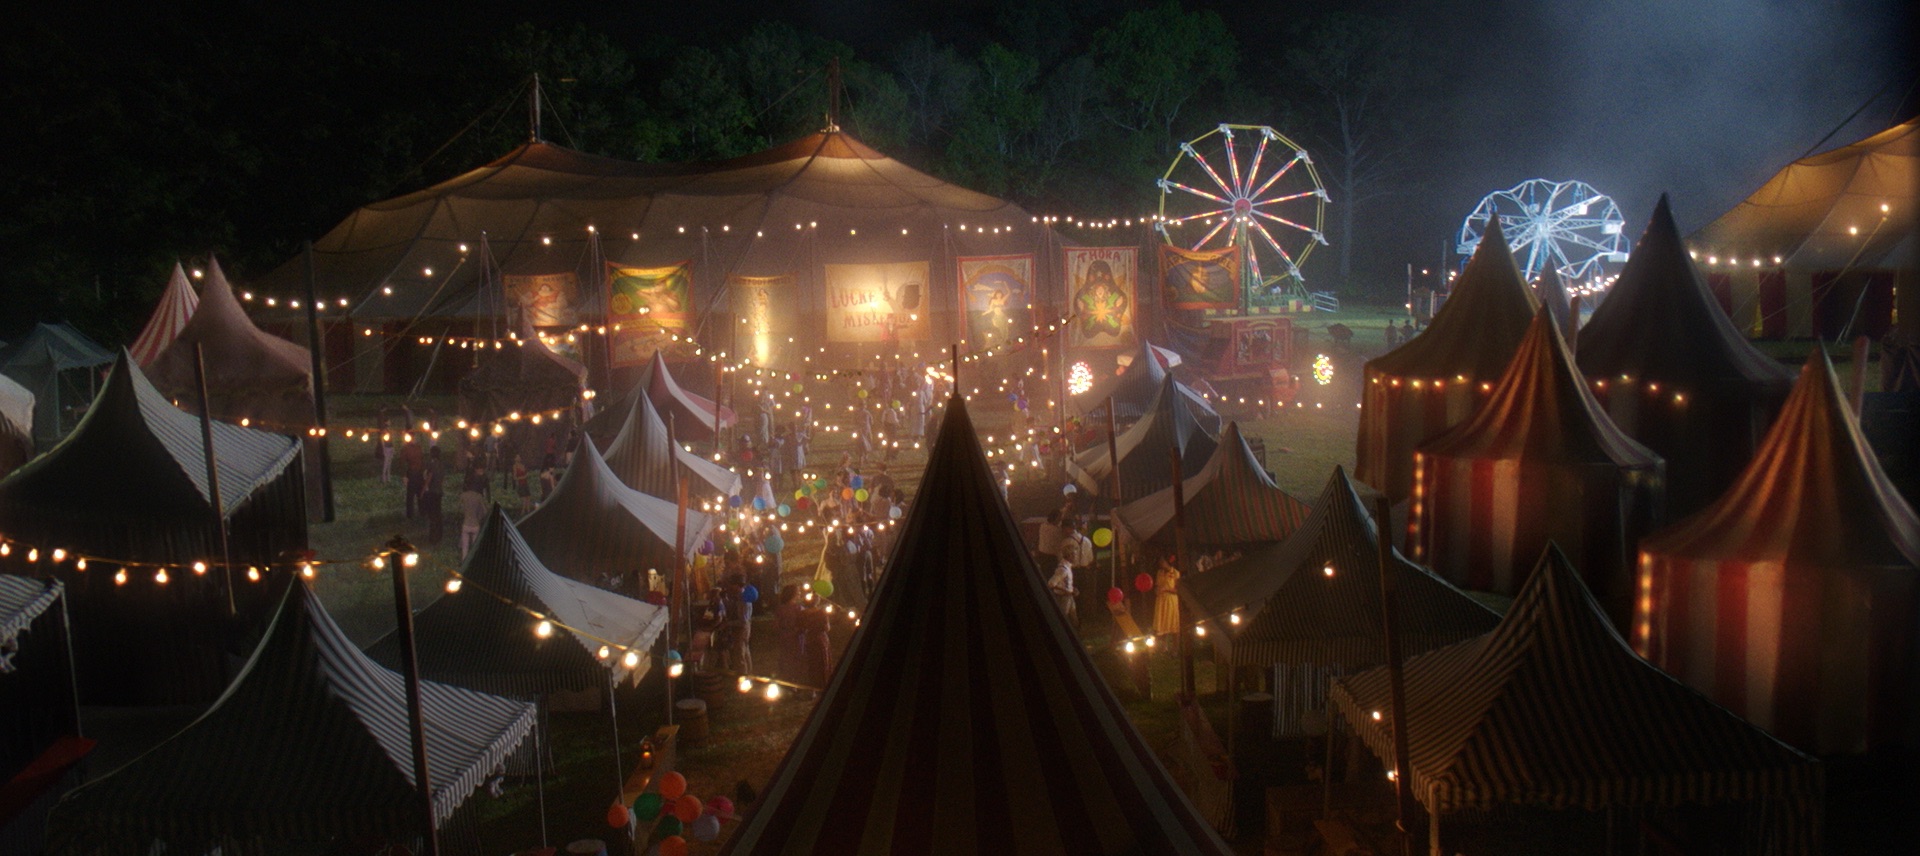
Discussing shots with director Kate Madison on the set of “Ren: The Girl with the Mark”. Photo: Michael Hudson
A thorough plan for shots and lighting can save lots of time on set, but no battle plan survives contact with the enemy. To what extent should a DP prepare?
How much camera angles are planned – and by whom – varies tremendously in my experience. Some directors will prepare a complete shot-list or storyboard and send it to the DP for feedback; others will keep it close to their chest until the time of shooting. Some don’t do one at all, either preferring to improvise on the day in collaboration with the DP, or occasionally asking the DP to plan all the shots alone.
A shot-list can be hard to interpret by itself, particularly if there’s a lot of camera movement. Overhead blocking diagrams, perhaps done in Shot Designer or a general graphics app, make things a lot clearer. Storyboards are very useful too, be they beautifully and time-consumingly drawn, or hastily scribbled thumbnails.
An Artemis shot from “Hamlet” using stand-ins
On a feature I shot last year, we were afforded the luxury of extensive rehearsals with the cast on location. I spent the time snapping photos with Artemis Pro, the viewfinder app, and ultimately output PDF storyboards of every scene; the 1st AD distributed these with the call-sheets every morning. That level of preparedness is rare unless complex stunts or VFX are involved, but it’s incredibly useful for all the departments. The art department in particular were able to see at a glance what they did and didn’t need to dress.
One of my unused storyboards from “The Little Mermaid”
Beware though: being prepared can kill spontaneity if you’re not careful. Years ago I directed a film that had a scene supposedly set at the top of a football stadium’s lighting tower; we were going to cheat it on a platform just a few feet high, and I storyboarded it accordingly. When we changed the location to a walkway in a brewery – genuinely 20ft off the ground – I stuck to the storyboards and ended up without any shots that showcased the height of the setting.
If the various departments have prepared based on your storyboards, not keeping to them can make you unpopular. So storyboards are a double-edged sword, and expectations should be carefully managed regarding how closely they will be adhered to.
The amount of planning that the DP puts into lighting will vary greatly with budget. On a micro-budget film – or a daytime soap like Doctors – you may not see the location until the day you shoot there. But on a high-end production shooting in a large soundstage you may have to agree a detailed lighting plot with the gaffer and pre-rigging crew days or weeks in advance.
Having enough crew to pre-rig upcoming scenes is one of the first things you benefit from as a DP moving up the ladder of budgets. Communicating to the gaffer what you want to achieve then becomes very important, so that when you walk onto the set with the rest of the cast and crew the broad strokes of the lighting are ready to go, and just need tweaking once the blocking has been done.
My lighting plan for a night exterior scene in “Exit Eve”
Blocking is usually the biggest barrier to preparedness. Most films have no rehearsals before the shoot begins, so you can never quite know where the actors will feel it is best to stand until they arrive on set on the day. So a lighting plan must be more about lighting the space than anything else, just trying to make sure there are sources in roughly the right places to cover any likely actor positions suggested by the script, director or layout of the set.
Whether a detailed lighting plan needs to be drawn up or not depends on the size and complexity of the set-up, but also how confident you feel that the gaffer understands exactly what you want. I often find that a few recces and conversations along with some brief written notes are enough, but the more money that’s being spent, the more crucial it is to leave no room for misunderstandings.
Again, Shot Designer is a popular solution for creating lighting plans, but some DPs use less specialised apps like Notability, and there’s nothing wrong with good old pencil and paper.
Overall, the best approach is to have a good plan, but to keep your eyes and mind open to better ideas on the day.
For more about apps that DPs can use to help them prep and shoot, see my article “Tools of the Trade” on britishcinematographer.co.uk.
It’s a very difficult question to answer, but let’s look at a few major things a cinematographer considers each time they set up their camera.
Tonal Range
“Above the Clouds” (2020, dir: Leon Chambers, DP: Neil Oseman)
TV sets and other moving-image devices, especially if they are non-HDR, cannot display as wide a dynamic range as most scenes have in real life. So it is often seen as desirable to make the most of what contrast a screen can reproduce by including at least one area of the blackest black and one of the whitest white, with a good distribution of all the tones in between.
Contrast makes an image richer and also easier for the viewer’s brain to interpret, but as with all of these rules, it is perfectly possible to break it with excellent results. For example, you may want to keep a scene in a prison entirely in the shadows, so that when the prisoner escapes into the daylight the viewer will feel the impact of the highlights. Tonal distribution has a big impact on mood, and thought should be given to what mood a DP wants to convey.
Colour Schemes
“Alder” (2019, dir: Vanda Ladeira, DP: Neil Oseman)
Since Isaac Newton invented the colour wheel in 1704, artists have devised several colour schemes which can evoke different feelings, the most common in cinematography being complementary and analogous.
A complementary colour scheme uses two hues on opposite sides of the wheel for maximum colour contrast, punch and vibrancy. Think Ripley’s yellow power loader against the blue lighting of Aliens, or the infamous teal-and-orange grading of Michael Bay’s films.
An analogous colour scheme uses hues adjacent to each other on the wheel for a harmonious or oppressive effect. Think the greens of The Matrix, or the reds of Mars in Paul Verhoeven’s Total Recall.
“Perplexed Music” (2018, dir: Mark McGann, DP: Neil Oseman)
“The so-called rules of photographic composition are, in my opinion, invalid, irrelevant and immaterial,” said the great American photographer Ansel Adams. I might not go that far, but they can certainly be overrated.
The Rule of Thirds, for example, is intended to produce a balanced image, but what if you don’t want a balanced image? Placing a character in an unusual part of the frame, as is frequently done in Amazon’s Mr. Robot, can be powerfully unsettling and say much about the character’s status and mindset. Breaking rules for the sake of breaking rules may not be wise, but breaking them in a single shot to make the viewer sit up and take notice, or breaking them subtly but consistently throughout a film to subconsciously cue the audience into a theme or character trait, is a good use of cinematic technique.
As for camera moves, some believe that they should always be motivated. Some like them to be expressive. Some simply like to keep dollying the camera back and forth to add energy to a scene. As long as the movement helps to immerse rather than distract the viewer, it is serving its purpose.
Depth
“The Gong Fu Connection” (2016, dir. Ted Duran, DP: Neil Oseman)
As film and TV are usually monoscopic media, cinematographers often aim to compensate by enhancing other types of depth cues. Commonly this is through lighting – using backlight to cut a layer out from the background, using colour to separate layers, or alternating light and dark layers. Haze and camera movement can also be used to create a greater sense of depth, as can lens choice, be it a wide lens which exaggerates perspective, or a long lens that throws backgrounds out of focus.
The result is not just impact but clarity, ensuring the viewer is not distracted from the story trying to figure out what they’re seeing. Again though, you may sometimes want just the opposite, to disorientate the viewer or make them work to find the important element in the frame.
“The Little Mermaid” (2018, dir: Blake Harris, DP: Neil Oseman)
A DP has the responsibility of capturing on film or digital media the work of every other department on the production (except sound!). If the costumers have spent weeks sewing beads onto a period dress, a cross-light to bring out the texture is the least the DP can do. If the make-up department are struggling to hide the joins in a prosthetic, softening or dimming the lighting will help. If a huge set has been built or an expensive location hired, showing it off in at least one wide shot is probably advisable.
Story and Character
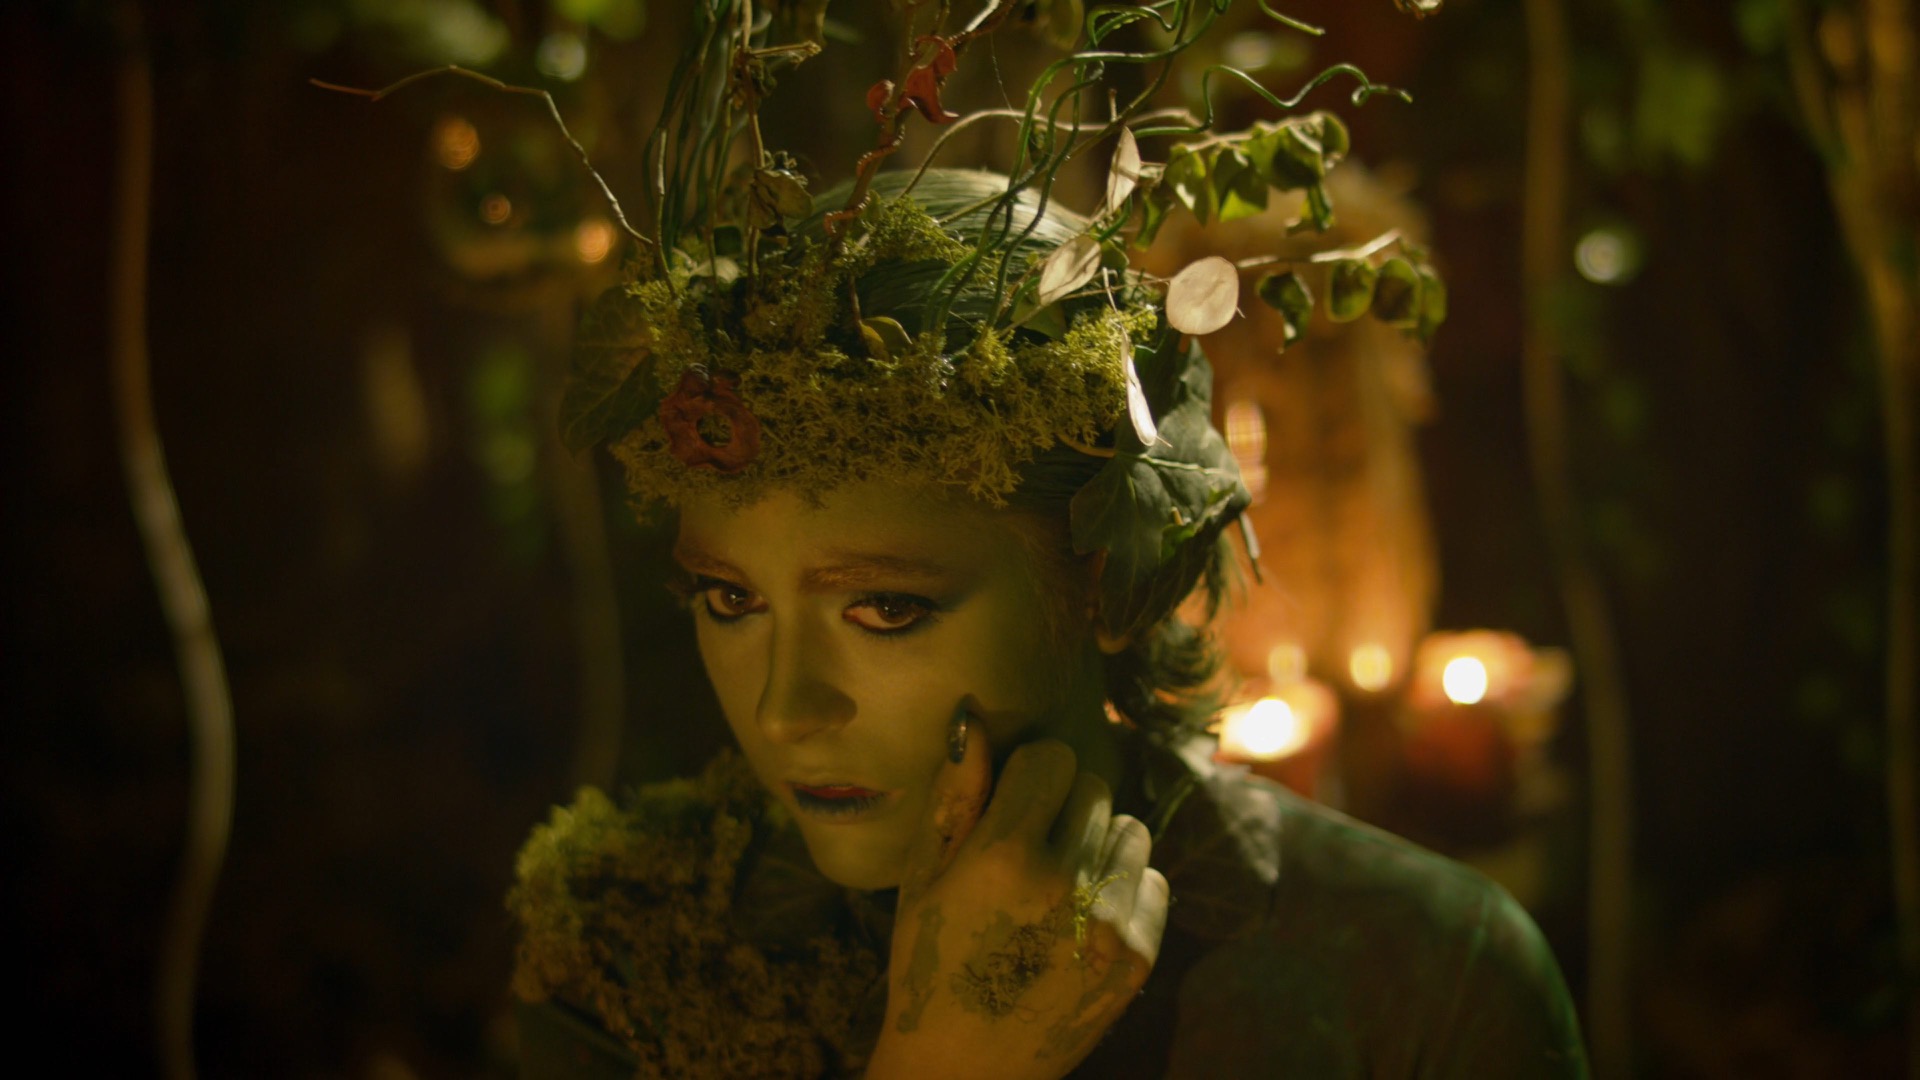
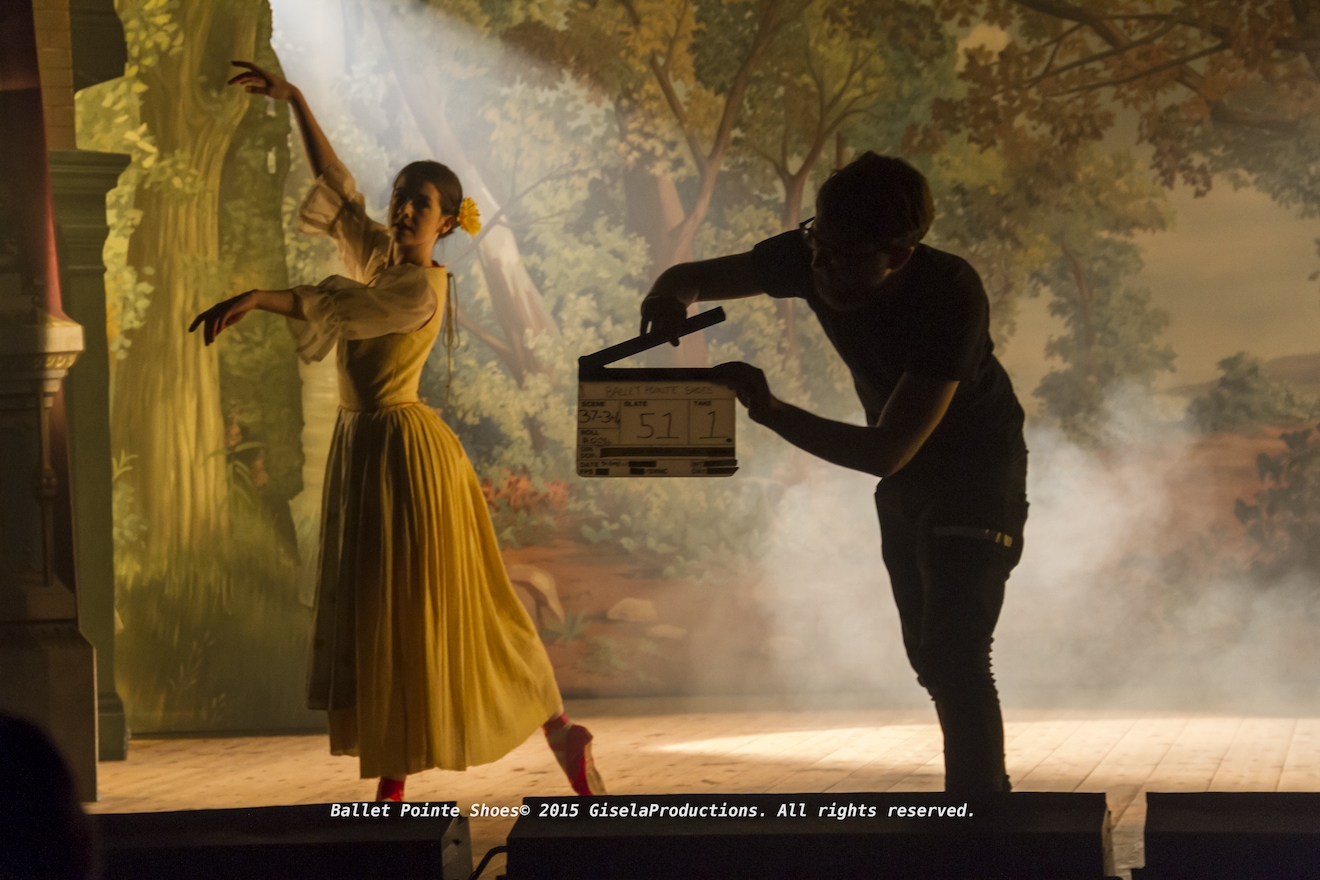
“Ren: The Girl with the Mark” (2016, dir: Kate Madison, DP: Neil Oseman)
As I’ve hinted throughout, the most important thing is that every aspect of the shot is working towards telling the story, revealing or enhancing character, and conveying the right overall mood. This might be by keeping everything quiet and conventional to let the performances shine through, or it might be through crazy framing, crunchy contrast and dramatic movements. The possibilities are endless.
Shooting on one camera, getting the lighting and framing perfect for just one angle at a time, used to be a hallmark of quality in film and television. Nowadays many drama DPs are expected to achieve comparable quality while photographing two or more angles simultaneously, with all the attendant problems of framing out booms, lights and other cameras.
So what is the best way to tackle multi-camera shooting? Let’s consider a few approaches.
Photo: Brooks Patrick Allen
1. Two sizes
The most straightforward use of a B camera is to put it close to the A camera and point it in the same direction, just with a different lens. One disadvantage is that you’re sacrificing the ability to massage the lighting for the closer shot, perhaps bringing in a bounce board or diffusion frame that would flatter the actor a little more, but which would encroach on the wider frame.
Another limitation is that the talent’s eye-line will necessarily be further off axis on one of the shots. Typically this will be the wider camera, perhaps on a mid-shot including the shoulder of the foreground actor, while the other camera is tighter in terms of both framing and eye-line, lensing a close-up through the gap between the shoulder and the first camera.
The sound department must also be considered, especially if one camera is very wide and another is tight. Can the boom get close enough to capture the kind of close-miked audio required for the tight shot without entering the wide frame?
Some TV series are solving this problem by routinely painting out the boom in the wider shots. This is usually easy enough in a lock-off, but camera movement will complicate things. It’s an approach that needs to be signed off by all the major players beforehand, otherwise you’re going to get some panicked calls from a producer viewing the dailies.
2. Cross-shooting
This means filming a shot-reverse simultaneously: over character A’s shoulder onto character B, and over character B’s shoulder onto character A. This approach is an editor’s delight because there is no danger that the performance energies will be different when they cut from one person to the other, nor that arm or head positions will throw up continuity errors.
Keeping the cameras out of each other’s frames is of course an issue, one usually handled by backing them off and choosing tighter lenses. (Long lenses are an unavoidable side effect of multi-camera cinematography.) Two booms are required, and keeping their shadows out is four times as difficult.
Lighting can take twice as long too, since you now have two cast members who need to look their best, and you need to maintain mood, shape and contrast in the light in both directions simultaneously. Softer and toppier light is usually called for.
The performances in certain types of scene – comedy with a degree of improvisation, for example – really benefit from cross-shooting, but it’s by far the most technically challenging approach.
3. Inserts
Grabbing inserts, like close-ups of people’s hands dealing with props, is a quick and simple way of getting some use out of a second camera. Lighting on such shots is often not so critical, they don’t need to be close-miked, and it’s no hassle to shoot them at the same time as a two-shot or single.
There is a limit to how many inserts a scene needs though, so sooner or later you’ll have to find something else to do with the camera before the producer starts wondering what they’re paying all that extra money for.
4. Splinter unit
The idea of sending B camera off to get something completely separate from what A camera is doing can often appeal. This is fine for GVs (general views), establishing shots of the outside of buildings, cutaways of sunsets and so on, but anything much more complicated is really getting into the realm of a second unit.
Does the set or location in front of camera need to be dressed? Then someone from the art department needs to be present. Is it a pick-up of an actor? Well, then you’re talking about hair, make-up, costume, continuity, sound…
Photo: Brooks Patrick Allen
With the extra problems that a second camera throws up, it’s a fallacy to think it will always speed up your shoot; the opposite can easily happen. An experienced crew and a clear plan worked out by the director, DP, operators and gaffer is definitely required. However, when it’s done well, it’s a great way to increase your coverage and give your editor more options.
Part of the volume at ARRI Rental in Uxbridge, with the ceiling panel temporarily lowered
Virtual production technically covers a number of things, but what people normally mean by it is shooting on an LED volume. This is a stage where the walls are giant LED screens displaying real-time backgrounds for photographing the talent in front of. The background may be a simple 2D plate shot from a moving vehicle, for a scene inside a car, or a more elaborate set of plates shot with a 360° rig.
The most advanced set-ups do not use filmed backgrounds at all, but instead use 3D virtual environments rendered in real time by a gaming engine like Unreal. A motion-tracking system monitors the position of the camera within the volume and ensures that the proper perspective and parallax is displayed on the screens. Furthermore, the screens are bright enough that they provide most or all of the illumination needed on the talent in a very realistic way.
I have never done any virtual production myself, but earlier this year I was fortunate enough to interview some DPs who have, for a British Cinematographer article. Here are some tips about VP shooting which I learnt from these pioneers.
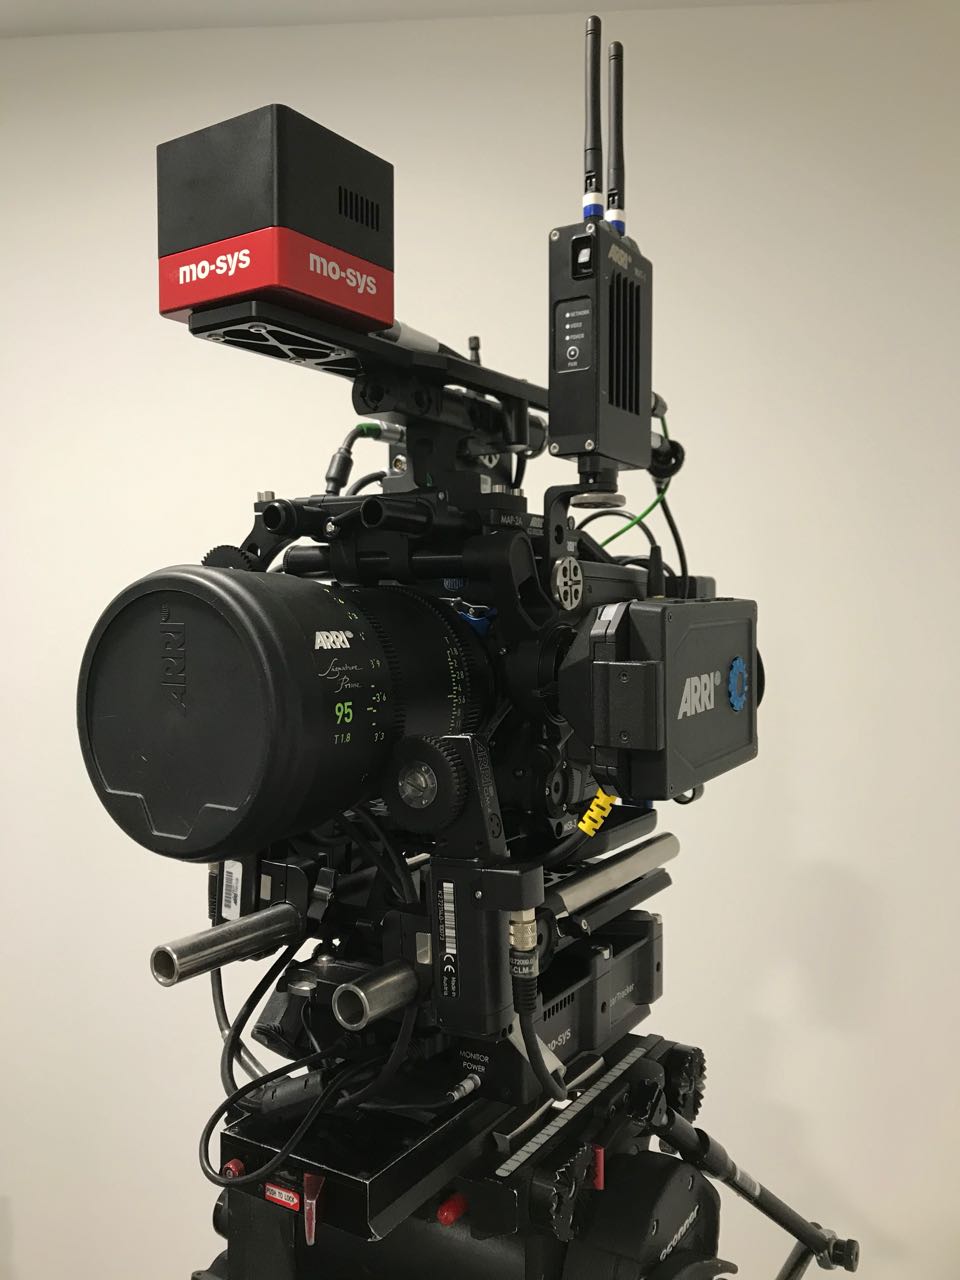
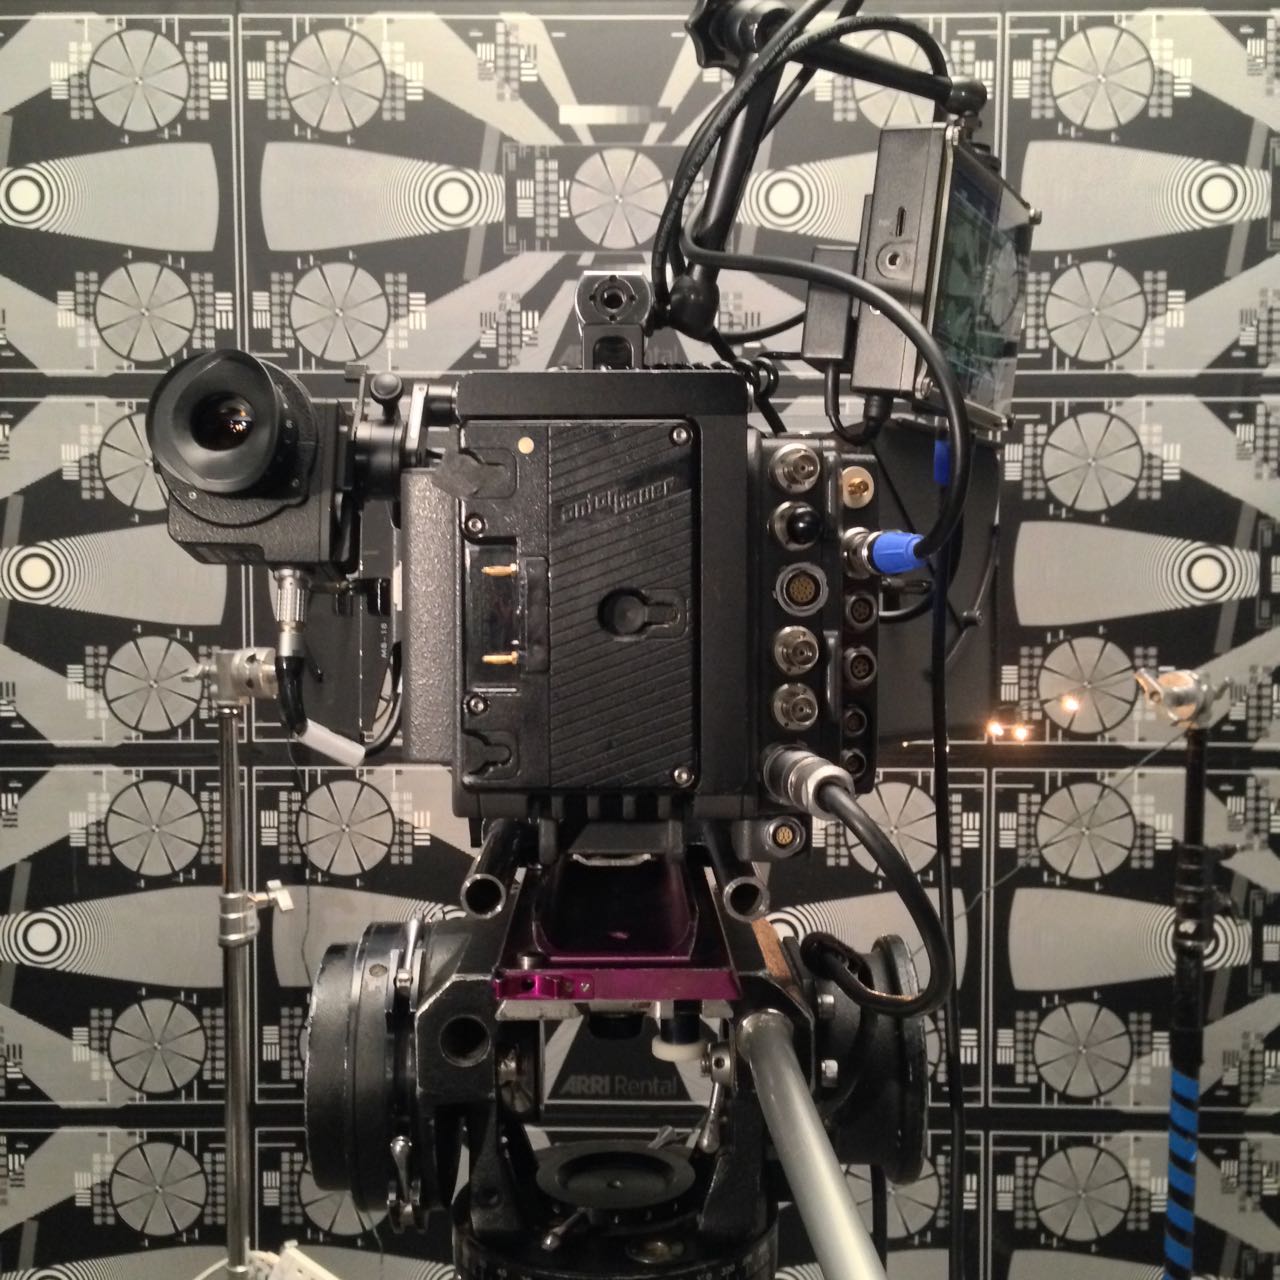
1. Shoot large format
An ARRI Alexa Mini LF rigged with Mo-Sys for tracking its position within the volume
To prevent a moiré effect from the LED pixels, the screens need to be out of focus. Choosing an LF camera, with their shallower depth of field, makes this easier to accomplish. The Alexa Mini LF seems to be a popular choice, but the Sony Venice evidently works well too.
2. Keep your distance
To maintain the illusion, neither the talent nor the camera should get too close to the screens. A rule of thumb is that the minimum distance in metres should be no less than the pixel pitch of the screens. (The pixel pitch is the distance in millimetres between the centre of one pixel and the centre of the next.) So for a screen of 2.3mm pixel pitch, keep everything at least 2.3m away.
3. Tie it all together
Several DPs have found that the real foreground and the virtual background fit together more seamlessly if haze or a diffusion filter are used. This makes sense because both soften the image, blending light from nearby elements of the frame together. Other in-camera effects like rain (if the screens are rated weatherproof) and lens flares would also help.
4. Surround yourself
The back of ARRI’s main screen, composed of ROE LED panels
The most convincing LED volumes have screens surrounding the talent, perhaps 270° worth, and an overhead screen as well. Although typically only one of these screens will be of a high enough resolution to shoot towards, the others are important because they shed interactive light on the talent, making them really seem like they’re in the correct environment.
5. Match the lighting
If you need to supplement the light, use a colour meter to measure the ambience coming from the screens, then dial that temperature into an LED fixture. If you don’t have a colour meter you should conduct tests beforehand, as what matches to the eye may not necessarily match on camera.
6. Avoid fast camera moves
Behind the scenes at the ARRI volume, built in partnership with Creative Technology
It takes a huge amount of processing power to render a virtual background in real time, so there will always be a lag. The Mandalorian works around this by shooting in a very classical style (which fits the Star Wars universe perfectly), with dolly moves and jibs rather than a lot of handheld shots. The faster the camera moves, the more the delay in the background will be noticeable. For the same reason, high frame rates are not recommended, but as processing power increases, these restrictions will undoubtedly fall away.
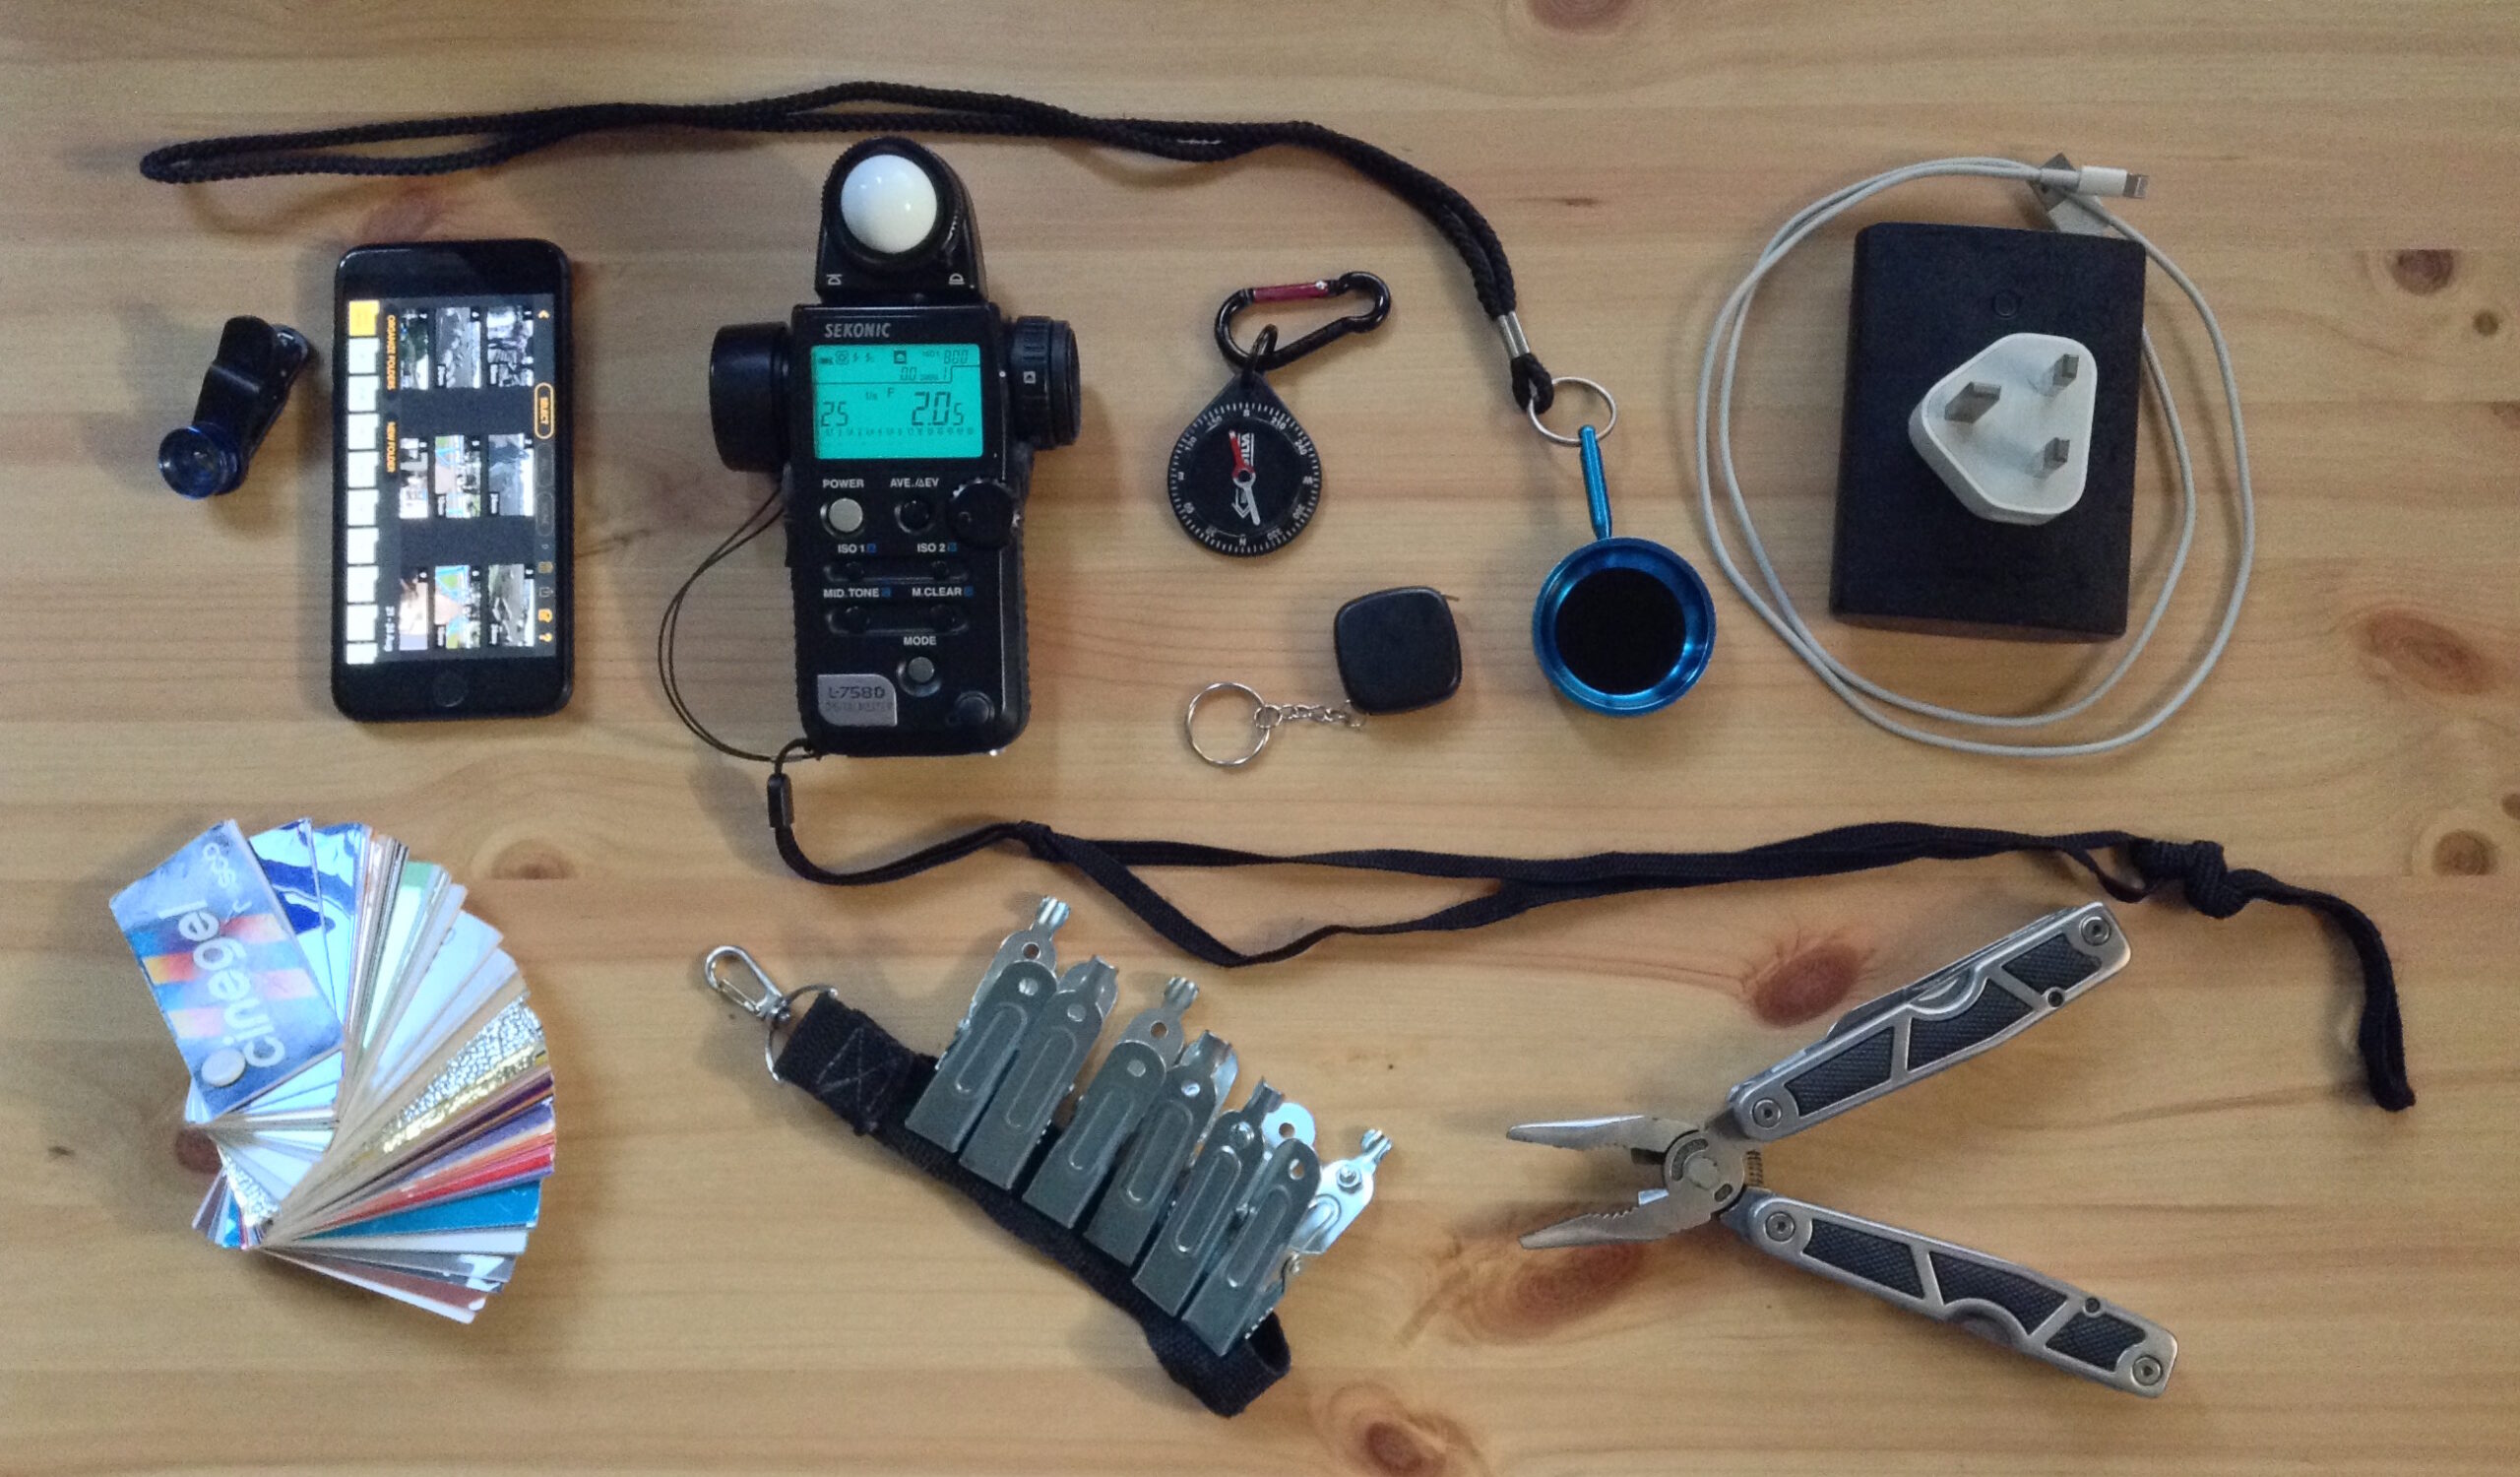
I used to own a whole bunch of equipment – camera, lenses, lights – but for reasons I’ve detailed elsewhere I got rid of all that back in 2017. These days I travel pretty light (no pun intended) to set, but there are a few items I wouldn’t like to be without.
Here’s what’s in my set bag, roughly in descending order of importance.
1. Phone
Alright, this isn’t technically in my set bag, but it is the most used thing on a typical day on set. I use Chemical Wedding‘s Artemis Pro app all the time to find frames and select lenses, the same company’s Helios Pro to look at sun paths, and occasionally other specialist apps like Arri Photometrics (to work out if a particular light is powerful enough at a particular distance) and Flicker Finder (to check if a light will flicker on camera). I’ve also got Lux Calc installed but so far I’ve never used it.
Other common uses of my phone are looking at call sheets and other production documents if hardcopies aren’t supplied, checking my Google Sheets breakdown to remind myself of my creative intentions for the scene, and taking photos of lighting set-ups in case I need to recreate them for pick-ups.
To enable Artemis Pro to simulate wider lenses with my iPhone 7’s relatively tight built-in lens I also carry a clip-on 0.67x wide angle adaptor.
2. Light Meter
I’ve written before about why light meters are still important. My Sekonic L-758D gets heavy use on set, mostly in incident mode but sometimes the spot reflectance mode too; see my post on judging exposure to learn about what these modes do.
I make sure to carry spare batteries for it too.
3. Gaffer’s Glass
On The Little Mermaid the crew took pity on me using a broken ND filter wrapped in ND gel as a gaffer’s glass and bought me a proper one. This is like a monocle with an ND 3.6 filter in it for looking into fresnels and other directional fixtures to see if the spot of light is aimed exactly where it should be. I mostly use mine to look at the clouds and see when the sun is going to go in and come out, but you shouldn’t use one to look at the naked sun because even with all the ND it can still damage your eyes.
4. Power bank
With the heavy use my phone gets on set the charge doesn’t always last the whole day, so a power bank is essential to keep it running, as of course is the mains charger just in case.
5. Travel mug/flask
Most productions are environmentally conscious enough now to dissuade people from using disposable coffee cups and water bottes (though there are still a million half-finished water bottles on set at the end of the day). I always bring my own travel mug and metal water bottle. Keeping the mug clean(ish), especially when switching between tea and coffee consumption, is a daily struggle.
6. Croc clips
I always keep a couple of croc clips on my belt when shooting. Although I rarely gel lights myself on larger productions, I find them useful for adjusting curtains to admit just the right amount of daylight, or attaching a rain cover or light-blocking cloth to the camera, or clipping my jacket to something as a last-minute lighting flag.
7. Multi-tool
On some productions I’ve worn a multi-tool on my belt every day and only used it once or twice (usually to open wrap beers), so now it stays in my bag unless it’s specifically needed. As a head of department I theoretically shouldn’t be doing any tasks that would require a multi-tool, but it’s annoying to need one and not have one.
8. Tape Measure
I think my mum gave me this tiny tape measure which I keep in my set bag because it’s so small and light there’s no reason not to. I’ve used it exactly once so far: to work out if an Alexa Classic with a Cooke 10:1 zoom on would fit into certain tight locations on Hamlet.
9. Gel swatches
I picked up a set of Rosco filter swatches at either the BSC Expo or the Media Production Show. I don’t think I’ve ever used it.
10. Compass
Occasionally Helios Pro isn’t playing ball and I need to work out roughly where the sun is going to be, so out comes the traditional compass.
One final thing. Until very recently I carried a pair of gardening gloves for handling hot lights, but again I shouldn’t really be doing this myself and incandescent lamps aren’t too common on sets any more anyway, so when my gloves became worn out enough to need replacing I decided not to bother.
This night shot is lit by a desk-lamp bounced off the wall behind and to the left of camera, plus the monitor light and the Christmas lights you can see at frame left. The background is lit by a reading lamp bounced off the ceiling (just out of frame right) and more Christmas lights.
It may be the beginning of the end for Covid-19, but it doesn’t look like home working and video calls are going away any time soon. We’re very lucky that we have such technology in the midst of a global pandemic, but let’s be honest: webcams don’t always make us look our best. Having lit and photographed movies for 20 years, I’d like to share a few tips to improve your image on Zoom, WhatsApp, Google Meet or whatever your video call software of choice is.
Firstly, low camera angles are not flattering to many people. Wherever possible, set up your webcam so that it’s at eye-level or a little above. If you’re using a laptop, this might mean stacking a few books under the device. Consider investing in a laptop stand that will raise the monitor and camera up if you’re going to be doing this a lot.
Avoid placing the camera too close yourself. A medium close-up works best for most video calls, head and shoulders at the closest, or down to your waist if you like to gesticulate a lot. Follow the classic rules of composition and make the most of your camera’s resolution by framing your head near the top of the shot, rather than leaving a lot of empty headroom above yourself.
It’s important to be aware of automatic exposure if you want to look your best on a webcam. Your camera and/or software continually assess the average luminance in the frame and alter the shutter speed or electronic gain to achieve what they think is the correct exposure. Since webcams have very poor dynamic range – they can’t handle a great deal of contrast within the frame – you should think carefully about what elements in your shot could sway the auto-exposure.
For example, a bright white wall, window or table lamp in the background will cause the camera to reduce its exposure, darkening the overall image and perhaps turning you into a silhouette. Even the colour of top you’re wearing can be a factor. If you have a pale skin tone and you’re wearing a black top – prompting the camera to increase its exposure – you might well find that your face bleaches out.
The black hoodie causes the automatic exposure to rise, bleaching out my face.The lighter tone of this t-shirt enables the automatic exposure to produce a balanced image.
This brings us to lighting. Most of us are used to lighting our homes and workspaces so that we can see what we’re doing comfortably, rather than worrying about how the light is falling on our own faces.
The clearest and most flattering type of lighting is generally a large, soft source roughly in front of and slightly above us, so if possible position your computer or webcam in front of a window. If direct sunlight comes in through this window, that is less ideal; try to cut it off with your curtains. The indirect light of sky and clouds is much softer and less likely to confuse the auto-exposure.
If you have little or no natural light to work with, the main source of light on your face might well be the monitor you’re looking at. In this case, what you have on your screen can make a huge difference. A blank white Word document is going to light you much more effectively than a paused Netflix frame from a horror movie.
Monitor light can leave you looking blue and ghostly, so consider placing a strategic window of pale orange colour on your virtual desktop to warm up your skin tone. Try adjusting the monitor’s brightness or switching to a darker desktop theme if your monitor is bleaching your face out completely.
Of course, your screen is not just a light source. You need to be able to use it for actually viewing things too, so a better solution is not to rely on it for light. Instead, create another soft source in front of and slightly above you by pointing a desk-lamp at the wall above your monitor. (If the wall is a dark or saturated colour, pin up something white to reflect the light.) The larger the patch of wall the lamp illuminates, the more softly your face will be lit.
You may find that your background now looks very dim, because little of the light from your monitor – or bouncing off the wall behind your monitor – is reaching it. Worse still, the auto-exposure might react to this dim background by over-exposing your face. In this case, use a second lamp to illuminate the background.
Often the room’s main ceiling light will do the job here, though it will likely result in an image that has an overall flat look to it. That might be just what you need for a professional video call, but if not, feel free to get creative with your background. Use table lamps to pick out certain areas, string up fairy lights, or whatever you feel best reflects your personality and profession.
The main thing is to get your “key light” right first – that’s the soft source in front of you that keeps you lit nicely. Everything after that is just icing on the cake.
This moodier shot has the much the same set-up as the image at the top of this post, but with a brighter light in the background and a dimmer light in the foreground.
I used to do a lot of editing work alongside DPing, and although those days are now behind me, their influence lives on. Every day that I work as a cinematographer, I use some of the knowledge I gained while slaving over a multi-coloured keyboard. Here are some of the most important things I learnt from editing.
1. Performance always wins.
The editor will always use the take with the best performance. What this means for the DP is that there is really no point requesting another take because of a missed focus pull, bumpy dolly move or dodgy pan, because inevitably the performance will not be as spontaneous and engaging as it was when you cocked up the camerawork, so the editor will use the first take.
Of course you need to make the director aware of any significant technical issues, and if they want to do another take, that’s absolutely their prerogative. But the editor will still use the first take. So get it right on the first take, even if that means pushing for another rehearsal.
2. Your darlings will die.
You know all your favourite shots? All the ones you’ve been mentally ear-marking for your showreel? The beautifully-lit wides, the fancy camera moves, that cool scene with the really interesting set? Yeah, half of those won’t make the final cut.
That wide shot is used for a single second before they cut into the meaty mid-shots. The camera move slowed the scene down too much so they chopped it up. That scene with the cool set looked great but didn’t advance the plot.
Two things to learn from this: 1. Do a great job, but don’t be a perfectionist, because you might be wasting everyone’s time on something that is destined for the cutting room floor. 2. If you want that shot for your showreel, grab it from the DIT, otherwise you might never see it again.
3. Bring ’em in, let ’em leave.
I can’t count the number of times, when shooting a close-up, I’ve advised the director to run the whole scene. They just wanted to pick up a few lines, but I convince them to let the talent walk in at the start and walk out at the end. That way the editor has much more flexibility on when to cut, a flexibility which I know that I appreciated when I was the one wrangling the timeline.
Any angle you shoot, push to cover the entire scene from it. In most cases it takes only slightly more time, and it’s easier for the actors because they get to do the whole emotional arc. And the editor will have many more options.
4. Spot the Missing Shot.
The ability to edit in your head is incredibly useful on set. If you can mentally assemble the coverage you’ve just shot, you can quickly identify anything that’s missing. Years of editing trained me to do this, and it’s saved annoying pick-ups several times. Officially this is the script supervisor’s job, but smaller productions may not always have someone in this capacity, and even when they do, another person keeping track can’t hurt.
5. Respect the slate.
On smaller productions, the clapperboard is often treated as an inconvenience. People sometimes chat over it, directors giving last-minute instructions, or actors finishing their showbiz anecdotes before getting into character, rendering the audio announcement unintelligible. On no- or micro-budget productions there might not be a 2nd AC, so the board gets passed to whoever’s handy at the time, who has no idea what the current slate or take number are, and the whole thing becomes a meaningless farce.
Which is fine for everyone except the poor bastard in the edit suite who’s got to figure out which audio clip goes with which video clip. It can add hours of extra work for them. I’ve been there, and it ain’t pretty. So, for the sanity of the (assistant) editor, please respect the slate.
One of the things which I believe separates a good director of photography from a bad one is preparation. On a big production you may have weeks of paid, full-time prep, but on a micro-budget movie you may be lucky to have a single meeting before the shoot. In the latter case you’ll have to use your initiative, put in the time for free, and use Skype a lot, but either way the quality of the prep can make or break the production.
Here are ten things a DP should do to set themselves up for success before the camera rolls. This is not intended to be an exhaustive list, rather it’s a run-down of the things which I have found to bear most fruit later on in the production.
1. Get inside the director’s head.
Some directors will come to you with a beautiful set of storyboards, concept art and reference images, but many won’t. Many will simply have an idea in their head of how they want it to look, and it’s your job to find out what that vision is. Often this will happen before full-time prep begins. It will consist of watching movies together, pouring over books of photos, sharing Pinterest boards or Dropboxes full of images, all the while discussing what they do and don’t like. The aim is to get such a clear idea of their vision that when you set up a shot you’ll deliver the mood they’re looking for first time.
2. Work with the art department.
Chatting over a set model helps identify potential lighting or lensing problems before construction begins.
The next person to get in sync with is the production designer. This is an incredibly important and symbiotic relationship; you have the power to completely destroy each others’ work, or to make each other look like geniuses! Two things you should talk about early on with the designer are the colour palette of the film (and any palettes specific to certain locations, plot threads or characters) and the aspect ratio: does the shape of the sets being designed fit the shape of the frame you’re planning to compose? Next you’ll want to discuss each set and the position of windows and practicals within it, to ensure that you’ll be able to get the lighting angles you need. For their part, the designer will want to quiz you on where the key camera positions will be, and the rough lens lengths you’ll be using, so they know where to put in the most detail and the important bits of dressing.
3. Get to know the needs of the other H.o.D.s.
Although the production designer is the most important head of department for a DP to work with, they are by no means the only one. The visual effects supervisor is increasingly a key collaborator; you should discuss the look you’re going for and how that will integrate with the VFX, and whether plates need to be shot at a higher resolution, in RAW, or any other technical requirements. You should familiarise yourself with the costume designs and discuss how those will integrate with the overall look. Similarly the make-up department will want to talk about about lens filtration, coloured lighting and anything else that may affect how their work looks. The line producer is a crucial person to get on the good side of. Sooner or later you’ll have to ask them for something expensive and unexpected, and they’re much more likely to say yes if you have tried to help them earlier on, by reducing your equipment list for example, or by hiring local camera assistants to save on accommodation costs.
When you start to scout the locations, you’ll want to pay careful attention to the direction of the sun. Which windows will it come through as it moves around over the course of the day? Are those trees or buildings likely to shadow that park bench where the characters will be sitting? With a bit of experience – and a compass, if it’s cloudy – you can estimate this, or use apps like Sun Tracker and Helios which are designed for exactly this purpose. For interiors, windows that never get direct sunlight are most convenient, allowing you to light them artificially, and thus constantly, without having to flag the real sun. For exteriors, shooting into the sun is generally most desirable, for the beauty of the backlight and the softness of the reflected fill. Of course, there will always be compromises with the other demands of the production.
Each director has a different process, but often they will draft a shot list on their own before passing it to you for feedback. There are many things for a DP to consider when going through this list. Do the shots reflect the style and visual grammar you both discussed earlier? (If not, has the director had a change of heart, or have they simply forgotten? Directors have a lot to think about!) Do the shots provide enough coverage for the editor? Are there too many shots to realistically accomplish on schedule? (Very often there are!) What grip equipment will the camera movements require? Are any special lenses or filters required, e.g. a macro lens for an extreme close-up of an eye?
6. Shoot tests.
Testing is a crucial part of the prep for both technical and creative reasons. Usually you will want to test a few different cameras and lens sets, to see which best serve the story. For example, a period film lit with a lot of genuine candlelight may work best on a sensitive camera like the Panasonic Varicam combined with soft fall-off lenses like Cooke S4s, while a sci-fi thriller might be suited to a Red or Alexa and a set of anamorphics for those classic flares. Until you’ve tested them and compared the images side by side though, you can’t be sure, and neither can the director and producers. Often costume and make-up tests will be requested, which may be combined with the camera tests to see how the different sensors render them, or maybe done separately once the camera kit is locked down. These tests are also a great opportunity for the DP to demonstrate for the director the type of lighting you plan to use to, and to make sure you really are on the same page. Ideally a DIT (digital imaging technician) will be available to grade the test footage, developing LUTs (look-up tables) if required, and providing proof of concept for the finished look of the movie.
Once the 1st AD has drafted the shooting schedule, they will show it to the DP for feedback. When determining how much can be done in a day, the 1st AD is thinking of the script page count, and they may not have seen a shot list at this point. Along with the director, the DP must bring any concerns they have about the schedule to the 1st AD in prep, or forever hold your peace! Is there enough time to get those tricky camera moves you’ve planned? Has the re-light time for the reverse been factored in? Have things been arranged in a logical order for lighting, or will things have to be torn down and put back up again later? Does the schedule permit things to be shot at the best time of day for light? Are the night scenes actually scheduled at night or will the windows have to be blacked out? Are there critical close-ups towards the end of the schedule, when the cast will be tired and no longer look their best?
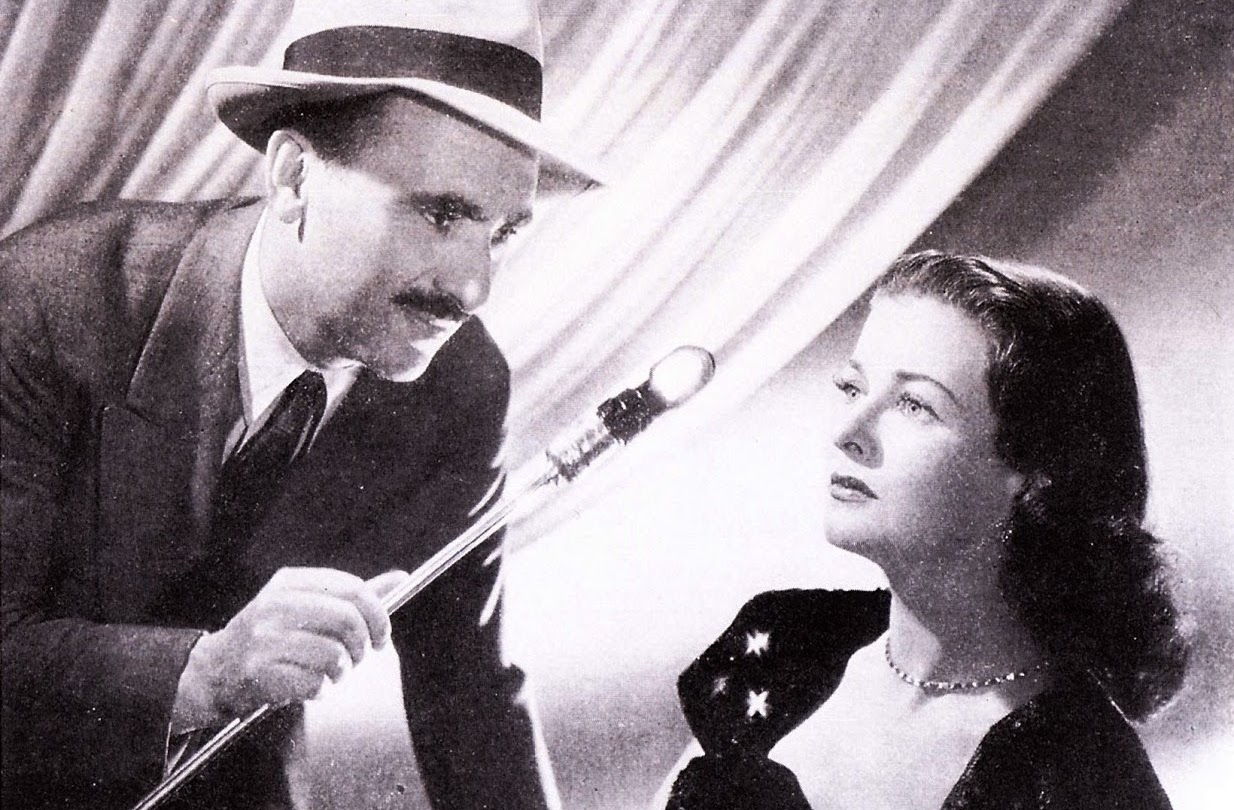
Legendary DP John Alton, ASC tests lighting angles with Joan Bennett
However good-looking the talent may be, they will always look better under certain types of lighting than others. Often you will figure out what suits each actor after a week or so of shooting, but ideally you want to find out before principal photography begins. You can do this during testing, if the cast are available and you have enough time – trying out different key angles, fill levels, backlight and lenses to see what works best for their individual faces. Apart from anything else, this is a great way to establish trust with the cast right from the start, assuring them that they are in safe hands. If testing isn’t possible, watch some of their previous work, looking carefully at how they have been photographed.
9. Mark up your script.
There’s no point in having lots of great ideas in preproduction if you forget them when you’re on set. Everyone has a different system, but you may wish to mark up your script and/or shot list. This could include using coloured highlighters to differentiate day and night scenes at a glance, underlining any references to mood or camera angles in the stage directions, or indicating beats in the development of the story or characters which need to be reflected in how things are lit or shot.
10. Plan your lighting.
Everyone likes to get rolling as soon as possible after call time, and a big factor in achieving this is how quickly you can light. Ideally you will have planned the broad strokes of the lighting in preproduction, and communicated that plan to the gaffer. Budget permitting, the lighting crew can even pre-rig the set so that only tweaking is required when the whole unit arrives. In this case you’ll need to have been very clear and specific about what you want set up and where, drawing diagrams or approving those which the gaffer has drawn up. Often you’ll need to know the rough blocking of the scene before you can plan the lighting, so you should make sure the director indicates their intentions for this during scouts.
Every film is different, but follow the steps above and you’ll be well on your way to an efficient and productive shoot in 2018. Happy new year!
I joined this social media platform last summer, after hearing DP Ed Moore say in an interview that his Instagram feed helps him get work. I can’t say that’s happened for me yet, but an attractive Instagram feed can’t do any creative freelancer any harm. And for photographers and cinematographers, it’s a great way to practice our skills.
The tips below are primarily aimed at people who are using a phone camera to take their pictures, but many of them will apply to all types of photography.
The particular challenge with Instagram images is that they’re usually viewed on a phone screen; they’re small, so they have to be easy for the brain to decipher. That means reducing clutter, keeping things bold and simple.
Here are twelve tips for putting this philosophy into practice. The examples are all taken from my own feed, and were taken with an iPhone 5, almost always using the HDR (High Dynamic Range) mode to get the best tonal range.
1. choose your background carefully
The biggest challenge I find in taking snaps with my phone is the huge depth of field. This makes it critical to have a suitable, non-distracting background, because it can’t be thrown out of focus. In the pub photo below, I chose to shoot against the blank pillar rather than against the racks of drinks behind the bar, so that the beer and lens mug would stand out clearly. For the Lego photo, I moved the model away from a messy table covered in multi-coloured blocks to use a red-only tray as a background instead.
2. Find Frames within frames
The Instagram filters all have a frame option which can be activated to give your image a white border, or a fake 35mm negative surround, and so on. An improvement on this is to compose your image so that it has a built-in frame. (I discussed frames within frames in a number of my recent posts on composition.)
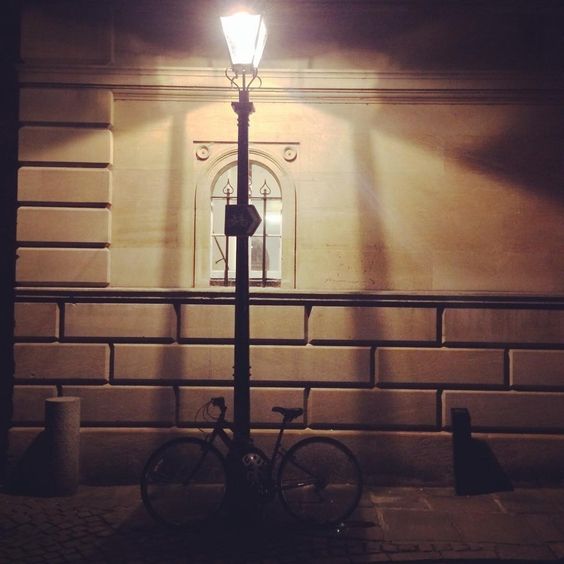
3. try symmetrical composition
To my eye, the square aspect ratio of Instagram is not wide enough for The Rule of Thirds to be useful in most cases. Instead, I find the most arresting compositions are central, symmetrical ones.
4. Consider Shooting flat on
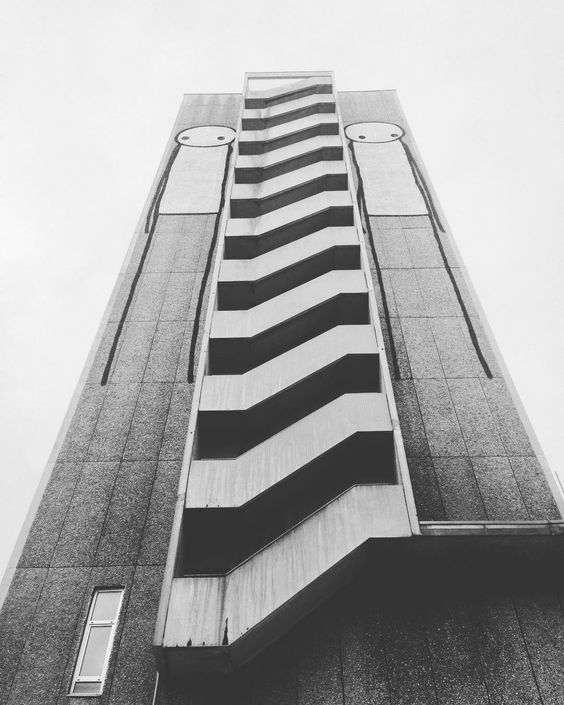
In cinematography, an impression of depth is usually desirable, but in a little Instagram image I find that two-dimensionality can sometimes work better. Such photos take on a graphical quality, like icons, which I find really interesting. The key thing is that 2D pictures are easier for your brain to interpret when they’re small, or when they’re flashing past as you scroll.
5. Look for shapes
Finding common shapes in a structure or natural environment can be a good way to make your photo catch the eye. In these examples I spotted an ‘S’ shape in the clouds and footpath, and an ‘A’ shape in the architecture.
6. Look for textures
Textures can add interest to your image. Remember the golden rule of avoiding clutter though. Often textures will look best if they’re very bold, like the branches of the tree against the misty sky here, or if they’re very close-up, like this cathedral door.
7. Shoot into the light
Most of you will not be lighting your Instagram pics artificially, so you need to be aware of the existing light falling on your subject. Often the strongest look is achieved by shooting towards the light. In certain situations this can create interesting silhouettes, but often there are enough reflective surfaces around to fill in the shadows so you can get the beauty of the backlight and still see the detail in your subject. You definitely need to be in HDR mode for this.
8. Look for interesting light
It’s also worth looking out for interesting light which may make a dull subject into something worth capturing. Nature provides interesting light every day at sunrise and sunset, so these are good times to keep an eye out for photo ops.
9. Use lens flare for interest
Photographers have been using lens flare to add an extra something to their pictures for decades, and certain science fiction movies have also been known to use (ahem) one or two. To avoid a flare being too overpowering, position your camera so as to hide part of the sun behind a foreground object. To get that anamorphic cinema look, wipe your finger vertically across your camera lens. The natural oils on your skin will cause a flare at 90° to the direction you wiped in. (Best not try this with that rented set of Master Primes though.)
10. Control your palette
Nothing gives an image a sense of unity and professionalism as quickly as a controlled colour palette. You can do this in-camera, like I did below by choosing the purple cushion to photograph the book on, or by adjusting the saturation and colour cast in the Photos app, as I did with the Canary Wharf image. For another example, see the Lego shot under point 3.
11. Wait for the right moment
Any good photographer knows that patience is a virtue. Waiting for pedestrians or vehicles to reach just the right spot in your composition before tapping the shutter can make the difference between a bold, eye-catching photo and a cluttered mess. In the below examples, I waited until the pedestrians (left) and the rowing boat and swans (right) were best placed against the background for contrast and composition before taking the shot.
12. Quality control
One final thing to consider: is the photo you’ve just taken worthy of your Instagram profile, or is it going to drag down the quality of your feed? If it’s not good, maybe you should keep it to yourself.
Shortly before Christmas, while browsing the secondhand books in the corner of an obscure Herefordshire garden centre, I came across a small blue hardback called The Tricks of Light and Colour by Herbert McKay. Published in 1947, the book covered almost every aspect of light you could think of, from the inverse square law to camouflage and optical illusions. What self-respecting bibliophile cinematographer could pass that up?
Here are some quite-interesting things about light which the book describes…
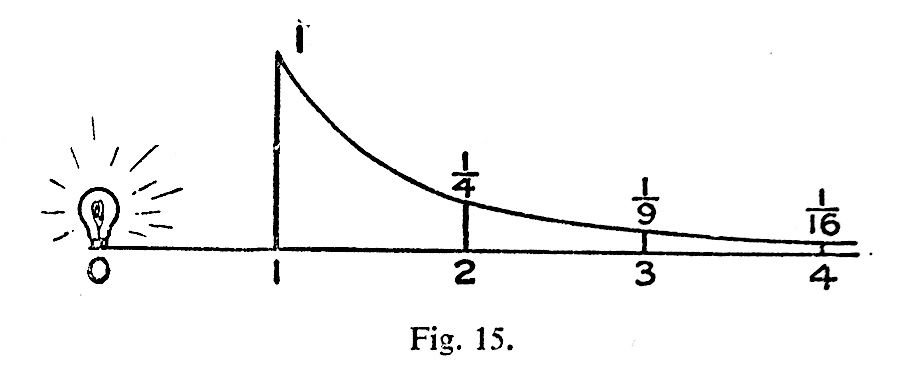
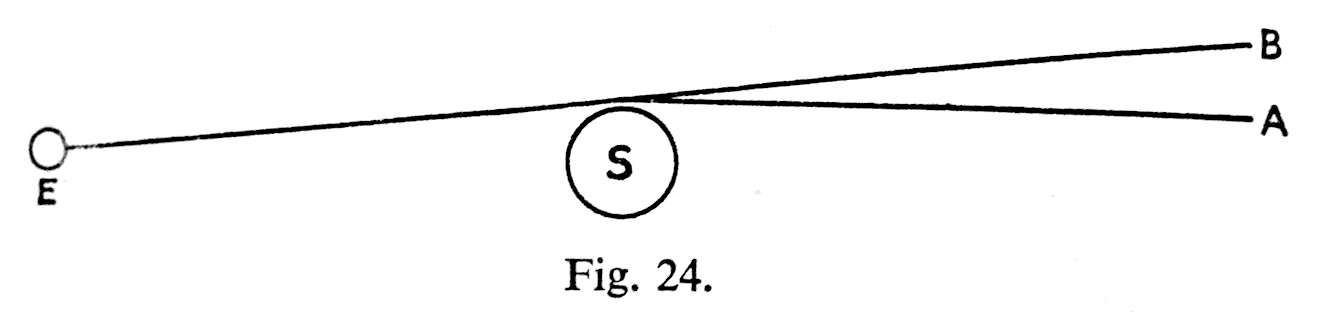
1. SPHERES ARE THE KEY to understandING the inverse square law.
Any cinematographer worth their salt will know that doubling a subject’s distance from a lamp will quarter their brightness; tripling their distance will cut their brightness to a ninth; and so on. This, of course, is the inverse square law. If you struggle to visualise this law and why it works the way it does, The Tricks of Light and Colour offers a good explanation.
[Think] of light being radiated from… a mere point. Light and heat are radiated in straight lines and in all directions [from this point]. At a distance of one foot from the glowing centre the whole quantity of light and heat is spread out over the surface of a sphere with a radius of one foot. At a distance of two feet from the centre it is spread over the surface of a sphere of radius two feet. Now to find an area we multiply two lengths; in the case of a sphere both lengths are the radius of the sphere. As both lengths are doubled the area is four times as great… We have the same amounts of light and heat spread over a sphere four times as great, and so the illumination and heating effect are reduced to a quarter as great.
2. MIRAGES ARE DUE TO Total internal reflection.
This is one of the things I dimly remember being taught in school, which this book has considerably refreshed me on. When light travels from one transparent substance to another, less dense, transparent substance, it bends towards the surface. This is called refraction, and it’s the reason that, for example, streams look shallower than they really are, when viewed from the bank. If the first substance is very dense, or the light ray is approaching the surface at a glancing angle, the ray might not escape at all, instead bouncing back down. This is called total internal reflection, and it’s the science behind mirages.
The heated sand heats the air above it, and so we get an inversion of the density gradient: low density along the heated surface, higher density in the cooler air above. Light rays are turned down, and then up, so that the scorched and weary traveller sees an image of the sky, and the images looks like a pool of cool water on the face of the desert.
3. Pinhole images pop up in unexpected places.
Most of us have made a pinhole camera at some point in our childhood, creating an upside-down image on a tissue paper screen by admitting light rays through a tiny opening. Make the opening bigger and the image becomes a blur, unless you have a lens to focus the light, as in a “proper” camera or indeed our eyes. But the pinhole imaging effect can occur naturally too. I’ve sometimes lain in bed in the morning, watching images of passing traffic or flapping laundry on a line projected onto my bedroom ceiling through the little gap where the curtains meet at the top. McKay describes another example:
One of the prettiest examples of the effect may be seen under trees when the sun shines brightly. The ground beneath a tree may be dappled with circles of light, some of them quite bright… When we look up through the leaves towards the sun we may see the origin of the circles of light. We can see points of light where the sun shines through small gaps between the leaves. Each of these gaps acts in the same way as a pinhole: it lets through rays from the sun which produce an image of the sun on the ground below.
4. The sun isn’t a point source.
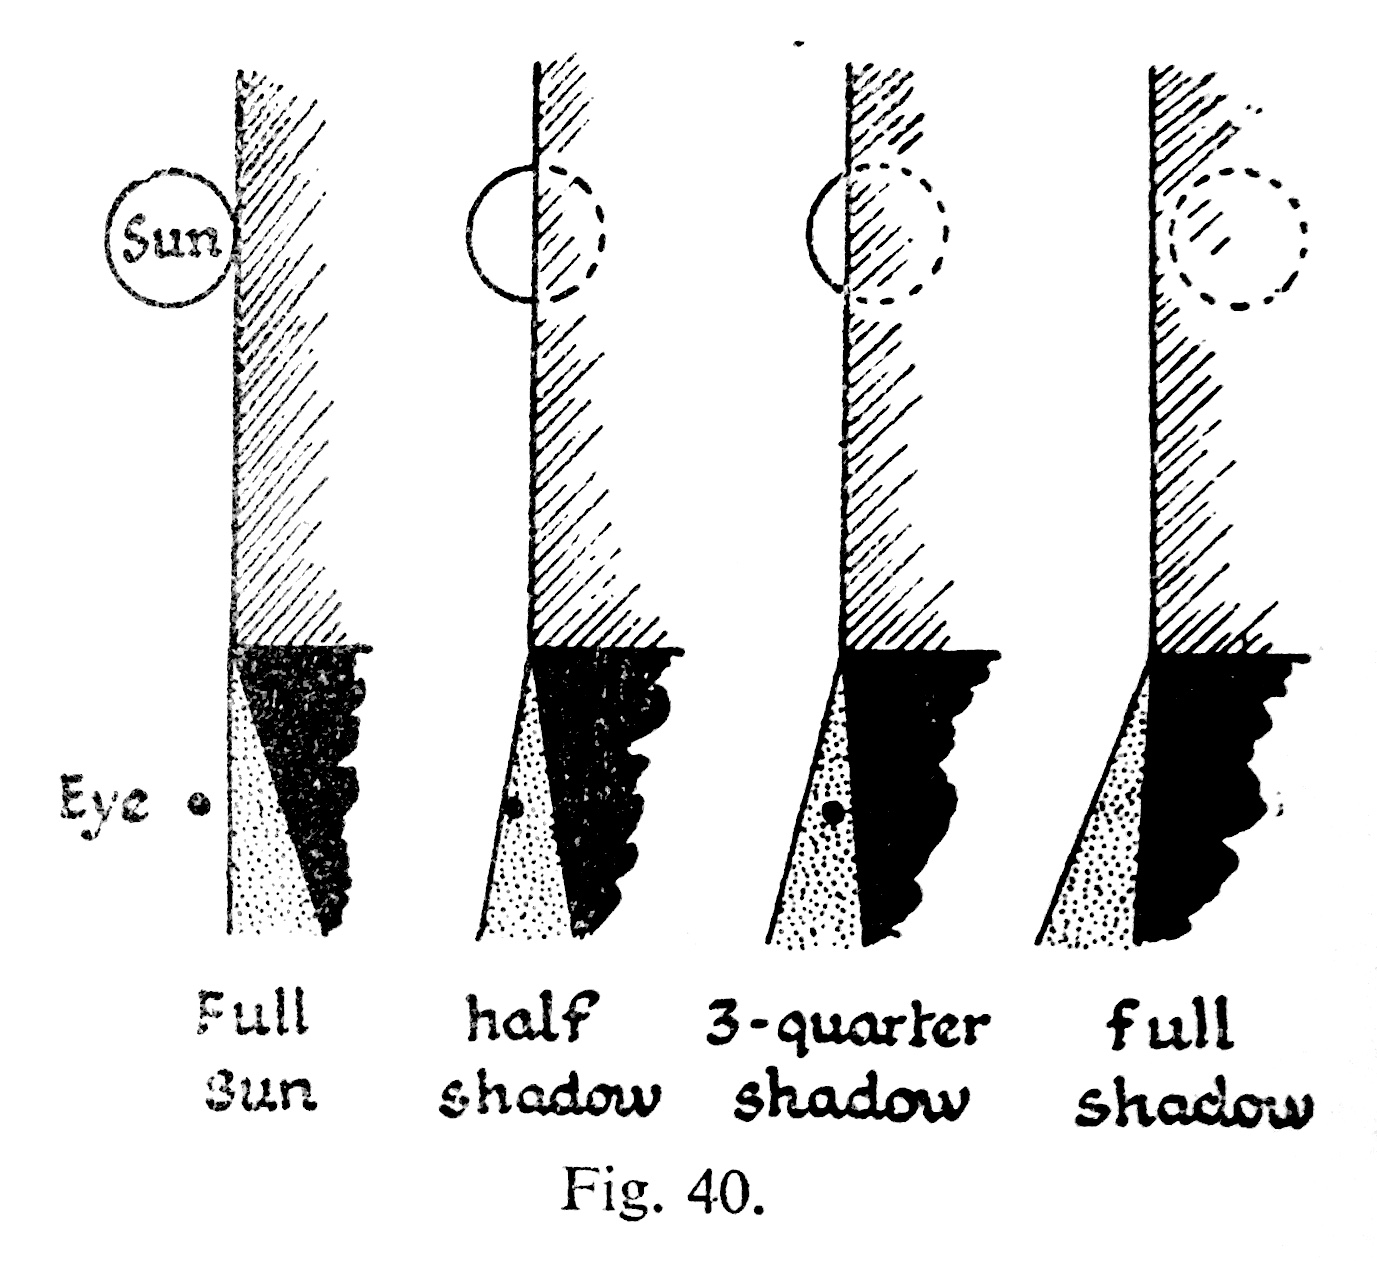
“Shadows are exciting,” McKay enthuses as he opens chapter VI. They certainly are to a cinematographer. And this cinematographer was excited to learn something about the sun and its shadow which is really quite obvious, but I had never considered before.
Look at the shadow of a wall. Near the base, where the shadow begins, the edge of the shadow is straight and sharp… Farther out, the edge of the shadow gets more and more fuzzy… The reason lies of course in the great sun itself. The sun is not a mere point of light, but a globe of considerable angular width.
The accompanying illustration shows how you would see all, part or none of the sun if you stood in a slightly different position relative to the hypothetical wall. The area where none of the sun is visible is of course in full shadow (umbra), and the area where the sun is partially visible is the fuzzy penumbra (the “almost shadow”).
5. Gravity bends LIGHT.
Einstein hypothesised that gravity could bend light rays, and observations during solar eclipses proved him right. Stars near to the eclipsed sun were seen to be slightly out of place, due to the huge gravitational attraction of the sun.
The effect is very small; it is too small to be observed when the rays pass a comparatively small body like the moon. We need a body like the sun, at whose surface gravity is 160 or 170 times as great as at the surface of the moon, to give an observable deviation…. The amount of shift depends on the apparent nearness of a star to the sun, that is, the closeness with which the rays of light from the star graze the sun. The effect of gravity fades out rapidly, according to the inverse square law, so that it is only near the sun that the effects can be observed.
6. Light helped us discover helium.
Sodium street-lamps are not the most pleasant of sources, because hot sodium vapour emits light in only two wave-lengths, rather than a continuous spectrum. Interestingly, cooler sodium vapour absorbs the same two wave-lengths. The same is true of other elements: they emit certain wave-lengths when very hot, and absorb the same wave-lengths when less hot. This little bit of science led to a major discovery.
The sun is an extremely hot body surrounded by an atmosphere of less highly heated vapours. White light from the sun’s surfaces passes through these heated vapours before it reaches us; many wave-lengths are absorbed by the sun’s atmosphere, and there is a dark line in the spectrum for each wave-length that has been absorbed. The thrilling thing is that these dark lines tell us which elements are present in the sun’s atmosphere. It turned out that the lines in the sun’s spectrum represented elements already known on the earth, except for one small group of lines which were ascribed to a hitherto undetected element. This element was called helium (from helios, the sun).
7. Moonlight is slightly too dim for colours.
Our retinas are populated by two different types of photoreceptors: rods and cones. Rods are much more sensitive than cones, and enable us to see in very dim light once they’ve had some time to adjust. But rods cannot see colours. This is why our vision is almost monochrome in dark conditions, even under the light of a full moon… though only just…
The light of the full moon is just about the threshold, as we say, of colour vision; a little lighter and we should see colours.
8. MAGIC HOUR can be longer than an hour.
We cinematographers often think of magic “hour” as being much shorter than an hour. When prepping for a dusk-for-night scene on The Little Mermaid, I used my light meter to measure the length of shootable twilight. The result was 20 minutes; after that, the light was too dim for our Alexas at 800 ISO and our Cooke S4 glass at T2. But how long after sunset is it until there is literally no light left from the sun, regardless of how sensitive your camera is? McKay has this to say…
Twilight is partly explained as an effect of diffusion. When the sun is below the horizon it still illuminates particles of dust and moisture in the air. Some of the scattered light is thrown down to the earth’s surface… Twilight ends when the sun is 17° or 18° below the horizon. At the equator [for example] the sun sinks vertically at the equinoxes, 15° per hour; so it sinks 17° in 1 hour 8 minutes.
9. Why isn’t Green a primary colour in paint?
And finally, the answer to something that bugged me during my childhood. When I was a small child, daubing crude paintings of stick figures under cheerful suns, I was taught that the primary colours are red, blue and yellow. Later I learnt that the true primary colours, the additive colours of light, are red, blue and green. So why is it that green, a colour that cannot be created by mixing two other colours of light, can be created by mixing blue and yellow paints?
When white light falls on a blue pigment, the pigment absorbs reds and yellows; it reflects blue and also some green. A yellow pigment absorbs blue and violet; it reflects yellow, and also some red and green which are the colours nearest to it in the spectrum. When the two pigments are mixed it may be seen that all the colours are absorbed by one or other of the components except green.
If you’re interested in picking up a copy of The Tricks of Light and Colour yourself, there is one on Amazon at the time of writing, but it will set you back £35. Note that Herbert McKay is not to be confused with Herbert C. McKay, an American author who was writing books about stereoscopic photography at around the same time.


 I joined this social media platform last summer, after hearing DP Ed Moore say in