Poppy Drayton in a scene from “The Little Mermaid” where we were blessed with beautiful evening light
Natural light can be beautiful, but it is not easy for a cinematographer to work with. Continuity, dynamic range, hardness and intensity are all potential challenges.
The most obvious difficulty with natural light is that it is forever changing. It can do stunning and unexpected things, but if you don’t move quickly it’s gone. Anyone who’s ever filmed a sunset scene and had the director push for another take after the perfect light has gone knows the disappointment it can bring.
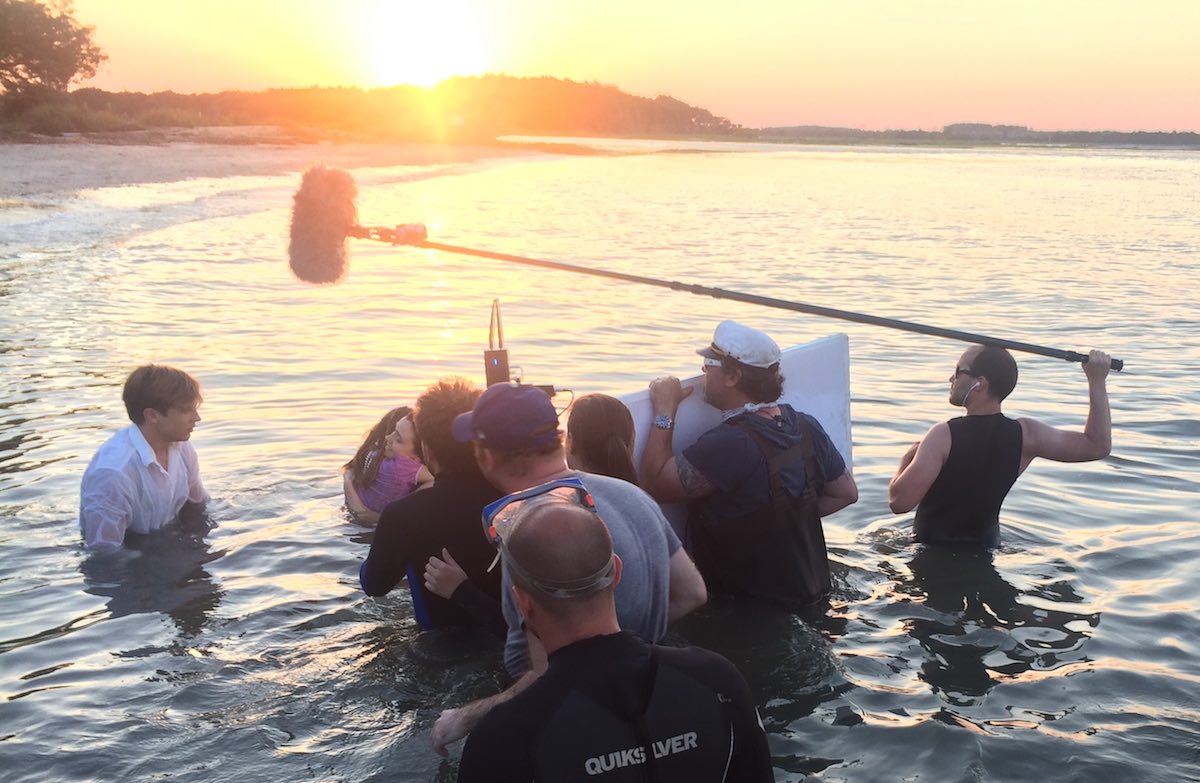
Preparation is key. Previewing the sun path using an app like Helios Pro or Sun Seeker is essential, as is working out the blocking to make the best use of the light. For The Little Mermaid I shot a sunset scene with three actors up to their waists in the Atlantic Ocean. I had to make sure, through rehearsals on dry land, that they would end up with their backs to the sun so that I would be shooting towards it.
Shooting the ocean scene for “The Little Mermaid”
I also had a grip next to me with a poly-board to bounce some of the sunlight back into the actors’ faces. This brings us to dynamic range, the fact that there may be too much or too little difference between the brightest and darkest areas. Too much contrast is common with exteriors under direct sun, or interiors with small windows or dark walls. Too little is often the case with overcast exteriors, or interiors with large windows or white walls.
As in my Mermaid example, shadows can be filled in using a reflector, be that the 5-in-1 collapsible kind that are widely and cheaply available, a white poly-board, a frame of Ultrabounce or even a white bedsheet. These will be much less effective indoors, where you may well need to add an artificial fill light, perhaps bounced off the ceiling.
If the light is too flat, contrast can be reduced using negative fill. Anything black can be used for this – a flag, a bedsheet, or the black side of a poly-board or 5-in-1 reflector. Typically this is placed to cut the light on the side of the talent’s face nearest camera to get the most shape in the image.
A demo of negative fill from my online course, “Cinematic Lighting”, available on Udemy
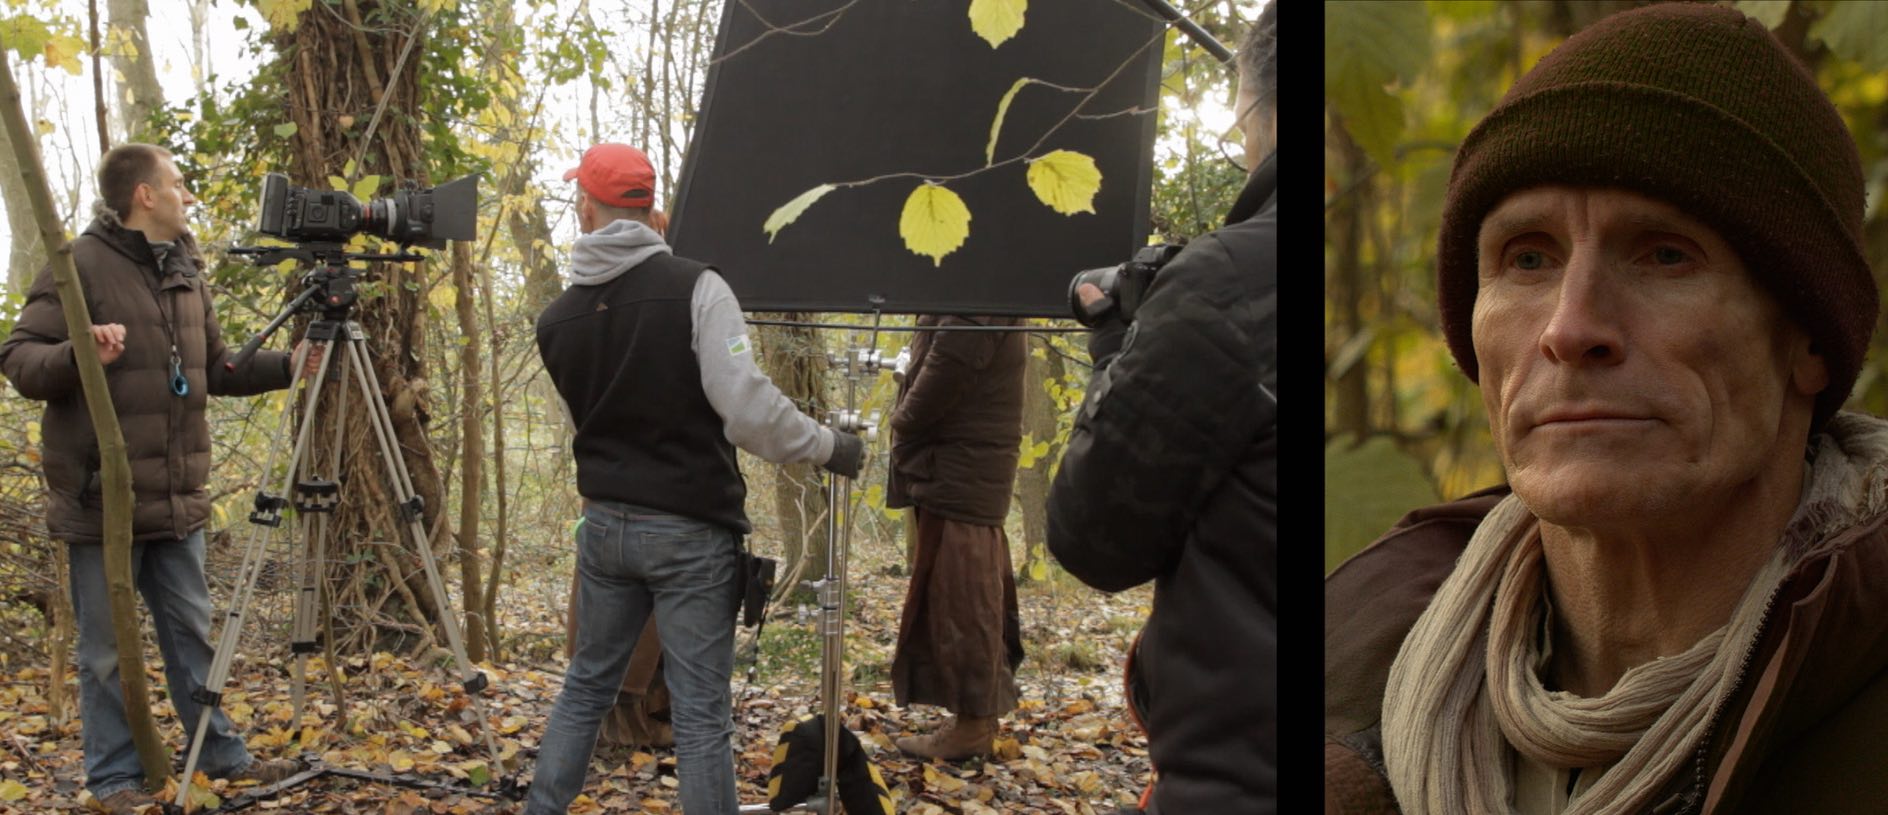
Direct sun is often too hard to be flattering, particularly in closer shots. The solution is to introduce some kind of diffusion between the actor and the sun. This could be anything from a shower curtain to a 12×12’ frame of Full Silk. 5-in-1 reflectors can be stripped down to a translucent white disc that works well for tight shots.
Indoors the trouble with natural light is that there might not be enough of it. If you like what it’s doing but just need more, try setting up a soft artificial source outside the window. A bigger production will often use 12K or 18K HMIs firing into Ultrabounce, but that requires a serious rental budget and a big generator. A smaller HMI pushing through a diffusion frame won’t be quite as soft but will be much cheaper.
If that’s not possible either, the next best thing is a soft source like an LED panel rigged indoors above the window. By having the source indoors you will lose the natural shaping of the light that the window frame gives you, but some of this can be regained by fitting a honeycomb or egg-crate.
Hard reflector
Another option is to place a hard reflector – essentially a mirror on a C-stand – outside the window and angle it to reflect the brightest part of the sky, or even direct sun, into the room. The great news for anyone working on a tight budget is that any old mirror will do, so long as you can find a way to position and angle it conveniently.
The opposite problem is one all DPs have to tackle at some point – namely direct sun coming into a room and moving across it, spoiling continuity. Choosing a north-facing location will save a lot of trouble here, otherwise flags will need to be rigged and regularly adjusted as the sun moves, unless you can move quickly enough to shoot everything before the light has noticeably changed.
Natural light can be one of the biggest challenges for a cinematographer, but also one of the greatest gifts and highest goals to emulate.
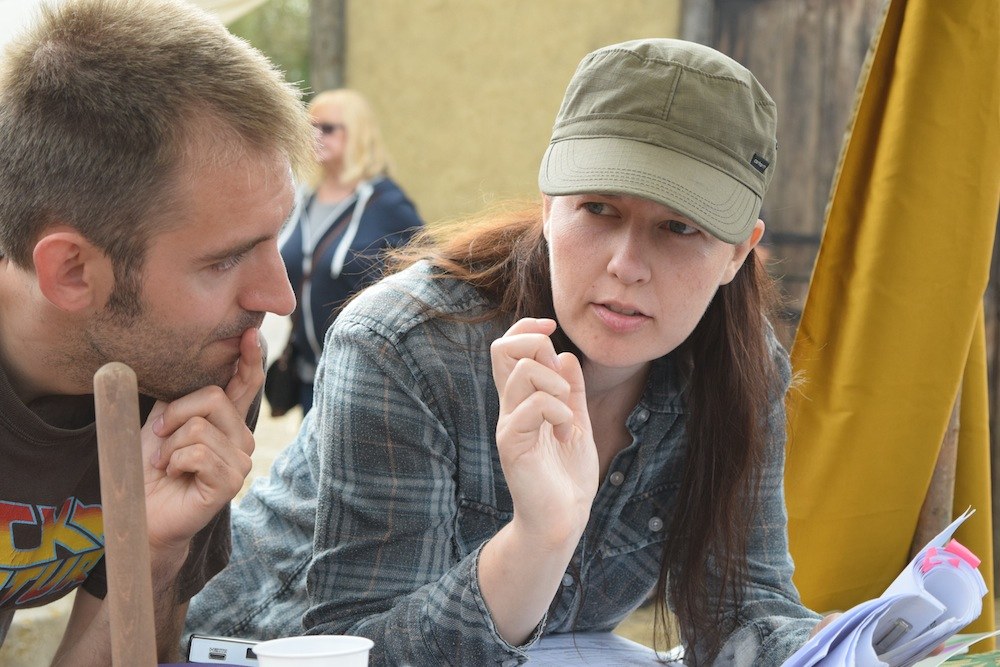
Discussing shots with director Kate Madison on the set of “Ren: The Girl with the Mark”. Photo: Michael Hudson
A thorough plan for shots and lighting can save lots of time on set, but no battle plan survives contact with the enemy. To what extent should a DP prepare?
How much camera angles are planned – and by whom – varies tremendously in my experience. Some directors will prepare a complete shot-list or storyboard and send it to the DP for feedback; others will keep it close to their chest until the time of shooting. Some don’t do one at all, either preferring to improvise on the day in collaboration with the DP, or occasionally asking the DP to plan all the shots alone.
A shot-list can be hard to interpret by itself, particularly if there’s a lot of camera movement. Overhead blocking diagrams, perhaps done in Shot Designer or a general graphics app, make things a lot clearer. Storyboards are very useful too, be they beautifully and time-consumingly drawn, or hastily scribbled thumbnails.
An Artemis shot from “Hamlet” using stand-ins
On a feature I shot last year, we were afforded the luxury of extensive rehearsals with the cast on location. I spent the time snapping photos with Artemis Pro, the viewfinder app, and ultimately output PDF storyboards of every scene; the 1st AD distributed these with the call-sheets every morning. That level of preparedness is rare unless complex stunts or VFX are involved, but it’s incredibly useful for all the departments. The art department in particular were able to see at a glance what they did and didn’t need to dress.
One of my unused storyboards from “The Little Mermaid”
Beware though: being prepared can kill spontaneity if you’re not careful. Years ago I directed a film that had a scene supposedly set at the top of a football stadium’s lighting tower; we were going to cheat it on a platform just a few feet high, and I storyboarded it accordingly. When we changed the location to a walkway in a brewery – genuinely 20ft off the ground – I stuck to the storyboards and ended up without any shots that showcased the height of the setting.
If the various departments have prepared based on your storyboards, not keeping to them can make you unpopular. So storyboards are a double-edged sword, and expectations should be carefully managed regarding how closely they will be adhered to.
The amount of planning that the DP puts into lighting will vary greatly with budget. On a micro-budget film – or a daytime soap like Doctors – you may not see the location until the day you shoot there. But on a high-end production shooting in a large soundstage you may have to agree a detailed lighting plot with the gaffer and pre-rigging crew days or weeks in advance.
Having enough crew to pre-rig upcoming scenes is one of the first things you benefit from as a DP moving up the ladder of budgets. Communicating to the gaffer what you want to achieve then becomes very important, so that when you walk onto the set with the rest of the cast and crew the broad strokes of the lighting are ready to go, and just need tweaking once the blocking has been done.
My lighting plan for a night exterior scene in “Exit Eve”
Blocking is usually the biggest barrier to preparedness. Most films have no rehearsals before the shoot begins, so you can never quite know where the actors will feel it is best to stand until they arrive on set on the day. So a lighting plan must be more about lighting the space than anything else, just trying to make sure there are sources in roughly the right places to cover any likely actor positions suggested by the script, director or layout of the set.
Whether a detailed lighting plan needs to be drawn up or not depends on the size and complexity of the set-up, but also how confident you feel that the gaffer understands exactly what you want. I often find that a few recces and conversations along with some brief written notes are enough, but the more money that’s being spent, the more crucial it is to leave no room for misunderstandings.
Again, Shot Designer is a popular solution for creating lighting plans, but some DPs use less specialised apps like Notability, and there’s nothing wrong with good old pencil and paper.
Overall, the best approach is to have a good plan, but to keep your eyes and mind open to better ideas on the day.
For more about apps that DPs can use to help them prep and shoot, see my article “Tools of the Trade” on britishcinematographer.co.uk.
Exciting title, right? It’s not the glamorous side of a DP’s job, but enabling a scene to be shot quickly is a skill which definitely has its place, as long as you balance it with creative and technical quality, of course.
When a scene has been blocked and the cast have gone off to have their make-up and costuming finished, and even the director has disappeared to make plans for future scenes, the DP is left on the set to light it. Though there is always time pressure on a film, it is at a minimum during this initial lighting period (usually for the wide shot). But once the wide is in the can, the DP is expected to move quickly when tweaking lights for the coverage, as all the cast and crew are standing around waiting for you.
So a wise DP always thinks ahead to the coverage, setting up as much as possible for it concurrently with the wide, or better still sets up the wide’s lighting so that it works for the coverage too.
If we boil things right down, light looks best when it comes in from the side or the back, not the front. A common technique is to block and/or light the scene so that the main light source, be that the real sun, a window or an artificial source, is behind the cast in the wide. Let’s imagine this from the top down with the camera at 6 o’clock, the key light at 12 o’clock, and the actors in the centre.
Because of the 180º Rule, otherwise known as the Line of Action, the camera positions for the coverage are likely to all be on the bottom half of the clock face between 3 o’clock and 9 o’clock. At either of those two positions the 12 o’clock key light is now coming in from the side, so your image still has mood.
This date scene in “Harvey Greenfield is Running Late” was cross-backlit; you can just see the second light in the top right of this photo.
Another common set-up is cross-backlight. Here you would have two lights, one at about 10:30 and the other at 1:30. These give a three-quarter backlight in the wide and a three-quarter key light in the singles.
Something basic to avoid is lights actually being in shot when you move to a new camera position. Early in my career I used to put all my lamps on stands because I didn’t know any better (or have any rigging kit to do anything else), but that means you’re forever moving them. Much better to rig things to the ceiling, or to position them outside the room shining in through doors and windows.
Practicals lights are really helpful too, because you can get them in shot with impunity. You can save hours of pain on set by collaborating with the art department in pre-production to make sure there are enough practicals to justify light from all the angles you might need it. Put them all on dimmers and use a fast lens or high ISO and you may well find that when you change camera position you only need to dim down the frontal ones and bring up the back ones to get the shot looking nice.
A behind-the-scenes view of some of the lights we rigged in the “Heretiks” chapel.
I once had to light a scene in a medieval chapel for a horror film called Heretiks. The master was a Steadicam shot moving 360º around the set. The gaffer and I invested the time beforehand to rig numerous 300W and 650W tungsten fresnels around the tops of all the walls, connected to dimmers. (The light was motivated by numerous candles.) With a bit of practice the gaffer and sparks were able to dim each lamp as the camera passed in front of it – to avoid camera shadows and the flat look of front light – and bring them back up afterwards, so there was always a wrapping backlight. A convenient side effect was that when we moved onto conventional coverage we could light shots in seconds by turning a few dimmers down or off and others up.
DP Benedict Spence used a similar principle on the recent BBC series This is Going to Hurt; he had 250 Astera Titan tubes built into the hospital set. While this was time-consuming and expensive upfront, it meant that shots could be lit very quickly by making a few tweaks at a lighting desk. And since the tubes looked like fluorescent strip-lights, there was never any problem with getting them in shot.
Once you start shooting a scene it’s important to keep up the pace so that the cast can stay in the zone. Spending extra time in prep or when lighting the wides will pay dividends in faster coverage, giving the director more time to get the best performances and to tell the story, which is ultimately what it’s all about.
If you’ve done much still photography, particularly on celluloid, you will probably have heard of the Sunny 16 Rule. It’s a useful shortcut for correctly exposing bright day exteriors without needing a light meter. Is it of any use in digital cinematography though? Yes, and I’ll explain how.
How the rule Works
Sunny 16 is very simple: if the sun is out, set your aperture to f/16 and your shutter speed denominator to the same as your ISO. For example, at ISO 100 set the shutter to 1/100th of a second. At ISO 400 set the shutter to 1/400th of a second – or 1/500th of a second, if that’s the closest option the camera permits – and so on.
You can use the rule to work out other combinations from there. Say your ISO is 100 but you want the sharper, less motion-blurred look of a 1/400th shutter. That’s two stops slower, so open the aperture from f/16 to f/8. (Check out my exposure series if this is all Dutch to you.)
The Sunny 16 Rule works because the sun outputs a constant amount of light and is a constant distance from the earth – at least constant enough to make no significant difference. The sun’s illuminance at the earth’s surface is about 10,000 foot-candles. The following formula relates illuminance (b) to f-stop (f), shutter speed (s) and ISO (i):
Using Sunny 16 in the case of ISO 100 and a shutter speed of 1/100th of a second, this formula gives us…
… 6,400 foot-candles. Less than 10,000fc, certainly, but remember this is only a rule of thumb – and one designed for film, which isn’t hurt at all by a little over-exposure. The rule probably accounts for the fact that you may want to see into the shadows a bit too. (See my article “How Big a Light Do I Need?” for explanations of illuminance and foot-candles and more on the above formula.)
Anyway, you can see from the equation why the shutter speed denominator and ISO cancel each other out if they’re the same.
Using the rule in cinematography
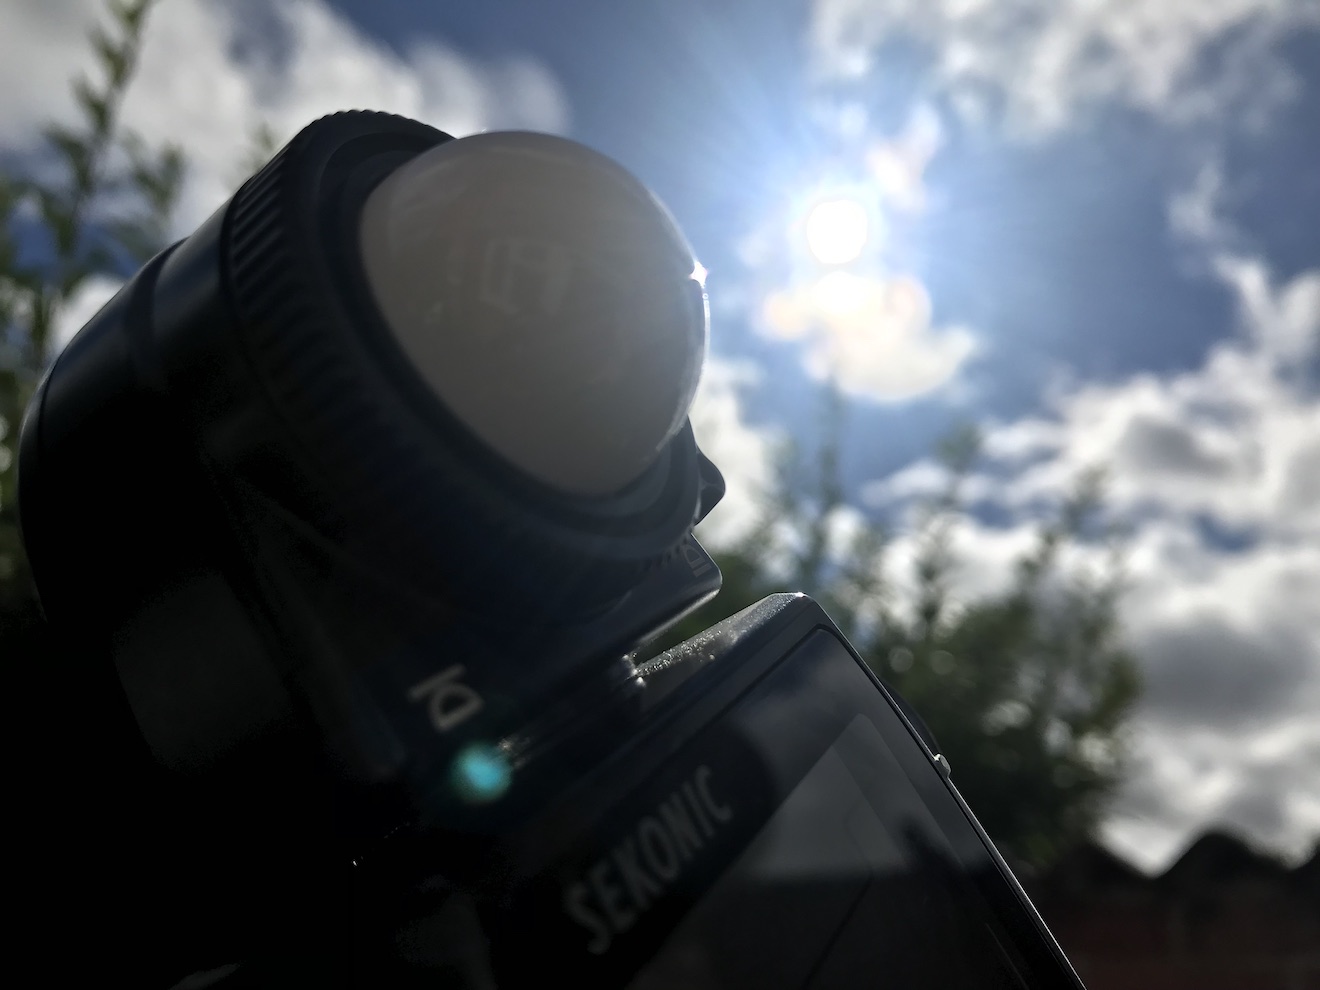
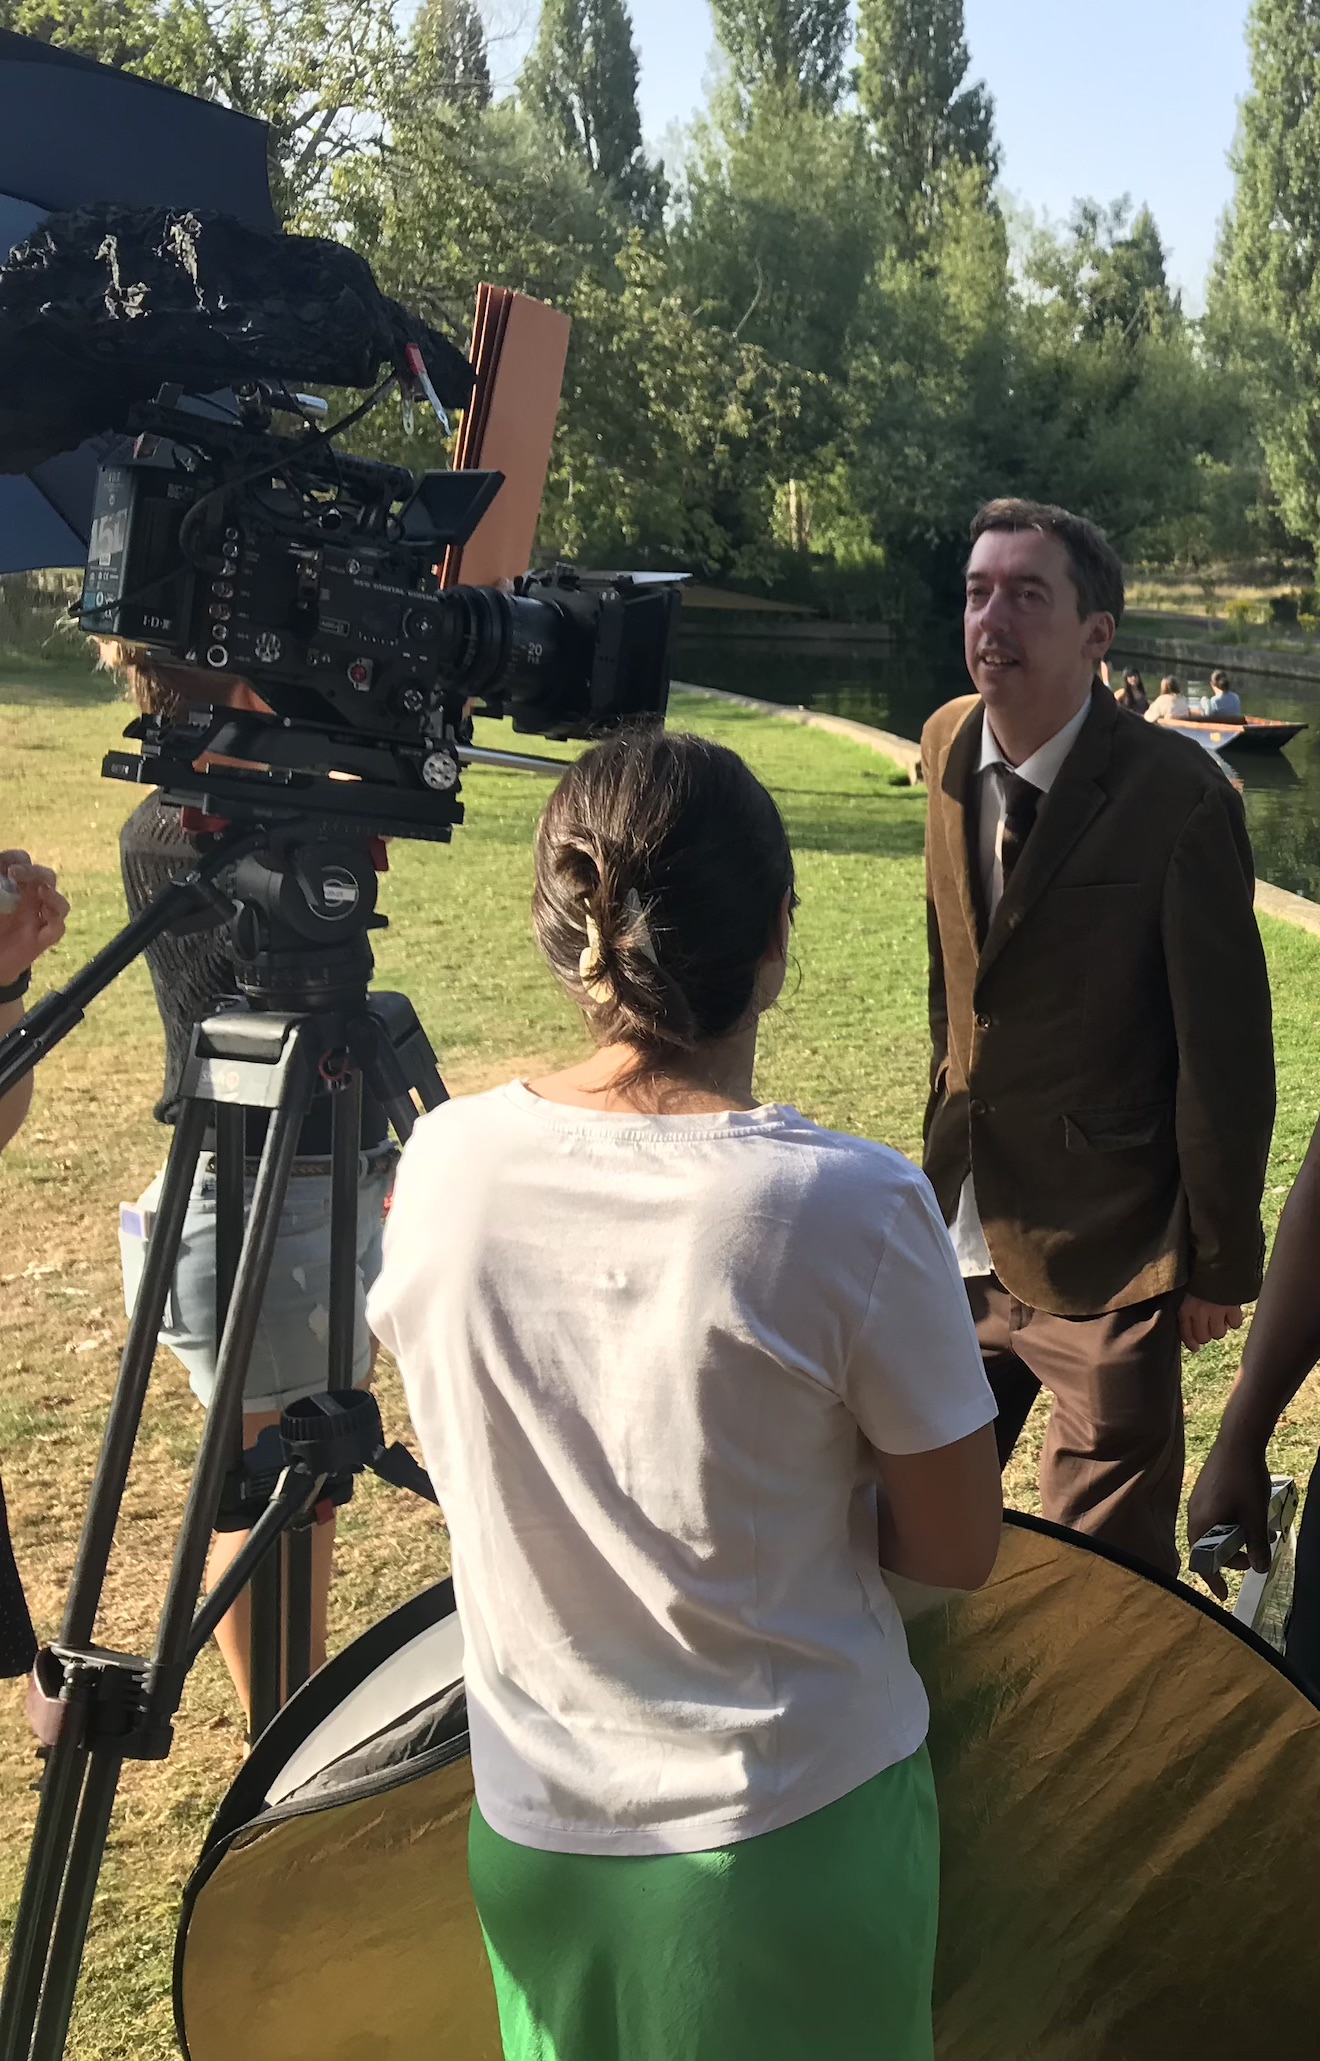
A few weeks ago when I was on the banks of the River Cam setting up for a scene in Harvey Greenfield is Running Late, my 1st AC Hamish Nichols asked which ND filter I wanted in the matte box. It was 5:30am; the sun had barely risen and certainly wasn’t high enough yet to reach me and my light meter over the trees and buildings on the horizon. But I knew that it would be hitting us by the time we turned over, and that the weather forecast was for a completely cloudless day, indeed the hottest day of the year at that time. So I was able to predict that we’d need the 2.1 ND.
How did I work this out? From the Sunny 16 Rule as follows:
I was shooting with a 1/50th of a second shutter interval (a 172.8° shutter angle at 24fps), so the Rule told me that f/16 (or T16) at ISO 50 would be the right exposure.
I was actually at ISO 800, which is four stops faster than ISO 50. (Doubling 50 four times gives you 800.)
I wanted to shoot at T5.6, which is three stops faster than T16.
That’s a total of seven stops too much light. To find the right optical density of ND filter you multiply that by 0.3, so 0.3 x 7 = 2.1. (More on this in my ND filters post.)
Everything on a film set sucks up time, so the more you know in advance, the more efficient you can be. Little tricks like this mean you don’t have to do a last-minute filter swing and waste five minutes that the director could have used for another take.
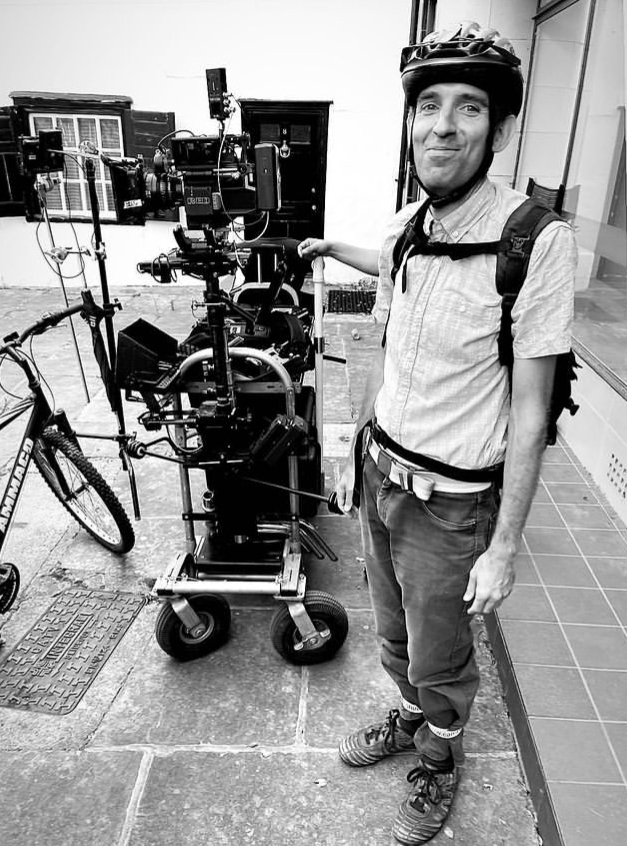
A morning full of short running scenes, all shot as oners on the Steadicam by Luke Oliver. Pretty much every crew member had had a cameo by this point, and today it was my turn. My character: Nerdy Cyclist. Alright, technically it was just Cyclist. The nerdy bit was just me (a) beefing up my part and (b) playing to type.
For the afternoon we moved to The Lab, a cocktail bar, where we filmed one of the fantasy/imaginary scenes that cuts with the very first shot we did of Harvey back on Day 1. Mixologist Tom was dressed in an elaborate all-black costume so Stephen and I hit him with two tungsten lamps, one either side, at an angle somewhere between side-light and backlight. This cut him out from the background, showed up the layering in the costume, edge-lit the cocktail shaker and liquids being poured, and deliberately kept Tom’s face dark. Quadruple win!
Day 22
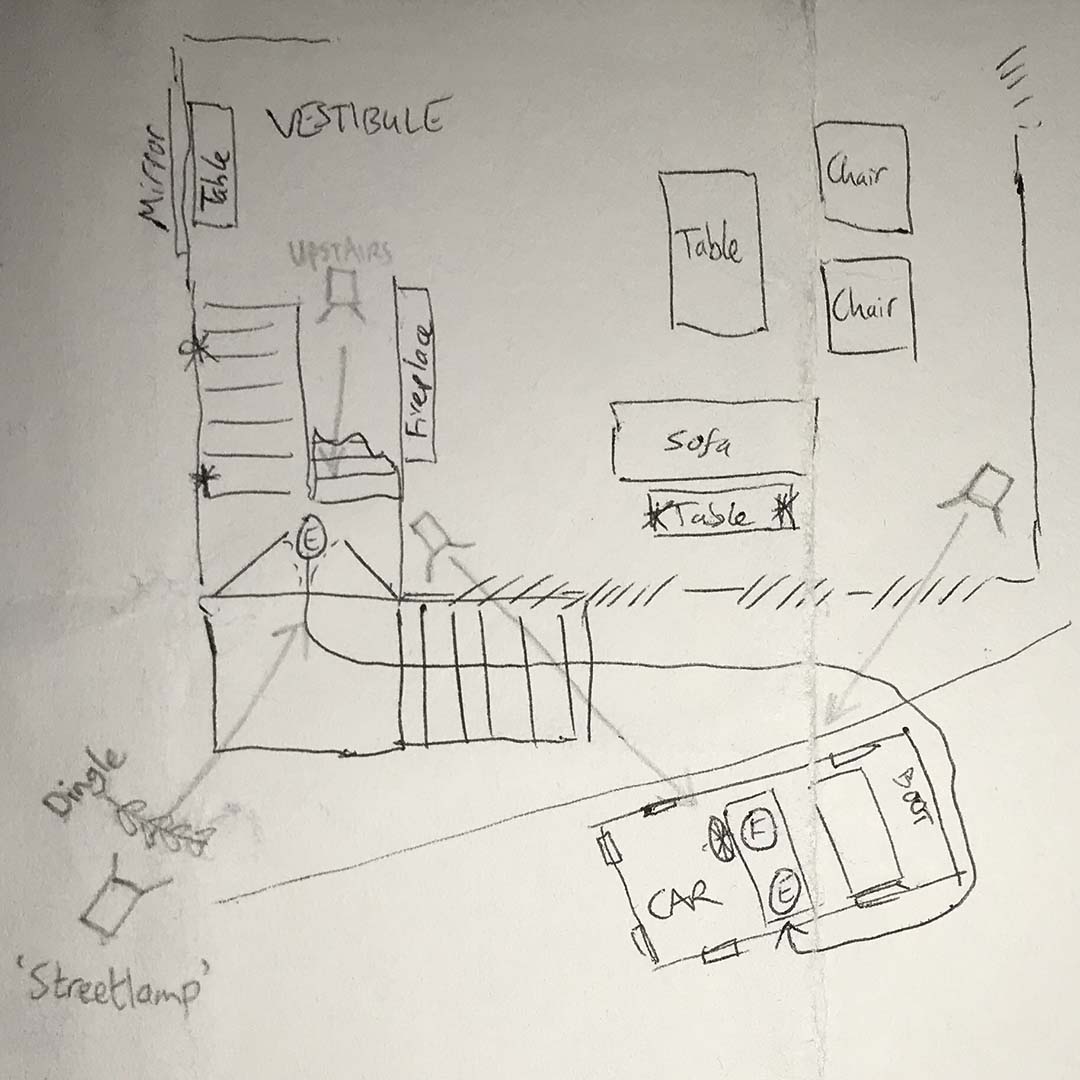
We returned to Othersyde to pick up the one scene we dropped there on our most packed day of principal photography, Day 7. I referred to the blog post to help get the vibe of the lighting the same. The main motivation was the real streetlamp at the front of the site, which we wrapped using an Aputure with a lantern attachment, rigged on a mini boom. Another Aputure lantern gave a cool moonlight wash on the venue’s terraced outdoor seating, and a blue-gelled 300W tungsten fresnel uplighter replicated what we did on the other side of the building last year. A 2K blasted light from the direction Harvey has come; this light represented the ongoing wedding, so we had a couple of people moving around in front of it for dynamic shadows.
I ended up turning off the first Aputure for the wide as it seemed to kill the mood, but we brought it back for the close-up to show more of Paul’s face. To represent the light of his phone as he turns it on, Stephen held a PavoTube just above the camera and twisted it quickly around to face Paul on cue. We adjusted the eyebrow on the camera to flag the tube’s light off the phone itself.
There were a few bitty pick-ups to do while we were outside with access to power, including a “BOV” – a POV of a bee. We did this with the probe lens on Jonnie’s Canon C200, which I had to float around and then jab into Paul’s neck. Sorry, Paul.
At 1am we moved into an adjacent industrial street – having decided that it was unreasonable to have Paul shouting dialogue in a residential area at that hour – for some Steadicam shots. I went to the Gemini’s low-light ISO 3200 and Stephen hand-bashed a lantern on a boom pole to fill Paul in between streetlamps, which became a fun dance when we had to do a 270° orbit!
Day 23
We convened at Cambridge’s Castle Hill. Nearby Indian restaurant Namaste Village kindly agreed to let us shoot a brief scene there at the last minute, even having one of the staff do a spot of acting. I posted a video breakdown on Instagram – here it is:
Back outside we filmed a nice sequence of shots ending with a 360° pan following Harvey as he walks around the top of Castle Hill talking on the phone. As the other end of the phone call had been shot with Steve’s head sometimes out of frame, we went the other way and gave Harvey loads of headroom, capturing some nice clouds along the way.
Then it was time for another pick-up from Day 7, reshooting the tent scene for continuity reasons. Again we put a light on one side and black-draped the other to get some shape into the light inside. This time we used a wider lens, the 14mm, and with the help of a runner I handheld it over Paul rather than trying to squeeze the tripod in around him like last time. He got a nasty shock when I accidentally knocked the matte box off and it hit him in the face. Er, sorry again.
After wrapping a few of us went back across the road to Namaste Village, where the food was excellent.
Day 24
On our last day we caught up to the elusive pick-up that was always meant to be a pick-up: the scenes with Harvey’s mum. We took over Rachel’s grandmother’s house for several hours, most of the shots being in a corner of her living room. Unusually I was drawn to a corner that didn’t have a window in it, because it had the best furniture and dressing to establish the character in our standard 24mm tableau shot.
But this meant – with all the windows behind camera – that it was a challenge to make the lighting interesting. We faked a window just off camera left using a diffusion frame with muslin and a grid over it; Stephen bounced the 600D into it from across the room. I closed the room’s curtains as much as I could get away with before the lack of natural fill light started to make it look like night. (For later scenes we closed them all the way and put a 300D behind the muslin, as pictured above.)
To add more interest to the shot I played around with the positions of two table lamps and a floor lamp. Pausing to check my script breakdown notes from last year I saw that I had written “a single practical floor lamp” in the lighting column; too many lamps would kill the scene’s sad tone. This is a good example of a breakdown keeping me honest as a DP and preventing me from getting carried away doing stuff on set just because I can (though that definitely still happens sometimes). I ended up with just one lamp in the back of the main shot.
After some variations on that main shot for later scenes, and a brief scene in the kitchen, we packed up and headed out for exteriors. Most of these were happy flashbacks from the early days of Harvey and Alice’s relationship, and Jonnie wanted to fill them with filmic references. First up was a Jules et Jim homage with the pair racing across a bridge, then a “remake” of one of Jonnie’s own amateur films with Harvey and Alice spinning around holding hands. For POV reverse shots we put the tripod on the point which they span around, and I set the panning tension to zero so that they could pull the camera around themselves by holding the moose bars (handgrips).
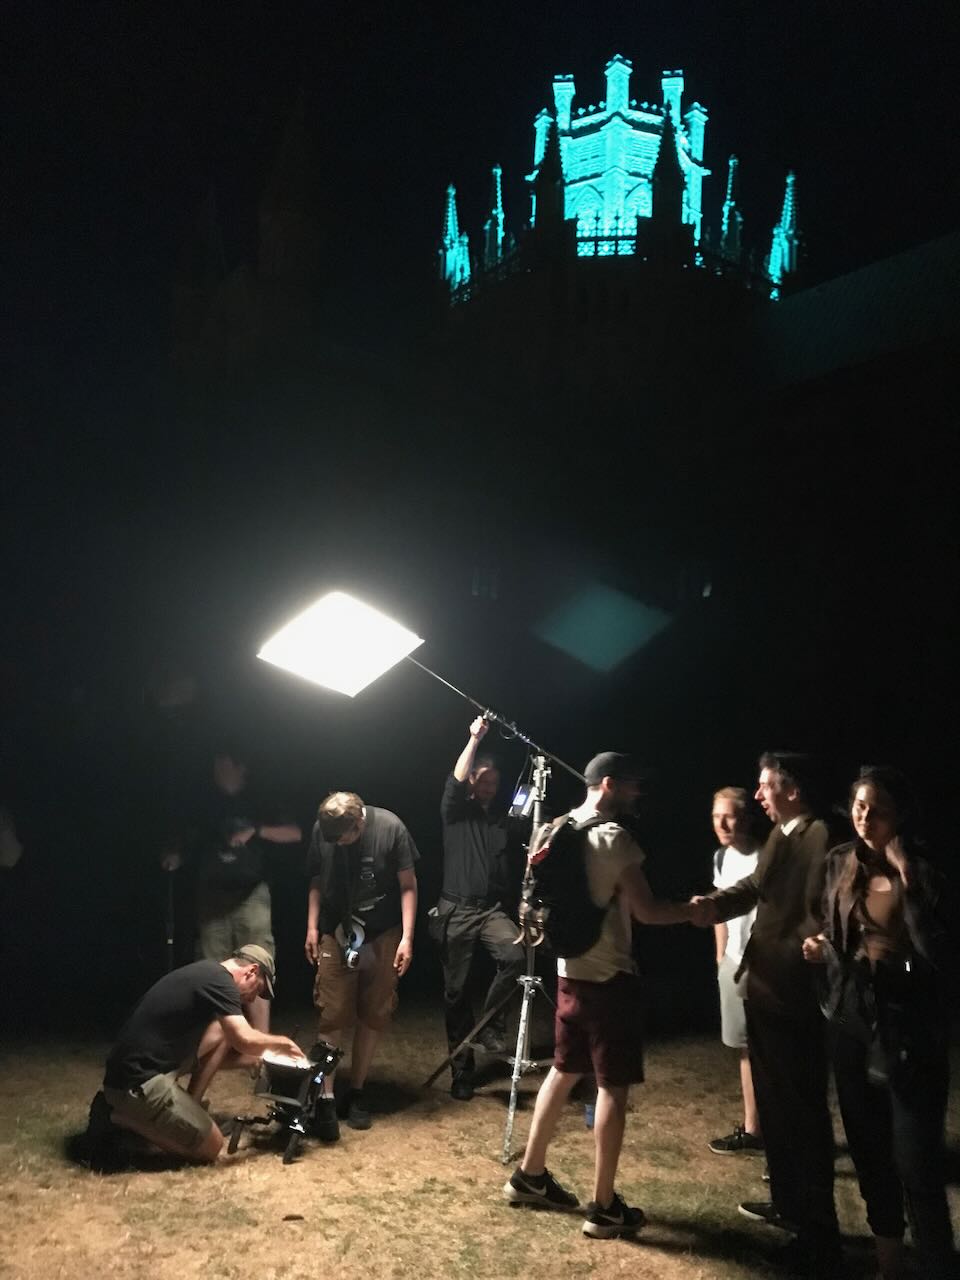
Next was a Manhattan-esque shot with the couple on a bench looking up at Ely Cathedral. We clearly weren’t going to light the cathedral on our budget, so we set up around sunset and waited for the streetlamps to come on and the ambient light to drop to a nice dusky level. We rolled when the daylight was metering at T1.4 at ISO 800, though I exposed at T2. To cut Harvey and Alice out from the background a bit Stephen stood just out of frame with an LED lantern motivated by a nearby streetlamp.
He pulled the same trick at our next location, a passageway beside Prezzo, where we did actually have to light a small portion of the cathedral wall as well, using a battery-powered Aputure (200X I think). We couldn’t have done it for long on the batteries we had, but fortunately it was a brief scene.
Our final set-up was a Poor Man’s shot of Harvey running at night. We did this on the green beside the cathedral because it was a handy open space where we could get a completely dark background save for a few dots of distant lights. Stephen armed a FalconEyes over Paul and swung it back and forth to create the illusion of passing streetlamps. The shot needed a tiny touch of fill, so we taped a PavoTube to the top of the matte box, setting it to 1% intensity and taping over most of it to get it down to a low enough level. (I was at ISO 3200 and on a 14mm lens, so mere inches from Paul’s face.)
Then Rob said the magic words, “It’s a wrap.” Like most micro-budget projects there are still a few loose ends to be shot, but those will be done with Jonnie’s camera and no crew. For most of the cast and crew Harvey Greenfield has run his course and I’ll see them at some distant time for the premiere. Thank you Stephen Allwright (gaffer), Jeremy Dawson (spark), Hamish Nichols (1st AC), Fiyin Oladimeji (2nd AC) and Nana Nabi (2nd AC daily) for all your hard work, and to Jonnie for bringing me onto this fun and creative film. Huge thanks also to Global Distribution, Red and Sigma who supported us with equipment which brought the whole thing up a level. The rough cut is already fantastic and I can’t wait to see it finished.
Read all my Harvey Greenfield is Running Late posts: