What Makes a Good Shot?

It’s a very difficult question to answer, but let’s look at a few major things a cinematographer considers each time they set up their camera.


Tonal Range
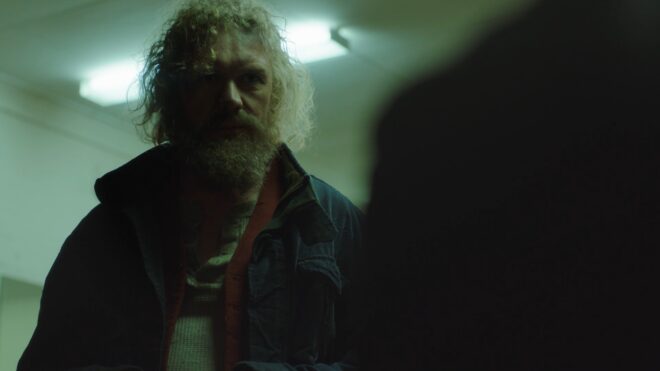
“Above the Clouds” (2020, dir: Leon Chambers, DP: Neil Oseman)

TV sets and other moving-image devices, especially if they are non-HDR, cannot display as wide a dynamic range as most scenes have in real life. So it is often seen as desirable to make the most of what contrast a screen can reproduce by including at least one area of the blackest black and one of the whitest white, with a good distribution of all the tones in between.

Contrast makes an image richer and also easier for the viewer’s brain to interpret, but as with all of these rules, it is perfectly possible to break it with excellent results. For example, you may want to keep a scene in a prison entirely in the shadows, so that when the prisoner escapes into the daylight the viewer will feel the impact of the highlights. Tonal distribution has a big impact on mood, and thought should be given to what mood a DP wants to convey. 


Colour Schemes

“Alder” (2019, dir: Vanda Ladeira, DP: Neil Oseman)

Since Isaac Newton invented the colour wheel in 1704, artists have devised several colour schemes which can evoke different feelings, the most common in cinematography being complementary and analogous.

A complementary colour scheme uses two hues on opposite sides of the wheel for maximum colour contrast, punch and vibrancy. Think Ripley’s yellow power loader against the blue lighting of Aliens, or the infamous teal-and-orange grading of Michael Bay’s films.

An analogous colour scheme uses hues adjacent to each other on the wheel for a harmonious or oppressive effect. Think the greens of The Matrix, or the reds of Mars in Paul Verhoeven’s Total Recall.

There’s more on colour schemes in this post.


Composition
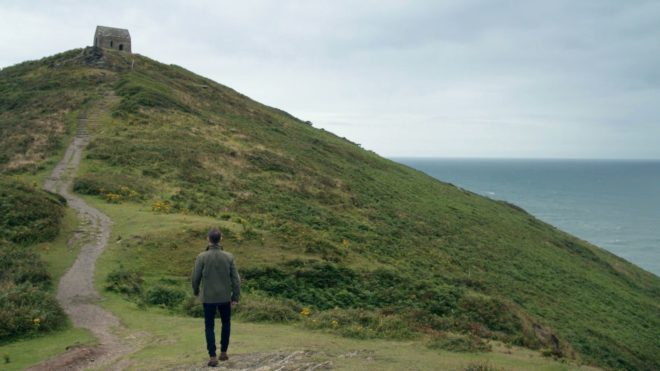
“Perplexed Music” (2018, dir: Mark McGann, DP: Neil Oseman)

“The so-called rules of photographic composition are, in my opinion, invalid, irrelevant and immaterial,” said the great American photographer Ansel Adams. I might not go that far, but they can certainly be overrated.

The Rule of Thirds, for example, is intended to produce a balanced image, but what if you don’t want a balanced image? Placing a character in an unusual part of the frame, as is frequently done in Amazon’s Mr. Robot, can be powerfully unsettling and say much about the character’s status and mindset. Breaking rules for the sake of breaking rules may not be wise, but breaking them in a single shot to make the viewer sit up and take notice, or breaking them subtly but consistently throughout a film to subconsciously cue the audience into a theme or character trait, is a good use of cinematic technique.

As for camera moves, some believe that they should always be motivated. Some like them to be expressive. Some simply like to keep dollying the camera back and forth to add energy to a scene. As long as the movement helps to immerse rather than distract the viewer, it is serving its purpose.


Depth
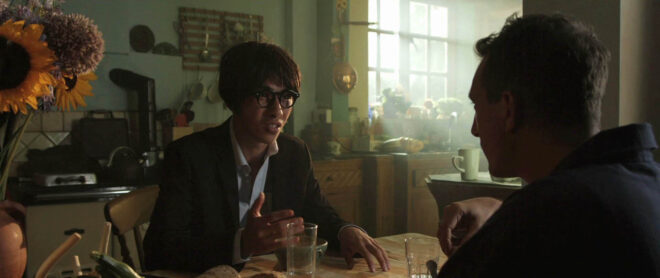
“The Gong Fu Connection” (2016, dir. Ted Duran, DP: Neil Oseman)

As film and TV are usually monoscopic media, cinematographers often aim to compensate by enhancing other types of depth cues. Commonly this is through lighting – using backlight to cut a layer out from the background, using colour to separate layers, or alternating light and dark layers. Haze and camera movement can also be used to create a greater sense of depth, as can lens choice, be it a wide lens which exaggerates perspective, or a long lens that throws backgrounds out of focus.

The result is not just impact but clarity, ensuring the viewer is not distracted from the story trying to figure out what they’re seeing. Again though, you may sometimes want just the opposite, to disorientate the viewer or make them work to find the important element in the frame.

This post has some good examples of depth cues.


Production Value
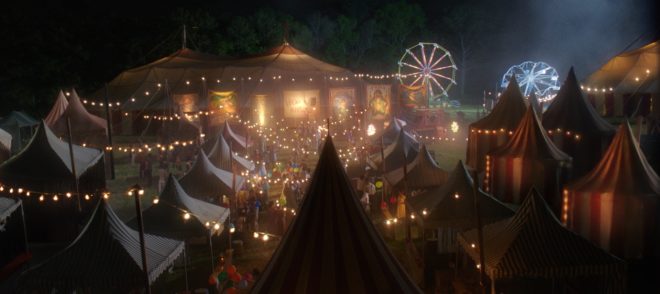
“The Little Mermaid” (2018, dir: Blake Harris, DP: Neil Oseman)

A DP has the responsibility of capturing on film or digital media the work of every other department on the production (except sound!). If the costumers have spent weeks sewing beads onto a period dress, a cross-light to bring out the texture is the least the DP can do. If the make-up department are struggling to hide the joins in a prosthetic, softening or dimming the lighting will help. If a huge set has been built or an expensive location hired, showing it off in at least one wide shot is probably advisable.


Story and Character

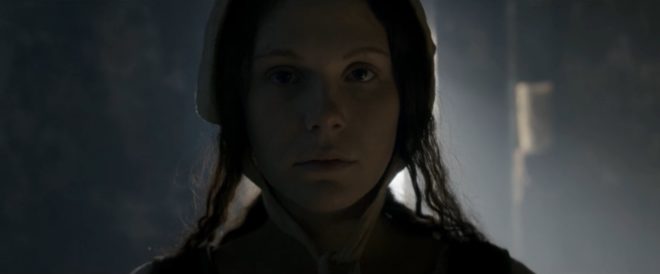
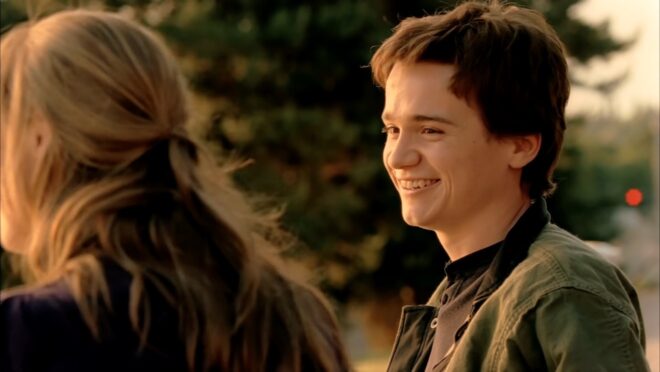
“Ren: The Girl with the Mark” (2016, dir: Kate Madison, DP: Neil Oseman)

As I’ve hinted throughout, the most important thing is that every aspect of the shot is working towards telling the story, revealing or enhancing character, and conveying the right overall mood. This might be by keeping everything quiet and conventional to let the performances shine through, or it might be through crazy framing, crunchy contrast and dramatic movements. The possibilities are endless.
What Makes a Good Shot?

What is a French Over?

Film industry jargon isn’t shy of national references. A Dutch angle is a canted shot. To Spanish a piece of kit is to get rid of it (a corruption of “it’s banished”). To German a light – I think – is to lie the stand horizontal, attach the head, then raise the whole thing vertical. Or maybe that’s Italianing. I forget. But what is a French over?
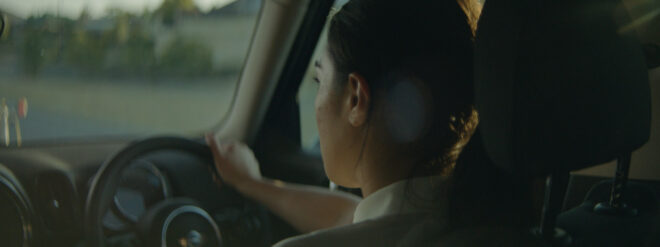
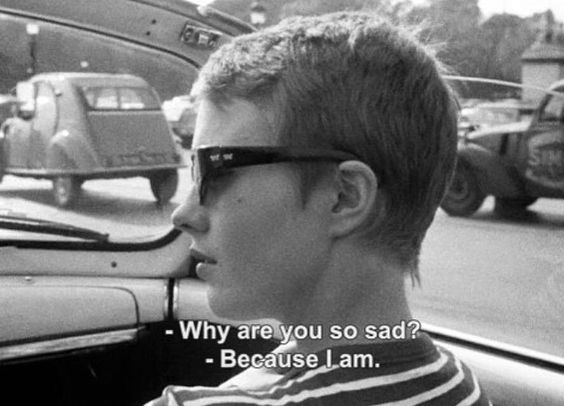
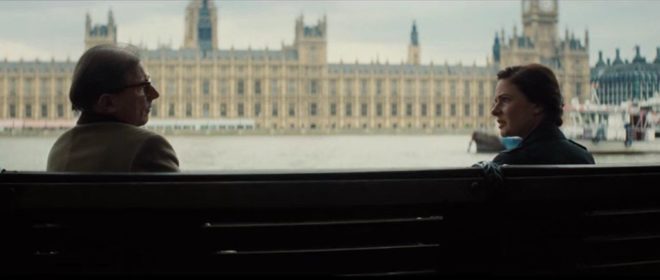
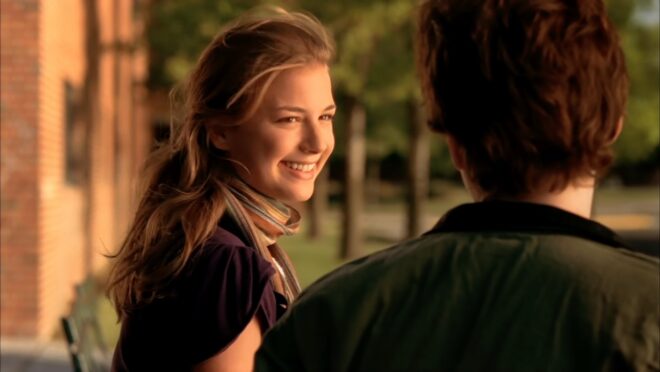
It’s a type of over-the-shoulder shot. It requires the two characters to be bodily facing in the same direction, like on a bench or in the front seats of a car. If the camera shoots from behind their bodies, it’s a French over. Here are a few examples.

“Norman” (2010, DP: Darren Genet)
A commercial shot by Patrick O’Sullivan
“À bout de souffle” (1960, DP: Raoul Coutard)

A French over feels a little more conspiratorial or voyeuristic than a standard over. It gives the viewer a sense that they’re privy to a confidential conversation.

It works well for bench scenes because benches often have nice vistas in front of them which you can keep in the background of your close-ups, and you don’t have to cross the line to do a wide shot behind the bench showcasing the whole view.

“Mission: Impossible – Rogue Nation” (2015, DP: Robert Elswit, ASC)

It’s far easier to shoot French overs in a car because the operator can simply sit on the back seat rather than trying to jam the camera onto the dashboard.

French overs allow the editor more flexibility too. A typical problem of covering dialogue scenes where characters are facing the same way is that you can often clearly see the foreground character’s mouth, which locks the editor in to maintaining lip-sync every time they cut. In a French over you only see the back of the foreground character’s head so this problem is eliminated.

They’re not to everyone’s taste though. You certainly see less of the actors’ faces than in a standard over, and if the cast are not going to turn to look at each other very often their emotions could easily end up unreadable. If that’s not the effect you want, standard overs would be a better choice.

What is a French Over?

“Die Hard”: A Masterclass in Composition

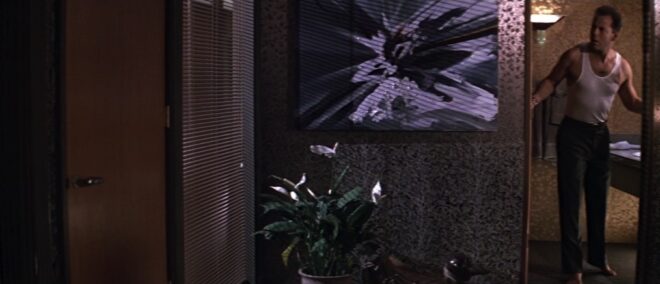
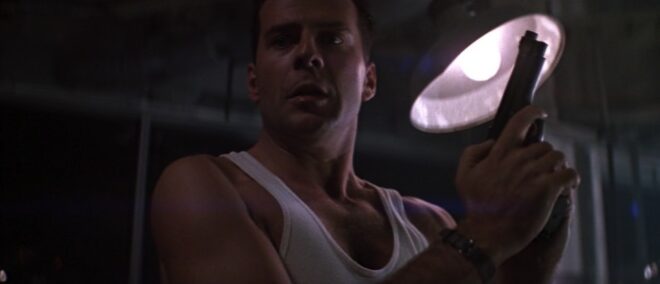
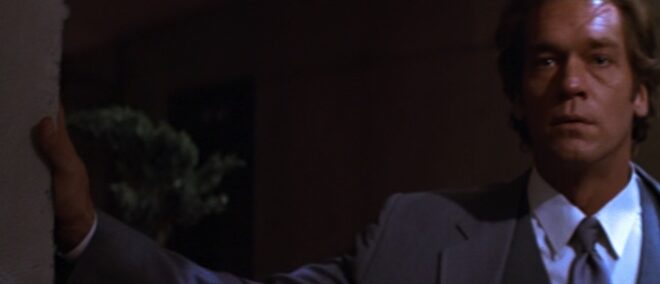
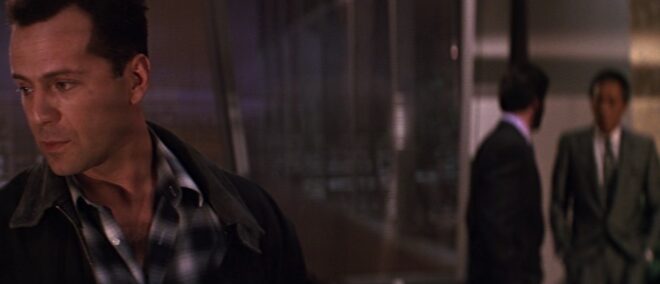
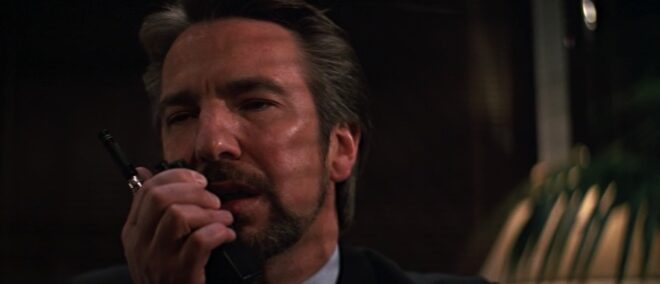
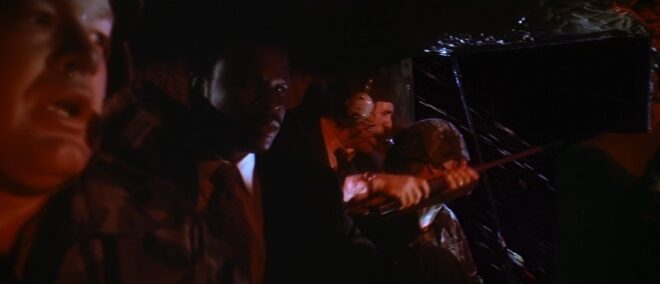
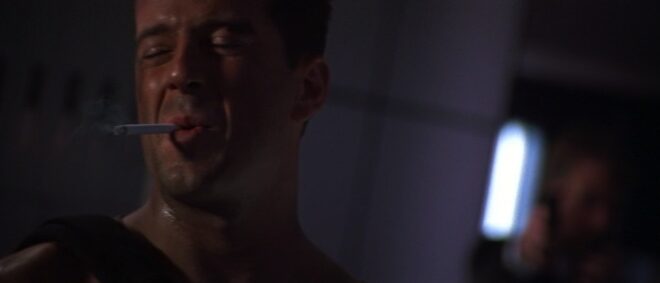
I hope you have all enjoyed Die Hard as a traditional staple of your Yuletide festivities. Every time I see it I am in awe of, among other things, the composition by DP Jan de Bont, ASC and camera operators Michael Ferris, Michael Scott and M. Todd Henry. Let’s have a look at some of the beautifully framed images and see what some of the hallmarks are.


Low Angles

“From up here it doesn’t look like you’re in charge of jack shit.”

So many low angles in Die Hard, some motivated by the blocking but many simply to make the characters seem larger than life.


No Rule of Thirds

“There are rules for policemen.” / “Yeah. That’s what my captain keeps telling me.”

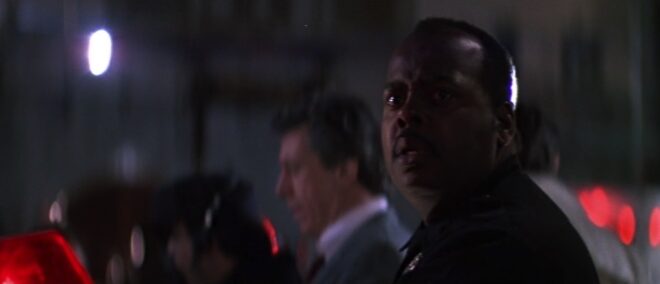
De Bont uses the full width of the 2.39:1 anamorphic frame to creatively place his subjects, rarely obeying the Rule of Thirds and often squeezing characters right into one side of the frame.


Short-siding

“Now I know what a TV dinner feels like.”

Short-siding means placing a character close to the side of the frame which they’re looking towards, and this happens quite often in the film as well.


Deep Raking Shots

“Welcome to the party, pal.”

The filmmakers love to have a row of characters ranging from near to far. Even in over-the-shoulder shots, de Bont frequently adds an extra element in the background, continuing the depth procession begun by the foreground shoulder and mid-ground actor.


Dutch Angles

“You oughta be on fucking TV with that accent.”

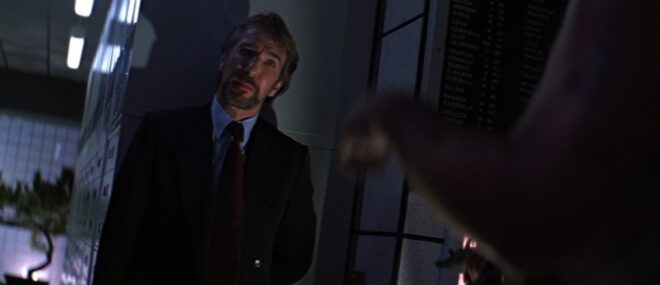
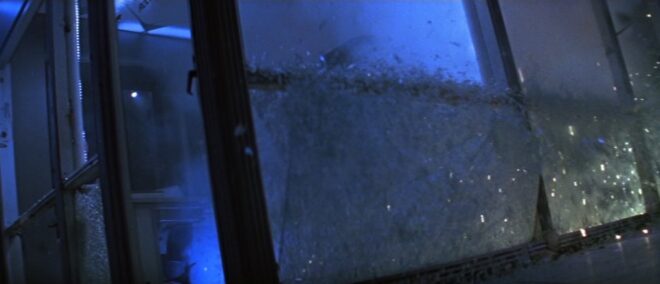
Jan de Bont is from the Netherlands, so every shot… But I’m talking specifically about the canted shots which underscore the deception of the scene where Alan Rickman’s Hans Gruber pretends to be a hostage (with a highly convincing English-German-American accent) and the subsequent shoot-out in the computer room.


There are also a lot of great camera moves in Die Hard, but that’s a post for another Christmas. Happy new year and yippie-ki-yay, motherfuckers!

“Die Hard”: A Masterclass in Composition

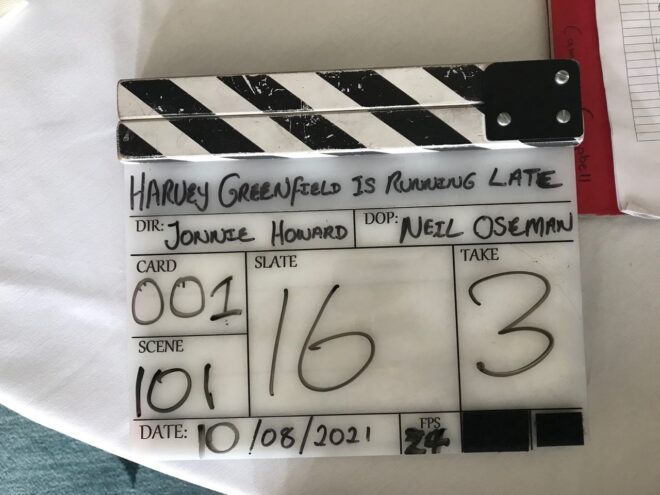
“Harvey Greenfield is Running Late”: Week 1

Day 1

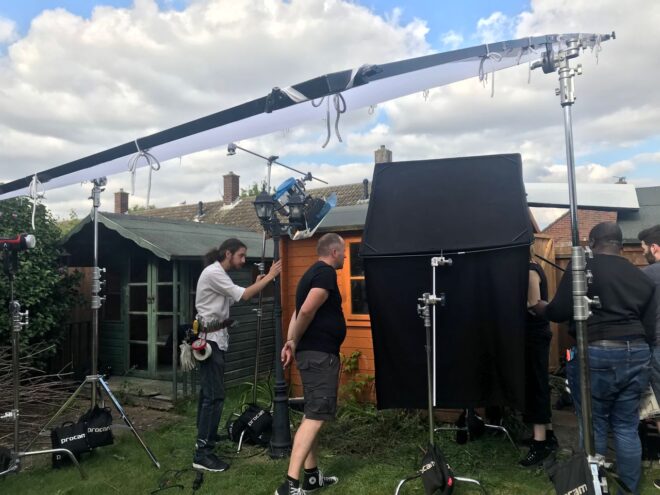
The weather was dry and overcast, shedding a pleasantly soft light on the proceedings as the crew of Harvey Greenfield is Running Late set up for our first scene, in front of a small primary school in rural Cambridgeshire.

Then we started shooting and the weather went bananas.

One moment we had bright sunshine, the next we had heavy rain bordering on hail… sometimes in the same take. We had lots of fun and games dodging the showers, maneouvering a 12×12′ silk to soften the sun, keeping reflections and shadows out of shot, waiting for noisy trains to pass, and trying to get through takes without the light changing. But we got there in the end.

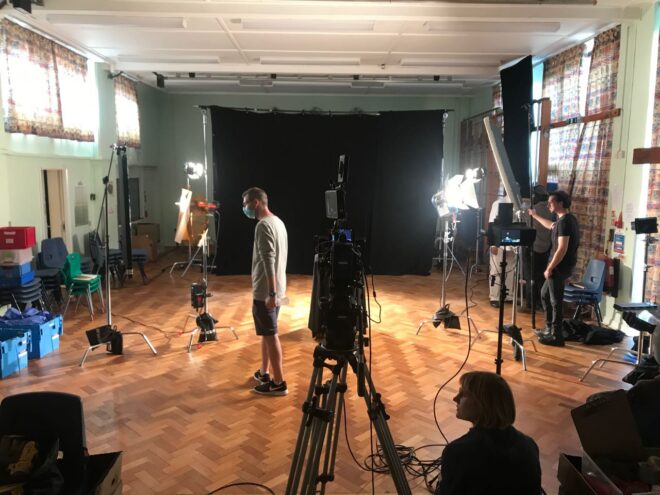
In the afternoon we moved into the school hall, which we were using as a makeshift studio. As well as numerous flashbacks, the film includes several imaginary sequences, including a spoof advert. This we shot against a black backdrop using dual backlights, one on either side, to highlight the talent. I totally stole this look from the Men in Black poster.

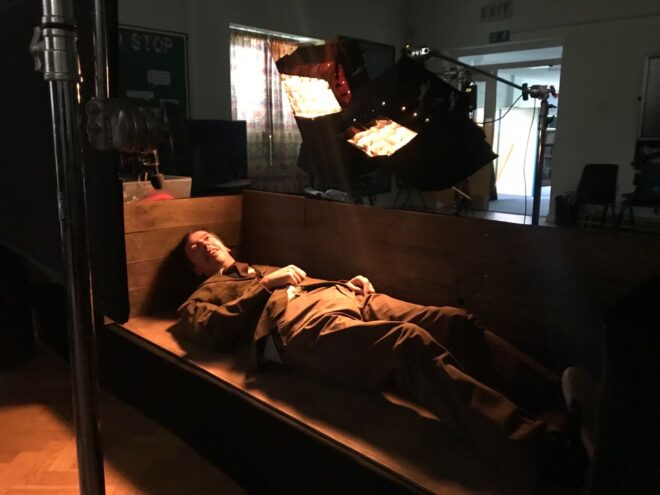
Our last shot of the day was Harvey’s first, and another imaginary scene, this time set in a coffin. To give the appearance of it being underground, the coffin (with no lid and one side missing) was placed on rostra with a black drape hanging below it. To create darkness above it, we simply set a flag in front of camera. Harvey (Paul Richards) lights a match to illuminate himself, which gaffer Stephen Allwright supplemented with two 1×1′ Aladdin Bi-flexes set to tungsten and gelled even more orange.


Day 2

One of the few occasions in my life when I’ve been able to walk to set from home: we started at the University Arms Hotel overlooking Parker’s Piece, one of Cambridge’s many green spaces (and, fact fans, the place where the rules of Association Football were first established).

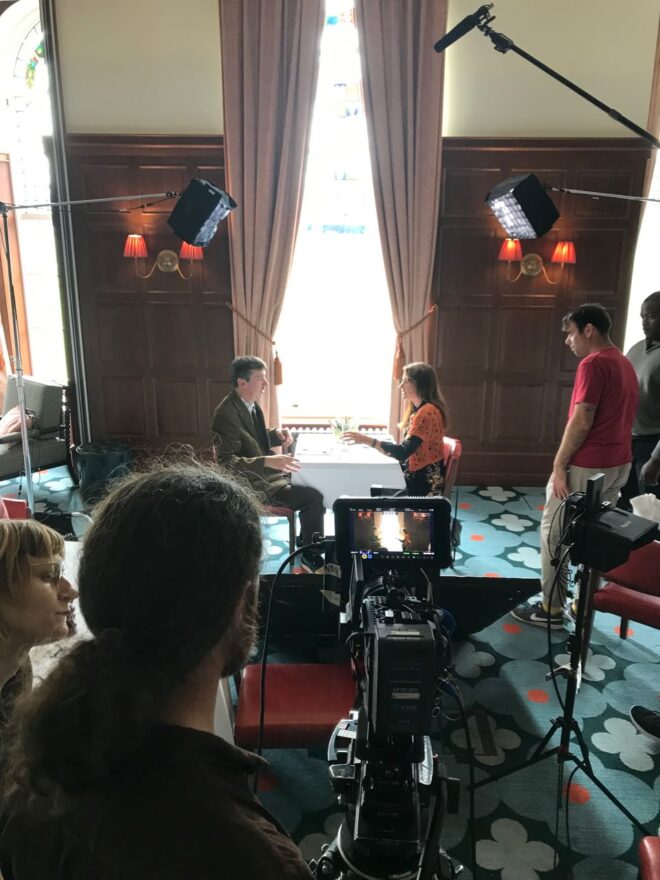
The hotel’s function room was dressed as an upmarket restaurant, where we captured Harvey’s first date with his girlfriend Alice (Liz Todd). We shot towards a window; putting your main light source in the background is always a good move, and it gave us the perfect excuse to do soft cross-backlight on the two characters. The room’s wood panelling and sconces looked great on camera too.

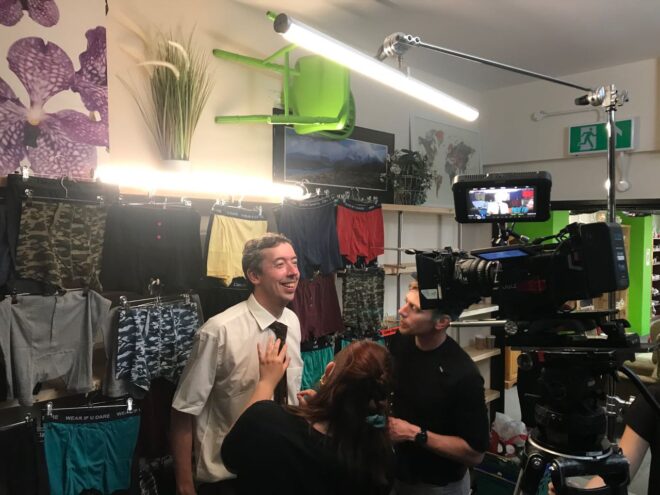
The unit then moved to Emmaus, a large charity shop north of the city, where we filmed a Wall of Pants and some tightly choreographed Sandwich Action. Here we broke out the Astera tubes for the fist time, using them as a toppy, fluorescent-style key-light and backlight.

By now we were getting into the visual rhythm of the film, embracing wide angles (our 18-35mm zoom gets heavy use), central framing (or sometimes short-siding), Wes Anderson-type pans/tilts, and a 14mm lens and/or handheld moves for crazier moments.


Day 3

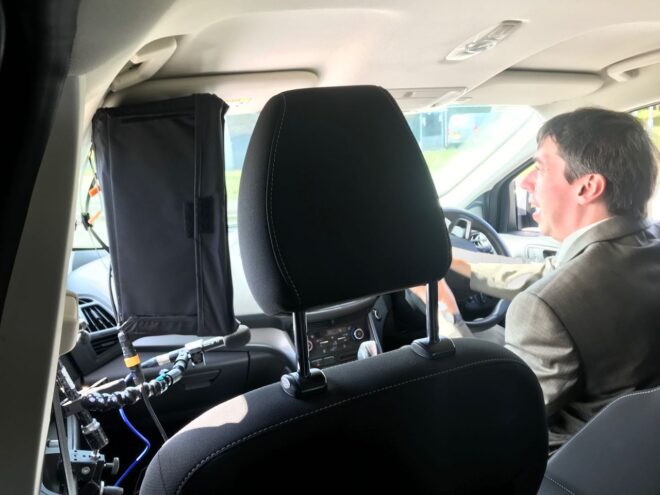
We were based at Paul’s house for day 3, beginning in the street outside for a brief scene in his car. Shooting from the back, we mounted an Aladdin in the passenger seat to key Paul, and blacked out some of the rear windows to create negative fill, much like I did for the driving scenes in Above the Clouds.

The rest of the day was spent in and around Paul’s shed. Or, to be more specific, the middle one of his three sheds. This is Harvey’s “Happy Place” so I stepped up from the Soft FX 0.5 filter I’d been shooting with so far to the Soft FX 1, to diffuse the image a little more. We also used haze for the only time on the film.

Some shots through the shed window gave us the usual reflection challenges. Stephen rigged a 12×12 black solid to help with this, and we draped some bolton over the camera. Inside the shed we used an Aladdin to bring up the level, and once we stopped shooting through the window we fired a tungsten 2K in through there instead. This was gelled with just half CTB so that it would still be warm compared with the daylight, and Stephen swapped the solid for a silk to keep the natural light consistent and eliminate the real direct sun.

I made my first use of the Red Gemini’s low light mode today, switching to ISO 3200 to maintain the depth of field when filming in slow motion. (I have been shooting at T4-5.6 because a sharper, busier background feels more stressful for Harvey.)


Day 4

Back to the primary school. We spent the morning outside shooting flashbacks with some talented child actors from the Pauline Quirke Academy. We got some nice slider shots and comedy pans while dealing with the ever-changing cloud cover.

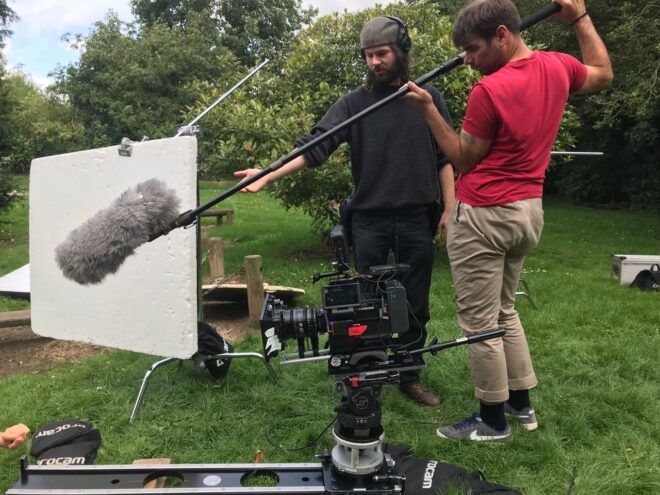
Inside in the afternoon we picked up a dropped scene from day 1, then moved on to one of the film’s biggest challenges: a six-minute dialogue scene travelling through a corridor and around a classroom, to be filmed in a single continuous Steadicam shot. This could easily have been a nightmare, but a number of factors worked in our favour. Firstly, we had rehearsed the scene on location with actors and a phone camera during pre-production. Secondly, we had the brilliant Rupert Peddle operating the Steadicam. Thirdly, it would have been so difficult to keep a boom and its shadows out of shot that mixer Filipe Pinheiro and his team didn’t even try, instead relying on lavaliers and a mic mounted on the camera.

For similar reasons, we didn’t do much lighting either; there were almost no areas of the rooms and their ceilings that didn’t come into shot at some point. In two places Stephen rigged blackout for negative fill. I then chose which of the existing ceiling lights to turn off and which to keep on, to get as much shape into the image as possible. We tried to rig a grid onto one of the ceiling lights to take it off a wall that was getting too hot, but after one take we realised that this was in frame, so instead we stuck a square of ND gel to it. We also rigged two Astera tubes in the corridor, but discovered that one of those came into frame too, so in the end a single Astera tube was the only additive lighting. The existing ceiling lights worked particularly well for a slow push-in to Alice near the end of the shot, providing her with both key and backlight from perfect angles.


Day 5

Today we shot a big scene based around a school play. Production designer Amanda Stekly had created a suitably cheesy, sparkly backdrop, and more PQA students dressed up in weird and wonderful costumes to enact snatches of a very random production called Spamlet (making it the second time this year I’ve shot “to be or not to be”, though this time was… er… a little different).

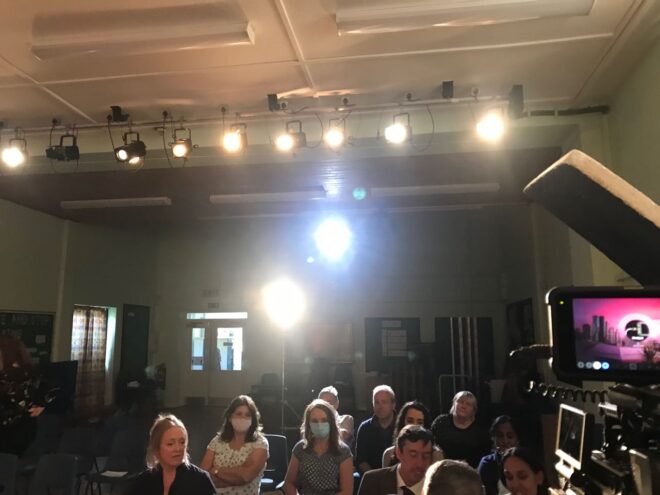
The school had a basic lighting rig already. We refocused and re-gelled some of the lights, keeping it very simple and frontal. Behind the set I put one of my old 800W Arri Lites as a backlight for the kids on stage. To one side, where Alice was standing, we used two Astera tubes, one to key her and one to backlight her. These were both set to a cool, slightly minty colour. My idea of using green for calming characters and moments hasn’t come to fruition quite as I’d planned, because it hasn’t fitted the locations and other design elements, but there’s a little hint of it here.

For the audience, Stephen rigged an Aputure 300D to the ceiling as a backlight, then we bounced the stage lighting back onto them using a silver board. We also used the school’s follow spot, which gave us some nice flares for the stressful moments later in the scene. It was daytime both in reality and in the story, but we closed the (thin) curtains and reduced the ambience outside with floppy flags so that the artificial lighting would have more effect.

We had to move at breakneck speed in the afternoon to get everything in the can before wrap time, but we managed it, finishing our first week on schedule. No mean feat.

“Harvey Greenfield is Running Late”: Week 1

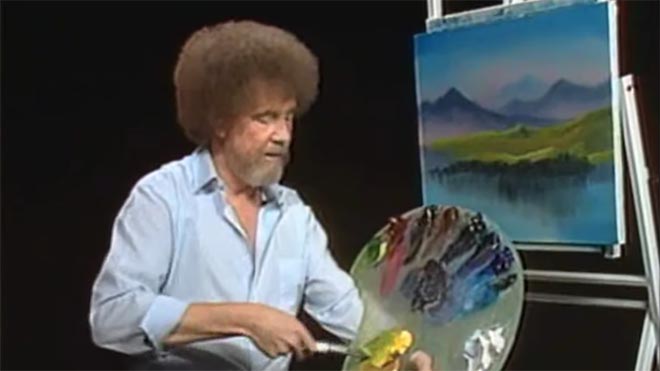
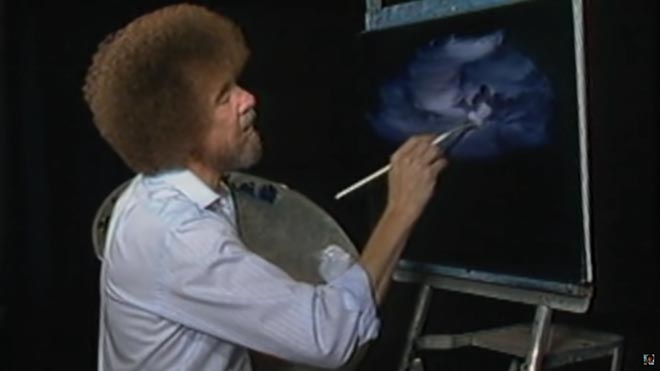
5 Things Bob Ross Can Teach Us About Cinematography

I’m certainly glad you could join me today. It’s a fantastic day here and I hope it is wherever you’re at. Are you ready to read a fantastic little blog post? Good, then let’s get started.

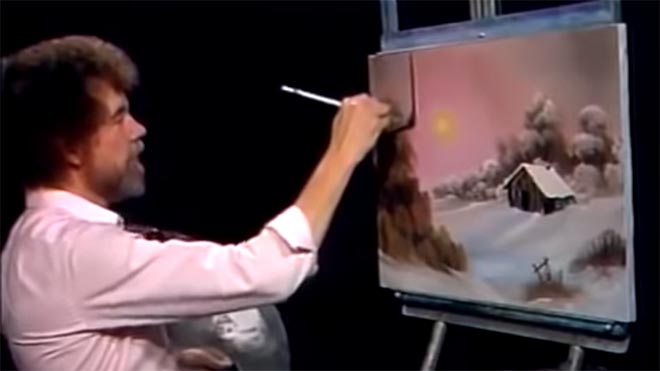
For twelve years, across 400 episodes, Bob Ross entertained all generations of Americans with his public access TV series, The Joy of Painting. Although he floated up to join the happy little clouds in 1995, in recent years YouTube and Twitch have brought his shows to a new audience, of which I am a humble member. Bob’s hypnotic, soft-spoken voice, his unfailingly positive attitude, and the magical effects of his wet-on-wet oil-painting technique make his series calming, comforting and captivating in equal measure.

Having watched every episode at least twice now, I’ve noticed several nuggets of Bob Ross wisdom that apply just as well to cinematography as they do to painting.


1. “The more plains you have in your painting, the more depth it has… and that’s what brings the happy buck.”

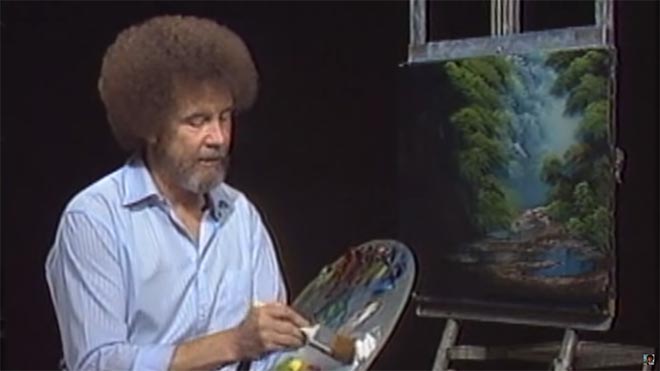
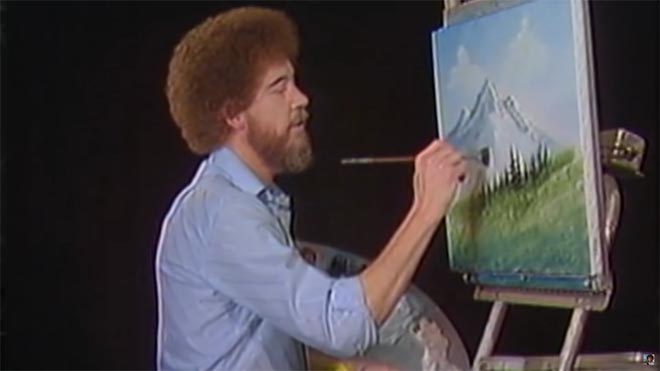
Bob always starts with the background of his scene and paints forward: first the sky with its happy little clouds; then often some almighty mountains; then the little footy hills; some trees way in the distance, barely more than scratches on the canvas; then perhaps a lake, its reflections springing forth impossibly from Bob’s brush; the near bank; and some detailed trees and bushes in the foreground, with a little path winding through them.

“Exile Incessant” (dir. James Reynolds)

Just as with landscape painting, depth is tremendously important in cinematography. Creating a three-dimensional world with a monoscopic camera is a big part of a DP’s job, which starts with composition – shooting towards a window, for example, rather than a wall – and continues with lighting. Depth increases production value, which makes for a happy producer and a happy buck for you when you get hired again.


2. “As things get further away from you in a landscape, they get lighter in value.”

Regular Joy of Painting viewers soon notice that the more distant layers of Bob’s paintings use a lot more Titanium White than the closer ones. Bob frequently explains that each layer should be darker and more detailed than the one behind it, “and that’s what creates the illusion of depth”.

“The Gong Fu Connection” (dir. Ted Duran)

Distant objects seem lighter and less contrasty because of a phenomenon called aerial perspectivebasically atmospheric scattering of light. As a DP, you can simulate this by lighting deeper areas of your frame brightly, and keeping closer areas dark. This might be achieved by setting up a flag to provide negative fill to an object in the foreground, or by placing a battery-powered LED fixture at the end of a dark street. The technique works for night scenes and small interiors, just as well as daytime landscapes, even though aerial perspective would never occur there in real life. The viewer’s brain will subconsciously recognise the depth cue and appreciate the three-dimensionality of the set much more.


3. “Don’t kill the little misty area; that’s your separator.”

After completing each layer, particularly hills and mountains, Bob takes a clean, dry brush and taps gently along the bottom of it. This has a blurring and fading effect, giving the impression that the base of the layer is dissolving into mist. When he paints the next layer, he takes care to leave a little of this misty area showing behind it.

“Heretiks” (dir. Paul Hyett)

We DPs can add atmos (smoke) to a scene to create separation. Because there will be more atmos between the lens and a distant object than between the lens and a close object, it really aids the eye in identifying different plains. That makes the image both clearer and more aesthetically pleasing. Layers can also be separated with backlight, or a differentiation of tones or colours.


4. “You need the dark in order to show the light.”

Hinting at the tragedy in his own life, Bob often underlines the importance of playing dark tones against light ones. “It’s like in life. Gotta have a little sadness once in a while so you know when the good times come,” he wisely remarks, as he taps away at the canvas with his fan-brush, painting in the dark rear leaves of a tree. Then he moves onto the lighter foreground leaves, “but don’t kill your dark areas,” he cautions.

“Closer Each Day” promo (dir. Oliver Park)

If there’s one thing that makes a cinematic image, it’s contrast. It can be very easy to over-light a scene, and it’s often a good idea to try turning a fixture or two off to see if the mood is improved. However bright or dark your scene is, where you don’t put light is just as important as where you do. Flagging a little natural light, blacking out a window, or removing the bubble from a practical can often add a nice bit of shape to the image.


5. “Maybe… maybe… maybe… Let’s DROP in an almighty tree.”

As the end of the episode approaches, and the painting seems complete, Bob has a habit of suddenly adding a big ol’ tree down one or both sides of the canvas. Since this covers up background layers that have been carefully constructed earlier in the show, Bob often gets letters complaining that he has spoilt a lovely painting. “Ruined!” is the knowing, light-hearted comment of the modern internet viewer.

“Synced” (dir. Devon Avery)

The function of these trees is to provide a foreground framing element which anchors the side of the image. I discussed this technique in my article on composing a wide shot. A solid, close object along the side or base of the frame makes the image much stronger. It gives a reason for the edge of the frame to be there rather than somewhere else. As DPs, we may not be able to just paint a tree in, but there’s often a fence, a pillar, a window frame, even a supporting artist that we can introduce to the foreground with a little tweaking of the camera position.

The ol’ clock on the wall tells me it’s time to go, so until next time: happy filming, and God bless, my friend.

If you’re keen to learn more about cinematography, don’t forget I have an in-depth course available on Udemy.

5 Things Bob Ross Can Teach Us About Cinematography

The Long Lenses of the 90s

Lately, having run out of interesting series, I’ve found myself watching a lot of nineties blockbusters: Outbreak, Twister, Dante’s Peak, Backdraft, Daylight. Whilst eighties movies were the background to my childhood, and will always have a place in my heart, it was the cinema of the nineties that I was immersed in as I began my own amateur filmmaking. So, looking back on those movies now, while certain clichés stand out like sore thumbs, they still feel to me like solid examples of how to make a summer crowd-pleaser.

Let’s get those clichés out of the way first. The lead character always has a failed marriage. There’s usually an opening scene in which they witness the death of a spouse or close relative, before the legend “X years later” fades up. The dog will be saved, but the crotchety elderly character will die nobly. Buildings instantly explode towards camera when touched by lava, hurricanes, floods or fires. A stubborn senior authority figure will refuse to listen to the disgraced lead character who will ultimately be proven correct, to no-one’s surprise.

Practical effects in action on “Twister”

There’s an intensity to nineties action scenes, born of the largely practical approach to creating them. The decade was punctuated by historic advances in digital effects: the liquid metal T-1000 in Terminator 2 (1991), digital dinosaurs in Jurassic Park (1993), motion-captured passengers aboard the miniature Titanic (1997), Bullet Time in The Matrix (1999). Yet these techniques remained expensive and time-consuming, and could not match traditional methods of creating explosions, floods, fire or debris. The result was that the characters in jeopardy were generally surrounded by real set-pieces and practical effects, a far more nerve-wracking experience for the viewer than today, when we can tell that our heroes are merely imagining their peril on a green-screen stage.

One thing I was looking out for during these movie meanders down memory lane was lens selection. A few weeks back, a director friend had asked me to suggest examples of films that preferred long lenses. He had mentioned that such lenses were more in vogue in the nineties, which I’d never thought about before.

As soon as I started to consider it, I realised how right my friend was. And how much that long-lens look had influenced me. When I started out making films, I was working with the tiny sensors of Mini-DV cameras. I would often try to make my shots look more cinematic by shooting on the long end of the zoom. This was partly to reduce the depth of field, but also because I instinctively felt that the compressed perspective was more in keeping with what I saw at the cinema.

I remember being surprised by something that James Cameron said in his commentary on the Aliens DVD:

I went to school on Ridley [Scott]’s style of photography, which was actually quite a bit different from mine, because he used a lot of long lenses, much more so than I was used to working with.

I had assumed that Cameron used long lenses too, because I felt his films looked incredibly cinematic, and because I was so sure that cinematic meant telephoto. I’ve discussed in the past what I think people tend to mean by the term “cinematic”, and there’s hardly a definitive answer, but I’m now sure that lens length has little to do with it.

“Above the Clouds” (dir. Leon Chambers)

And yet… are those nineties films influencing me still? I have to confess, I struggle with short lenses to this day. I find it hard to make wide-angle shots look as good. On Above the Clouds, to take just one example, I frequently found that I preferred the wide shots on a 32mm than a 24mm. Director Leon Chambers agreed; perhaps those same films influenced him?

A deleted scene from Ren: The Girl with the Mark ends with some great close-ups shot on my old Sigma 105mm still lens, complete with the slight wobble of wind buffeting the camera, which to my mind only adds to the cinematic look! On a more recent project, War of the Worlds: The Attack, I definitely got a kick from scenes where we shot the heroes walking towards us down the middle of the street on a 135mm.

Apart from the nice bokeh, what does a long lens do for an image? I’ve already mentioned that it compresses perspective, and because this is such a different look to human vision, it arguably provides a pleasing unreality. You could describe it as doing for the image spatially what the flicker of 24fps (versus high frame rates) does for it temporally. Perhaps I shy away from short lenses because they look too much like real life, they’re too unforgiving, like many people find 48fps to be.

The compression applies to people’s faces too. Dustin Hoffman is not known for his small nose, yet it appears positively petite in the close-up below from Outbreak. While this look flatters many actors, others benefit from the rounding of their features caused by a shorter lens.

Perhaps the chief reason to be cautious of long lenses is that they necessitate placing the camera further from the action, and the viewer will sense this, if only on a subconscious level. A long lens, if misused, can rob a scene of intimacy, and if overused could even cause the viewer to disengage with the characters and story.

I’ll leave you with some examples of long-lens shots from the nineties classics I mentioned at the start of this post. Make no mistake, these films employed shorter lenses too, but it certainly looks to me like they used longer lenses on average than contemporary movies.


Outbreak

DP: Michael Ballhaus, ASC


Twister

DP: Jack N. Green, ASC


Daylight

DP: David Eggby, ACS


Dante’s Peak

DP: Andrzej Bartkowiak, ASC


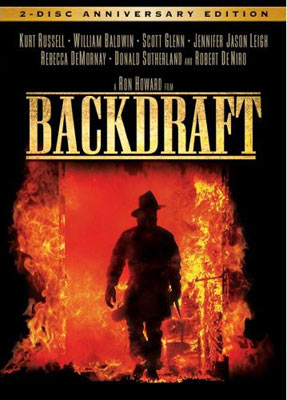
Backdraft

DP: Mikael Salomon, ASC

For more on this topic, see my article about “The Normal Lens”.

The Long Lenses of the 90s

Where to Place Your Horizon

I once had an argument with a director about the composition of a wide shot. I wanted to put the horizon nearer the top of the frame than the bottom, and he felt that this was the wrong way around. In reality there is no right and wrong in composition, only a myriad of possibilities that are all valid and can all make your viewers feel different ways. In this article I will take a metaphorical ramble through these possibilities, and ponder their effects.

You would think that the most natural position for the horizon would be in the vertical centre of the frame. After all, in our day-to-day life, when we look straight ahead, this is where it appears to be.

In practice, a central horizon is not a popular choice. This article by Art Wolfe, for example, argues that it robs the image of dynamism, sending the eye straight to the horizon rather than letting it wander around the frame. The technique is also at odds with the Rule of Thirds, though as I’ve written before, that’s not a rule I place much stock in.

The talented photographer and vlogger Arian Vila, however, describes the merits of a central horizon when composing for a square aspect ratio. And this is an excellent reminder that the horizon does not exist in a vacuum; like anything else, it must be judged in the context of the aspect ratio and the other compositional elements of the frame.

For Leon Chambers’ Above the Clouds (out now on Amazon Prime and other platforms!), I placed the horizon centrally several times:

This was a deliberate echo of the painting “Above the Clouds” which appears in the film and provides the thematic backbone.

A year or two after shooting Clouds, I came across Photograms of the Year: 1949 in a charity shop. Amongst its pages I found another diptych, one created by the book designer rather than the two entirely separate photographers:

These two images, perfectly paired, demonstrate contrasting horizon placement. At Grey Dawn emphasises the sky by placing the horizon low in the frame, creating a sense of space. Meanwhile, Homeward Bound positions its horizon somewhere beyond the trees near the top of frame, drawing attention to the sand and the wheel ruts and indeed to the figures of the caravan itself, rather than to the destination or surroundings.

Horizon placement is closely tied to two other creative choices: headroom, which I dedicated a whole article to, and lens height, i.e. is this a low or a high angle? Even a GCSE media student can tell you that a low angle imbues power while a high angle implies vulnerability, but these are terms most applicable to closer shots. When we think of horizon placement we are probably concerned with big wides, where creating a mood for the scene or setting is more important than visualising a character’s power or lack thereof.

Breaking Bad is an example of a series that predominantly chooses low horizons to show off the big skies of its New Mexico locations. “[Showrunner] Vince [Gilligan] is a student of cinema and knows movies like the back of his hand,” says DP Michael Slovis, ASC. “It was always in his mind that this was a Western in the style of Sergio Leone and the Italian Neo-realists.”

Incidentally, there’s an amazing desert scene in the episode “Crawl Space” where a sunlit close-up cuts to a big wide. The wide holds as clouds roll over the sun. The action continues and the shot still holds, the line between sunlight and shade visible as it rolls away across the desert, until finally a new line slides under the camera and sun breaks over the actors once more. Only then are we permitted to see the scene up close again.

This creative choice, to set the character’s small concerns against the vast immutability of nature, comes from the same place as the choice to put the horizon low in frame.

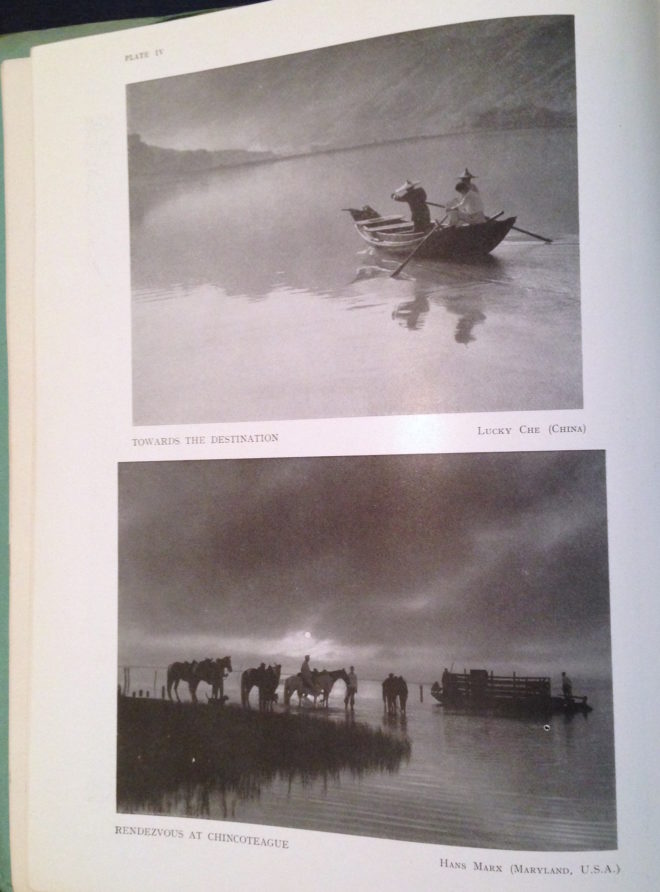
Returning to Photograms of the Year: 1949, my eyes light upon another pair of contrasting images:

Despite its title, Towards the Destination shows us little of where the sailors are heading, by placing the horizon high in the frame and focusing on the water and the reflections therein. Rendezvous at Chincoteague, by placing its horizon low in the frame, radiates a feeling of isolation that is in contrast to the meeting of the title.

As we consider the figures in these photographs I am forced to concede that the argument I alluded to in the introduction may have been less about the position of the horizon and more about the position of the actor. I think the director felt that it was unnatural for an person to appear in the top half of the frame rather than the bottom half.

I can see his point. The vision of our naked eyes is definitely framed along the bottom by the ground, while the top remains open and unlimited – outdoors, at least. So if a person is standing on the ground, we naturally expect them to appear low down in an image.

But this – like nose room, the Rule of Thirds, the 180° Rule, short-key lighting, so many things in cinematography – is merely a guideline. There are times when it just isn’t helpful, when it can lead to wasted opportunities.

Here is a shot of mine from The Gong Fu Connection (dir. Ted Duran) where the horizon and the cast are placed in the upper half of frame:

Would it really have been better to frame them lower, losing out on the reflections and the foreround rushes, and gaining just empty sky? I think not. This composition was especially important to me, because the film’s titular connection is all about man and the natural world. By showing the water and greenery, we root the characters in it. A composition with more sky might have made them seem dwarfed by nature, lost in it.

This article has been something of a stream of consciousness, but the point I’m trying to make is this: always consider the content and meaning of your shot; reflecting those in your composition is infinitely more important than adhering to any guidelines.

If you enjoyed this, you may be interested in some of my other articles on composition:

Where to Place Your Horizon

Aspect Ratio and the Marvel Cinematic Universe

I used to be a casual follower of superhero films, until I was inducted into the Marvel Cinematic Universe via a movie marathon. Despite different directors for each instalment, the MCU has a fairly consistent look and feel, so I was a little surprised when we got to The Avengers to note that it differs visually in one significant way from all of its predecessors. Whereas the five previous films (and indeed most of the subsequent ones) were in the 2.39:1 aspect ratio, The Avengers was presented in the taller 1.85:1 ratio.

This initially struck me as counterintuitive. 2.39:1 was introduced in the 1950s to tempt watchers of the new-fangled TV back into the cinemas, and ever since then it has been associated with the biggest, most epic, most cinematic of movies. It seems like the natural choice for a superhero franchise, so it’s no surprise that the MCU adopted this ratio for most of its instalments. But if wider images mean a more epic movie, then surely The Avengers, the climax of Phase One and the coming-together of a whole team of superheroes, should be, if anything, even wider than its 2.39:1 predecessors?

“The Avengers” (2012, DP: Seamus McGarvey, BSC, ASC)

I’m certainly not the first person to be nonplussed by the choice. A quick google later on threw up plenty of forums where fans complained that The Avengers was “not cinematic enough” because of its aspect ratio. Some linked the choice of ratio to director Joss Whedon’s TV background, claiming he was more comfortable with that shape of frame.

The real reason for Whedon’s decision became clear as the action ramped up into the third act. The battle of New York is not a two-dimensional conflict; Thor and Iron Man are flying around, the Hulk climbs up buildings, the Chitauri ships float above the streets, and Stark Tower plays a key part in the action. The extra frame height of 1.85 was essential to tell that story.

“I wanted to feel the space around us, and use wider lenses,” said Whedon. “That’s why I went 1.85 instead of wider. In IMAX, I wanted it to fill your eyeball completely.”

“Ant-Man” (2015, DP: Russell Carpenter, ASC)

Continuing the movie marathon, the MCU does not return to 1.85 until Ant-Man, and director Peyton Reed initially encountered resistance from the studio when he advocated this ratio. “It’s a big conversation because it affects production design. It affects everything. And it felt to me… that shrinking was a vertical act and it was going to serve the movie even more. And I had to make a case for the fact that it was still going to be epic.”

I wonder if the days of wider aspect ratios being perceived as more epic are numbered. IMAX sequences are becoming more and more common in blockbusters, including the Marvel films. Digital IMAX has an aspect ratio of 1.90:1, very similar to the 1.85 which is so often perceived as the small-scale, poor man’s ratio. (To confuse matters, the 1.90 sequences are often cropped to 2.39 for ordinary cinemas and home entertainment release.) An epic feel is very much what the IMAX brand is selling, so the traditional perception is being turned on its head. Both Avengers: Infinity War and the recent Endgame were shot entirely in Imax 1.90:1, and are sure to be the very definition of epic for a while to come.

Things seem to be going the same way over in the DC universe too. On the social media platform Vevo, director Zak Snyder had this to say about Batman v. Superman and Justice League: “I had so much fun shooting the IMAX sections of my movie (BvS) [that I] sort of fell in love with that giant less rectangular aspect ratio and so that’s why I shot JL 1:85”.

Image size may have something to do with this shifting trend. After all, a larger image is surely more epic than a smaller one. In theory, 2.39 should result in the largest image, with curtains or masks at the sides of a cinema screen opening up for these widescreen presentations. In practice though, many smaller multiplex auditoria mask the top and bottom of their screens for 2.39, making for a smaller overall image than 1.85, just like when you watch 2.39 content at home on your TV or monitor (which is 1.78:1). My local multiplex recently converted its largest auditorium to IMAX, which involved no change to the width of the screen, but an increase in height.

Add to this the fact that 2.39 overtook 1.85 as the most common aspect ratio for top-grossing films over a decade ago, and it’s small wonder that filmmakers seeking to make their work stand out from the crowd are turning to taller frames.

“Avengers: Infinity War” (2018, DP: Trent Opaloch)

However the trend of aspect ratios ends up going, it’s important to remember that there’s no wrong or right. I’ve done jobs where directors have told me, “It’s a movie, it’s got to be 2.39,” or, “It’s a series, it’s got to be 1.78,” but there is always a choice. Are your sets tall or wide? Are your lead characters similar or dissimilar in height? Are landscapes or body language most important to this story? It’s factors like these that should really determine the best ratio for your movie, just as Whedon and Reed both realised.

See also:

Aspect Ratio and the Marvel Cinematic Universe

Is the Rule of Thirds Right for 2.39:1?

The Rule of Thirds is the most well-known guide for framing an image. Simply imagine the frame divided into equal horizontal and vertical thirds – or don’t even bother imagining, just turn on your camera’s built-in overlay – and place your subject on one of those lines to get a pleasantly composed picture every time. Some filmmakers believe in the Rule so much that they refuse to even consider any other type of composition.

The Rule of Thirds in action on “The Aviator” (2004, DP: Robert Richardson, ASC), winner of the 2005 Best Cinematography Oscar

As I’ve previously written, I find the Rule of Thirds grossly overrated. In particular, when composing for a widescreen aspect ratio like Scope (CinemaScope, i.e.. 2.39:1), the Rule often doesn’t work for me at all.

In this post I’m going to look at an alternative compositional technique, but first let’s step back and find out where the Rule of Thirds actually comes from and why it’s so popular.


Origins of the Rule of Thirds

The first known appearance of the term “Rule of Thirds” is in a 1797 treatise Remarks on Rural Scenery by the English painter John Thomas Smith. It seems he read too much into a simple statement by fellow artist Sir Joshua Reynolds to the effect that, if a picture has two clear areas of differing brightness, one should be bigger than the other. Hardly a robust and auspicious start for a rule that dominates the teaching and discussion of composition today.

I suspect that the Rule has gained strength over the last two centuries from the fact that it encourages novice painters, designers and photographers to overcome their natural tendency to frame everything centrally. Another factor in the Rule’s ubiquity is undoubtedly its similarity to a much older and more reasoned rule: the Golden Ratio.


The Golden Ratio and the Phi Grid

A mathematical concept that’s been around since the time of the ancient Greeks, the Golden Ratio is approximately 1.6:1. It’s a special ratio because if you add the two numbers together, 1.6+1, you get 2.6, and 2.6:1.6 turns out to be, when boiled down, the same ratio you started with, 1.6:1.

Wikipedia puts it this way:

Two quantities are in the Golden Ratio if their ratio is the same as the ratio of their sum to the larger of the two quantities.

It’s difficult to get your head around, I know!

The Golden Ratio is found in nature, in the spiral leaves of some plants for example, and even in certain crystals at the atomic level. There is a long history of artists believing that using the Ratio produces a more aesthetically pleasing image.

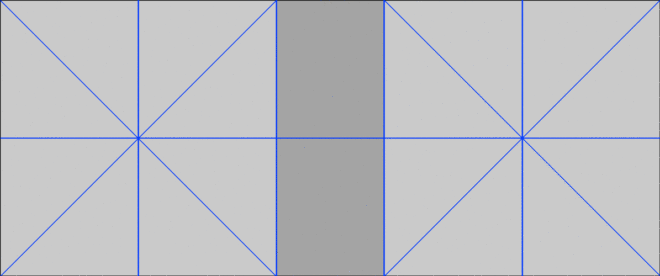
The Golden Ratio is most simply applied to composition in the form of a Phi Grid, which resembles a Rule of Thirds grid, but in different proportions, namely 1.6:1:1.6 rather than 1:1:1.

Andrew Lesnie, ACS, ASC applies the Phi Grid – though not necessarily deliberately – to “The Lord of the Rings: The Two Towers”

The Rule of Thirds and the Phi Grid both feel quite limiting in Scope because out of all that horizontal space you’ve only got two vertical lines to place your subject on. There is another technique though, one which provides more options.


The Squares within the rectangle

In his book The Mind of the Photographer, Michael Freeman writes about a composition guideline which dates back to the Middle Ages. You imagine two squares, the same height as the frame, and aligned with either side of the frame, then place your subject on the centre or inner edge of one of these squares.

Applied to a Scope frame it looks like this:

We can simplify it down to this:

When I first read about this technique, it really chimed with me. I’ve long believed that a “Rule of Fifths” would be a more effective guide for Scope composition than the Rule of Thirds, and the above diagram isn’t far away from fifths.

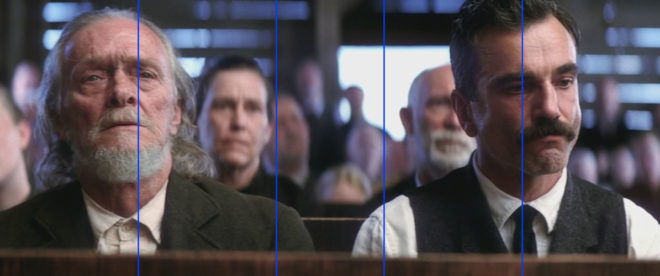
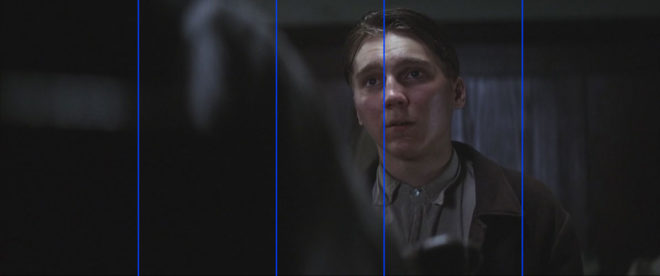
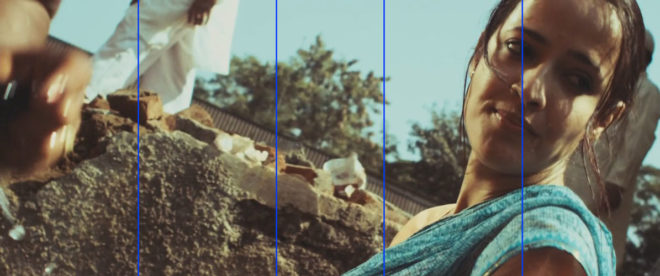
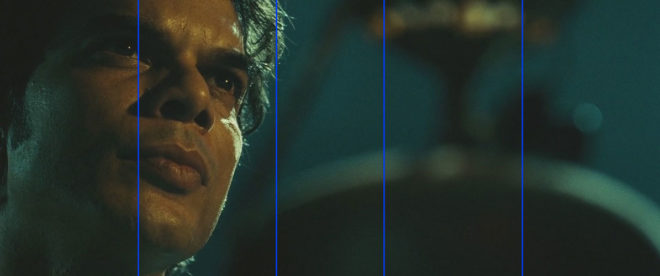
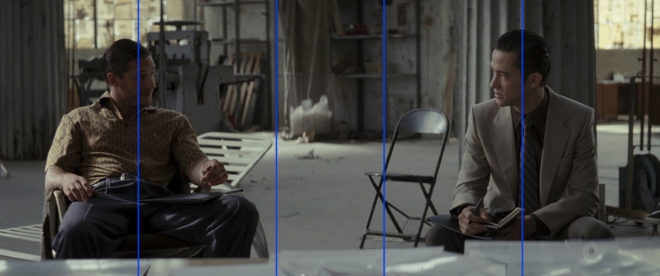
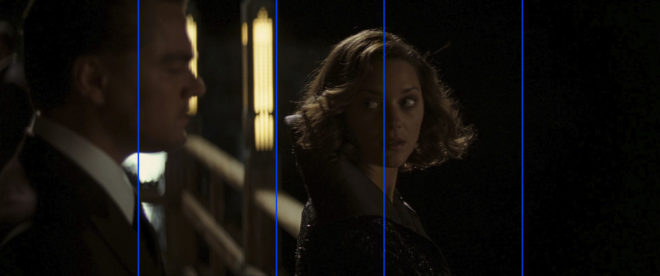
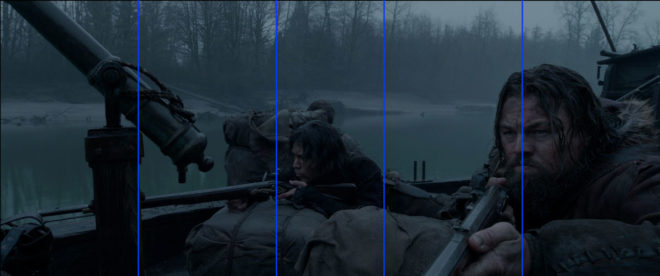
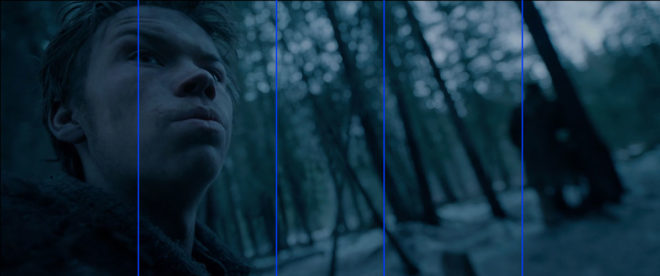
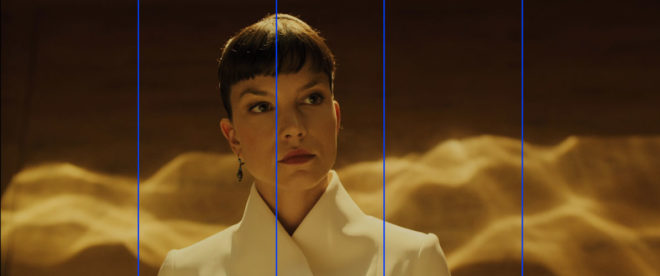
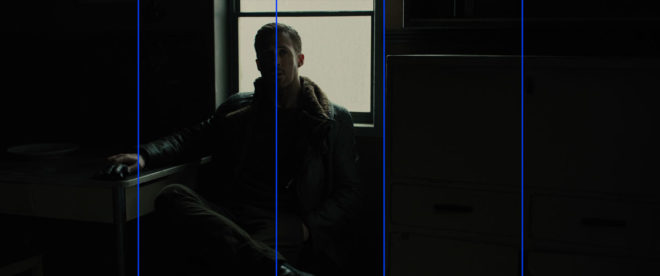
Below I’ve overlaid this grid on a few shots from Scope movies that won Best Cinematography Oscars: There Will Be Blood (DP: Robert Elswit, ASC), Slumdog Millionaire (Anthony Dod Mantle, DFF, ASC, BSC), Inception (Wally Pfister, ASC), The Revenant (Emmanuel Lubezki, ASC, AMC) and Blade Runner 2049 (Roger Deakins, CBE, ASC, BSC).

Let me provide a disclaimer first, though. You could draw any grid you wanted and find some shots from movies that matched it. The purpose of this article is not to convince you to ditch the Rule of Thirds and start following this “rule of squares within a rectangle” instead. (For a start, that name is never going to catch on.) This “rule” chimes with me because it’s similar to the way that I was already instinctively composing, but if it doesn’t work for you then don’t use it. Develop your own eye. It’s a creative medium, so compose creatively, not like a robot programmed with simple rules.

I’ll leave you with this quote from the great photographer Ansel Adams:

The so-called rules of photographic composition are, in my opinion, invalid, irrelevant and immaterial.

See also:

And if you want to read a thorough debunking of the Rule of Thirds, check out this article on Pro Video Coalition.

Is the Rule of Thirds Right for 2.39:1?

The 4:3 Aspect Ratio is Not Dead

This summer I shot Exit Eve, a short film from director Charlie Parham dealing with the exhausting and demeaning life of an au pair. We took the unusual decision to shoot it in 4:3, a ratio all but obsolete, but one which felt right for this particular story. Before I look at some of the ratio’s strengths and challenges, let’s remind ourselves of the history behind it.


History

William Kennedy Dickson

The 4:3 motion picture aspect ratio, a.k.a. 1.33:1, was created about 120 years ago by William Kennedy Dickson. This Thomas Edison employee was developing a forerunner to the movie projector, and decided that an image height of four perforations on 35mm film gave the ideal shape. In 1909 the ratio was declared the official standard for all US films by the Motion Picture Patent Company.

When the talkies arrived two decades later, room needed to be made on the film prints for the optical soundtrack. The Academy of Motion Pictures Arts and Sciences responded by determining a new, very slightly wider ratio of 1.37:1, known fittingly enough as the Academy Ratio. It’s so similar to 4:3 that I’m going to lump them together from hereon in.

When television was invented it naturally adopted the same 4:3 ratio as the big screen. The popularity of TV led to falling cinema attendance in the 1950s, to which the Hollywood studios responded with a range of enticing gimmicks including widescreen aspect ratios. Widescreen stuck, and for the next generation 1.85:1 and 2.39:1 were the ratios of cinema, while the narrower 4:3 was the ratio of TV.

By the time I entered the industry in the late 1990s, 4:3 was much maligned by filmmakers. It seemed boxy and restrictive compared with widescreen, and reminded those of us in the guerrilla world that we didn’t have the budgets and equipment of the Hollywood studios. Meanwhile, the wide compositions of big movies were butchered by pan-and-scan, the practice of cropping during the telecine process to fit the image onto a 4:3 TV without letterboxing. 4:3 was ruining our favourite movies, we felt.

Then, in the 21st century, 16:9 television became the norm, and the 4:3 aspect ratio quietly disappeared, unmourned…. Or did it?


Contemporary Cinema

Although they are firmly in a minority, a number of filmmakers have experimented with 4:3 or Academy Ratio in recent years. Some, like Andrea Arnold and the late Éric Rohmer, rarely shot anything else.

Arnold wanted a combination of intimacy and claustrophobia for her Bafta-winning 2009 drama Fish Tank. She carried the ratio over to her next film, an adaptation of Wuthering Heights, despite the prevalence of big landscapes which would have prompted most directors to choose 2.39:1. The Academy Ratio focuses the viewer’s attention much more on the characters and their inner worlds.

“Fish Tank” – DP: Robbie Ryan, BSC

Mark Kermode has this to say about the 1.37:1 work of Arnold and her DP Robbie Ryan: “What’s wonderful about it is the way [Ryan] uses that squarer format not to make the picture seem compressed but to make it seem taller, to make it seem larger, to make it seem oddly more expansive.”

Meek’s Cutoff (2010), a modern western by Kelly Reichardt, recalls the early Academy classics of the genre. As with Wuthering Heights, characters are placed in the landscape without being dominated by it, while the height of the frame produces bigger skies and an airier feel.

“Meek’s Cutoff” – DP: Chris Blauvelt

Pawel Pawlikowski’s 2013 Oscar-winner Ida deliberately goes against the grain, shooting not only in 4:3 but in black and white as well. It’s the perfect format to convey the timeless, spartan existence of the titular Ida and her fellow nuns. The tall frame allows for copious headroom, inspiring thoughts of Heaven and God, beneath which the mortal characters seem small.

The 2017 animated feature Loving Vincent, meanwhile, adopted 4:3 because it was closer to the shape of Van Gogh’s paintings.

David Lowery, director of last year’s A Ghost Story, wanted to trap his deceased title character in the boxy ratio. “It gave me a good opportunity to really hammer home the circumstances this ghost finds himself trapped in, and to dig into and break down the claustrophobia of his life within these four walls… And it was also a way to tap into some degree of nostalgia, because it feels old-fashioned when you see a movie in a square aspect ratio.”

4:3’s nostalgia factor has allowed it to be used very effectively for flashbacks, such as those in the recent Channel 4/Netflix series The End of the F***ing World. Wes Anderson delineated the three time periods of The Grand Budapest Hotel (2014) with different aspect ratios, using 1.37:1 for scenes set in 1932, the very same year in which that ratio was standardised by the Academy.


“Exit Eve”

Nostalgia, intimacy, claustrophobia, isolation – these are just some of the feelings which cinema’s original aspect ratio can evoke. For Charlie and I on Exit Eve, it was the sense of being trapped which made the ratio really fit our story. 

I’m also a great believer in choosing a ratio that fits the shape of your primary location, and the converted schoolhouse which we were shooting in had very high ceilings. 4:3 allowed us to show the oppressive scale of these rooms, while giving the eponymous Eve little horizontal freedom to move around it. One additional practical consideration was that, when lensing a party scene, the narrower ratio made it easier to fill the frame with supporting artists!

It wasn’t hard to get used to framing in 4:3 again. A lot of Exit Eve was handheld, making for fluid compositions. There were a couple of tripod set-ups where I couldn’t help thinking that the extra width of 1.85:1 would be useful, but for the most part 4:3 worked well. 

We were shooting on an Alexa Plus with a 16:9 sensor, meaning we were cropping the image at the sides, whereas ideally we would have hired a 4:3 model to use the full width of the sensor and a larger proportion of our lenses’ image circles. This would have allowed us to get slightly wider frames in some of the location’s smaller rooms.

Our sound department had to adapt a little. The boom op was used to being able to get in just above the actors’ heads, but with the generous headroom I was often giving, she had to re-learn her instincts.

Classic 4:3 overs in “Star Trek: The Next Generation”

I had forgotten how well dialogue scenes are suited to 4:3. With wider ratios, over-the-shoulder shots can sometimes be tricky; you can end up with a lot of space between the foreground shoulder and the other actor, and the eye-line ends up way off camera. 4:3 perfectly fits a face, along with that ideal L-shape of the foreground shoulder and side of head, while keeping the eye-line tight to camera.

Not every project is right for 4:3, far from it. But I believe that the ratio has served its sentence in the wilderness for its pan-and-scan crimes against cinema, and should now be returned to the fold as a valid and expressive option for filmmakers.

See also:

The 4:3 Aspect Ratio is Not Dead