The First Light a Cinematographer Should Put Up

Where do you start, as a director of photography lighting a set? What should be the first brushstroke when you’re painting with light?

I believe the answer is backlight, and I think many DPs would agree with me.

Let’s take the example of a night exterior in a historical fantasy piece, as featured in my online course, Cinematic Lighting. The main source of light in such a scene would be the moon. Where am I going to put it? At the back.

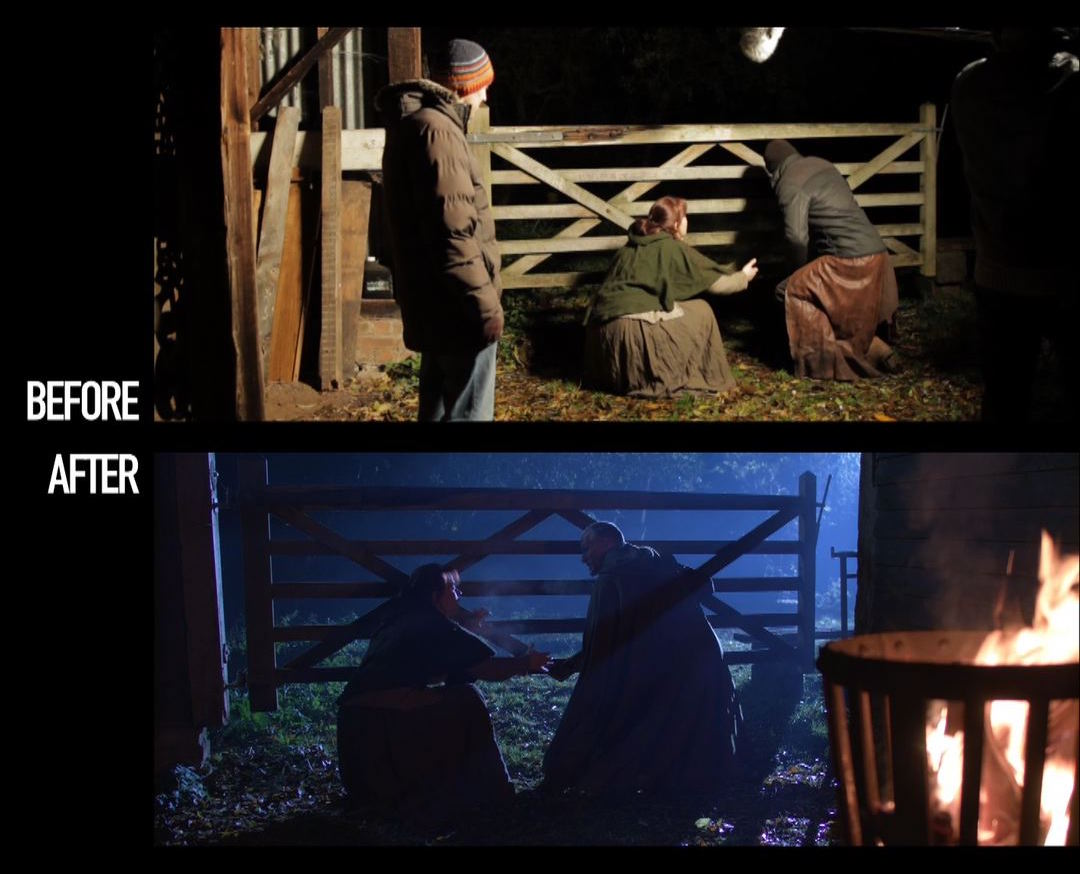
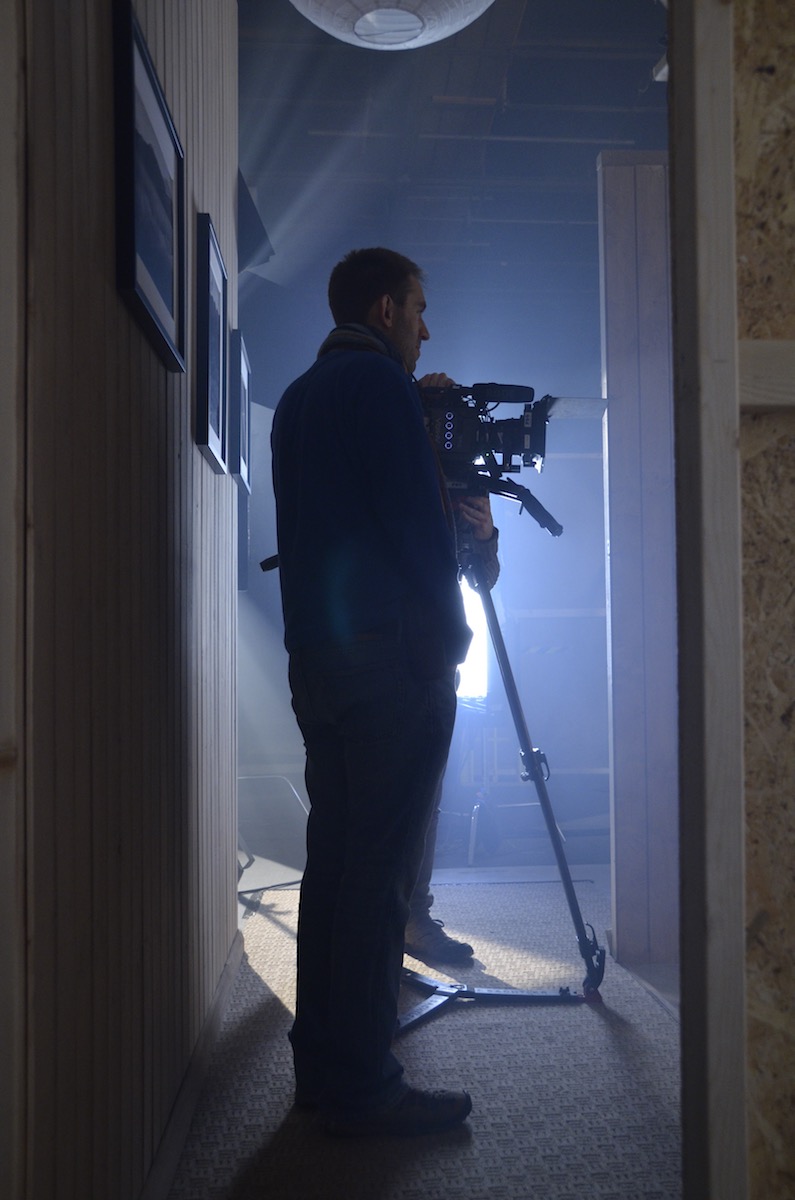
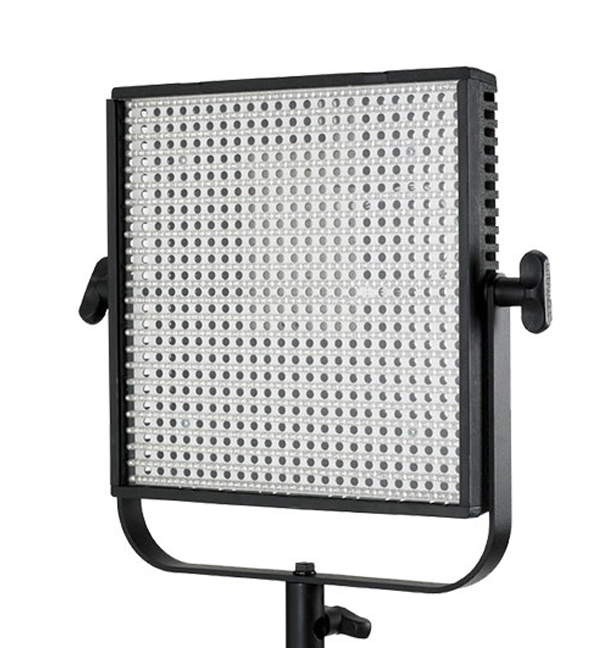
The before image is lit by an LED panel serving purely as a work-light while we rehearsed. It’s not directly above the camera, but off to the right, so the lighting isn’t completely flat, but there is very little depth in the image. Beyond the gate is a boring black void.

The after image completely transforms the viewer’s understanding of the three-dimensional space. We get the sense of a world beyond the gate, an intriguing world lighter than the foreground, with a glimpse of trees and space. Composing the brazier in the foreground has added a further plane, again increasing the three-dimensional impression.

Here is the lighting diagram for the scene. (Loads more diagrams like this can be seen on my Instagram feed.)

The “moon” is a 2.5KW HMI fresnel way back amongst the trees, hidden from camera by the wall on the right. This throws the gate and the characters into silhouette, creating a rim of light around their camera-right sides.

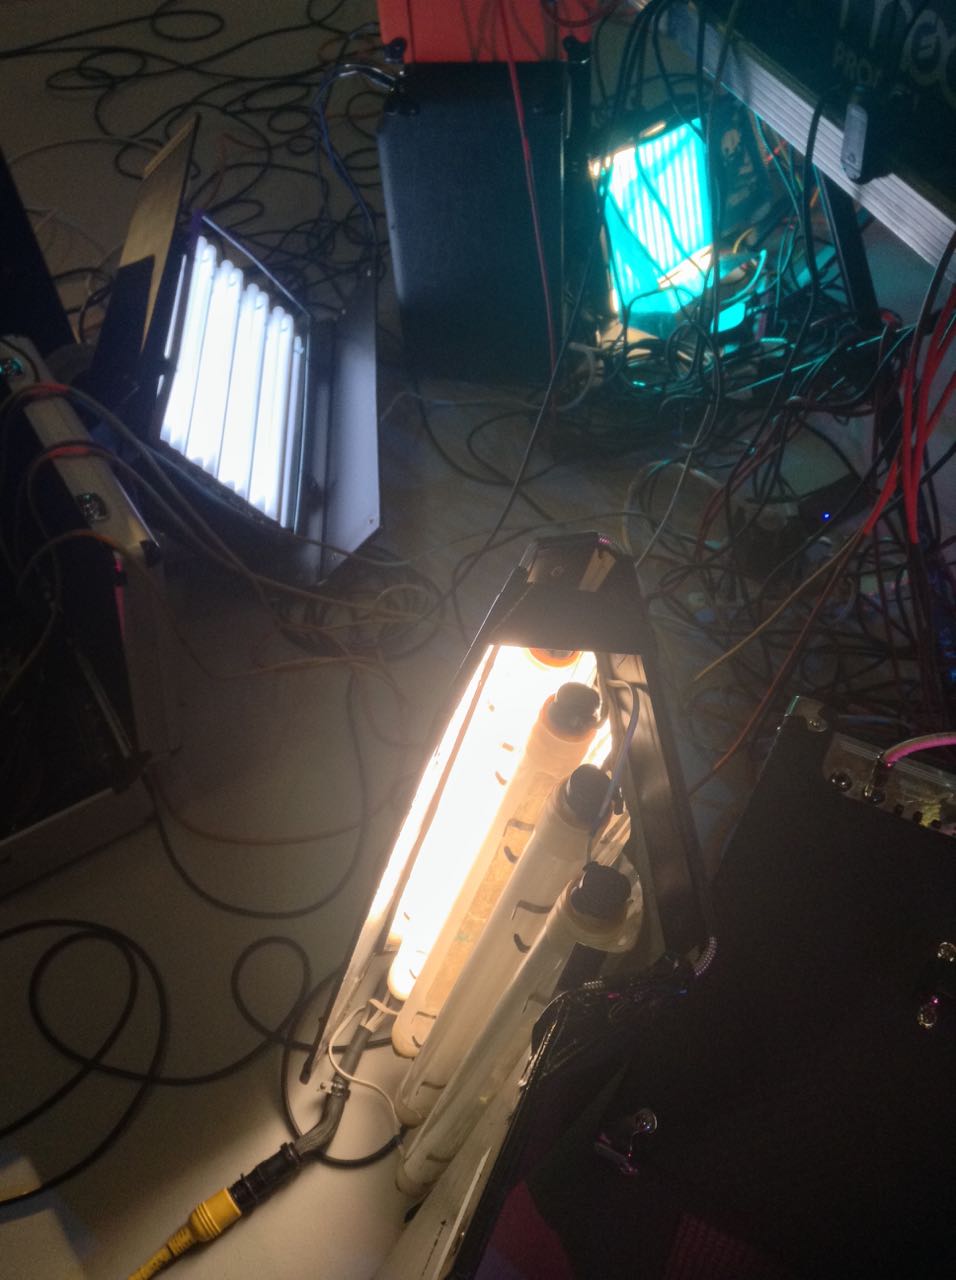
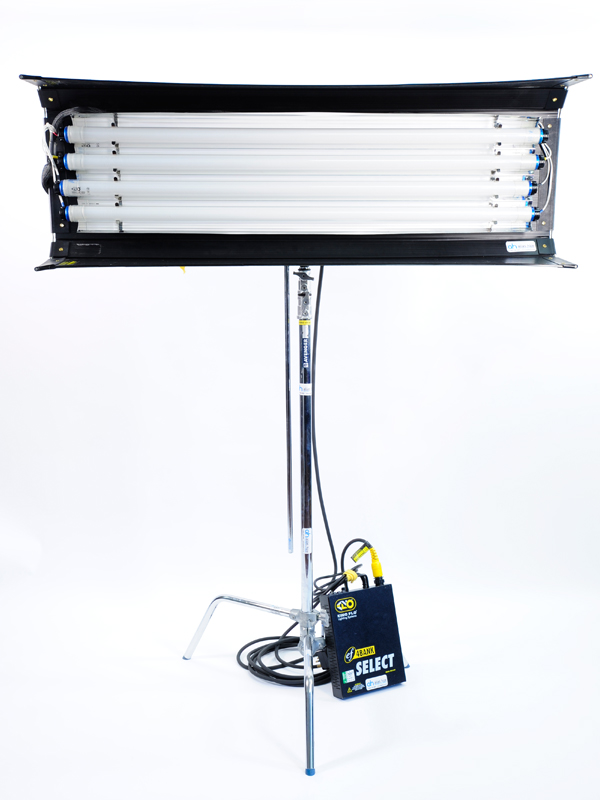
To shed a little light on Ivan’s face as he looks camera-left, I hid a 4×4′ Kino Flo behind the lefthand wall, again behind the actors.

The LED from the rehearsal, a Neewer 480, hasn’t moved, but now it has an orange gel and is dimmed very low to subtly enhance the firelight. Note how the contrasting colours in the frame add to the depth as well.

So I’ll always go into a scene looking at where to put a big backlight, and then seeing if I need any additional sources. Sometimes I don’t, like in this scene from the Daylight Interior module of the course.

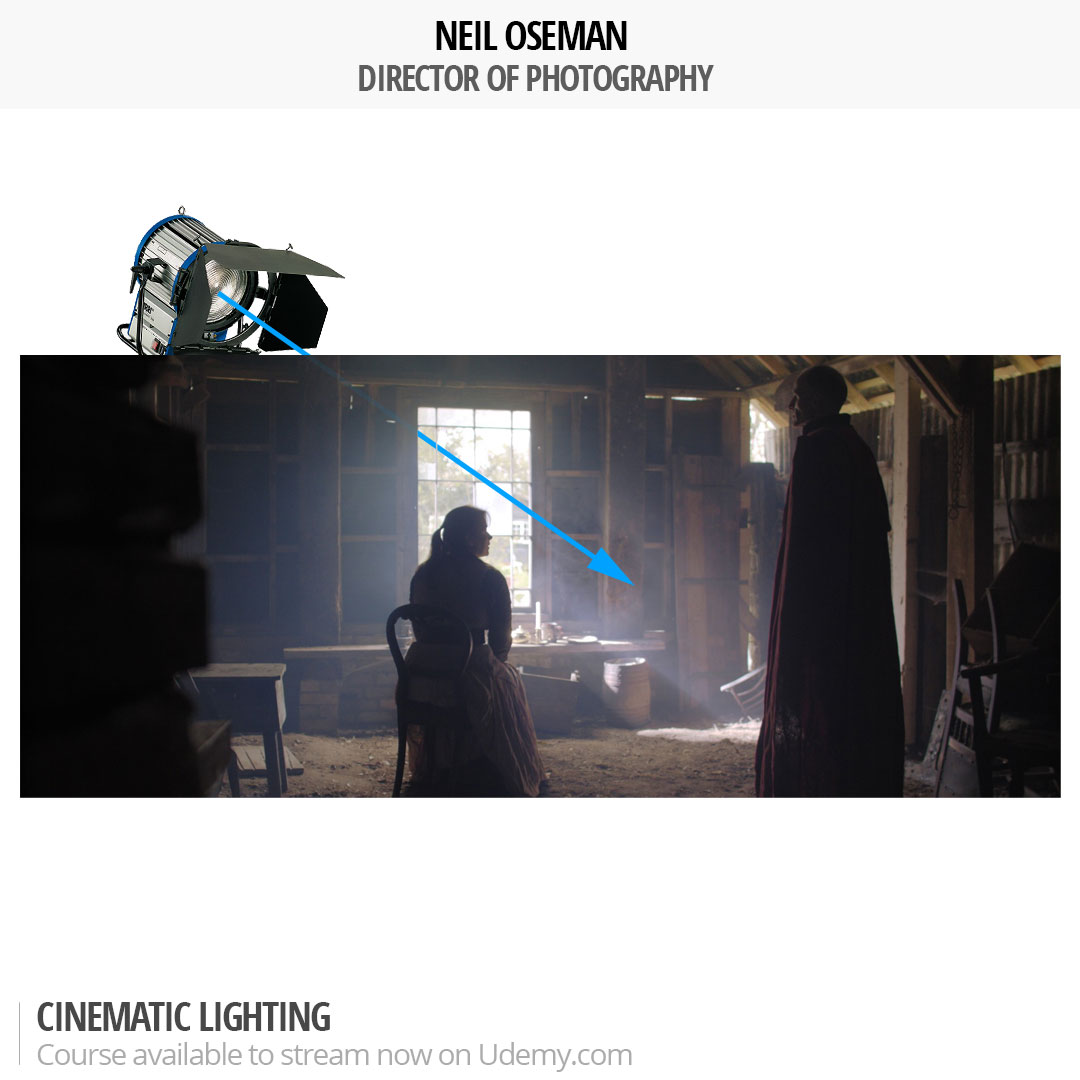
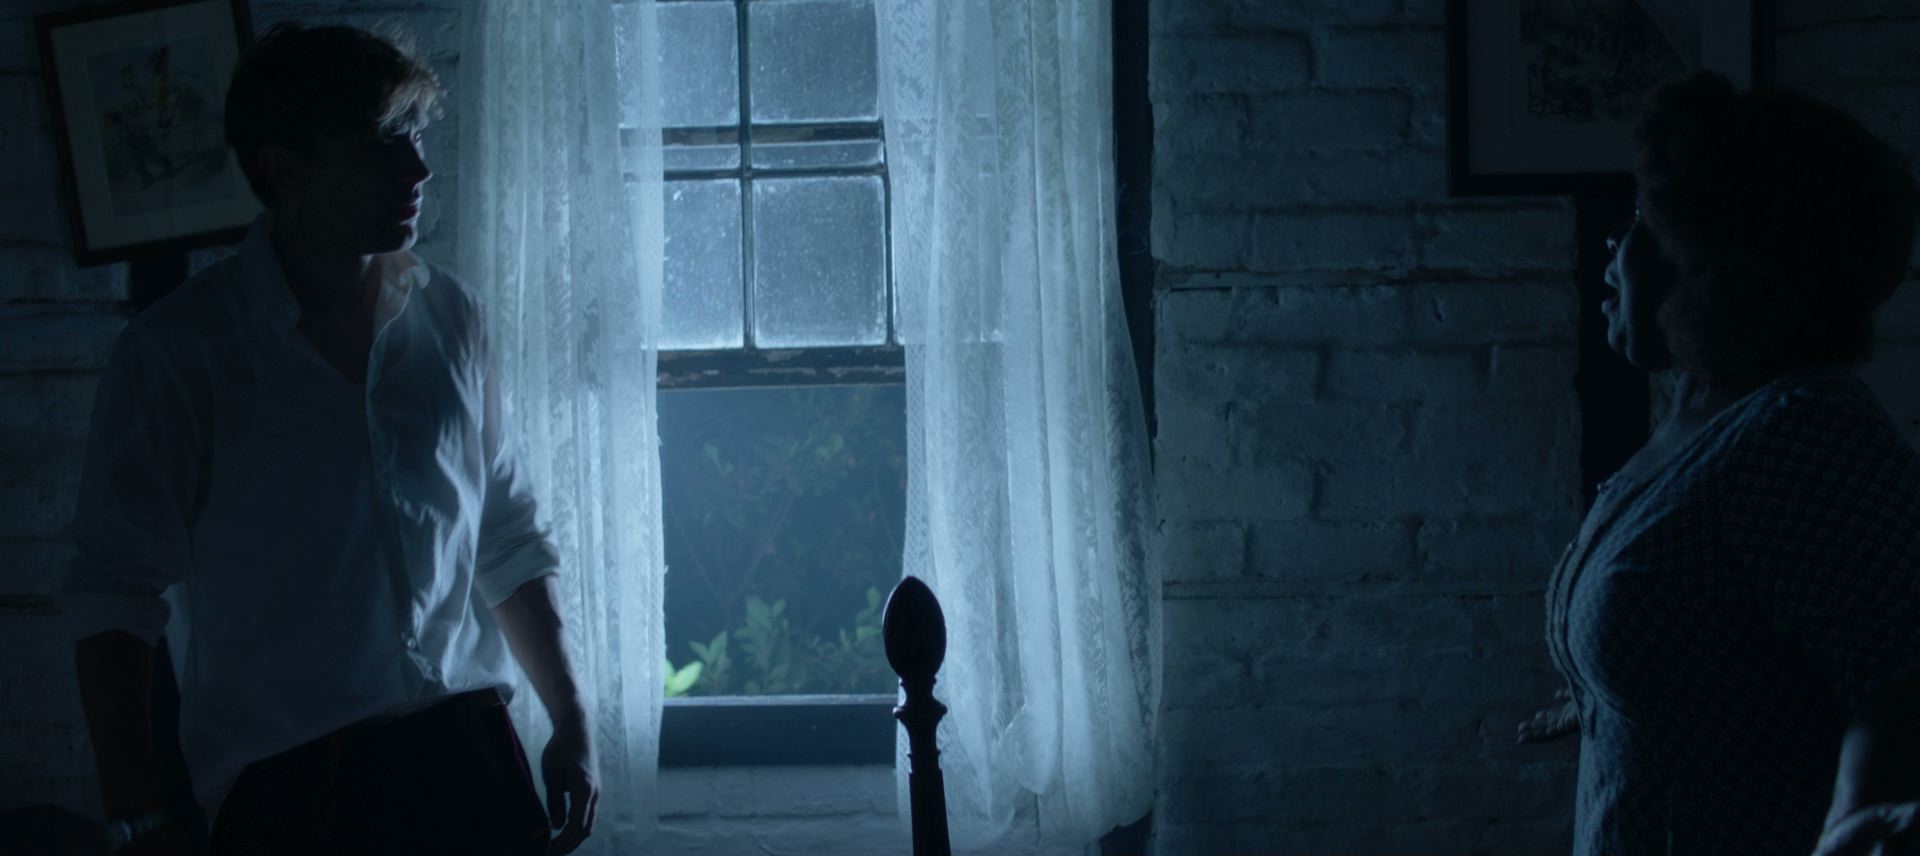
Backlight for interior scenes is different to night interiors. You cannot simply put it where you want it. You must work with the position of the windows. When I’m prepping interiors, I always work with the director to try to block the scene so that we can face towards the window as much as possible, making it our backlight. If a set is being built, I’ll talk to the production designer at the design stage to get windows put in to backlight the main camera positions whenever possible.

In the above example, lit by just the 2.5K HMI outside the window, I actually blacked out windows behind camera so that they would not fill in the nice shadows created by the backlight.

Daylight exteriors are different again. I never use artificial lights outdoors in daytime any more. I prefer to work with the natural light and employ reflectors, diffusion or negative fill to mould it where necessary.

So it’s very important to block the scene with the camera facing the sun whenever possible. Predicting the sun path may take a little work, but it will always be worth it.

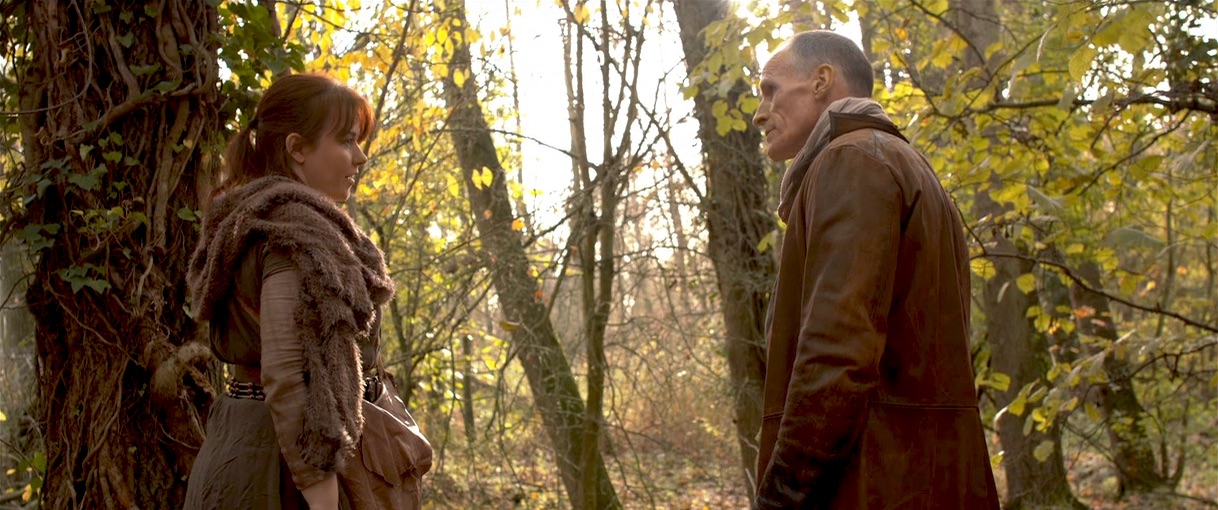
Here I’ve shot south, towards the low November sun, and didn’t need to modify the light at all.

Shooting in the opposite direction would have looked flat and uninteresting, not to mention causing potential problems with the cast squinting in the sunlight, and boom and camera shadows being cast on them.

You can learn much more about the principles and practice of cinematic lighting by taking my online course on Udemy. Currently you can get an amazing 90% off using the voucher code INSTA90 until November 19th.

For more examples of building a scene around backlight, see my article “Lighting from the Back”.

The First Light a Cinematographer Should Put Up

“The Little Mermaid”: Lighting from the Back

So far, this blog series about my cinematography of The Little Mermaid has covered the biggest and most complex scenes in the movie. Today I’m going to look at some smaller scenes, and how I employed the cinematography tenet of lighting from the back to quickly build a look for these which has depth, mood and drama.

Many of these examples are specifically cross-backlighting, something I covered in my Lighting Techniques series, but I’ll quickly recap since it has so much relevance here. It involves lighting two characters facing each other with two sources, on the far side of the eye-line (short key), crossed so that each source keys one character and often backlights the other too.

So with that in mind, let’s proceed to the examples from my shooting diary.


Day 1

The first week is pretty much all in houses with just a few principals, so an easy start. Day 1’s schedule is tight though. We start in a third floor bedroom – no way lamps are getting up to those windows from outside, so I’m relying on natural light augmented with a bit of cross-backlight cheated inside the room. (There’s a Kino Flo shining at Elle over Cam’s right shoulder, for example.) Once the haze is in it looks great. After we get the main coverage, we head out to the garden for the next scene, while the ‘B’ camera team steps in to pick up a couple of inserts…


Day 3

…It’s a night scene and the grips have tented the window. To get a nice blue glow coming in, I have two 4×4 Kino Flos set either side of the window (outside), and they give a great wrapping backlight to the actors and the set dressing. Smoke and a cool white balance of 3,200K (the Kinos are tubed for 5,600K) complete the look. It owes a lot to a scene from Hook, one of Blake’s (director Blake Harris) reference movies which I watched during preprod. This stuff definitely filters in and inspires things!


Day 13

Our first day on stage. It’s weird to be back at the former supermarket I spent five weeks of preproduction in. The first set, Locke’s chamber, is very confined and the walls don’t wild, so it’s quite slow-going to work in there. We fire a 5K fresnel through the stained glass window at the back of the set. Then I fall back on the tried and tested method of cross-backlighting even though I know that it will be hard to hide the lamps (a 650W fresnel in both of the upper rear corners of the set) from camera. In the end I have the art department dress drapes in front of them. For the villain’s single I leave the light hard, but for the hero’s single we use bounce boards to wrap the light around his face more…


Day 28

We start with the fortune-teller’s tent, another small set constructed on stage. In fact, it’s just an Easy-Up artfully draped with fabrics. Initially there’s nowhere to get light in from except the front, but I know that this will leave the scene looking flat and fake, so I work with the art department again to make holes in the top rear corners. Through those we shine tungsten-bubbled “Fat Boy” Kino Flos. (These 2ft 4-bank units are giving the dual kickers on Cam in the centre, and the beautiful down-light on the background fabrics, bringing out the ruching. Each one also provides a little key-light on the two ladies.) The other sources are “moonlight” coming in through the entrance, linking us to the circus exteriors, and a stylised slash of light across Thora’s eyes from a Source Four, suggested by Jason (key grip Jason Batey). Adding foreground practicals is an important final touch to expand the depth and scale of the set…


Day 31

It’s the last day of principal photography. Our big scene of the day is the newspaper office where Cam works, which is a set in the front of the studio, using the building’s real windows. We fire the 12K in and gel it with half CTS for a nice morning sunlight effect. We’re shooting towards the windows, which have blinds, so we get some nice shafts of light, though sometimes it’s a little too smokey. Running haze is a pretty skilled and tricky job, and involves considering the lens length and backlight, which both affect how much the smoke shows up on camera. When we get it right, combined with the dark wood period furniture, it totally sells the 1937 setting. Apparently people at video village are loving it, saying it looks like Mad Men….

Next week, in the final part of my blog series on The Little Mermaid, I’ll share my experiences of shooting the sunset denouement while up to my waist in the Atlantic Ocean.

“The Little Mermaid”: Lighting from the Back

“Above the Clouds”: February 2017 Pick-ups

Last weekend saw many of the crew of Above the Clouds reunite to shoot the remaining scenes of this comedy road movie. Principal photography was captured on an Alexa Mini during summer 2016 on location in Kent, on the Isle of Skye, and at Longcross Studio in Buckinghamshire, with additional location shooting on a Blackmagic Micro Cinema Camera in October.

The outstanding scenes were to be photographed on stage, at Halliford Studio in Shepperton, this time on an Arri Amira. The Amira uses the same sensor as the Alexas, allowing us to match the look from principal photography in the most cost-effective way. With the addition of a Premium license, the camera is capable of the same ProRes 4444 recording codec as the Alexas too. As per last summer, our glass was a set of Arri/Zeiss Ultra Primes, with a half Soft FX filter to take the digital edge off.

Director Leon Chambers designed and built the set himself, sending me photos of a scale model well in advance. He was also specific about certain lighting cues and states that were required across the two sets and six scenes we would be recording to complete the movie. Based on this information, I concocted a lighting plan, which I communicated to Halliford’s in-house gaffer Micky Reeves by Photoshopping stock images of lamps onto Leon’s set model photos.

Last Saturday was devoted to pre-lighting the sets, mainly the kitchen, while construction work continued on the second set.


Day 24 / Sunday

We begin with a morning scene. A 5K fresnel serves as a low sun, streaking across the back wall of the set (see my post about lighting through windows). Even with this direct light four stops over, the natural bounce off the set isn’t enough to bring actor Philip Jackson – with his back to the window – up to key. Micky rigs a Dedo firing into a soft silver bounce just out of frame to solve the problem.

Also coming through the window are two 4×4 kinos, rigged on goalposts above the window. Their daylight tubes reflect off the blinds, serendipitously creating the illusion of a blue sky “outdoors”, where in fact there is only a wall and a white backdrop.

Philip exits into the hallway and disappears from view, supposedly to go out through the front door. No door exists. Instead there is a flag which spark Amir Moulfi rotates in front of a 2K, creating a momentary oblong of light in which Philip’s shadow appears.

The next scene follows on from an exterior captured last October at dusk, when the natural light was soft, flat and cool in colour, cheated even cooler with the white balance. This failing daylight is to be the only source of illumination now in the kitchen set, until Philip enters and turns on the lights. This is the main reason that the daylight 4×4 kinos outside the window were rigged. A third kino from the direction of the front door is added, plus a small LED reporter light to pick an important prop out of the shadows.

Lead actress Naomi Morris enters, silhouetted against the windows. Then Philip enters and hits the lights. Simultaneously, Amir flips a breaker on a lunchbox, activating a hanging practical fixture above the breakfast bar and the 5K which that practical motivates.

Generally I don’t like toplight. It throws the eyes – those windows to the soul… or windows to the performance – into shadow. But with the hanging practical in shot, whatever I was going to use to beef it up had to be somewhat toppy or it wouldn’t make sense. I considered space-lights and Jem balls, but in consultation with Micky I ultimately picked a 5K with a chimera, coming in at a 45 degree back/toplight angle. As you can see from the photos, this looks almost comically large. But large and close means soft, which is what I want. It had to be soft enough to wrap both actors when they faced each other across the bar.


But why such a large lamp? Why not use a 2K, like Micky suggested yesterday? Bitter experience has always taught me to go with a bigger unit than you think you need, particularly if you’re softening it, and particularly if it’s going to take a while to rig. (The 5K was hung from another goalposts set-up.) We ended up dimming the 5K to 50% and scrimming it down a stop and a half. But having too much light like that is easy to deal with. If we had put up a 2K and it wasn’t bright enough, we would have to have taken the whole thing down and re-rigged with a 5K. And even if the 2K had seemed sufficient to begin with, blocking can often take actors into unexpected, dark corners of the set. Being able to turn up a dimmer a couple of notches to handle that kind of situation is very useful.

Besides the 5K, there are a few other sources playing: some 300W hairlights, a pup bouncing off the side of a cupboard to bring up the area around the cooker, a China ball in the hallway, and Leon’s Rosco LitePads serving as practical under-cabinet down-lighters.


Day 25 / Monday

I probably shouldn’t say what today’s set is, because it’s a little bit of a spoiler. There are some lighting similarities to the kitchen: again we have a character flicking a light switch, bringing on two hanging overhead practicals and a 2K with a chimera to beef them up.

A practical lamp on a desk was supposed to be turned on during the scene as well, but we all forget until it’s too late. It would have bounced off the desk and given Philip a little eye-light, and at first I regret losing this. But soon I realise that it is more appropriate for the scene not to have that level of refinement, for the lighting to be a little raw. The toppy, “broken key” angle of the chimera’s light works well for this tone too.

We wrap just before noon, releasing Naomi to high-tail it to Oxford to appear on stage in a musical this evening. Eventually there will be second-unit-style GVs and establishing shots to do, but there will only be three or four of us for that. For the cast and most of the crew, today brings Above the Clouds to an end, eight months after the camera first rolled.

See all my Above the Clouds posts here, or visit the official website.

“Above the Clouds”: February 2017 Pick-ups

Know Your Lights: Fluorescent

Unusually being used as practicals, in a music promo, are a 2'x4 Kino Flo (foreground, with 3200K tubes) and a Kino Flo Diva Lite (top left, with 5500K tubes).
Unusually being used as practicals, in a music promo, are a 2’x4 Kino Flo (foreground, with 3200K tubes) and a Kino Flo Diva-Lite (top left, with 5500K tubes).

Tungsten and/or HMI lamps are usually the workhorse units of a lighting package, providing the power that is needed to key-light all but the smallest of set-ups. But they’re not right for every situation. If you don’t need the punch of a point source, and you want something a little softer, fluorescents might be the answer.

This is the third category of lighting units I’m covering in my Know Your Lights series; back up to the overview if you want to start from the beginning.

Fluorescent units use very similar technology to HMIs, with electrodes exciting a gas so that it gives off UV light. The phosphor coating on the tube absorbs the UV light and fluoresces, i.e. re-emits the light in the visible spectrum. Like HMIs, fluorescent units require a ballast to regulate the current.

One of the most notable early uses of fluorescents was in Robocop (1987). Jost Vocano, ASC chose the fixtures because the long, thin reflections looked great on Robocop’s suit. The flip side of that coin is that under certain circumstances fluorescents can make actors’ skin unpleasantly shiny. There was a scene in Ren: The Girl with the Mark where the poor make-up artist had to cake layers of powder onto Sophie Skelton to combat the shine of a Kino Flo I had set up.

Robocop (1987, dir. Paul Verhoeven) - note the fluorescent strips reflected in the suit.
Robocop (1987, dir. Paul Verhoeven) – note the fluorescent strips reflected in the suit.

One way I often use fluorescents is as a “Window Wrap”, a soft source that augments a hard HMI coming in through a window to wrap the light more pleasingly around the talent’s face. Or I’ll place a fluorescent outside the room, to represent or enhance indirect daylight spilling through a doorway.

Being soft sources, the light rays which fluorescents emit spread out widely, meaning the intensity drops off quickly as you move away from the lamp. (We refer to this as “throw”: fluorescents have little throw, whereas spotlights have a lot of throw.) For this reason they start to become pretty ineffective once you get more than about 6ft away from them, depending on the model.

Kino Flo is far and away the most common brand of fluorescent lighting used in the film and TV industry today, so apologies if the rest of this post reads a little like an advert for them. They’re not paying me, honestly!

The company was started by gaffer Frieder Hochheim and best boy Gary Swink after inventing the units for the 1987 comedy-drama Barfly (DP: Robby Müller, BVK). They required a fixture small enough to tuck into little alcoves in a bar location, without getting hot and causing damage.

Kino Flos come in two different kinds:


4'x4 Kino Flo with remote ballast leaning against the base of the C-stand
4’x4 Kino Flo with remote ballast leaning against the base of the C-stand
4-bank Kino Flo ballast

Remote Ballast

With these units, the lighting fixture is separate to the ballast, and they are connected by a header cable, just like HMIs. Remote units are usually referred to by two numbers, the first representing the length of the tubes in feet, and the second representing the number of tubes. So a unit with two tubes, four feet in length, is called a “4ft 2-bank”, often written as: 4’x2 (pronounced “four by two”).

The most common units are 2’x4 (a.k.a. “fat boy”), 4’x4 and 4’x2, but others are available, including “Single Flo” units and 6ft/8ft “Mega” units.

The ballasts allow you to turn individual tubes on and off as required, and also feature a switch marked either Hi/Lo or 4ft/2ft, which reduces the light output by adjusting the current waveform.


Kino Flo Tegra
Kino Flo Tegra. You can see the integrated ballast on the back.

Built-in Ballast

As you might expected, these models combine the fixture and ballast into a single unit. They are designed primarily for interview/ENG applications where it is more convenient to have everything in one. On drama productions it is generally preferable to have a remote fixture, which will be lighter, and a header cable running to an easily accessible ballast.

One advantage of built-in models over their remote cousins is that they are smoothly dimmable down to 5%.

Built-in units are known by names rather than numbers: “Diva-Lite” (2’x4), “Tegra” (4’x4) and “BarFly”, which resembles a swollen 1’x1′ LED panel. There is also the large “Image 87”, a 4’x8 fixture with a built-in ballast. It’s great for lighting green and blue screens because it puts out so much soft light.

Kino Flo Image 87 with a silver egg crate fitted
Top to bottom:
Top to bottom: 2900K, 3200K and 5500K tubes

Kino Flo tubes are available in five colours:

  • KF55 – 5500K – i.e. daylight – identified by blue end caps on the tubes
  • KF32 – 3200K – standard tungsten – gold end caps
  • KF29 – 2900K – warm tungsten – red end caps
  • 420nm blue – an extra-saturated blue for lighting blue screens
  • 525nm green – for lighting green screens

Kino Flos often come with plastic grids known as “egg crates” or “louvres”. Their purpose is to make the light more directional, effectively polarising it on a macro scale. They come in black, silver and “honeycomb” varieties, the latter available in 45º, 60º and 90º angles so you can choose how directional the light becomes – and, as a side effect, how much intensity you lose.

It is possible to remove the tubes and wiring from a Kino Flo housing so that the lamps can be squeezed into a tight space. For example, on The Little Mermaid we needed to see a soft blue glow emanating from a small translucent compartment in an organ. Best boy “Captain” Dan Xeller removed a 2ft Kino tube from its housing and placed it inside the compartment, running the wires out the back to the ballast.

Pampa Light in action behind the scenes of Ren: The Girl with the Mark. You can see I've gelled it with Quarter Minus Green in an attempt to correct the CRI.
Pampa Light in action behind the scenes of Ren: The Girl with the Mark. You can see I’ve gelled it with Quarter Minus Green in an attempt to correct the CRI.

Other than Kino Flo, another brand of fluorescent lights you may come across is Pampa Lights. They come in rugged boxes which can be interlinked to create larger banks of illumination. Unfortunately, in my experience the CRI (see overview) is not good, and they are best avoided.

The same goes even more so for the many fluorescent softbox kits available on Ebay from Hong Kong sellers. Not only are they flimsy in construction and questionable in terms of electrical safety, but the CRI of the lamps is very, very poor. If you need a cheap soft source, you would be much better off bouncing a halogen work light off a white card.

Indeed, firing an incandescent source into a bounce board will give you a better quality of light than even a Kino Flo. But a fluorescent fixture won’t make the room unbearably warm, it can emit daylight-balanced light, and it’s quicker to set up than a bounce board and the attendant flags. In a nutshell, it’s more convenient.

Next week, the Know Your Lights series concludes with a look at the fast-evolving world of LED illumination.

Know Your Lights: Fluorescent

Know Your Lamps: Overview

Welcome to the first in a series of posts looking at the many types of lighting instruments in use on film and TV sets today. This is not intended to be an exhaustive or comprehensive list, but it will give you a good idea of your options, particularly if you’re moving up from smaller productions – where lighting kit is mostly borrowed – to larger ones, where you’re required to submit a lighting list to a rental house.

Some of the key considerations when choosing a lamp are:

  • Colour temperature – how orange or blue the light appears – see this post for more info
  • CRI – Colour Rendering Index – how full a spectrum of light is emitted, and therefore how accurately colours are rendered
  • Light quality – how hard or soft the light is
  • Power consumption
  • Hire cost

Lamps can be divided into categories according to the means by which they produce light. Here is an overview of the main types.


Redheads draw 800W each

Incandescent (view detailed post)

Incandescent lamps work by passing electrical current through a wire filament which becomes so hot that it glows. In the film industry they are generally referred to as ‘tungsten‘ units after the metal which the filament is made from. Common tungsten lamps include Dedolites, 1K ‘babies’ and open-face 800W and 2KW units (which have misogynous nicknames I shall not repeat here).

Pros: cheap, dimmable, extremely high CRI

Cons: very inefficient, get very hot, colour temperature changes when dimmed

Colour temperature: 3,200K

Light quality: generally hard (although certain units like Space Lights are softer)


HMI fresnel

HMI (view detailed post)

The HMI (hydragyrum medium-arc iodide) is the most common form of high intensity discharge lamp used in the industry. It operates by creating an electrical arc between two electrodes which excites a gas. You may occasionally hear about an MSR (medium source rare-earth), which is slightly different technology, but as far as a cinematographer is concerned MSRs and HMIs are the same. They require a ballast to ignite the arc and regulate the current and voltage.

Pros: good CRI, good match for daylight, efficient

Cons: only dimmable down to 50%, expensive, heads and ballasts sometimes hum or ‘squeal’, older bulbs can vary in colour, flicker issues at certain shutter angles with magnetic ballasts

Colour temperature: 5,600K

Light quality: hard


Kino4x4Fluorescent (view detailed post)

Fluorescent lamps are found almost everywhere today, as strip lights in supermarkets and offices, and energy-saver bulbs in the home. Similar in principle to HMIs, electric current causes mercury vapour to emit UV light which is translated into the visible spectrum by the phosphor coating on the tube. Kino Flo pretty much has the monopoly on fluorescent lighting for the film industry. Like HMIs, fluorescents require a ballast.

Pros: reasonable CRI from Kino Flos (appalling CRI from domestic/commercial fixtures), very efficient, get warm but not hot

Cons: limited dimming, high fall-off of light

Colour temperature: 5,500K and 3,200K tubes available

Light quality: soft


LED copyLED (view detailed post)

Gradually replacing tungsten as the most common lamps found on no-budget shoots, LED (light emitting diode) units contain semi-conductors that emit light when their electrons reconfigure. The technology is advancing rapidly, but there is currently a wide range of LED lamps on the market, varying greatly in price and corresponding quality.

Pros: extremely efficient, barely get warm, can run off batteries, almost fully dimmable, some models have adjustable colour temperature

Cons: CRI ranges from almost acceptable in the expensive models to downright shocking in the cheaper ones

Colour temperature: varies

Light quality: varies


Though there are other types of lighting, like xenon, metal-halide and HEP (high efficiency plasma), the above four are the main ones you will encounter on film and TV sets today. Over the next few weeks I’ll look at each of those types in more detail, listing many of the specific units available in each category and their applications.

By the way, if your budget is too tight to hire film lamps of any kind, you may want to check out my post on lighting without movie lamps.

Know Your Lamps: Overview