Know Your Lights: Fluorescent

Unusually being used as practicals, in a music promo, are a 2'x4 Kino Flo (foreground, with 3200K tubes) and a Kino Flo Diva Lite (top left, with 5500K tubes).
Unusually being used as practicals, in a music promo, are a 2’x4 Kino Flo (foreground, with 3200K tubes) and a Kino Flo Diva-Lite (top left, with 5500K tubes).

Tungsten and/or HMI lamps are usually the workhorse units of a lighting package, providing the power that is needed to key-light all but the smallest of set-ups. But they’re not right for every situation. If you don’t need the punch of a point source, and you want something a little softer, fluorescents might be the answer.

This is the third category of lighting units I’m covering in my Know Your Lights series; back up to the overview if you want to start from the beginning.

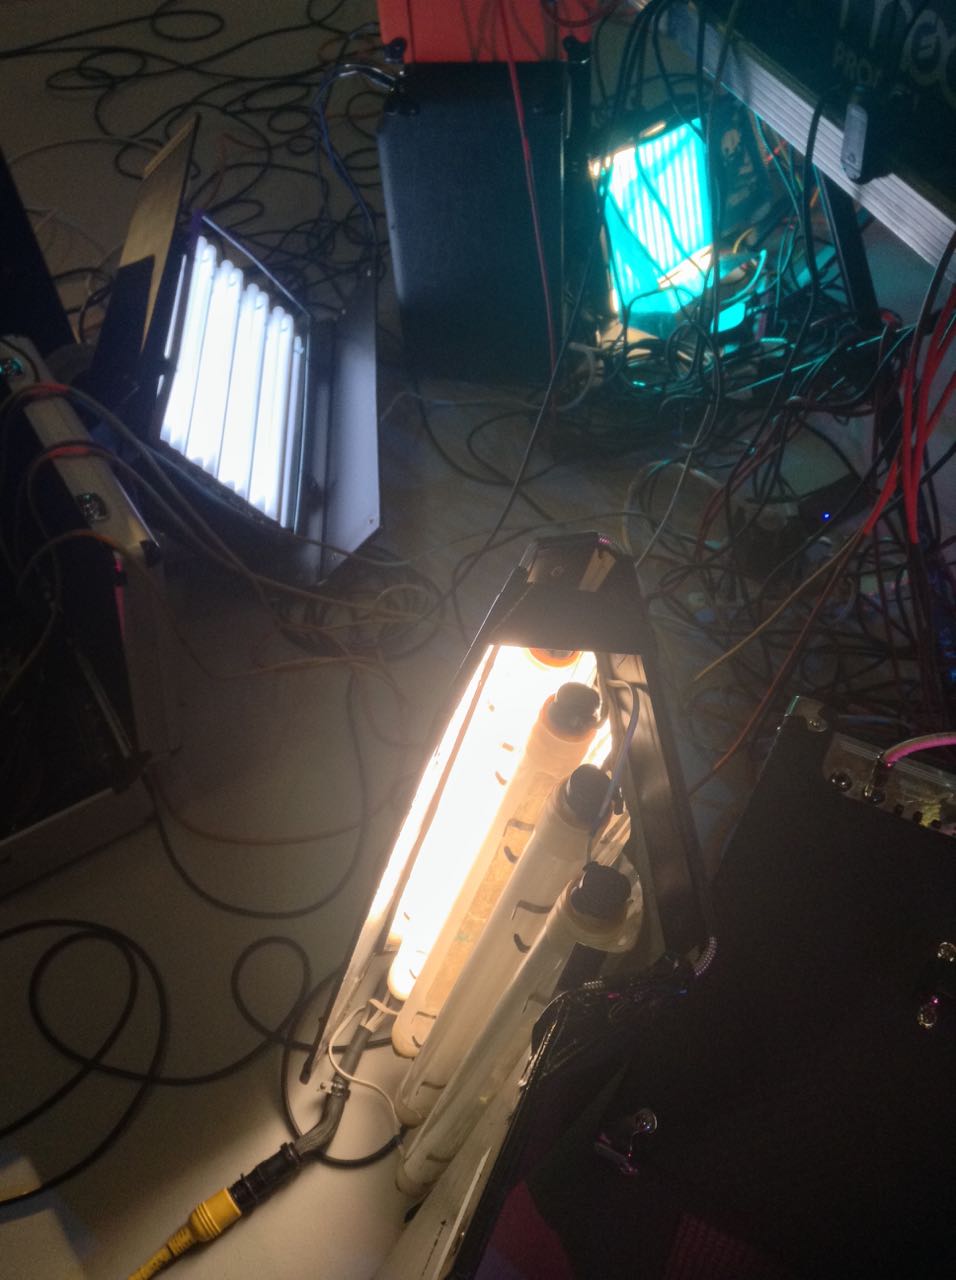
Fluorescent units use very similar technology to HMIs, with electrodes exciting a gas so that it gives off UV light. The phosphor coating on the tube absorbs the UV light and fluoresces, i.e. re-emits the light in the visible spectrum. Like HMIs, fluorescent units require a ballast to regulate the current.

One of the most notable early uses of fluorescents was in Robocop (1987). Jost Vocano, ASC chose the fixtures because the long, thin reflections looked great on Robocop’s suit. The flip side of that coin is that under certain circumstances fluorescents can make actors’ skin unpleasantly shiny. There was a scene in Ren: The Girl with the Mark where the poor make-up artist had to cake layers of powder onto Sophie Skelton to combat the shine of a Kino Flo I had set up.

Robocop (1987, dir. Paul Verhoeven) - note the fluorescent strips reflected in the suit.
Robocop (1987, dir. Paul Verhoeven) – note the fluorescent strips reflected in the suit.

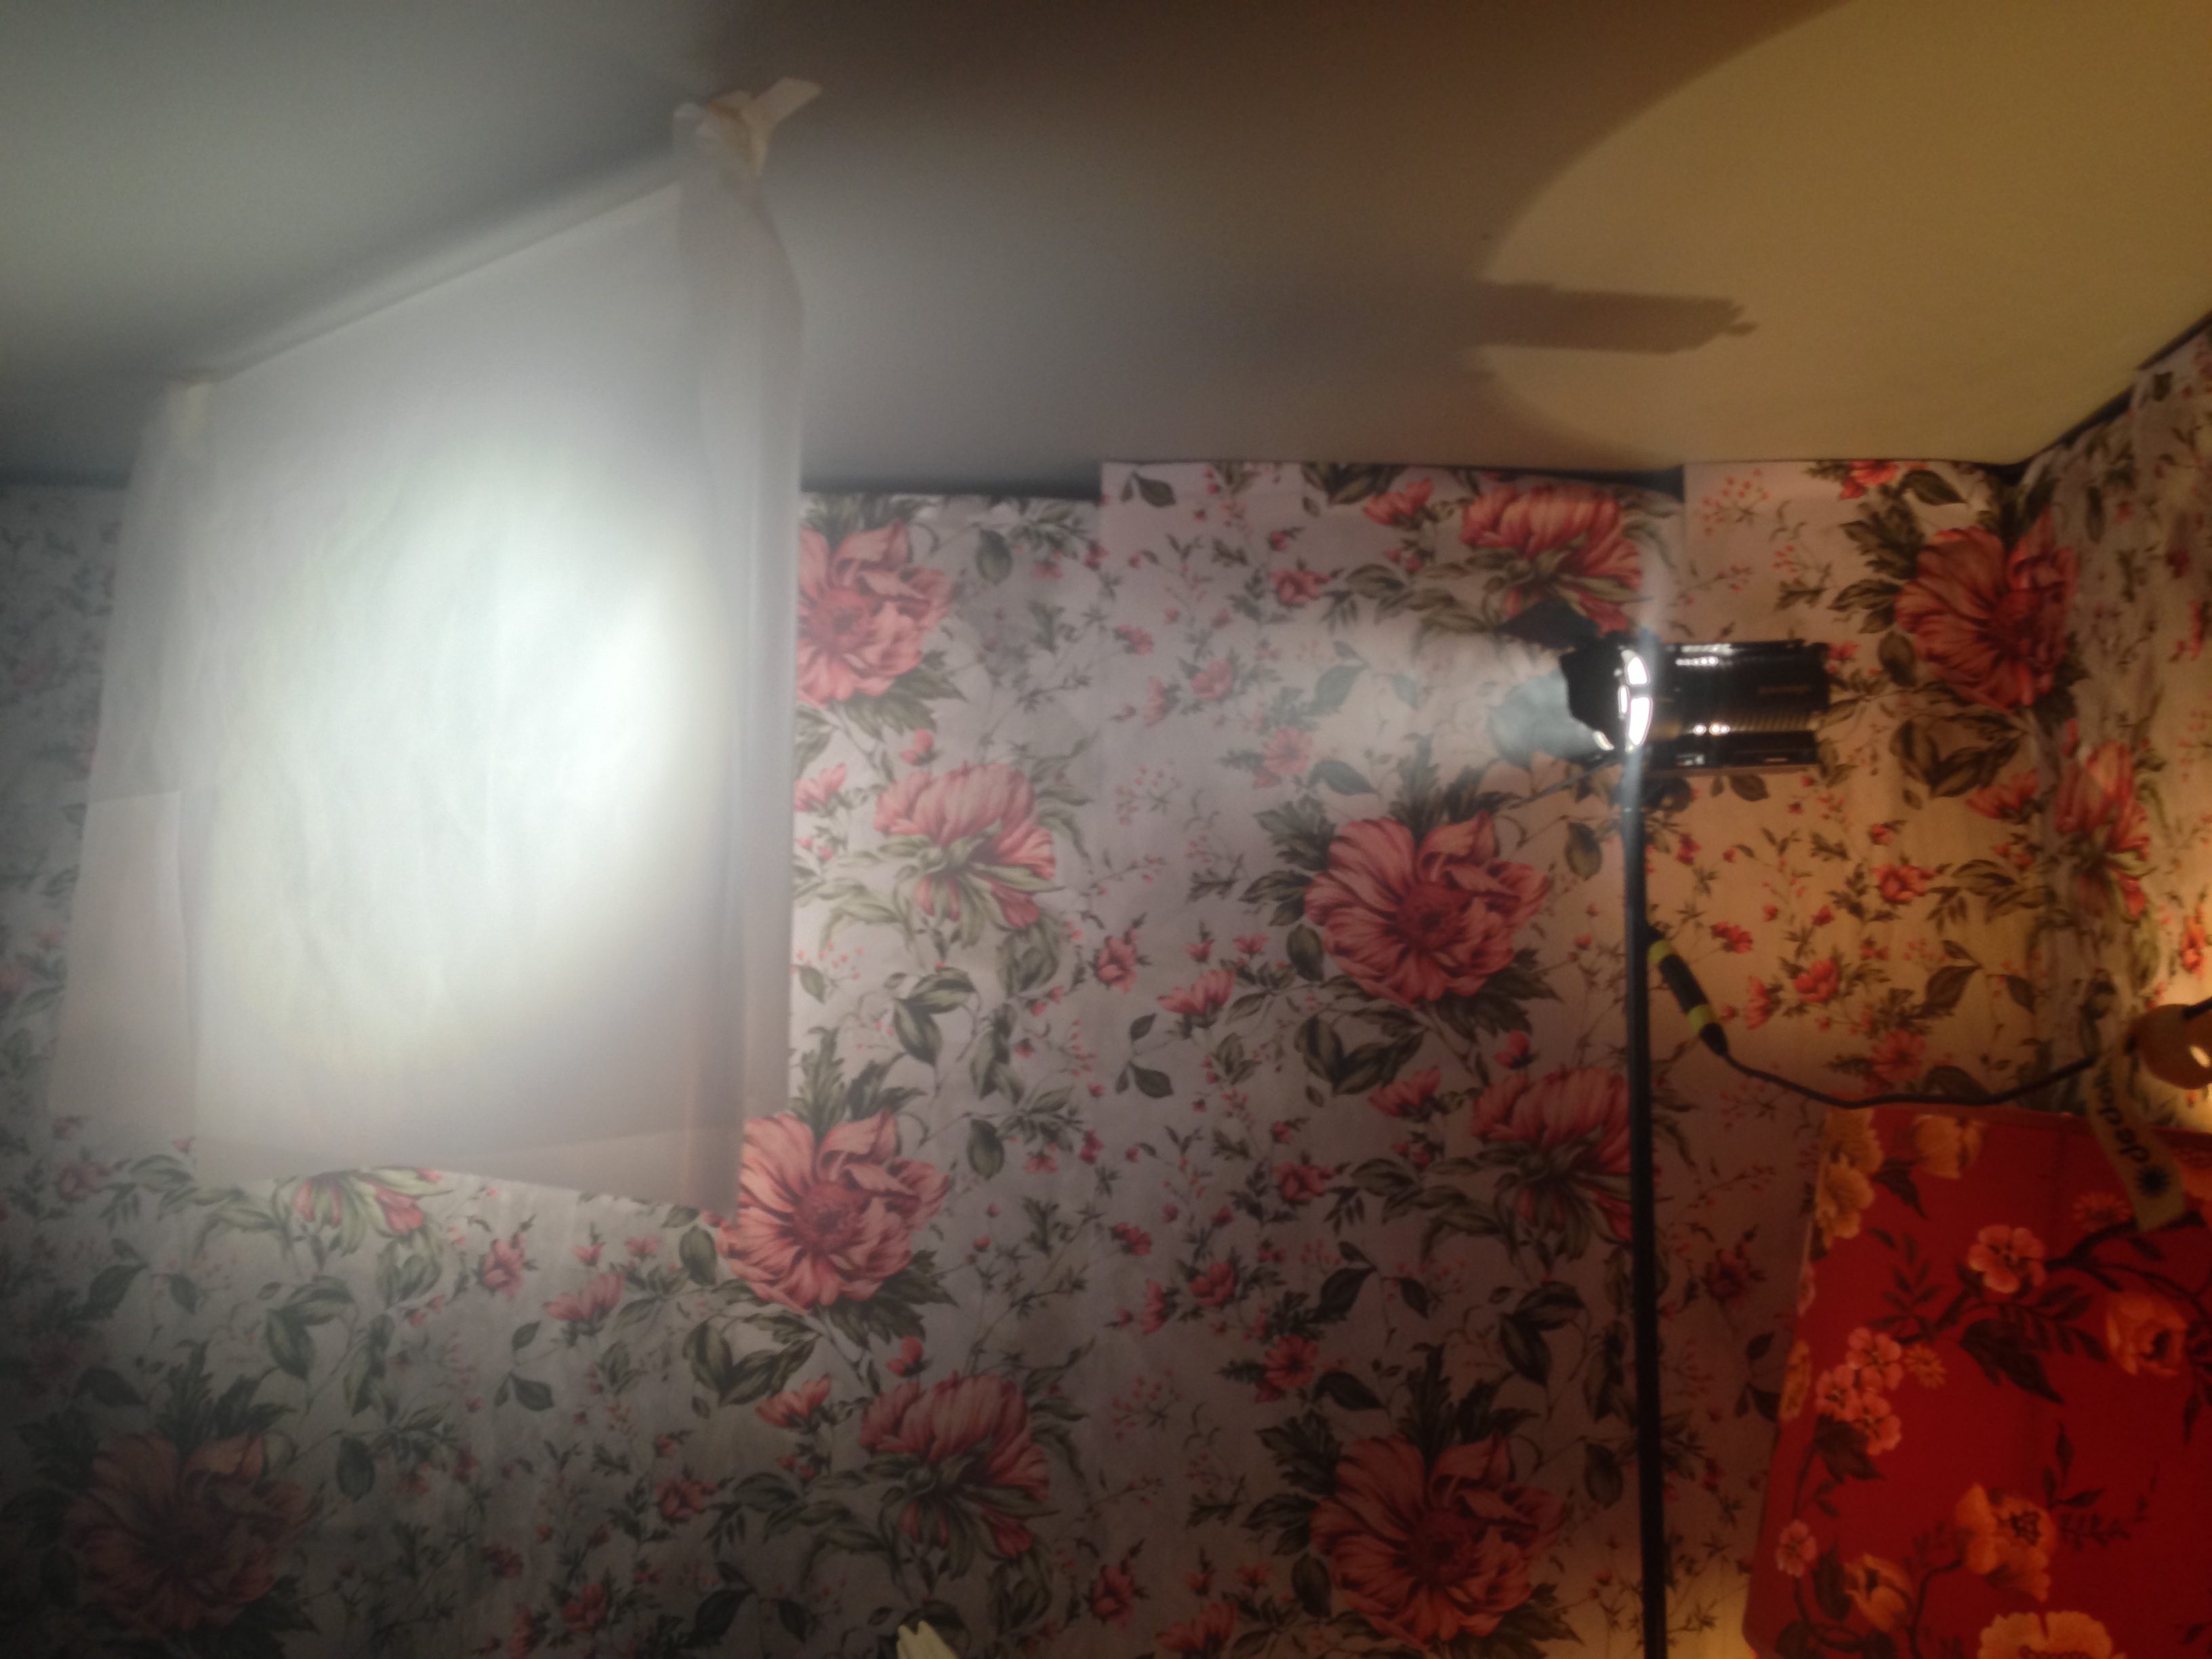
One way I often use fluorescents is as a “Window Wrap”, a soft source that augments a hard HMI coming in through a window to wrap the light more pleasingly around the talent’s face. Or I’ll place a fluorescent outside the room, to represent or enhance indirect daylight spilling through a doorway.

Being soft sources, the light rays which fluorescents emit spread out widely, meaning the intensity drops off quickly as you move away from the lamp. (We refer to this as “throw”: fluorescents have little throw, whereas spotlights have a lot of throw.) For this reason they start to become pretty ineffective once you get more than about 6ft away from them, depending on the model.

Kino Flo is far and away the most common brand of fluorescent lighting used in the film and TV industry today, so apologies if the rest of this post reads a little like an advert for them. They’re not paying me, honestly!

The company was started by gaffer Frieder Hochheim and best boy Gary Swink after inventing the units for the 1987 comedy-drama Barfly (DP: Robby Müller, BVK). They required a fixture small enough to tuck into little alcoves in a bar location, without getting hot and causing damage.

Kino Flos come in two different kinds:
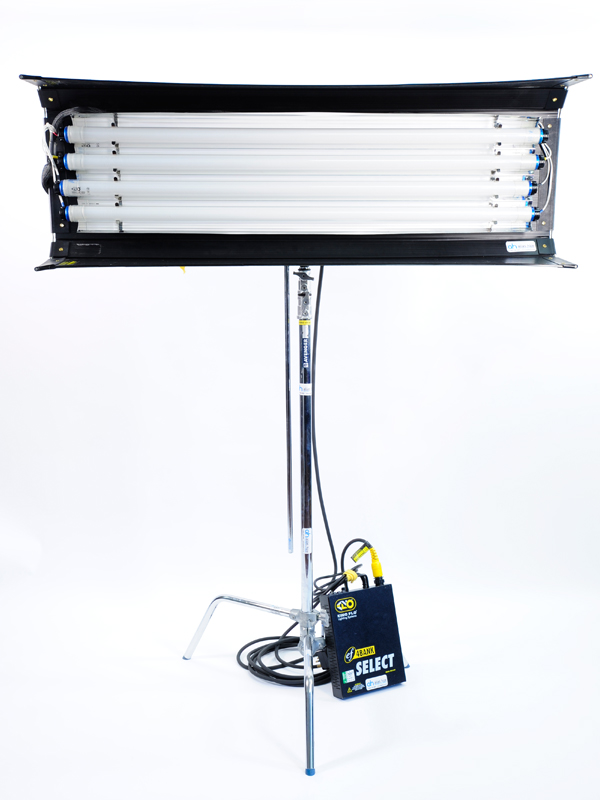
 

4'x4 Kino Flo with remote ballast leaning against the base of the C-stand
4’x4 Kino Flo with remote ballast leaning against the base of the C-stand
4-bank Kino Flo ballast

Remote Ballast

With these units, the lighting fixture is separate to the ballast, and they are connected by a header cable, just like HMIs. Remote units are usually referred to by two numbers, the first representing the length of the tubes in feet, and the second representing the number of tubes. So a unit with two tubes, four feet in length, is called a “4ft 2-bank”, often written as: 4’x2 (pronounced “four by two”).

The most common units are 2’x4 (a.k.a. “fat boy”), 4’x4 and 4’x2, but others are available, including “Single Flo” units and 6ft/8ft “Mega” units.

The ballasts allow you to turn individual tubes on and off as required, and also feature a switch marked either Hi/Lo or 4ft/2ft, which reduces the light output by adjusting the current waveform.
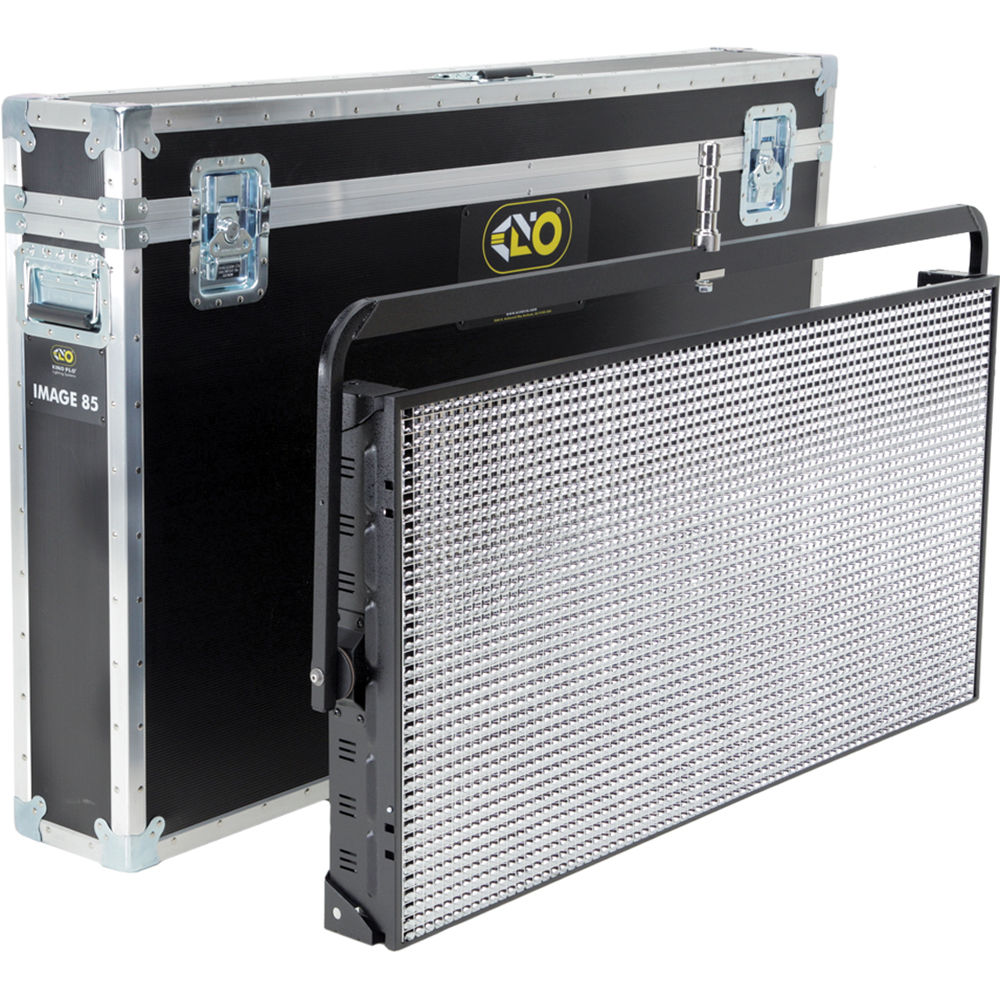
 

Kino Flo Tegra
Kino Flo Tegra. You can see the integrated ballast on the back.

Built-in Ballast

As you might expected, these models combine the fixture and ballast into a single unit. They are designed primarily for interview/ENG applications where it is more convenient to have everything in one. On drama productions it is generally preferable to have a remote fixture, which will be lighter, and a header cable running to an easily accessible ballast.

One advantage of built-in models over their remote cousins is that they are smoothly dimmable down to 5%.

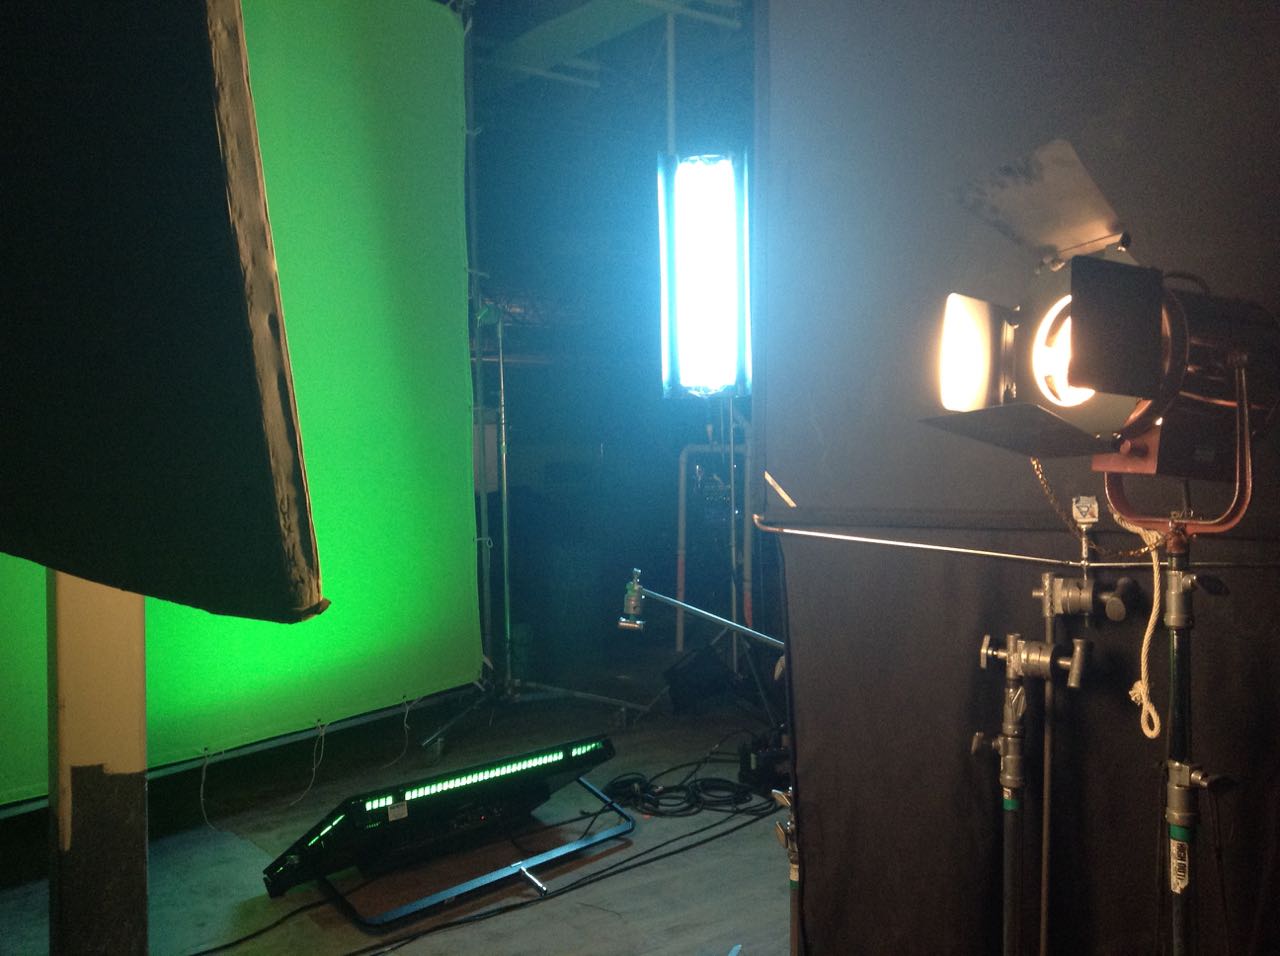
Built-in units are known by names rather than numbers: “Diva-Lite” (2’x4), “Tegra” (4’x4) and “BarFly”, which resembles a swollen 1’x1′ LED panel. There is also the large “Image 87”, a 4’x8 fixture with a built-in ballast. It’s great for lighting green and blue screens because it puts out so much soft light.

Kino Flo Image 87 with a silver egg crate fitted
Top to bottom:
Top to bottom: 2900K, 3200K and 5500K tubes

Kino Flo tubes are available in five colours:

  • KF55 – 5500K – i.e. daylight – identified by blue end caps on the tubes
  • KF32 – 3200K – standard tungsten – gold end caps
  • KF29 – 2900K – warm tungsten – red end caps
  • 420nm blue – an extra-saturated blue for lighting blue screens
  • 525nm green – for lighting green screens

Kino Flos often come with plastic grids known as “egg crates” or “louvres”. Their purpose is to make the light more directional, effectively polarising it on a macro scale. They come in black, silver and “honeycomb” varieties, the latter available in 45º, 60º and 90º angles so you can choose how directional the light becomes – and, as a side effect, how much intensity you lose.

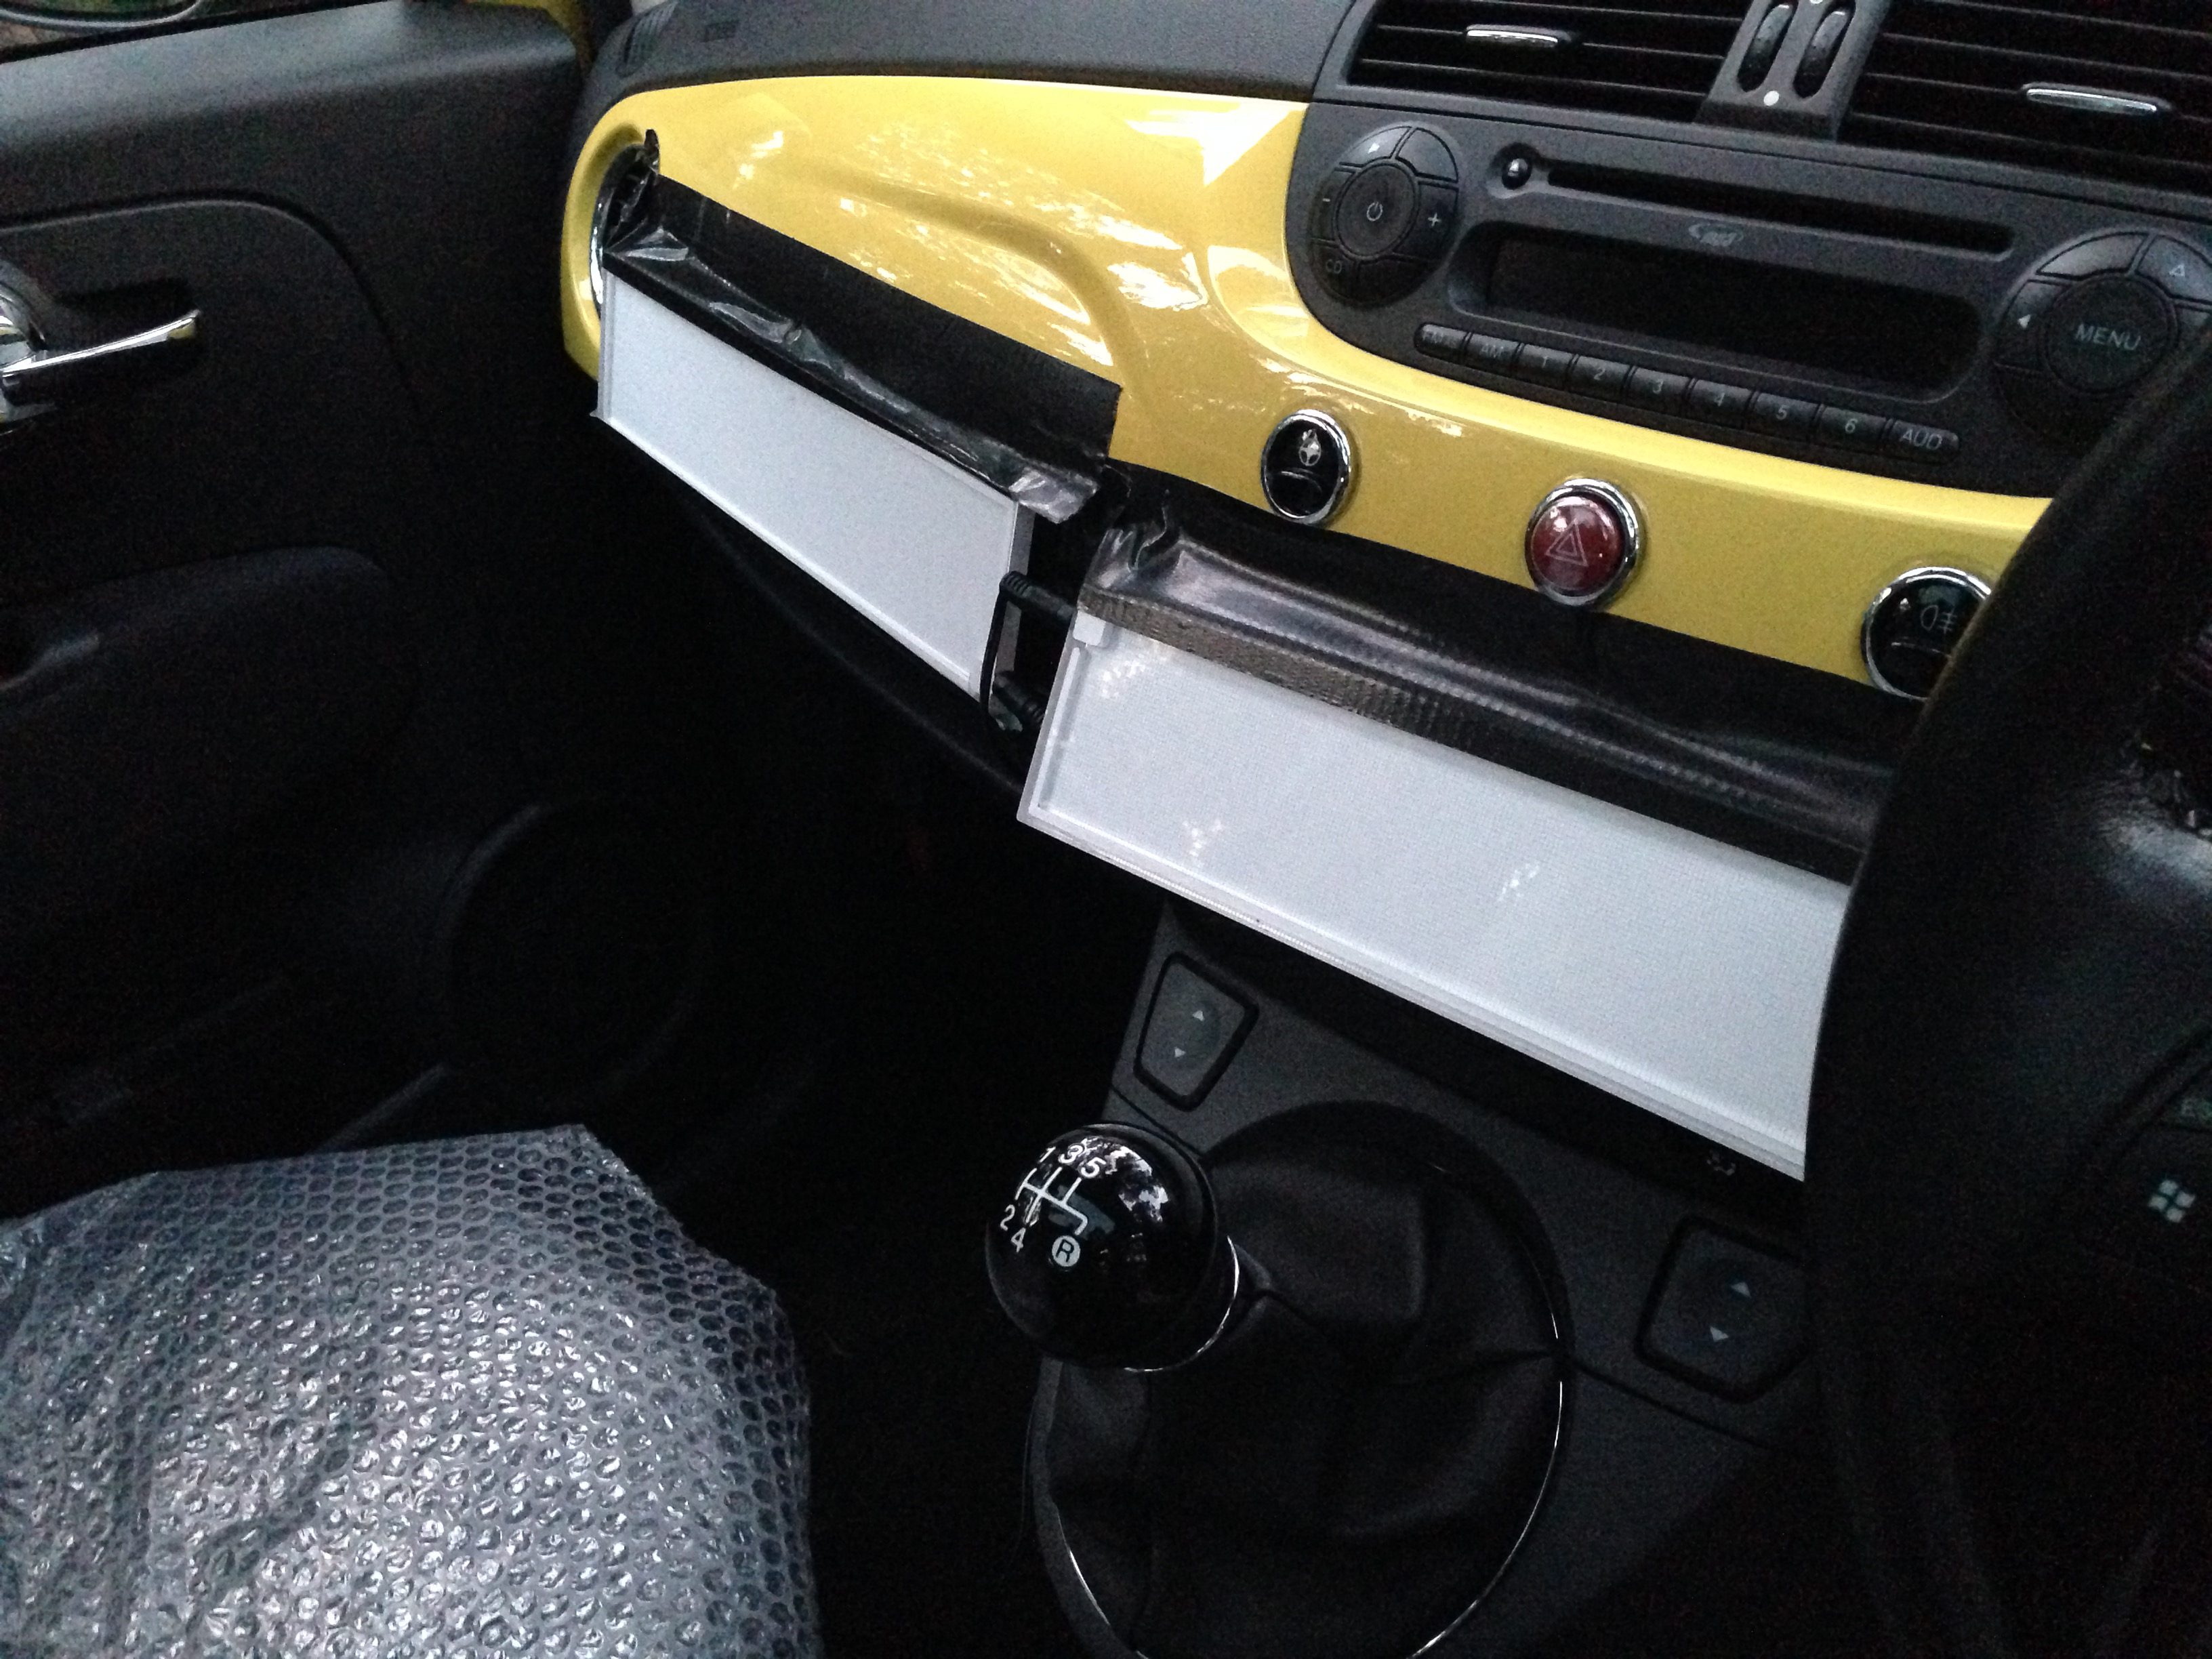
It is possible to remove the tubes and wiring from a Kino Flo housing so that the lamps can be squeezed into a tight space. For example, on The Little Mermaid we needed to see a soft blue glow emanating from a small translucent compartment in an organ. Best boy “Captain” Dan Xeller removed a 2ft Kino tube from its housing and placed it inside the compartment, running the wires out the back to the ballast.

Pampa Light in action behind the scenes of Ren: The Girl with the Mark. You can see I've gelled it with Quarter Minus Green in an attempt to correct the CRI.
Pampa Light in action behind the scenes of Ren: The Girl with the Mark. You can see I’ve gelled it with Quarter Minus Green in an attempt to correct the CRI.

Other than Kino Flo, another brand of fluorescent lights you may come across is Pampa Lights. They come in rugged boxes which can be interlinked to create larger banks of illumination. Unfortunately, in my experience the CRI (see overview) is not good, and they are best avoided.

The same goes even more so for the many fluorescent softbox kits available on Ebay from Hong Kong sellers. Not only are they flimsy in construction and questionable in terms of electrical safety, but the CRI of the lamps is very, very poor. If you need a cheap soft source, you would be much better off bouncing a halogen work light off a white card.

Indeed, firing an incandescent source into a bounce board will give you a better quality of light than even a Kino Flo. But a fluorescent fixture won’t make the room unbearably warm, it can emit daylight-balanced light, and it’s quicker to set up than a bounce board and the attendant flags. In a nutshell, it’s more convenient.

Next week, the Know Your Lights series concludes with a look at the fast-evolving world of LED illumination.

Know Your Lights: Fluorescent

Know Your Lights: HMIs

18K bubble for an Arrimax 12/18
18K bubble for an Arrimax 18/12

Following on from last week’s look at tungsten units, today we focus on HMI lighting. HMIs are more complex technology than tungsten, meaning they are far more expensive, and more prone to problems, particularly if you get a deal from a hire company and they give you older units. But they are bright and relatively efficient and because of this, and their colour temperature of 5,600K, they are by far the most popular type of light used in today’s film and TV industry when battling or mixing with natural daylight.

HMIs (hydragyrum medium-arc iodide) operate by creating an arc between two electrodes. This arc excites a gas which produces the light. In order to ignite the arc, a ballast is required. This device also regulates the current, while a special header cable connects the ballast to the light.

Arri_540817_Ballast_Electronic_2500_4000_Watts_1317042538000_325678
Arri electronic ballast for 2.5K and 4K HMIs

Ballasts come in two types: electronic and magnetic. Magnetic ballasts are cheaper, but if you are shooting at a shutter interval out of sync with the cycling of your power supply – e.g. 1/48th of a second with a 50Hz UK power supply – the HMI will appear to flicker on camera. Electronic ballasts have a ‘flicker free mode’ which converts the sine wave of the power supply into a square wave so that the arc does not extinguish at any point in the cycle. A side effect of this is that the head and/or ballast can produce humming, buzzing or squealing noises. Therefore many electronic ballasts have a ‘silent mode’ which reduces the noise but only prevents flicker at standard frame rates, not for high-speed work. In practice, flicker is rarely a problem as the shutter angles of today’s digital cameras can easily be tweaked to deal with it at common frame rates.

Adjusting an Arri Daylight Compact 1200 (a 1.2K MSR) on the set of Ashes. Photo: Sophie Black
Adjusting an Arri Daylight Compact 1.2K HMI fresnel

Like tungsten units, HMIs are available in open face, par and fresnel varieties, though the open face models are not very common. Arri, the major manufacturers of HMIs, call their daylight par fixtures ‘Arrisun’. Other HMI brands include Film Gear, Silver Bullet and K5600, which makes Jokers (see below).

Measured by their wattage, standard HMIs sizes are: 200W, 575W, 1.2K, 2.5K, 4K, 6K, 12K, 18K.

The smaller models, up to 2.5K, are fairly common on no-budget sets, because they can run off a domestic power supply and so don’t require a generator. At the other end of the scale, 18Ks are standard for daylight exterior and interior work on medium budgets and above.

Because of their power, HMIs often play a key part in night exterior lighting too. A 12K or 18K on a condor crane may be used to simulate the moon, while other HMI units, perhaps bounced or coming through a frame, might serve as sidelight or fill. By choosing to shoot at 3,200K, you automatically turn these HMI sources blue, often a desirable look for nighttime work.

Two 18K Silver Bullet HMI fresnels rigged to a condor crane to provide moonlight for a night exterior on The Little Mermaid

There are many variants on the standard HMIs. Here are some of the more common ones.

Arrilux 125W Pocket Par

Pocket pars are little 125W daylight pars that can be run off batteries. Before the days of LED panels, I used one of these for eye-light on a short film set in a forest in daylight. They can also make a good TV gag when bounced off a wobbling silver reflector.

K5600 Joker Bug 800W

Jokers are small units that come in 400W and 800W models. They can be reconfigured in various ways and even slotted into Source 4 housings (see last week’s tungsten post) to convert these units to daylight. We used a 400W joker a couple of times on Heretiks, when there was little space to rig in but we needed a fair bit of punch – like daylight through a small window.

Arrimax M18
Arrimax M18

The Arrimax range uses a hybrid of par and fresnel technology. They are lighter and more efficient than standard HMIs – the 800W model puts out almost as much light as an ordinary 1.2K, for example – but they’re more expensive to hire and don’t create the nice shafts of light that some DPs like (ahem). The model numbers are the wattage in tenths of a kilowatt: M8 (800W), M18 (1.8K), M40 (4K), M90 (9K) and the anomalously-named Arrimax 18/12 which accepts both 12K and 18K bubbles.

Airstar helium balloons in action

Helium Balloons are designed to provide a soft overhead illumination for night exteriors or high-ceilinged interiors. They come in a range of shapes and sizes, and aren’t necessarily HMIs; they can be fitted with tungsten lamps, or a combination of both.

Again, please let me know on Facebook or Twitter if I’ve missed out any of your favourite units. Next week: fluorescents.

Know Your Lights: HMIs

Know Your Lights: Tungsten

Following on from my ‘Know Your Lights’ overview last week, today I’ll look in more detail at the first category of lamps and the various units available and when you might use them.

And that first category is incandescent lighting, commonly known as tungsten. It is the oldest, simplest and most robust lighting technology. Tungsten lamps are the cheapest to hire, the easiest to repair, and emit a smoother spectrum of light than any other artificial sources, making for the most natural skin tones. For my money, there’s no better way to artificially light a human face than by bouncing a tungsten source off polyboard.

This comparison of domestic bulbs against daylight shows the spectra of light they emit.
This comparison of domestic bulbs against daylight shows the spectra of light they emit, with incandescent (tungsten) and halogen producing the smoothest spectra of the artificial sources.

Tungsten lighting units can be sub-categorised by the style of reflectors and/or lenses in the heads…


Open-face

Lilliput 300W open-face lamp
Ianiro Lilliput, a 300W open-face light

Redheads draw 800W each
Generic 800W open-face light

Unknown
Arrilite 1000, a 1K open-face light

A blonde - a basic 2,000W tungsten lamp
Generic 2K open-face light

The simplest instruments are known as ‘open-face’ because they have no lens to focus the light. By far the most common units are the 800 Watt and 2,000 Watt models. These are often referred to as ‘redheads’ and ‘blondes’ respectively, though I strongly discourage these terms for reasons touched on here. 300W models – dubbed ‘Lilliputs’ by manufacturer Ianiro – are also available, as well as 1Ks and much larger models like the Mole-Richardson Skypan 5K and Skylite 10K.

While I have lit entire no-budget features with just open-face lights, on larger productions the uneven and unfocused nature of their light makes them a poor relation of other units on the truck. They are most likely to get fired into a bounce board or used to create a little pool of light somewhere in the deep background where finesse is not needed.


Fresnel

Arri 300W fresnel
Arri 300W fresnel

Filmgear 650W fresnel

Mole Richardson 1K 'baby' fresnel
Mole Richardson 1K ‘baby’ fresnel

Arri T12, a 12K fresnel

The fresnel lens was invented in the early 19th century by French physicist and engineer Augustin-Jean Fresnel in order to increase the focus and throw of lighthouse lamps. Today in the film industry, fresnel lenses can be found on tungsten, HMI and even LED fixtures.

Fresnel lens
Fresnel lens

Tungsten fresnels come in the following wattages: 150W, 300W, 650W (a.k.a. ‘tweenie’), 1K, 2K, 5K, 10K, 12K, 20K, 24K.

1Ks and 2Ks are sometimes called ‘babies’ and ‘juniors’ respectively, but confusingly those terms can also refer to whether they are the smaller location models or larger studio versions of the same wattage.

Though the fresnel lens reduces the light output a little, the beam is much more focused and can therefore create a shaft of light through smoke, which open-face lamps cannot. Hence I sometimes use tungsten fresnels to simulate hard sunlight when shooting on a stage. But beware that shadows cast by a fresnel can sometimes show up the ridges in the lens.

I often fire fresnels into bounce boards, and because their light is more focused they require less flagging to control the spill than open-face units.

On Heretiks we used numerous 300W and 650W fresnels to beef up candlelight, often placing tough-spun diffuser over them, dimming them down to warm up the colour temperature, and flickering them too.


Par (parabolic aluminised reflector)

Par 16 (birdie)
Par 16 (birdie)

Par 38
Par 38

Filmgear 4-light Minibrute
Filmgear 4-light minibrute

Mole Richardson 9-light maxibrute

Par lights use a parabolic (shaped like half a rugby ball) reflector and a lens to produce a soft-edged oval pool of light. They are extremely common in theatres, but are often used in film and TV as well.

Unlike fresnel and open-face units, par cans are referred to not by wattage but by the diameter of the bubble in eighths of an inch. So a Par 16 (a.k.a. ‘birdie’) has a 2″ bulb.

Par cans come in the following sizes: 16, 20, 36, 38, 46, 56, 64. They also come with various internal specs which affect the width of the beam.

Par cans are good for throwing shafts of light. On The Little Mermaid I used them to simulate car headlights, and as practicals (i.e. they were seen on camera) to uplight banners at the circus.

Maxibrutes (a.k.a. ‘Molepars’) are banks of multiple par 64 (1KW) lights. They come in banks of 4, 6, 9, 12 or 24. They pop up in the background of music promos quite often, because they look cool and kind of retro. I used two 9-light Maxibrutes, bounced off the tent roof, to illuminate the big top in The Little Mermaid. Some DPs like to use Maxibrutes for backlight on night exteriors. If you’re using them direct, you’ll need at least a sheet of diff to prevent multiple shadows.

Minibrutes (a.k.a. ‘fays’) are similar, but use smaller par 36 (650W) lamps.


Other

Dedo, de-e-edo. Dedo come and me want go home.
Dedolite

Dedolites are compact units that use a unique lens system to produce very focussed, controllable light from (most commonly) 150W bulbs. They are widely available to hire, come with in-line dimmers, and are small and light enough to be rigged overhead or in tight spots. I often use them to beef up practicals.

ETC Source Four
ETC Source Four

Source Fours or (a.k.a. ‘lekos’) are ellipsoid reflector spotlights. They feature cutters which can be used to shape the beam, they can be hired with different lenses (some of which are zoomable), and they can be fitted with gobos to project patterns. They are good for stylised pools of light or for firing into distant bounce boards without spilling light elsewhere.

Spacelights
Spacelights

Spacelights are wagon-wheel configurations of three or six 1K lamps inside a cylinder of diffusion material. They are normally used in large numbers to provide ambient toplight on stage. Click here for a brief video introduction to spacelights.

1K Jem ball
1K Jem ball

Jem Balls, or China balls, resemble Chinese paper lanterns. They come in 22″ (up to 1KW) and 30″ (up to 2KW) sizes and produce a very soft light which I personally find is never bright enough.

Bare bulbs (usually referred to as ‘globes‘) in pendant fittings can be hung from overhead or hidden behind set dressing, perhaps to beef up practicals. On Ren: The Girl with the Mark and other projects I hid some globes behind furniture to enhance the pool of light from candles.

Finally, tungsten is usually the most desirable type of bulb to use in practicals. It is commonplace when shooting a daylight interior for a spark to go around replacing the energy-saver fluorescent bulbs in the table lamps with old-school tungsten ones. The colour is much nicer, the skin tones are better as noted above, and they can be dimmed to just the right level for camera.


I’m sure I’ve missed something out – please feel free to let me know on Facebook or Twitter! Next week: HMIs.

Know Your Lights: Tungsten

5 Tips for Lighting a Green Screen

Green screen work is almost unavoidable for a modern cinematographer. In an age when even the most basic of corporates might use the technique, and big blockbusters might never leave the green screen stage, knowing how to light for it is essential. The following tips apply equally to blue screen work….

IMG_0837 1. Light the screen at key.

Or to put it another way, your screen should not be over- or under-exposed. If you use a light meter, you can hold it at various spots on the screen (taking care not to block any light with your body) and check that the reading always matches what the iris of your lens is set to. If your camera or monitor has a false colours option, you can use this to check the level and consistency of the exposure across the screen.

2. Use soft sources.

Bouncing tungsten lamps off polyboard is a cheap and effective way to spread soft light across a green screen. Typically you will want two sources, one to each side of the screen. They will need to be well flagged so that their light does not spill onto the subject.

On larger budgets, Kinoflo Image 85s or 87s are often used to illuminate green screens. They are 4ft 8-bank units which put out a large amount of soft light. Ask your hire company to supply them with spiked green tubes; designed especially for green screen work, these tubes help to increase the colour saturation of the screen. (Spiked blue tubes are also available.)

3. Control spill.

As far as possible, reflected green light from the screen should not fall on the subject. The main way to ensure this is to put as much distance as possible between the screen and the subject.

I learnt a great tip recently which also helps reduce spill: once the exact camera position is known, bring in 4×4 floppy flags slightly behind the subject, one either side, just out of frame.

IMG_31674. Avoid dark shadows.

Green spill will bleed most easily into the dark areas on your subject, especially if you’re shooting with a wide aperture. Clipped (or ‘crushed’) blacks are particularly undesirable. The solution is to use more fill light, even if this goes against the mood and contrast levels you’re using in non-VFX shots. If you use LUTs, you should consider creating a custom one for green screen work which pushes the contrast further to compensate for this flatter starting point. If not, you will have to work with the colourist in post to ensure that the shadows are restored to their usual levels once the VFX are complete.

5. Add tracking markers.

Camera movement against green screen isn’t the no-no that it used to be, with any VFX team worth their salt being able to deal with handheld shots, pans, tilts and push-ins. If there isn’t a VFX supervisor on set, you can help them out by taping crosses to a few points on the screen. There should always be at least one marker in shot throughout the camera move (more if it’s a multi-axis move), and they shouldn’t stay put behind any tricky edges (e.g. long hair) for long.

5 Tips for Lighting a Green Screen

Lighting in Traditional Art

IMG_0879As I dig deeper into the craft of cinematography I feel the need to consume more references and inspiration than cinema itself can provide. To that end, I took a trip this week to the National Portrait Gallery in Trafalgar Square to see a little of  how light has been used in painting and photography over the last few centuries.

The light in many of the portraits is strikingly similar, with the subjects positioned near an unseen window in such a way as to light their up-side, the side of their face closest to the artist or viewer. This is known as a broad key, and in modern cinematography you don’t see it very often; a short key (‘lighting the down-side’) is almost universally favoured. The only convincing explanation I can offer for this is changing fashions.

The paintings that caught my eye were the ones that try something a little different with their lighting. I found it an interesting exercise to work out where the natural light was coming from and how I would recreate it with modern equipment. Here are three of my favourites…


Frederick, Duke of York and Albany by Sir David Wilkie (1823)

by Sir David Wilkie, oil on panel, 1822-1823, dated 1823

Rather than using the daylight to illuminate his subject’s face, Wilkie seats the duke with his back to the window, which cross-lights his sword nicely. The paper in his hand acts as a bounce board, throwing light back onto his face and shirt buttons. It’s great fun doing this in cinematography – firing a hot source in through a window and then seeing it bounce unpredictably off the set and costumes. If I was recreating this painting, the source might be a 6K HMI through a diffusion frame.


Thomas Henry Huxley by John Collier (1883)

NPG 3168; Thomas Henry Huxley by John Collier

I love how the top-light in this painting throws Huxley’s eye sockets into shadow, making him resemble the skull he’s holding. I’m guessing Collier didn’t pitch the portrait that way though! I might recreate this using a lightly diffused Joker Bug rigged to the ceiling, or a Source 4 Leiko fired up into an overhead bounce board.


The Mission of Mercy: Florence Nightingale Receiving the Wounded at Scutari by Jerry Barrett (1857)

NPG 6202; The Mission of Mercy: Florence Nightingale receiving the Wounded at Scutari by Jerry Barrett

The key light here is coming from the left – perhaps a 12K through a 12×12 full grid – but there’s a hotter shaft picking out Flo in the centre. For that I might use a 2.5K just out of frame, flagged to hit only her. At her feet there would have to be a silver reflector to kick that up-light onto the face of the kneeling woman. The characters on the right of frame are edged quite strongly by the light from the archway. (We know from looking at the shadows on the background buildings that it can’t be direct sunlight, so there must be a window or a very bright wall which that edge light is bouncing off.) I would use an 8×4 matte silver bounce board or maybe even a mirror board to recreate that.

That’s all for now, but look out for more art posts in the near future.

Lighting in Traditional Art

Why Are There So Few Women in Camera Departments?

In an eye-opening 2014 investigation of gender within the UK film industry, Stephen Follows showed that just 92% of DPs are men. Why is this?

“Women just aren’t interested in that techie stuff,” is a common refrain, but then how do you explain the much greater percentage of women working in stills photography (anywhere from 17% in the UK to 51% according to a US report)? I believe the difference is that, unlike photographers, cinematographers are surrounded by large crews – and the attitudes and prejudices of those crews can hugely impact how comfortable and welcoming a career it feels.

Leslie Hill, one of Hollywood's first female camera assistants
Leslie Hill, one of Hollywood’s first female camera assistants (1976)

An excellent female camera assistant I once worked with mentioned, towards the end of the shoot, that she almost turned down the job. It was because of something a male member of the production department said to her during preproduction: “Can you even carry heavy camera kit?”

I had actually had a conversation with this man earlier in prep concerning the way he spoke about women, and his defence was that he was joking, he didn’t mean it. But even if this was true, the fact remains that the project nearly lost a very competent and experienced member of the camera team (who, for the record, had absolutely no problem lifting a heavy camera package onto my shoulder day in, day out for weeks).

How many  productions, I wonder, have lost talented female crew members because of similar misogynous remarks or assumptions? And how many such remarks does it take before some women might say, “Well, I’m a great camera assistant and I’d love to be a DP some day, but I’m giving up and switching careers because I just can’t take all this sexist bullshit any more”? How many such remarks until some women might even start to believe that they really can’t do the job as well as men?

Ellen Kuras, ASC, cinematographer of Eternal Sunshine of the Spotless Mind amongst others

This is surely part of the reason for the huge gender disparity amongst cinematographers – because some women have been teased, doubted, persuaded and bullied out of the department, maybe not openly, maybe not directly, but gradually and insidiously with a bigoted remark here, a misogynous joke there, and so on. And whether it’s intentional or not, it has an effect. Even calling lamps “redheads” and “blondes” is another grain of sand on the ten mile beach of misogyny. (Instead call them 800s and 2Ks – little things like this do add up.)

The responsibility is on all of us, men especially, to make sure we are not contributing to this culture, that we are calling out this behaviour when we see it, and that our departments are comfortable places to work for both genders. Some producers and directors complain that there simply aren’t enough women applying for positions in the camera dept, but if together we can create an environment that values them, I believe we will eventually find just as many women applying as men.

I’ll leave you with a couple of articles that highlight some of the excellent female cinematographers working today:

IndieWire: Top Women Cinematographers Reveal 7 Best Tips for Career Success

And So It Begins: Why are there no Female Cinematographers?

Why Are There So Few Women in Camera Departments?

“Above the Clouds”: Week 4

IMG_0725Day 18 / Tuesday

Yesterday some of the crew started the long drive up to Skye, but for a lucky few – me, MUA Helen and actors Naomi and Andy – our journey starts today with a flight from Luton to Inverness. From there it’s a two-and-a-half-hour drive across the Highlands to the Kyle of Kochalsh, where Gary is waiting for us with his motorhome and the crafty table all set up. Soon afterwards the vans arrive, and the Yellow Peril. From 4pm we are shooting on a little ferry, big enough to hold three or four cars, as it pootles back and forth, back and forth between Skye and the mainland. It is, I think, the most stunning location I have ever shot in. The mountains tower over us from either side of the water, which sparkles in the sun. Although the light turns cloudy pretty quickly, the scene looks epic. All I do is add the usual dashboard LEDs in the picture car, and some sky bounce from Celotex, and darken the skies a little with an ND grad.

IMG_0713

Day 19 / Wednesday

For some reason there’s no water at the cottage where many of us are staying, so it’s a slightly whiffy cast and crew that rocks up in another stunning location this morning. In common with the whole shoot to date, the weather – and therefore the light – is very changeable. We have to roll between the squalls that drift across the valley. An interesting continuity issue arises with the mountains in the background of shot: the light on them keeps changing as clouds move across them. The weather here really is something else; this morning we saw a rainbow so close and so low to the ground that it felt like we could have walked over and touched it.

IMG_0751In the afternoon we’re at yet another stunning location, a bench overlooking a bay. For once the light is fairly constant and sunny, which gives us lovely sparkles in the sea. Again I frame the master like the painting in the Turner, with the horizon bang on the vertical centre of frame: clouds above, landscape and characters below. When we flip around to shoot the singles, the light is hard on the actors’ faces, but frontal, which at least is the most flattering kind of hard light. And it fits well with the dialogue, which references it being sunny, so it wouldn’t make sense to put a diffusion frame up. All I do is have runner Jacob stand just out of frame with some poly, which lifts the shadows a little and makes sure we see into Naomi’s eyes when she looks away from the sun.


Day 20 / Thursday

IMG_0768Various small driving scenes to start with. Rupert and Max reconfigure the camera as per our test of week 2, and I climb into the Yellow Peril’s modest rear seat to capture the action. I black out the rear window to get a classic dark-to-light depth effect: underexposed backs of seats in the foreground, the actors (including Naomi’s reflection in the rear view mirror) correctly exposed in the midground, and the view through the windscreen slightly overexposed in the background.

We also shoot exterior up-and-pass shots of the car amidst the spectacular scenery, before crossing the Skye Bridge to record a scene in a mainland village. Here we’re shooting dusk-for-night, so I set the white balance to 3,200K and heavily grad the sky. For shots inside the car, I plaster multiple Litepads over the windscreen, gelled with half CTO. The intention was for these to represent the car’s courtesy light, but with a fair amount of daylight coming into the vehicle the effect is more subtle, serving only to warm up what would otherwise be very cold skin-tones at 3,200K.

IMG_0775On the final set-up, appropriately enough, a car with clouds painted on it happens to drive by. And with that, principal photography is wrapped. There is a fifth week to do at some point, perhaps September, when a certain critical role has been cast, but for now the shoot is over. Andy, Naomi, Helen and I will meander back to Inverness tomorrow, while the rest of the crew drive south. I’ve had a great time, and I look forward to seeing a rough cut and shooting the remaining scenes later in the year.

Keep up to date with Above the Clouds on the official Facebook page or Instagram account.

“Above the Clouds”: Week 4

“Above the Clouds”: Week 3

IMG_0572Day 12 / Sunday

A split day, starting with two scenes at two different petrol stations (one of them open!). It’s a sunny day and when the cast stand next to the Yellow Peril (the picture car) they are bathed in yellow bounce. We build on this by bouncing more light with the gold side of a Lasolite.

IMG_0590Next we have some interiors in a soup kitchen, which will intercut and contrast with the dining room scenes from day one. Whereas the dining room had perfect three point lighting with a Rembrandt key, I want the soup kitchen to look much less pleasant, so I use toplight, broken keys and cross-light to bring out the texture of the peeling walls.

Our last scene is a night exterior. A sodium vapour security light which we can’t turn off is already backlighting the set. Rather than fighting it, we beef it up using the 1.2K gelled with Urban Sodium. This forms half of a cross-backlighting set-up, paired with a 1×1 LED panel gelled with Quarter Plus Green. Another 1×1 gelled with Mustard Yellow provides a pool of light in the background, while the 4×4 Kino gelled wth full CTB supplies a tiny bit of ‘moonlight’ fill. I’ve never lit a scene with so many different colours, but it feels realistic because there are so many different kinds of streetlamps and security lights in our towns and cities these days.


Day 13 / Monday

IMG_0595In the pub all day. The scenes are meant to have an evening feel, so we black out the windows with thin weed-blocking material which lets a little light through, and close the curtains. On a tungsten white balance we get just a little blue glow coming through the curtains. The window in the door has no curtains, so we gel it with .9 ND and it looks convincingly dusky outside.

Fairly standard stuff today, lighting wise. Cross-backlighting for bar scenes, a bit of blue glow in the deep background from a kino to give depth and show up the smoke.

We echo the Turner scenes with a symmetrical shot of Andy and Naomi seated in front of the fireplace. For a soft, pleasing key we bounce fire both the Dedos into a poly board. A double CTO-gelled LED panel on the floor enhances the backlight from the fire, and the pub’s practicals do the rest.

One of the last close-ups we do has an alcove in the background. It bothers me that the brickwork in there is the same shade and tone as the foreground brickwork – we’re losing the dimensionality – so I have Colin run in with a bit of half CTB to cool down the sconce slightly and separate the alcove.


Day 14 / Tuesday

IMG_0612

IMG_0613More micro sets in Leon’s living room. One of them is a tiny under-the-stairs bathroom, which we light with a single bare bulb hanging down into the shots. Again the Alexa’s dynamic range allows me to hold all the highlights and shadows, even when Andy is inches from the bulb, and it looks completely authentic on camera.

For the first time I try gelling the Rosco Litepads to match the tungsten Dedos. It doesn’t work; the Litepads are noticeably greener. If I try that again I’ll need to spend some time to find the correct cocktail of minus green and CTO gels.


IMG_0633Day 15 / Wednesday

After one final micro set in Leon’s living room we move upstairs for some crucial scenes in the master bedroom. I light it with a 2.5K HMI coming in through the window, that being really the only option. I shape this with gels, diffusion and black-out on the window or the lamp-head itself. For example, when we do Naomi’s close-ups I stick two or three layers of opal to the middle section of the window. That way we keep the nice hot streaks on the background wall, but Naomi has a much softer light on her.

The only other sources are the two 6×2″ Litepads hidden in the wardrobe behind a key prop, dimmed right down so they just silhouette the prop very, very slightly. For the final bedroom scene I go purely with available light, since the sun is now shining in at a nice angle, hitting the bed and bouncing back up into Naomi’s face.

It’s our last day in Kent, and many of the crew will be returning home tonight and commuting for the rest of the week, so it feels like the end of an era. Nevertheless, we remain detached and professional. No-one kidnaps Naomi’s stuffed dog Rupert and messages a picture of him tied up and gagged with gaffer tape, and definitely no-one retaliates by kidnapping Colin’s dashboard Spider-pig.


Day 16 / Thursday

IMG_0642

We are at Longcross Studio & Test Track, an ex-MOD facility in Berkshire. We stage a traffic jam on a road originally built for tank trials. The 85mm lens gets more use than it has the whole shoot so far. The compression of perspective works perfectly for the scene, enhancing the feeling that the characters are hemmed in both physically and psychologically.

Most of the action takes place inside the car and is shot raking across the characters from a side window. To get the best shape to the natural light, we black out the sunroof and place negative fill on the window closest to camera, then bounce in extra light through the windscreen.

The rota polar sees extensive use again, although sometimes it reveals weird circular patterns in the car’s window glass.


IMG_0650Day 17 / Friday

Our second day at Longcross, and this time we’re using the main loop of track. It’s non-exclusive, so occasionally a prototype sports car zooms past us, or a stills photographer hanging out of the boot of an SUV.

Day-playing grip Darren has brought his universal mount which we use as a hostess tray, shooting in through the passenger or driver’s windows. (Leon is not a fan of bonnet-mounted shots.) The rig prevents us from closing the window, which necessitates minor rewrites, but the shots look great and allow us to cover large swathes of dialogue relatively quickly.

The picture car is towed on an A-frame by Andrew’s Landrover. Riding in the Landrover are Leon, Rupert and me, each with a monitor. Leon’s shows a clean picture, Rupert’s of course has focus assist, and I switch mine between clean and false colours so that I can monitor the exposure as we go around the track. Leon connects his mixer to the Landrover’s stereo so that we can all hear the dialogue. Communication back to the picture car is achieved via radio with Max, hiding on the back seat, popping out to slate and even reading in lines for a phone conversation.

IMG_0658Col rigs the two 6×2″ Litepads to the dashboard. They mitigate the sunroof’s toplight by filling in the shadows very slightly, but more importantly they put a sparkle in the actors’ eyes, which always helps the performances come across on camera. I take a light reading inside the Yellow Peril before each lap, but due to the number of trees around the track, light levels during the takes are about two stops below what I get in the car park when we’re prepping. Fortunately the cloud cover is fairly consistent today so there aren’t hot patches of sun to contend with.

Today wraps the English portion of principal photography for Above the Clouds, and we sadly say goodbye to Colin, Zoë, Alice and Andrew. It’s been a really fun team to work with, and it will be strange next week without them.

“Above the Clouds”: Week 3

“Above the Clouds”: Week 2

Day 7 / Monday

image
One of our biggest days, shooting several key scenes from the first act of the movie. We’re in the Turner Contemporary in Margate, and getting this location is a big coup for the production. On the flip side, the amount of material we have to get through in our nine hour day is only achievable if lighting is kept to an absolute minimum. I know from the photos that Leon has shown me that there is plenty of natural light from the floor-to-ceiling windows and bright white walls. I also know that with eight scenes on the day’s schedule, there isn’t time to rig the kind of extensive negative fill we used at the roadside cafe last week.

We start in the Turner’s cafe, where angles towards the windows look great with the beach and seafront in the background and the daylight wrapping softly from behind and one side. In the opposite direction the light is extremely flat, but there is no time to do anything but hand-bash a little negative fill, grin and bear it.

Upstairs in the gallery, the sea-view windows are so big and there is so much bounce off the walls that there is only about a single stop’s difference between looking towards the window and looking away from it. Nonetheless, we bring in poly and Celotex for the seaward shots to add a little shape and put nice reflections in the talent’s eyes.

Responding to the formality of the gallery setting, there is an unspoken agreement between Leon and I to shoot on sticks and compose centrally or symmetrically. I end the day feeling that we have captured some of the film’s most iconic images.


imageDay 8 / Tuesday

Back in Margate for seafront exteriors. The weather is lovely to start with, but gradually goes down hill as the day progresses. For the first scene we have light cloud, and we use the 8×8 full grid cloth as a bounce to fill in the shadows. For close-ups we add silver from Celotex or a Lasolite to give the talent extra radiance and a glint in their eyes. (See my post on Health Bounce for more on this.)

The influence of yesterday’s gallery scenes is still being felt on the compositions. In wide shots I try to use the horizon to divide the frame into two halves, like the diptych the characters were looking at in the Turner: one above the clouds (or more accurately OF the clouds), and one below. I use a graduated ND filter on most of the day’s wide shots. Even though the Alexa’s dynamic range means that grads are rarely necessary to retain the detail in skies, and they can be added in post, I prefer to get the look in camera, especially on a micro-budget project where time in the grading suite may be very precious.

The day ends with a dusk shot of Oz shuffling along the seafront, which we shoot in the window between the streetlights coming on and the daylight dropping off completely. I set the white balance to 3200K to emphasise the evening look. The colour and positions of the streetlights aren’t great, but there is a lot of production value in the backdrop of Margate, bathed in cool ambience and sprinkled with points of light.


imageDay 9 / Wednesday

Our first scene is on a layby overlooking an estuary. Again the weather starts off nice but deteriorates as the day goes on. By the time we get back to Leon’s for the next scene, the rain is getting noticeable enough that continuity with adjacent scenes is an issue. We decide to wrap for the day.

The camera team uses the time to re-build the Alexa Mini as small as possible and test different lenses inside the picture car for upcoming driving scenes. Our main angles will be from the back seat, looking diagonally forwards for three-quarter singles and straight ahead for a central shot over both driver and passenger’s shoulders to the windscreen. We find that the 24 and 32 work well for the former, and the 20 for the latter. We have a 14, because I knew space would be tight in the car, but it just looks like a Top Gear Go Pro shot.


imageDay 10 / Thursday

We’re in another tiny set in Leon’s living room. Production designer Zoë Seiffert has dressed it as a beautiful/hideous den of clashing patterns and colours, and practical lamps. First up is a day scene, newly added to the script, so as with the Travel Inn I fire in the 2.5K HMI, this time with the curtains open. That might seem like a ridiculous amount of light for a room only about 10ft square, but only a powerful source like that creates all the bounce and ambience that sun would. I make sure the direct beam only really hits the floor. For some shots I put a white sheet over the carpet to maximise the bounce off the floor.

For the night scenes Colin puts all the practicals on dimmers and I place one of Leon’s ETC Profiles outside the window with Urban Sodium gel. Although the curtains will be closed, they are thin enough to be backlit by this ‘streetlight’. The bulb is even visible through the curtains sometimes, but it totally passes as a streetlight. That’s the only source of light when the characters first enter in silhouette, before turning up the practicals.

imageTo beef up the practicals, we rig a couple of Dedos to the top of the set and direct one through sheets of Opal hung from the ceiling, as a key, and use the other as backlight with half CTO on it. We tweak them around shot by shot to follow the blocking. For a scene with more character conflict, I lose the backlight and go hard with the key.

Later we move to another location – conveniently the cottage neighbouring the one where most of us are staying – for a little doorstep night scene. Again I rake the 2.5K along the front of the building, through the full silent grid cloth. In the singles we beef up the existing exterior sconce with three tungsten globes wrapped in Opal. I would rather have used an 800 bounced off poly, for a softer texture, but our package is pretty lacking in tungsten units.

After wrapping we throw a surprise birthday party for Zoë. Colin lights the party with a remote-controlled colour-changing LED fixture and smoke.


imageDay 11 / Friday

We have two hours in a charity shop to set up (including blacking out windows), shoot two scenes, and tear down. Leon decides to shoot them both using only torchlight, and choreographs the cast to light each other throughout the scenes. We hide silver Lasolites and other bounces around the set to reflect the torchlight when it doesn’t make sense for the actors to point their torches where they’re needed. We smoke up the shop heavily to show up the beams.

To anchor the shots, so the pools of torchlight aren’t floating around in a black nothingness, I set two lamps in the background. One, a Divalite gelled with Urban Sodium, spills out of a changing room, and the other, a 1×1 LED panel gelled heavily blue to suggest a computer screen, glows out from behind the counter. As well as adding colour, and colour contrast, to the scene, the pools of light from these two lamps serve to silhouette the characters so you get a sense of where they are when the torch beams aren’t on them.

image

We move to a forest car park for the film’s only major night exterior. With our HMI package consisting of only a 2.5K and 1.2K, and no tungsten bigger than a Dedo, this was always going to be challenging. We place the 2.5K in the deep background, purely to light up the smoke and foliage behind the action. The action itself is lit by the 1.2K and two 1×1 LED panels, plus smaller panels taped to the dashboards of the vehicles in the scene.

To get it all done with the time and resources we have, a compromise must be made somewhere with the lighting. I decide that this compromise will be motivation of sources. Other than dashboard lights, there should really only be one source in this scene: the moon. If I had time, I would move the biggest source around to backlight every shot and then bounce it back as sidelight. Instead we leave the HMIs mostly where they are, and fly the 1×1 panels around to backlight or sidelight as needed. It makes no sense whatsoever, but it looks good.

“Above the Clouds”: Week 2

“Above the Clouds”: Week 1

Principal photography has begun on my latest feature, Above the Clouds, a comedy road movie written by Simon Lord and directed by Leon Chambers. The film stars Naomi Morris as Charlie, an 18-year-old learner driver who sets off on an epic road trip from Margate to Skye with a ‘gentleman of no fixed abode’ as her responsible adult.


imageDay 1 / Monday

It’s a very different shoot to my last one. With a five figure budget and a total crew of about ten or twelve, we’re lean and mean. About a quarter of that crew are working for me – 1st AC Rupert Peddle and 2nd AC Max Quinton, veterans of Heretiks, and my long-serving one-man lighting team, Colin Smith. We’re shooting on an Alexa Mini. Although it’s lovely how much lighter it is than the full-size model, it’s quite fiddly. It doesn’t help that the EVF is faulty, and while we wait for a replacement Max has to change many of the settings via a smartphone app. The lenses are Arri/Zeiss Ultra Primes, my first time with these, and I’m once again using a half Soft FX filter to take off the digital edge.

We start with a dining room scene. As many of the sets will be, it’s built in director Leon Chambers’ living room, so it’s not very big. We’re prepared for this though, and Leon has purchased several Rosco Litepads in 6″x2″, 4″x4″ and 12″x12″ sizes. We stick a 4×4 to the wall behind each character as hairlights, and rig the two 6x2s, at a perpendicular angle to each other, to a flag arm. Wrapped in unbleached muslin, they’re a pleasing key.

image

After lunch we move into the shed, dressed as a young artist’s studio, complete with coloured string lights. Colin and I add three tungsten bulbs as additional practicals, plus a couple of the Litepads amongst the rafters. Outside the window we place a 4×4 kino or 2.5K HMI depending on the time of day.


imageDay 2 / Tuesday

Today we’re in Leon’s kitchen primarily, but with several of the scenes spilling into the hall and porch. We put our two HMIs outside the windows and initially use an LED panel on top of a cabinet and my brand new torch gaffered to the side of a cabinet to augment these for a scene that is meant to have an evening feel. Then we move onto a proper daylight scene and those have to go, to ensure all the light seems to be coming in from outside. The other reason they have to go is that we are now doing an ambitious steadicam shot which moves from the kitchen to the hall and porch, then back into the kitchen, then back into the hall and porch as characters exit the house. To the two HMIs we add the 4×4 kinoflo shining down the stairs, augmenting the natural light coming down from the landing windows. Thanks to the Alexa’s large dynamic range, we are able to accomplish the shot without any clipping, even when the door opens and when the characters move through the darkest part of the hall. The rest of the day passes in variations on the theme. I quickly find that the window positions are limiting and a fair bit of head scratching to make the angles work goes on before we wrap.


Day 3 / Wednesday

Back in the kitchen, one of our first scenes involves heavy smoke as a story beat. I decide to go with purely natural light, so that it’s soft enough to illuminate the smoke evenly, rather than producing shafts or pools.

After lunch we shoot a dusk scene in broad (albeit overcast) daylight. I cool down the white balance to 4300K and use a .9 soft edge graduated ND, just edging into frame, to bring down the sky a little.

Later we move to a garage, a scenario in which all the light is coming from outside through the door. Although this looks flat when the camera is looking into the garage, I decide not to fight that. When we look the other way I use matt silver bounce and a 4×4 kino to fill in.


Day 4 / Thursday

image

We’re on location at a roadside cafe, and I agonised long last night about how much lighting gear we should take. We don’t have transpo or security so reducing the kit means a lot less hassle for us all, though generally I prefer to have everything to hand just in case. Ultimately I decided to keep it small – just LEDs, a 4×4 kino and then flags and bounce – knowing from location photos that there will be plenty of natural light.

In fact there’s too much. The photos failed to warn me of the skylights, which take a while to block with floppy flags and Easy Up walls clipped between them. Leon has set me up for success though by choosing to shoot the scene with the windows (and therefore the key light) in the background. Flagging the skylights and ambience allows the window light to wrap around the actors in a pleasing fashion, and makes for great modelling in the close-ups, with the window light hitting the talent’s down-sides. This natural light approach requires you to work with and respond to that natural light as well, and so I embrace the appropriate ‘broken key’ look that the sun position creates on male lead Andrew, a homeless man with a troubled past. (‘Broken key’ is a term Shane Hurlbut uses to describe a key light striking the talent not quite from the side, but slightly behind.)

imageLater we shoot a scene in the Fiat 500 ‘Yellow Peril’ outside in the car park. I use a rota polar to find the perfect amount of reflection in the car windows, striking a balance between seeing some clouds (the film is called Above the Clouds after all) and seeing the characters inside.

Again the 4×4 kino proves the ideal source to bring up the light coming through the windscreen, due to its shape and softness. As shooting progresses, the sky darkens. A storm is coming. We drop the kino down to one tube, quartering the amount of key light and therefore allowing me to turn off the Alexa Mini’s internal .6 ND, bringing up the background by 2 stops and re-balancing the overall exposure. But after one more take the rain begins, and we have to wrap. Fortunately we seem to have everything we need in the can.


Day 5 / Friday

After watching the news in shock over breakfast, and wondering just how badly Brexit is going to screw the UK film and TV industry, we head to Leon’s for some more scenes in his living room studio. This time it’s dressed as a Travel Inn, and my lighting is motivated by the bedside practicals on the back wall. (Lighting from the back first – always a good plan.) We put a dedo above each practical and a divalite between those to give us something softer and little wrappy. The only other sources are a third practical and a Mustard Yellow gelled 1×1 LED panel outside the window, representing a streetlight. For a morning scene in the same set we put a 2.5K HMI outside the window and let the closed curtains diffuse it, with no other sources.

The set is then reconfigured into reception, and I employ a cross-backlighting set-up, with an added LED panel to represent the glow from a computer monitor.


imageDay 6 / Saturday

Today’s location is a tiny little mechanic’s garage in the middle of nowhere. Most of the scenes take place in the doorway, so we are at the mercy of the weather, which is incredibly changeable. Bright sunshine, cloud and heavy showers alternate throughout the day.

On the first set-up I ask to wait for cloud on at least one take because I can see from the sky that is going to be the easiest thing to match to as the day goes on. Balancing the light inside and outside the garage will also be easier in cloud, even though the Alexa’s incredible dynamic range can handle it in bright sun too.

Aside from the weather, the big challenge for me is making the shots looking into the garage have depth. The best depth is normally achieved by having the brightest area of the frame be the background, and the darkest area the foreground. Looking into the garage though, the opposite is true. But there are other ways of creating depth. One is to make pools of light with practicals, so I leave on the location’s suitably grungy fluorescents. Another is smoke, so we pump a little in and use a 2.5K HMI through a window and a 4×4 kino tucked around a corner to pick it up.

image

After dinner we have a very brief night scene to do. The blocking suggests raking the 2.5K across the front of the building which will also three-quarter-backlight the talent. Extensive experience of doing this in the past warns me that the angle of incidence could cause a massive reflection of the lamp in the shiny garage door, so I choose the lamp position carefully, and push it through an 8×8 frame of full silent grid cloth to mitigate any glare. Also this particular film seems to call for a ‘softly, softly’ approach to moonlight. It’s not fantasy, it’s contemporary comedy, so most of the time my night sources will be streetlights to keep it feeling realistic, but when I have to use moonlight as motivation I don’t want it to be hard and draw attention to itself.

The diffusion looks great, and the door is glare free, but I failed to consider the window. Fortunately Rupert spots a way to flag it. Saved by a great team!

All in all, a very productive day and a good week.

“Above the Clouds”: Week 1