“The Knowledge”: Lighting a Multi-camera Game Show

Metering the key-light. Photo: Laura Radford

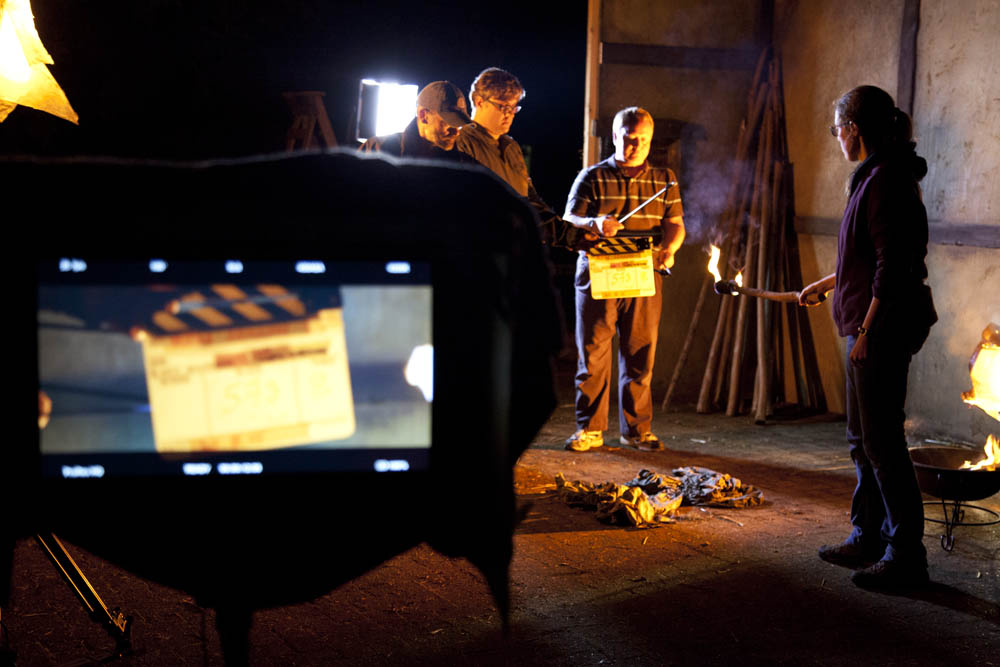
Last week I discussed the technical and creative decisions that went into the camerawork of The Knowledge, a fake game show for an art installation conceived by Ian Wolter and directed by Jonnie Howard. This week I’ll break down the choices and challenges involved in lighting the film.

The eighties quiz shows which I looked at during prep were all lit with the dullest, flattest light imaginable. It was only when I moved forward to the nineties shows which Jonnie and I grew up on, like Blockbusters and The Generation Game, that I started to see some creativity in the lighting design: strip-lights and glowing panels in the sets, spotlights and gobos on the backgrounds, and moodier lighting states for quick-fire rounds.

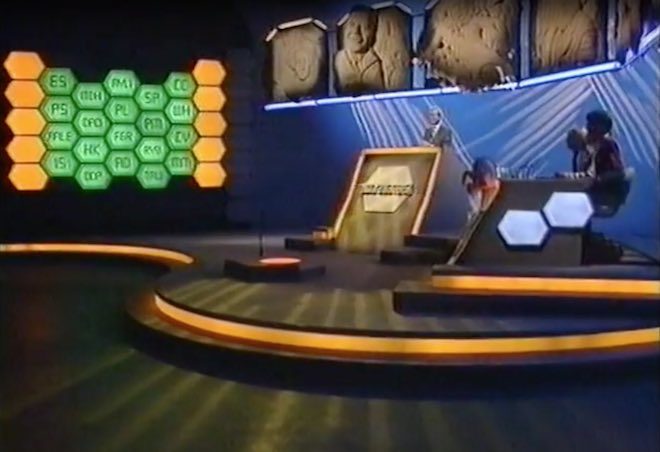
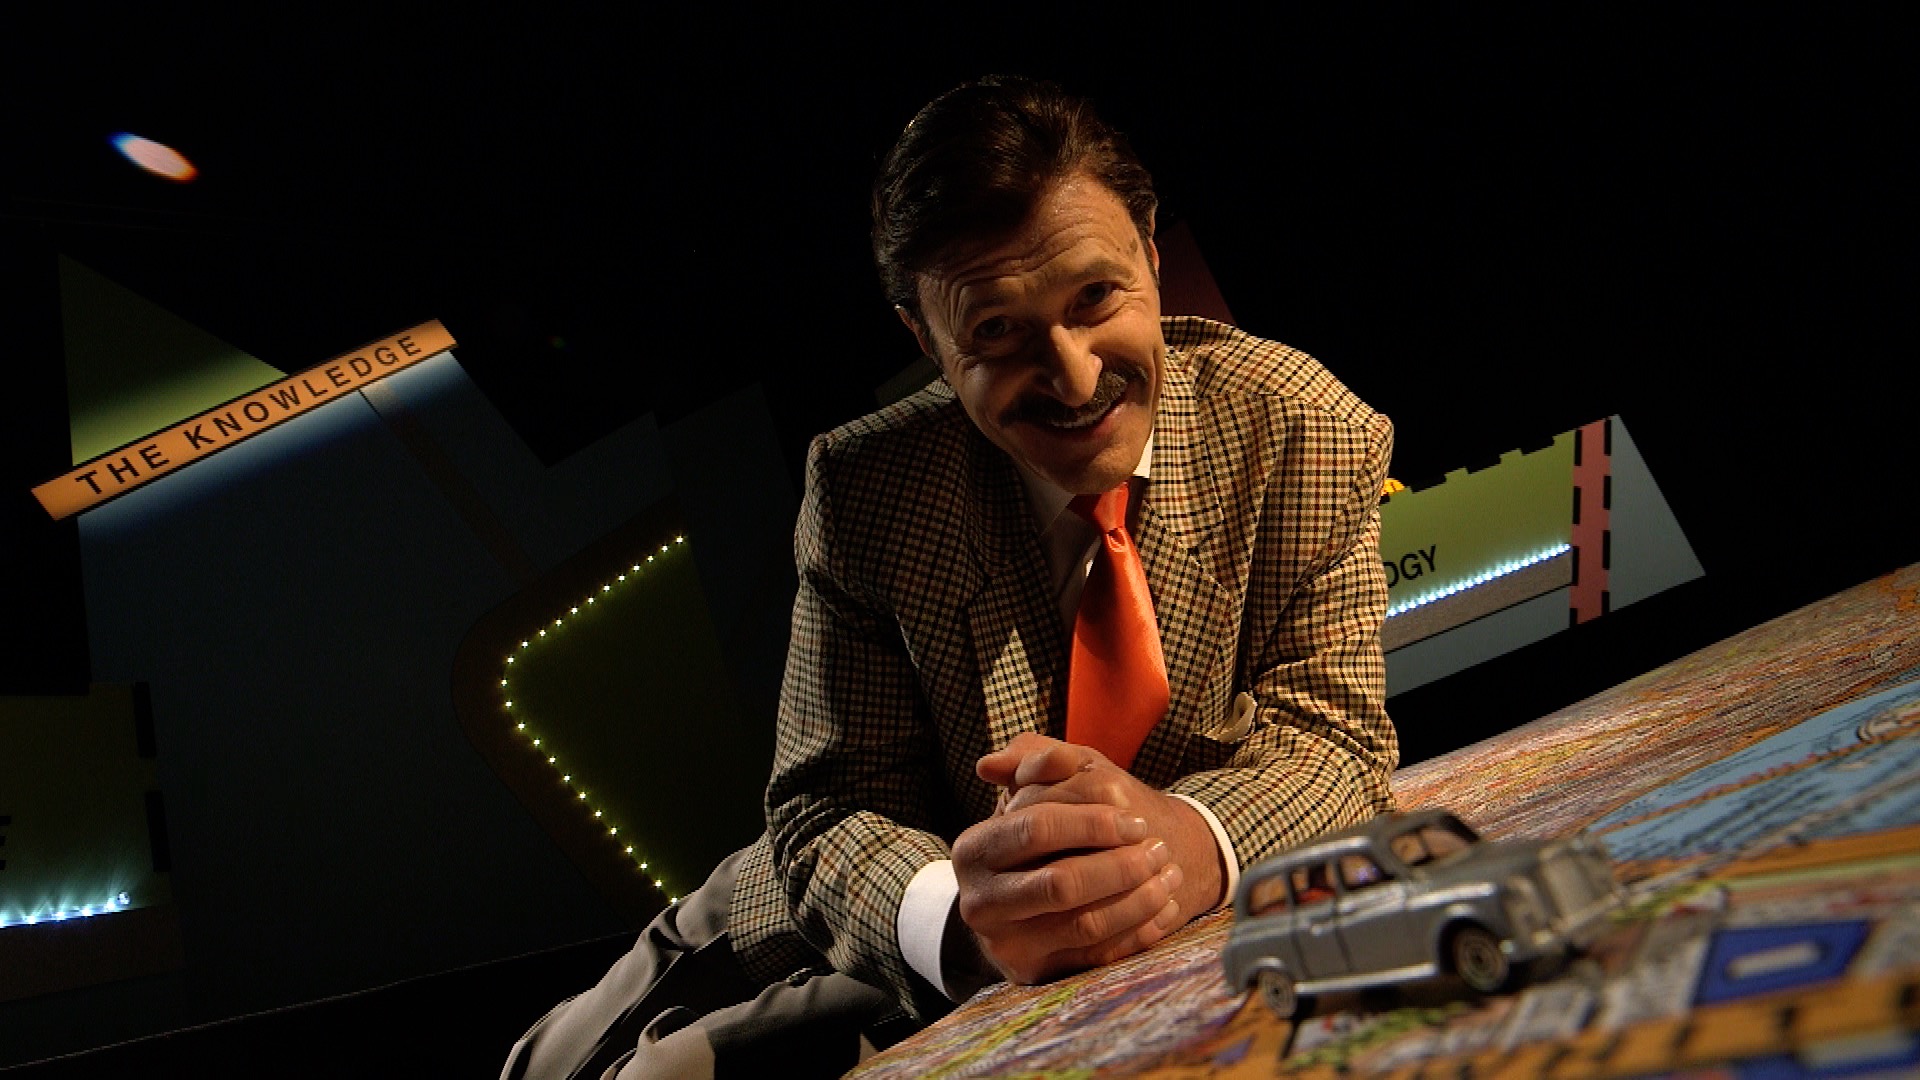
Jonnie and I both wanted The Knowledge‘s lighting to be closer to this nineties look. He was keen to give each team a glowing taxi sign on their desks, which would be the only source of illumination on the contestants at certain moments. Designer Amanda Stekly and I came up with plans for additional practicals – ultimately LED string-lights – that would follow the map-like lines in the set’s back walls.

Once the set design had been finalised, I did my own dodgy pencil sketch and Photoshopped it to create two different lighting previsualisations for Jonnie.

He felt that these were a little too sophisticated, so after some discussion I produced a revised previz…

…and a secondary version showing a lighting state with one team in shadow.

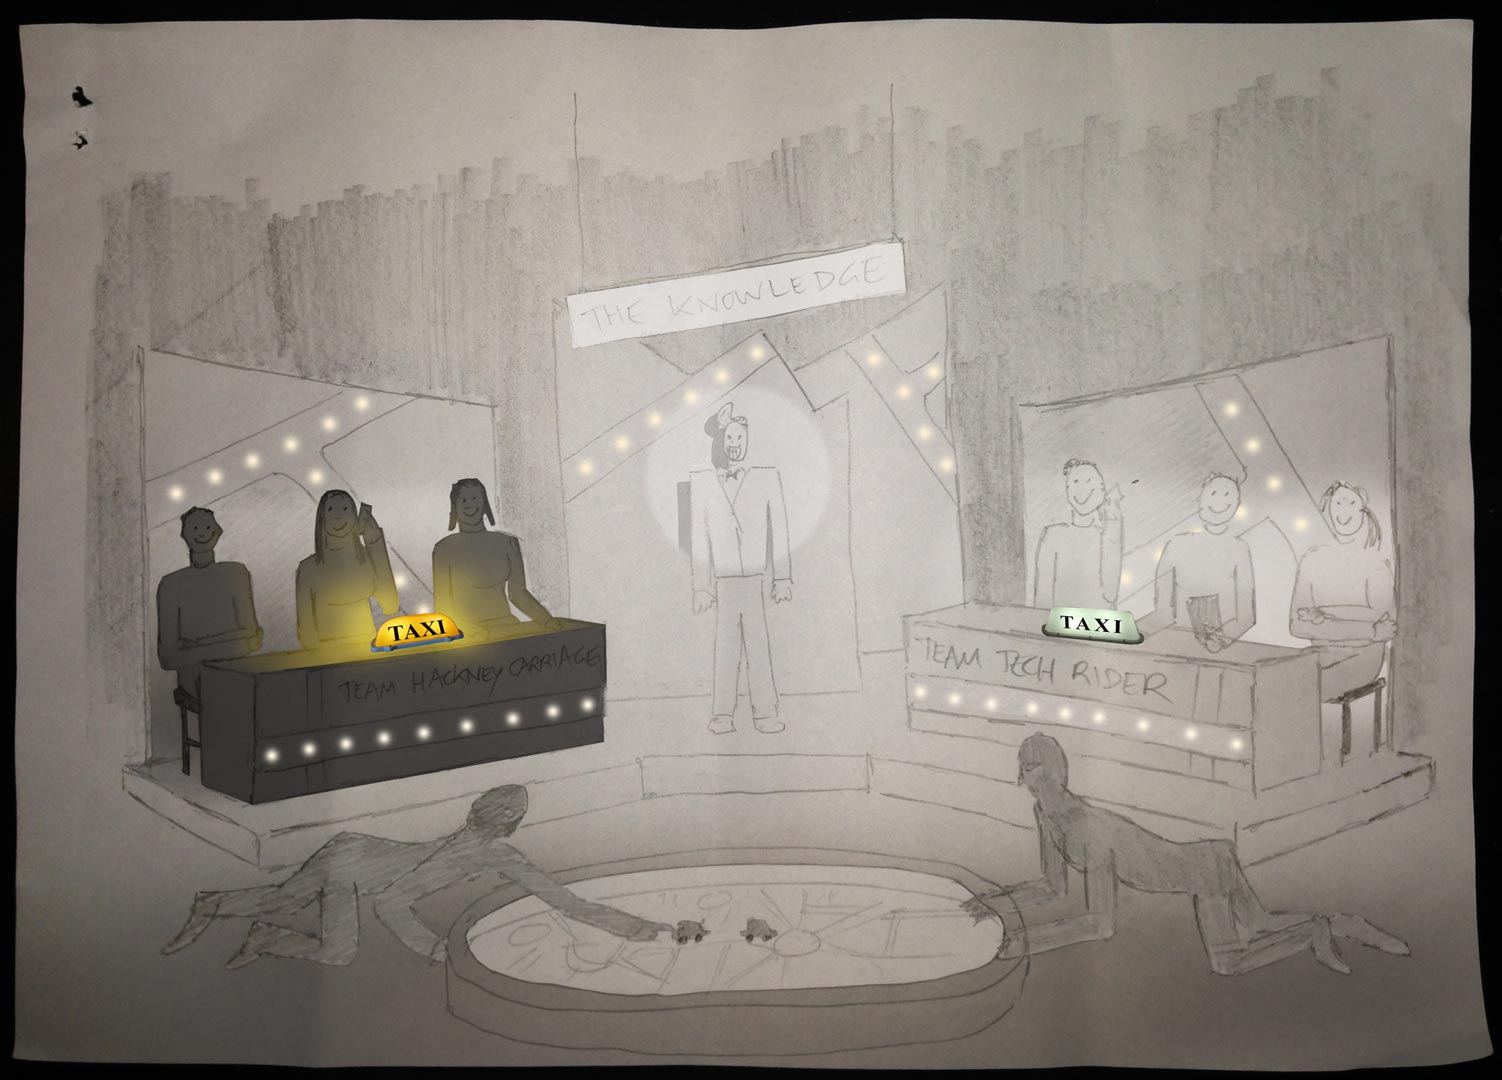
These were approved, so now it was a case of turning those images into reality.

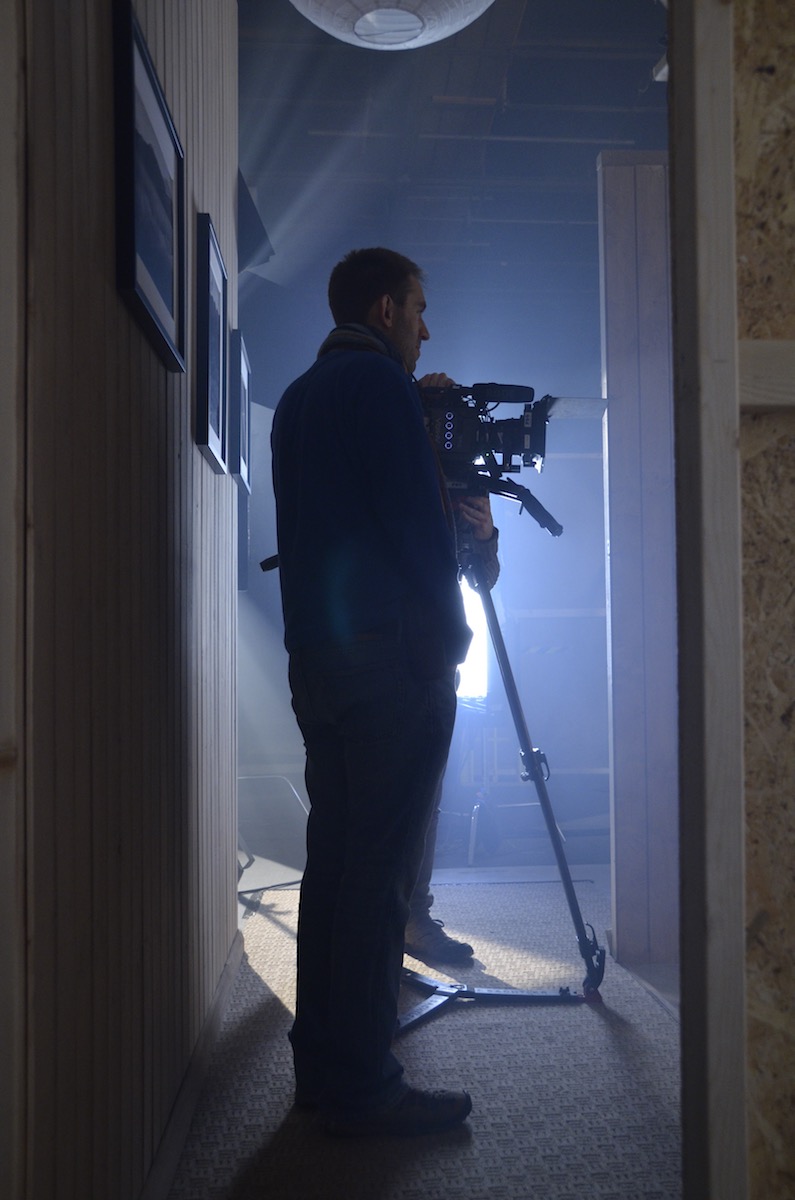
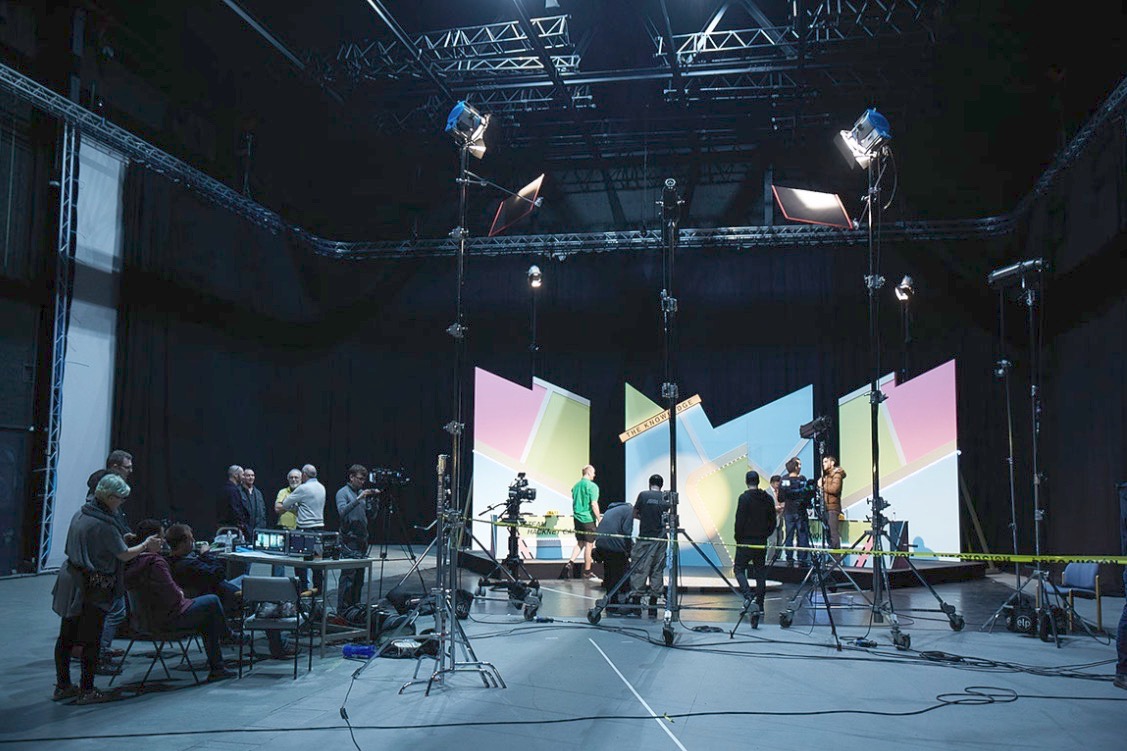
We were shooting on a soundstage, but for budget reasons we opted not to use the lighting grid. I must admit that this worried me for a little while. The key-light needed to come from the front, contrary to normal principles of good cinematography, but very much in keeping with how TV game shows are lit. I was concerned that the light stands and the cameras would get in each others’ way, but my gaffer Ben Millar assured me it could be done, and of course he was right.

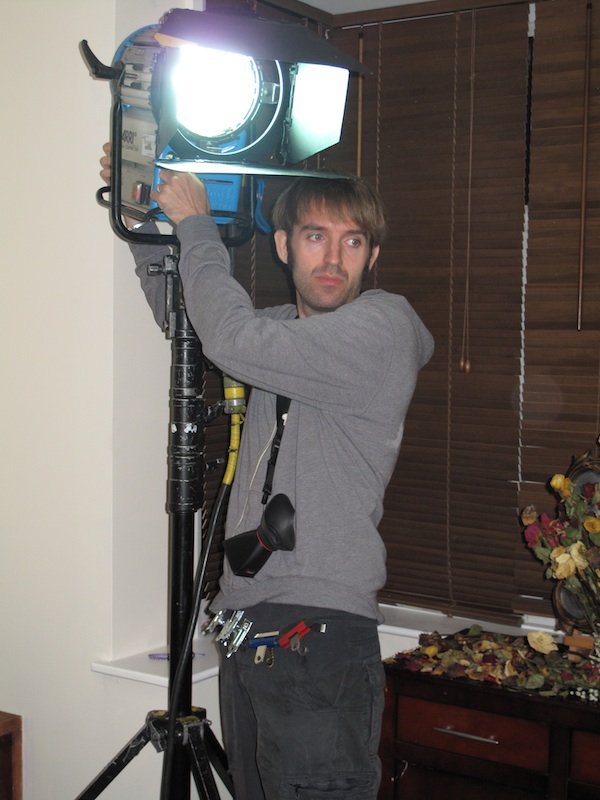
Ben ordered several five-section Strato Safe stands (or Fuck-offs as they’re charmingly known). These were so high that, even when placed far enough back to leave room for the cameras, we could get the 45° key angle which we needed in order to avoid seeing the contestants’ shadows on the back walls. (A steep key like this is sometimes known as a butterfly key, for the shape of the shadow which the subject’s nose casts on their upper lip.)  Using the barn doors, and double nets on friction arms in front of the lamp-heads, Ben feathered the key-light to hit as little as possible of the back walls and the fronts of the desks. As well as giving the light some shape, this prevented the practical LEDs from getting washed out.

Note the nets mounted below the key-lights (the tallest ones). Photo: Laura Radford

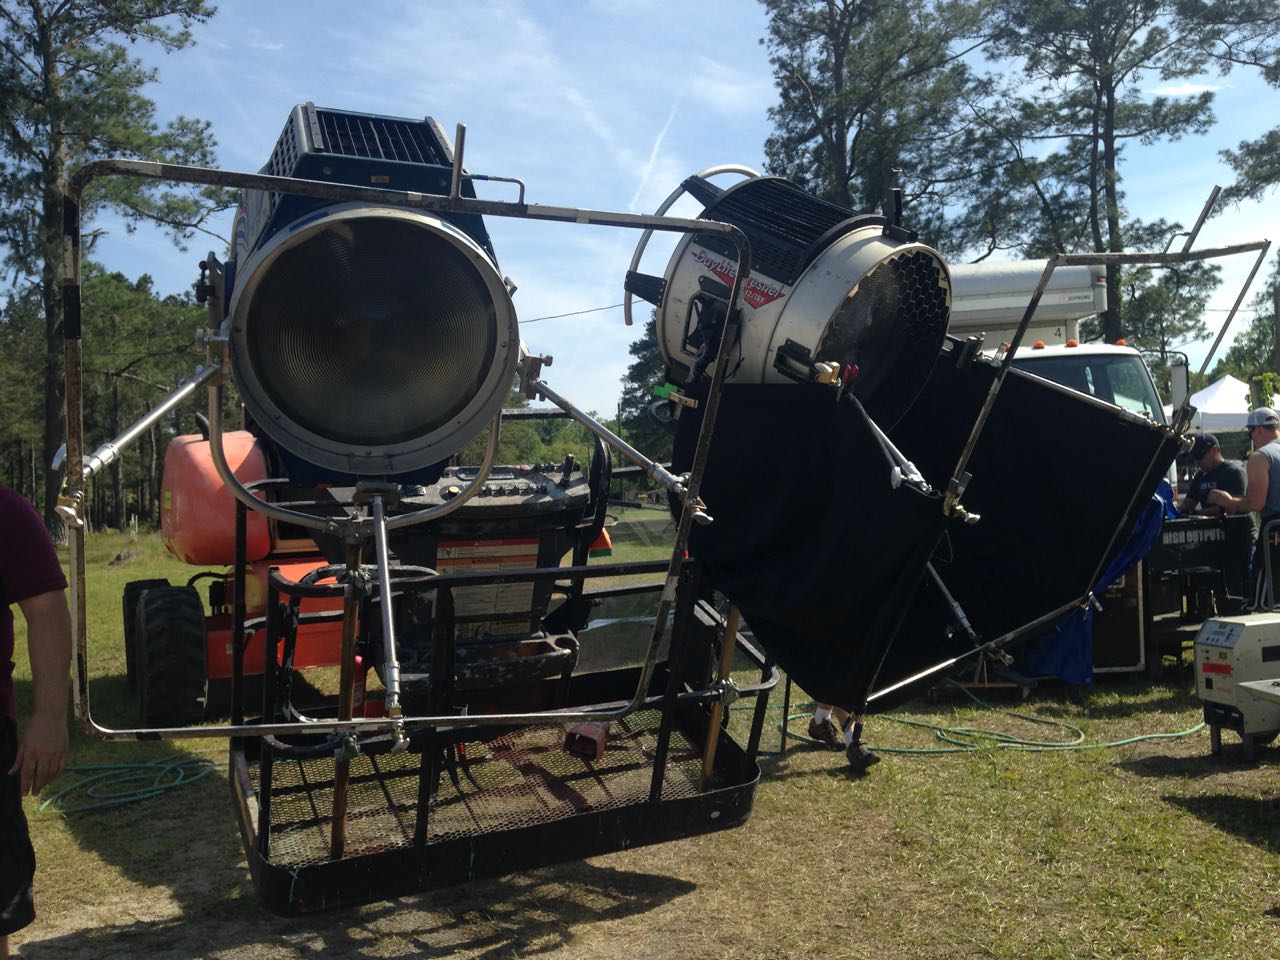
Once those key-lights were established (a 5K fresnel for each team), we set a 2K backlight for each team as well. These were immediately behind the set, their stands wrapped in duvetyne, and the necks well and truly broken to give a very toppy backlight. A third 2K was placed between the staggered central panels of the set, spilling a streak of light out through the gap from which host Robert Jezek would emerge.

A trio of Source Fours with 15-30mm zoom lenses were used for targeted illumination of certain areas. One was aimed at The Knowledge sign, its cutters adjusted to form a rectangle of light around it. Another was focused on the oval map on the floor, which would come into play during the latter part of the show. The last Source Four was used as a follow-spot on Robert. We had to dim it considerably to keep the exposure in range, which conveniently made him look like he had a fake tan! Ben hooked everything, in fact, up to a dimmer board, so that various lighting cues could be accomplished in camera.

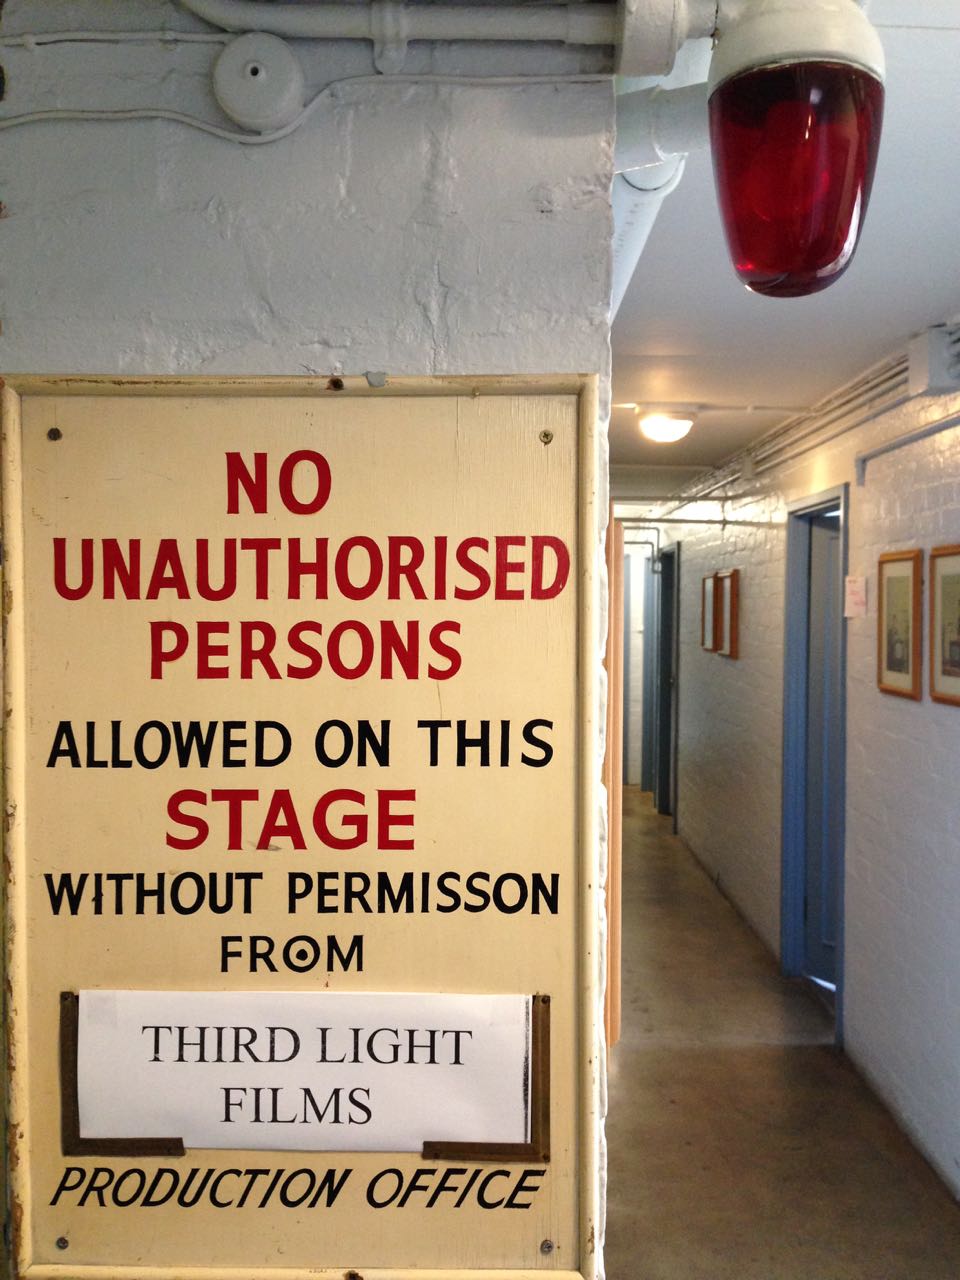
The bulk of the film was recorded in a single day, following a day’s set assembly and a day of pre-rigging. A skeleton crew returned the next day to shoot pick-ups and promos, a couple of which you can see on Vimeo here.

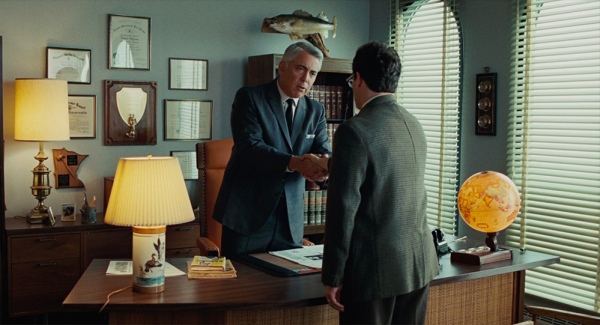
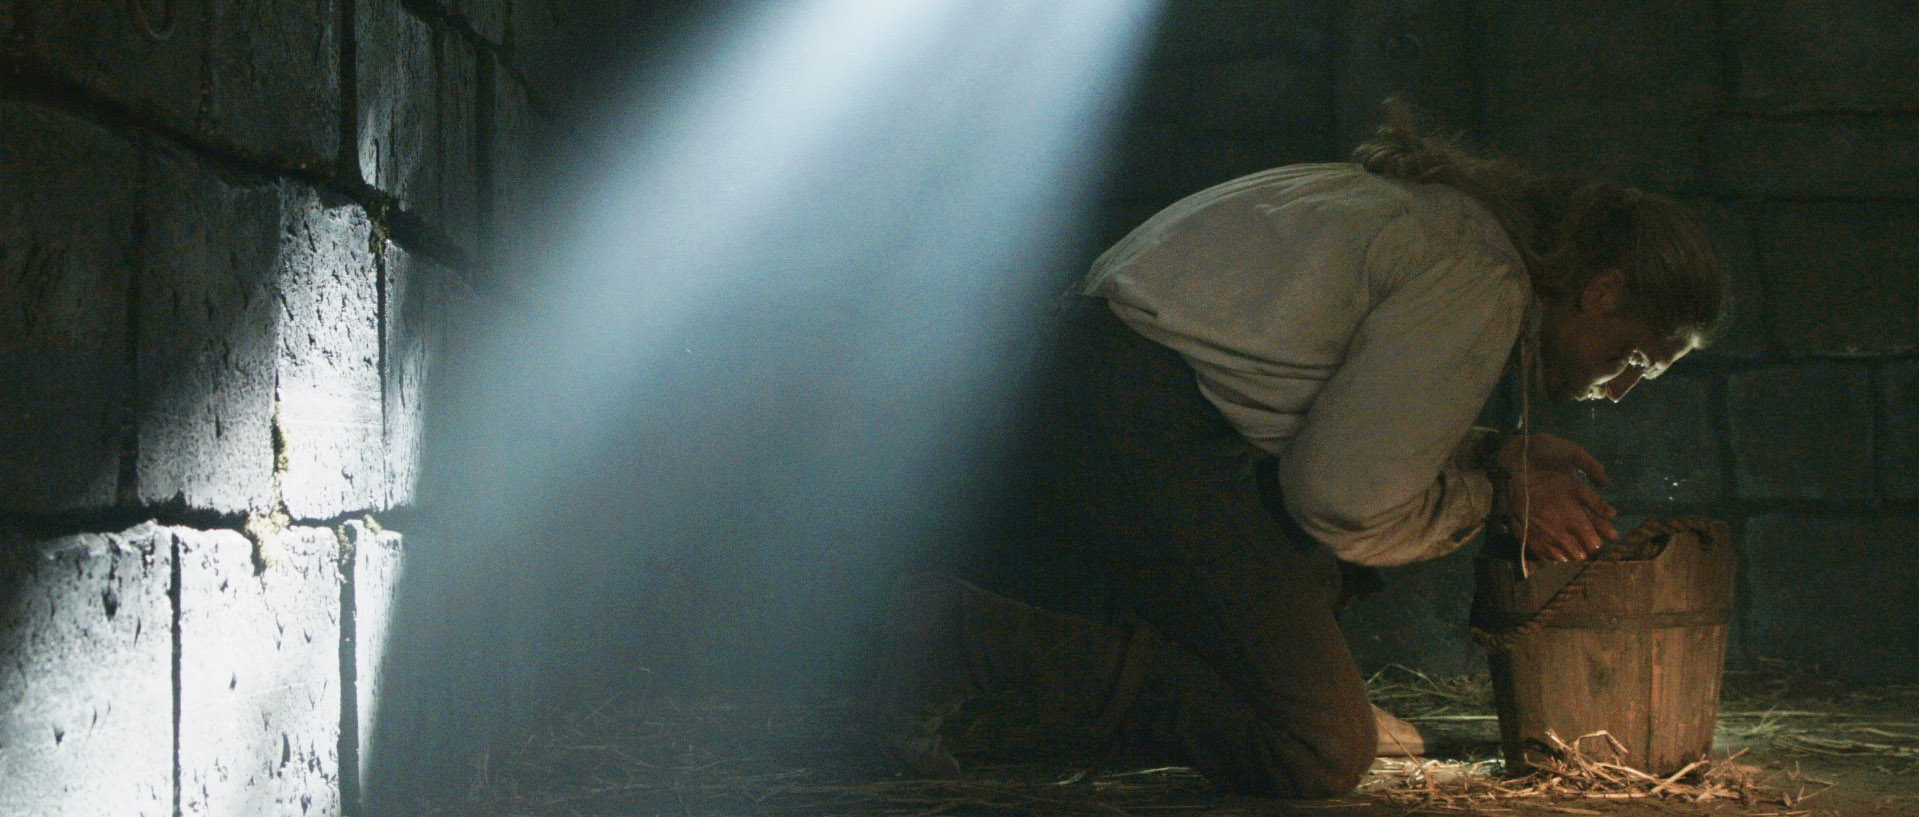
I’ll leave you with some frame grabs from the finished film. Find out more about Ian Wolter’s work at ianwolter.com.

SaveSave

SaveSave

SaveSave

“The Knowledge”: Lighting a Multi-camera Game Show

“Above the Clouds”: February 2017 Pick-ups

Last weekend saw many of the crew of Above the Clouds reunite to shoot the remaining scenes of this comedy road movie. Principal photography was captured on an Alexa Mini during summer 2016 on location in Kent, on the Isle of Skye, and at Longcross Studio in Buckinghamshire, with additional location shooting on a Blackmagic Micro Cinema Camera in October.

The outstanding scenes were to be photographed on stage, at Halliford Studio in Shepperton, this time on an Arri Amira. The Amira uses the same sensor as the Alexas, allowing us to match the look from principal photography in the most cost-effective way. With the addition of a Premium license, the camera is capable of the same ProRes 4444 recording codec as the Alexas too. As per last summer, our glass was a set of Arri/Zeiss Ultra Primes, with a half Soft FX filter to take the digital edge off.

Director Leon Chambers designed and built the set himself, sending me photos of a scale model well in advance. He was also specific about certain lighting cues and states that were required across the two sets and six scenes we would be recording to complete the movie. Based on this information, I concocted a lighting plan, which I communicated to Halliford’s in-house gaffer Micky Reeves by Photoshopping stock images of lamps onto Leon’s set model photos.

Last Saturday was devoted to pre-lighting the sets, mainly the kitchen, while construction work continued on the second set.


Day 24 / Sunday

We begin with a morning scene. A 5K fresnel serves as a low sun, streaking across the back wall of the set (see my post about lighting through windows). Even with this direct light four stops over, the natural bounce off the set isn’t enough to bring actor Philip Jackson – with his back to the window – up to key. Micky rigs a Dedo firing into a soft silver bounce just out of frame to solve the problem.

Also coming through the window are two 4×4 kinos, rigged on goalposts above the window. Their daylight tubes reflect off the blinds, serendipitously creating the illusion of a blue sky “outdoors”, where in fact there is only a wall and a white backdrop.

Philip exits into the hallway and disappears from view, supposedly to go out through the front door. No door exists. Instead there is a flag which spark Amir Moulfi rotates in front of a 2K, creating a momentary oblong of light in which Philip’s shadow appears.

The next scene follows on from an exterior captured last October at dusk, when the natural light was soft, flat and cool in colour, cheated even cooler with the white balance. This failing daylight is to be the only source of illumination now in the kitchen set, until Philip enters and turns on the lights. This is the main reason that the daylight 4×4 kinos outside the window were rigged. A third kino from the direction of the front door is added, plus a small LED reporter light to pick an important prop out of the shadows.

Lead actress Naomi Morris enters, silhouetted against the windows. Then Philip enters and hits the lights. Simultaneously, Amir flips a breaker on a lunchbox, activating a hanging practical fixture above the breakfast bar and the 5K which that practical motivates.

Generally I don’t like toplight. It throws the eyes – those windows to the soul… or windows to the performance – into shadow. But with the hanging practical in shot, whatever I was going to use to beef it up had to be somewhat toppy or it wouldn’t make sense. I considered space-lights and Jem balls, but in consultation with Micky I ultimately picked a 5K with a chimera, coming in at a 45 degree back/toplight angle. As you can see from the photos, this looks almost comically large. But large and close means soft, which is what I want. It had to be soft enough to wrap both actors when they faced each other across the bar.


But why such a large lamp? Why not use a 2K, like Micky suggested yesterday? Bitter experience has always taught me to go with a bigger unit than you think you need, particularly if you’re softening it, and particularly if it’s going to take a while to rig. (The 5K was hung from another goalposts set-up.) We ended up dimming the 5K to 50% and scrimming it down a stop and a half. But having too much light like that is easy to deal with. If we had put up a 2K and it wasn’t bright enough, we would have to have taken the whole thing down and re-rigged with a 5K. And even if the 2K had seemed sufficient to begin with, blocking can often take actors into unexpected, dark corners of the set. Being able to turn up a dimmer a couple of notches to handle that kind of situation is very useful.

Besides the 5K, there are a few other sources playing: some 300W hairlights, a pup bouncing off the side of a cupboard to bring up the area around the cooker, a China ball in the hallway, and Leon’s Rosco LitePads serving as practical under-cabinet down-lighters.


Day 25 / Monday

I probably shouldn’t say what today’s set is, because it’s a little bit of a spoiler. There are some lighting similarities to the kitchen: again we have a character flicking a light switch, bringing on two hanging overhead practicals and a 2K with a chimera to beef them up.

A practical lamp on a desk was supposed to be turned on during the scene as well, but we all forget until it’s too late. It would have bounced off the desk and given Philip a little eye-light, and at first I regret losing this. But soon I realise that it is more appropriate for the scene not to have that level of refinement, for the lighting to be a little raw. The toppy, “broken key” angle of the chimera’s light works well for this tone too.

We wrap just before noon, releasing Naomi to high-tail it to Oxford to appear on stage in a musical this evening. Eventually there will be second-unit-style GVs and establishing shots to do, but there will only be three or four of us for that. For the cast and most of the crew, today brings Above the Clouds to an end, eight months after the camera first rolled.

See all my Above the Clouds posts here, or visit the official website.

“Above the Clouds”: February 2017 Pick-ups

5 Tips for Working with Practicals

As the sensitivity and dynamic range of cameras has increased, practicals have become a more and more important and popular tool in the cinematographer’s arsenal. A practical is any light source that appears in the frame. It could be a fluorescent strip-light, a table lamp, car headlights, candles, a fireplace, an iPad, fairy lights, street lamps, a torch, a security light… any light that could be realistically found in the place where your scene is set.

Here are five pieces of advice I’ve put together from my own experiences working with practical lights.


1. Liaise continually with the director and art department.

Production Designer Stuart Craig and Cinematographer Slawomir Idziak PSC confer on the set of Harry Potter and the Order of the Phoenix.

Although the bulb, wiring and power supply are the responsibility of the lighting department, the fixture itself falls under the purview of the art department. A good production designer will be thinking of light sources from the very beginning of their set design process. This is the start of a conversation which will continue throughout preproduction, as you the DP ask for fixtures in certain positions to make the set and actors look good, and the designer either says yes or asks for compromises so as not to ruin the aesthetics or believability (or budget!) of their design. The places a DP wants light sources in order to get the best modelling of the talent are often not the places a real human being would choose to install a light source in their home/office/dungeon etc. Some designers will demand realism and fight you on these decisions; others are open to artistic license. Either way, you must respect the symbiotic relationship between your two departments and do your best to reach a solution that works for both of you.

Keeping the director in the loop is also very important. When it comes to lighting, practicals are one of the things most likely to cause disagreement between the director and DP. You may have spent an hour lighting the set to be motivated by the candles all around, only for the director to walk onto set and say that they feel it makes no sense within the story for someone to have lit the candles in this scene. At which point, if you can’t change the director’s mind, you will find yourself hastily relighting the set while the 1st AD shakes their head in despair.


2. Sometimes it’s as simple as turning it on.

A Serious Man (DP: Roger Deakins CBE, ASC, BSC)

Earlier in my career, whenever I saw a practical, I felt that I had to set up a movie light somewhere out of frame in order to beef up the amount of light apparently coming from that practical. And traditionally, this is indeed the way DPs have worked, because film stocks weren’t sensitive enough to get an acceptable exposure from typical practicals like table lamps. Or it was impossible to find a level for the practical where it was bright enough to expose the talent but dim enough that the lamp itself didn’t read on camera as an ugly, over-exposed white blob.

But today’s digital cameras have a wider dynamic range, making it much easier to expose both the source and the subject acceptably. So ask yourself, do you really need that movie light? Roger Deakins, the world’s most celebrated living cinematographer, says he commonly lights his sets now with predominantly practical sources. Take a look at your scene without any additional lights, and only add extra sources if your practical’s illumination isn’t reaching the distance it needs to.

And practicals don’t even need to light the talent. Sometimes you have a scene perfectly well illuminated with other sources, but turning on a practical in the background just adds the icing on the cake. It may not illuminate anything but a small pool immediately around itself, but that little pool of orange light might add colour contrast, production value and interest. I’ve often seen daylight interior scenes on TV or in movies where bright shafts of “sunlight” are blasting in through a window, and no-one would realistically need to turn an artificial light on, but nonetheless several table lamps are glowing away in the background – because it looks great!


3. Always use dimmers.

As I’ve already said, finding that perfect brightness for your practical can be a delicate balancing act, so always have your crew put practicals on dimmers (a.k.a. “squeezers”) to make it easy to find that right level. Besides, practicals often look best with a warmer colour temperature, and you can get that by dimming them down, if they’re tungsten, adding to the cosy feel.


4. Keep other sources off the practical.

One of the reasons practicals look good is because they create contrast in the frame: a bright patch spreading out into darkness. If other light is falling on the practical, this effect will be washed out and reduced. If the other source is bright, it may even make the practical look like it’s not switched on. (Just like if you take a torch outside in daylight and turn it on, it doesn’t look like it’s on at all because the sun is so overpowering.)

If possible, other sources should be flagged so that they don’t hit the practical. This is something that an experienced gaffer will often have done as a matter of course.


5. Dim the camera side of the practical.

O Brother, Where Art Thou? (DP: Roger Deakins CBE, ASC, BSC)

Even with the wide dynamic range of today’s cameras, the flame or bulb of a practical may still look unpleasantly bright on camera. To deal with this, depending on the design of the fixture, you may be able to hide a small piece of ND gel inside it on the camera side. If properly arranged, this will cut the light travelling directly into the camera lens, but not the light shining in other directions and illuminating the talent.

Alternatively, the glass case of a lantern can be sprayed black on the camera side. The paint will not be picked up by the camera because there will still be a lot of light coming through it, but it should cut enough brightness to eliminate lens flare and reduce highlight clipping.


I hope these tips are helpful next time you shoot with practicals. Happy lighting, and merry Christmas!

5 Tips for Working with Practicals

Lighting Micro-sets

From time to time I help out my friend Kate Madison shooting show reels for actors. The fun and the challenge is in creating and lighting little micro-sets to capture angles that look like they might be lifted out of a scene from a much larger production, all with limited equipment.

lawyer-grade-moresat
Here’s an interesting shot from a recent showreel for Dana Hajaj. This was intended to resemble a Good Wife style legal drama, though actually the first reference that the lawyer’s office setting brought to my mind was Ally McBeal. I remember how they often had hot sunlight coming in through their office windows which would hit the talent from the chest down, while softer, indirect daylight would illuminate the faces.

Clearly this technique wasn’t exactly going to work for an MCU, but it did get me thinking about windows as two-in-one sources: a hard source which adds interest and ‘sheen’ to the image but is too harsh to hit faces with, and a soft sources for faces. Often cinematographers will use two different lights through the same window to achieve these two distinct effects. (I sometimes employ what I call a “Window Wrap” to this end.)

Now, the set for this showreel shot was just a red wall and sconce. (We tried a plant in the corner but couldn’t get it to work.) I wanted to suggest what the rest of the set might be, beyond the borders of this MCU, and simulating a window seemed like a natural choice. Furthermore, a window with Venetian blinds would help sell what was really a living room as a place of business. But this was not film noir; I didn’t want stripes of light on Dana’s face. Instead I used them to add interest to the wall.

Kate had a slatted-top stool in the hall which threw convincing “blinds” shadows when clamped to a C-stand in front of an 800W Arrilite. Ideally the shadows would have been sharper, but without a Dedo or a par this was the best I could do.

To get the maximum richness from the practical, I put a topper (black wrap clipped to the stool!) on the 800 to keep it off the sconce, and placed CTO inside the lampshade to warm up the fluorescent bulb.

To key Dana, I fired a 1K Arrilite into a 4’x4′ polyboard which was positioned next to the stool. Tungsten bounced off poly gives a beautiful soft, matt quality of light, and is a great way to key talent.

The backlight comes from a 1’x1′ LED panel set to about 4500K. What is the motivation for this source? North light coming from another window maybe? The great thing about micro-sets is there’s no wide shot so I don’t have to worry about that if I don’t want to! The motivation is that cold backlight looks good on black hair, and that’s that.

img_1344

As we prepared to roll, I wondered if I should increase the contrast more. I could have done this by (a) flagging the poly bounce to prevent it filling in the “blinds” shadows on the wall and (b) bringing in negative fill on the talent’s camera right side to kill the ambience. But I decided that more contrast was not appropriate for this kind of piece.

For another scene for Dana’s reel, we mocked up a remote Arabian campsite on Kate’s patio! Kate used a piece of fabric hung from a post and two light stands to represent the tent.

campsite-grade-moresat

I wanted to give the impression that if we cut to a wide shot – which of course we never do, but if we did – that it would show a vast landscape, perhaps a desert, all backlit by moonlight. On this hypothetical production, I would generate that moonlight with 18Ks on condor cranes, gelled with Steel Blue.

But on this tight shot I was able to achieve the same effect with two far smaller sources, both gelled with Steel Blue. (This is a blue with more green in it than CTB. It’s prettier and has connotations of many 80s and 90s thrillers and action movies that seemed to use copious amounts of this gel.) In the deep background is an LED panel, 3/4 backlighting a couple of blurry apple trees that could maybe play as vegetation around an oasis. Immediately behind the “tent” is a 40″ C-stand, top floor, with a 1K Arrilite on it. So close to the talent, the 1K comes down at a steep enough angle to imply moonlight, or an 18K on a condor, depending on how you want to look at it.

The flames from the fire pit weren’t doing much to light Dana, so I bounced another 1K off a gold reflector on the floor next to the fire. During takes I wiggled the reflector to add dynamics to the light.

To add a final touch of production value, I suggested a foreground practical. Kate found a candle lantern which we hung from a flag arm just in front of camera. Every frame of a Blockbuster movie is packed with details, so things like this help a lot to sell the scale.

img_1308
The 1K “moon” backlight is at top left. The gold reflector for the fire source is in the bottom centre, with the 1K bouncing into it visible two-thirds of the way down the right-hand edge of this image. The camera is just out of the bottom right corner of this frame. Not pictured is the LED background light, way back off left of this frame.

For more on shooting micro-sets, check out my blog from Above the Clouds, a feature that had several of them. Visit actorsatworkproductions.co.uk for showreel info.

Lighting Micro-sets

Know Your Lights: LED

In this final part of the Know Your Lights series, I’m taking a look at some of the LED fixtures currently available.

In this frame from Ren: The Girl with the Mark, Hunter's face is lit by a small LED reporter light hidden behind the bucket to suggest a reflection off the water.
In this frame from Ren: The Girl with the Mark, Hunter’s face is lit by a small LED reporter light hidden behind the bucket to suggest a reflection off the water.

LEDs (light emitting diodes) generate light through electroluminescence. When a controlled direct current is applied to the electrodes, electrons in the semi-conductor reconfigure, releasing energy as light. LEDs have been around since the early sixties, but for decades they were only capable of emitting a weak red glow, restricting their applications to things like TV standby lights and digital clocks. In recent years the brightness and colour range of LEDs has improved dramatically, making them practical alternatives to traditional light sources.

Compared with those sources – tungsten, HMI and fluorescent –  LEDs are more efficient, lighter, generate less heat, have a longer life, and are less likely to break and less dangerous when they do. They are fully dimmable, without the colour temperature changing, but if you wish, some fixtures allow you to alter the colour temperature with the turn of a knob.

On the down side, LED units are expensive, lack the raw power of large HMI or tungsten fixtures, and can often suffer from poor CRI (colour rendering index – see the overview for more info).

The technology is improving rapidly, and LEDs will only get better over the coming years. For now, many regard them as speciality lights, and they are almost always outnumbered by tungsten, HMI and fluorescent units in a drama lighting package. But some productions have really embraced them, an example being Guardians of the Galaxy, where many of the colourful practicals built into the sets were LEDs. Because they can be squeezed into smaller spaces than any other kind of light, and because you can get around the poor CRI by using coloured lamps, or gelling white ones, LEDs are well suited to creating practical glows from computers, control desks and other technology.

These are just a few of the LED fixtures currently on the market…


Panels

LP-1x1 Bi-color LitePanel
LP-1×1 Bi-color LitePanel

1’x1′ LitePanels are perhaps the most common LED unit. These panels have two dials on the back: one for brightness, and one for colour temperature (3200-5600K). They can be run off mains or a V-lock battery, drawing 40W to output about as much light as a 200W HMI.

LP-1x1 LitePanel, set up in seconds on a lintel in a street location in Japan for the sci-fi thriller Synced.
LP-1×1 LitePanel, set up in seconds on a lintel in a street location in Japan for the sci-fi thriller Synced.

I usually ask for a couple of these panels in my package, and they are great for situations like these:

  • As you are about to roll, you spot an area of the frame that needs a little extra splash of light. It is the work of moments to slap a battery on a LitePanel and fly it into shot.
  • A light needs to be situated in a tight space in the set, or in a spot which a power cable couldn’t reach without appearing in frame, or both. The fact that you can just prop these panels up against the set without worrying about them getting hot and damaging something is huge.
  • When required to shoot a night exterior without a generator, LED panels can really help you out. Even if you do have a genny, the ability to set up a source without running power to it is extremely useful. A short film I shot called Forever Alone is a good example.
  • Wrapped in a diffuser like tough-spun or muslin, they make good fill lights or eye lights for day exterior close-ups.
  • They can make good TV sources, particularly if your set-up time is limited. A spark can twiddle the brightness and colour temp dials during takes to simulate changing images on the TV screen.

There are many manufacturers producing panels in 1’x1′ and other sizes, but LitePanels are the best ones I’ve encountered. However, I’ve yet to come across any LED unit with a good enough CRI to use as a key light.

Under the black bag is an LED panel to keep some consistency to the light on the actors as the car moves.
Under the black bag is an LP-1×1 LitePanel to keep some consistency to the light on the actors as the car moves, in this scene from The Gong Fu Connection.
Arri SkyPanel S60-C, the 60cm colour-tuneable model

A range I haven’t used is the Arri SkyPanels. Designed primarily to be rigged overhead from studio grids, they come in 30, 60 and 120cm lengths. The coolest thing about these units is that you don’t need to gel them; just punch in the Lee or Rosco code of the gel you want to use, and the light instantly changes colour!

Rosco Lite Pads go for a slightly different approach. The LEDs are arranged around the edges of these panels, and bounce off the white backing to produce a soft daylight source. They’re not very bright, and again the CRI is not great, but the range of shapes and sizes they come in mean that you can find one to fit most tricky spaces.

Two 6"x2" Rosco LitePads taped to the dashboard of the picture car in Above the Clouds
Two 3″x12″ Rosco LitePads taped to the dashboard of the picture car in Above the Clouds

I used these a lot on Above the Clouds (check out the blog posts) in many different situations. Two 3″x12″ Lite Pads saw extensive use as fill/eye light, taped to the dashboard of a Fiat 500 in driving scenes. The other standard sizes are  3″x6″, 6″x6″, 6″x12″, 12″x12″ and 3″ circular. The panels themselves are stripped down, so batteries and dimmers can be sited remotely.

Rosco also makes LitePad Vectors, which are more like other brands of LED panel, with on-board dimmers and increased light output, and they can even make custom LitePads.


Arri L7-C LED fresnel

Fresnels

Several companies make small fresnels which at first glance appear to be HMIs, but are in fact LEDs. LitePanels make the Sola 6C and Sola ENG, equivalent to 200 and 100W HMIs respectively. Arri makes the L5, L7 and L10 units, which are each available in three models with differing brightness and colour-tuneability characteristics. The brightest L10 models are comparable with a 2K tungsten fresnel, while drawing a fifth of the power.

There are budget models out there too, such as the NiceFoto CE-1500Ws, which I used a little on Ren: The Girl with the Mark. As with all budget LED and fluorescent lights, the CRI is very poor, but it was useful when we lacked enough traditional fixtures.

Overall, LED fresnels are currently most relevant in scenarios where power is very limited, or portability and lack of heat is particularly important – in a nutshell, electronic news-gathering (ENG).


Ribbons

litegear-vho-pro-120-x2-literibbon-hybrid-2-e1413377188863

One of the most exciting things about LEDs is that because the individual diodes are so small, they don’t necessarily have to be housed in a fixture of any kind. LiteGear, for example, supplies LiteRibbons, which are strips of LEDs “mounted to a white backing material that is flexible, cuttable and adhesive backed”. The possibilities for these ribbons are pretty much endless. Here are some examples:

  • The Enterprise bridge set featured in the last three Star Trek movies has all its control panels lit by LiteRibbons.
  • Mad Max: Fury Road, and many other movies with driving scenes, had strips of LEDs mounted to the ceiling, window frames and pillars of the truck cab to increase the exposure inside.
  • The mini reactor that powers Iron Man’s suit is illuminated by LiteRibbon LEDs.

bh1220_29962_028_resize


Conclusion

Some predict that, as LEDs get brighter, cheaper and higher in CRI, they will eventually replace every other kind of lighting. For now though, they’re just another part of the toolkit in which tungsten and HMIs, and to a lesser extent fluorescents, are the go-to tools.

There is a fifth type of lighting that is emerging too: plasma lighting, but it’s so new and so rare at the moment that I don’t feel equipped to write a post about it yet. But you can read about it over on Shane Hurlbut’s blog.

Another great blog to teach you about the many lights out there is Set Lighting, written by experienced Hollywood gaffer Martijn Veltman. His site was really useful when I was researching this series.

Of course, the most important thing is not what lights you have, but how you use them. There are many, many posts here on neiloseman.com to teach you about that. Check out the Lighting Techniques series for some basics, watch my Lensing Ren video series to see how all four types of lighting are used in practice on a real shoot, or simply search the tag ‘lighting’ for a wealth of material.

Happy lighting!

Know Your Lights: LED

Know Your Lights: Fluorescent

Unusually being used as practicals, in a music promo, are a 2'x4 Kino Flo (foreground, with 3200K tubes) and a Kino Flo Diva Lite (top left, with 5500K tubes).
Unusually being used as practicals, in a music promo, are a 2’x4 Kino Flo (foreground, with 3200K tubes) and a Kino Flo Diva-Lite (top left, with 5500K tubes).

Tungsten and/or HMI lamps are usually the workhorse units of a lighting package, providing the power that is needed to key-light all but the smallest of set-ups. But they’re not right for every situation. If you don’t need the punch of a point source, and you want something a little softer, fluorescents might be the answer.

This is the third category of lighting units I’m covering in my Know Your Lights series; back up to the overview if you want to start from the beginning.

Fluorescent units use very similar technology to HMIs, with electrodes exciting a gas so that it gives off UV light. The phosphor coating on the tube absorbs the UV light and fluoresces, i.e. re-emits the light in the visible spectrum. Like HMIs, fluorescent units require a ballast to regulate the current.

One of the most notable early uses of fluorescents was in Robocop (1987). Jost Vocano, ASC chose the fixtures because the long, thin reflections looked great on Robocop’s suit. The flip side of that coin is that under certain circumstances fluorescents can make actors’ skin unpleasantly shiny. There was a scene in Ren: The Girl with the Mark where the poor make-up artist had to cake layers of powder onto Sophie Skelton to combat the shine of a Kino Flo I had set up.

Robocop (1987, dir. Paul Verhoeven) - note the fluorescent strips reflected in the suit.
Robocop (1987, dir. Paul Verhoeven) – note the fluorescent strips reflected in the suit.

One way I often use fluorescents is as a “Window Wrap”, a soft source that augments a hard HMI coming in through a window to wrap the light more pleasingly around the talent’s face. Or I’ll place a fluorescent outside the room, to represent or enhance indirect daylight spilling through a doorway.

Being soft sources, the light rays which fluorescents emit spread out widely, meaning the intensity drops off quickly as you move away from the lamp. (We refer to this as “throw”: fluorescents have little throw, whereas spotlights have a lot of throw.) For this reason they start to become pretty ineffective once you get more than about 6ft away from them, depending on the model.

Kino Flo is far and away the most common brand of fluorescent lighting used in the film and TV industry today, so apologies if the rest of this post reads a little like an advert for them. They’re not paying me, honestly!

The company was started by gaffer Frieder Hochheim and best boy Gary Swink after inventing the units for the 1987 comedy-drama Barfly (DP: Robby Müller, BVK). They required a fixture small enough to tuck into little alcoves in a bar location, without getting hot and causing damage.

Kino Flos come in two different kinds:


4'x4 Kino Flo with remote ballast leaning against the base of the C-stand
4’x4 Kino Flo with remote ballast leaning against the base of the C-stand
4-bank Kino Flo ballast

Remote Ballast

With these units, the lighting fixture is separate to the ballast, and they are connected by a header cable, just like HMIs. Remote units are usually referred to by two numbers, the first representing the length of the tubes in feet, and the second representing the number of tubes. So a unit with two tubes, four feet in length, is called a “4ft 2-bank”, often written as: 4’x2 (pronounced “four by two”).

The most common units are 2’x4 (a.k.a. “fat boy”), 4’x4 and 4’x2, but others are available, including “Single Flo” units and 6ft/8ft “Mega” units.

The ballasts allow you to turn individual tubes on and off as required, and also feature a switch marked either Hi/Lo or 4ft/2ft, which reduces the light output by adjusting the current waveform.


Kino Flo Tegra
Kino Flo Tegra. You can see the integrated ballast on the back.

Built-in Ballast

As you might expected, these models combine the fixture and ballast into a single unit. They are designed primarily for interview/ENG applications where it is more convenient to have everything in one. On drama productions it is generally preferable to have a remote fixture, which will be lighter, and a header cable running to an easily accessible ballast.

One advantage of built-in models over their remote cousins is that they are smoothly dimmable down to 5%.

Built-in units are known by names rather than numbers: “Diva-Lite” (2’x4), “Tegra” (4’x4) and “BarFly”, which resembles a swollen 1’x1′ LED panel. There is also the large “Image 87”, a 4’x8 fixture with a built-in ballast. It’s great for lighting green and blue screens because it puts out so much soft light.

Kino Flo Image 87 with a silver egg crate fitted
Top to bottom:
Top to bottom: 2900K, 3200K and 5500K tubes

Kino Flo tubes are available in five colours:

  • KF55 – 5500K – i.e. daylight – identified by blue end caps on the tubes
  • KF32 – 3200K – standard tungsten – gold end caps
  • KF29 – 2900K – warm tungsten – red end caps
  • 420nm blue – an extra-saturated blue for lighting blue screens
  • 525nm green – for lighting green screens

Kino Flos often come with plastic grids known as “egg crates” or “louvres”. Their purpose is to make the light more directional, effectively polarising it on a macro scale. They come in black, silver and “honeycomb” varieties, the latter available in 45º, 60º and 90º angles so you can choose how directional the light becomes – and, as a side effect, how much intensity you lose.

It is possible to remove the tubes and wiring from a Kino Flo housing so that the lamps can be squeezed into a tight space. For example, on The Little Mermaid we needed to see a soft blue glow emanating from a small translucent compartment in an organ. Best boy “Captain” Dan Xeller removed a 2ft Kino tube from its housing and placed it inside the compartment, running the wires out the back to the ballast.

Pampa Light in action behind the scenes of Ren: The Girl with the Mark. You can see I've gelled it with Quarter Minus Green in an attempt to correct the CRI.
Pampa Light in action behind the scenes of Ren: The Girl with the Mark. You can see I’ve gelled it with Quarter Minus Green in an attempt to correct the CRI.

Other than Kino Flo, another brand of fluorescent lights you may come across is Pampa Lights. They come in rugged boxes which can be interlinked to create larger banks of illumination. Unfortunately, in my experience the CRI (see overview) is not good, and they are best avoided.

The same goes even more so for the many fluorescent softbox kits available on Ebay from Hong Kong sellers. Not only are they flimsy in construction and questionable in terms of electrical safety, but the CRI of the lamps is very, very poor. If you need a cheap soft source, you would be much better off bouncing a halogen work light off a white card.

Indeed, firing an incandescent source into a bounce board will give you a better quality of light than even a Kino Flo. But a fluorescent fixture won’t make the room unbearably warm, it can emit daylight-balanced light, and it’s quicker to set up than a bounce board and the attendant flags. In a nutshell, it’s more convenient.

Next week, the Know Your Lights series concludes with a look at the fast-evolving world of LED illumination.

Know Your Lights: Fluorescent

Know Your Lights: HMIs

18K bubble for an Arrimax 12/18
18K bubble for an Arrimax 18/12

Following on from last week’s look at tungsten units, today we focus on HMI lighting. HMIs are more complex technology than tungsten, meaning they are far more expensive, and more prone to problems, particularly if you get a deal from a hire company and they give you older units. But they are bright and relatively efficient and because of this, and their colour temperature of 5,600K, they are by far the most popular type of light used in today’s film and TV industry when battling or mixing with natural daylight.

HMIs (hydragyrum medium-arc iodide) operate by creating an arc between two electrodes. This arc excites a gas which produces the light. In order to ignite the arc, a ballast is required. This device also regulates the current, while a special header cable connects the ballast to the light.

Arri_540817_Ballast_Electronic_2500_4000_Watts_1317042538000_325678
Arri electronic ballast for 2.5K and 4K HMIs

Ballasts come in two types: electronic and magnetic. Magnetic ballasts are cheaper, but if you are shooting at a shutter interval out of sync with the cycling of your power supply – e.g. 1/48th of a second with a 50Hz UK power supply – the HMI will appear to flicker on camera. Electronic ballasts have a ‘flicker free mode’ which converts the sine wave of the power supply into a square wave so that the arc does not extinguish at any point in the cycle. A side effect of this is that the head and/or ballast can produce humming, buzzing or squealing noises. Therefore many electronic ballasts have a ‘silent mode’ which reduces the noise but only prevents flicker at standard frame rates, not for high-speed work. In practice, flicker is rarely a problem as the shutter angles of today’s digital cameras can easily be tweaked to deal with it at common frame rates.

Adjusting an Arri Daylight Compact 1200 (a 1.2K MSR) on the set of Ashes. Photo: Sophie Black
Adjusting an Arri Daylight Compact 1.2K HMI fresnel

Like tungsten units, HMIs are available in open face, par and fresnel varieties, though the open face models are not very common. Arri, the major manufacturers of HMIs, call their daylight par fixtures ‘Arrisun’. Other HMI brands include Film Gear, Silver Bullet and K5600, which makes Jokers (see below).

Measured by their wattage, standard HMIs sizes are: 200W, 575W, 1.2K, 2.5K, 4K, 6K, 12K, 18K.

The smaller models, up to 2.5K, are fairly common on no-budget sets, because they can run off a domestic power supply and so don’t require a generator. At the other end of the scale, 18Ks are standard for daylight exterior and interior work on medium budgets and above.

Because of their power, HMIs often play a key part in night exterior lighting too. A 12K or 18K on a condor crane may be used to simulate the moon, while other HMI units, perhaps bounced or coming through a frame, might serve as sidelight or fill. By choosing to shoot at 3,200K, you automatically turn these HMI sources blue, often a desirable look for nighttime work.

Two 18K Silver Bullet HMI fresnels rigged to a condor crane to provide moonlight for a night exterior on The Little Mermaid

There are many variants on the standard HMIs. Here are some of the more common ones.

Arrilux 125W Pocket Par

Pocket pars are little 125W daylight pars that can be run off batteries. Before the days of LED panels, I used one of these for eye-light on a short film set in a forest in daylight. They can also make a good TV gag when bounced off a wobbling silver reflector.

K5600 Joker Bug 800W

Jokers are small units that come in 400W and 800W models. They can be reconfigured in various ways and even slotted into Source 4 housings (see last week’s tungsten post) to convert these units to daylight. We used a 400W joker a couple of times on Heretiks, when there was little space to rig in but we needed a fair bit of punch – like daylight through a small window.

Arrimax M18
Arrimax M18

The Arrimax range uses a hybrid of par and fresnel technology. They are lighter and more efficient than standard HMIs – the 800W model puts out almost as much light as an ordinary 1.2K, for example – but they’re more expensive to hire and don’t create the nice shafts of light that some DPs like (ahem). The model numbers are the wattage in tenths of a kilowatt: M8 (800W), M18 (1.8K), M40 (4K), M90 (9K) and the anomalously-named Arrimax 18/12 which accepts both 12K and 18K bubbles.

Airstar helium balloons in action

Helium Balloons are designed to provide a soft overhead illumination for night exteriors or high-ceilinged interiors. They come in a range of shapes and sizes, and aren’t necessarily HMIs; they can be fitted with tungsten lamps, or a combination of both.

Again, please let me know on Facebook or Twitter if I’ve missed out any of your favourite units. Next week: fluorescents.

Know Your Lights: HMIs

Know Your Lights: Tungsten

Following on from my ‘Know Your Lights’ overview last week, today I’ll look in more detail at the first category of lamps and the various units available and when you might use them.

And that first category is incandescent lighting, commonly known as tungsten. It is the oldest, simplest and most robust lighting technology. Tungsten lamps are the cheapest to hire, the easiest to repair, and emit a smoother spectrum of light than any other artificial sources, making for the most natural skin tones. For my money, there’s no better way to artificially light a human face than by bouncing a tungsten source off polyboard.

This comparison of domestic bulbs against daylight shows the spectra of light they emit.
This comparison of domestic bulbs against daylight shows the spectra of light they emit, with incandescent (tungsten) and halogen producing the smoothest spectra of the artificial sources.

Tungsten lighting units can be sub-categorised by the style of reflectors and/or lenses in the heads…


Open-face

Lilliput 300W open-face lamp
Ianiro Lilliput, a 300W open-face light

Redheads draw 800W each
Generic 800W open-face light

Unknown
Arrilite 1000, a 1K open-face light

A blonde - a basic 2,000W tungsten lamp
Generic 2K open-face light

The simplest instruments are known as ‘open-face’ because they have no lens to focus the light. By far the most common units are the 800 Watt and 2,000 Watt models. These are often referred to as ‘redheads’ and ‘blondes’ respectively, though I strongly discourage these terms for reasons touched on here. 300W models – dubbed ‘Lilliputs’ by manufacturer Ianiro – are also available, as well as 1Ks and much larger models like the Mole-Richardson Skypan 5K and Skylite 10K.

While I have lit entire no-budget features with just open-face lights, on larger productions the uneven and unfocused nature of their light makes them a poor relation of other units on the truck. They are most likely to get fired into a bounce board or used to create a little pool of light somewhere in the deep background where finesse is not needed.


Fresnel

Arri 300W fresnel
Arri 300W fresnel

Filmgear 650W fresnel

Mole Richardson 1K 'baby' fresnel
Mole Richardson 1K ‘baby’ fresnel

Arri T12, a 12K fresnel

The fresnel lens was invented in the early 19th century by French physicist and engineer Augustin-Jean Fresnel in order to increase the focus and throw of lighthouse lamps. Today in the film industry, fresnel lenses can be found on tungsten, HMI and even LED fixtures.

Fresnel lens
Fresnel lens

Tungsten fresnels come in the following wattages: 150W, 300W, 650W (a.k.a. ‘tweenie’), 1K, 2K, 5K, 10K, 12K, 20K, 24K.

1Ks and 2Ks are sometimes called ‘babies’ and ‘juniors’ respectively, but confusingly those terms can also refer to whether they are the smaller location models or larger studio versions of the same wattage.

Though the fresnel lens reduces the light output a little, the beam is much more focused and can therefore create a shaft of light through smoke, which open-face lamps cannot. Hence I sometimes use tungsten fresnels to simulate hard sunlight when shooting on a stage. But beware that shadows cast by a fresnel can sometimes show up the ridges in the lens.

I often fire fresnels into bounce boards, and because their light is more focused they require less flagging to control the spill than open-face units.

On Heretiks we used numerous 300W and 650W fresnels to beef up candlelight, often placing tough-spun diffuser over them, dimming them down to warm up the colour temperature, and flickering them too.


Par (parabolic aluminised reflector)

Par 16 (birdie)
Par 16 (birdie)

Par 38
Par 38

Filmgear 4-light Minibrute
Filmgear 4-light minibrute

Mole Richardson 9-light maxibrute

Par lights use a parabolic (shaped like half a rugby ball) reflector and a lens to produce a soft-edged oval pool of light. They are extremely common in theatres, but are often used in film and TV as well.

Unlike fresnel and open-face units, par cans are referred to not by wattage but by the diameter of the bubble in eighths of an inch. So a Par 16 (a.k.a. ‘birdie’) has a 2″ bulb.

Par cans come in the following sizes: 16, 20, 36, 38, 46, 56, 64. They also come with various internal specs which affect the width of the beam.

Par cans are good for throwing shafts of light. On The Little Mermaid I used them to simulate car headlights, and as practicals (i.e. they were seen on camera) to uplight banners at the circus.

Maxibrutes (a.k.a. ‘Molepars’) are banks of multiple par 64 (1KW) lights. They come in banks of 4, 6, 9, 12 or 24. They pop up in the background of music promos quite often, because they look cool and kind of retro. I used two 9-light Maxibrutes, bounced off the tent roof, to illuminate the big top in The Little Mermaid. Some DPs like to use Maxibrutes for backlight on night exteriors. If you’re using them direct, you’ll need at least a sheet of diff to prevent multiple shadows.

Minibrutes (a.k.a. ‘fays’) are similar, but use smaller par 36 (650W) lamps.


Other

Dedo, de-e-edo. Dedo come and me want go home.
Dedolite

Dedolites are compact units that use a unique lens system to produce very focussed, controllable light from (most commonly) 150W bulbs. They are widely available to hire, come with in-line dimmers, and are small and light enough to be rigged overhead or in tight spots. I often use them to beef up practicals.

ETC Source Four
ETC Source Four

Source Fours or (a.k.a. ‘lekos’) are ellipsoid reflector spotlights. They feature cutters which can be used to shape the beam, they can be hired with different lenses (some of which are zoomable), and they can be fitted with gobos to project patterns. They are good for stylised pools of light or for firing into distant bounce boards without spilling light elsewhere.

Spacelights
Spacelights

Spacelights are wagon-wheel configurations of three or six 1K lamps inside a cylinder of diffusion material. They are normally used in large numbers to provide ambient toplight on stage. Click here for a brief video introduction to spacelights.

1K Jem ball
1K Jem ball

Jem Balls, or China balls, resemble Chinese paper lanterns. They come in 22″ (up to 1KW) and 30″ (up to 2KW) sizes and produce a very soft light which I personally find is never bright enough.

Bare bulbs (usually referred to as ‘globes‘) in pendant fittings can be hung from overhead or hidden behind set dressing, perhaps to beef up practicals. On Ren: The Girl with the Mark and other projects I hid some globes behind furniture to enhance the pool of light from candles.

Finally, tungsten is usually the most desirable type of bulb to use in practicals. It is commonplace when shooting a daylight interior for a spark to go around replacing the energy-saver fluorescent bulbs in the table lamps with old-school tungsten ones. The colour is much nicer, the skin tones are better as noted above, and they can be dimmed to just the right level for camera.


I’m sure I’ve missed something out – please feel free to let me know on Facebook or Twitter! Next week: HMIs.

Know Your Lights: Tungsten

5 Tips for Successful Pick-ups

Discussing the next set-up on the Ren pick-ups shoot with director Kate Madison. Photo: Michael Hudson

Recently I’ve been involved in pick-ups shoots for a couple of projects I lensed last year: action-comedy feature The Gong Fu Connection and fantasy series Ren. Both pick-up shoots were strange experiences, featuring some very familiar aspects of the original shoot – locations, sets, costumes – but noticeably lacking others – certain actors, crew members and so on. The Ren pick-ups in particular were like re-living principal photography in microcosm, with stressful crowd shoots followed by more relaxed, smaller scenes and finally night shots with flaming arrows again!

A CTB-gelled Arrilite 1000 stands in for the 2.5K we used for backlight during principal photography on Ren! Photo: Michael Hudson
A CTB-gelled Arrilite 1000 stands in for the 2.5K HMI used for backlight during principal photography on Ren! Photo: Michael Hudson

I’ve blogged previously about how a director/producer can prepare for pick-ups – by keeping certain key props and costumes, for example – but today I have a few thoughts from a DP’s perspective.

1. Keep a record of lighting plans. I have a pretty good memory for my lighting set-ups, but not everyone does, so keeping notes is a good idea. Your gaffer may even do this for you. I frequently use this blog as a means of recording lighting set-ups, and indeed tried to access it during the Ren pick-ups shoot but was foiled by dodgy wifi.

2. Keep camera logs. On a properly crewed shoot this will be the 2nd AC’s job. The logs should include at least the following info for each slate: lens, aperture, ASA, white balance and shutter angle. This can be useful in principal photography too, for example if you shoot the two parts of a shot-reverse at different ends of the day or different days all together, and need to make sure you use the same lens.

Production assistant Claire Finn tends the brazier which provides smoke in the absence of the Artem smoke gun we used during principal photography. Photo: Michael Hudson
Production assistant Claire Finn tends the brazier which provides smoke in the absence of the Artem smoke gun used during principal photography. Photo: Michael Hudson

3. Have the original scene handy when you shoot the pick-ups. Load the edit onto a laptop or tablet so that you can compare it on set to the new material you’re framing up.

4. Own a bit of lighting kit if you can. In the shed I have some battered old Arrilites and a few other bits and pieces of gear that has seen better days. On a proper shoot I would leave this at home and have the production hire much better kit. But for pick-ups, when there’s often no money left, this stuff can come in handy.

5. Keep gels. If you employ an unusual colour of gel during principal photography, try to keep a piece of it in case you need to revisit that lighting set-up in pick-ups. Production will have to pay for the gel once it’s been used anyway. On the Ren pick-ups shoot, after pulling all of my gels out of the plastic kitchen bin I keep them in, I was relieved to find that I still had two pieces of the Urban Sodium gel I used in the flaming arrows scene the first time around.

Urban Sodium gel provides the grungy orange light for the flaming arrows scene, just as it did last November. Photo: Hermes Contreras
5 Tips for Successful Pick-ups

Synced: The Japan Shoot – Part 1

cast-and-crew
Actor Shigeki Maegawa, director Devon Avery, actor Oliver Park with Justine Avery in front of him, actress Daisy Hainsworth, actor Sydney Jay, me and gaffer Keisuke Ueda, at Himeji Castle
575W HMI
575W HMI

On Wednesday May 27th I got a call from my friend and actor Oliver Park, saying he was flying to Japan on Sunday for a shoot and did I want to come as DP? He was playing the leading man in Synced, a sci-fi feature film directed and co-written by Devon Avery, and after a month of shooting in Glasgow, the existing DP had opted not to take part in the Asian shoot.

On Friday night my plane ticket came through, at midnight on Sunday I was changing planes in Qatar, and on Monday afternoon (local time) I was in Osaka. The following morning saw me at Arc System, a very helpful lighting rental house, with Devon, his wife/multi-talented assistant Justine and a couple of the Japanese crew. With two night exteriors and a night interior as well as a day exterior scene, a reasonable amount of kit was needed.

The mains electricity in Japan is 100V, 60Hz, so very similar to the US – and indeed the plugs and sockets are identical. But the killer is that you can only draw 7A per socket. That’s a maximum of 700W, as opposed to over 3,000W from a UK socket.

Canon Ultrasonic 24-70mm f2.8

So the biggest lamp we could hire without needing a generator was a 575W HMI. With one of those in the bag, I figured it was best to fill out the package with battery-powered lamps, and so hired four 1’x1′ Bi-Color LitePanels. Although I’m still not 100% sold on the colour rendition of any LED panels (even LitePanels, which are amongst the best), there’s no denying they’re incredibly handy and quick to set up.

Pentax 50mm f1.4
Pentax 50mm f1.4

I would be shooting in 4K ProRes 422 HQ on my Blackmagic Production Camera, at 23.976fps. I initially stuck to two Canon L series lenses for continuity: Devon’s 24-70mm f2.8 and crew member Keisuke Ueda’s Canon L 50mm f1.4. Since I was constantly struggling to expose an image at the BMPC’s native 400 ISO, I later employed my Sigma 20mm f1.8 for faster wide shots, and I couldn’t resist trying my new Pentax 50mm f1.4, which performed beautifully at f1.7 and above, but did seem a touch soft when wide open.

Thunderbolt
Monitoring via Thunderbolt cable to Blackmagic Ultrascopes on a Powerbook

Regular readers will know of the trials and tribulations I’ve experienced getting a monitor signal out of my BMPC, with the result that I bought a 17″ Blackmagic SDI monitor last year. It was impossible to bring this to Japan, so instead – for the first time – I experimented with Thunderbolt monitoring. A runner was dispatched to buy a cable, and Devon installed the Blackmagic Camera package on his Macbook. This package includes Ultrascopes, which provides a live video view amongst other things, though annoyingly only in a pretty small window.

Whenever I turned the camera off or played anything back, the signal would be lost. To get it back, Devon would have to quit Ultrascopes and I’d have to switch to 25fps before he re-opened it. Only once it was re-opened could I switch back to 23.976fps. Please sort out that little bug, Blackmagic Design!

With the kit and workflow sorted, we travelled to Himeji (by bullet train, no less) ready to start shooting on Wednesday. Watch this space for part 2: shooting the kitchen scene.

Synced is copyright 2015 Empty Box Productions LLC.

Synced: The Japan Shoot – Part 1