7 Awesome Female DPs

For International Women’s Day in 2017 I wrote about “seven female DPs you didn’t know you’ve been watching”. Since then I’m happy to say that both the number and visibility of women behind the camera seem to have improved, though there’s still a long way to go before equality is achieved. So here, on the eve of this year’s IWD, are seven more female DPs whose work has caught my eye.


Natasha Braier, ASC, ADF

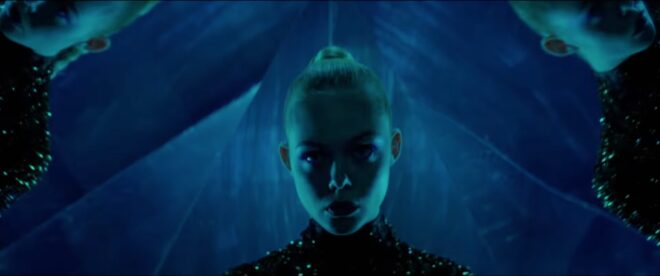
Braier is best known for Nicolas Winding Refn’s The Neon Demon. On this film she began to develop a unique technique she calls “lens painting”, whereby she creates a custom filter for every shot by applying a range of substances (presumably onto an optical flat). “I have a whole set of five suitcases with different materials, different powders and liquids and glitters, things like that,” she said in a 2020 interview. Braier’s other features include Amazon Original Honey Boy, and she’s currently shooting the pilot of American Gigolo for Paramount. Her awards include several for commercials and three for Neon Demon, and she was number 15 on The Playlist’s “50 Best and Most Exciting Cinematographers Working Today”.


Catherine Goldschmidt

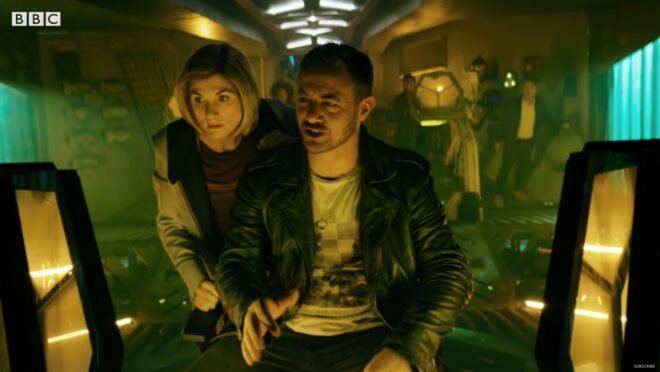
Born in California, raised in New Jersey and now based in London, Goldschmidt studied cinematography at the American Film Institute. Her credits include episodes of Doctor WhoA Discovery of Witches and new Amazon series Chloe, as well as the upcoming Game of Thrones prequel House of the Dragon. She has provided additional photography for the features Hope Gap (shot by another female DP to watch, Anna Valdez Hanks) and Spider-Man: Far from Home, while her short-form work includes the Qibi comedy series Dummy starring Anna Kendrick (impressively framed simultaneously for 16:9 and 9:16 aspect ratios). Goldschmidt founded the female DPs’ collective Illuminatrix along with Vanessa Whyte.


Magdalena Gorka, ASC, PSC

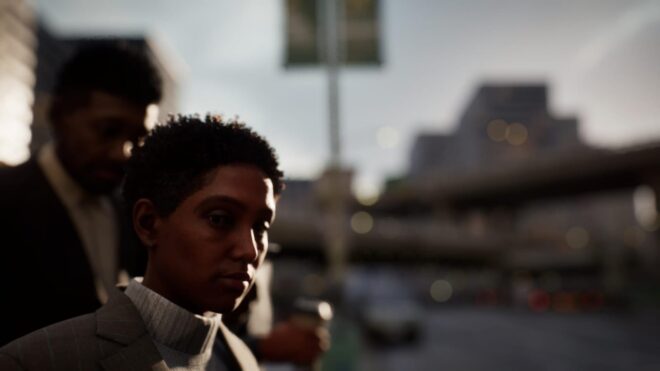
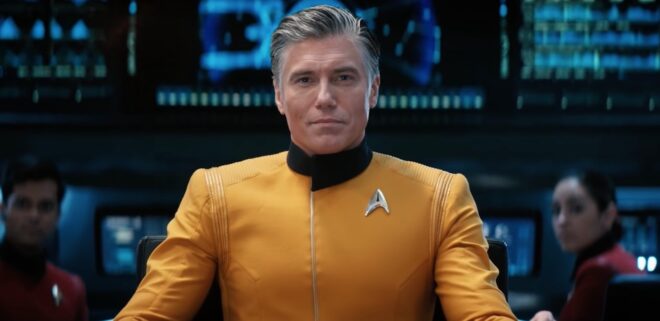
Gorka is a graduate of the Polish National Film School. I remember seeing her on a panel at Camerimage in 2017. She talked about how getting the look right in camera was important to her, because she worked on low-budget productions and she didn’t always have control in post. These days she’s shooting Star Trek: Strange New Worlds so presumably the budgets have gone up a bit (though who knows about the control). She also lensed the entire second season of Netflix Euro-thriller Into the Night, several episodes of underdog superhero saga Doom Patrol, feature films including Bridesmaids and Paranormal Activity 3, and music promos for Katy Perry and Elton John. Gorka was recently welcomed into the American Society of Cinematographers.


Kate Reid, BSC

With a background in art and a year at the University of California under her belt, Reid studied cinematography at NFTS. After graduating she worked as a camera assistant under such DPs as Balazs Bolygo, BSC, HSC and Newton Thomas Sigel, ASC before rising to the rank herself. Her early work included documentaries like Years of Living Dangerously and award-winning shorts like Nazi Boots. She now shoots a lot of high-end TV, including episodes of Game of Thrones, action thriller Hanna, detective drama Marcella, and upcoming dark comedy The Baby from HBO. She was nominated for an ASC Award this year for “Hanged”, her episode of Josh Whedon’s sci-fi show The Nevers.


Nanu Segal, BSC

It was while Segal was studying chemistry at university that she became an avid cinema-goer and began to consider a career in this industry. “It seemed to offer the perfect combination of technical intrigue and artistry,” she told Primetime. She subsequently attended film school and learnt from the likes of Seamus McGarvey, ASC, BSC and Sue Gibson, BSC. Segal has shot the features Marvelous and the Black Hole, Old Boys, The Levelling and An Evening with Beverly Luff Linn. Her shorts include Bit by Bit, For Love and All of this Unreal Time. She contributed second unit photography to Queen biopic Bohemian Rhapsody.


Ari Wegner, ACS

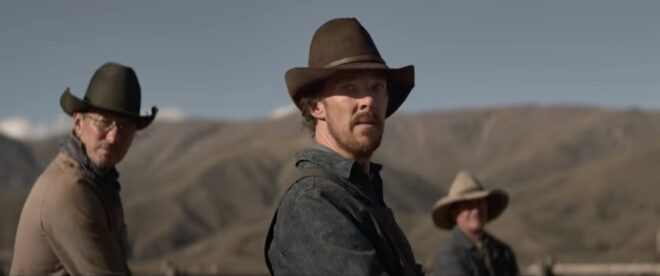
Wegner attended a Melbourne film school where she made shorts with fellow students in her spare time. She has shot commercials for brands like Apple, and TV series like The Girlfriend Experience for Starz. In 2017 she won a BIFA for period drama Lady MacBeth (gaffered by one of my regular collaborators, Ben Millar). Last month she became the first woman to win a BSC Award for Best Cinematography in a Theatrical Feature Film, for Montana-set drama The Power of the Dog. This, and the many other cinematography awards the film has scooped, are the just reward for Wegner’s unprecedented year of prep with director Jane Campion. The pair took inspiration from another impressive and talented woman, turn-of-the-20th-century Montana photographer Evelyn Cameron.


Zoë White, ACS

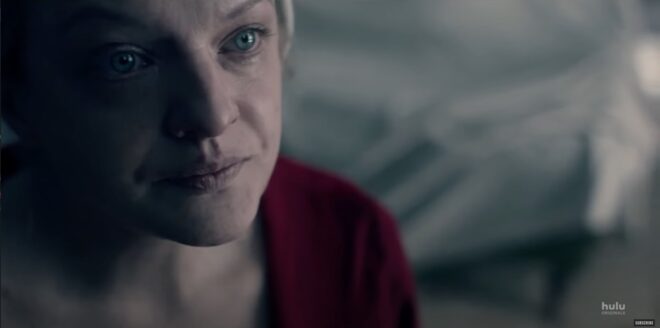
White has shot 12 episodes of the multi-award-winning Hulu series The Handmaid’s Tale, garnering Primetime Emmy and ASC Award nominations for her episode “Holly”. There’s many ways to translate the way you want something to feel,” she said in a 2019 interview about the series, “and there’s a lot of gut instinct that comes with deciding what it is that you think is most effective for a particular moment.” White also shot the pilot for Netflix drama Hit and Run, and two episodes of Westworld plus aerial photography for two more. Her indie work includes short psychological thriller The Push (winner of Best Cinematography at Brooklyn Horror Film Festival 2016) and coming-of-age drama Princess Cydney. 

7 Awesome Female DPs

Corridors and Kitchens

I’ve been shooting films for Rick Goldsmith and his company Catcher Media for over 20 years now. “That’s longer than I’ve been alive,” said the make-up artist on U & Me, Catcher’s latest, when I told her. Ouch.

Like most of the films I’ve done with Rick, U & ME is a drama for schools, about healthy relationships. These projects are as much about giving young people a chance to be involved in the making of a film as they are about the finished product. This means that we have to be pretty light on our feet as a crew – always a good challenge.

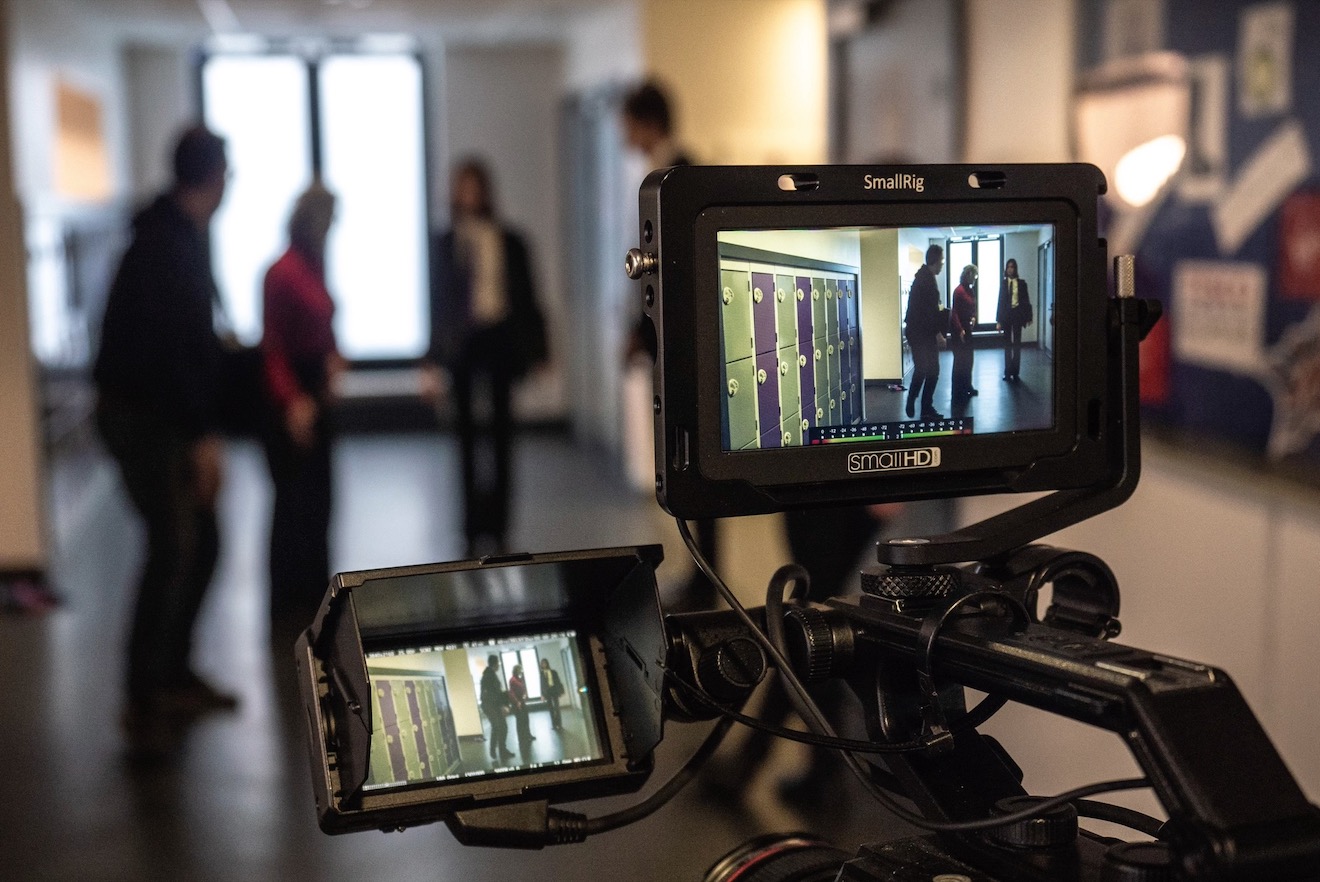
One of the main scenes was in the corridor of a school, or “academy” as they all seem to be called now (have we established yet that I’m old?). Rick had picked a corridor that was relatively quiet, though it was still impossible to film when kids were moving between lessons. It had a nice double-door fire exit at the end with diffuse glass. Any corridor/tunnel benefits from having light at the end of it. That’s not a metaphor; light in the deep background is a staple of cinematography, and this light kicked nicely off the shiny floor as well. Whenever framing permitted, I beefed up the light from the doors with one of Rick’s Neewer NL-200As, circular LED fixtures.

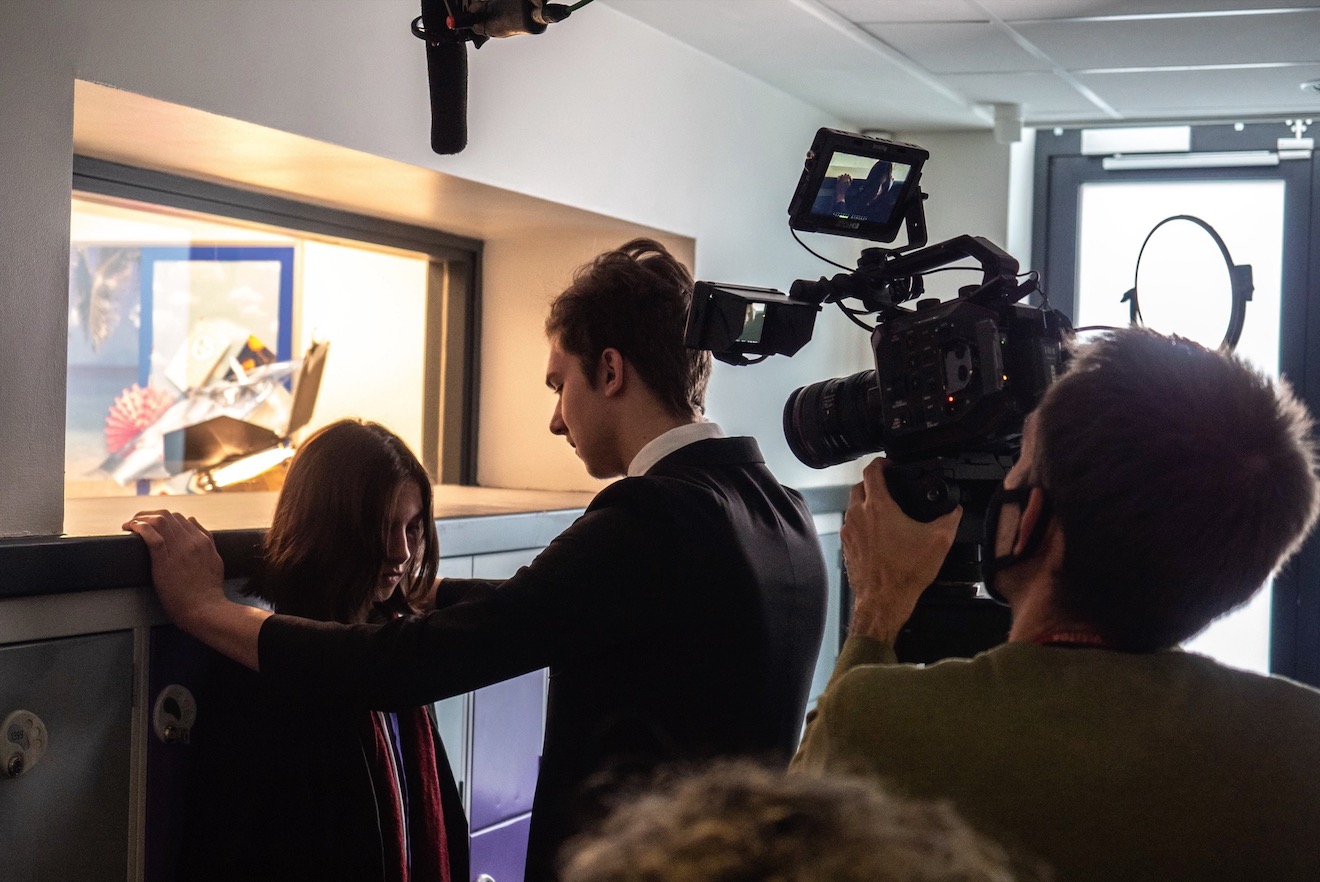
For the key light there was a convenient window above the hero lockers. The window looked into an office which – even more conveniently – was empty. In here I put an open-face tungsten 2K pointing at the ceiling. This turned the ceiling into a soft source that spilled through the window. I added another Neewer panel when I needed a bit more exposure.

I also wanted to control the existing overhead lights in the corridor. They couldn’t be turned off – I don’t think there were even any switches – so I flagged the ones I didn’t like using black wrap and a blackout curtain hung from the drop ceiling. I taped diffusion over another light, one that I didn’t want to kill completely.

It looked nice and moody in the end.

A brighter scene was shot in the kitchen of an AirBnB that doubled as accommodation for us crew. Here I used the 2K outside the window to fire in a hot streak of sunlight that spilt across the worktops, the actor’s clothes and the cupboards (bouncing back onto her face when she looked towards them).

The 2K would have been too hard to light her face with. Instead I fired one of the Neewers into the corner next to the window, creating a soft source for her key. The only other thing I did was to add another Neewer bouncing into the ceiling behind camera for later scenes, when the natural light outside was falling off and it was starting to look too contrasty inside.

It might not have been rocket science, but it was quite satisfying to get an interesting look out of ordinary locations and limited kit.

Corridors and Kitchens

Large Format

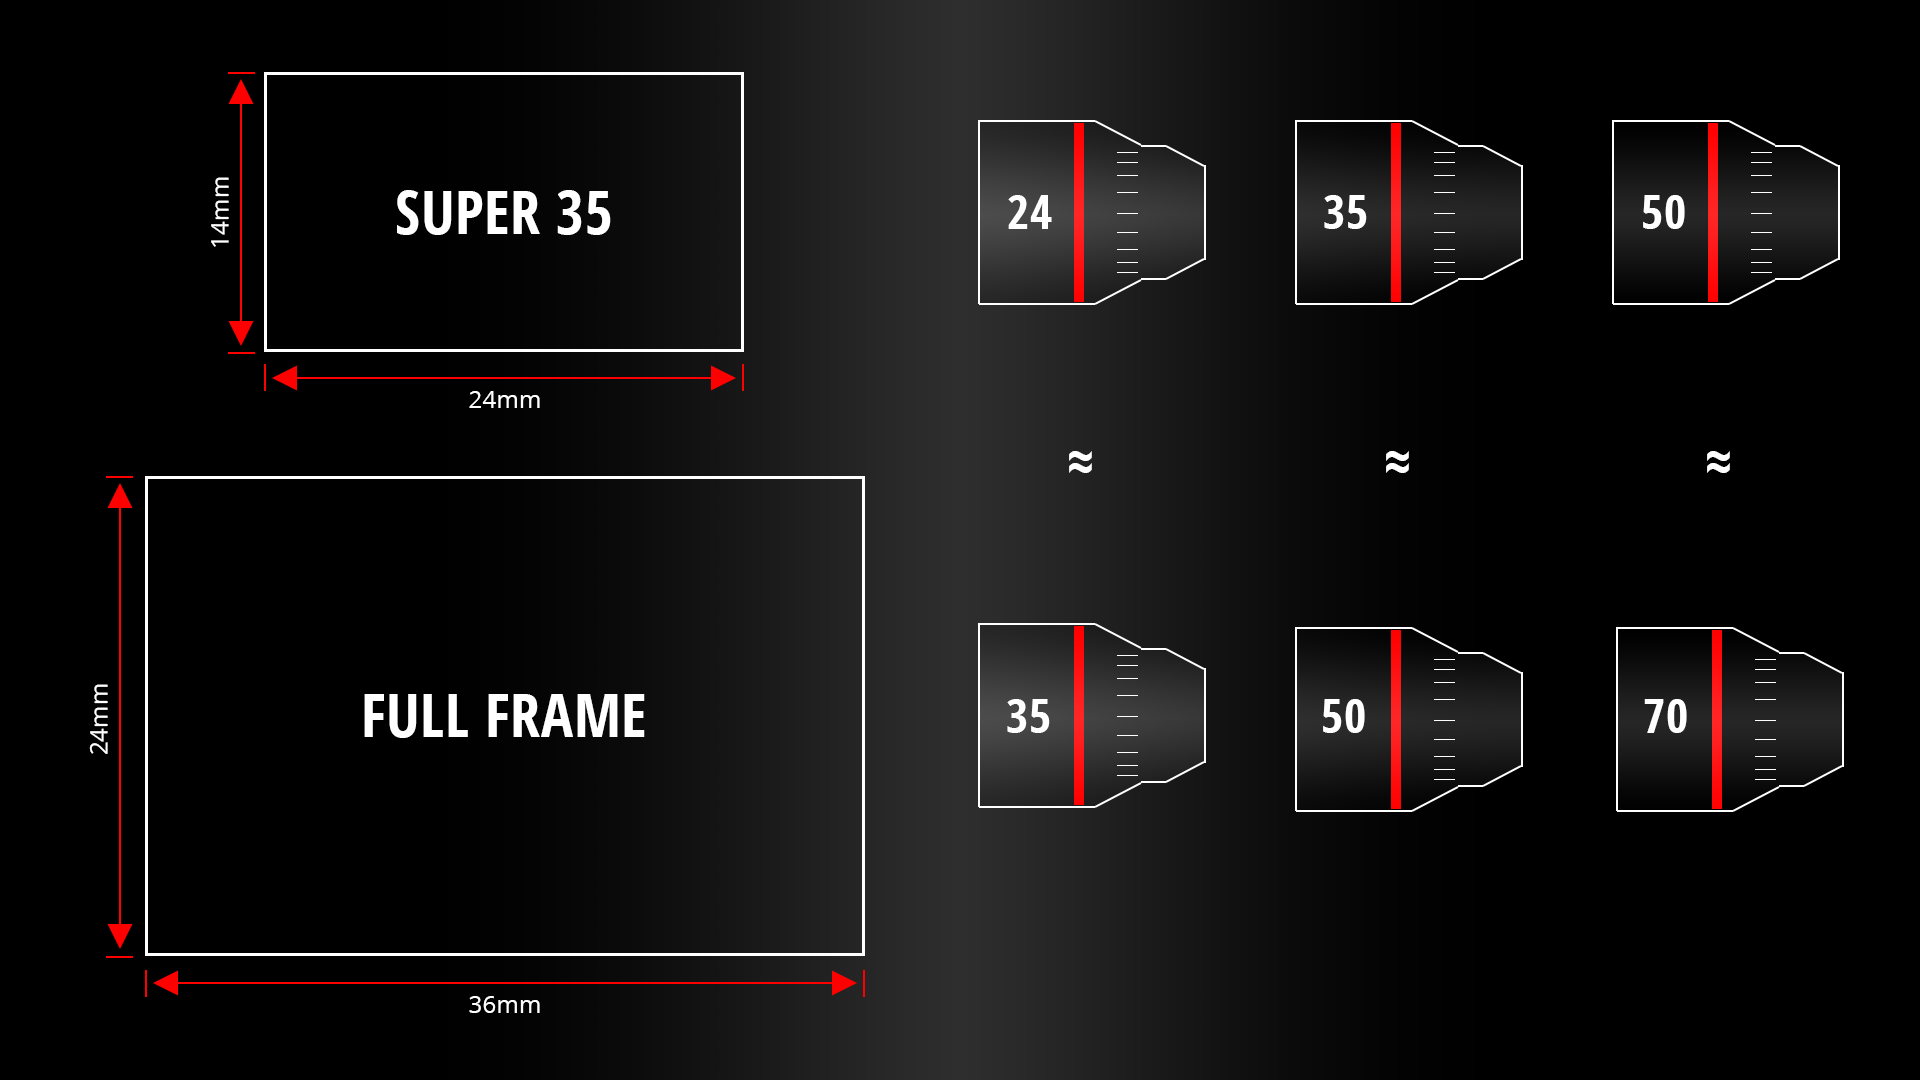
Recently I shot my second online cinematography course, provisionally titled The Secrets of Cinematography, which will be out in the spring. In it I shoot on a Z Cam E2-F6, a full-frame camera. As far as I can remember, the only other time I’ve shot full-frame was for the miniature map in Above the Clouds, captured on a Canon 5D Mk III. So I thought this would be a good time to post a few facts about large-format, and a good excuse to get some more use out of this graphic I created for the course…

First of all, some definitions:

  • Super-35, about 24x14mm, has been the standard sensor size since digital cinematography took off in the noughties. It’s based on an analogue film standard which has its own complex history that I won’t go into here.
  • A large-format digital cinema camera is any that has a sensor larger than Super-35. It’s not to be confused with large-format still photography, which uses much bigger sensors/film than any currently existing for moving images.
  • Full-frame is a subset of large-format. Confusingly, this term does come from still photography, where it is used to identify digital sensors that are the same size as a frame of 35mm stills film: 36x24mm.

These are the differences you will notice shooting in large-format versus Super-35:

  • Lenses will have a wider field of view. (You’ll need to make sure your chosen lenses have a large enough image circle to cover your sensor.)
  • If you increase your focal length to get the same field of view you would have had on Super-35, perspective will be rendered exactly the same as it was on Super-35…
  • … but the depth of field will be shallower…
  • … and you may see more imperfections at the edges of frame where the lens is working harder. (A Super-35 sensor would crop these imperfections out.)
  • Picture noise will probably be finer and less noticeable due to the photosites being larger and more sensitive.

In the case of full-frame, the crop factor is 1.4. This means you should multiply your Super-35 focal length by 1.4 to find the lens that will give you the same field of view on a full-frame camera. (Some examples are given in the graphic above.) It also means that you can multiply your Super-35 T-stop by 1.4 to find the full-frame T-stop to match the depth of field.

For a detailed comparison of Super-35 and full-frame, check out this test by Manuel Luebbers.

Large Format

What I Learnt from DSLRs

RedShark News recently published an article called “The DSLR is now dead”, based on the fact that the Canon 1D X Mark III will be the last flagship DSLR from the company and that mirrorless cameras are now first choice for most photographers. This prompted me to reflect on some of the things I learnt when I bought my first (and only) DSLR.

It was 2011, and I documented some of the challenges my new Canon 600D created for me in this blog post. But what the DSLR did really well was to introduce me to a workflow very similar in many ways to the bigger productions I’m working on now. Previously I had shot everything on prosumer camcorders, so the following things were new to me with DSLRs and have been constant ever since.


Shallow Depth of Field

I had been used to everything being in focus, so not really thinking about my aperture setting, just turning the iris dial until the exposure looked right. My Canon 600D set me on a journey of understanding f-stops, and eventually choosing a target stop to shoot at for focus reasons and then using lighting or ND filters to achieve that stop.


Prime Lenses

My lenses

Although for several years I owned a Canon XL1-S, which had interchangeable lenses, I only ever owned a couple of zooms for it. As far as I’m aware, no prime lenses to fit the XL1-S’s proprietary mount were ever made, so prime lenses were completely new to me when I got my 600D. As with aperture, it forced me to think about what field of view and degree of perspective or compression I wanted, select the appropriate lens, and then place the camera accordingly, rather than lazily zooming to get the desired framing.


Dual-System Sound

It’s weird now to think that I used to be tethered to the sound recordist before I switched to DSLR shooting. At the time I was doing most of my own editing as well, so syncing the sound was a pain in the arse, but it was a valuable introduction to this industry-standard way of working. It’s also weird to think that clapperboards were optional for me before this.


Building a camera rig

All my cameras before the 600D had a built-in viewfinder, handgrip, shoulder mount (if the camera was large enough to need one) and lens (except the XL1-S), and there was no need to add an external battery plate or a follow-focus. The idea that a camera rig needed to be built, and that it could be customised to suit different operators and situations, was a novel one to me. I have to say that I still prefer cameras that have more things built in, like the Alexa Classic. A good part of the reason I rarely use Reds is because they don’t come with viewfinders. Why anyone ever thinks a viewfinder is an optional part of a camera is utterly beyond me. It’s an important point of stabilising contact for handheld work, and your face shields it completely from extraneous light, unlike a monitor.


Tapeless recording

The 600D was my first camera to record to memory cards rather than magnetic tape. It was certainly scary to have to wipe the cards during a shoot, being careful to back everything up a couple of times first. Data wrangling was a tricky thing to deal with on the kind of tiny-crewed productions I was usually doing back then, but of course now it’s completely normal. Just last week I shot my new cinematography course and had the fun of staying up until 2:30am after a long day of shooting, to make sure all the footage was safely ingested! More on that course soon.

What I Learnt from DSLRs

“Annabel Lee”: Using a Wall as a Light Source

Here’s another lighting breakdown from the short film Annabel Lee, which has won many awards at festivals around the world, including seven now for Best Cinematography.

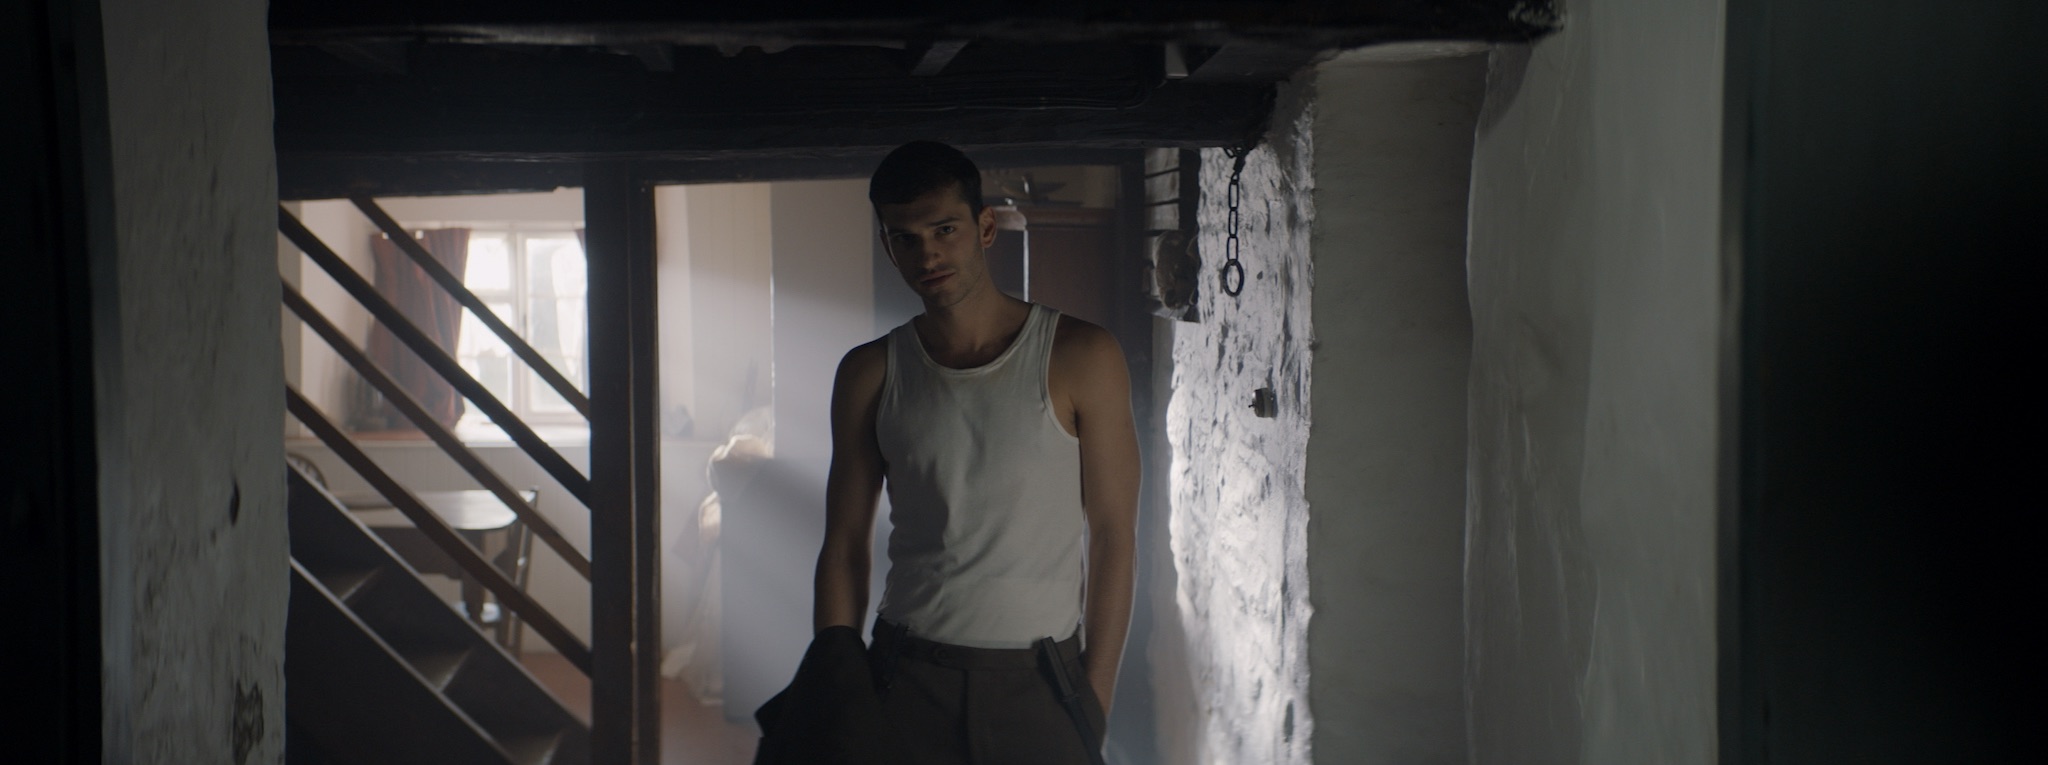
I wanted the cottage to feel like a safe place for Annabel and E early in the film. When they come back inside and discuss going to the village for food, I knew I wanted a bright beam of sunlight coming in somewhere. I also knew that, as is usual for most DPs in most scenes, I wanted the lighting to be short-key, i.e. coming from the opposite of the characters’ eye-lines to the camera. The blocking of the scene made this difficult though, with Annabel and E standing against a wall and closed door. In the story the cottage does not have working electricity, so I couldn’t imply a ceiling light behind them to edge them out from the wall. Normally I would have suggested to the director, Amy Coop, that we flip things around and wedge the camera in between the cast and the wall so that we could use the depth of the kitchen as a background and the kitchen window as the source of key-light. But it had been agreed with the art department that we would never show the kitchen, which had not been dressed and was full of catering supplies.

The solution was firing a 2.5K HMI in through one of the dining room windows to create a bright rectangle of light on the white wall. This rectangle of bounce became the source of key-light for the scene. We added a matt silver bounce board just out of the bottom of frame on the two-shot, and clamped silver card to the door for the close-ups, to increase the amount of bounce. The unseen kitchen window (behind camera in the two-shot) was blacked out to create contrast. I particularly like E’s close-up, where the diffuse light coming from the HMI’s beam in the haze gives him a lovely rim (stop sniggering).

Adding to the fun was the fact that it was a Steadicam scene. The two-shot had to follow E through into the dining room, almost all of which would be seen on camera, and end on a new two-shot. We put our second 2.5K outside the smaller window (camera left in the shot below), firing through a diffusion frame, to bring up the level in the room. I think we might have put an LED panel outside the bigger window, but it didn’t really do anything useful without coming into shot.

For more on the cinematography of Annabel Lee, visit these links:

“Annabel Lee”: Using a Wall as a Light Source

“Annabel Lee”: Lighting the Arrival

Last week, Annabel Lee – a short I photographed at the end of 2018 – won its sixth and seventh cinematography awards, its festival run having been somewhat delayed by Covid. I’ve previously written a couple of posts around shooting specific parts of Annabel Lee – here’s one about a Steadicam shot with a raven, and another about the church scene – and today I want to dissect the clip above. The sequence sees our two young refugees, Annabel and E, arriving at the Devonshire cottage where they’ll await passage to France.

I was a last-minute replacement for another DP who had to pull out, so the crew, kit list and locations were all in place when I joined. Director Amy Coop had chosen to shoot on an Alexa Mini with Cooke anamorphic glass, and gaffer Bertil Mulvad and the previous DP had put together a package including a nine-light Maxi Brute, a couple of 2.5K HMIs and some LiteMats.

The Brute is serving as the moon in the exteriors, backlighting the (special effects) rain at least when we’re looking towards the driver. (If you’re not familiar with Maxi Brutes, they’re banks of 1K tungsten pars. Ours was gelled blue and rigged on a cherry-picker.) The topography of the location made it impossible to cheat the backlight around when we shot towards Annabel and E; rain doesn’t show up well unless it’s backlit, so this was quite frustrating.

We didn’t have any other sources going on except the period car’s tungsten headlights. It was very tricky to get the cast to hit the exact spots where the headlights would catch them while not shadowing themselves as they held out their hands with umbrellas or brooches.

Inside the cottage it’s a story point that the electricity doesn’t work, so until E lights the oil lamp we could only simulate moonlight and the headlights streaming in through the window. These latter were indeed a simulation, as we didn’t have the picture car at the time we shot inside. There was a whole sequence of bad luck that night when the camera van got stuck on the single-lane dirt track to the cottage, stranding certain crucial vehicles outside and sealing us all inside for three hours after wrap, until the RAC arrived and towed the camera van. So the “headlights” were a couple of tungsten fresnels, probably 650s, which were panned off and dimmed when the car supposedly departs. We also tried to dim them invisibly so that we could get more light on E as he comes in the door and avoid the Close Encounters look when the window comes into shot, but after a few takes of failing to make it undetectable we had to abandon the idea.

We also didn’t have the rain machine for the interiors, so as E opens the door you might briefly glimpse water being poured from an upstairs window by the art department, backlit by an LED panel. We put one of the HMIs outside a window that’s always off camera left to give us some “moonlight” in the room, create colour contrast with the tungsten headlights and the flame of the oil lamp, and ensure that we weren’t left in complete darkness when the “car” departs. Annabel looks right into it as she hugs E.

When the action moves upstairs, an HMI shines in through the window again. I remember it gave us real camera-shadow problems at the end of the scene, because Steadicam operator Rupert Peddle had to end with his back to that window and the talent in front of him (though the clip above cuts off before we get to that bit). The practical oil lamp does a lot of the work making this scene look great. I was sad that I had to put a little fill in the foreground to make E’s bruises at least a tiny bit visible; this was a LiteMat panel set to a very low intensity and bounced off the wall right of camera.

It’s worth mentioning the aspect ratio. My recollection is that I framed for 2.39:1, which is normal for anamorphic shooting. With the Alexa Mini in 4:3 mode, 2x anamorphic lenses produce an 8:3 or 2.66:1 image, which you would typically crop at the sides to 2.39 in post. When I arrived at the grade Annabel Lee was all in 2.66:1 and Amy wanted to keep it that way. I’m not generally a fan of changing aspect ratios in post because it ruins all the composition I worked hard to get right on set, but there’s no denying that this film looks beautiful in the super-wide ratio.

Finally, let me say a huge thank you to all the people who helped make the cinematography the award-winning success it has become, crucially drone operators Mighty Sky, underwater DP Ian Creed and colourist Caroline Morin. I’m sure the judges for these awards were swayed more by the beautiful aerial and aquatic work than the stuff I actually did!

“Annabel Lee”: Lighting the Arrival

Time Up for Tungsten?

Poppy Drayton, in “The Little Mermaid”, lit by a tungsten 1K bounced off poly

Last October, rental house VMI retired all of its tungsten lighting units as part of its mission to be a Net Zero company by 2030. I know this mainly because I am currently writing an article for British Cinematographer about sustainability in the film and TV industry, and VMI’s managing director Barry Bassett was one of the first people I interviewed.

Barry is very passionate about helping the environment and this is reflected in numerous initiatives he’s pioneered at VMI and elsewhere, but in this post I just want to discuss the tungsten issue.

I love tungsten lighting. There’s no better way to light a human face, in my opinion, than to bounce a tungsten light off a poly-board. (Poly-board is also terrible for the planet, I’ve just learnt, but that’s another story.) The continuous spectrum of light that tungsten gives out is matched only by daylight.

Dana Hajaj lit by another tungsten 1K bounced off poly

Tungsten has other advantages too: it’s cheap to hire, and it’s simple technology that’s reliable and easy to repair if it does go wrong.

But there’s no denying it’s horribly inefficient. “Tungsten lighting fixtures ought to be called lighting heaters, since 96% of the energy used is output as heat, leaving only 4% to produce light,” Barry observed in a British Cinematographer news piece. When you put it that way, it seems like a ridiculous waste of energy.

Without meaning to, I have drifted a little away from tungsten in recent years. When I shot Hamlet last year, I went into it telling gaffer Ben Millar that it should be a tungsten heavy show, but we ended up using a mix of real tungsten and tungsten-balanced LED. It’s so much easier to set up a LiteMat 2L on a battery than it is to run mains for a 2K, set up a bounce and flag off all the spill.

Shirley MacLaine lit by a tungsten book-light in “The Little Mermaid”

I admire what VMI have done, and I’ve no doubt that other companies will follow suit. The day is coming – maybe quite soon – when using tungsten is impossible, either because no rental companies stock it any more, or no-one’s making the bulbs, or producers ban it to make their productions sustainable.

Am I ready to give up tungsten completely? Honestly, no, not yet. But it is something I need to start thinking seriously about.

Time Up for Tungsten?

What is a French Over?

Film industry jargon isn’t shy of national references. A Dutch angle is a canted shot. To Spanish a piece of kit is to get rid of it (a corruption of “it’s banished”). To German a light – I think – is to lie the stand horizontal, attach the head, then raise the whole thing vertical. Or maybe that’s Italianing. I forget. But what is a French over?

It’s a type of over-the-shoulder shot. It requires the two characters to be bodily facing in the same direction, like on a bench or in the front seats of a car. If the camera shoots from behind their bodies, it’s a French over. Here are a few examples.

“Norman” (2010, DP: Darren Genet)
A commercial shot by Patrick O’Sullivan
“À bout de souffle” (1960, DP: Raoul Coutard)

A French over feels a little more conspiratorial or voyeuristic than a standard over. It gives the viewer a sense that they’re privy to a confidential conversation.

It works well for bench scenes because benches often have nice vistas in front of them which you can keep in the background of your close-ups, and you don’t have to cross the line to do a wide shot behind the bench showcasing the whole view.

“Mission: Impossible – Rogue Nation” (2015, DP: Robert Elswit, ASC)

It’s far easier to shoot French overs in a car because the operator can simply sit on the back seat rather than trying to jam the camera onto the dashboard.

French overs allow the editor more flexibility too. A typical problem of covering dialogue scenes where characters are facing the same way is that you can often clearly see the foreground character’s mouth, which locks the editor in to maintaining lip-sync every time they cut. In a French over you only see the back of the foreground character’s head so this problem is eliminated.

They’re not to everyone’s taste though. You certainly see less of the actors’ faces than in a standard over, and if the cast are not going to turn to look at each other very often their emotions could easily end up unreadable. If that’s not the effect you want, standard overs would be a better choice.

What is a French Over?

5 Things You Didn’t Know About the Iris in Your Lens

Inside a lens, amongst the various glass elements, is an ingenious mechanism which we call the iris. Just like your biological iris, it controls the amount of light passing through the pupil to form an image. I’ve written about the iris’s use to control exposure before, and its well-known side effect of controlling depth of field. But here are five things that aren’t so commonly known about irises.


1. f-stops and the entrance pupil

This image shows the exit pupil because it’s seen through the rear element of the lens. A view through the front element would show the entrance pupil.

The f-number of a lens is the ratio of the focal length to the diameter of the aperture, but did you know that it isn’t the actual diameter of the aperture that’s used in this calculation? It’s the apparent diameter as viewed through the front of the lens. A lens might have a magnifying front element, causing the aperture to appear larger than its physical size, or a reducing one, causing it to appear smaller. Either way, it’s this apparent aperture – known as the entrance pupil – which is used to find the f-number.


2. No-parallax point

The no-parallax point of a lens is located at its entrance pupil. Sometimes called the nodal point, although that’s technically something different, this is the point around which the camera must pan and tilt if you want to eliminate all parallax. This is important for forced perspective work, for panoramas stitched together from multiple shots, and other types of VFX.


3. Focus

If you need to check your focal distance with a tape measure, many cameras have a handy Phi symbol on the side indicating where the sensor plane is located so that you can measure from that point. But technically you should be measuring to the entrance pupil. The sensor plane marker is just a convenient shortcut because the entrance pupil is in a different place for every lens and changes when the lens is refocused or zoomed. In most cases the depth of field is large enough for the shortcut to give perfectly acceptable results, however.


4. Bokeh shape

The bokeh of a 32mm Cooke S4 wide open at T2 (left) and stopped down to T2.8 (right). Note also the diffraction spikes visible in the righthand image.

The shape of the entrance pupil determines the shape of the image’s bokeh (out of focus areas), most noticeable in small highlights such as background fairy lights. The pupil’s shape is determined both by the number of iris blades and the shape of their edges. The edges are often curved to approximate a circle when the iris is wide open, but form more of a polygon when stopped down. For example, a Cooke S4 produces octagonal bokeh at most aperture settings, indicating eight iris blades. Incidentally, an anamorphic lens has a roughly circular aperture like any other lens, but the entrance pupil (and hence the bokeh) is typically oval because of the anamorphosing effect of the front elements.


5. Diffraction spikes

When the edge of an iris blade is straight or roughly straight, it spreads out the light in a perpendicular direction, creating a diffraction spike. The result is a star pattern around bright lights, typically most visible at high f-stops. Every blade produces a pair of spikes in opposite directions, so the number of points in the star is equal to twice the number of iris blades – as long as that number is odd. If the number of blades is even, diffraction spikes from opposite sides of the iris overlap, so the number of apparent spikes is the same as the number of blades, as in the eight-pointed Cooke diffraction pictured above right.

5 Things You Didn’t Know About the Iris in Your Lens

“Die Hard”: A Masterclass in Composition

I hope you have all enjoyed Die Hard as a traditional staple of your Yuletide festivities. Every time I see it I am in awe of, among other things, the composition by DP Jan de Bont, ASC and camera operators Michael Ferris, Michael Scott and M. Todd Henry. Let’s have a look at some of the beautifully framed images and see what some of the hallmarks are.


Low Angles

“From up here it doesn’t look like you’re in charge of jack shit.”

So many low angles in Die Hard, some motivated by the blocking but many simply to make the characters seem larger than life.


No Rule of Thirds

“There are rules for policemen.” / “Yeah. That’s what my captain keeps telling me.”

De Bont uses the full width of the 2.39:1 anamorphic frame to creatively place his subjects, rarely obeying the Rule of Thirds and often squeezing characters right into one side of the frame.


Short-siding

“Now I know what a TV dinner feels like.”

Short-siding means placing a character close to the side of the frame which they’re looking towards, and this happens quite often in the film as well.


Deep Raking Shots

“Welcome to the party, pal.”

The filmmakers love to have a row of characters ranging from near to far. Even in over-the-shoulder shots, de Bont frequently adds an extra element in the background, continuing the depth procession begun by the foreground shoulder and mid-ground actor.


Dutch Angles

“You oughta be on fucking TV with that accent.”

Jan de Bont is from the Netherlands, so every shot… But I’m talking specifically about the canted shots which underscore the deception of the scene where Alan Rickman’s Hans Gruber pretends to be a hostage (with a highly convincing English-German-American accent) and the subsequent shoot-out in the computer room.


There are also a lot of great camera moves in Die Hard, but that’s a post for another Christmas. Happy new year and yippie-ki-yay, motherfuckers!

“Die Hard”: A Masterclass in Composition