“Harvey Greenfield is Running Late”: June 2022 Pick-ups

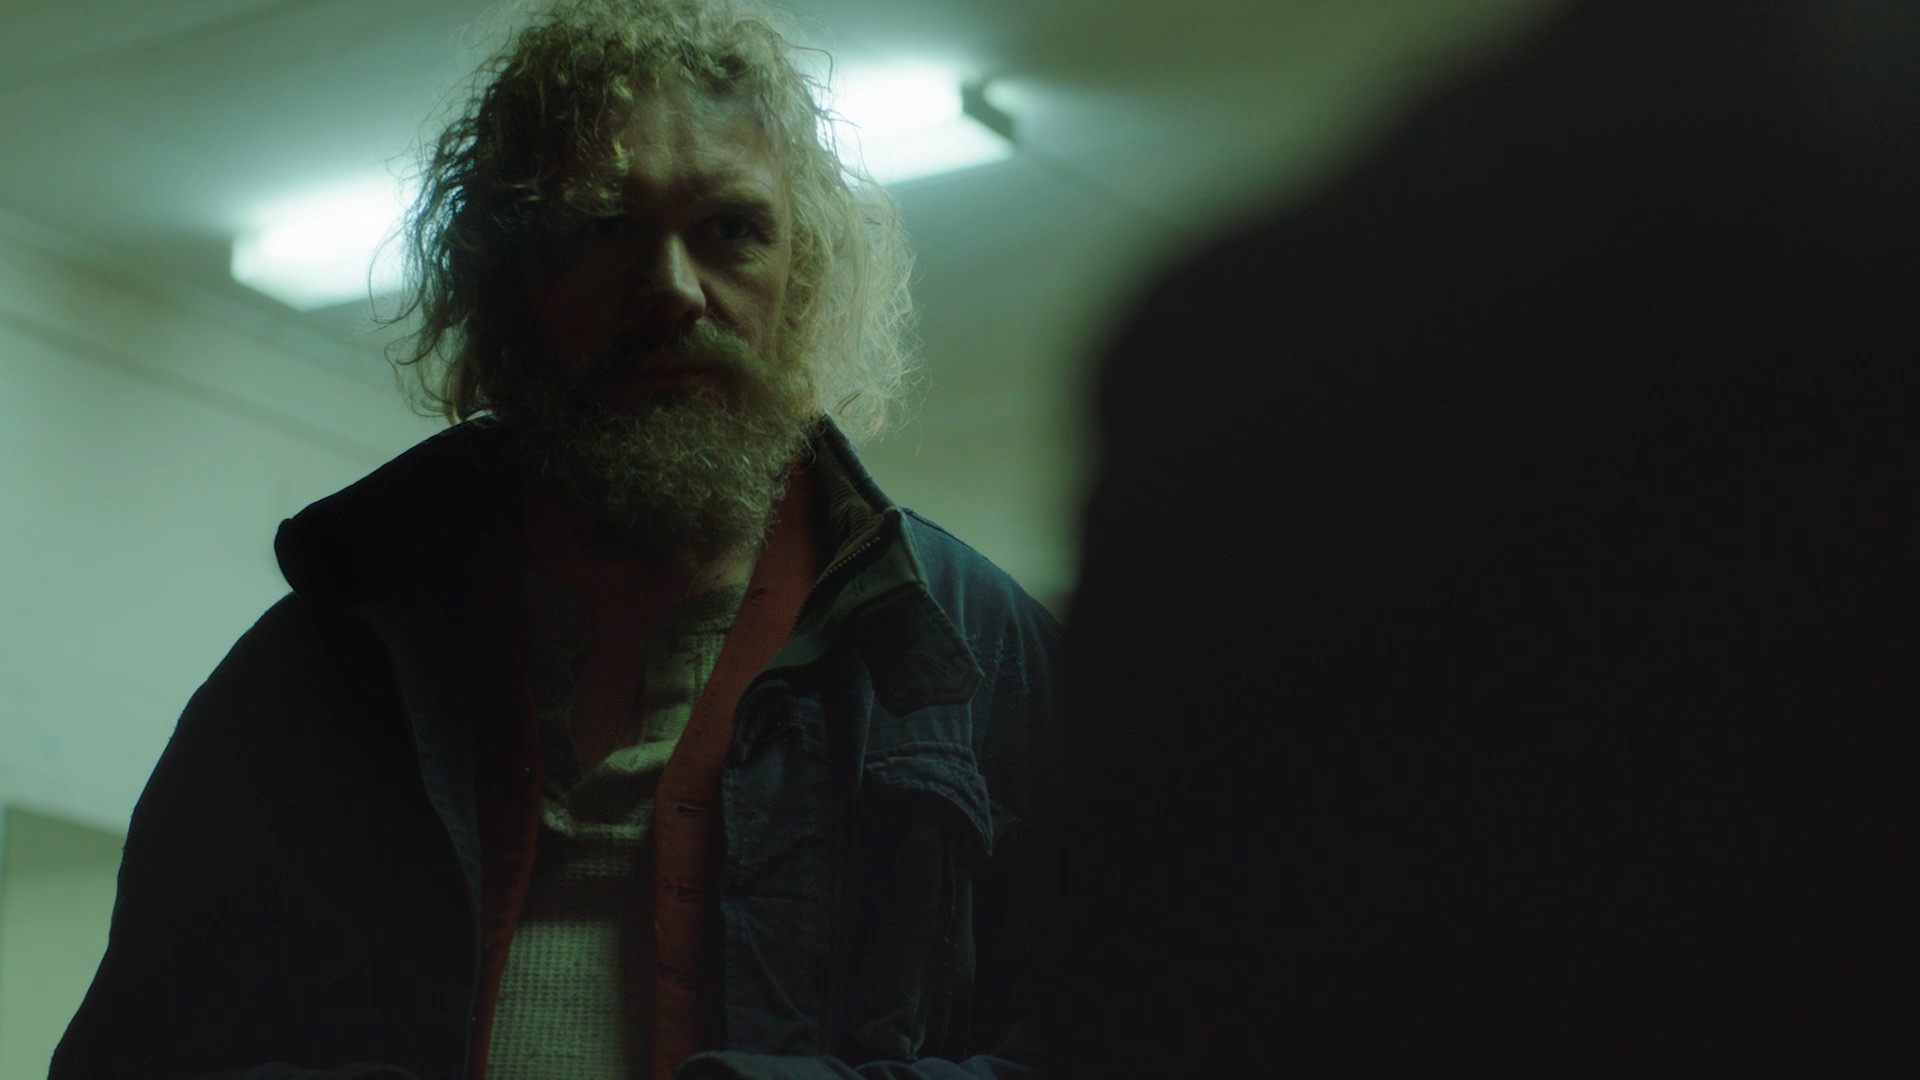
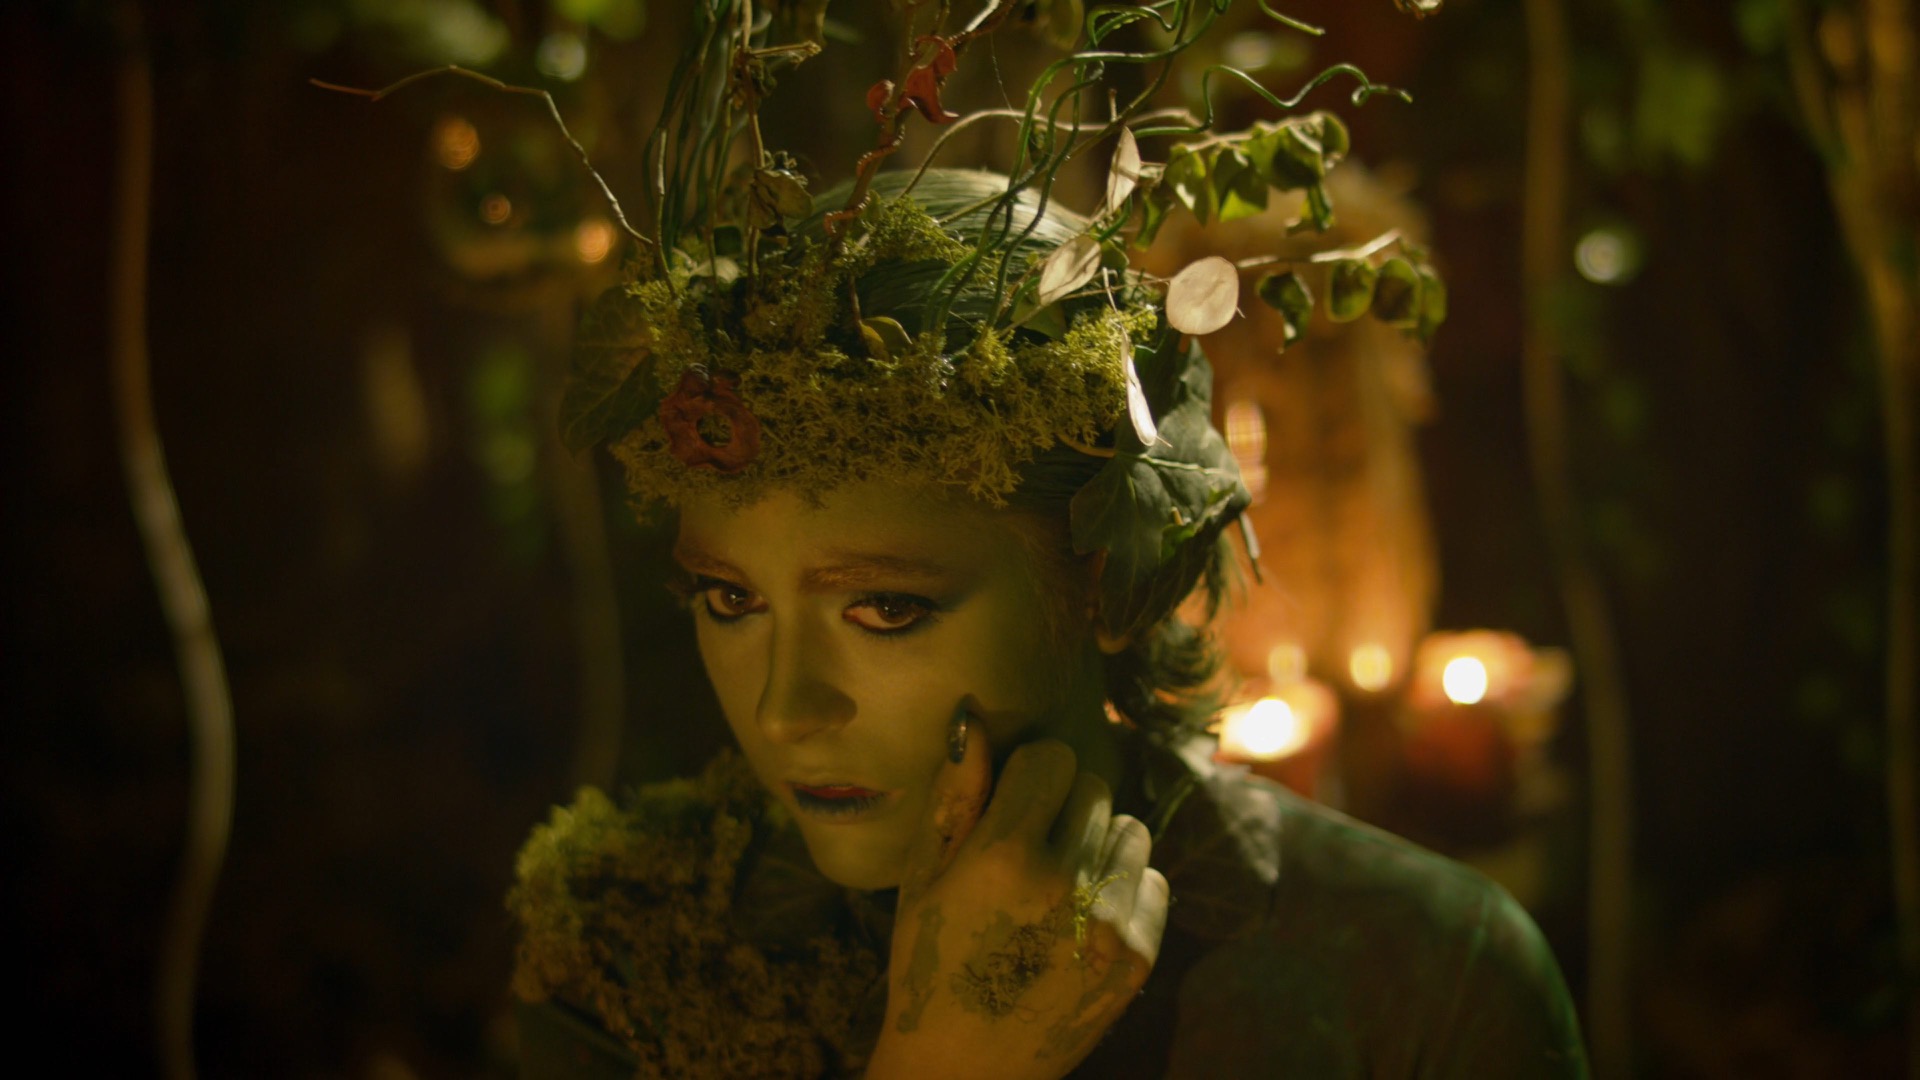
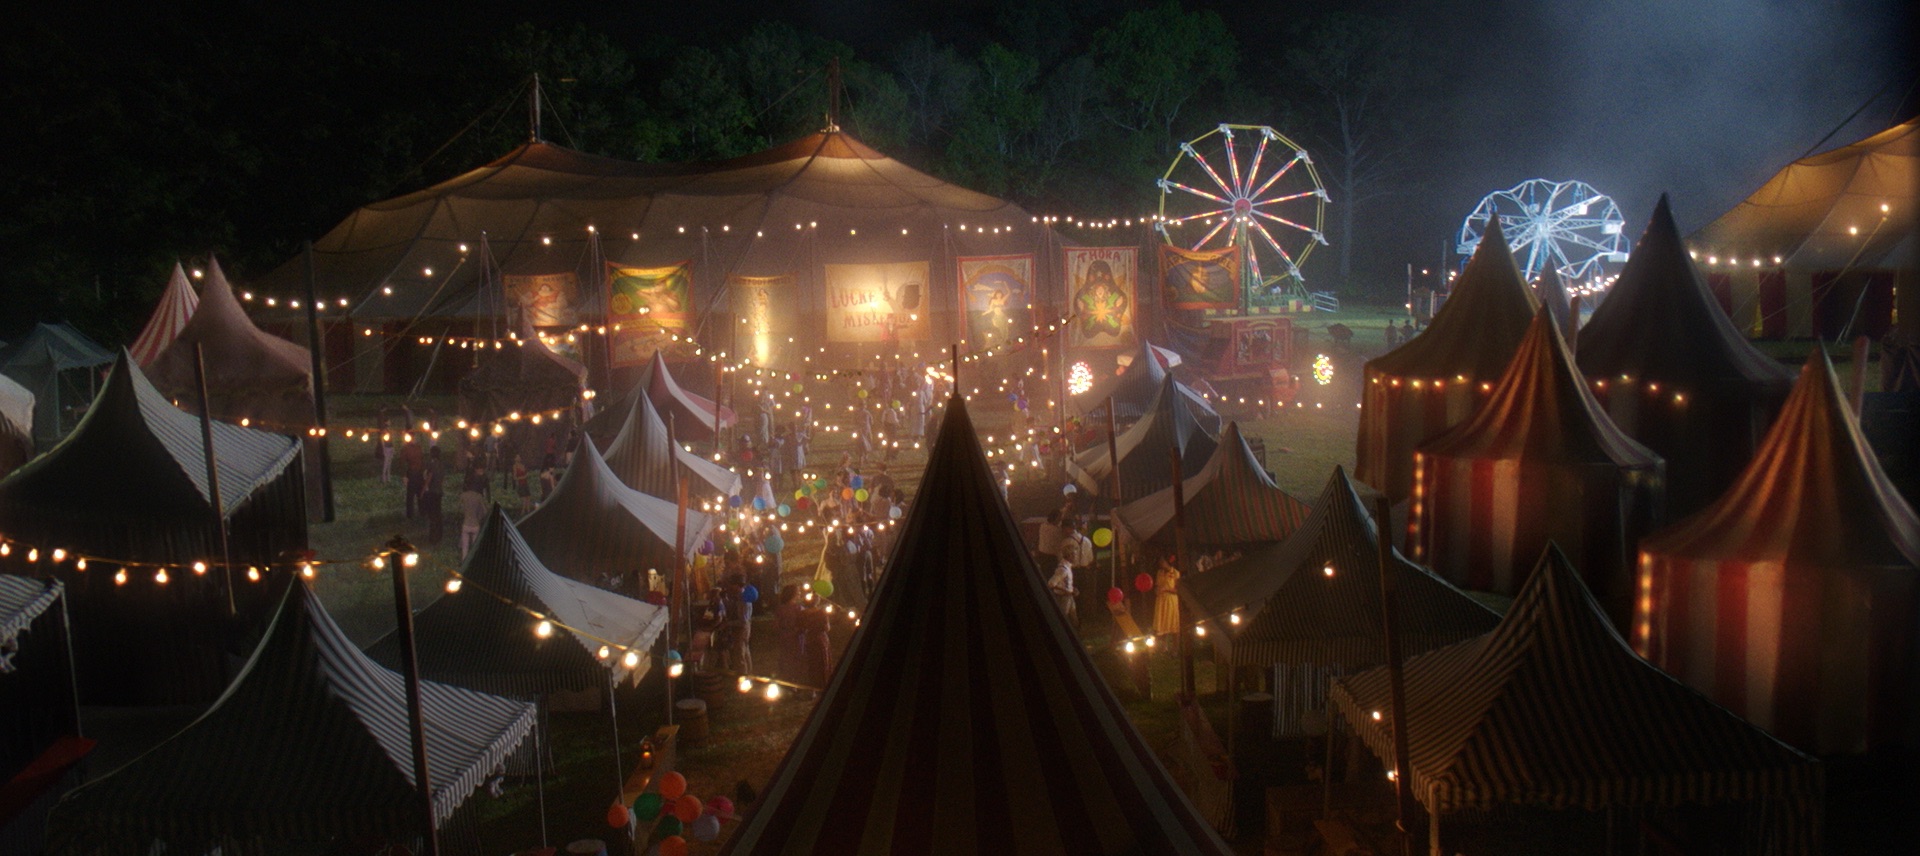
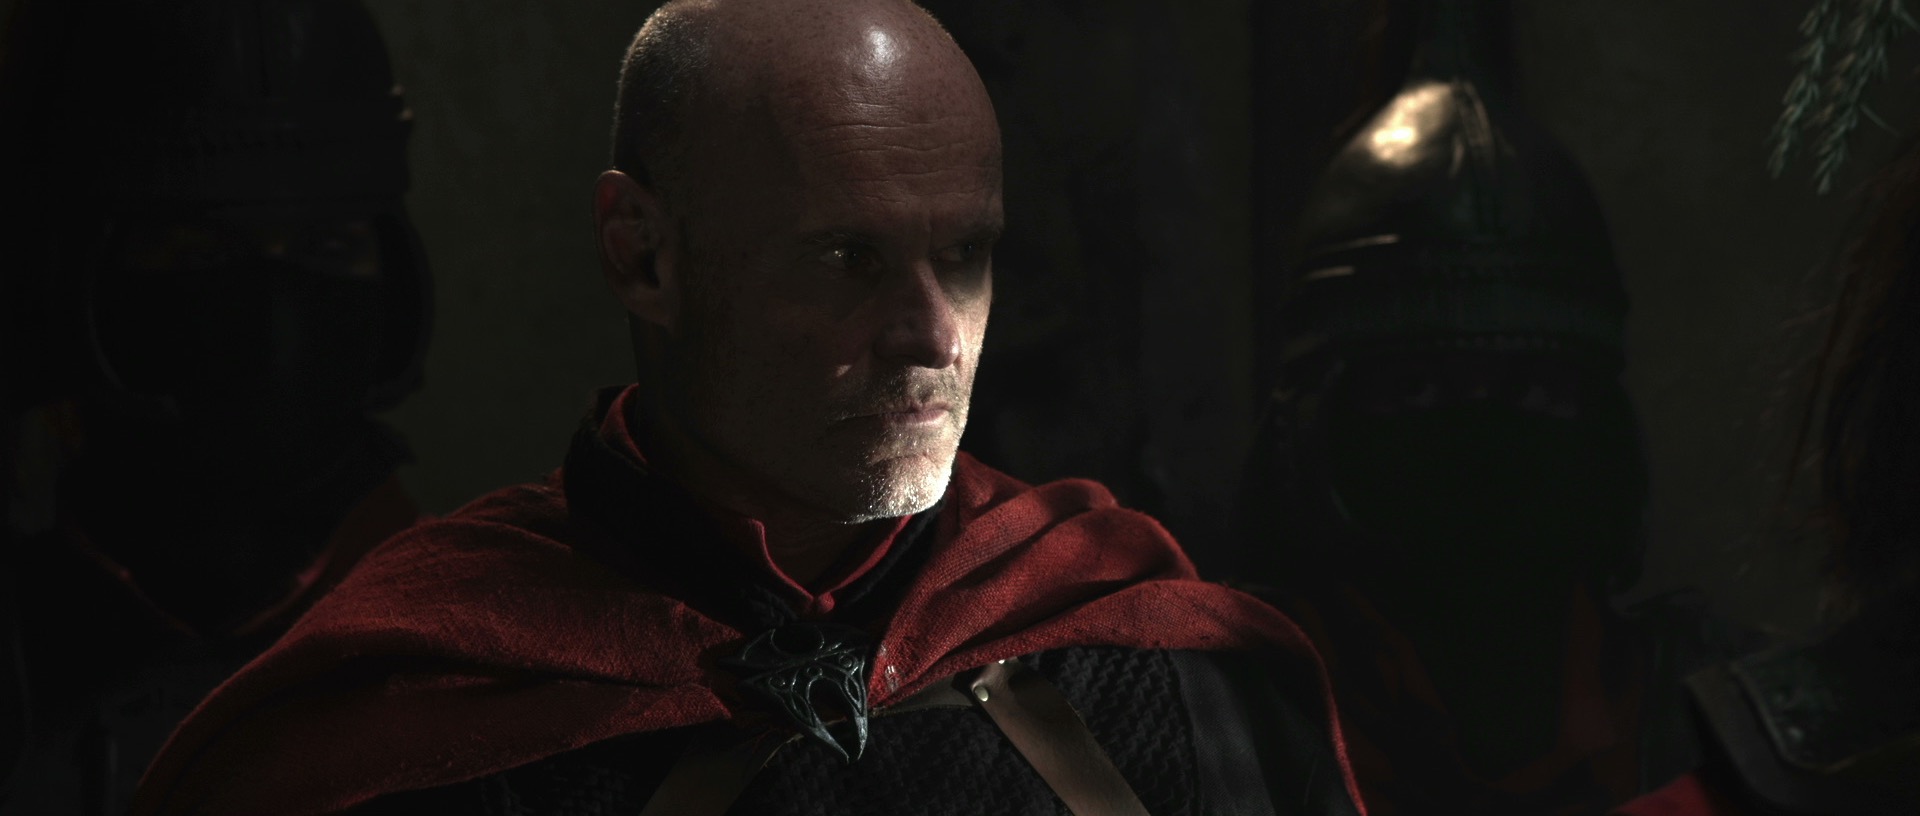
Last summer I lensed Harvey Greenfield is Running Late, a hilarious comedy feature starring Paul Richards, based on his acclaimed one-man play, soon to have its 100th performance. We had a 14-day window in Paul’s schedule for the shoot, during which we captured two thirds of the film – less than we’d hoped, but still a remarkable achievement given the resources we had and the production value we achieved. This summer we shoot the rest.


Day 15

Ten months on, we returned to the house from days 11 and 12. It’s on the verge of being sold, and this was our last chance to mop up the outstanding material here.

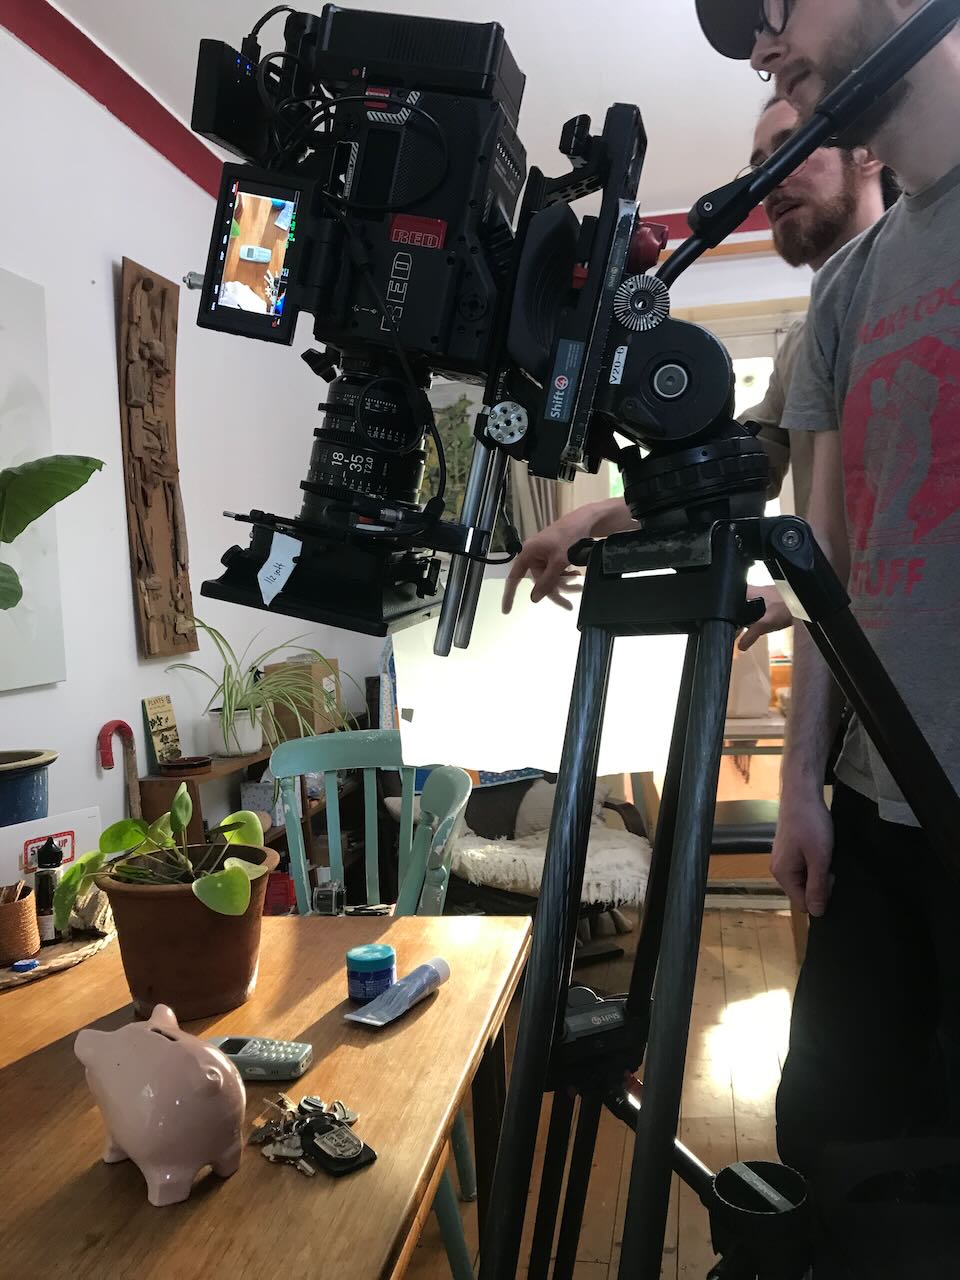
We eased into it gradually with simple inserts, recreating the look and lighting in the kitchen using Fifi’s camera notes, clips from the assembly edit, and this blog (yes, it’s not just for you, dear reader). At times like this I wish I recorded even more information – intensity and colour temperature readings for every source would be extremely useful, but is that really practical?

After traumatising Paul with a reshoot of a scene in which he gets slapped (accidentally for real the first time around) we popped outside to get a shot of him on the street, filmed through a car windscreen. Last year we captured the first monologue of the film as a oner, but with hindsight director Jonnie Howard decided it needed breaking up; this windscreen shot is one of several that he has added to illustrate the things Harvey monologues about. Proving that there are no easy shots, it took me an embarrassingly long time to eliminate annoying reflections in the glass by covering shiny parts of the dashboard with matt black tape and putting a polarising filter in the matte box.

Next we moved to the back garden for one of the film’s most complicated shots. It starts off as a two-shot of Harvey and Alice (Liz Barker) in a nighttime interior setting then – via a low-tech, Michel Gondry-style transition – becomes a single of Harvey in a daytime exterior. Gaffer Stephen Allwright and spark Jeremy Dawson built a dark box out of flags and bolton, parts of which had to swing away to let in the natural light during the transition. A light had to be panned off and a reflector swung in too, while production designer Amanda Stekly and her helpers performed their own magic with the set. By the time we got it in the can we were losing the light, but the result was well worth it.

The dusk gave us just the look we needed for a quick scene in the bedroom, then we were into full nighttime scenes. I climbed into the wardrobe to get the right camera angle – we were without our beloved 14mm lens this time around, so the locations felt a little tighter!

Later we had to recreate the lighting of the aforementioned oner, so we could shoot coverage, again with extensive reference to the camera notes, rushes and R3D metadata, this blog, and on-set photos captured on my phone. Last year we dialled a custom cyan colour into the Astera tubes and I really wish I had noted the XY or HSL numbers so that we could have dialled those into the Rayzr MC 200 that was replacing them for the pick-ups. Instead we had to judge it by eye.

It was now about midnight and we still had an important sequence in the kitchen and living room to shoot; we ultimately captured it in two set-ups and an insert. This day’s filming had seen the most extreme examples of the colour scheme I planned last year: orangey-red colours to represent Harvey’s stress, and cooler, greenish shades for calmer moments. By the end of the night it was starting to look like The Neon Demon and I was wondering if I had gone too far. I guess I will find out when it’s all cut together.


Day 16

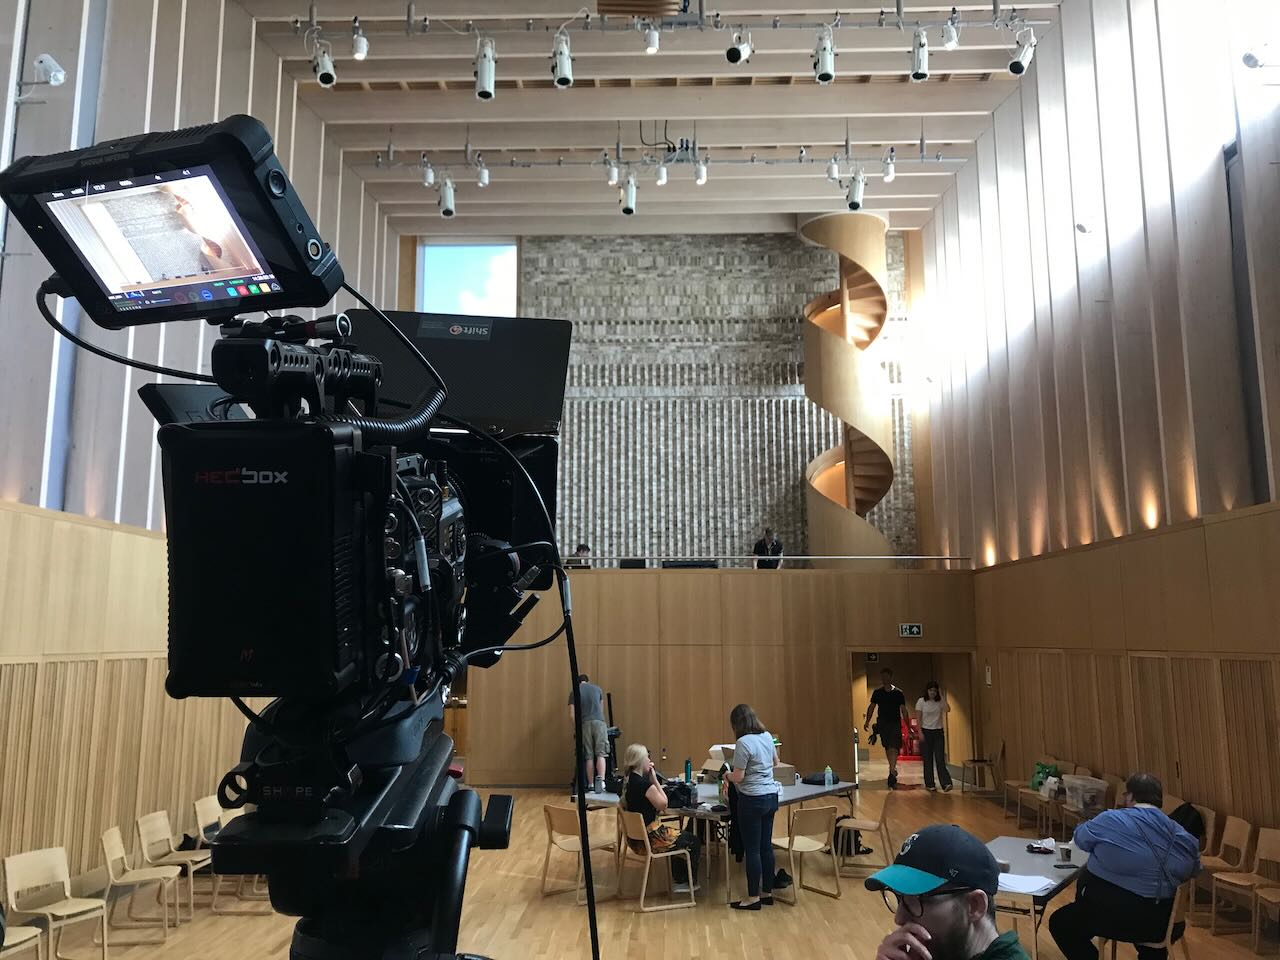
A pleasant cycle ride through Cambridge and out across a meadow brought me to the brand-new village of Eddington and the impressive Storey’s Field Centre where we would be filming the office of Harvey’s boss, Bryan (Alan Hay). First up was a fantastic shot of Harvey huffing and puffing up a spiral staircase in the centre’s main hall. The high-tech building had its lights and two layers of blinds controlled electronically, and Stephen was able to completely reshape the natural light in the huge wide shot and even put a glorious streak of light on the staircase just by pressing a few buttons. If only every location was equipped so.

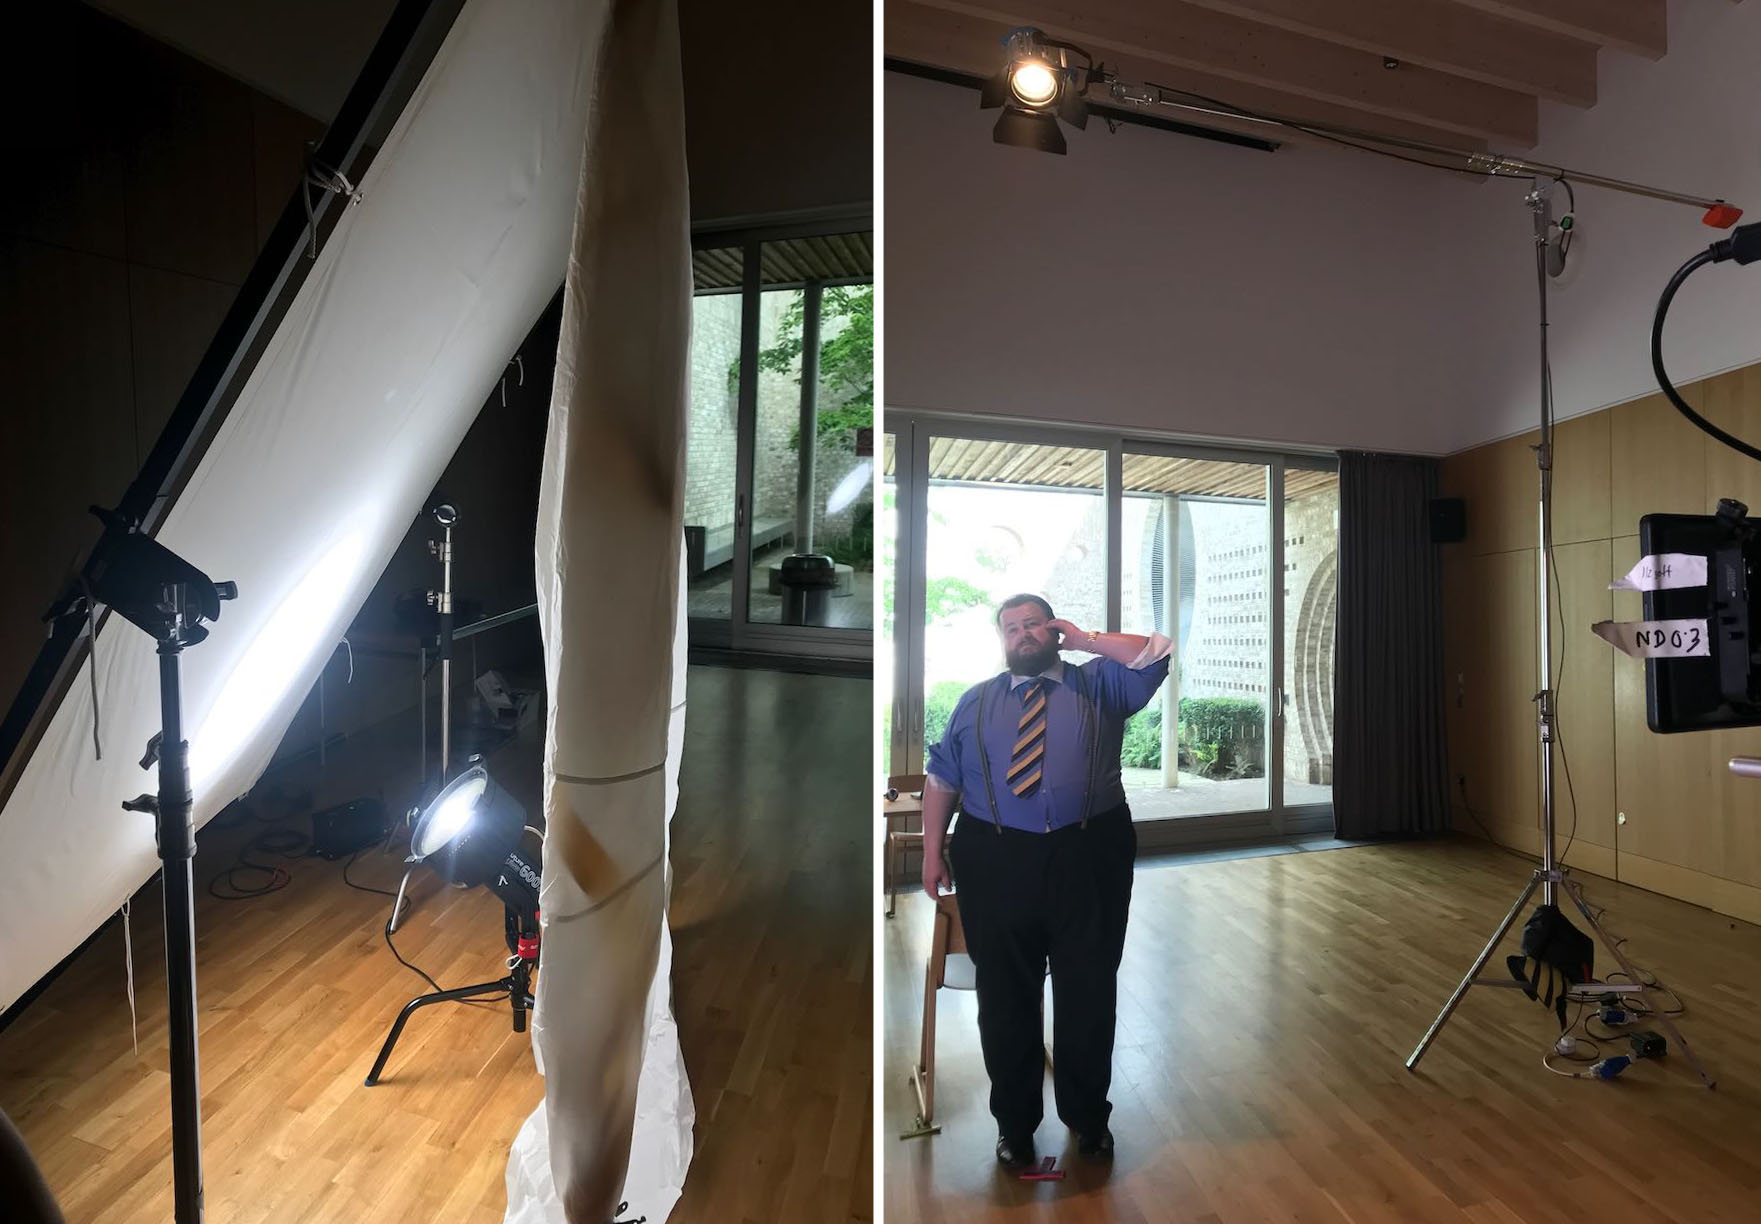
A smaller, but still obscenely spacious, hall served as Bryan’s office. French windows faced east into a beautiful courtyard garden. High windows on the opposite side of the room featured motorised blinds again, which sadly would not stop halfway, forcing us to close them completely to control the light. An overhang above the French windows, combined with the high walls of the courtyard, meant that very little natural light now entered the room. For a key, Stephen constructed a book-light by pointing an Aputure 600D up into a tilted frame of Ultrabounce and then hanging some diffusion (half grid, I think) off the top edge. We added a tungsten fresnel on a boom to give some orange, stress-themed hair-light to characters in the middle of the room.

The first shot was effectively the POV of a dartboard, so we stuck three darts to the matte box with Blu Tack. Sharp points and oily substances – exactly the things you want right next to your lens! – but it looked great.

The next couple of shots featured co-writer Raymond Howard’s baby daughter. One was a contra-zoom, captured on the 18-35mm which I zoomed manually off the barrel while pushing in on the Tango ProSup slider. The other required me to brandish the handheld camera right in baby’s face for a very long time until she eventually cried.

Then it was onto the big scene. This featured Bryan referring to a PowerPoint presentation, which meant a lighting transition as the screen came down and the projector fired up. For Harvey’s angle, with his back to the projector, we boomed an Aputure 300D behind him to simulate the projection beam, and sat a pocket LED light on the matte box to represent the bounce off the screen; these faded up as the 600D book-light and tungsten hair-light dimmed down. For Bryan’s angle the real projection light wasn’t doing enough on his face, so we “extended” the practical lamp on his desk with a small tungsten fresnel. For the wide shot we could get away with re-angling the practical so that it cast a dramatic, Citizen Kane-esque shadow from Bryan up onto the screen.

All in all, the day’s work added a huge amount of scale and humour to the movie. It was lovely to see and work with everyone again for the weekend. Next month most of us will be back for eight more days of running late.

“Harvey Greenfield is Running Late”: June 2022 Pick-ups

What is a Diopter in Cinematography?

If you’re a fan of early Steven Spielberg films, you’ve probably heard of split diopter shots (also spelt “dioptre” in the UK). Brian de Palma used them a lot too, and Robert Wise’s Star Trek: The Motion Picture is absolutely riddled with them.

A split diopter allows half the image to be focused at one distance and half at another. Shallow depth of field is sought after by many filmmakers today, but it wasn’t always so popular. Sometimes a director or DP wanted both characters in a deep two-shot simultaneously in focus, and slow film stock and/or lenses meant that it wasn’t possible to just stop down the iris.

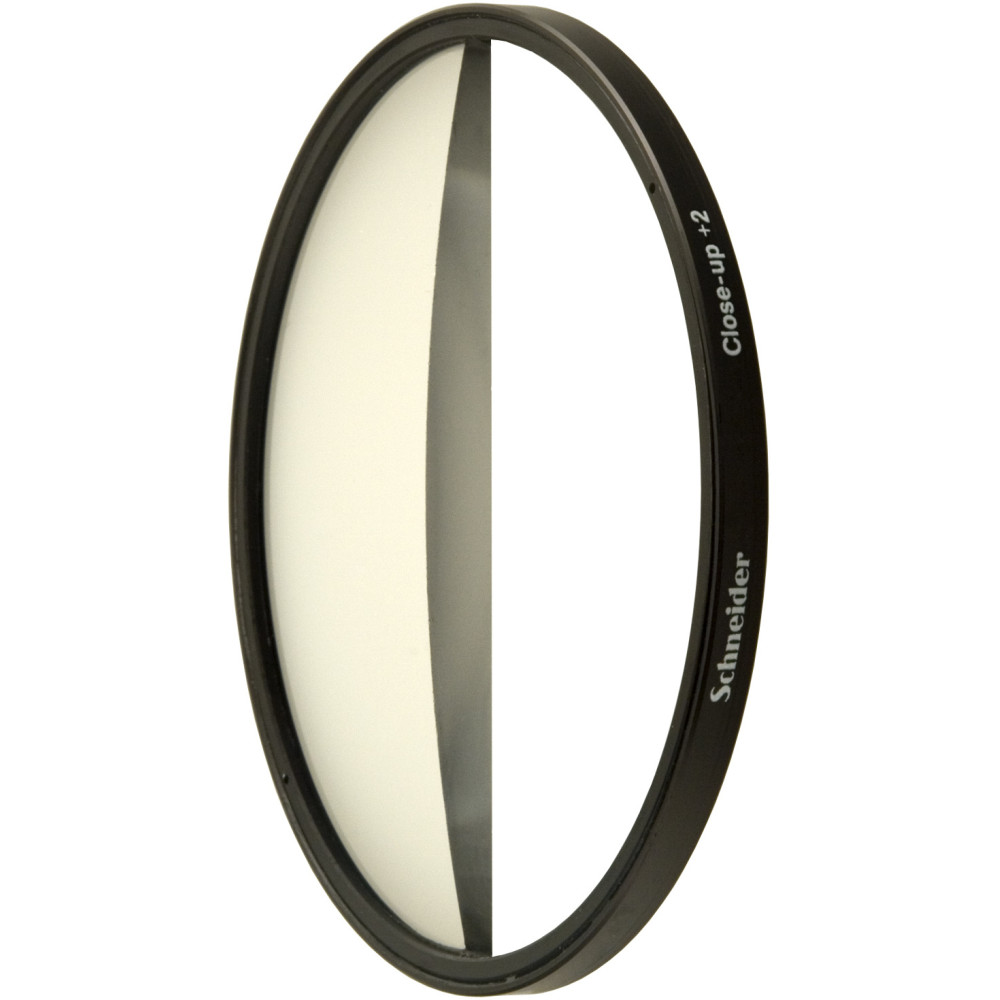
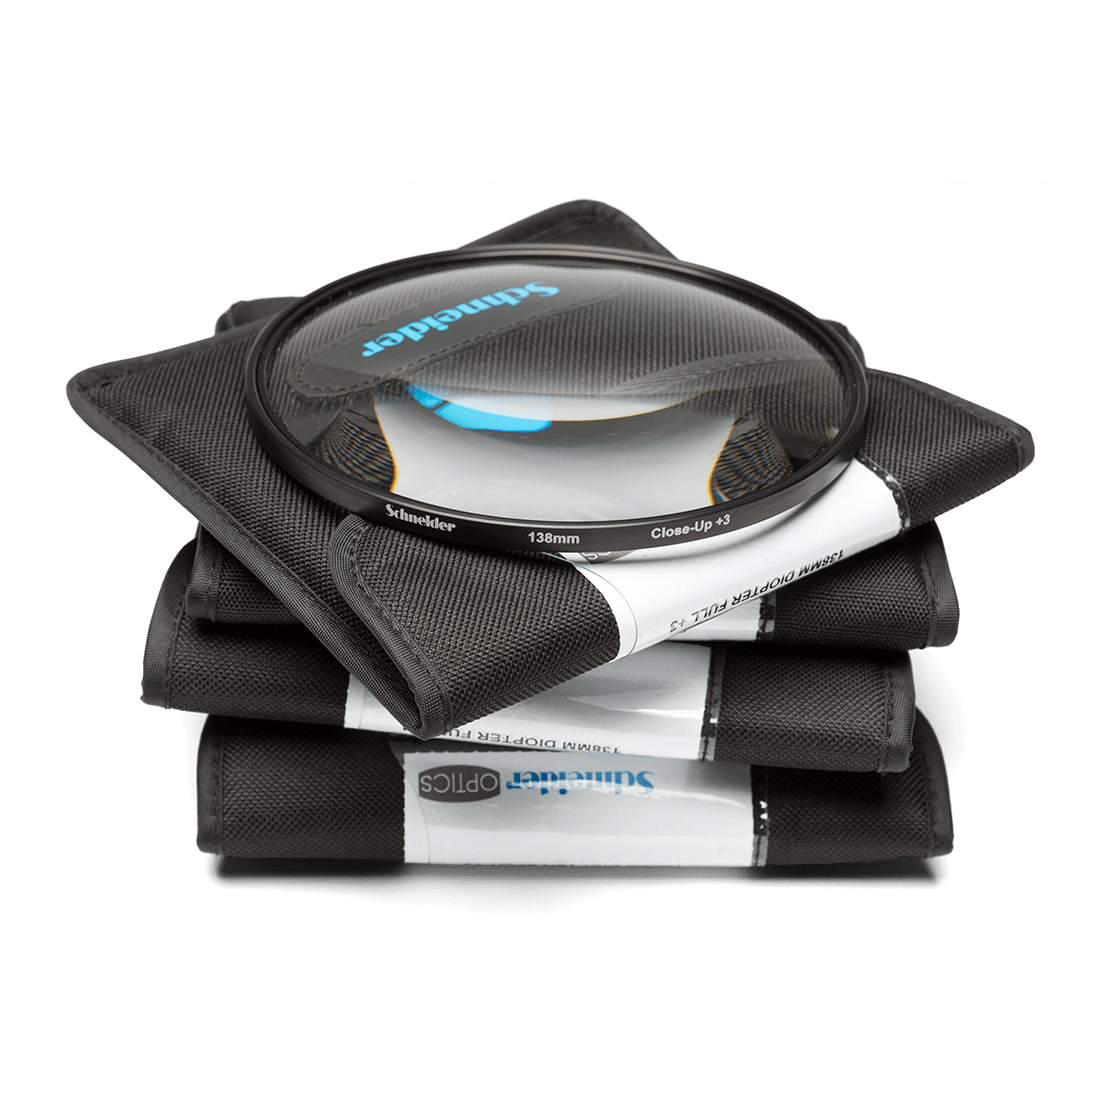
So what is a split diopter (a.k.a. split-field diopter)? It’s a convex lens of a semi-circular shape that can be slotted into your matte box. Light passing through this lens is converged so that it focuses closer, while light passing through the empty half of course goes unaltered to the main lens.

Bog-standard diopters are available too, with no missing half, enabling the entire image to be focused closer than normal. (In stills photography they are sometimes called close-up lenses or macro filters.) These are especially useful with anamorphic and zoom lenses, which tend to have greater close-focus distances than spherical primes. There’s no stop loss, so you don’t have to compensate with more light.

I carried a set of diopters with me on Hamlet and we used them for a couple of shots with the vintage Cooke Cinetal 25-250mm zoom (CF: 5’6″) when I was shooting quite tight and quite close to the talent.

So that’s what the physical object is. But a diopter is also a unit of measurement. A typical set of physical diopters (full or split) contains ½, 1, 2 and 3 strengths. What do those numbers mean?

A diopter is defined as a reciprocal metre, or 1 over the focal length. It’s the same unit used to define prescriptions for glasses. The important thing in cinematography is what effect a diopter of a given strength has on your minimum and maximum focus distances. Apps like pCAM Pro will work these out for you, but let’s do the maths ourselves because it’s my blog and I said so.

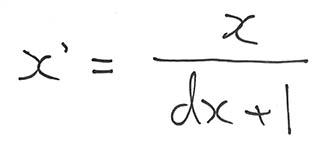
The formula for minimum focal distance is

where

  • x is the normal minimum focus of the lens (in metres),
  • x’ is the new minimum focus,
  • and d is the strength of the diopter.

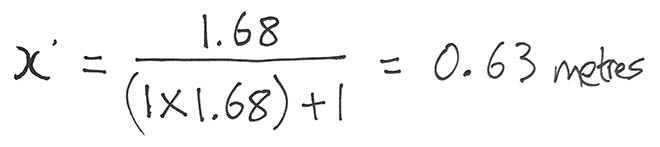
Let’s take my Cooke Cinetal as an example. The 5’6″ close focus in metres is 1.68, so with a number 1 diopter…

… or with a number 3 diopter…

Diopters can be stacked; simply add the strengths together and then drop that number into the formula, so in the above case we’d have a total of 4 diopters (diopters the units, not diopters the objects!) which would produce a close focus of 0.22m. Keep the strongest diopter closest to the camera when stacking.

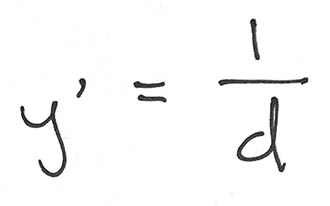
You have to be careful that you don’t reduce your maximum focal distance too much and find you can’t hold focus on a character as they move away. Your new maximum focal distance y’ (when the main lens is set to infinity) is

So that would be 1m with a number 1 diopter! Pretty restrictive, huh? A number 3 diopter gives you a maximum focal distance of 0.33m, even worse! I remember having to cheat Ian McKellen (CLANG!!!) a little closer to camera when we did a diopter shot on Hamlet, so that we could pull focus to him from a foreground actor’s hands.

If you bear that caveat in mind, however, a set of diopters is a very useful thing to have with you.

What is a Diopter in Cinematography?

“Robin Hood: Prince of Thieves” Retrospective

“I’m going to carve your heart out with a spoon!”

“Why a spoon, cousin? Why not an ax or a…?”

“Because it’s dull, you twit! It’ll hurt more!”

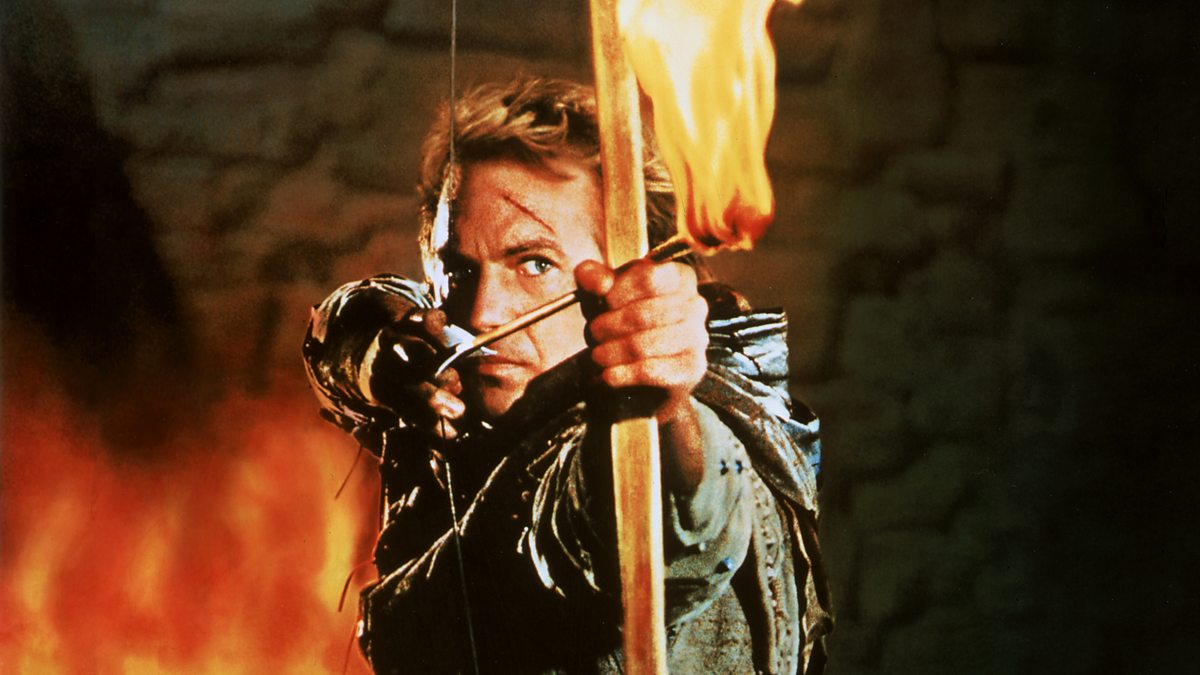
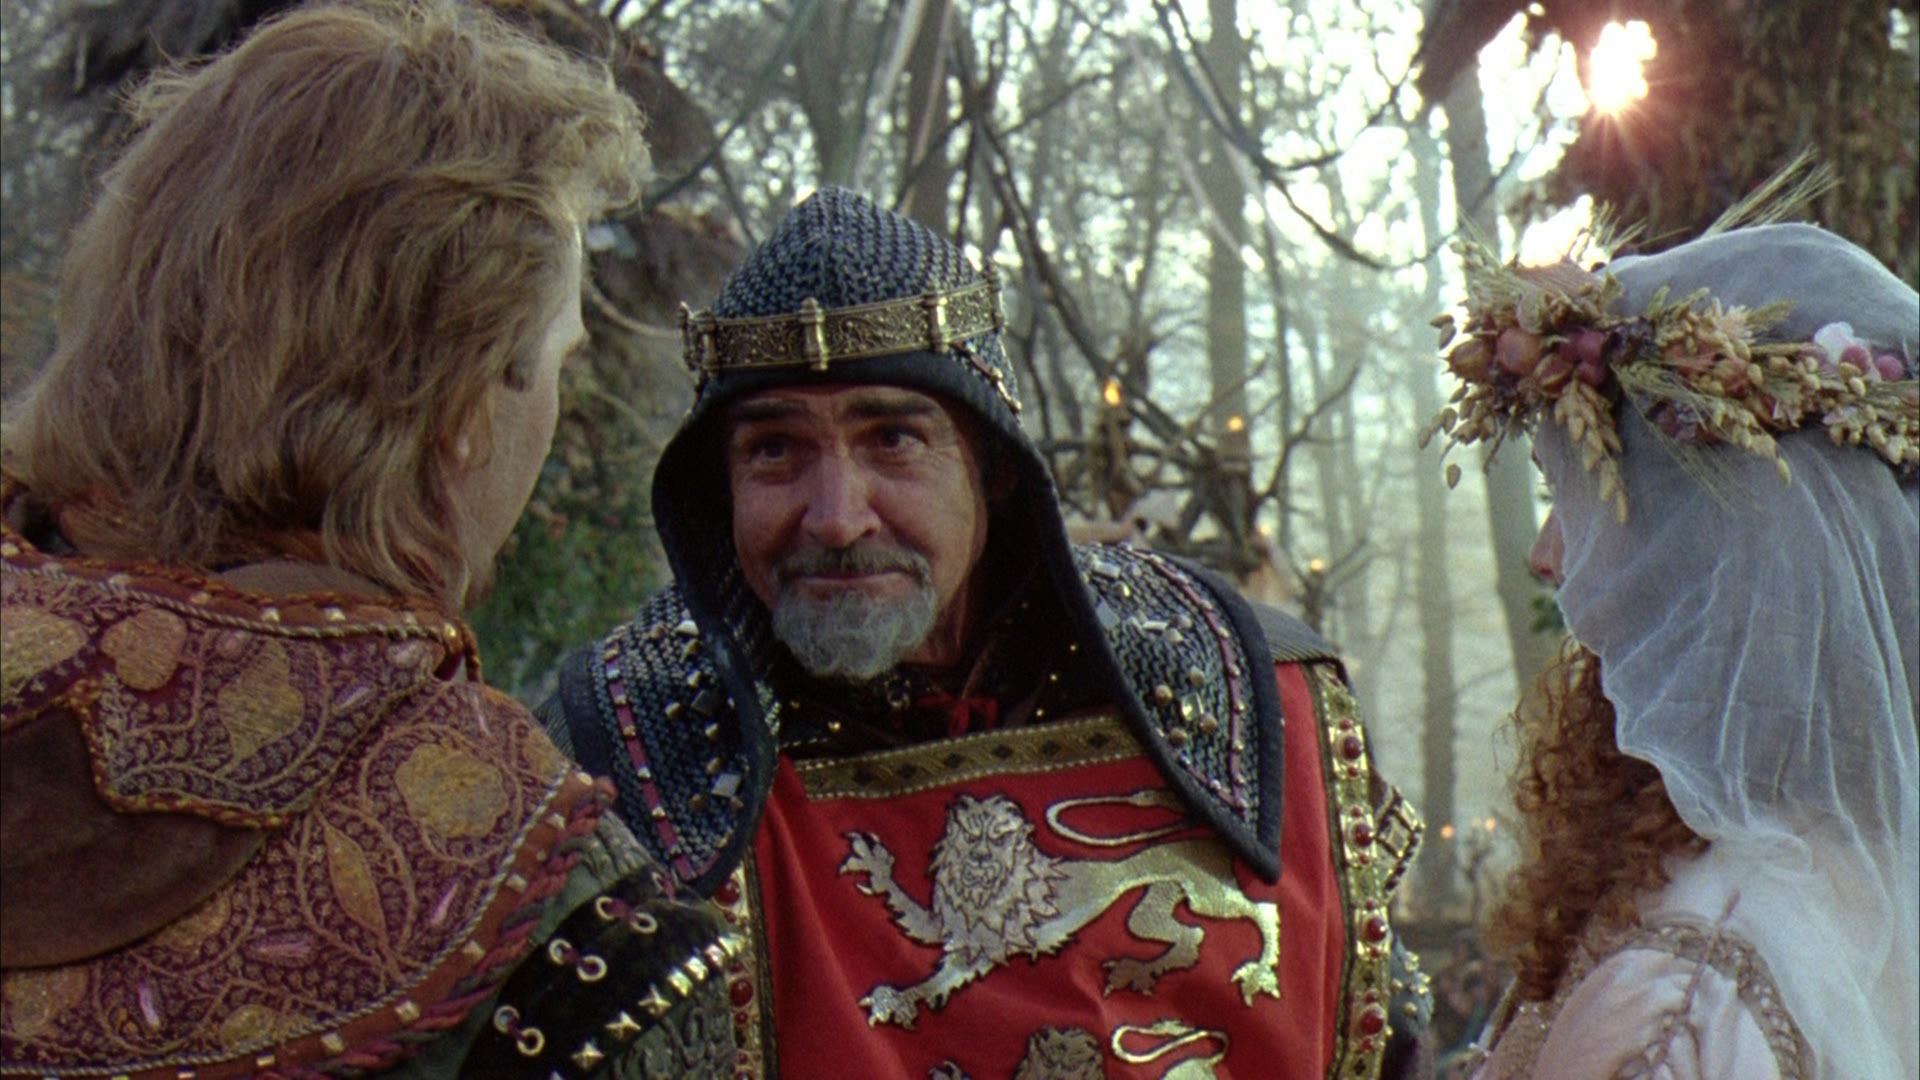
Alan Rickman’s scenery-chomping Sheriff of Nottingham may be widely considered the best thing in Robin Hood: Prince of Thieves, but there is plenty more to enjoy in this classic action romp even now, 31 years on from its release.

“There was gold on the page,” claimed executive producer David Nicksay of the screenplay by Pen Densham and John Watson, which he read in early 1990. Both Fox and Tri-Star were working on their own Robin Hood movies, so Nicksay’s comparatively small company, Morgan Creek Productions, had to move fast to avoid being buried at the box office.

Director Kevin Reynolds was hired for his previous collaborations with Kevin Costner, having given the star his big break on 1988’s Fandango as well as directing part of Dances With Wolves. Following a scant ten weeks of prep, Reynolds launched into shooting Prince of Thieves against the ticking clock of the approaching winter.

The English weather was as cooperative as you might imagine, but no-one could have predicted that unusual winds would cause Heathrow to divert all its flights over the Buckinghamshire forest standing in for Sherwood, playing havoc with the sound. 

Kevin Costner – who had coincidentally been offered and turned down Fox’s Robin Hood – arrived from the Dances With Wolves editing room just three days before filming began. His very first scene required him to jump out of a rowboat on the Sussex coast and wade to shore, even as his woollen cloak soaked up half his bodyweight in water. Later he spent four days immersed in the freezing waters of Aysgarth Falls, North Yorkshire, for the sequence in which his character battles Little John.

The crew also shot in Wiltshire, Northumberland and even Carcassonne in France, but never set foot in Nottinghamshire. The film’s most derided geographical anomaly is the stop-off at Hadrian’s Wall, which somehow falls on Robin’s route from Dover to Nottingham. 

The character’s accent is also geographically challenged, partly due to a disagreement between the two Kevins about whether an English Costner would be distracting for audiences. The result is best summed up by the man himself on the DVD commentary: “Well, there’s my dumb-ass accent. It was something I wanted to do, and I wasn’t very good at it.”

Test screenings were positive but showed that Rickman’s sheriff – whose part had been beefed up by Reynolds in last-minute rewrites – was more popular than Costner’s hero. The producers insisted on redressing the balance in the edit, leading to Reynolds storming out and a 2009 director’s cut that reinstated Rickman’s extra material. (The two Kevins got over their differences in time for 1995’s Waterworld… and I’m sure they’re both very glad about that.)

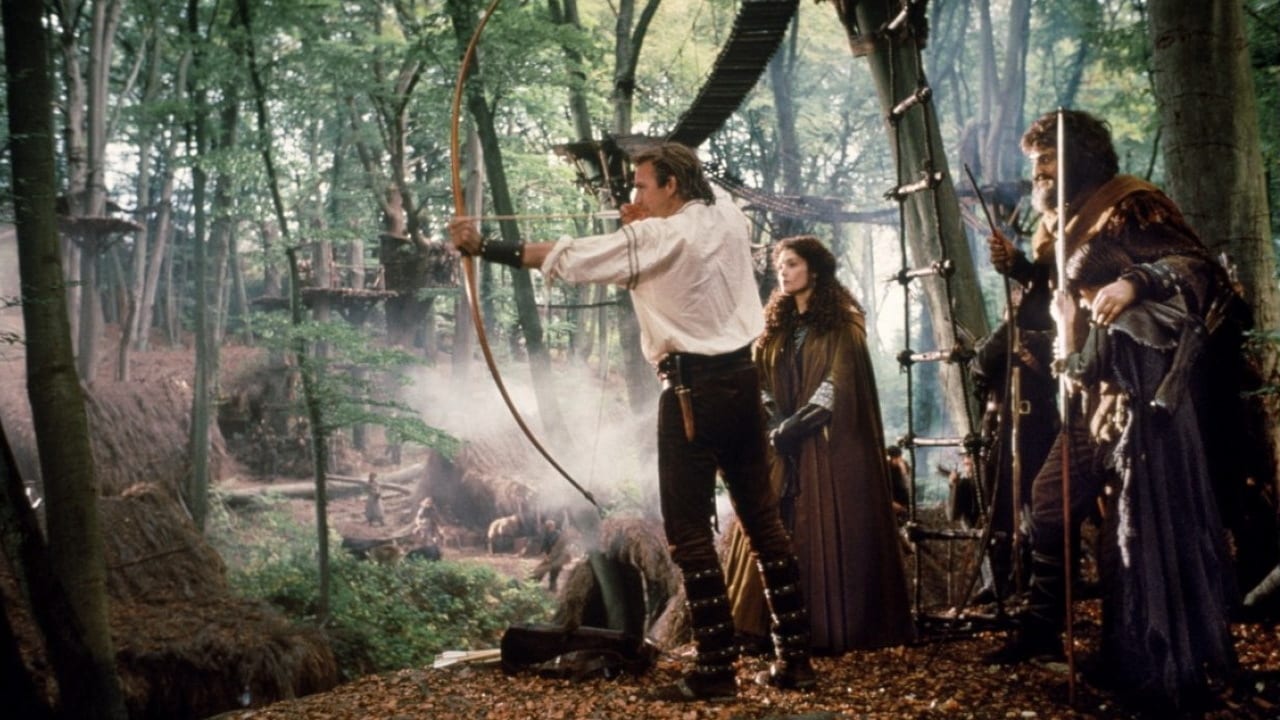
Legendary cinematographer Doug Milsome ensured that Prince of Thieves’ visuals were beyond reproach. To capture sweeping views of the forest hideout he mounted a Wescam – a camera stabiliser typically used for helicopter shots – to a truss erected between the trees.

The famous arrow POV shot, hurtling through the woods, took a week to plan and execute. A static arrow was blue-screened over a travelling forest plate photographed at a stately one frame per second. Originally intended just for the trailer, the shot caused such a buzz amongst the public that it was written into the film itself.

Another highlight is the score by Michael Kamen, who based his love theme on an actual medieval tune. For the tie-in single, Bryan Adams and his keyboardist Mutt Lange took that same theme and added lyrics, turning it into the power ballad “(Everything I Do) I Do It For You”. The track garnered an Oscar nomination and won a Grammy, and spent 16 weeks at the top of the UK charts, a run still unbeaten today.

The achievements of the film itself were more mixed. Alan Rickman bagged a Bafta for his spirited turn as the Sheriff of Nottingham, while Kevin Costner won a Golden Raspberry for Worst Actor, and Christian Slater was nominated for Worst Supporting Actor. The lacklustre reviews did no harm to the box office though; Robin Hood: Prince of Thieves was the second-highest grossing film of 1991, surpassed only by Terminator 2: Judgment Day. 

And what about the other Robin Hood films that Reynolds and co had raced to beat? Tri-star’s project never left the starting blocks, while Fox’s effort, starring Patrick Bergin and Uma Thurman and exec-produced by Die Hard’s John McTiernan, went straight to television. In fact the only film to challenge Prince of Thieves for many years was the Mel Brooks comedy, Robin Hood: Men in Tights. This parody is surely the ultimate evidence of Prince of Thieves’ cultural impact.

“Robin Hood: Prince of Thieves” Retrospective

How Does a DP Choose Lenses?

There is a huge range of glass available to filmmakers today – everything from vintage cinema lenses from the 60s to modern stills glass made for DSLRs. How can a DP choose which is right for their production?


Mount

The first thing to take into account is the lens mount on your camera. If it is PL mount you will have access to a huge range of cinema lenses, some of them with decades of movie history. Other mounts such as Canon EF also provide plenty of choice, but mainly glass aimed at stills rather than cinematography. Some lenses can be mount-converted, some cameras can switch mounts, and adapters are available too, but it’s important to know upfront which lenses are going to be ruled out by your camera choice and which aren’t.


Spherical or Anamorphic

Test of a 30mm Cooke Xtal anamoprhic lens

Anamorphic lenses squeeze the image horizontally, to be unsqueezed in post-production. The results are a wider picture, distinctive oval bokeh (out of focus areas) and often lens flares with horizontal streaks in them. This look is very cinematic, but anamorphic lenses tend to be bigger, heavier, more expensive, need more light than and don’t focus as close as their spherical counterparts, so think carefully before you choose them.


Speed

The speed of a lens – i.e. its maximum aperture – is one of its most important characteristics. A fast prime lens might open to T1.4, while a zoom or anamorphic prime might only go to T4. That’s three stops’ difference, equating to eight times more light required by the T4 lens. That can have a big impact on the size and number of lights you need. The ISO you plan to shoot at will also factor into this, of course.

Also consider how deep or shallow a depth of field you want. If you’re after super-blurry backgrounds, only a fast lens will give you those (though shooting on a large-format camera will help). This brings us to…


Bokeh

A quick bokeh test of a Sigma Cine 50-100mm zoom lens using fairy lights

Bokeh is the appearance of out-of-focus areas in your image. It is most noticeable in small highlights such as fairy lights, which generally turn into big circles when they’re out of focus. Just how big and how smoothly circular depends on the lens and the aperture settings. Some lenses will have more geometric bokeh, octagons for example, which is a result of the shape and number of iris blades within. The bokeh may look rounder when the lens is wide open and more geometric when it is stopped down, or vice versa. It will also have a different shape at the edges of frame. What this comes down to is what look you feel is most aesthetically pleasing or appropriate for your story.


Lens Flares

Testing the flare of a Cooke Century 32mm

Another aesthetic choice. How much does the lens flare when light shines straight into it? What about when the light is just out of frame? Is there much veiling flare – an overall milkiness to the image? Do you like the colours and shapes of the flare? Do they feel natural or intrusive, and which is most fitting for the tone of your piece?


Sharpness

This is an important factor with the resolutions of cameras ever increasing. Any decent lens will be sharp at T5.6, but the more you open the iris the more you might start to see the image softening, especially when it is wide open (or conversely when it is stopped down to its minimum aperture). Check also the edges of frame, which may be less sharp than the centre, especially on a vintage or anamorphic lens. If you plan to do a lot of central framing then soft edges may not matter, or may even help to draw the viewer’s eye to the subject, but if you plan to put your subjects at the extreme sides of the frame then you should be careful what lenses you select.


Breathing

A lens is said to breathe when pulling the focus makes the image zoom in or out slightly. It is most noticeable with zoom lenses, some stills lenses and older glass. If you are racking back and forth between the characters in a deep two-shot, lens breathing can become very distracting.


Other Considerations

Other things to look out for are diffraction spikes, the star effect that happens around bright light sources, and colour rendition, which can vary slightly from lens to lens. If you expect to be physically close to your subject you should note the minimum focus distance of the lenses, which will be different for each length in the series. Also consider what focal lengths your chosen lens series contains – are there enough different lengths to cover everything you hope to shoot, especially at the shortest and longest ends of the range?

If you’re still not sure where to start, test footage and comparison videos of different lenses can be found online, like this one I made in 2017:

Better still, ask a rental house if you can come in for a day and shoot your own tests.

See also:

How Does a DP Choose Lenses?

How a Film’s Budget Affects the Role of the DP

A Micro Cinema Camera for a micro budget, on “Above the Clouds”, fittingly kept in place by a wallet

I recently read a document – I think it was published by the BFI – that gave some definitions of the different scales of feature film productions: low-, micro- and no-budget. While admitting that there is no universal agreement on figures for these categories, the document suggested the following:

  • No budget: up to £50,000
  • Micro budget: up to £250,000
  • Low budget: up to £1,000,000

I have shot features in all three of these categories (and at least one above them, presumably ranking as a medium-budget film) so I thought it would be interesting to look at the differences between them as experienced by the director of photography. I’m going to focus mainly on the contrast between no- and low-budget, because micro-budget is often very similar to no-budget in every respect except that the cast and crew are paid.
 

Prep

The biggest difference is in pre-production. On a low budget the DP tends to get a period of paid prep time equal to the number of shooting days, so if there are five weeks of filming, you get five weeks of prep beforehand. On a no-budget film you are likely to get a single day of location recces and nothing else.

Some of the things you’d do during your low-budget prep period will have to get done in your spare time on no budget: lining up your crew, watching any reference films the director suggests, making an equipment list. You won’t be conducting any camera tests (but you probably won’t get much of a choice about the camera anyway – see below). The chances are that you will not be reading and breaking down the script as carefully. You may cobble a few images together as references, but you will not be creating an extensive mood board. You might read through a shot list which the director sends you, but you won’t be giving a great deal of advance thought to shot ideas of your own. Inevitably a no-budget project will be less of a collaboration between director and DP than a low-budget one.

Your relationship with the gaffer will also be different. On a low budget you can expect to have at least one good recce of every location with them, maybe two, and lengthy meetings where you can really hash out how each scene will be lit. On no-budget films they might never be able to attend a recce, and all you get is a Zoom call where you screen-share your location photos and talk in general terms about the look. Lighting has to be much more improvised on the day.


Crew

No-budget vs. medium-budget camera dept.

This brings us onto crew. Most no-budget producers plan for a single camera assistant and a one-person lighting team, and don’t really think about who is going to back up the footage. On a low budget you can expect to get a 1st AC, 2nd AC, camera trainee, data wrangler, grip, gaffer, best boy or girl, and spark, though you may have to push the line producer for one or two of these. There is usually some allowance for spark dailies too when bigger scenes are shot.

When we wrap for the day on a low-budget film, I have no problem walking straight off set because I know there is a full camera and lighting crew to take care of packing away the gear. I can spend what remains of my energy reviewing the dailies, meeting with the director and planning for upcoming scenes. On a micro-budget film I will help pack up because the small crew needs all the hands it can get, but then I probably won’t get to the other stuff. So I might not spot the things in the rushes that I could improve on, or be as well prepared for the next day as I could have been.


Equipment

Equipment, of course, is hugely budget-dependent. Many no-budget films are unable to hire anything at all, relying on gear owned by the director and/or DP, and other bits begged, borrowed or scrounged. Emphasis is often placed on having a decent camera, with everything else neglected – cheap lenses, no filters, few of the accessories that make the camera dept run smoothly, and very limited lighting.

Getting kit around is often very challenging for no-budget producers. Just hiring a van and finding someone to drive it are big deals when you have no money. Sending someone to a rental house in London to collect the gear – even if renting can be afforded – is a logistical headache which a low-budget production doesn’t think twice about. This is why gear owned by crew members is so attractive to no-budget producers, because they don’t have to worry about how it gets to set, or the insurance.

On a low-budget production you will draw up your camera list maybe a couple of weeks into prep, with the assistance of the 1st AC, and the gaffer will handle the lighting list. Usually the first drafts of these lists will prove too expensive when the line producer has got the quotes back from the rental house, and you’ll have to cut a few things, but you’ll get most of what you wanted.

How a Film’s Budget Affects the Role of the DP

“Citizen Kane” Retrospective

For five decades in a row, Citizen Kane was voted the greatest film of all time in Sight & Sound’s International Critic’s Choice poll. Although pipped to the top spot by Vertigo in the latest poll, there are still plenty of filmmakers, academics and fans who consider actor-director Orson Welles’ 1941 debut the very pinnacle of cinematic accomplishment.

The spoilt son of a hotelier and a concert pianist, Orson Welles found fame in 1938 when he directed and starred in a radio adaptation of The War of the Worlds which was so convincing that thousands thought it was real and fled their homes. Not long afterwards, RKO, one of the five big studios of Hollywood’s Golden Age, offered a generous two-picture deal to the 24-year-old who had never made a film before and didn’t much want to.

12 months and two abandoned concepts later, Welles teamed with screenplay-fixer Herman J. Mankiewicz, whose past projects included The Wizard of Oz, to script the rise and fall of a powerful newspaper magnate based on William Randolph Hearst. The pair went through five drafts, making changes for creative, financial and legal reasons (hoping to avoid a lawsuit from Hearst).

The story’s fictionalised press baron, Charles Foster Kane, dies in the opening scene, but his mysterious last word – “Rosebud” – spurs a journalist to investigate his life. The journalist’s interviews with Kane’s friends and associates lead the viewer into extended flashbacks, an innovative structure for the time.

Welles himself took the title role, spending many hours in the make-up chair to portray Kane from youth to old age. Inventive, non-union make-up artist Maurice Seiderman developed new techniques to create convincing wrinkles that would not restrict the actor’s facial expressions. Sometimes Welles would be called as early as 2:30am, holding production meetings while Seiderman worked on him.

“I was just as made-up as a young man as an old man,” Welles said later, noting that he wore a prosthetic nose, face-lifting tape and a corset to satisfy both his own vanity and the demands of the studio for a handsome leading man.

The young auteur – who directed part of the film from a wheelchair after fracturing his ankle – was not easy to work with. Editor Robert Wise said: “He could one moment be guilty of a piece of behaviour that was so outrageous it would make you want to tell him to go to Hell and walk off the picture. Before you could do it he’d come up with some idea that was so brilliant that it would literally have your mouth gaping open, so you never walked. You stayed.”

Welles was keen for his film to look different from others, drawing on his experience of directing theatre. The leading DP of the time, Gregg Toland, jumped at the chance to break the rules. Influenced by German Expressionism, he was not afraid of silhouettes and bright shafts of light.

Welles cast many of his Mercury Players – a theatre repertory company he had set up himself – who he knew could handle long takes. He insisted on a large depth of field and often shot from low angles to mimic the experience of a theatre-goer, specifically someone in the front row looking up at the cast. This required many of the sets to have ceilings, unconventionally, and these were made of fabric in some cases so that the boom mic could record through them.

Special effects were used extensively to reduce set-building costs and avoid location shooting wherever possible. One example is a crane-up from a theatre’s stage to a pair of technicians watching from the flies above; the middle part of the shot is a matte painting, bridging the two live-action set pieces. In another scene, the camera travels through a neon sign on the roof of a building and down through the skylight; the rooftop is a miniature, the sign is rigged to split apart as the camera moves through it, and a flash of lightning eases the transition into the live-action set.

“We were under schedule and under budget,” Welles proudly stated in a 1982 interview. He cheated though, because he asked the studio for ten days of camera tests, citing his inexperience behind the lens, and used those ten days to start shooting the movie!

When Citizen Kane was premiered in May 1941, William Randolph Hearst was not fooled by the script tweaks and took the title character as an unflattering portrayal of himself. While he was unable to suppress the film’s release – though not for the want of trying – a smear campaign in his publications ensured it only enjoyed moderate success and that Welles would never have the filmmaking career that such a startling debut should have sparked. It wasn’t until the 1950s that Citizen Kane received the critical acclaim which it still holds today, 81 years on.

“Citizen Kane” Retrospective

My New Online Course: “Cinematography for Drama”

My new second online cinematography course, Cinematography for Drama, is now out on Udemy. The course explains the role of a DP on set, from collaborating with the director in blocking the cast and choosing the camera angles, to lighting the scene with depth and mood.

Across the four modules of the course, I set up and shoot scenes in common contemporary locations: domestic banter in a sunny kitchen, a monologue in a dark bedroom, an awkward first date in a restaurant, and a walk-and-talk in an outdoor bar. Watch me try out different blocking and camera angles to get the most depth and interest in the frame, create movement using a slider and a gimbal, and work out the coverage needed to complete the scene. Then learn the secrets of cinematic lighting as I set up LED, tungsten and practical lights to create a look. Witness the camera rehearsals through to the final take, then sit back and watch the final edited scene. Every step of the way, I explain what I’m doing and why, as well as the alternatives you could consider for your own films.

This is a follow-up to my best-selling Udemy course Cinematic Lighting, which has over 3,600 students and a star rating of 4.5 out of 5. Here is some student feedback:

  • “Excellent. Informative and enjoyable to watch.” – 5 stars – David C.
  • “Thank you to Neil and his team for a fantastic course that gives a real insight into the thought process of a cinematographer.” – 5 stars – Dan B.
  • “Some great tips in this. Really enjoyed watching the decisions being made as and when the scenario is actually being lit, some good workarounds and nice in depth descriptions to why he’s doing what he is. Genuinely feels like your taking in some advice on set! Well worth taking the time to do this!” – 5 stars – Ed L.

You can get the new course for a special low price by using the code IREADTHEBLOG before April 2nd.

My New Online Course: “Cinematography for Drama”

Cinematography in a Virtual World

Yesterday I paid a visit to my friend Chris Bouchard, co-director of The Little Mermaid and director of the hugely popular Lord of the Rings fan film The Hunt for Gollum. Chris has been spending a lot of time working with Unreal, the gaming engine, to shape it into a filmmaking tool.

The use of Unreal Engine in LED volumes has been getting a lot of press lately. The Mandalorian famously uses this virtual production technology, filming actors against live-rendered CG backgrounds displayed on large LED walls. What Chris is working on is a little bit different. He’s taking footage shot against a conventional green screen and using Unreal to create background environments and camera movements in post-production. He’s also playing with Unreal’s MetaHumans, realistic virtual models of people. The faces of these MetaHumans can be puppeteered in real time by face-capturing an actor through a phone or webcam.

Chris showed me some of the environments and MetaHumans he has been working on, adapted from pre-built library models. While our friend Ash drove the facial expressions of the MetaHuman, I could use the mouse and keyboard to move around and find shots, changing the focal length and aperture at will. (Aperture and exposure were not connected in this virtual environment – changing the f-stop only altered the depth of field – but I’m told these are easy enough to link if desired.) I also had complete control of the lighting. This meant that I could re-position the sun with a click and drag, turn God rays on and off, add haze, adjust the level of ambient sky-light, and so on.

Of course, I tended to position the sun as backlight. Adding a virtual bounce board would have been too taxing for the computer, so instead I created a “Rect Light”, a soft rectangular light source of any width and height I desired. With one of these I could get a similar look to a 12×12′ Ultrabounce.

The system is pretty intuitive and it wasn’t hard at all to pick up the basics. There are, however, a lot of settings. To be a user-friendly tool, many of these settings would need to be stripped out and perhaps others like aperture and exposure should be linked together. Simple things like renaming a “Rect Light” to a soft light would help too.

The system raises an interesting creative question. Do you make the image look like real life, or like a movie, or as perfect as possible? We DPs might like to think our physically filmed images are realistic, but that’s not always the case; a cinematic night exterior bears little resemblance to genuinely being outdoors at night, for example. It is interesting that games designers, like the one below (who actually uses a couple of images from my blog as references around 3:58), are far more interested in replicating the artificial lighting of movies than going for something more naturalistic.

As physical cinematographers we are also restricted by the limitations of time, equipment and the laws of physics. Freed from these shackles, we could create “perfect” images, but is that really a good idea? The Hobbit‘s endless sunset and sunrise scenes show how tedious and unbelievable “perfection” can get.

There is no denying that the technology is incredibly impressive, and constantly improving. Ash had brought along his Playstation 5 and we watched The Matrix Awakens, a semi-interactive film using real-time rendering. Genuine footage of Keanu Reeves and Carrie-Anne Moss is intercut with MetaHumans and an incredibly detailed city which you can explore. If you dig into the menu you can also adjust some camera settings and take photos. I’ll leave you with a few that I captured as I roamed the streets of this cyber-metropolis.

Cinematography in a Virtual World

Slit-scan and the Legacy of Douglas Trumbull

Award-winning visual effects artist Douglas Trumbull died recently, leaving behind a body of memorable work including the slit-scan “Stargate” sequence from 2001: A Space Odyssey. But what is slit-scan and where else has it been used?

Slit-scan has its origins in still photography of the 1800s. A mask with a slit in it would be placed in front of the photographic plate, and the slit would be moved during the exposure. It was like a deliberate version of the rolling shutter effect of a digital sensor, where different lines of the image are offset slightly in time. 

The technique could be used to capture a panorama onto a curved plate by having the lens (with a slit behind it) rotate in the centre of the curve. Later it was adapted into strip photography, a method used to capture photo-finishes at horse races. This time the slit would be stationary and the film would move behind it. The result would be an image in which the horizontal axis represented not a spatial dimension but a temporal one.

Such a collision of time and space was exactly what Stanley Kubrick required for the Stargate sequence in 2001: A Space Odyssey, when astronaut Dr David Bowman is treated to a mind-warping journey by the alien monolith.

Douglas Trumbull, then only 25, had already been working on the film for a couple of years, first producing graphics for the monitors in the spacecraft (all done with physical photography), then detailing and shooting miniatures like the moon bus, creating planets by projecting painted slides onto plexiglass hemispheres, and so on, eventually earning a “special photographic effects supervisor” credit.

“The story called for something that represented this transit into another dimension,” Trumbull said of the Stargate in a 2011 interview with ABC, “something that would be completely abstract, not something you could aim a camera at in the real world. 

“I had been exposed to some things like time-lapse photography and what is called ‘streak photography’,” he continued, referring to long exposures which turn a point light source into a streak on film.

This germ of an idea developed into a large and elaborate machine that took five minutes to shoot a single frame. 

The camera was mounted on a special tracking dolly driven by a worm gear to ensure slow, precise movement. While exposing a single frame it would creep towards a large black mask with a 4ft-high slit in it. Behind the slit was a piece of backlit artwork mounted on a carriage that could move perpendicularly to the camera. This artwork – an abstract painting or a photo blow-up of flowers or coral – slid slowly to the right or left as the camera tracked towards it. Remember, this was all just to capture one frame.

The resulting image showed a wall of patterned light stretching into the distance – a wall generated by that slit streaking across the frame.

For each new frame of film the process was repeated with the artwork starting in a slightly different position. Then the whole strip of film was exposed a second time with the camera adjusted so that the slit now produced a second wall on the other side of frame, creating a tunnel.

The Stargate sequence was unlike anything audiences had seen before, and one of the many people inspired by it was the BBC’s Bernard Lodge, who was responsible for creating Doctor Who’s title sequences at the time. For early versions he had used a ‘howl-around’ technique, pointing a camera at a monitor showing its own output, but when a new look was requested in 1973 he decided to employ slit-scan.

Lodge used circles, diamonds and even the silhouette of Jon Pertwee’s Doctor rather than a straight slit, creating tunnels of corresponding shapes. Instead of artwork he used stressed polythene bags shot through polarising filters to create abstract textures. The sequence was updated to incorporate Tom Baker when he took over the lead role the following year, and lasted until the end of the decade.

An adaptation of slit-scan was used in another sci-fi classic, Star Trek: The Next Generation, where it was used to show the Enterprise-D elongating as it goes to warp. This time a slit of light was projected onto the miniature ship, scanning across it as the camera pulled back and a single frame was exposed. “It appears to stretch, like a rubber band expanding and then catching back up to itself,” visual effects supervisor Robert Legato told American Cinematographer. “This process can only be used for a couple of shots, though; it’s very expensive.”

Thanks to CGI, such shots are now quick, cheap and easy, but the iconic images produced by the painstaking analogue techniques of artists like Douglas Trumbull will live on for many years to come.

Slit-scan and the Legacy of Douglas Trumbull