14 months ago production began on the comedy feature Harvey Greenfield is Running Late. Most of the editing is done, and yesterday a reduced crew assembled to shoot one final scene and few odd shots to plug holes.
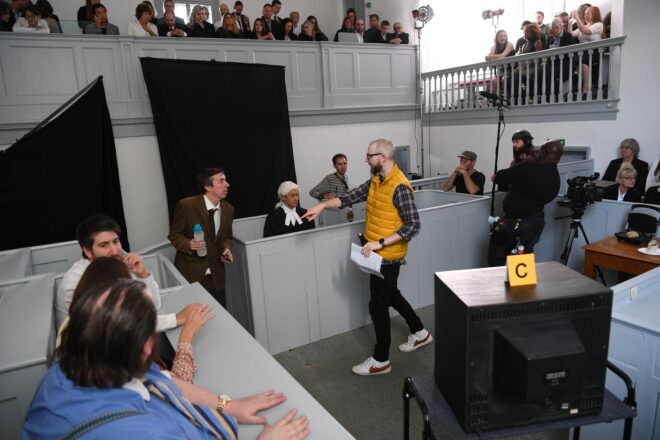
The crew may have been reduced, but the cast was bigger than it’s ever been. Jonnie and the team managed to pack out Sessions House, a historic courthouse in Ely, with about 60 extras to watch Harvey (Paul Richards) present a case against Choice. Also not reduced was the shot list, an ambitious 21 set-ups to be accomplished in just a few hours. I’m not sure how many we got in the end, but we covered everything so we must have got close.
Since the budget was a dim and distant memory, I shot on Jonnie’s own Canon C200 and lenses. An important part of Harvey‘s visual grammar is the use of wide lenses for stressy scenes, with a 14mm having been the apotheosis throughout production. For this reason, but also for speed, we shot almost everything in the courthouse on Jonnie’s Samyang 14mm, swinging to an L-series 24-70mm zoom right at the end. We couldn’t get hold of a Soft/FX filter to perfectly match with principal photography, but we were able to borrow a 1/8th Black Pro Mist to provide a little diffusion at least.
For lighting, Jeremy set up his Aputure 300D and 600D in an upper gallery at the side of the courtroom, firing into the wall to provide a soft side-light throughout the room. We’d hoped not to have to tweak it much from shot to shot, but it did prove necessary, not least because we needed to look up to that gallery in a couple of set-ups. I wanted to use a lot of negative fill to bring down the ambient bounce off the walls, which had evidently been repainted at some point in the recent past by someone with an Ideal Home subscription. But the 14mm doesn’t leave much room to hide things, so there was a limit to the contrast we could introduce. Adjusting the blinds over the main windows – whenever they were out of frame – became one of our major methods of controlling the light.
Once Harvey had rested his case we moved out into the carpark to get Bryan’s “manic wides”. These grotesque caricatures of the supporting characters, imagined by Harvey at the climax of the film, required each actor, in this case Alan, to deliver key lines from their earlier scenes while I shoved the 14mm lens in their face and dutch-tilted like crazy. We recreated the day-for-night shot grabbed with the limo back on Day 13, covering the car in black drapes and firing the 300D with Urban Sodium gel through a side window – orange being another symbol of stress in the movie.
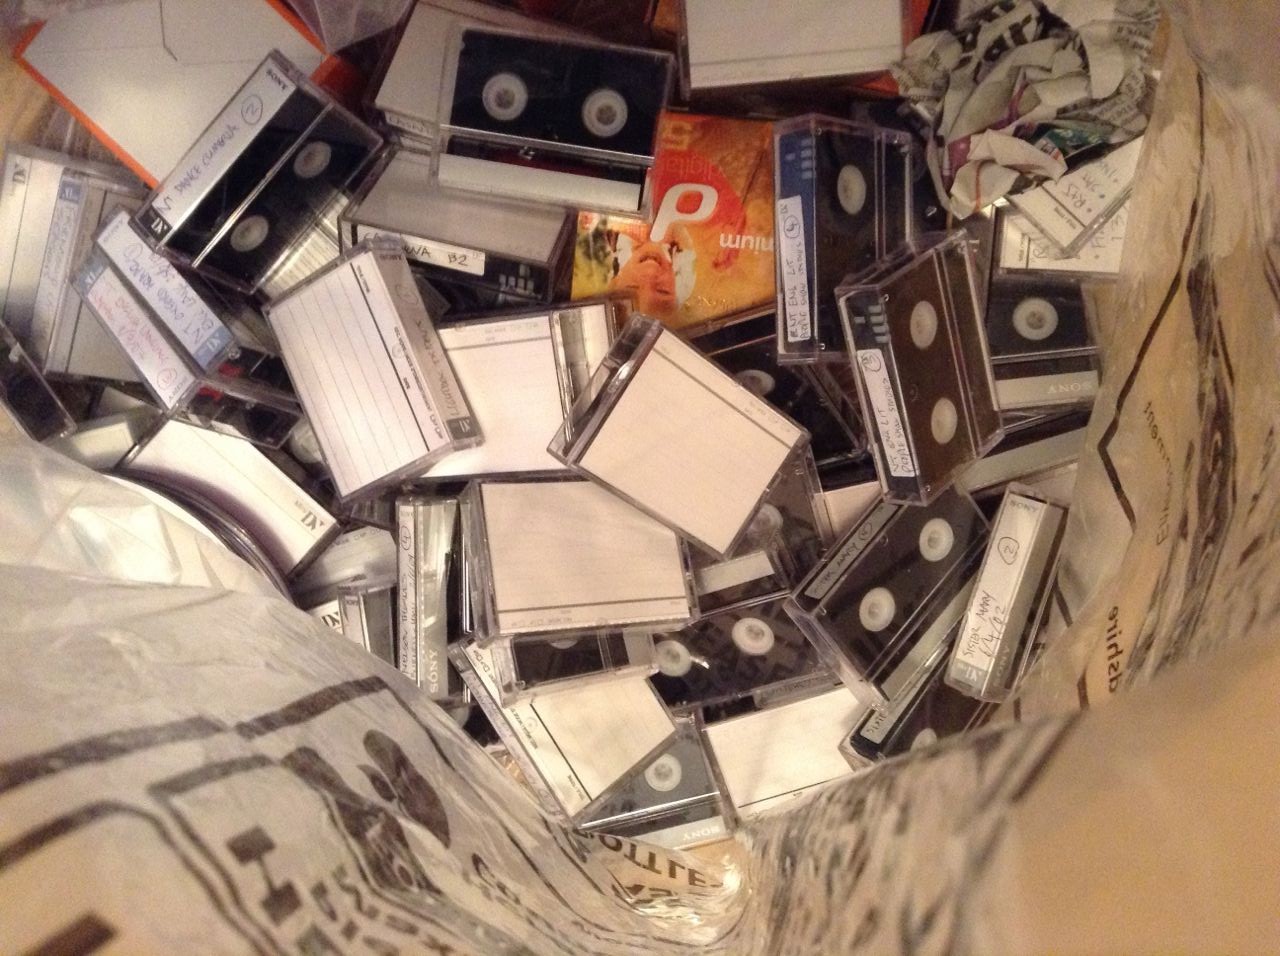
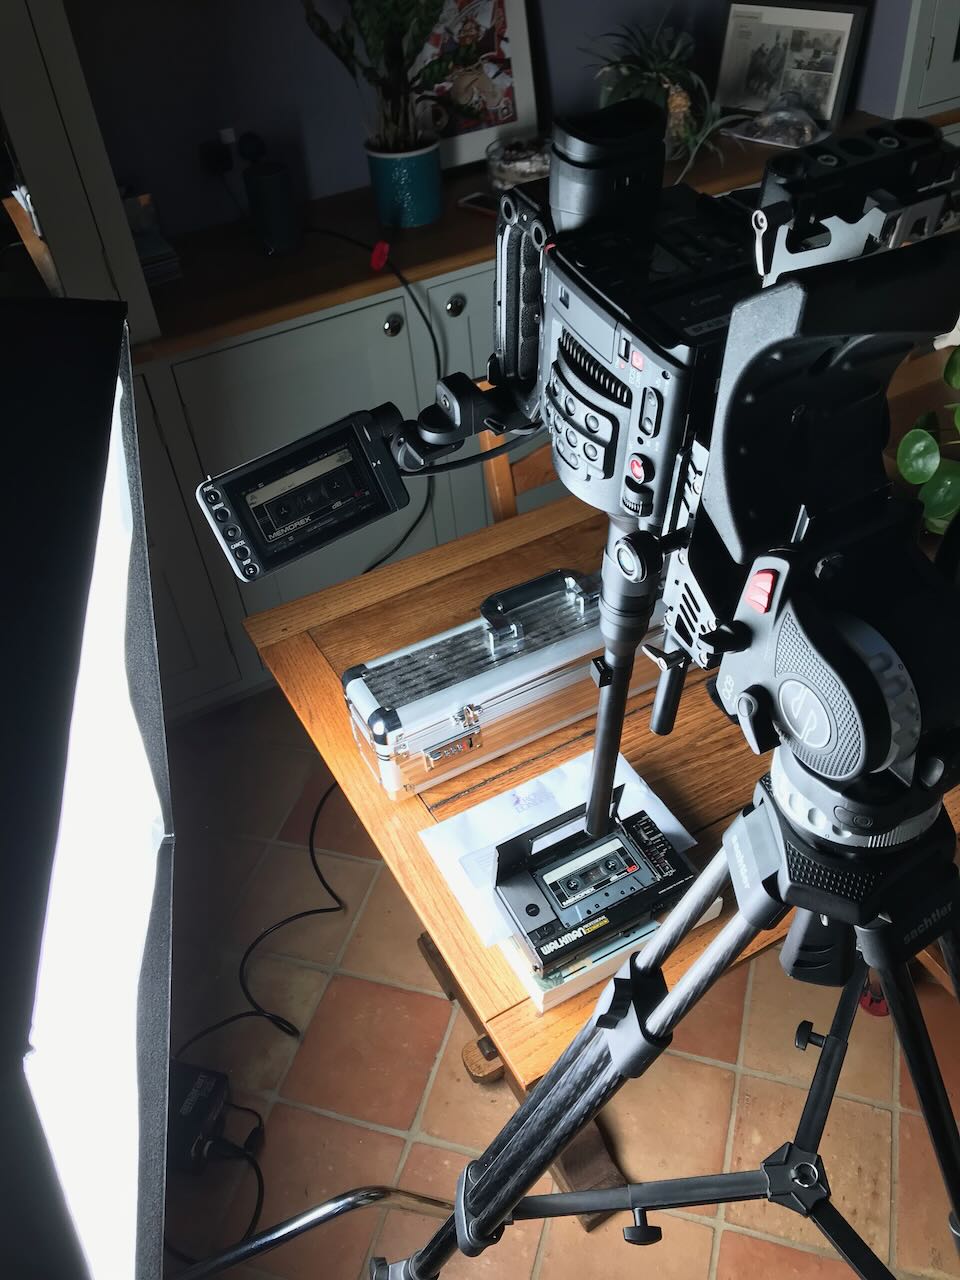
The few of us that were left then regrouped at Jonnie’s house for some ADR and a handful of inserts. The probe lens got another airing to capture a macro shot of a tape recorder, and I got to double as Harvey’s hands flicking through a book. In Paul’s very last shot he was out of focus, due to a lack of continuity-matching make-up, with the book sharp in the foreground.
The final shot of all was Cat, the editor, dropping some Post-its into frame and Jonnie, clad in Harvey’s jacket, picking them up. Not a grand shot to go out on, but one that nicely sums up the collaborative, all-hands-on-deck nature of no-budget filmmaking. It’s been a fun ride.
Read all my Harvey Greenfield is Running Late posts:
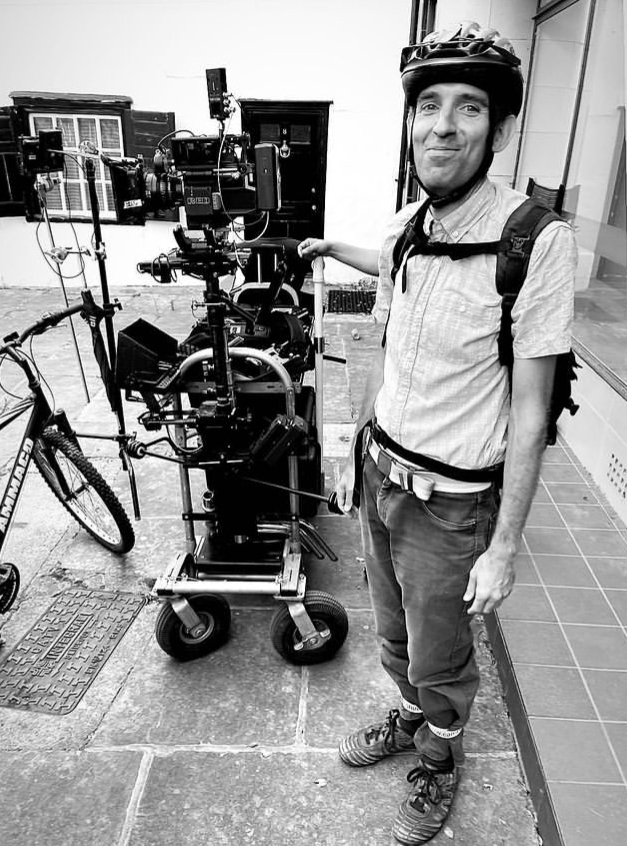
A morning full of short running scenes, all shot as oners on the Steadicam by Luke Oliver. Pretty much every crew member had had a cameo by this point, and today it was my turn. My character: Nerdy Cyclist. Alright, technically it was just Cyclist. The nerdy bit was just me (a) beefing up my part and (b) playing to type.
For the afternoon we moved to The Lab, a cocktail bar, where we filmed one of the fantasy/imaginary scenes that cuts with the very first shot we did of Harvey back on Day 1. Mixologist Tom was dressed in an elaborate all-black costume so Stephen and I hit him with two tungsten lamps, one either side, at an angle somewhere between side-light and backlight. This cut him out from the background, showed up the layering in the costume, edge-lit the cocktail shaker and liquids being poured, and deliberately kept Tom’s face dark. Quadruple win!
Day 22
We returned to Othersyde to pick up the one scene we dropped there on our most packed day of principal photography, Day 7. I referred to the blog post to help get the vibe of the lighting the same. The main motivation was the real streetlamp at the front of the site, which we wrapped using an Aputure with a lantern attachment, rigged on a mini boom. Another Aputure lantern gave a cool moonlight wash on the venue’s terraced outdoor seating, and a blue-gelled 300W tungsten fresnel uplighter replicated what we did on the other side of the building last year. A 2K blasted light from the direction Harvey has come; this light represented the ongoing wedding, so we had a couple of people moving around in front of it for dynamic shadows.
I ended up turning off the first Aputure for the wide as it seemed to kill the mood, but we brought it back for the close-up to show more of Paul’s face. To represent the light of his phone as he turns it on, Stephen held a PavoTube just above the camera and twisted it quickly around to face Paul on cue. We adjusted the eyebrow on the camera to flag the tube’s light off the phone itself.
There were a few bitty pick-ups to do while we were outside with access to power, including a “BOV” – a POV of a bee. We did this with the probe lens on Jonnie’s Canon C200, which I had to float around and then jab into Paul’s neck. Sorry, Paul.
At 1am we moved into an adjacent industrial street – having decided that it was unreasonable to have Paul shouting dialogue in a residential area at that hour – for some Steadicam shots. I went to the Gemini’s low-light ISO 3200 and Stephen hand-bashed a lantern on a boom pole to fill Paul in between streetlamps, which became a fun dance when we had to do a 270° orbit!
Day 23
We convened at Cambridge’s Castle Hill. Nearby Indian restaurant Namaste Village kindly agreed to let us shoot a brief scene there at the last minute, even having one of the staff do a spot of acting. I posted a video breakdown on Instagram – here it is:
Back outside we filmed a nice sequence of shots ending with a 360° pan following Harvey as he walks around the top of Castle Hill talking on the phone. As the other end of the phone call had been shot with Steve’s head sometimes out of frame, we went the other way and gave Harvey loads of headroom, capturing some nice clouds along the way.
Then it was time for another pick-up from Day 7, reshooting the tent scene for continuity reasons. Again we put a light on one side and black-draped the other to get some shape into the light inside. This time we used a wider lens, the 14mm, and with the help of a runner I handheld it over Paul rather than trying to squeeze the tripod in around him like last time. He got a nasty shock when I accidentally knocked the matte box off and it hit him in the face. Er, sorry again.
After wrapping a few of us went back across the road to Namaste Village, where the food was excellent.
Day 24
On our last day we caught up to the elusive pick-up that was always meant to be a pick-up: the scenes with Harvey’s mum. We took over Rachel’s grandmother’s house for several hours, most of the shots being in a corner of her living room. Unusually I was drawn to a corner that didn’t have a window in it, because it had the best furniture and dressing to establish the character in our standard 24mm tableau shot.
But this meant – with all the windows behind camera – that it was a challenge to make the lighting interesting. We faked a window just off camera left using a diffusion frame with muslin and a grid over it; Stephen bounced the 600D into it from across the room. I closed the room’s curtains as much as I could get away with before the lack of natural fill light started to make it look like night. (For later scenes we closed them all the way and put a 300D behind the muslin, as pictured above.)
To add more interest to the shot I played around with the positions of two table lamps and a floor lamp. Pausing to check my script breakdown notes from last year I saw that I had written “a single practical floor lamp” in the lighting column; too many lamps would kill the scene’s sad tone. This is a good example of a breakdown keeping me honest as a DP and preventing me from getting carried away doing stuff on set just because I can (though that definitely still happens sometimes). I ended up with just one lamp in the back of the main shot.
After some variations on that main shot for later scenes, and a brief scene in the kitchen, we packed up and headed out for exteriors. Most of these were happy flashbacks from the early days of Harvey and Alice’s relationship, and Jonnie wanted to fill them with filmic references. First up was a Jules et Jim homage with the pair racing across a bridge, then a “remake” of one of Jonnie’s own amateur films with Harvey and Alice spinning around holding hands. For POV reverse shots we put the tripod on the point which they span around, and I set the panning tension to zero so that they could pull the camera around themselves by holding the moose bars (handgrips).
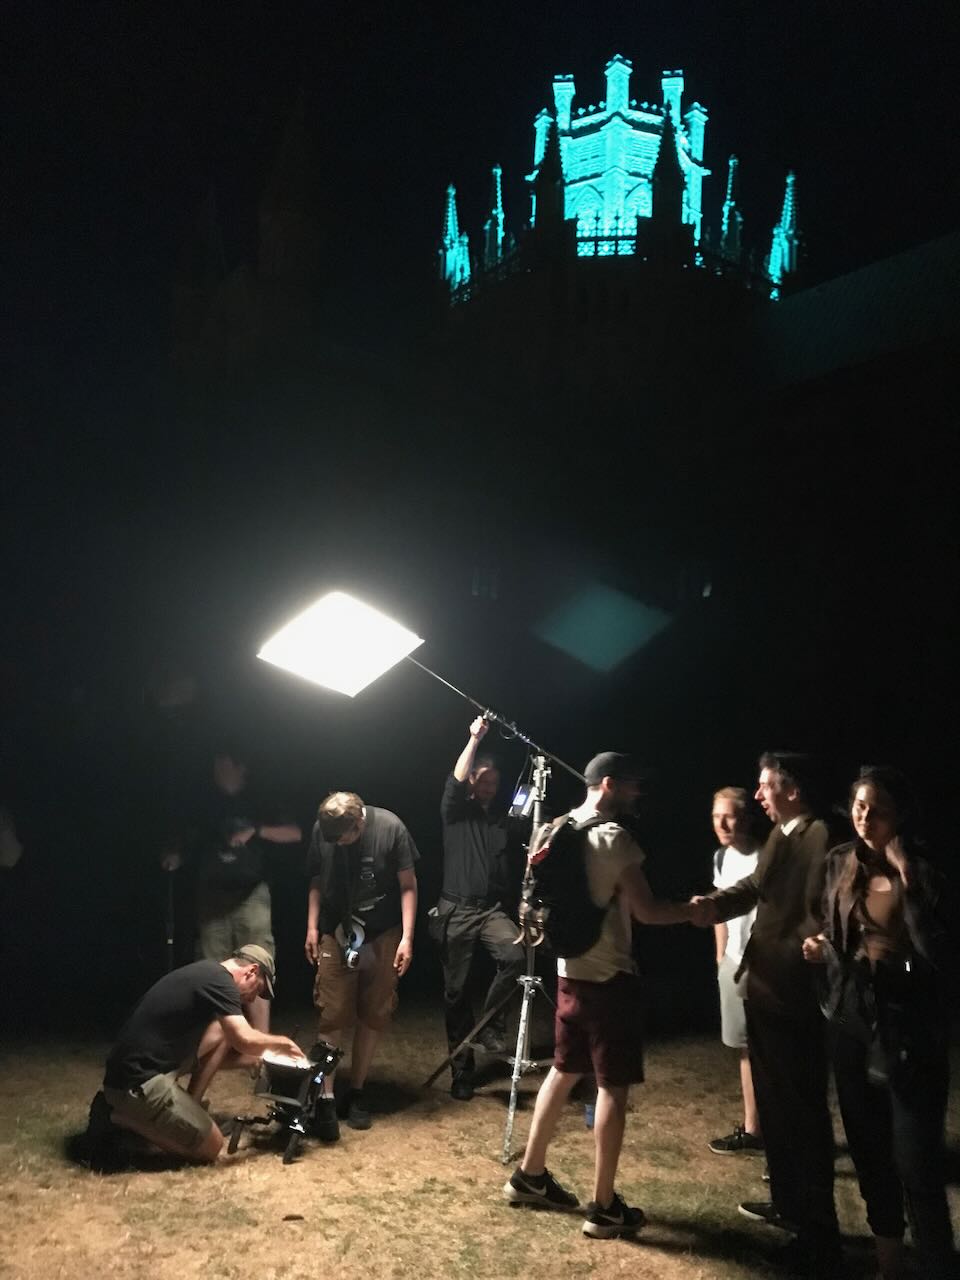
Next was a Manhattan-esque shot with the couple on a bench looking up at Ely Cathedral. We clearly weren’t going to light the cathedral on our budget, so we set up around sunset and waited for the streetlamps to come on and the ambient light to drop to a nice dusky level. We rolled when the daylight was metering at T1.4 at ISO 800, though I exposed at T2. To cut Harvey and Alice out from the background a bit Stephen stood just out of frame with an LED lantern motivated by a nearby streetlamp.
He pulled the same trick at our next location, a passageway beside Prezzo, where we did actually have to light a small portion of the cathedral wall as well, using a battery-powered Aputure (200X I think). We couldn’t have done it for long on the batteries we had, but fortunately it was a brief scene.
Our final set-up was a Poor Man’s shot of Harvey running at night. We did this on the green beside the cathedral because it was a handy open space where we could get a completely dark background save for a few dots of distant lights. Stephen armed a FalconEyes over Paul and swung it back and forth to create the illusion of passing streetlamps. The shot needed a tiny touch of fill, so we taped a PavoTube to the top of the matte box, setting it to 1% intensity and taping over most of it to get it down to a low enough level. (I was at ISO 3200 and on a 14mm lens, so mere inches from Paul’s face.)
Then Rob said the magic words, “It’s a wrap.” Like most micro-budget projects there are still a few loose ends to be shot, but those will be done with Jonnie’s camera and no crew. For most of the cast and crew Harvey Greenfield has run his course and I’ll see them at some distant time for the premiere. Thank you Stephen Allwright (gaffer), Jeremy Dawson (spark), Hamish Nichols (1st AC), Fiyin Oladimeji (2nd AC) and Nana Nabi (2nd AC daily) for all your hard work, and to Jonnie for bringing me onto this fun and creative film. Huge thanks also to Global Distribution, Red and Sigma who supported us with equipment which brought the whole thing up a level. The rough cut is already fantastic and I can’t wait to see it finished.
Read all my Harvey Greenfield is Running Late posts:
RedShark News recently published an article called “The DSLR is now dead”, based on the fact that the Canon 1D X Mark III will be the last flagship DSLR from the company and that mirrorless cameras are now first choice for most photographers. This prompted me to reflect on some of the things I learnt when I bought my first (and only) DSLR.
It was 2011, and I documented some of the challenges my new Canon 600D created for me in this blog post. But what the DSLR did really well was to introduce me to a workflow very similar in many ways to the bigger productions I’m working on now. Previously I had shot everything on prosumer camcorders, so the following things were new to me with DSLRs and have been constant ever since.
Shallow Depth of Field
I had been used to everything being in focus, so not really thinking about my aperture setting, just turning the iris dial until the exposure looked right. My Canon 600D set me on a journey of understanding f-stops, and eventually choosing a target stop to shoot at for focus reasons and then using lighting or ND filters to achieve that stop.
Prime Lenses
Although for several years I owned a Canon XL1-S, which had interchangeable lenses, I only ever owned a couple of zooms for it. As far as I’m aware, no prime lenses to fit the XL1-S’s proprietary mount were ever made, so prime lenses were completely new to me when I got my 600D. As with aperture, it forced me to think about what field of view and degree of perspective or compression I wanted, select the appropriate lens, and then place the camera accordingly, rather than lazily zooming to get the desired framing.
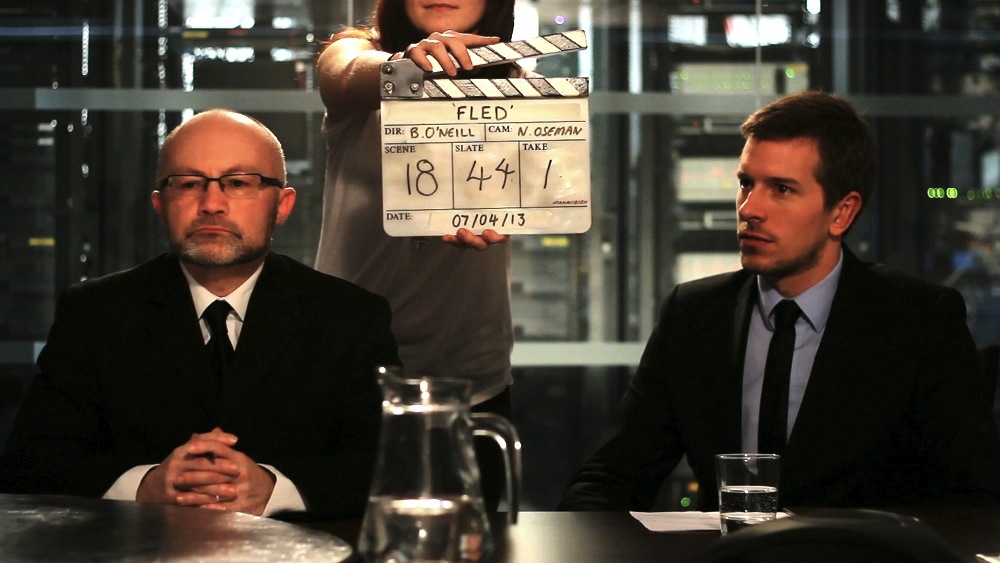
Dual-System Sound
It’s weird now to think that I used to be tethered to the sound recordist before I switched to DSLR shooting. At the time I was doing most of my own editing as well, so syncing the sound was a pain in the arse, but it was a valuable introduction to this industry-standard way of working. It’s also weird to think that clapperboards were optional for me before this.
Building a camera rig
All my cameras before the 600D had a built-in viewfinder, handgrip, shoulder mount (if the camera was large enough to need one) and lens (except the XL1-S), and there was no need to add an external battery plate or a follow-focus. The idea that a camera rig needed to be built, and that it could be customised to suit different operators and situations, was a novel one to me. I have to say that I still prefer cameras that have more things built in, like the Alexa Classic. A good part of the reason I rarely use Reds is because they don’t come with viewfinders. Why anyone ever thinks a viewfinder is an optional part of a camera is utterly beyond me. It’s an important point of stabilising contact for handheld work, and your face shields it completely from extraneous light, unlike a monitor.
Tapeless recording
The 600D was my first camera to record to memory cards rather than magnetic tape. It was certainly scary to have to wipe the cards during a shoot, being careful to back everything up a couple of times first. Data wrangling was a tricky thing to deal with on the kind of tiny-crewed productions I was usually doing back then, but of course now it’s completely normal. Just last week I shot my new cinematography course and had the fun of staying up until 2:30am after a long day of shooting, to make sure all the footage was safely ingested! More on that course soon.
In August 2019 Jonnie Howard, director of The Knowledge, approached me about shooting an unusual short film with him. A Cliché for the End of the World is only two minutes long, but Jonnie wanted to shoot it as two unbroken takes which would be presented side by side. Each take would follow one character, starting and ending with them next to each other, but separating in the middle.
My first thought was that the two takes would have to be shot concurrently, but to squeeze two cameras into the small location and keep each out of the other’s frame would have been impossible. Instead, we settled on shooting with a single camera. After capturing 18 takes of the first side, Jonnie reviewed the footage with his editor Kat and selected one to use. We then shot the other side, with Kat calling out cues that would keep the actors in sync with the selected “master” take. (It took 18 takes to get this side in the can as well, partly because of getting the cues right and partly because of the difficulties Steadicam op Luke Oliver had in manoeuvring up the narrow staircase.)
The film had to be lit in a way that worked for both sides, with the camera starting in the living room looking towards the kitchen, moving up the stairs, through the landing and into the bedroom.
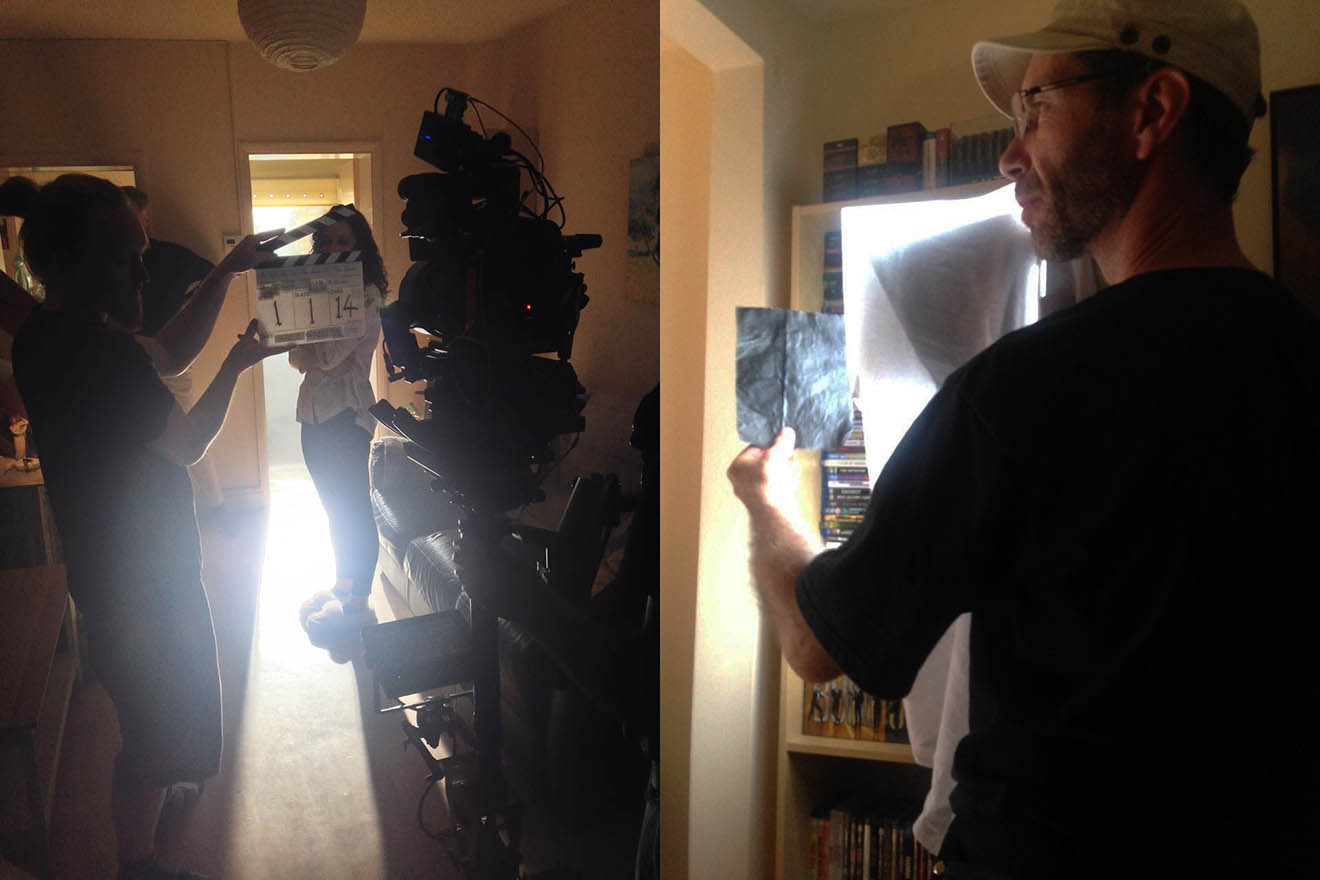
The HMI skips off the floor (left); Jeremy creates the dynamic look of TV light (right)
Working as usual to the general principle of lighting from the back, I set up a 2.5K HMI outside the kitchen window to punch a shaft of sunlight into the room. I angled this steeply so that it would not reach the actors directly, but instead bounce off the floor and light them indirectly. (See my article on lighting through windows.)
Gaffer Jeremy Dawson blacked out the living room windows to keep the foreground dark. He used an LED panel set to 6,600K (versus our camera’s white balance of 5,600K) to simulate an off-screen TV, waving a piece of black wrap in front of it to create dynamics.
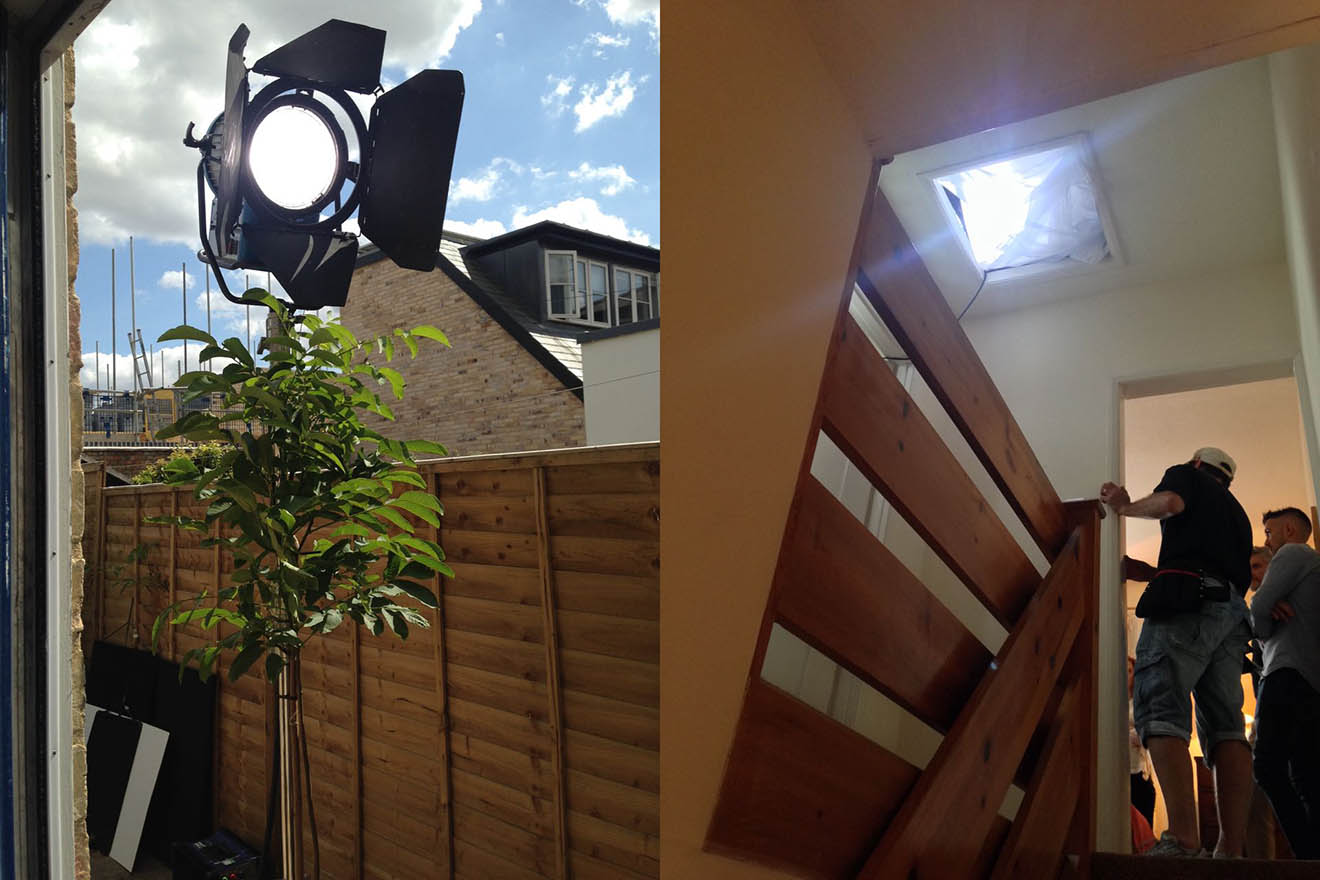
The HMI outside (left); the diffused Dedo in the loft (right)
Next we needed to bring up the light levels for the actor’s journey up the stairs, which were naturally darker. Jeremy and spark Gareth Neal opened the loft hatch on the landing and rigged an LED Dedo inside, aimed at the darkest part of the staircase. They diffused this with some kind of net curtain I think.
To brighten the landing we set up a diffused 2×4 Kino Flo in the spare room and partially closed the door to give the light some shape. Both this and the loft Dedo were a couple of stops under key so as not to look too artificial.
Luke Oliver balances Jonnie’s C200 on his Steadicam rig.
All that remained was the bedroom. The characters were to end up sitting on the bed facing the window. Originally the camera in both takes was to finish facing them, with the window behind it, but this would have meant shadowing the actors, not to mention that space between the bed and the window was very limited. After some discussion between me, Jonnie, Luke, the cast, and production designer Amanda Stekly, we ended up moving the bed so that the camera could shoot the actors from behind, looking towards the window. This of course made for much more interesting and dimensional lighting.
The window looked out onto the street, and with a narrow pavement and no permission from the council, rigging a light outside was out of the question. Furthermore, we knew that the sun was going to shine right into that window later in the day, seriously messing with our continuity. Unfortunately all we could do was ask Amanda to dress in a net curtain. This took the worst of the harshness out of any direct sun and hopefully disguised the natural changes in light throughout the day at least a little.
When the sun did blast in through the window at about 6pm, we added a layer of unbleached muslin behind the net curtain to soften it further. We doubled this as the angle of the sun got more straight-on, then removed it entirely when the sun vanished behind the rooftops opposite at 7pm. About 20 minutes later we rigged a daylight LED panel in the room, bouncing off the ceiling, as a fill to counteract the diminishing natural light. We wrapped just as it was becoming impossible to match to earlier takes.
We were shooting in RAW on a Canon C200, which should give some grading latitude to help match takes from different times of day. The split-screen nature of the film means that the match needs to be very close though!
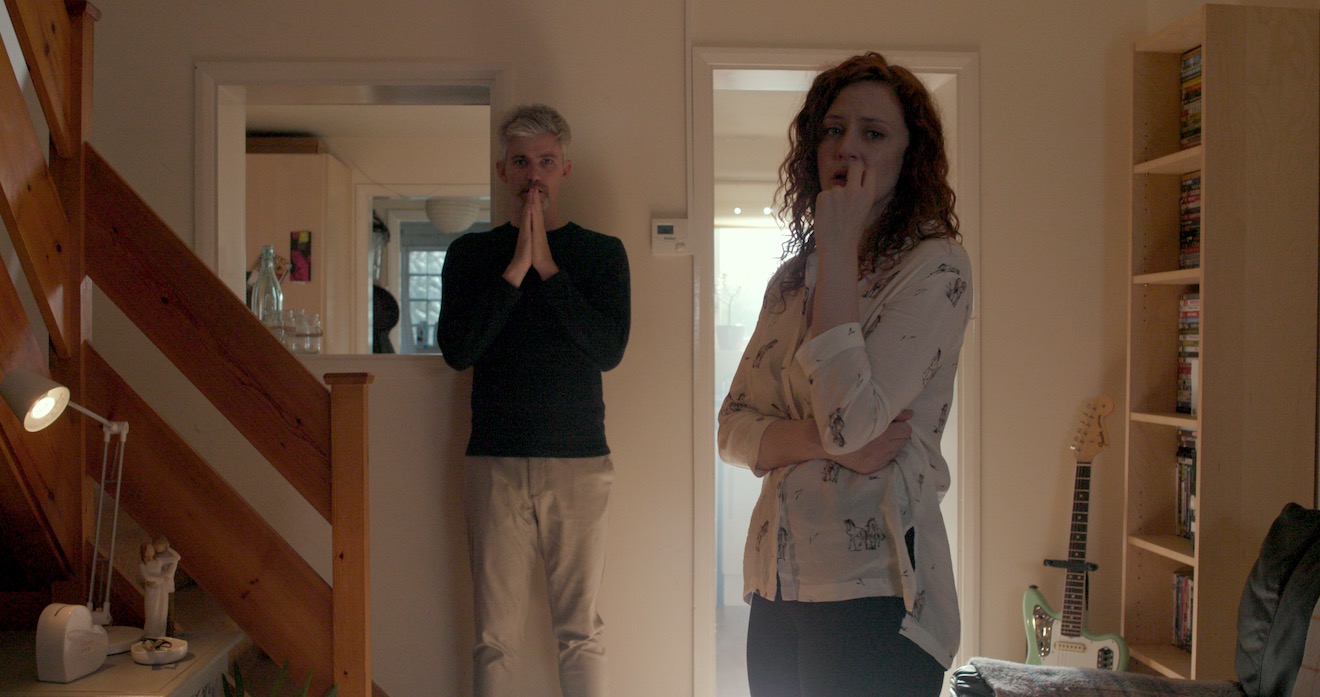
As I write this, the film is still in postproduction, and I very much look forward to seeing how it comes out. I’ll leave you with the start and end frames from slate 2, take 17, with a very quick and dirty grade.
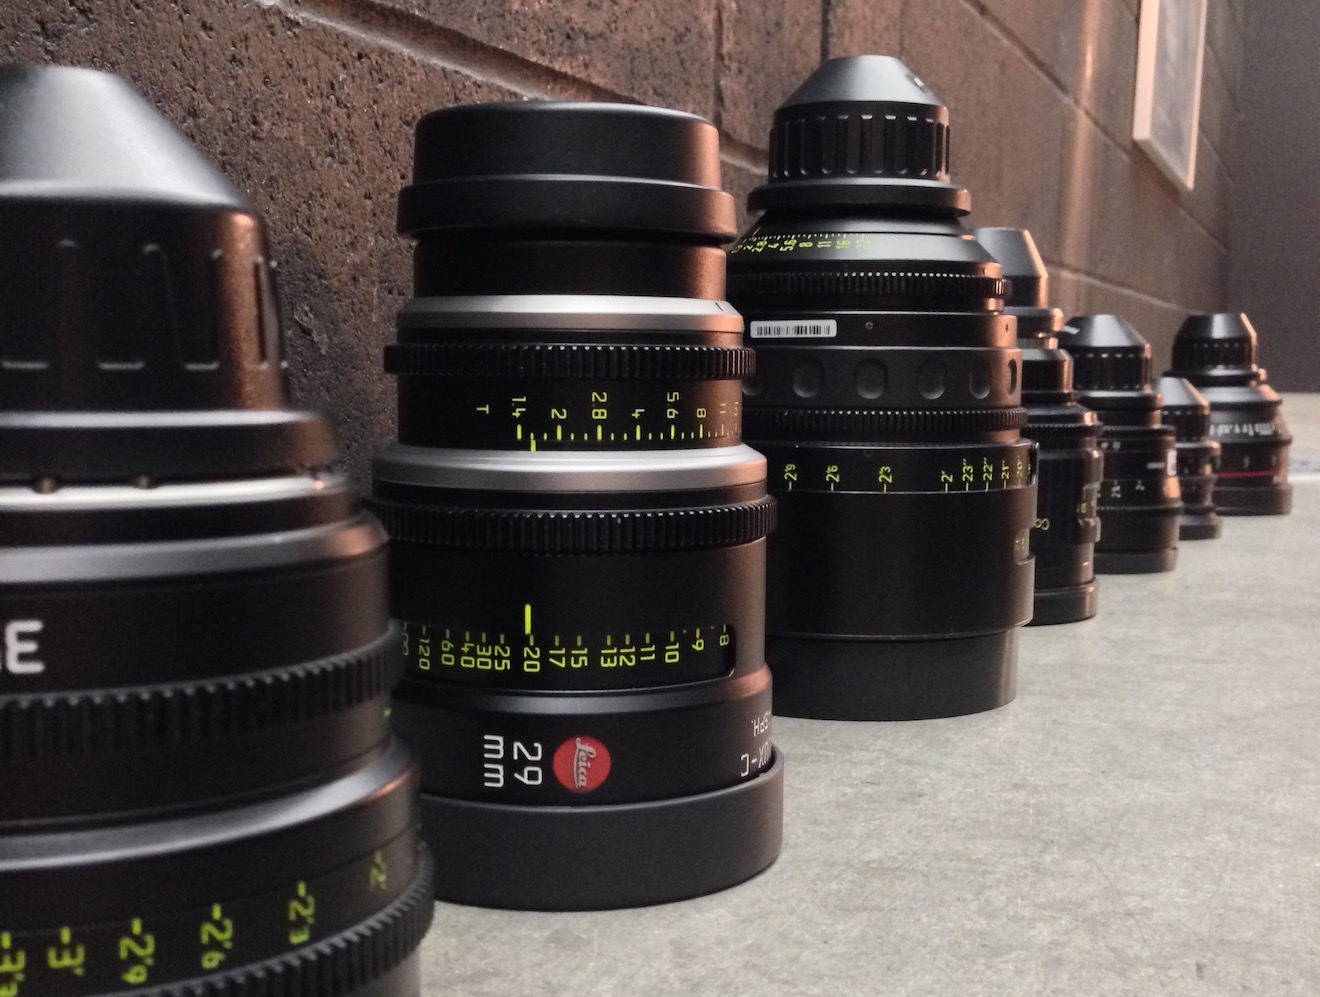
The other week I spent a day at Arri Rental in Uxbridge, in the Bafta Room no less, conducting various camera and lens tests. I’ve done a number a productions now where I wanted to test but there wasn’t the time or money, so for a while I’ve been meaning to go into Arri on my own time and do some general tests for my education and edification. An upcoming short provided the catalyst for me to get around to it at last.
Aided by 1st AC Rupert Peddle and 2nd AC Bex Clives, I tested a dozen lenses, some spherical, some anamorphic. Today I will cover the spherical lenses; next time I’ll look at the anamorphics.
Method
We shot on an Alexa XT Plus in log C ProRes 4444 XQ at 3.2K. In the video the image has been downscaled to 1080P and a standard Rec.709 LUT has been added.
I set the Alexa to ISO 800 and lit Bex to a T2.8 using a 650W tungsten fresnel bounced off poly. For fill I caught a little of the spill from the fresnel with a matte silver bounce board on the opposite side of camera. I placed fairy lights in the background to observe the bokeh (out of focus areas) and turned on a 100W globe during each take to see what the flare did.
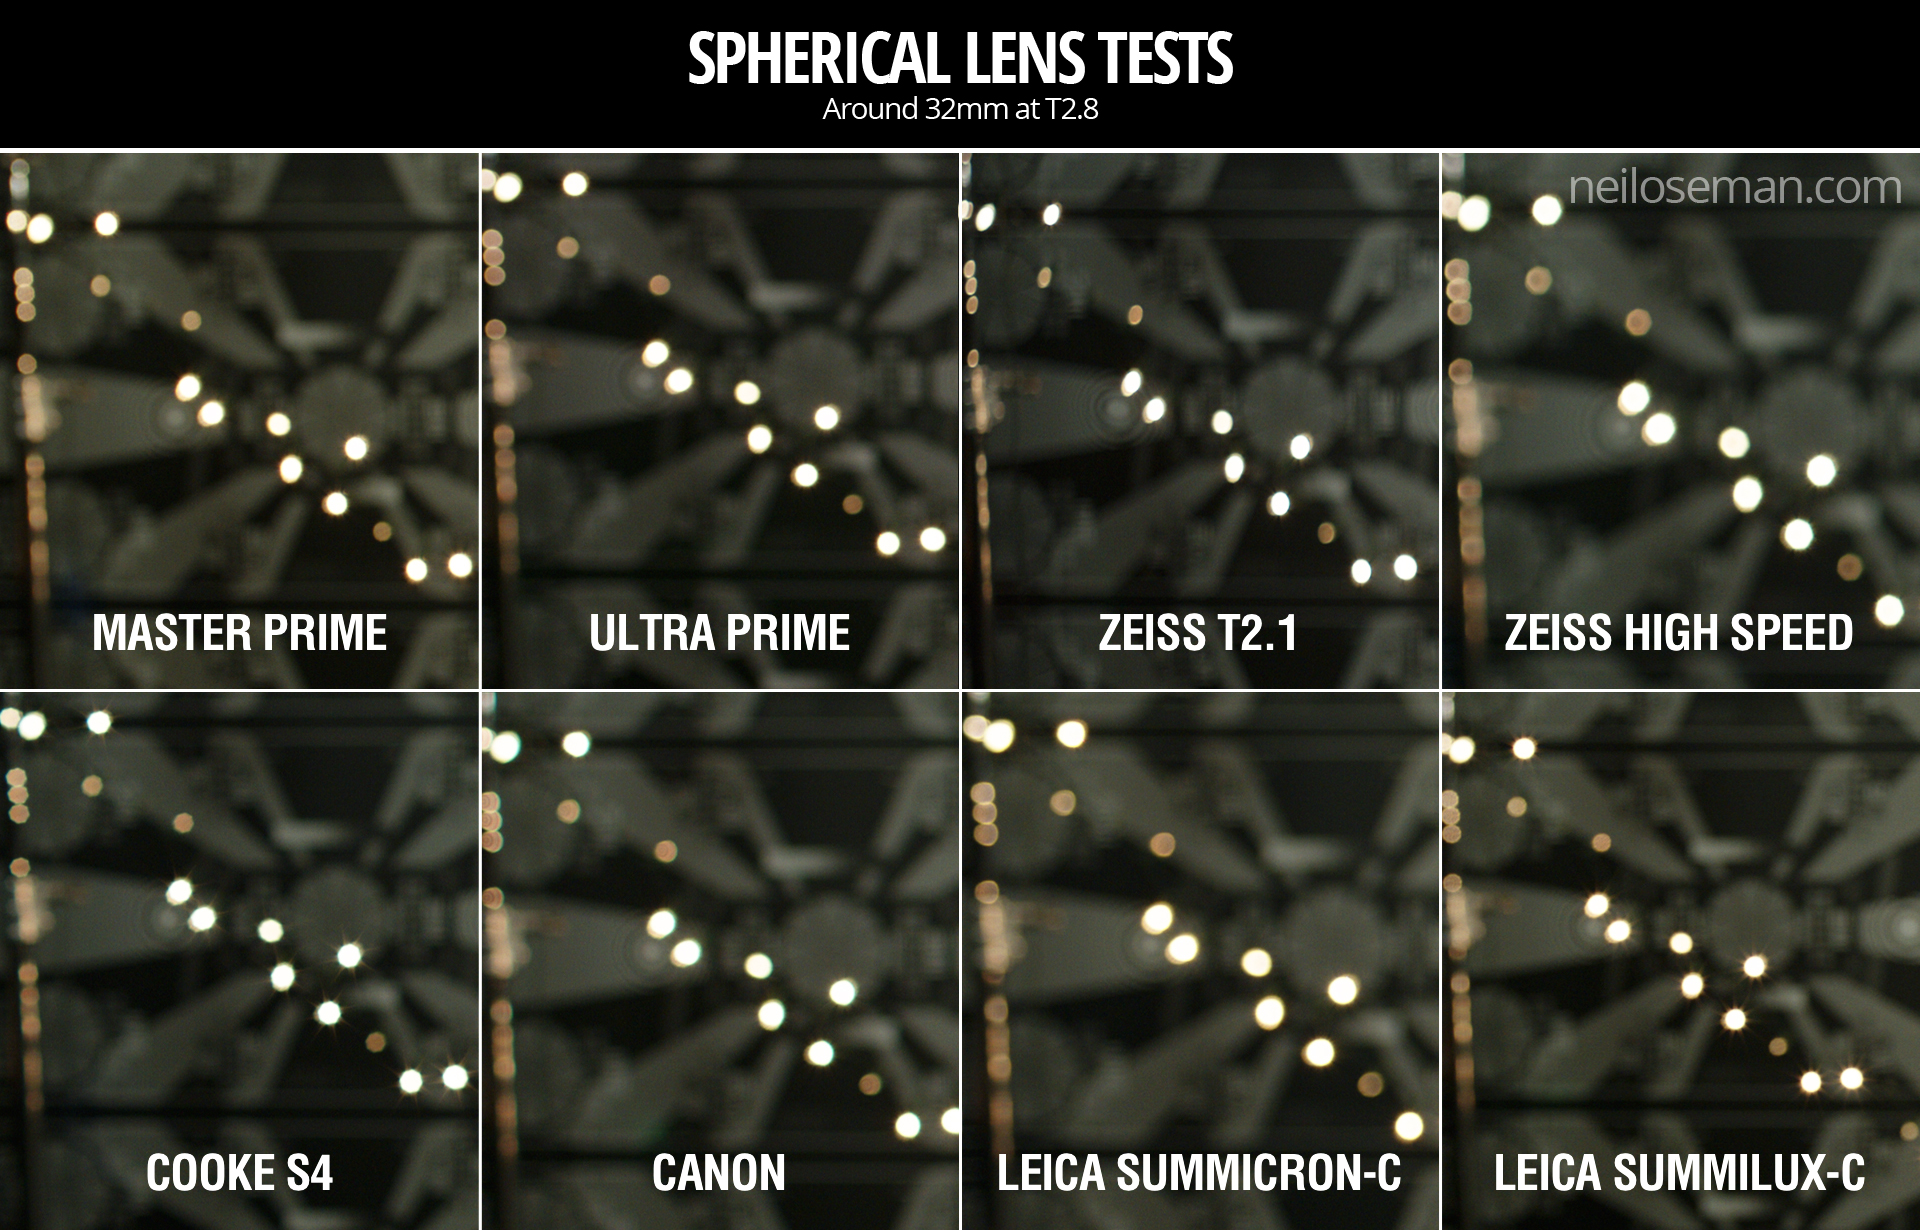
We shot all the lenses at 2.8 – the stop I most commonly use – and also wide open (compensating with the shutter angle), but the direct 2.8 comparison proved most useful, so that’s mainly what you’ll see in the video. We tested a single length: 35mm or the closest available to it.
What we didn’t do was shoot grey-scale or colour charts, or do any testing of vignettes or distortion. (The day after doing these tests, Shane Hurlbut, ASC published an Inner Circle post about how to tests lenses, so I immediately learnt what my omissions were!)
We tested the following lenses:
Series
Length
Speed
CF*
Weight
Price
Leica Summilux-C
29mm
T1.4
18″
1.7kg
£27K
Arri/Zeiss Master Prime
35mm
T1.3
14″
2.2kg
£16K
Cooke S4
32mm
T2
6″
1.85kg
£14K
Leica Summicron-C
35mm
T2
14″
1.3kg
£13K
Zeiss High Speed
(a.k.a. Superspeed Mk III)
35mm
T1.3
14″
0.79kg
£12K
(refurb)
Arri/Zeiss Ultra Prime
32mm
T1.9
15″
1.1kg
£10K
Zeiss T2.1
32mm
T2.1
24″
0.45kg
£4K
(used)
Canon
35mm
T1.5
12″
1.1kg
£3K
* CF = close focus
Here’s the video…
Skin tones
Click the image to see it at best quality.
The Arri/Zeiss Master Prime and the two Leicas seem to have the most vibrant skin tones. To my eye, the Leicas have a slight creaminess that’s very pleasing. The Canon looks just a little cooler and less dynamic. I was surprised to find that the Cooke S4, the lens I’ve used most, appears to have a grey, flat skin tone compared with the Master Prime, Leicas and Canon. I would rank the Ultra Prime and Superspeed next, on a par except that the Ultra Prime has a noticeable magenta cast. My least favourite skin tones are on the Zeiss T2.1, which comparatively makes poor Bex look a little bit ill!
Some of the nuances will be lost in the YouTube and Jpeg compression, but this is a very subjective assessment anyway, so feel free to completely disagree with all of the above. Any of the differences noted above could be corrected by grading, to some extent . But remember that the lens is at the very start of the light’s journey from set to screen, and any wavelengths that don’t get through it are lost forever. It’s like fluorescent lamps with colours missing from the spectrum; you can’t put those back in in post.
Sharpness
I have to say, I’m unable to detect any difference in sharpness between the Master Prime, Cooke S4, Canon and Leicas. The Ultra Prime and Superspeed both look a hair softer, while the T2.1 is very soft.
Breathing
Breathing is the slight zooming effect that you get with some lenses when you pull focus. Looking at 4:44 in the video you can clearly see the differences in breathing between the eight lenses. Because this part of the video is showing a crop of the bottom left corner of the image, the breathing manifests as a shift to the left (zoom in) as the lens is racked closer (goes soft) and a shift to the right (zoom out) as it’s racked deeper (goes sharp).
All the Zeiss lenses except the Master Prime have a significant amount of breath when seen in isolation like this, but not enough to be noticeable to an audience in most real-world situations. The Cooke S4 has a little bit of breathe, and the Canon a hair less. The Master Prime and the Leicas are rock solid.
Bokeh
Small points of light, when thrown out of focus, most clearly demonstrate the bokeh pattern of a lens. The shape of the bokeh is determined by the number of iris blades and the shape of those blades. Generally a circle is preferred, because it’s a natural shape, but for certain stories a more unusual shape might be appropriate. The shape of the iris changes with the T-stop, hence the T2.8 and wide open images above.
Immediately noticeable is the difference in the Cooke S4’s bokeh between wide open (circular) and T2.8 (octagonal). All of the other lenses have round bokeh at T2.8, apart from the Superspeed, which has heptagonal (seven-sided) bokeh.
It’s entirely subjective which bokeh you prefer. The only other thing I’ll point out is that the Canon’s bokeh wide open is very fuzzy, with noticeable colour aberration, though this may be due to the bright highlight rather than the defocusing.
Flare
Flare patterns also vary with aperture. The smaller the aperture, the more of a star effect you will get, as the light interacts with the corners in the iris blades. The Summilux shows this most clearly, with a pronounced star at T2.8 (two stops down from its maximum aperture) and almost none when wide open. The Cooke S4 also has a nice star pattern at T2.8. With the other lenses it’s much more subtle, and the Canon has almost none.
Conclusions
The real revelations in these tests, for me, were the Leicas. The Summilux in particular is a beautiful lens, with rich, dynamic skin tones, nice bokeh, no breathing, plus the bonus of nice star flares. I will definitely be looking to work with this glass in the future, although given the price tag that may be optimistic!
The Summicron also performed incredibly well, matching the more expensive Summilux and Master Prime in every respect except speed. I can see this becoming my new go-to lens.
The Master Prime of course produced a beautiful, sharp, clean image, but it lacks character. It might work nicely for science fiction, a drama requiring a neutral look, or something where filtration was being used to give the image character.
The Canon impressed me too – no mean feat given that it’s the cheapest lens we tested. With nice skin tones and attractive flares, I could see this working well for a romantic movie.
The Zeiss T2.1 did not appeal to me, with poor sharpness and cold, washed-out skin tones, so I would avoid it.
The Superspeed is a decent lens, but in most cases I’d plump for an Ultra Prime instead. Ultra Primes are certainly easier to work with for the 1st AC, and have proven to be a good workhorse lens for drama. (I shot Above the Clouds on them.)
The Cooke S4 has been my go-to glass up to now, and while it will probably remain my first choice for period pieces, due to its gentle focus fall-off, I’m excited to try some of the other glass in this test on other productions.
I’ll say it one last time: this is all subjective. Our visual preferences are what make every director of photography unique.
Tune in next week when I’ll look at the anamorphic lenses: Hawk-V, Cooke Xtal and Kowa Mirrorscope.
This time last year, principal photography had just wrapped on Above the Clouds, a comedy road movie directed by Leon Chambers. We always knew that there would be additional photography, and several days of this have been scattered over the past year.
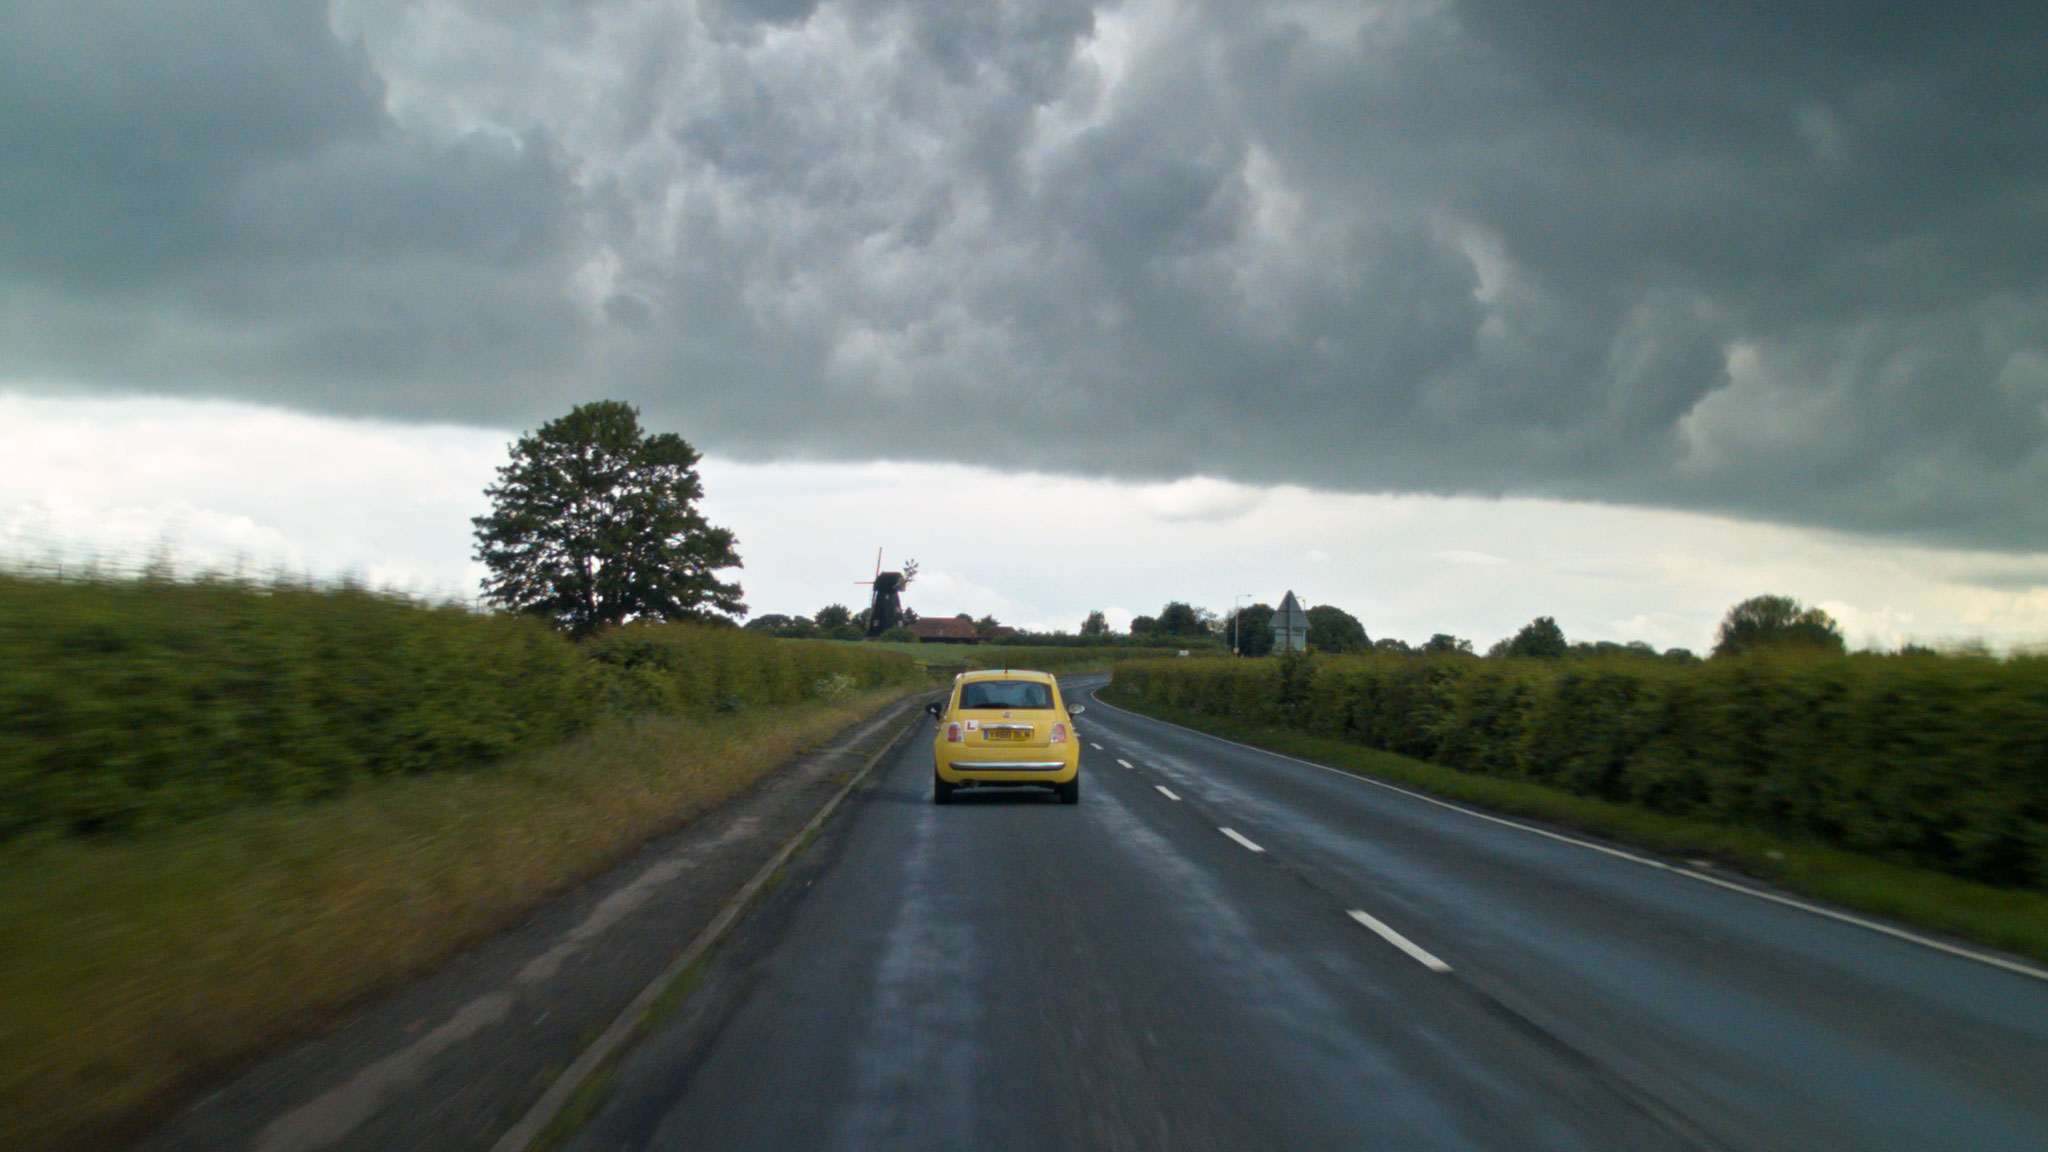
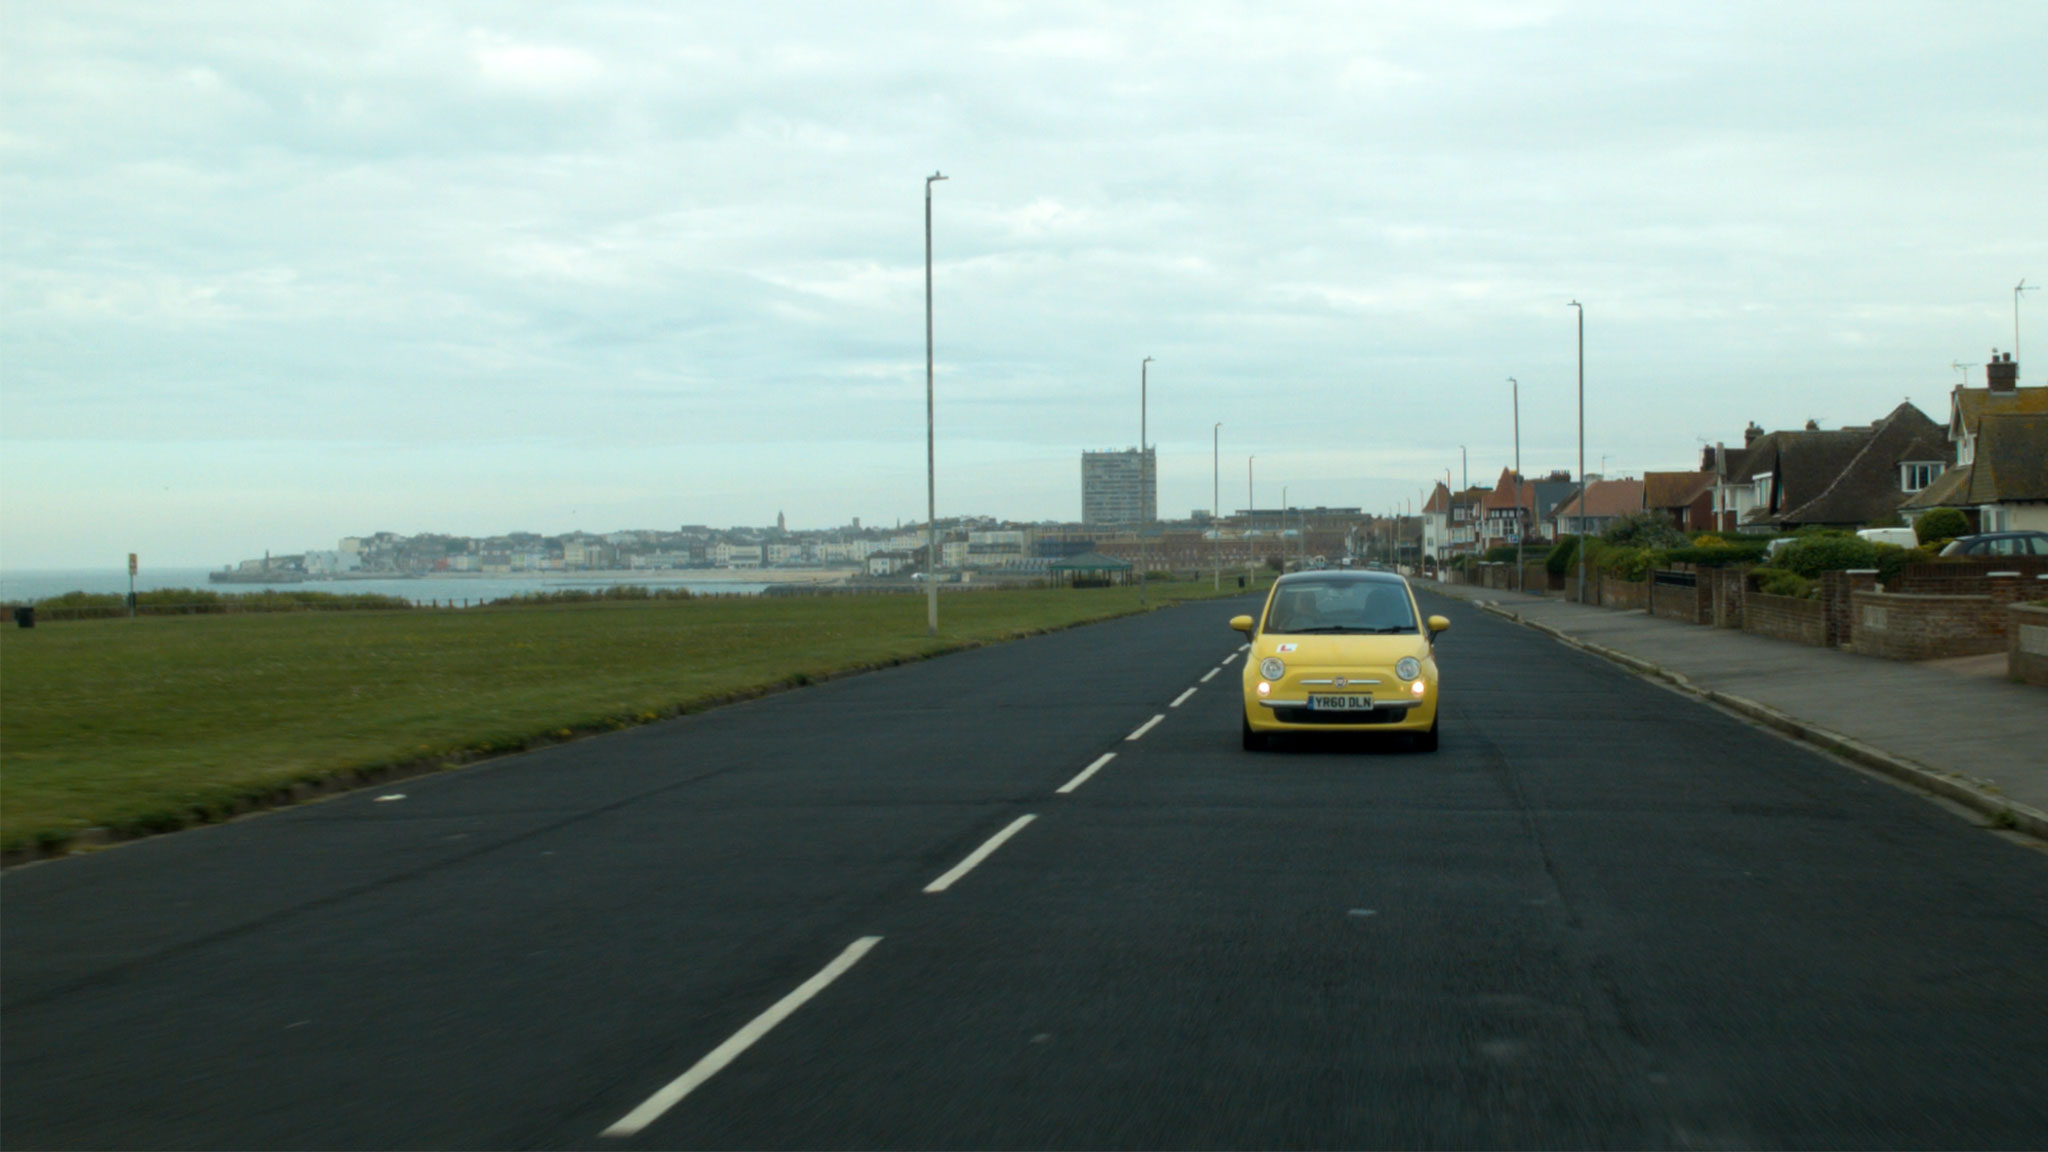
In May I spent a few odd days with Leon and the Yellow Peril, primarily capturing car-to-car tracking shots. Leon had already shot some of these without me up in Cumbria, so he had the technique down. He attached his Blackmagic Micro Cinema Camera to his roof rack with clamps and suction cups – three points of contact in all, to eliminate vibrations.
The focus was left fixed at the approximate distance the cars would be apart, and I could reach out of the passenger window and tweak it, along with the variable ND filter, if necessary. Recording was triggered from the custom remote which Leon had made for the camera last year when we used it for the autumn pick-ups. I monitored on a 5″ Blackmagic Video Assist which – thanks to a firmware update – now has a false colour display, which was very useful for keeping an eye on the exposure.
We had no means of panning or tilting the camera during takes, so we would frame the car centrally, allowing the maximum space to each side for when we went around the bends. This had the nice effect of making the Peril look small in the landscape, surrounded by it on all sides.
And speaking of the Peril looking small, it had shrunk considerably when I next saw it. But so had the landscape.
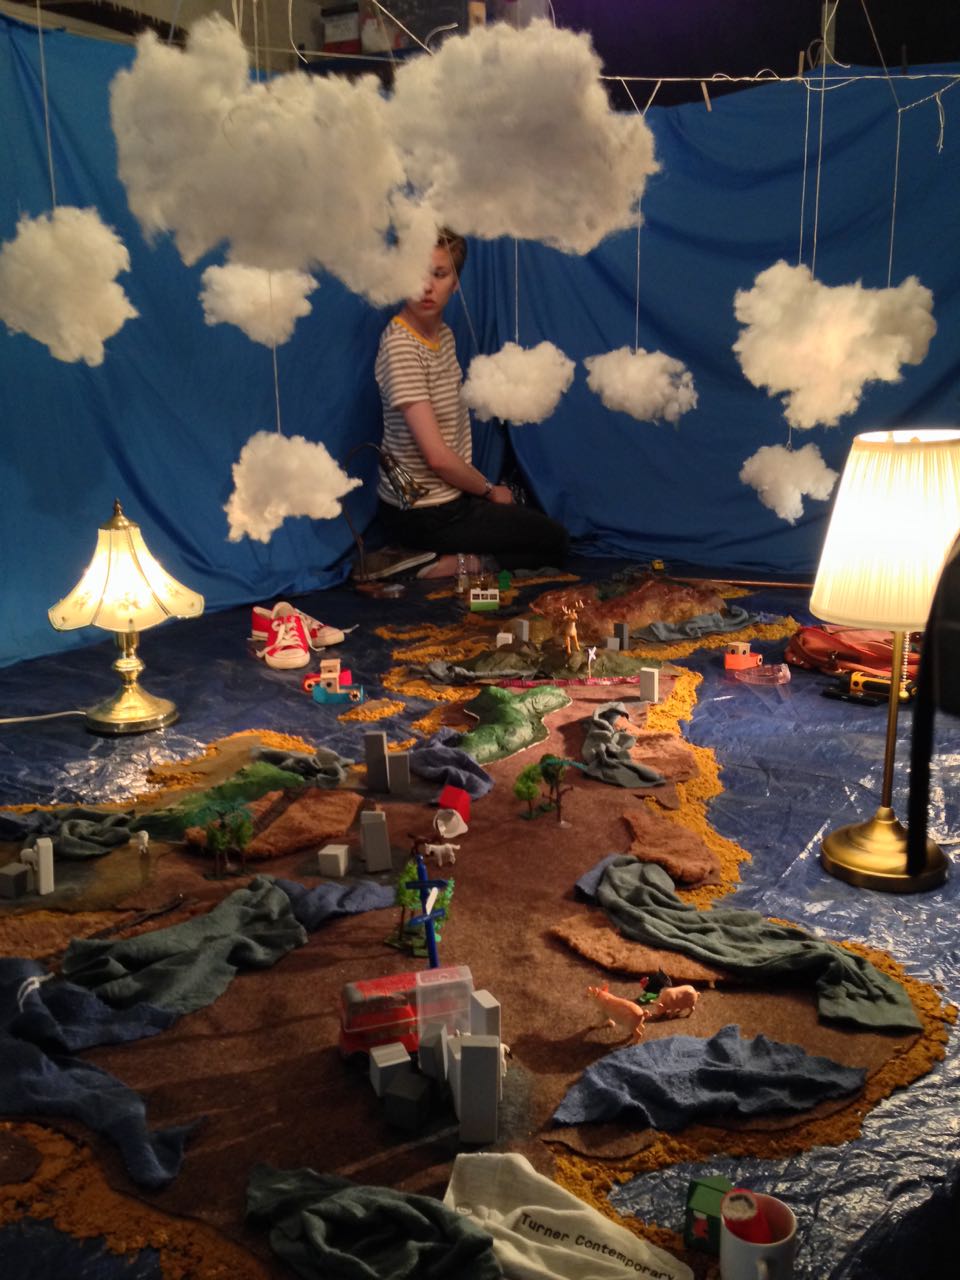
To keep the audience informed of the characters’ progress across Great Britain, Leon planned to cut to a map at a few strategic moments. At some point the original plan of shooting an Ordnance Survey map on a wall turned into something much more elaborate, a work of art featuring found objects, such as the lead character Charlie might have made herself.
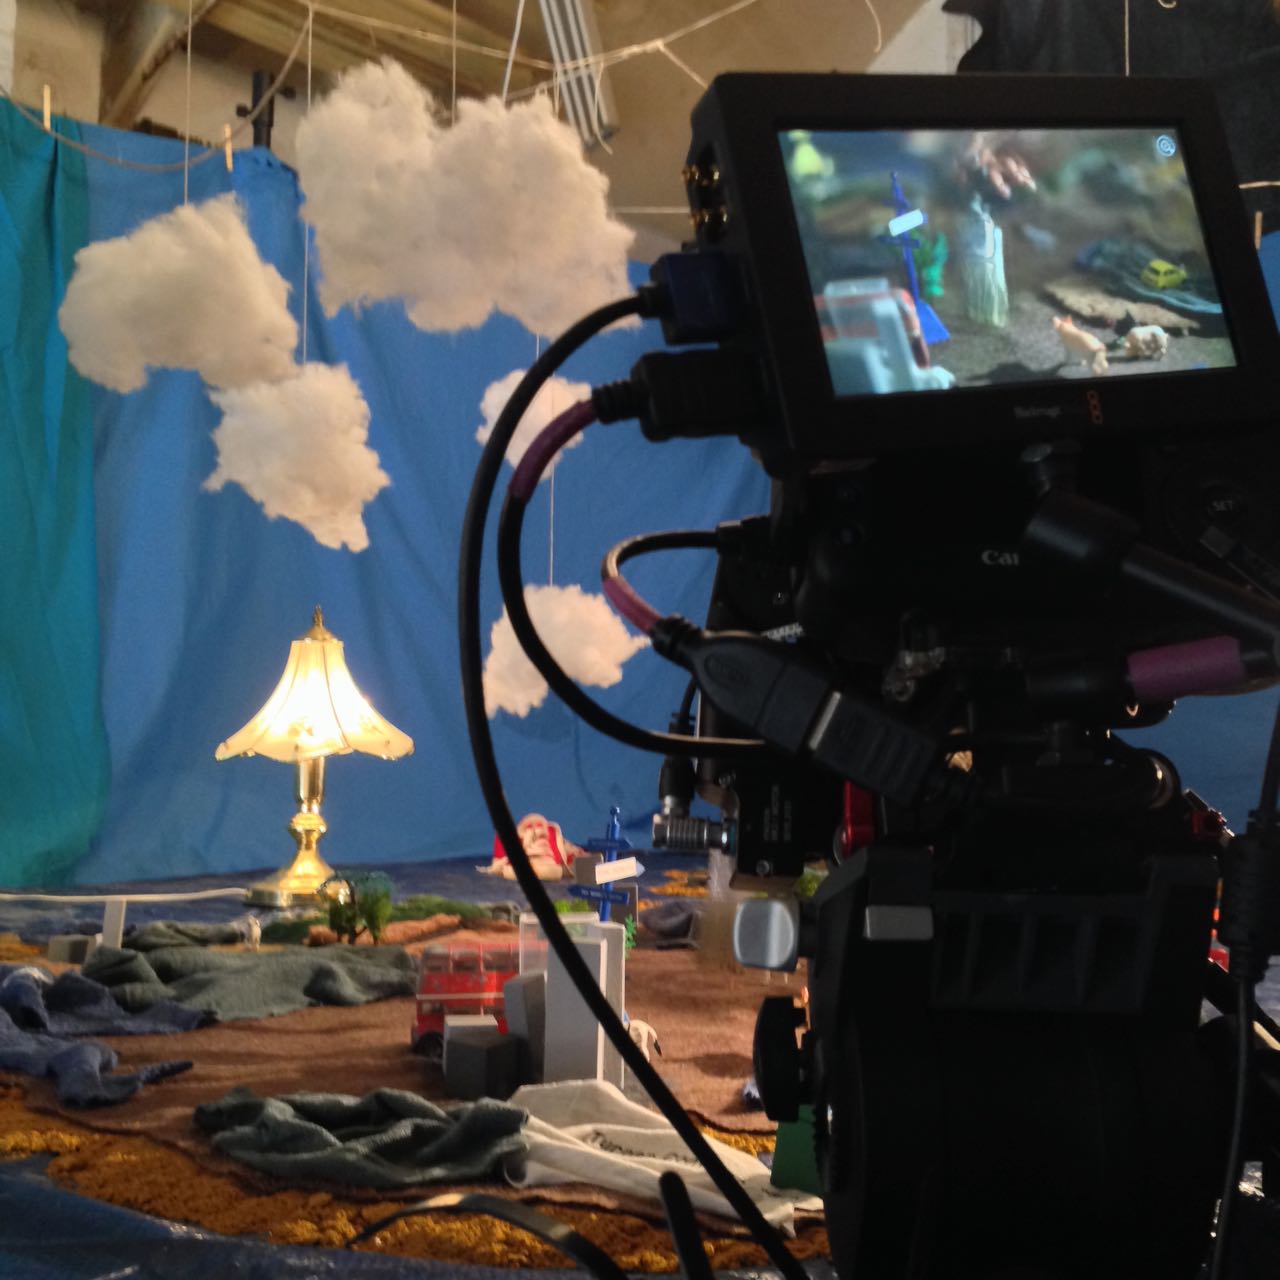
Leon knew he wanted to use his jib to drift the camera over the map. But what camera? We both agreed that these shots needed to have a noticeably different look to the rest of the movie. Both Super-8 and Super-16 were discussed, but ultimately neither were viable. Then I suggested shooting on a full-frame DSLR to get a tiny depth of field. I imagined the camera having fixed focus as it skimmed over the map, with features coming in and out of focus as they passed through the field. We didn’t end up doing that, but Leon did like the DSLR idea.
Asahi Pentax-M 50mm/f1.4
So the decision was made to shoot on a Canon 5D Mk III belonging to focus puller Max Quinton. We ended up shooting everything on a single lens, my Asahi Pentax-M 50mm/f1.4. This is a vintage K-mount stills lens which is beautifully sharp, and we mounted it with a passive EF adapter. 50mm on full-frame is equivalent to 35mm on Super 35, very close to the 32mm which was our most used lens length during principal photography.
I added a half Soft FX filter as I usually do. I had briefly considered omitting it, to further differentiate the map shots from the rest of the film, but undiffused shots in a mostly diffused movie draw attention to the filtration and can be quite jarring.
I offered Leon two options for the lighting. One was to simulate the natural light you would see if shooting the British Isles from a high altitude, i.e. a hard sun source and ambient toplight. The other, which he went for, was to carry on the suggestion of Charlie making the map herself, and make it look like she had lit it herself too, with an eclectic mix of practicals around the edge. A couple of tungsten Chinese lanterns were hung overhead as well for soft fill. To help the camera’s limited dynamic range, I put tough-spun diffuser inside some of the practicals’ shades, on the camera side.
The Blackmagic 5″ Video Assist can be seen here mounted on the back of the camera.
There were a couple of “night” scenes on the shot list. For these we turned off the Chinese lanterns and turned on a desk-lamp practical with a blue-ish LED bulb to suggest moonlight. We also used a string of LED fairy lights to represent a road with streetlights.
For the smallest possible depth of field, everything was shot at f1.4. Even at ISO 320, in the daylight scenes it was necessary to add a 0.45 ND filter to bring the exposure down to f1.4. We shot on a neutral picture profile, piping the images via HDMI to the Blackmagic Video Assist, where they were recorded in ProRes 422 HQ.
After a few years shooting on Blackmagics, FS7s and Alexas, the 5D’s colour saturation and contrast seemed very pronounced to me, but that really suited the toy-like nature of the map. And the tiny depth of field made everything look even smaller and cuter than it already was.
So, that’s a wrap on Above the Clouds finally and forever. Apparently.

 The few of us that were left then regrouped at Jonnie’s house for some ADR and a handful of inserts. The probe lens got another airing to capture a macro shot of a tape recorder, and I got to double as Harvey’s hands flicking through a book. In Paul’s very last shot he was out of focus, due to a lack of continuity-matching make-up, with the book sharp in the foreground.