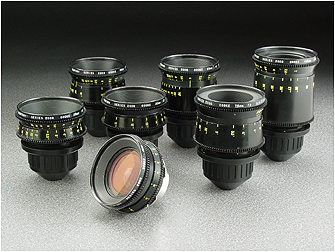
Ever since digital cinematography became the norm, DPs have sought to counter the format’s perfection with characterful vintage lenses. Having just completed a feature film shoot, Hamlet, on Cooke Panchros and a Cooke 10:1 Varotal, I’m over the moon with the beautiful, creamy, organic look they brought to the production. However, I can’t deny that they have some disadvantages over modern glass which you should take into consideration before choosing the vintage approach.
1. Softness
Vintage lenses simply aren’t as sharp as their modern counterparts, particularly at the edges of frame and particularly when the iris is wide open. On Hamlet I deliberately shot with the Panchros wide open to soften the image, rather than adding a diffusion filter like I’ve often done in the past, but that look is not for everyone, and it does make things a little harder for your focus puller. Be sure to test the sharpness and view the results on a large screen before committing.
2. BreathING
https://www.youtube.com/watch?v=YcpLAk34fkk
Breathe is the phenomenon whereby a lens appears to zoom slightly in or out when the focus is pulled. The Cooke Varotal is especially prone to this. As a result, my focus puller Aristide Russo had to be very gentle with his pulls otherwise the breathing was distracting.
3. Veiling
Many DPs love lens flares, and beautiful, natural flares were one of the reasons I picked the vintage Cooke glass. But look out for veiling flare – a milkiness and lift in the shadows affecting the whole frame. I noticed this a lot when shooting under the practical fluorescents in Hamlet‘s stage set, especially with handheld shots where the veiling would appear and disappear depending on the camera’s angle to the lights. I decided to embrace it and make it part of the film’s look, but if maintaining high contrast at all times is important to you, lenses without modern coatings may not be the right choice.
4. Vignetting
Check for dark patches in the corners of your image. The Varotal I used vignetted at certain parts of the zoom range and not at others, so the dark corners would appear and disappear during a zoom. Although not ideal, it isn’t noticeable most of the time. Besides, I figured that most colourists add vignettes to most shots anyway, so I was simply saving them a little time!
5. Mechanics
Older lenses are, quite naturally, less reliable. Even if they have been rehoused, like our Cooke “Century” Panchros had been in 2000, you may find that the iris and/or focus sticks sometimes. Our 25mm started to play up halfway through our shoot, forcing Aris to use the rosettes to support the matte box, otherwise the motor wasn’t powerful enough to turn the focus ring. This possibility was flagged for me during testing when we had a similar issue with the 50mm. Even if all your lenses seem to be fine during prep, know that a vintage lens could start misbehaving at any time, and your rental house may not have another on the shelf to replace it with.
6. Uniformity
Don’t expect a set of vintage primes to all have the same maximum aperture or the same external configuration. The iris ring might be buried in the matte box, the matte box might not fit on at all, or it may be impossible to engage both iris and focus motors at the same time.
All this sounds quite negative, but the flares, softness, breathing and vignettes can be absolutely beautiful. Be aware of the downsides of using vintage glass, absolutely, but if they suit your story then embrace the flaws and get ready to be blown away by your dailies.
In case you missed them the first time, I’ll leave you with some highlights from my Hamlet lens tests.
The main event of last week’s prep was a test at Panavision of the Arri Alexa XT, Red Gemini and Sony F55, along with Cooke Panchro, Cooke Varotal, Zeiss Superspeed and Angenieux glass. More on that below, along with footage.
The week started with Zoom meetings with the costume designer, the make-up artist, potential fight choeographers and a theatrical lighting designer. The latter is handling a number of scenes which take place on a stage, which is a new and exciting collaboration for me. I met with her at the location the next day, along with the gaffer and best boy. After discussing the stage scenes and what extra sources we might need – even as some of them were starting to be rigged – I left the lighting designer to it. The rest of us then toured the various rooms of the location, with the best boy making notes and lighting plans on his tablet as the gaffer and I discussed them. They also took measurements and worked out what distro they would need, delivering a lighting kit list to production the next day.
Meanwhile, at the request of the producer, I began a shot list, beginning with two logistically complex scenes. Despite all the recces so far, I’ve not thought about shots as much as you might think, except where they are specified in the script or where they jumped out at me when viewing the location. I expect that much of the shot planning will be done during the rehearsals, using Artemis Pro. That’s much better and easier than sitting at home trying to imagine things, but it’s useful for other departments to be able to see a shot list as early as possible.
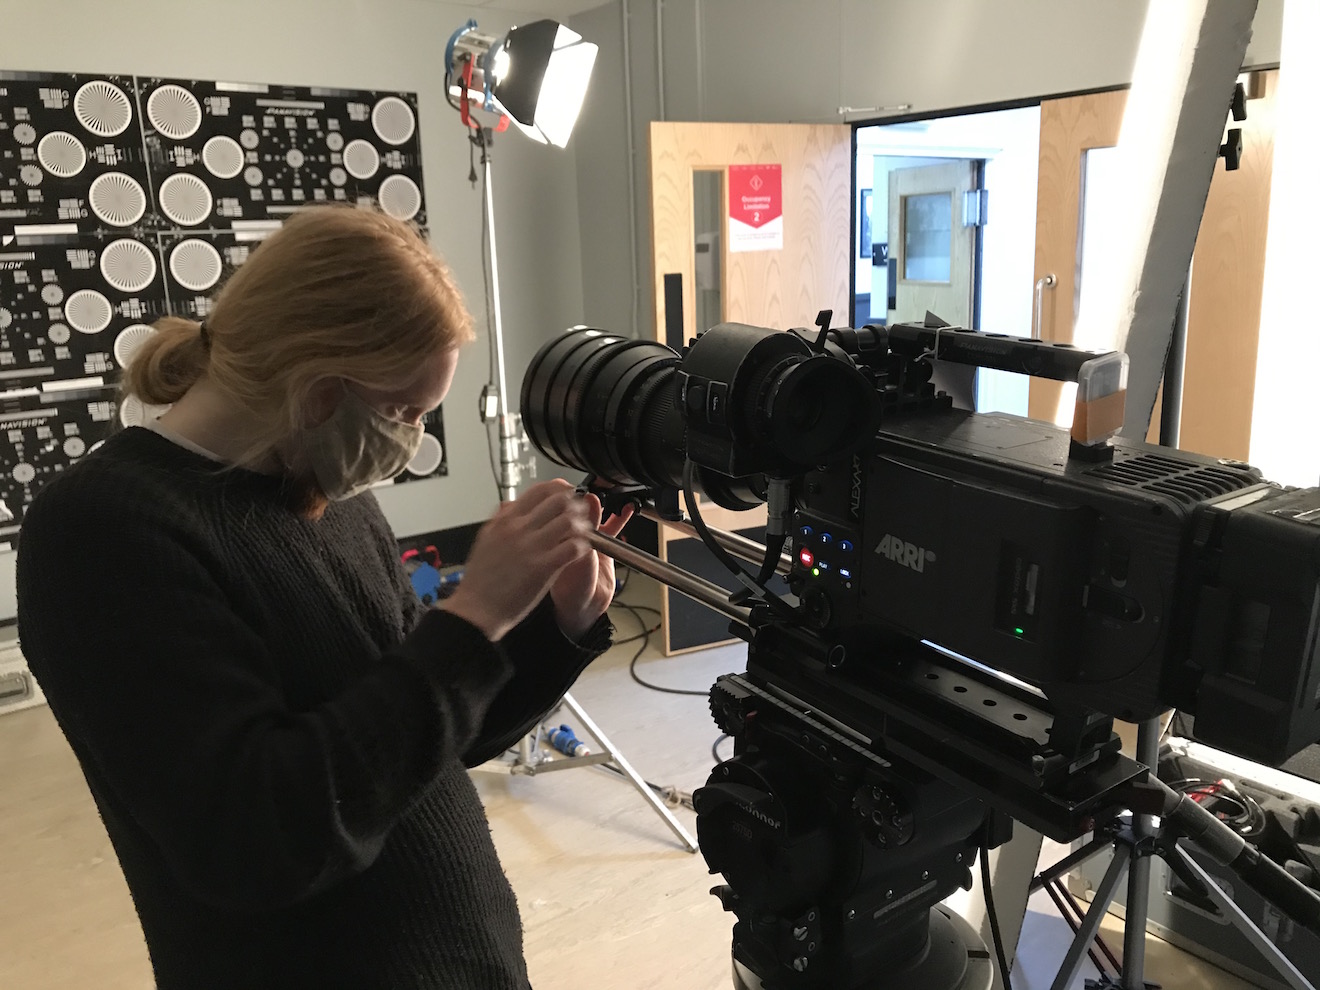
So, the camera tests. I knew all along that I wanted to test multiple cameras and lenses to find the right ones for this project, a practice that is common on features but which, for one reason and another, I’ve never had a proper chance to do before. So I was very excited to spend Wednesday at Panavision, not far from my old stomping ground in Perivale, playing around with expensive equipment.
Specifically we had: an Arri Alexa – a camera I’m very familiar with, and my gut instinct for shooting this project on; a Sony F55 – which I was curious to test because it was used to shoot the beautiful Outlander series; and a Red Gemini – because I haven’t used a Red in years and I wanted to check I wasn’t missing out on something awesome.
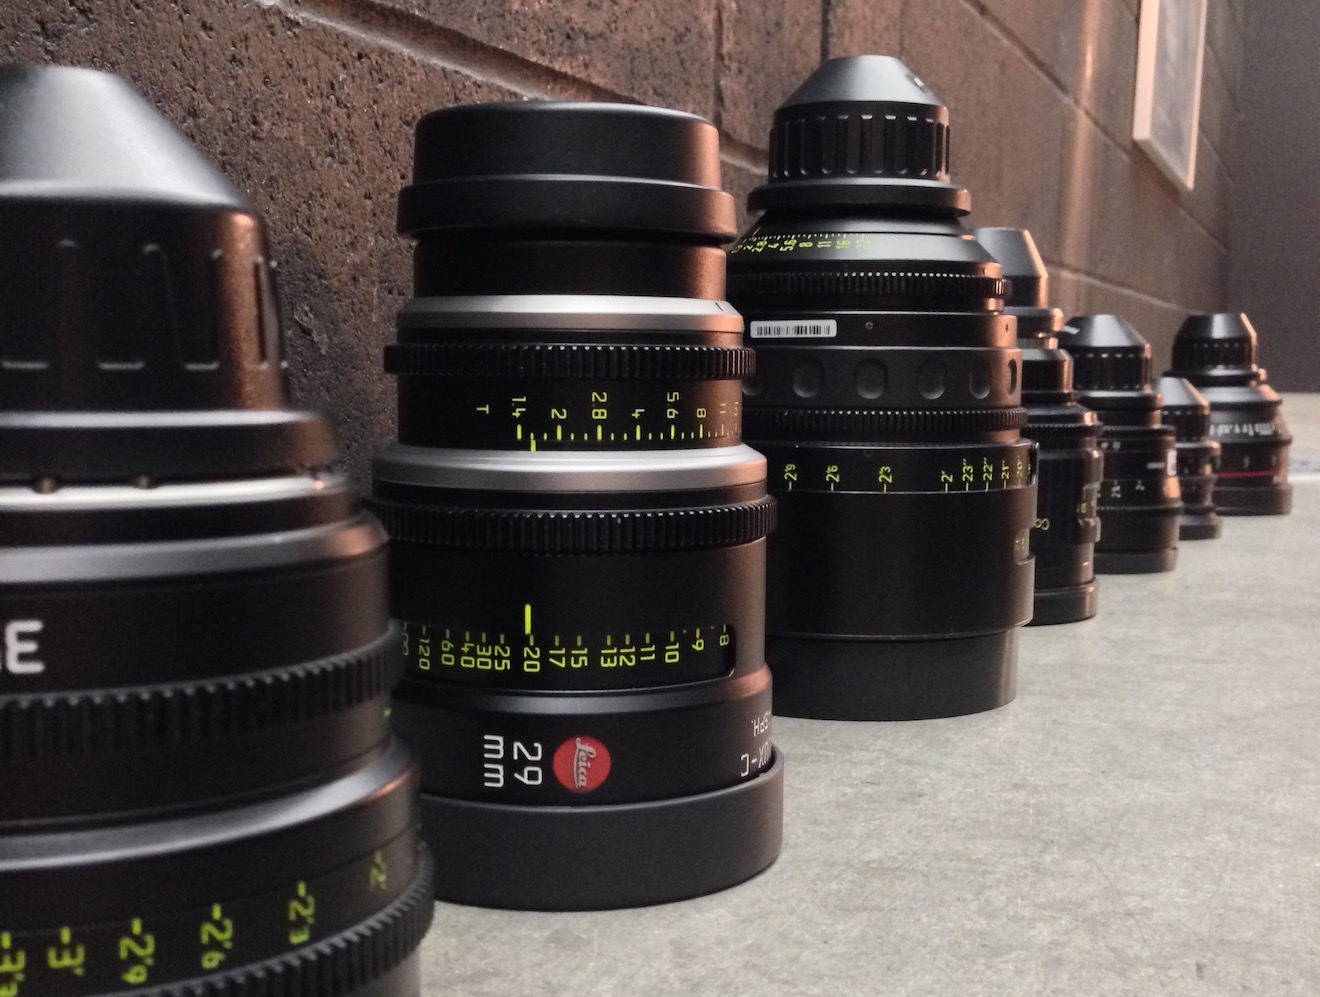
For lenses we had: a set of Cooke Panchros – again a gut instinct (I’ve never used them, but from what I’ve read they seemed to fit); a set of Zeiss Superspeeds – selected after reviewing my 2017 test footage from Arri Rental; a couple of Cooke Varotal zooms, and the equivalents by the ever-reliable Angenieux. Other than the Angenieux we used on the B-camera for The Little Mermaid (which I don’t think we ever zoomed during a take), I’ve not used cinema zooms before, but I want the old-fashioned look for this project.
Here are the edited highlights from the tests…
You’ll notice that the Sony F55 disappears from the video quite early on. This is because, although I quite liked the camera on the day, as soon as I looked at the images side by side I could see that the Sony was significantly softer than the other two.
So it was down to the Alexa vs. the Gemini, and the Cookes vs. the Superspeeds. I spent most of Thursday and all of Friday morning playing with the footage in DaVinci Resolve, trying to decide between these two pairs of very close contenders. I tried various LUTs, did some rough grading (very badly, because I’m not a colourist), tested how far I could brighten the footage before it broke down, and examined flares and bokeh obsessively.
Ultimately I chose the Cooke Panchros because (a) they have a beautiful and very natural-looking flare pattern, (b) the bokeh has a slight glow to it which I like, (c) the bokeh remains a nice shape when stopped down, unlike the Superspeeds’, which goes a bit geometric, (d) they seem sharper than the Superspeeds at the edges of frame when wide open, and (e) more lengths are available.
As for the zoom lenses (not included in the video), the Cooke and the Angenieux were very similar indeed. I chose the former because it focuses a little closer and the bokeh again has that nice glow.
I came very close to picking the Gemini as my camera. I think you’d have to say, objectively, it produces a better image than the Alexa, heretical as that may sound. The colours seem more realistic (although we didn’t shoot a colour chart, which was a major oversight) and it grades extremely well. But…
I’m not making a documentary. I want a cinematic look, and while the Gemini is by no means un-cinematic, the Alexa was clearly engineered by people who loved the look of film and strove to recreate it. When comparing the footage with the Godfather and Fanny and Alexander screen-grabs that are the touchstone of the look I want to create, the Alexa was just a little bit closer. My familiarity and comfort level with the Alexa was a factor too, and the ACs felt the same way.
I’m very glad to have tested the Gemini though, and next time I’m called upon to shoot something great and deliver in 4K (not a requirement on this project) I will know exactly where to turn. A couple of interesting things I learnt about it are: (1) whichever resolution (and concomitant crop factor) you select, you can record a down-scaled 2K ProRes file, and this goes for the Helium too; (2) 4K gives the Super-35 field of view, whereas 5K shows more, resulting in some lenses vignetting at this resolution.
In the first part of this series, I explained the concepts of f-stops and T-stops, and looked at how aperture can be used to control exposure. We saw that changing the aperture causes side effects, most noticeably altering the depth of field.
How can we set the correct exposure without compromising our depth of field? Well, as we’ll see later in this series, we can adjust the shutter angle and/or ISO, but both of those have their own side effects. More commonly a DP will use neutral density (ND) filters to control the amount of light reaching the lens. These filters get their name from the fact that they block all wavelengths of light equally, so they darken the image without affecting the colour.
When to use an ND Filter
Let’s look at an example. Imagine that I want to shoot at T4; this aperture gives a nice depth of field, on the shallow side but not excessively so. My subject is very close to a bright window and my incident light meter is giving me a reading of f/11. (Although I’m aiming for a T-stop rather an f-stop, I can still use the f-number my meter gives me; in fact if my lens were marked in f-stops then my exposure would be slightly off because the meter does not know the transmission efficiency of my lens.) Let’s remind ourselves of the f-stop/T-stop series before we go any further:
1 1.4 2 2.8 4 5.6 8 11 16 22 32
By looking at this series, which can be found printed on any lens barrel or permanently displayed on a light meter’s screen, I can see that f/11 (or T11) is three stops down from f/4 (or T4) – because 11 is three numbers to the right of 4 in the series. To achieve correct exposure at T4 I’ll need to cut three stops of light. I can often be seen on set counting the stops like this on my light meter or on my fingers. It is of course possible to work it out mathematically or with an app, but that’s not usually necessary. You quickly memorise the series of stops with practice.
What Strength of filter to choose
Some ND filters are marked in stops, so I could simply select a 3-stop ND and slide it into my matte box or screw it onto my lens. Other times – the built-in ND filters on the Sony FS7, for example – they’re defined by the fraction of light they let through. So the FS7’s 1/4 ND cuts two stops; the first stop halves the light – as we saw in part of one of this series – and the second stop halves it again, leaving us a quarter of the original amount. The 1/16 setting cuts four stops.
However, most commonly, ND filters are labelled in optical density. A popular range of ND filters amongst professional cinematographers are those made by Tiffen, and a typical set might be labelled as follows:
.3 .6 .9 1.2
That’s the optical density, a property defined as the natural logarithm of the ratio of the quantity of light entering the filter to the quantity of light exiting it on the other side. A .3 ND reduces the light by half because 10 raised to the power of -0.3 is about 0.5, and reducing light by half, as we’ve previously established, means dropping one stop.
If that maths is a bit much for you, don’t worry. All you really need to do is multiply the number of stops you want to cut by 0.3 to find the filter you need. So, going back to my example with the bright window, to get from T11 to T4, i.e. to cut three stops, I’ll pick the .9 ND.
It’s far from intuitive at first, but once you get your head around it, and memorise the f-stops, it’s not too difficult. Trust me!
Here are a couple more examples:
Light meter reads f/8 and you want to shoot at T5.6. That’s a one stop difference. (5.6 and 8 are right next to each other in the stop series, as you’ll see if you scroll back to the top.) 1 x 0.3 = 0.3 so you should use the .3 ND.
Light meter reads f/22 and you want to shoot at T2.8. That’s a six stop difference (scroll back up and count them), and 6 x 0.3 = 1.8, so you need a 1.8 ND filter. If you don’t have one, you need to stack two NDs in your matte box that add up to 1.8, e.g. a 1.2 and a .6.
Variations on a Theme
Variable ND filters are also available. These consist of two polarising filters which can be rotated against each other to progressively lighten or darken the image. They’re great for shooting guerilla-style with a small crew. You can set your iris where you want it for depth of field, then expose the image by eye simply by turning the filter. On the down side, they’re hard to use with a light meter because there is often little correspondence between the markings on the filter and stops. They can also have a subtle adverse effect on skin tones, draining a person’s apparent vitality, as some of the light which reflects off human skin is polarised.
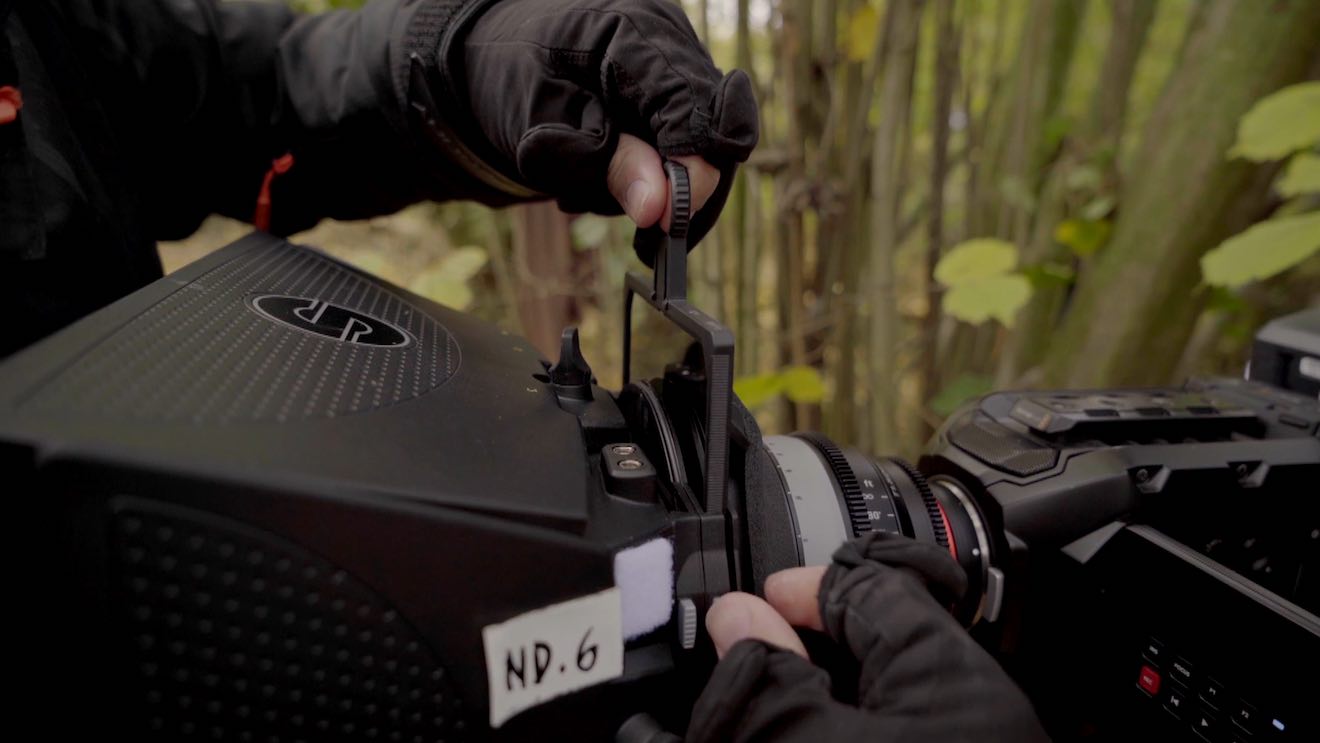
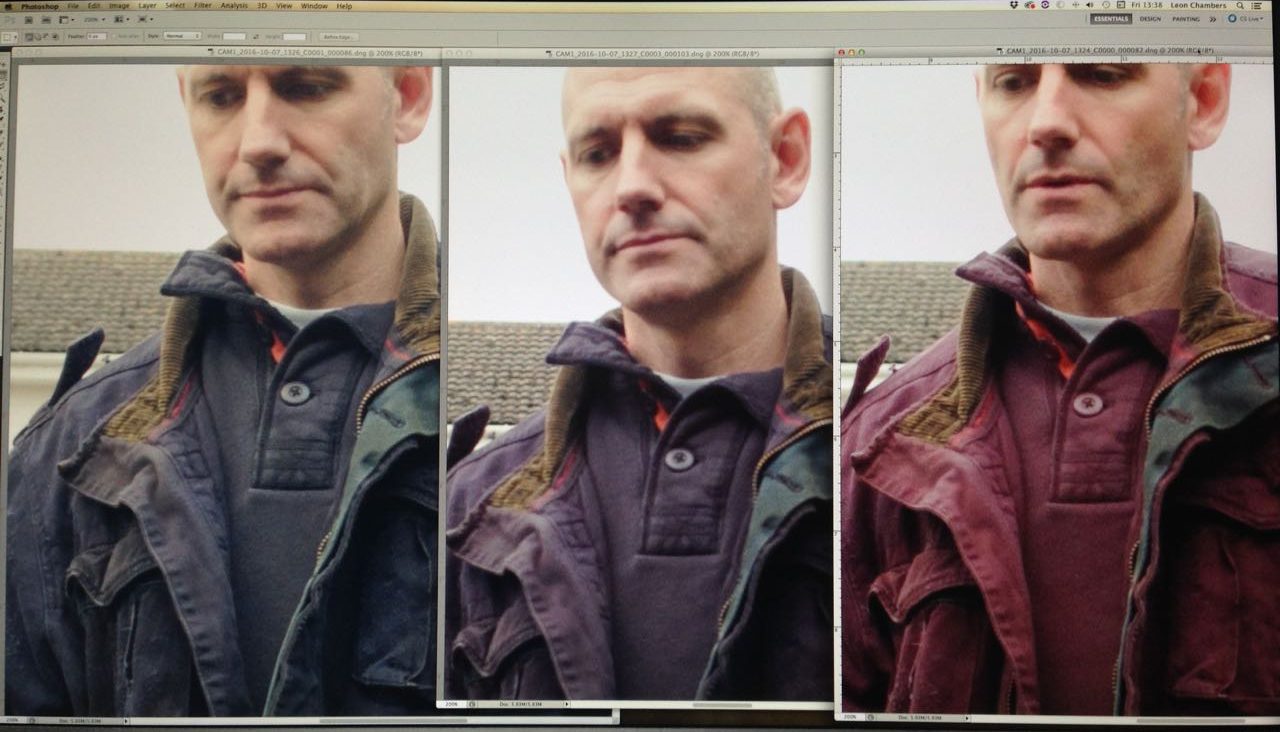
IR pollution increases with successively stronger ND filters (left to right) used on a Blackmagic Micro Cinema Camera. The blue dyes in this costume evidently reflect a large amount of IR.
Another issue to look out for with ND filters is infra-red (IR). Some filters cut only the visible wavelengths of light, allowing IR to pass through. Some digital sensors will interpret this IR as visible red, resulting in an image with a red colour cast which can be hard to grade out because different materials will be affected to different degrees. Special IR ND filters are available to eliminate this problem.
These caveats aside, ND filters are the best way to adjust exposure (downwards at least) without affecting the image in any other way.
In the next part of this series I’ll look at shutter angles, what they mean, how they affect exposure and what the side effects are.
Learn how to use ND filters practically with my Cinematic Lighting online couse. Enter voucher code INSTA90 for an amazing 90% off.
This is the first in a series of posts where I will look in detail at the four means of controlling the brightness of a digital video image: aperture, neutral density (ND) filters, shutter angle and ISO. It is not uncommon for newer cinematographers to have only a partial understanding of these topics, enough to get by in most situations; that was certainly the case with me for many years. The aim of this series is to give you an understanding of the underlying mechanics which will enable you to make more informed creative decisions.
You can change any one of the four factors, or any combination of them, to reach your desired level of exposure. However, most of them will also affect the image in other ways; for example, aperture affects depth of field. One of the key responsibilities of the director of photography is to use each of the four factors not just to create the ideal exposure, but to make appropriate use of these “side effects” as well.
f-stops and t-stops
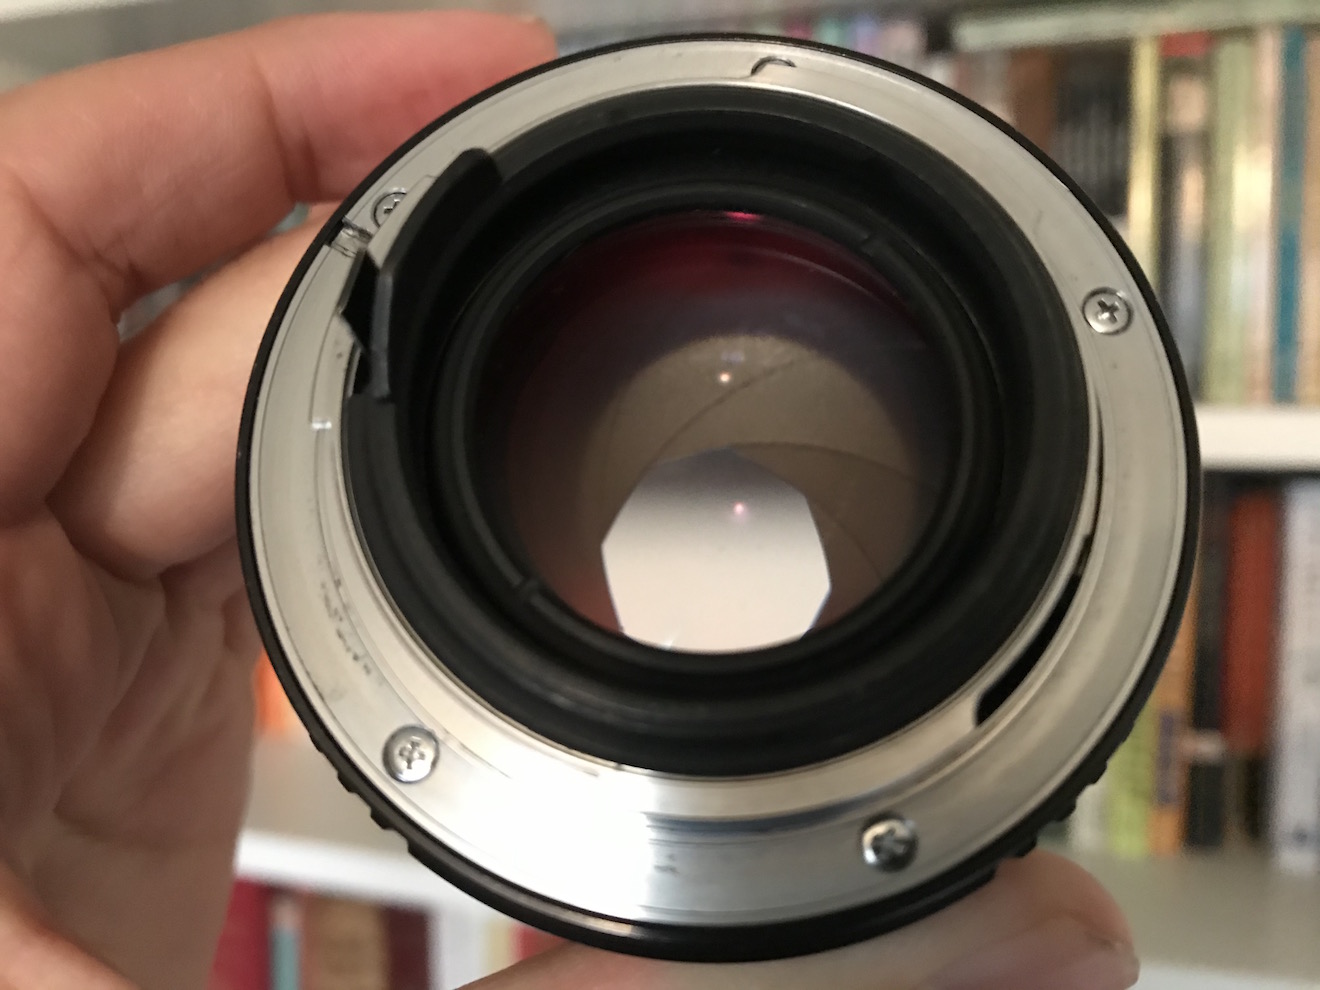
The most common way of altering exposure is to adjust the aperture, a.k.a. the iris, sometimes described as changing “the stop”. Just like the pupil in our eyes, the aperture of a photographic lens is a (roughly) circular opening which can be expanded or contracted to permit more or less light through to the sensor.
You will have seen a series of numbers like this printed on the sides of lenses:
1 1.4 2 2.8 4 5.6 8 11 16 22 32
These are ratios – ratios of the lens’ focal length to its iris diameter. So a 50mm lens with a 25mm diameter iris is at f/2. Other lengths of lens would have different iris diameters at f/2 (e.g. 10mm diameter for a 20mm lens) but they would all produce an image of the same brightness. That’s why we use f-stops to talk about iris rather than diameters.
But why not label a lens 1, 2, 3, 4…? Why 1, 1.2, 2, 2.8…? These magic numbers are f-stops. A lens set to f/1.4 will let in twice as much light as (or “one stop more than”) a lens set to f/2, which in turn will let in twice as much as one set to f/2.8, and so on. Conversely, a lens set to f/2.8 will let in half as much light as (or “one stop less than”) a lens set to f/2, and so on. (Note that a number between any of these f-stops, e.g. f/1.8, is properly called an f-number, but not an f-stop.) These doublings or halvings – technically known as a base-2 logarithmic scale – are a fundamental concept in exposure, and mimic our eyes’ response to light.
If you think back to high-school maths and the πr² squared formula for calculating the area of a circle from its radius, the reason for the seemingly random series of numbers will start to become clear. Letting in twice as much light requires twice as much area for those light rays to fall on, and remember that the f-number is the ratio of the focal length to the iris diameter, so you can see how square roots are going to get involved and why f-stops aren’t just plain old round numbers.
If you’re shooting with a cine lens, rather than a stills lens, you’ll see the same series of numbers on the barrel, but here they are T-stops rather than f-stops. T-stops are f-stops adjusted to compensate for the light transmission efficiency. Two different lenses set to, say, f/2 will not necessarily produce equally bright images, because some percentage of light travelling through the elements will always be lost, and that percentage will vary depending on the quality of the glass and the number of elements. A lens with 100% light transmission would have the same f-number and T-number, but in practice the T-number will always be a little bigger than the f-number. For example, Cooke’s 15-40mm zoom is rated at a maximum aperture of T2 or f/1.84.
Fast and slow lenses
When buying or renting a lens, one of the first things you will want to know is its maximum aperture. Lenses are often described as being fast (larger maximum aperture, denoted by a smaller f- or T-number like T1.4) or slow (smaller maximum aperture, denoted by a bigger f- or T-number like T4). These terms come from the fact that the shutter speed would need to be faster or slower to capture the same amount of light… but more on that later in the series.
Faster lenses are generally more expensive, but that expense may well be outweighed by the savings made on lighting equipment. Let’s take a simple example, and imagine an interview lit by a 4-bank Kino Flo and exposed at T2.8. If our lens can open one stop wider (known as stopping up) to T2 then we double the amount of light reaching the sensor. We can therefore halve the level of light – by turning off two of the Kino Flo’s tubes or by renting a cheaper 2-bank unit in the first place. If we can stop up further, to T1.4, then we only need one Kino tube to achieve the same exposure.
Side effects
One of the first things that budding cinematographers learn is that wider apertures make for a smaller depth of field, i.e. the range of distances within which a subject will be in focus is smaller. In simple terms, the background of the image is blurrier when the depth of field is shallower.
It is often tempting to go for the shallowest possible depth of field, because it feels more cinematic and helps conceal shortcomings in the production design, but that is not the right look for every story. A DP will often choose a stop to shoot at based on the depth of field they desire. That choice of stop may affect the entire lighting budget; if you want to shoot at a very slow T14 like Douglas Slocombe did for the Indiana Jones trilogy, you’re going to need several trucks full of lights!
There is another side effect of adjusting the aperture which is less obvious. Lenses are manufactured to perform best in the middle of their iris range. If you open a lens up to its maximum aperture or close it down to its minimum, the image will soften a little. Therefore another advantage of faster lenses is the ability to get further away from their maximum aperture (and poorest image quality) with the same amount of light.
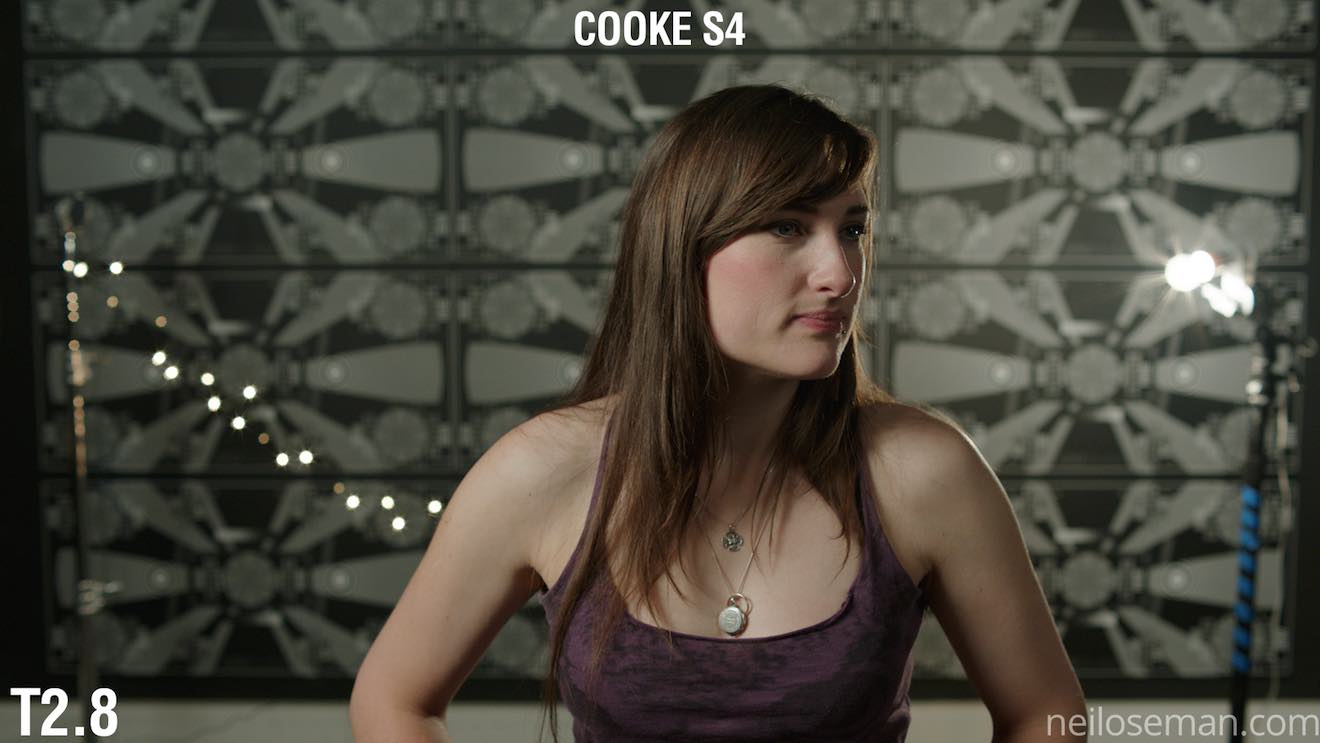
Finally it is worth noting that the appearance of bokeh (out of focus areas) and lens flares also changes with aperture. The Cooke S4 range, for example, renders out-of-focus highlights as circles when wide open, but as octagons when stopped down. With all lenses, the star pattern seen around bright light sources will be stronger when the aperture is smaller. You should shoot tests – like these I conducted in 2017 – if these image artefacts are a critical part of your film’s look.
Next time we’ll look at how we can use ND filters to control exposure without compromising our choice of stop.
Learn how to use exposure practically with my Cinematic Lighting online couse. Enter voucher code INSTA90 for an amazing 90% off.
The high dynamic range of the ARRI Alexa Mini allowed me to retain all the sky detail in this shot from “Above the Clouds”.
Recently I’ve been pondering which camera to shoot an upcoming project on, so I consulted the ASC’s comparison chart. Amongst the many specs compared is dynamic range, and I noticed that the ARRI Alexa’s was given as 14+ stops, while the Blackmagic URSA’s is 15. Having used both cameras a fair bit, I can tell you that there’s no way in Hell that the Ursa has a higher dynamic range than the Alexa. So what’s going on here?
What is dynamic range?
To put it simply, dynamic range is the level of contrast that an imaging system can handle. To quote Alan Roberts, who we’ll come back to later:
This is normally calculated as the ratio of the exposure which just causes white clipping to the exposure level below which no details can be seen.
A photosite on a digital camera’s sensor outputs a voltage proportional to the amount of light hitting it, but at some point the voltage reaches a maximum, and no matter how much more light you add, it won’t change. At the other end of the scale, a photosite may receive so little light that it outputs no voltage, or at least nothing that’s discernible from the inherent electronic noise in the system. These upper and lower limits of brightness may be narrowed by image processing within the camera, with RAW recording usually retaining the full dynamic range, while linear Rec. 709 severely curtails it.
In photography and cinematography, we measure dynamic range in stops – doublings and halvings of light which I explain fully in this article. One stop is a ratio of 2:1, five stops are 32:1, thirteen stops are almost 10,000:1
It’s worth pausing here to point out the difference between dynamic range and latitude, a term which is sometimes regarded as synonymous, but it’s not. The latitude is a measure of how much the camera can be over- or under-exposed without losing any detail, and is dependent on both the dynamic range of the camera and the dynamic range of the scene. (A low-contrast scene will allow more latitude for incorrect exposure than a high-contrast scene.)
Problems of Measurement
Before digital cinema cameras were developed, video had a dynamic range of about seven stops. You could measure this relatively easily by shooting a greyscale chart and observing the waveform of the recorded image to see where the highlights levelled off and the shadows disappeared into the noise floor. With today’s dynamic ranges into double digits, simple charts are no longer practical, because you can’t manufacture white enough paper or black enough ink.
For his excellent video on dynamic range, Filmmaker IQ’s John Hess built a device fitted with a row of 1W LEDs, using layers of neutral density gel to make each one a stop darker than its neighbour. For the purposes of his demonstration, this works fine, but as Phil Rhodes points out on RedShark News, you start running into the issue of the dynamic range of the lens.
It may seem strange to think that a lens has dynamic range, and in the past when I’ve heard other DPs talk about certain glass being more or less contrasty, I admit that I haven’t thought much about what that means. What it means is flare, and not the good anamorphic streak kind, but the general veiling whereby a strong light shining into the lens will raise the overall brightness of the image as it bounces around the different elements. This lifts the shadows, producing a certain amount of milkiness. Even with high contrast lenses, ones which are less prone to veiling, the brightest light on your test device will cause some glare over the darkest one, when measuring the kind of dynamic range today’s cameras enjoy.
Manufacturer Measurements
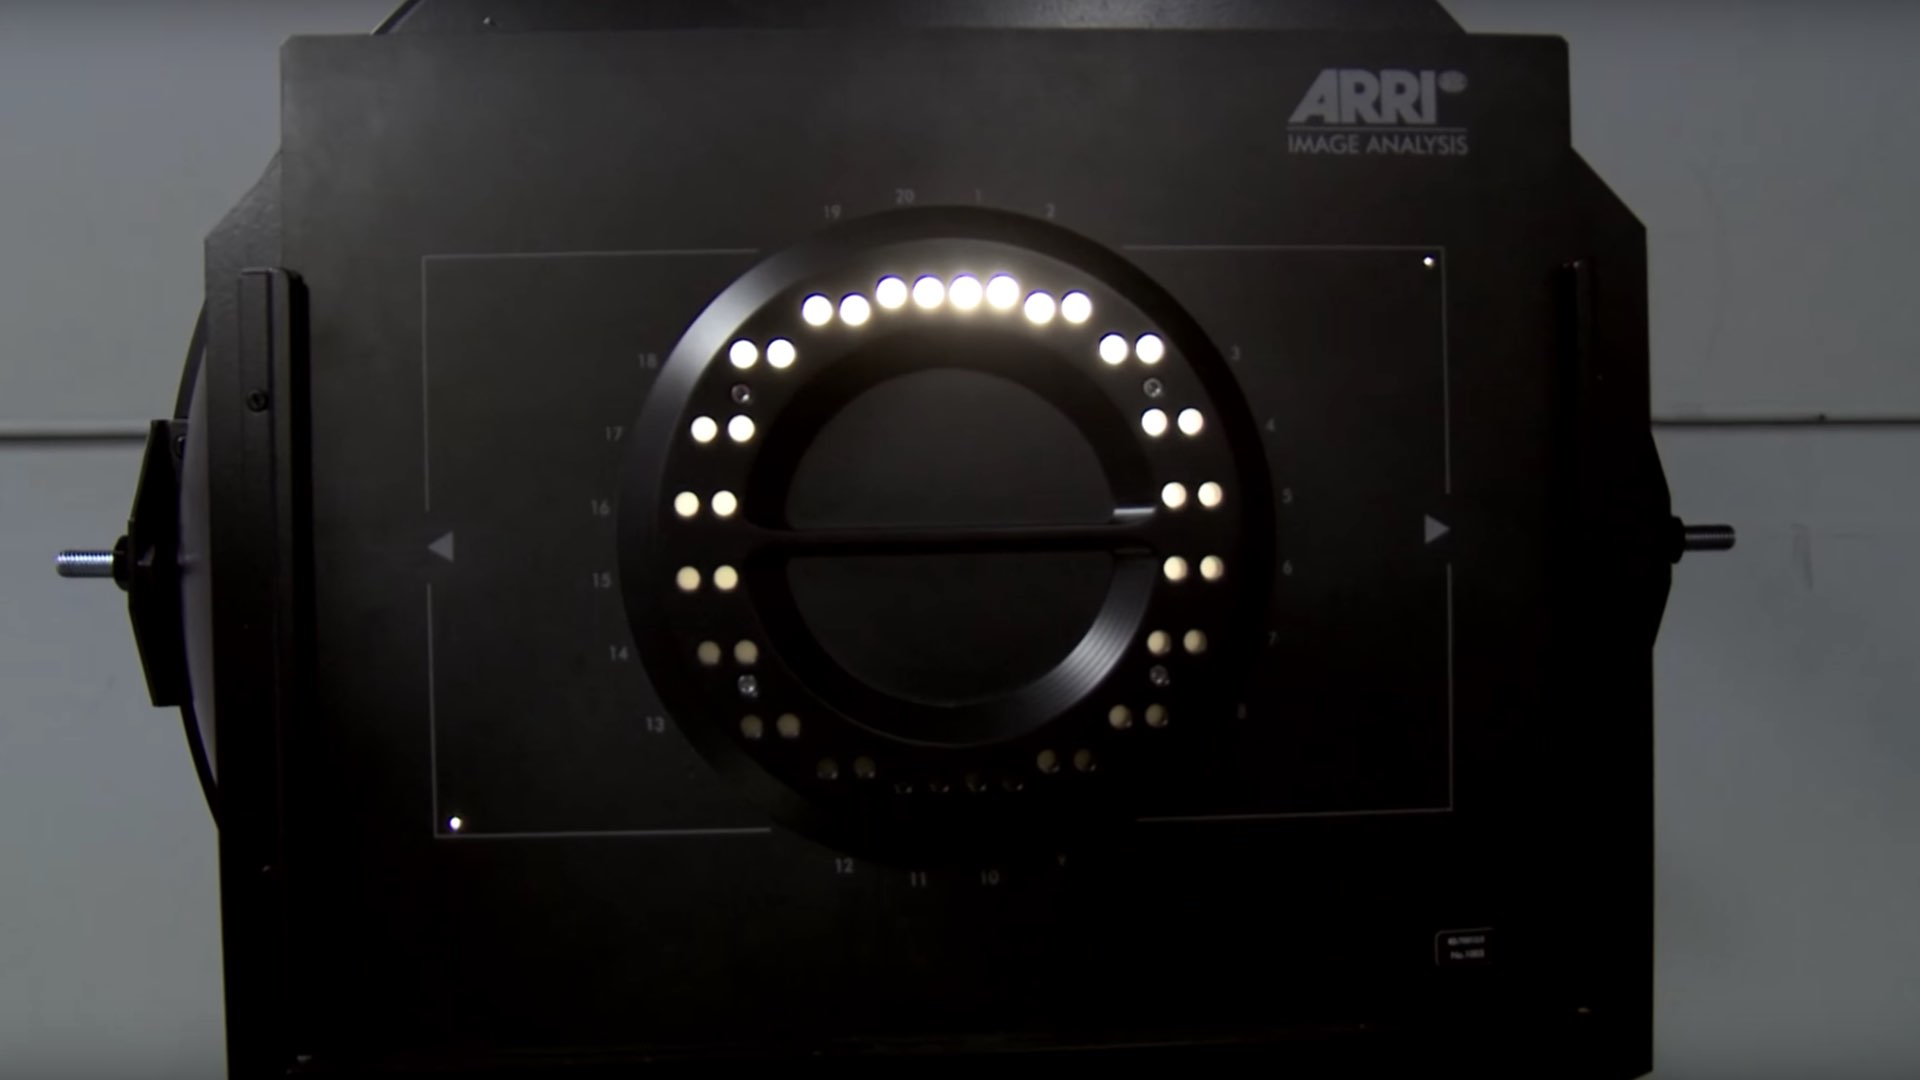
Going back to my original query about the Alexa versus the URSA, let’s see exactly what the manufacturers say. ARRI specifically states that its sensor’s dynamic range is over 14 stops “as measured with the ARRI Dynamic Range Test Chart”. So what is this chart and how does it work? The official sales blurb runs thusly:
The ARRI DRTC-1 is a special test chart and analysis software for measurement of dynamic range and sensitivity of digital cameras. Through a unique stray light reduction concept this system is able to accurately measure up to 15.5 stops of dynamic range.
The “stray light reduction” is presumably to reduce the veiling mentioned earlier and provide more accurate results. This could be as simple as covering or turning off the brighter lights when measuring the dimmer ones.
I found a bit more information about the test chart in a 2011 camera shoot-out video, from that momentous time when digital was supplanting film as the cinematic acquisition format of choice. Rather than John Hess’s ND gel technique, the DRTC-1 opts for something else to regulate its light output, as ARRI’s Michael Bravin explains in the video:
There’s a piece of motion picture film behind it that’s checked with a densitometer, and what you do is you set the exposure for your camera, and where you lose detail in the vertical and horizontal lines is your clipping point, and where you lose detail because of noise in the shadow areas is your lowest exposure… and in between you end up finding the number of stops of dynamic range.
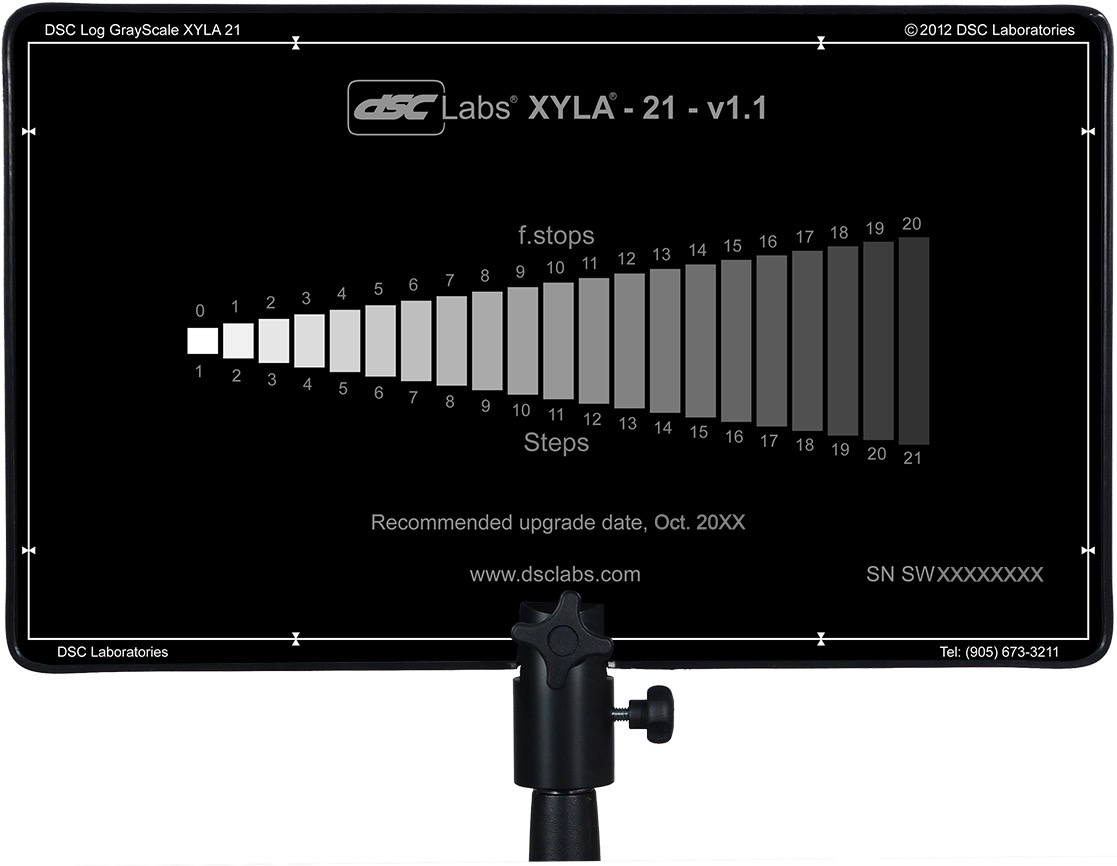
Blackmagic Design do not state how they measure the dynamic range of their cameras, but it may be a DSC Labs Xlya. This illuminated chart boasts a shutter system which “allows users to isolate and evaluate individual steps”, plus a “stepped xylophone shape” to minimise flare problems.
I used to do a lot of consulting with DSC Labs, who make camera test charts, so I own a 20-stop dynamic range chart (DSC Labs Xyla). This is what most manufacturers use to test dynamic range (although not ARRI, because our engineers don’t feel it’s precise enough) and I see what companies claim as usable stops. You can see that they are just barely above the noise floor.
Conclusions
Obviously these ARRI folks I keep quoting may be biased. I wanted to find an independent test that measures both Blackmagics and Alexas with the same conditions and methodology, but I couldn’t find one. There is plenty of anecdotal evidence that Alexas have a bigger dynamic range, in fact that’s widely accepted as fact, but quantifying the difference is harder. The most solid thing I could find is this, from a 2017 article about the Blackmagic Ursa Mini 4.6K (first generation):
The camera was measured at just over 14 stops of dynamic range in RAW 4:1 [and 13 stops in ProRes]. This is a good result, especially considering the price of the camera. To put this into perspective Alan measured the Canon C300 mkII at 15 stops of dynamic range. Both the URSA Mini 4.6 and C300 mkII are bettered by the ARRI Alexa and Amira, but then that comes as no surprise given their reputation and price.
The Alan mentioned is Alan Roberts, something of a legend when it comes to testing cameras. It is interesting to note that he is one of the key players behind the TLCI (Television Lighting Consistency Index), a mooted replacement for CRI (Colour Rendering Index). It’s interesting because this whole dynamic range business is starting to remind me of my investigation into CRI, and is leading me to a similar conclusion, that the numbers which the manufacturers give you are all but useless in real-world cinematography.
Whereas CRI at least has a standardised test, there’s no such thing for dynamic range. Therefore, until there is more transparency from manufacturers about how they measure it, I’d recommend ignoring their published values. As always when choosing a camera, shoot your own tests if at all possible. Even the most reliable numbers can’t tell you whether you’re going to like a camera’s look or not, or whether it’s right for the story you want to tell.
When tests aren’t possible, and I know that’s often the case in low-budget land, at least try to find an independent comparison. I’ll leave you with this video from the Slanted Lens, which compares the URSA Mini Pro G2 with the ARRI Amira (which uses the same Alev III sensor as the Alexa). They don’t measure the dynamic range, but you can at least see the images side by side, and in the end it’s the images that matter, not the numbers.
Lately, having run out of interesting series, I’ve found myself watching a lot of nineties blockbusters: Outbreak, Twister, Dante’s Peak, Backdraft, Daylight. Whilst eighties movies were the background to my childhood, and will always have a place in my heart, it was the cinema of the nineties that I was immersed in as I began my own amateur filmmaking. So, looking back on those movies now, while certain clichés stand out like sore thumbs, they still feel to me like solid examples of how to make a summer crowd-pleaser.
Let’s get those clichés out of the way first. The lead character always has a failed marriage. There’s usually an opening scene in which they witness the death of a spouse or close relative, before the legend “X years later” fades up. The dog will be saved, but the crotchety elderly character will die nobly. Buildings instantly explode towards camera when touched by lava, hurricanes, floods or fires. A stubborn senior authority figure will refuse to listen to the disgraced lead character who will ultimately be proven correct, to no-one’s surprise.
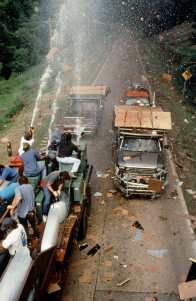
Practical effects in action on “Twister”
There’s an intensity to nineties action scenes, born of the largely practical approach to creating them. The decade was punctuated by historic advances in digital effects: the liquid metal T-1000 in Terminator 2 (1991), digital dinosaurs in Jurassic Park(1993), motion-captured passengers aboard the miniature Titanic (1997), Bullet Time in The Matrix (1999). Yet these techniques remained expensive and time-consuming, and could not match traditional methods of creating explosions, floods, fire or debris. The result was that the characters in jeopardy were generally surrounded by real set-pieces and practical effects, a far more nerve-wracking experience for the viewer than today, when we can tell that our heroes are merely imagining their peril on a green-screen stage.
One thing I was looking out for during these movie meanders down memory lane was lens selection. A few weeks back, a director friend had asked me to suggest examples of films that preferred long lenses. He had mentioned that such lenses were more in vogue in the nineties, which I’d never thought about before.
As soon as I started to consider it, I realised how right my friend was. And how much that long-lens look had influenced me. When I started out making films, I was working with the tiny sensors of Mini-DV cameras. I would often try to make my shots look more cinematic by shooting on the long end of the zoom. This was partly to reduce the depth of field, but also because I instinctively felt that the compressed perspective was more in keeping with what I saw at the cinema.
I remember being surprised by something that James Cameron said in his commentary on the Aliens DVD:
I went to school on Ridley [Scott]’s style of photography, which was actually quite a bit different from mine, because he used a lot of long lenses, much more so than I was used to working with.
I had assumed that Cameron used long lenses too, because I felt his films looked incredibly cinematic, and because I was so sure that cinematic meant telephoto. I’ve discussed in the past what I think people tend to mean by the term “cinematic”, and there’s hardly a definitive answer, but I’m now sure that lens length has little to do with it.
“Above the Clouds” (dir. Leon Chambers)
And yet… are those nineties films influencing me still? I have to confess, I struggle with short lenses to this day. I find it hard to make wide-angle shots look as good. On Above the Clouds, to take just one example, I frequently found that I preferred the wide shots on a 32mm than a 24mm. Director Leon Chambers agreed; perhaps those same films influenced him?
A deleted scene from Ren: The Girl with the Mark ends with some great close-ups shot on my old Sigma 105mm still lens, complete with the slight wobble of wind buffeting the camera, which to my mind only adds to the cinematic look! On a more recent project, War of the Worlds: The Attack, I definitely got a kick from scenes where we shot the heroes walking towards us down the middle of the street on a 135mm.
Apart from the nice bokeh, what does a long lens do for an image? I’ve already mentioned that it compresses perspective, and because this is such a different look to human vision, it arguably provides a pleasing unreality. You could describe it as doing for the image spatially what the flicker of 24fps (versus high frame rates) does for it temporally. Perhaps I shy away from short lenses because they look too much like real life, they’re too unforgiving, like many people find 48fps to be.
The compression applies to people’s faces too. Dustin Hoffman is not known for his small nose, yet it appears positively petite in the close-up below from Outbreak. While this look flatters many actors, others benefit from the rounding of their features caused by a shorter lens.
Perhaps the chief reason to be cautious of long lenses is that they necessitate placing the camera further from the action, and the viewer will sense this, if only on a subconscious level. A long lens, if misused, can rob a scene of intimacy, and if overused could even cause the viewer to disengage with the characters and story.
I’ll leave you with some examples of long-lens shots from the nineties classics I mentioned at the start of this post. Make no mistake, these films employed shorter lenses too, but it certainly looks to me like they used longer lenses on average than contemporary movies.
A couple of weeks ago I shared my thoughts about whether a director of photography should own equipment. My conclusion was that it can be useful early in your career, when you’re shooting corporates or tiny films with no hire budget. So what is the best camera for indie cinematography?
I’m not going to answer that, but I will tell you what to look for when investing in a camera. Hopefully these tips will help you choose the one that’s right for you from the huge and ever-changing array of professional cameras on the market, from the humble DSLR to the ubiquitous Reds and everything in between.
1. Image quality
Shooting on a Sony FS7 for “Finding Hope”
The quality of the image is of course the most imporant attribute of any camera. Rather than any technical specifications, I’m talking about the aesthetic quality here: how does it feel? Does it have that elusive “cinematic” quality? Is it “filmic”? Does it remind you of certain kinds of movies?
A good place to start is to look up sample footage on YouTube, or better still Vimeo for less compression muddying the issue. If you can borrow the camera and try it out before you buy, even better. Take away some test footage and try grading it too.
2. Resolution
Resolution, the sheer number of pixels a camera can record, is part of image quality, but I include it as a separate point because I see it as more of a technical consideration than an aesthetic one. You should ask yourself what longevity you require from your films – will people still be watching them, say two or three years from now, and if so what sort of resolution might be the norm by then?
Also consider your delivery platform. If everything you shoot is going on YouTube, perhaps you don’t need more than 1080P (standard HD).
3. Dynamic Range
Dynamic range is a measure of how much contrast a camera can handle. Too small a dynamic range and you will frequently struggle with bright areas “clipping” – i.e. losing details – or dark areas getting lost in the image noise. Also, the wider the dynamic range, the more flexibility you will have in grading.
For a cinematic image, 12 stops of dynamic range is the absolute minimum, with 14 or more being ideal.
4. Maximum ISO
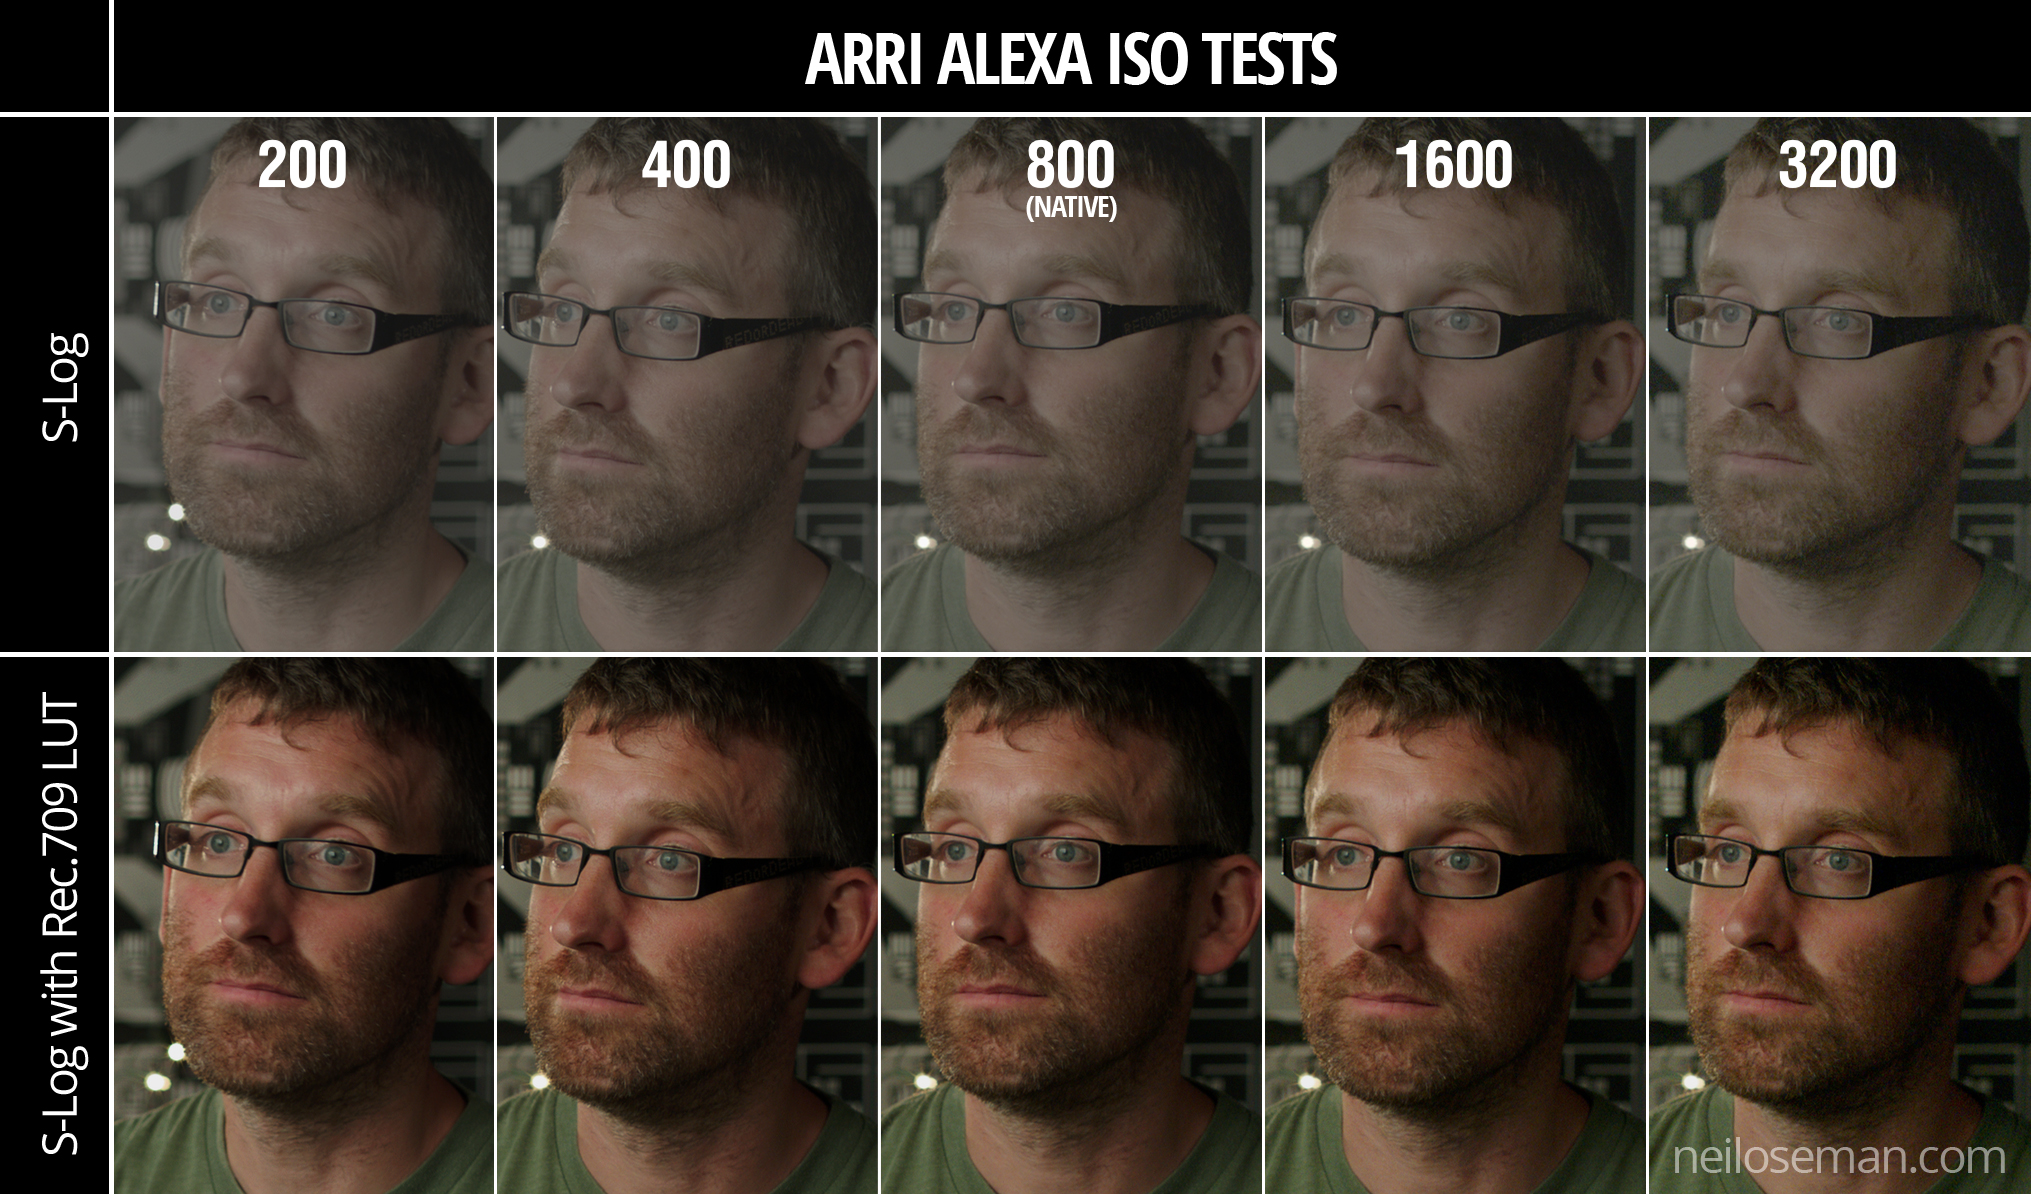
Some ISO tests I conducted on an Arri Alexa Classic in 2017
The ISO (International Standards Organisation) scale rates the light sensitivity of a camera. The most important thing is the native ISO, the one at which the camera is optimised to give the cleanest image with the most detail. On some cameras, setting an ISO other than the native one reduces the image quality considerably.
The higher the ISO, the less light will be required to expose an image correctly. 800 is typical these days, but many cameras go much higher than that. It is worth thinking about spending more money to get a camera with a higher native ISO, because you may save a lot of money on lighting.
5. Lens Mount
This is crucial because you may already have a collection of lenses, or you may intend to hire certain lenses, and you need to be sure that they will fit your new camera’s mount.
The Canon EF mount is extremely common and will open up a huge range of options for stills glass as well as some low-end cinema glass. The smaller MFT (micro four-thirds) mount also has a wide range of lenses.
Top-end cameras have PL mounts which take all the beautiful cinema lenses used on big movies, but only choose this route if you are willing to part with a lot of cash!
6. Form Factor
A Blackmagic Micro Cinema Camera, not so micro once it’s rigged with rails, matte box, wireless follow focus, battery, monitor and video transmitter!
When I started in the industry, cameras were all ergonomically designed to sit on your shoulder, with a nice handgrip to the right of the lens and an EVF (electronic viewfinder) to provide a third point of stabilising contact. Nowadays cameras tend to be boxy, heavy and uncomfortable to hold without additional accessories (see below).
Again, try to gets your hands on the camera in a shop and see how it feels before you purchase. As well as handheld shooting, consider how easy it will be to rig onto dollies, sliders, gimbals, etc.
7. Required Accessories
Buying the camera body itself is unlikely to be the end of your expenditure. You will need lenses, batteries, a battery charger, cards, a card reader and almost certainly some kind of stabilising system, be it a simple shoulder rig or an electronic gimbal.
You may also want an EVF, a tripod, matte box, follow focus – the list can seem endless! Be careful to budget your essential accessories before buying the camera. Some cameras seem like bargains until you add up all the extras. Pay particular attention to the media, and to exactly what speed of media you need in order to shoot at the resolution and frame rate that you require, as this can get very expensive.
8. Codec
What file type and codec does the camera shoot? Does your editing system support that format? If not, how time-consuming will it be to convert everything?
What compression ratios does the camera support? How much hard drive space will you need to store an hour of footage at that ratio? What about ten hours, plus back-ups? Often there is a trade-off between a highly compressed format like H.264 which is light on disc space but may need converting before you can edit it, and a lightly compressed format like ProRes which burns through disc space but can be dropped straight into most editing software.
Recently I discovered Tailslate, a podcast by DPs Ed Moore, BSC and Benedict Spence. The second episode focuses on equipment, and the two men discuss the pros and cons of having your own gear. I have some pretty strong feelings on this myself, so I thought I’d share them here.
I owned equipment for the first 17 years of my career. I was fortunate that at the time I first went freelance (late 1999) I had a small inheritance which I was able to invest in the wonderful new Mini-DV/Firewire technology that had recently emerged. I bought my first semi-professional camera, a Canon XM-1, along with a decent Manfrotto 501/520 tripod, a basic tracking dolly, sound gear, and for editing a PowerMac G4, Mini-DV/VHS deck and a pair of Yamaha MSP5 active nearfield speakers. (The speakers are the only things I still have, and I’m using them as I write, 20 years on. They are the best thing I’ve ever bought. Nothing else has ever served me for so long, so frequently and so reliably.)
Shooting on my Canon XL1-S back in 2003
Apart from the speakers, everything else got replaced every few years as it fell into obsolescence or simply packed up. The XM-1 was replaced with an XL-1S, then I moved onto HDV with a Sony A1, then onto DSLRs with a Canon 600D/T3i, then a Blackmagic Production Camera, which turned out to be my last camera.
Immediately you can see one of the key problems with owning equipment: the fast pace of technological progression and the need to upgrade regularly to keep up. But owning equipment had disadvantages even before the fast-paced digital revolution. In a fascinating Clubhouse Conversation from the American Society of Cinematographers, M. David Mullen, ASC recounts his own experience with gear:
I ended up never owning a camera package. Because of that, I shot mostly 35mm in my early days… People I know who bought a [super]-16 camera, they ended up shooting [super]-16 films for the next ten years or so. So you can get tied to your own equipment.
But there are benefits to owning kit, of course. Corporate clients expect you to provide the gear yourself or to hire it in without any fuss. Clearly the former allows you to make more money from these jobs.
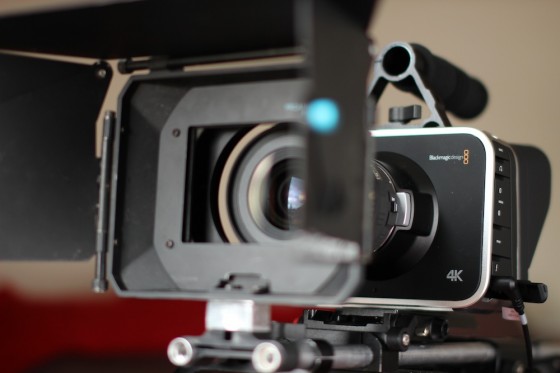
My last camera, the Blackmagic Production Camera 4K
For creative jobs, things aren’t so cut and dried. Owning a camera will certainly get you more work of a certain type. That type is unpaid and low-paid. If you expect to charge a hire fee on your gear, forget it. The type of productions that want you to have your own gear is the type that can’t afford to hire, either from you or from a facilities house. They’ll expect you to come along and bring your gear for free.
We all need to do this type of work at the start of our careers, which is why owning equipment is great at that point. But ultimately I sold my Blackmagic in 2017 and didn’t replace it because I no longer wanted that type of work.
I think things are a little different if you can afford to own a high-end camera. I’m pretty certain that I’ve lost jobs in the past, despite being a better cinematographer than the successful applicant, because they had a Red and I only had a DSLR or a Blackmagic. If you can afford an Alexa then you might well be able to get quality jobs off the back of it, but most of us aren’t in that position!
A camera that I could never afford to buy
The best thing about not owning gear is that you’re free to select the best equipment to tell each particular story (budget and production mandates notwithstanding). Each production is different, and there is no single camera or lens set that is best for all of them. Resolution, high frame rates, colour science, contrast, sharpness, weight, size, cost – all these factors and more influence a DP’s choice, and it’s a critical choice to make. If you’re pushing your own camera or lenses to the production just so you can recoup some of the cash you spent to buy them, you’re doing the story a disservice.
In conclusion, whether or not to invest equipment depends on your budget and the type of work you want to do. But if you’re shooting a drama, even if you own equipment, you should be asking yourself what camera and lenses will best set the tone and tell this story.
Each month I get a digital copy of American Cinematographer to my inbox, filled with illuminating (pun intended) articles about the lighting and lensing of the latest theatrical releases. As a rule of thumb, I only read the articles if I’ve seen the films. Trouble is, I don’t go to the cinema much any more… even before Coronavirus put a stop to all that anyway.
Why? TV is better, simple as that. Better writing, better cinematography, better value for money. (Note: I include streaming services like Netflix and Amazon under the umbrella of “TV” here.) But whereas I can turn to AC to discover the why and how of the cinematography of a movie, there is no equivalent for long-form content. I would love to see a magazine dedicated to the beautiful cinematography of streaming shows, but until then I’ll try to plug the gap myself.
I’d like to start with a look at the increasing use of anamorphic lenses for the small screen. Let’s look at a few examples and try to discover what anamorphic imaging adds to a project.
Lenses with an anamorphic element squeeze the image horizontally, allowing a wider field of view to be captured. The images are restored to their correct proportions in postproduction, but depth of field, bokeh (out of focus areas), barrel distortion and lens flare all retain different characteristics to those obtained with traditional spherical lenses.
The Cinematic look
“Doctor Who: The Woman Who Fell to Earth”, DP: Denis Crossan
The venerable Doctor Who, which started off shooting on 405-line black-and-white videotape more than half a century ago, has employed Arri Alexas and Cooke Anamorphic/i glass since the introduction of Jodie Whittaker’s 13th Doctor. “[Director Jamie Childs] suggested we shoot on anamorphic lenses to give it a more filmic look,” says DP Denis Crossan. “You get really nice background falloff and out of focus ellipses on light sources.”
While most viewers will not be able to identify these visual characteristics specifically, they will certainly be aware of a more cinematic feel to the show overall. This is because we associate anamorphic images – even if we do not consciously know them as such – with the biggest of Hollywood blockbusters, everything from Die Hard to Star Trek Beyond.
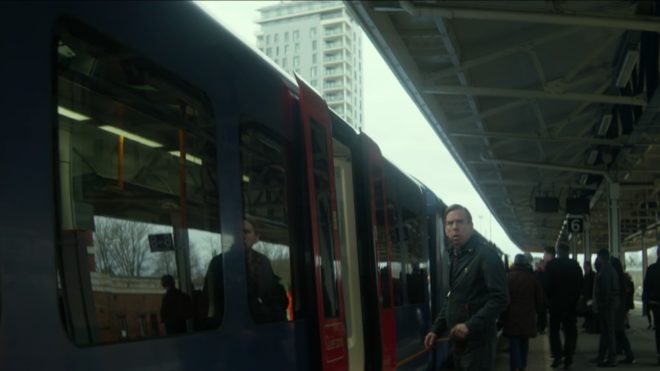
It’s not just the BBC who are embracing anamorphic. DP Ollie Downey contrasted spherical glass with vintage anamorphics to deliberate effect in “The Commuter”, an episode of the Channel 4/Amazon sci-fi anthology series Electric Dreams.
The story revolves around Ed (Timothy Spall) whose mundane but difficult life turns upside down when he discovers Macon Heights, a town that seems to exist in an alternate reality. “Tim Spall’s character is torn between his real life and the fantastical world of Macon Heights,” Downey explains on his Instagram feed. “We shot Crystal Express Anamorphics for his regular life, and Zeiss Super Speed Mk IIs for Macon Heights.”
The anamorphic process was invented as a way to get a bigger image from the same area of 35mm negative, but in today’s world of ultra-high-resolution digital sensors there is no technical need for anamorphics, only an aesthetic one. In fact, they can actually complicate the process, as Downey notes: “We had to shoot 8K on the Red to be able to punch in to our Crystal Express to extract 16:9 and still deliver 4K to Amazon.”
“Electric Dreams: The Commuter”, DP: Ollie Downey
Evoking a period
Back at the BBC, last year’s John le Carré adaptation The Little Drummer Girl uses anamorphic imaging to cement its late 1970s setting. The mini-series revolves around Charmian, an actress who is recruited by Israeli intelligence via the mysterious agent Becker. The truth is distorted throughout, just as the wide anamorphic lenses distort every straight line into a curve.
Reviewing the show for The Independent, Ed Cumming notes that director Park Chan-wook “does not aim to be invisible but to remind you constantly that what you are seeing is a creation. Take the scene at a beachside taverna in Greece, where Charmian and Becker start talking properly to each other. The camera stays still, the focus snaps between him and her.” Such focus pulls are more noticeable in anamorphic because the subject stretches vertically as it defocuses.
The Little Drummer Girl is slavish in its recreation of the period, in camera style as well as production design. Zooms are used frequently, their two-dimensional motion intricately choreographed with the actors who step in and out of multiple planes in the image. Such shots were common in the 70s, but have since fallen very much out of fashion. When once they would have passed unnoticed, a standard part of film grammar, they now draw attention.
“The Little Drummer Girl”, DP: Woo-Hyung Kim
Separating worlds
Chilling Adventures of Sabrina, a Netflix Original, also draws attention with its optics. Charting the trials and tribulations of a teenaged witch, the show uses different makes of lenses to differentiate two worlds, just like “The Commuter”.
According to DP David Lazenberg’s website, he mixed modern Panavision G series anamorphics with “Ultragolds”. Information on the latter is hard to find, but they may be related to the Isco Ultra Star adapters which some micro-budget filmmakers have adopted as a cheap way of shooting anamorphic.
The clean, sharp G series glass is used to portray Sabrina’s ordinary life as a small-town teenager, while the Ultragolds appear to be used for any scenes involving witchcraft and magic. Such scenes display extreme blur and distortion at the edges of the frame, making characters squeeze and stretch as the camera pans over them.
“Chilling Adventures of Sabrina: Chapter Ten: The Witching Hour”, DP: Stephen Maier
Unlike the anamorphic characteristics of Doctor Who or “The Commuter”, which are subtle, adding to the stories on a subconscious level, the distortion in Sabrina is extreme enough to be widely noticed by its audience. “Numerous posts on Reddit speak highly of Chilling Adventures of Sabrina’s content and cinematography,” reports Andy Walker, editor of memeburn.com, “but a majority have a collective disdain for the unfocused effect.”
“I hate that blurry s*** on the side of the screen in Sabrina,” is the more blunt appraisal of Twitter user @titanstowerr. Personally I find the effect daring and beautiful, but it certainly distracted me just as it has distracted others, which forces me to wonder if it takes away more from the story than it adds.
And that’s what it all comes down to in the end: are the technical characteristics of the lens facilitating or enhancing the storytelling? DPs today, in both cinema and long-form series, have tremendous freedom to use glass to enhance the viewers’ experience. Yes, that freedom will sometimes result in experiments that alienate some viewers, but overall it can only be a good thing for the expressiveness of the art form.
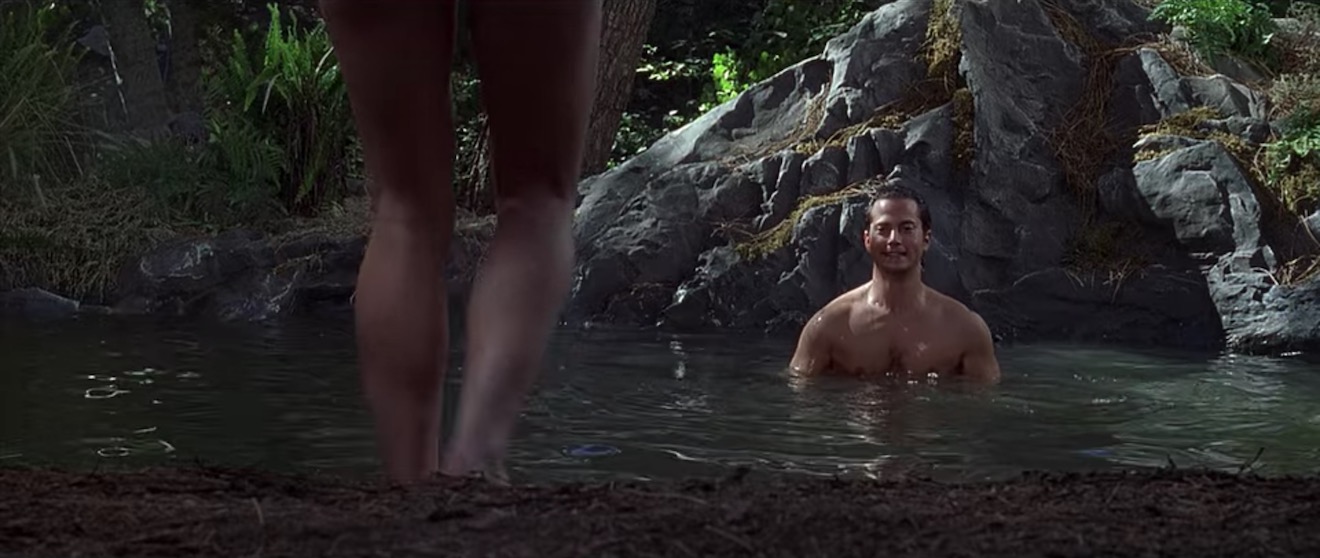
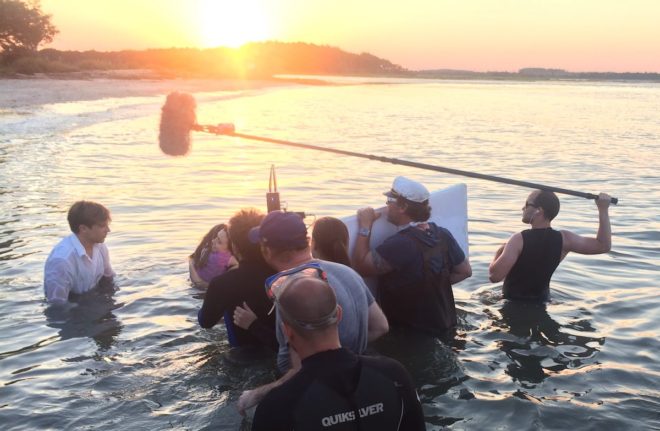
(Spoiler alert!) The denouement of The Little Mermaid takes place in the waves on a picturesque beach, where Cam (William Moseley) has carried Elizabeth (Poppy Drayton). In true fairytale style, our hero and heroine finally share their first kiss, parting to reveal the flaring orange sun behind them, just above the horizon. By the time we got to this sequence, we had already shot some water scenes, but those were in controlled, studio-like conditions. Working with natural light and real waves was going to be a whole different ball-game.
Here are some extracts from my diary, revealing how this magical moment was ultimately captured.
Day 22
Scenes at the beach today, with actors in the ocean. We’ve been worried about this sequence since the earliest stages of preproduction. Will the cast get too cold? Will it be too dangerous with waves and jellyfish and razor-sharp oyster beds? Will we get the magical dawn lighting the script requires? Building a partial beach set against green-screen was considered for a long time, but eventually shooting on a real beach, and this one particular beach, turned out to be our only option. (We’re back on Tybee Island, the same island we did the Shirley Shoot on so very long ago, and Baywatch seems to have all the other beaches tied up.)
The weather is good, with a cloudless sky. We’re cheating sunset for sunrise, and I know exactly where the sun will go down, thanks to the Helios and Sun Tracker apps.
We get ready to go into the water shortly after 6pm. The ACs put the camera in the splash bag and we bring it into the ocean. It starts to leak. Which is pretty much the last thing you want to happen. We pull it out before the camera gets damaged, but now we’re wondering how to shoot the scene. Someone suggests I just put the camera on my shoulder (I’m only going in up to my waist) and a couple of the crew spot me to make sure I don’t drop it. Sounds risky, doesn’t it? But it works. Meanwhile Captain Dan joins us in his waders to hand-bash a polyboard bounce, and the ‘B’ camera team are on a pontoon trying to get alternate angles.
Perhaps the most important thing I do today is ask Will to pick Poppy up the other way around. You see, when we’re about to turn over, Will picks up Poppy with her head to his right and her tail to his left. But I can see that if they play the scene with Poppy this way around, I will end up framing the two-shot with my back to the sun, losing that magical image of the low sun in the background, and probably casting camera shadows on them to boot. So I ask Will to pick Poppy up the other way around.
As the sun races towards the horizon, we get two magical takes. I’m constantly reframing to keep the setting sun in the background, and as the hero and heroine kiss, it flares out perfectly between them. Everyone is ecstatic.
Day 23
‘B’ cam 1st AC Geran Daniels on the pontoon with the Alexa XR Studio and the hefty Angenieux 19.5-94mm Optimo
It’s another beautiful day, and the first task is to go out on the pontoon and shoot Poppy’s double swimming about in the mermaid tail. I use the Angenieux zoom for only the second time (it normally lives on the ‘B’ camera), and for the first time on my shoulder. Damn, that thing’s heavy. But my shoulder has worse to come today.
As sunset approaches, we must shoot pick-ups for Saturday’s water scene with the principal cast. Today the tide is much lower at sunset, and getting out to a deep enough spot (up to around waist or chest level) means walking over very squelchy mud which you sometimes sink in up to your knees, and sharp oyster beds. So instead we get into the water via the pontoon. This boat has a limited capacity, so I’m dropped off on the first trip, before it returns to the dock twice more to get the rest of the cast and crew who are needed. It’s extremely pleasant to swim about in the ocean (more of an estuary really) while we wait.
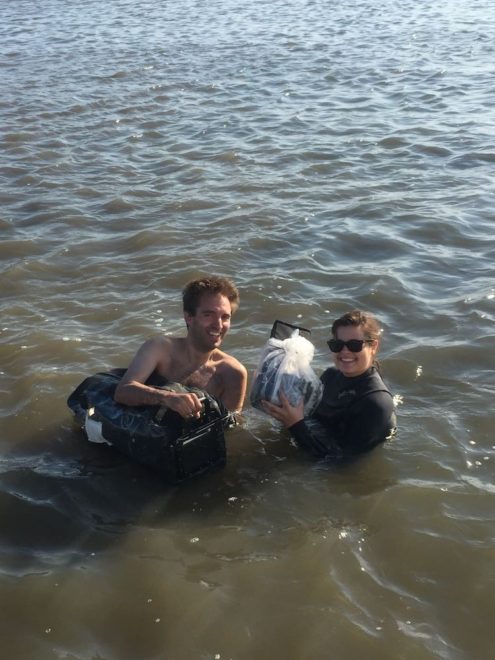
In the water with 2nd AC Kane Pearson and some expensive electronics. The white patch on the splash bag is the $5 of tape!
Line producer Fabio has proudly repaired the leaky splash bag with a $2 bicycle inner tube patch. 2nd AC Kane, a big spender, added $5 of tape, and we successfully tested it before we set sail.
Because the splash-bag doesn’t fit our Alexa’s viewfinder, Kane has to hand-bash a 5.6” monitor in a ziplock bag (along with a Teradek receiver and battery) so that I can see what I’m shooting. This works pretty well though. The hardest thing is the mud; it’s impossible to find a firm spot, so during the takes I’m always sinking and trying to keep my balance and follow the action at the same time. Kane has to prop me up on a couple of occasions.
For all the material in the ocean I stick to a (Cooke S4i) 32mm lens; the zoom won’t fit in the splash housing, and lens changes take too long. (The cast can only be in the water for 30 minutes at a time, according to Screen Actors Guild rules.) Although we mostly shoot at water level, where the splash bag floats and is easy to control, one set-up requires me to put it on my shoulder. The weight is quite something, but with help I get the shot.
With the water scenes wrapped, and the tide now higher, we swim back to shore. We’ve been in the water at least three hours, and it was exhausting but a lot of fun too.
That concludes my blog series on The Little Mermaid. If you missed any of the earlier instalments, here are the links:
“Shooting Shirley” – the pre-shoot with Hollywood legend Shirley MacLaine
 Ever since digital cinematography became the norm, DPs have sought to counter the format’s perfection with characterful vintage lenses. Having just completed a feature film shoot, Hamlet, on Cooke Panchros and a Cooke 10:1 Varotal, I’m over the moon with the beautiful, creamy, organic look they brought to the production. However, I can’t deny that they have some disadvantages over modern glass which you should take into consideration before choosing the vintage approach.