We’ve all been there. Schedules are tight. Sooner or later the 1st AD, a producer or even the director is going to want to save time by “shooting the rehearsal”. I strongly disagree with this and here’s why.
No matter how great an actor is, they have only a finite amount of performance energy. They can only do so many takes before the results start to go downhill. In my experience, most actors deliver their best performance on take one or two.
So those first takes need to be useable. They need to be in focus. The timing of the camera movement needs to be right. The boom needs to be out of frame. The prop in the drawer that the talent has to take out halfway through the scene needs to be in position, not still in the standby props person’s hand because they didn’t realise we were going that far. The view out of the door that the talent opens at the very end needs to have been dressed and lit. What, you didn’t know they were opening the door because they skipped that in the block-through and you didn’t get a rehearsal? Bummer.
The purpose of a camera rehearsal is to find all these problems without burning the actors’ performance energy. If you roll the camera on the “rehearsal” – and I use quote marks because it isn’t a rehearsal any more – the cast have to deliver a full performance. Maybe a great, spontaneous performance that can’t be repeated. The last thing you want is for a boom shadow to be hovering over their forehead for half the scene.
Things like boom positions and focus pulling especially can only be properly rehearsed with the camera up and the cast moving through their actual positions. And you can talk about a scene all you want, but a moving picture is worth a million words. There’s no substitute for everyone watching the monitor during that rehearsal and seeing exactly what’s required.
Is a camera rehearsal always necessary on every set-up? No, especially if the scene has already been shot from several other angles, or if everyone’s confident that they know how it’s going to unfold, or if the scene demands little emotional commitment from the cast. But it should be the default practice.
Will a camera rehearsal always throw up problems? Of course not. And if it goes perfectly, people will curse that you didn’t roll, and start asking why we bother with camera rehearsals anyway. That’s life.
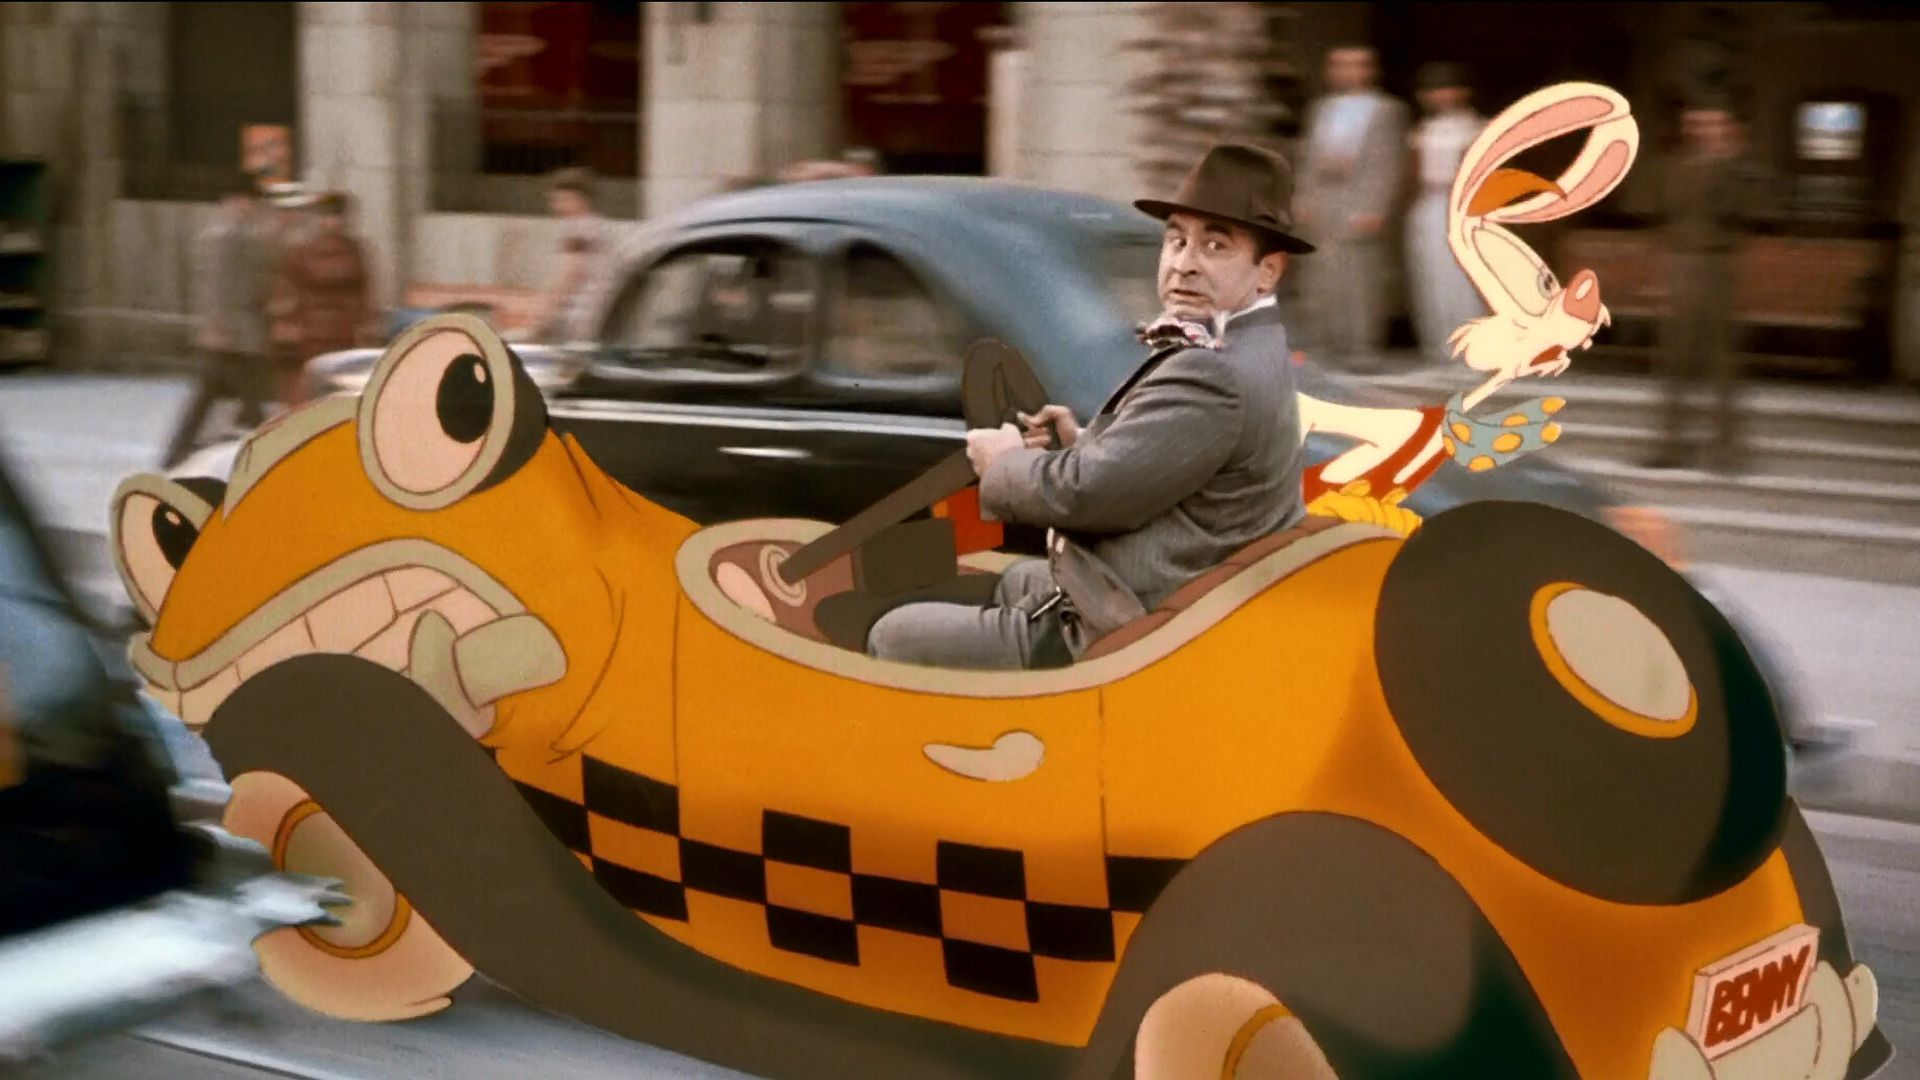
With the recent releases of Tom and Jerry and Space Jam: A New Legacy, it’s clear that there’s an appetite for traditional cartoon characters in live-action movies. While this mash-up of techniques goes back at least as far as 1964’s Mary Poppins, perhaps no film has done it quite as well as Who Framed Roger Rabbit.
The 1988 movie was loosely based on a Gary K. Wolf novel published seven years earlier, Who Censored Roger Rabbit? However, most of the plot was jettisoned, keeping only the central characters: Eddie Valiant, a private detective; his client, the titular Roger Rabbit; Roger’s wife and femme fatale Jessica; and Roger’s colleague, the libidinous, cigar-smoking Baby Herman. The original villain, a genie of the lamp, was replaced in early script drafts by the hunter who killed Bambi’s mother in the 1942 Disney classic, and finally by Christopher Lloyd’s pop-eyed Judge Doom.
Ditching the contemporary setting of its source material, Who Framed Roger Rabbit? takes place in Hollywood, 1947, where cartoon characters (“toons”) co-exist with humans. Bob Hoskins plays the toon-hating Valiant, who reluctantly teams up with Roger after the latter is implicated in the murder of Marvin Acme. The unlikely pair’s investigations lead them to Toontown, where they uncover a conspiracy to demolish this animated region and build a freeway in its place. Screenwriters Jeffrey Price and Peter S. Seaman found inspiration for this plot in Roman Polanski’s 1974 thriller Chinatown. Several film noirs of the 1940s were also referenced, with Hoskins modelling his character on Humphrey Bogart.
Numerous famous cartoon characters make cameos, including Mickey Mouse, Daffy Duck, Donald Duck, Tweetie Pie and Betty Boop, with executive producer Steven Spielberg pulling his weight behind the scenes to accomplish the historic meeting of competing studios’ properties.
Robert Zemeckis pitched to direct Roger Rabbit in 1982, but his films’ poor box office up to that point put him out of the running. Terry Gilliam was in the frame for a time, while the likes of Harrison Ford, Chevvy Chase and Bill Murray were considered for the lead. Spielberg’s Amblin Entertainment joined the project in 1985, but the projected budget of $50 million was deemed too big to green-light. Meanwhile, Zemeckis’s Back to the Future made him far more bankable with the result that he signed on to direct Roger Rabbit that same year, albeit with a reduced budget of $30 million. Ironically, the film would go over schedule and wind up costing just over its original price tag.
The animation was directed by Richard Williams, otherwise best known for his title sequences for the Pink Panther films. Williams refused to work in LA, forcing the production to shoot primarily in England. While Williams and his 326-strong team set up in Camden Town, Zemeckis and company filmed the interiors at Elstree, with warehouses and bus depots in Shepherd’s Bush standing in for exteriors of Hollywood studios and backlots.
Some of the sets, including the Ink & Paint Club where Jessica is memorably introduced, were raised 10ft off the floor to accommodate puppeteers. Although no puppets are seen in the finished film, whenever a toon had to hold a real object it was either mounted on a rod coming up through the floor, marionetted on wires from above, or manipulated by a robotic arm.
Rehearsals were conducted using a dummy of Roger, or with voice artist Charles Fleischer – bedecked in a rabbit suit – standing in. Hoskins even studied his three-year-old daughter’s antics with an imaginary friend to prepare for the challenge of acting to nothing.
Creating the film’s 55 minutes of animation took two years. The live-action footage was printed as a series of enlarged black-and-white frames over which a cel (sheet of transparent acetate) could be placed for the animator to draw on. 82,080 frames were generated in this way, every single one by hand.
To better blend the animated characters with the live backgrounds, Industrial Light and Magic composited layers of shading and shadows. The sparkling sequins on Jessica’s dress were achieved by shining a light through a plastic bag which had holes scratched in it.
The finished film attracted a degree of controversy, not least from the top brass at Disney. It’s easy to see why the family-friendly company would object to the over-sexualisation of Jessica, or to Valiant’s constant drinking and even bumming a cigarette off children at one point. But Zemeckis’s deal gave him final cut, so the compromise was to release the unaltered film under Disney’s Touchstone label.
The result was the second highest grossing film of 1988 and critical acclaim, with an impressive 97% on Rotten Tomatoes and four Academy Awards.
Like many articles on my blog, this one first appeared on RedShark News.
Shooting on one camera, getting the lighting and framing perfect for just one angle at a time, used to be a hallmark of quality in film and television. Nowadays many drama DPs are expected to achieve comparable quality while photographing two or more angles simultaneously, with all the attendant problems of framing out booms, lights and other cameras.
So what is the best way to tackle multi-camera shooting? Let’s consider a few approaches.
Photo: Brooks Patrick Allen
1. Two sizes
The most straightforward use of a B camera is to put it close to the A camera and point it in the same direction, just with a different lens. One disadvantage is that you’re sacrificing the ability to massage the lighting for the closer shot, perhaps bringing in a bounce board or diffusion frame that would flatter the actor a little more, but which would encroach on the wider frame.
Another limitation is that the talent’s eye-line will necessarily be further off axis on one of the shots. Typically this will be the wider camera, perhaps on a mid-shot including the shoulder of the foreground actor, while the other camera is tighter in terms of both framing and eye-line, lensing a close-up through the gap between the shoulder and the first camera.
The sound department must also be considered, especially if one camera is very wide and another is tight. Can the boom get close enough to capture the kind of close-miked audio required for the tight shot without entering the wide frame?
Some TV series are solving this problem by routinely painting out the boom in the wider shots. This is usually easy enough in a lock-off, but camera movement will complicate things. It’s an approach that needs to be signed off by all the major players beforehand, otherwise you’re going to get some panicked calls from a producer viewing the dailies.
2. Cross-shooting
This means filming a shot-reverse simultaneously: over character A’s shoulder onto character B, and over character B’s shoulder onto character A. This approach is an editor’s delight because there is no danger that the performance energies will be different when they cut from one person to the other, nor that arm or head positions will throw up continuity errors.
Keeping the cameras out of each other’s frames is of course an issue, one usually handled by backing them off and choosing tighter lenses. (Long lenses are an unavoidable side effect of multi-camera cinematography.) Two booms are required, and keeping their shadows out is four times as difficult.
Lighting can take twice as long too, since you now have two cast members who need to look their best, and you need to maintain mood, shape and contrast in the light in both directions simultaneously. Softer and toppier light is usually called for.
The performances in certain types of scene – comedy with a degree of improvisation, for example – really benefit from cross-shooting, but it’s by far the most technically challenging approach.
3. Inserts
Grabbing inserts, like close-ups of people’s hands dealing with props, is a quick and simple way of getting some use out of a second camera. Lighting on such shots is often not so critical, they don’t need to be close-miked, and it’s no hassle to shoot them at the same time as a two-shot or single.
There is a limit to how many inserts a scene needs though, so sooner or later you’ll have to find something else to do with the camera before the producer starts wondering what they’re paying all that extra money for.
4. Splinter unit
The idea of sending B camera off to get something completely separate from what A camera is doing can often appeal. This is fine for GVs (general views), establishing shots of the outside of buildings, cutaways of sunsets and so on, but anything much more complicated is really getting into the realm of a second unit.
Does the set or location in front of camera need to be dressed? Then someone from the art department needs to be present. Is it a pick-up of an actor? Well, then you’re talking about hair, make-up, costume, continuity, sound…
Photo: Brooks Patrick Allen
With the extra problems that a second camera throws up, it’s a fallacy to think it will always speed up your shoot; the opposite can easily happen. An experienced crew and a clear plan worked out by the director, DP, operators and gaffer is definitely required. However, when it’s done well, it’s a great way to increase your coverage and give your editor more options.
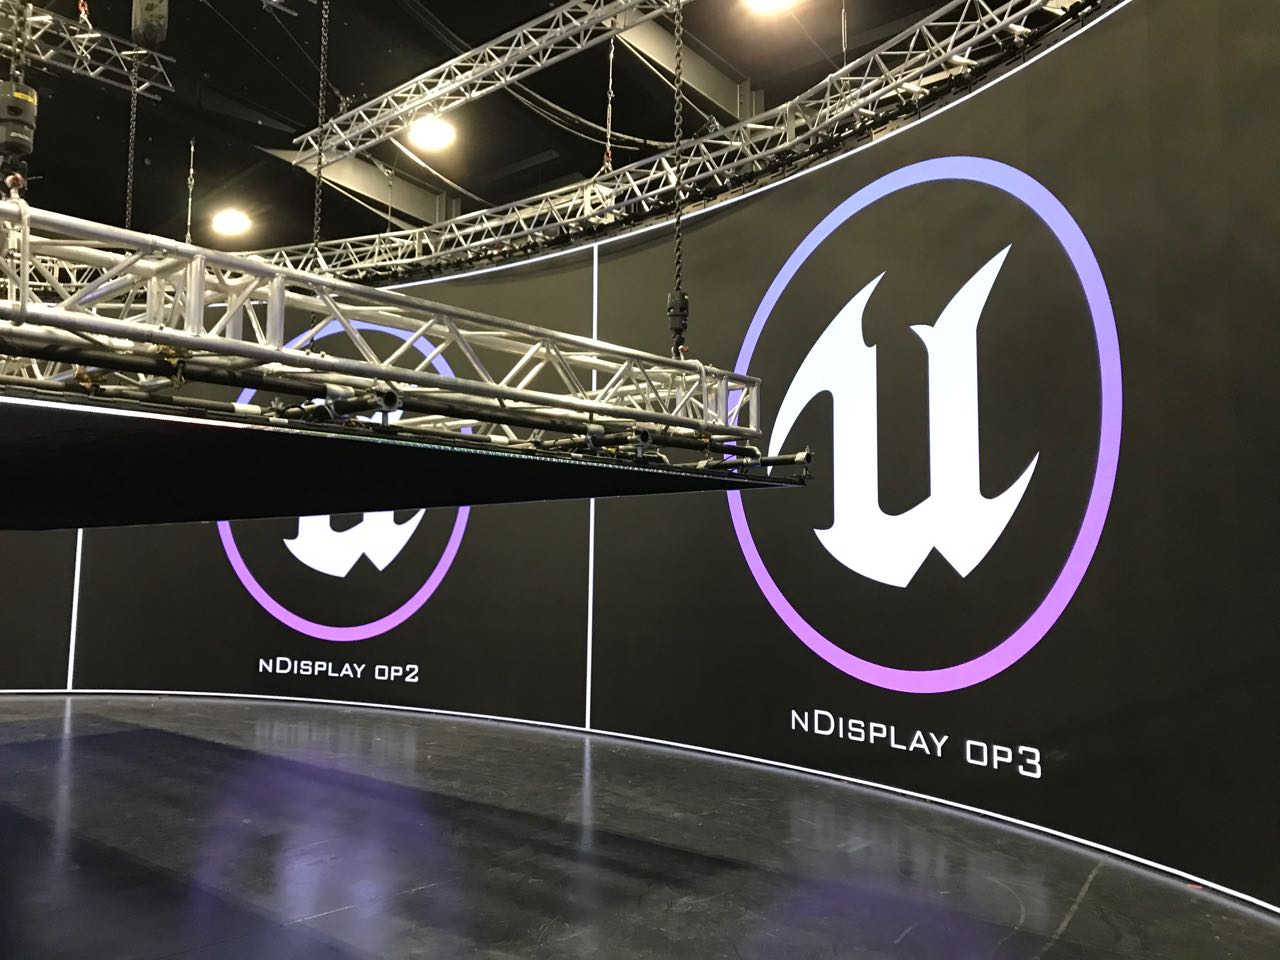
Part of the volume at ARRI Rental in Uxbridge, with the ceiling panel temporarily lowered
Virtual production technically covers a number of things, but what people normally mean by it is shooting on an LED volume. This is a stage where the walls are giant LED screens displaying real-time backgrounds for photographing the talent in front of. The background may be a simple 2D plate shot from a moving vehicle, for a scene inside a car, or a more elaborate set of plates shot with a 360° rig.
The most advanced set-ups do not use filmed backgrounds at all, but instead use 3D virtual environments rendered in real time by a gaming engine like Unreal. A motion-tracking system monitors the position of the camera within the volume and ensures that the proper perspective and parallax is displayed on the screens. Furthermore, the screens are bright enough that they provide most or all of the illumination needed on the talent in a very realistic way.
I have never done any virtual production myself, but earlier this year I was fortunate enough to interview some DPs who have, for a British Cinematographer article. Here are some tips about VP shooting which I learnt from these pioneers.
1. Shoot large format
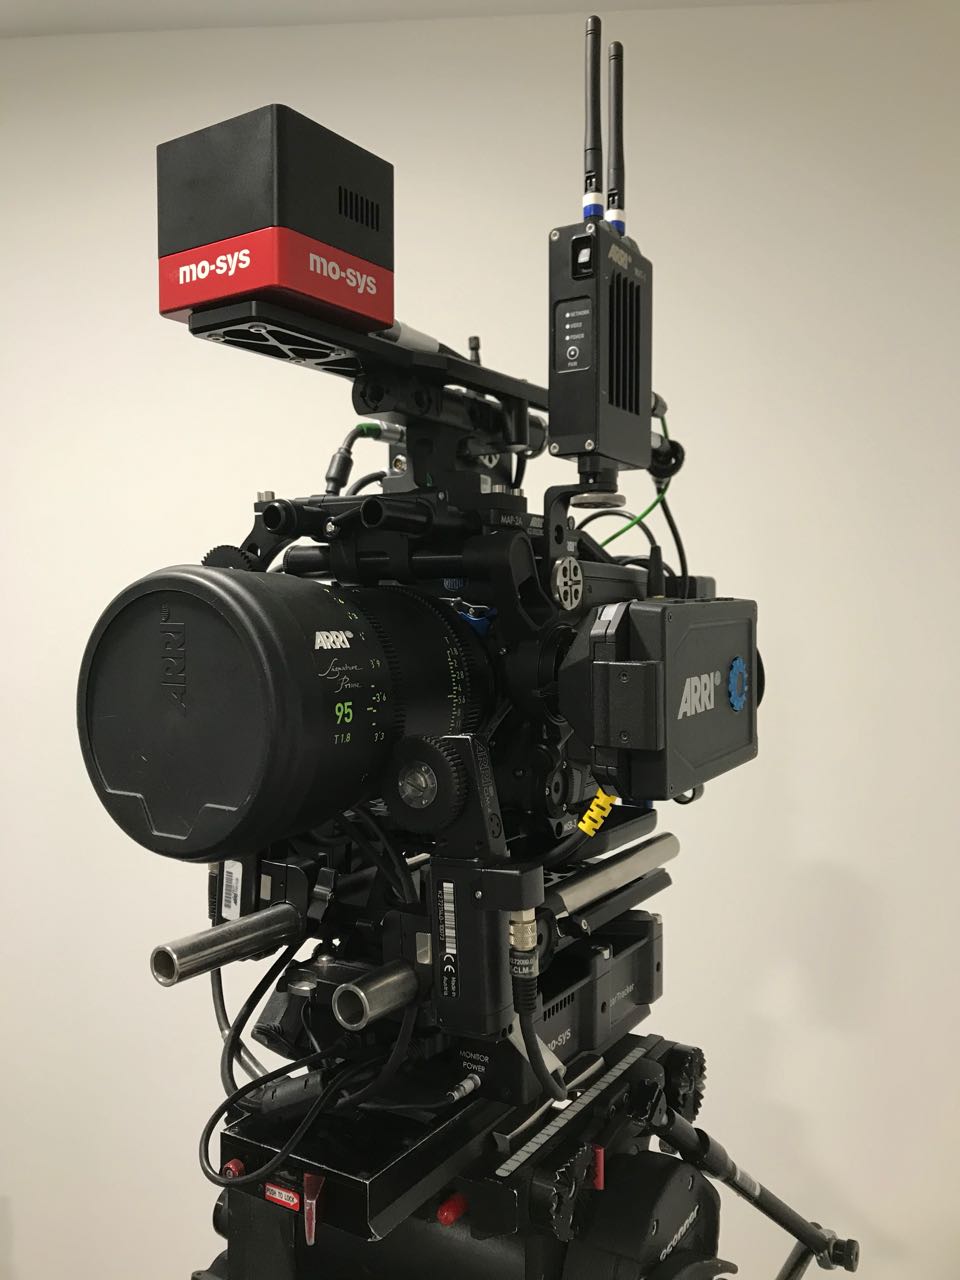
An ARRI Alexa Mini LF rigged with Mo-Sys for tracking its position within the volume
To prevent a moiré effect from the LED pixels, the screens need to be out of focus. Choosing an LF camera, with their shallower depth of field, makes this easier to accomplish. The Alexa Mini LF seems to be a popular choice, but the Sony Venice evidently works well too.
2. Keep your distance
To maintain the illusion, neither the talent nor the camera should get too close to the screens. A rule of thumb is that the minimum distance in metres should be no less than the pixel pitch of the screens. (The pixel pitch is the distance in millimetres between the centre of one pixel and the centre of the next.) So for a screen of 2.3mm pixel pitch, keep everything at least 2.3m away.
3. Tie it all together
Several DPs have found that the real foreground and the virtual background fit together more seamlessly if haze or a diffusion filter are used. This makes sense because both soften the image, blending light from nearby elements of the frame together. Other in-camera effects like rain (if the screens are rated weatherproof) and lens flares would also help.
4. Surround yourself
The back of ARRI’s main screen, composed of ROE LED panels
The most convincing LED volumes have screens surrounding the talent, perhaps 270° worth, and an overhead screen as well. Although typically only one of these screens will be of a high enough resolution to shoot towards, the others are important because they shed interactive light on the talent, making them really seem like they’re in the correct environment.
5. Match the lighting
If you need to supplement the light, use a colour meter to measure the ambience coming from the screens, then dial that temperature into an LED fixture. If you don’t have a colour meter you should conduct tests beforehand, as what matches to the eye may not necessarily match on camera.
6. Avoid fast camera moves
Behind the scenes at the ARRI volume, built in partnership with Creative Technology
It takes a huge amount of processing power to render a virtual background in real time, so there will always be a lag. The Mandalorian works around this by shooting in a very classical style (which fits the Star Wars universe perfectly), with dolly moves and jibs rather than a lot of handheld shots. The faster the camera moves, the more the delay in the background will be noticeable. For the same reason, high frame rates are not recommended, but as processing power increases, these restrictions will undoubtedly fall away.
This week issue 40 of Infinity magazine comes out, featuring a couple of articles I wrote, including one about the cult sci-fi series Quantum Leap. The show saw Dr. Sam Beckett (Scott Bakula) bouncing around time into other people’s bodies and striving to put right what once went wrong, while his holographic friend Al (Dean Stockwell) smoked cigars, letched, and relayed exposition from Ziggy the computer.
I end the article by wondering whether it’s time for someone like Netflix to bring the show back (it definitely is). What I don’t mention in the magazine is that – unbeknownst to almost everyone – Quantum Leap has already been rebooted once.
This, my loyal readers, is the story of Quantum Leaper.
Season One (1995)
As teenagers, my friend David Abbott and I were huge Quantum Leap fans, and were bereft when the show was axed in 1993. I was developing an interest in filmmaking, having dabbled in 2D computer animation on my Atari ST and borrowed my grandfather’s Video-8 camcorder on a couple of occasions. When I was given that camcorder for my 15th birthday, David and I decided that we would make our own version of Quantum Leap, which we imaginatively titled Quantum Leaper.
The first episode was called “Just What the Doctor Ordered” and saw my character – named, again with great imagination, Neil – leaping into a doctor just as his patient is flatlining. I don’t remember much about the plot, but I do remember that we climbed the nearby Malvern Hills to film a fight scene.
Dave played Albert, my holographic helper, communicating with Project Quantum Leap’s supercomputer Ziggy by means of a special hand-link, just like Dean Stockwell did. Unlike Dean Stockwell’s, this hand-link was a calculator.
The two of us also played all the supporting characters (often with the judicious addition of a hat or jacket) and operated the camera, unless we were both in shot, in which case it was locked off. Much of the the editing was done in camera – rewinding the 8mm videotape, cueing it up to the exact moment the last piece of action ended, then hitting record and calling action simultaneously – and the rest I did tape-to-tape with two VCRs connected together. A cheap four-track disco mixer enabled the addition of music (badly composed by me) and sound effects (many of which were sampled from Quantum Leap itself). As YouTube was still years away, the only viewers for the series were our parents and friends, forced to sit down in front of the TV and watch it off VHS.
Episode two, “Boom!”, saw the fictional Neil as a bomb disposal expert supposedly in Northern Ireland in 1980, though like the first episode it was all shot in and around my house. My sister Kate was drafted in to play a journalist whose life Neil has to save.
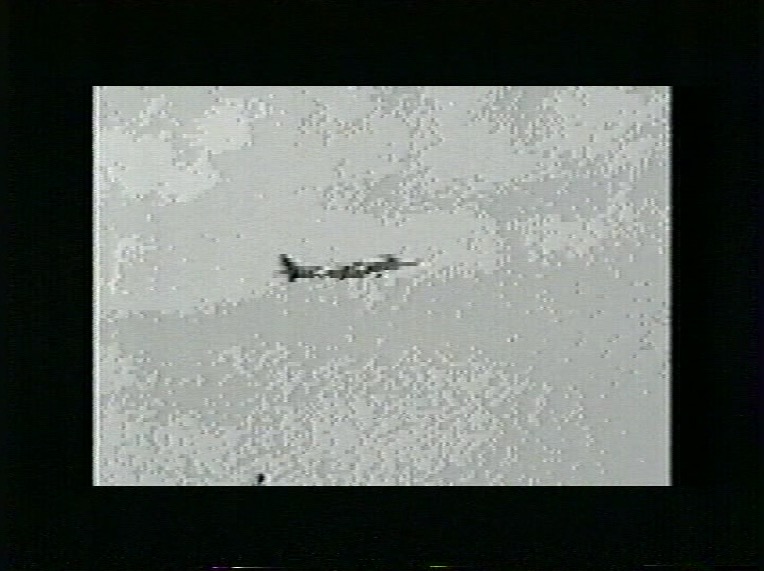
“A Leap into the Blue” was the next episode, with Neil in the body of a parachutist. Scenes of characters in free-fall were shot with us standing in front of a white wall; I digitised the footage on my ST with a Videomaster cartridge and composited scrolling clouds into the background. The resolution of the Videomaster was very limited – maybe 320×240 – the frame rate was very low too, and it could only do black and white.
A digitised visual effect using a shot of a plane stolen from some TV programme or other
Next we shot a “pilot” episode explaining how Neil and Albert switched places with Sam and Al. I remember digitising shots of Scott Bakula and Dean Stockwell from Quantum Leap and compositing them atrociously into our own footage. At about 30 minutes long, the pilot was double the length of our other episodes.
Then we continued the series where we’d left off. Dave’s script “One Giant Leap” has Neil on a space shuttle mission, an episode that included NASA footage taped off the TV. We made almost no attempt to create sets; the space shuttle cockpit was a plain wall, a computer keyboard and a piece of card to cover an incongruous bookcase.
The space shuttle cockpit “set”
The next two episodes find Neil meeting (and shooting) an evil future version of himself, then leaping into the crazy future space year of 2017. The latter involves a flying car – my mum’s Citroen AX with the wheels framed out, intercut with an extremely crude CGI model.
Dave’s episodes “Virtual Leaping” and “Bullets Over Leaping” see Neil become a VR programmer (with a headset made of Lego) and then an actor (in a studio suspiciously like Dave’s shed).
The VR headset “prop”
My next episode has Neil leaping into himself and saving his father’s life. (My actual dad provided some splendidly wooden acting.) But doing this causes a paradox, and the season finale sees Neil and Albert swap places (as Sam and Al do in a classic Quantum Leap episode) and Neil having to restore the timeline to prevent the destruction of the universe.
We were ambitious. You can say that much for us.
Season Two (1996)
The following year, while doing our GCSEs, we began work on a second season. In between I’d made a bad 40-minute comedy, Bob the Barbarian, and an appalling feature-length sci-fi film, The Dark Side of the Earth, and I’d learnt a few things that would lift the production values of Season Two very slightly. I’d also nagged my parents into buying me a genlock which would let me superimpose CGI over analogue video, meaning I didn’t have to digitise footage and suffer the horrendous image degradation any more.
The holographic Albert enters the Imaging Chamber, an effect enabled by my new genlock.
The actual Quantum Leaping effect from this era of the show is surprisingly decent given the equipment we were working with. We would lock the camera off and jump-cut to a blue filter being over the lens, then a white glow would creep over me – an animation I achieved in software called Deluxe Paint – followed by tendrils of electricity. The screen would then fade to white and a similar effect would play out in reverse to show the leap in.
Leaping from life to life, striving to put right what once went wrong…
Another improvement was that we managed to convince a few other friends to act in the series, including fellow Quantum Leap fan Lee Richardson, as well as Chris Jenkins, Conrad Allen, Matt Hodges, Si Timbrell and Jim McKelvie. Recognising my lack of musical talent at last, I abandoned composing and instead used soundtrack CDs from Star Trek: Deep Space Nine (Dennis McCarthy), the John Woo film Broken Arrow (Hans Zimmer), and the Doctor Who story “The Curse of Fenric” (Mark Ayres). Albert’s hand-link prop got an upgrade too, from a calculator to a custom Lego build with flashing lights.
Lee Richardson “acting” in the control room “set”
Season Two opens with Dave’s episodes “Project Hijacked” and “Oh Brother, Where Art Thou?” which focus on events at Project Quantum Leap, supposedly a high-tech facility in the New Mexico desert in 2005. In reality it was a living room with a control console made out of painted cardboard boxes and Christmas lights. In an early manifestation of my cinematography leanings, I snooted the ceiling light with a rolled-up piece of silver card, lending a little bit of mood to the look.
At the time, Dave’s family were training a hearing dog, Louis, so I wrote an episode to feature him; “Silence is Golden” sees Neil leap into a deaf man, and was followed by the morbid “Ashes to Ashes” where he leaps into a corpse.
The next episode, Dave’s “Driven to Distraction”, is probably the best of the lot. For once there were few enough characters that no-one needed to confusingly play dual roles, and there is plenty of action to boot. (I uploaded this episode to YouTube so long ago that the ten-minute time limit still applied.)
The X-Files-inspired “Close Encounters of the Leaping Kind” comes next, with Neil as a ufologist bothered by a shadowy government agent. Then Neil becomes a teenager who must prevent a drugs overdose, then a one-armed man who must overcome prejudice to hold down a job. Cringingly entitled “Not So Armless”, this latter was shot in a newsagent’s owned by a friend’s parents, one of the series’ few non-domestic locations.
Like Quantum Leap we had a mirror shot in every episode where Neil would see the leapee’s reflection looking back at him. Sometimes Dave would track the camera behind my back and we’d hide a cut in the darkness to swap me with whoever was playing the reflection. Another time we pretended the serving hatch in Dave’s house was a mirror and the two of us synchronised our movements. For a fight scene in “Not So Armless” Chris hid one arm inside his t-shirt so that Neil’s mirror image could appear to punch the antagonist with an invisible fist!
Facing mirror images that were not his own…
The penultimate episode of the season features several brief leaps, ending with one to Hiroshima in 1945, where the A-bomb detonation (more footage off the TV) causes both Neil and Albert to leap simultaneously. In the finale, Albert becomes a mountaineer caught in an avalanche, while Neil is a member of the rescue team – a premise thieved from the Quantum Leap novel “Search and Rescue”. We started shooting it during snowy weather, but the snow thawed and the episode was never completed. The friends who had been appearing as supporting characters now had part-time jobs and couldn’t spare the time for filming.
Legacy
We wrote all six episodes of a third season which would have explained how Neil became the evil future version of himself seen in an earlier episode, but nothing was ever filmed.
In 1997 we began a remake of the pilot using the experience we had gained since shooting the original, but again it was never completed. One part we did film was an action sequence with me on the roof rack of a car while the driver swerves around trying to throw me off. We shot this on Malvern’s Castlemorton Common and used a dummy of me for some of the wider and more dangerous shots. Its acting was probably better than mine. We remade the scene four years later as part of my Mini-DV feature The Beacon.
Today only five of the 20 Quantum Leaper episodes that we made survive, the rest having been callously taped over at some point in my late teens. That’s probably for the best, as most of it was hilariously bad, but making it taught me a hell of a lot about filmmaking. Without it, I doubt I’d have a career in cinematography today.
His only guide on these journeys is Al, an observer from his own time…
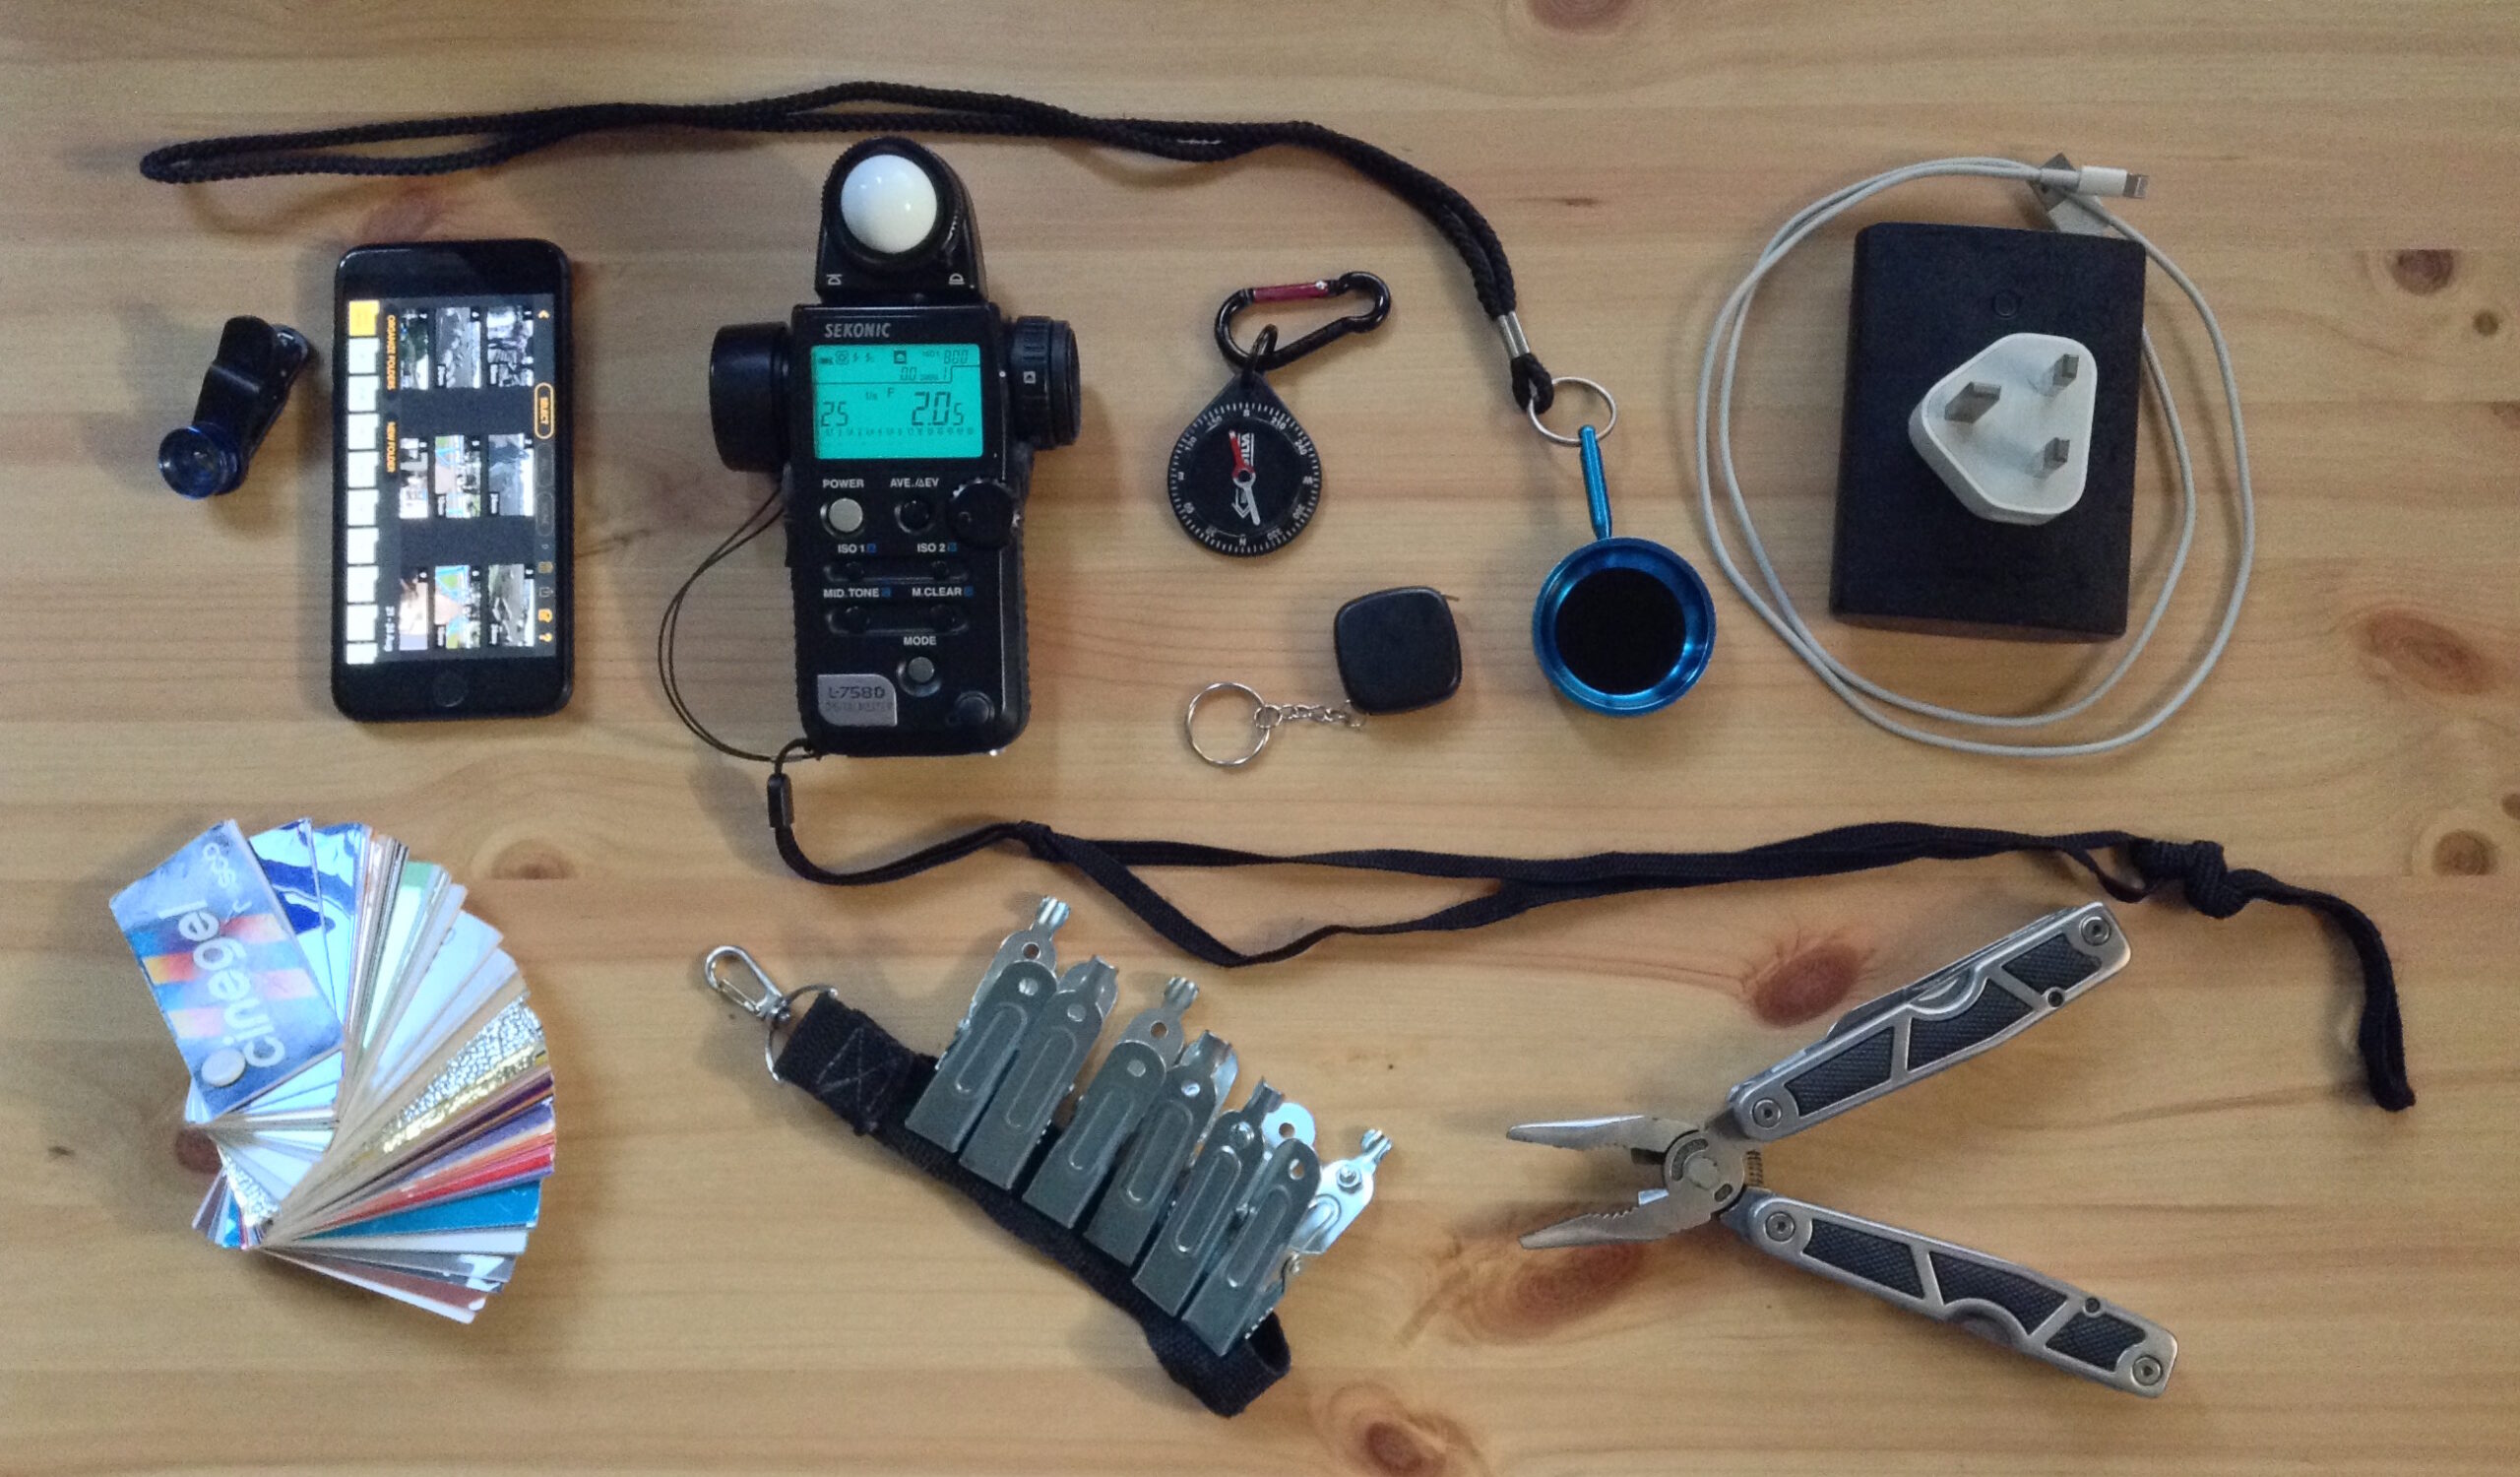
I used to own a whole bunch of equipment – camera, lenses, lights – but for reasons I’ve detailed elsewhere I got rid of all that back in 2017. These days I travel pretty light (no pun intended) to set, but there are a few items I wouldn’t like to be without.
Here’s what’s in my set bag, roughly in descending order of importance.
1. Phone
Alright, this isn’t technically in my set bag, but it is the most used thing on a typical day on set. I use Chemical Wedding‘s Artemis Pro app all the time to find frames and select lenses, the same company’s Helios Pro to look at sun paths, and occasionally other specialist apps like Arri Photometrics (to work out if a particular light is powerful enough at a particular distance) and Flicker Finder (to check if a light will flicker on camera). I’ve also got Lux Calc installed but so far I’ve never used it.
Other common uses of my phone are looking at call sheets and other production documents if hardcopies aren’t supplied, checking my Google Sheets breakdown to remind myself of my creative intentions for the scene, and taking photos of lighting set-ups in case I need to recreate them for pick-ups.
To enable Artemis Pro to simulate wider lenses with my iPhone 7’s relatively tight built-in lens I also carry a clip-on 0.67x wide angle adaptor.
2. Light Meter
I’ve written before about why light meters are still important. My Sekonic L-758D gets heavy use on set, mostly in incident mode but sometimes the spot reflectance mode too; see my post on judging exposure to learn about what these modes do.
I make sure to carry spare batteries for it too.
3. Gaffer’s Glass
On The Little Mermaid the crew took pity on me using a broken ND filter wrapped in ND gel as a gaffer’s glass and bought me a proper one. This is like a monocle with an ND 3.6 filter in it for looking into fresnels and other directional fixtures to see if the spot of light is aimed exactly where it should be. I mostly use mine to look at the clouds and see when the sun is going to go in and come out, but you shouldn’t use one to look at the naked sun because even with all the ND it can still damage your eyes.
4. Power bank
With the heavy use my phone gets on set the charge doesn’t always last the whole day, so a power bank is essential to keep it running, as of course is the mains charger just in case.
5. Travel mug/flask
Most productions are environmentally conscious enough now to dissuade people from using disposable coffee cups and water bottes (though there are still a million half-finished water bottles on set at the end of the day). I always bring my own travel mug and metal water bottle. Keeping the mug clean(ish), especially when switching between tea and coffee consumption, is a daily struggle.
6. Croc clips
I always keep a couple of croc clips on my belt when shooting. Although I rarely gel lights myself on larger productions, I find them useful for adjusting curtains to admit just the right amount of daylight, or attaching a rain cover or light-blocking cloth to the camera, or clipping my jacket to something as a last-minute lighting flag.
7. Multi-tool
On some productions I’ve worn a multi-tool on my belt every day and only used it once or twice (usually to open wrap beers), so now it stays in my bag unless it’s specifically needed. As a head of department I theoretically shouldn’t be doing any tasks that would require a multi-tool, but it’s annoying to need one and not have one.
8. Tape Measure
I think my mum gave me this tiny tape measure which I keep in my set bag because it’s so small and light there’s no reason not to. I’ve used it exactly once so far: to work out if an Alexa Classic with a Cooke 10:1 zoom on would fit into certain tight locations on Hamlet.
9. Gel swatches
I picked up a set of Rosco filter swatches at either the BSC Expo or the Media Production Show. I don’t think I’ve ever used it.
10. Compass
Occasionally Helios Pro isn’t playing ball and I need to work out roughly where the sun is going to be, so out comes the traditional compass.
One final thing. Until very recently I carried a pair of gardening gloves for handling hot lights, but again I shouldn’t really be doing this myself and incandescent lamps aren’t too common on sets any more anyway, so when my gloves became worn out enough to need replacing I decided not to bother.
The seventh instalment in the Mission: Impossible franchise was originally scheduled for release this July. It’s since been pushed back to next September, which is a minor shame because it means there will be no release in 2021 to mark the quarter of a century since Tom Cruise first chose to accept the mission of bringing super-spy Ethan Hunt to the big screen.
Today, 1996’s Mission: Impossible is best remembered for two stand-out sequences. The first, fairly simple but incredibly tense, sees Cruise descend on a cable into a high-security vault where even a single bead of sweat will trigger pressure sensors in the floor.
The second, developing from the unlikely to the downright ludicrous, finds Cruise battling Jon Voight atop a speeding Channel Tunnel train, a fight which continues on the skids of a helicopter dragged along behind the Eurostar, ending in an explosion which propels Cruise (somehow unscathed) onto the rear of the train.
It is the second of those sequences which is a landmark in visual effects, described by Cinefex magazine at the time as “the dawn of virtual sets”.
“In Mission: Impossible, we took blue-screen elements of actors and put them into believable CG backgrounds,” said VFX supervisor John Knoll of Industrial Light and Magic. Building on his work on The Abyss and Terminator 2, Knoll’s virtual tunnel sets would one day lead to the likes of The Mandalorian – films and TV shows shot against LED screens displaying CG environments.
Which is ironic, given that if Tom Cruise was remaking that first film today, he would probably insist on less trickery, not more, and demand to be strapped to the top of a genuine speeding Eurostar.
The Channel Tunnel had only been open for two years when Mission: Impossible came out, and the filmmakers clearly felt that audiences – or at least American audiences – were so unfamiliar with the service that they could take a number of liberties in portraying it. The film’s tunnel has only a single bore for both directions of travel, and the approaching railway line was shot near Glasgow.
That Scottish countryside is one of the few real elements in the sequence. Another is the 100ft of full-size train that was constructed against a blue-screen to capture the lead actors on the roof. To portray extreme speed, the crew buffeted the stars with 140mph wind from a parachute-training fan.
Many of the Glasgow plates were shot at 12fps to double the apparent speed of the camera helicopter, which generally flew at 80mph. But when the plate crew tried to incorporate the picture helicopter with which Jean Reno’s character chases the train, the under-cranking just looked fake, so the decision was taken to computer-generate the aircraft in the vast majority of the shots.
The train is also CGI, as are the tunnel entrance and some of its surroundings, and of course the English Channel is composited into the Glaswegian landscape. Once the action moves inside the tunnel, nothing is real except the actors and the set-pieces they’re clinging to.
“We cheated the scale to keep it tight and claustrophobic,” said VFX artist George Hull, admitting that the helicopter could not have fitted in such a tunnel in reality. “The size still didn’t feel right, so we went back and added recognisable, human-scale things such as service utility sheds and ladders.”
Overhead lights spaced at regular intervals were simulated for the blue-screen work. “When compositing the scenes into the CG tunnel months later, we could marry the environment by timing those interactive lights to the live-action plates,” explained Hull.
Employing Alias for modelling, Softimage for animation, RenderMan for rendering, plus custom software like ishade and icomp, ILM produced a sequence which, although it wasn’t completely convincing even in 1996, is still exciting.
Perhaps the best-looking part is the climactic explosion, which was achieved with a 1/8th scale miniature propelled at 55mph through a 120ft tunnel model. (The runaway CGI which followed Jurassic Park’s 1993 success wisely stayed away from explosions for many years, as their dynamics and randomness made them extremely hard to simulate on computers of the time.)
Knoll went on to supervise the Star Wars prequels’ virtual sets (actually miniatures populated with CG aliens), and later Avatar and The Mandalorian. Meanwhile, Cruise pushed for more and more reality in his stunt sequences as the franchise went on, climbing the Burj Khalifa for Ghost Protocol, hanging off the side of a plane for Rogue Nation, skydiving and flying a helicopter for Fallout, and yelling at the crew for Mission: Impossible 7.
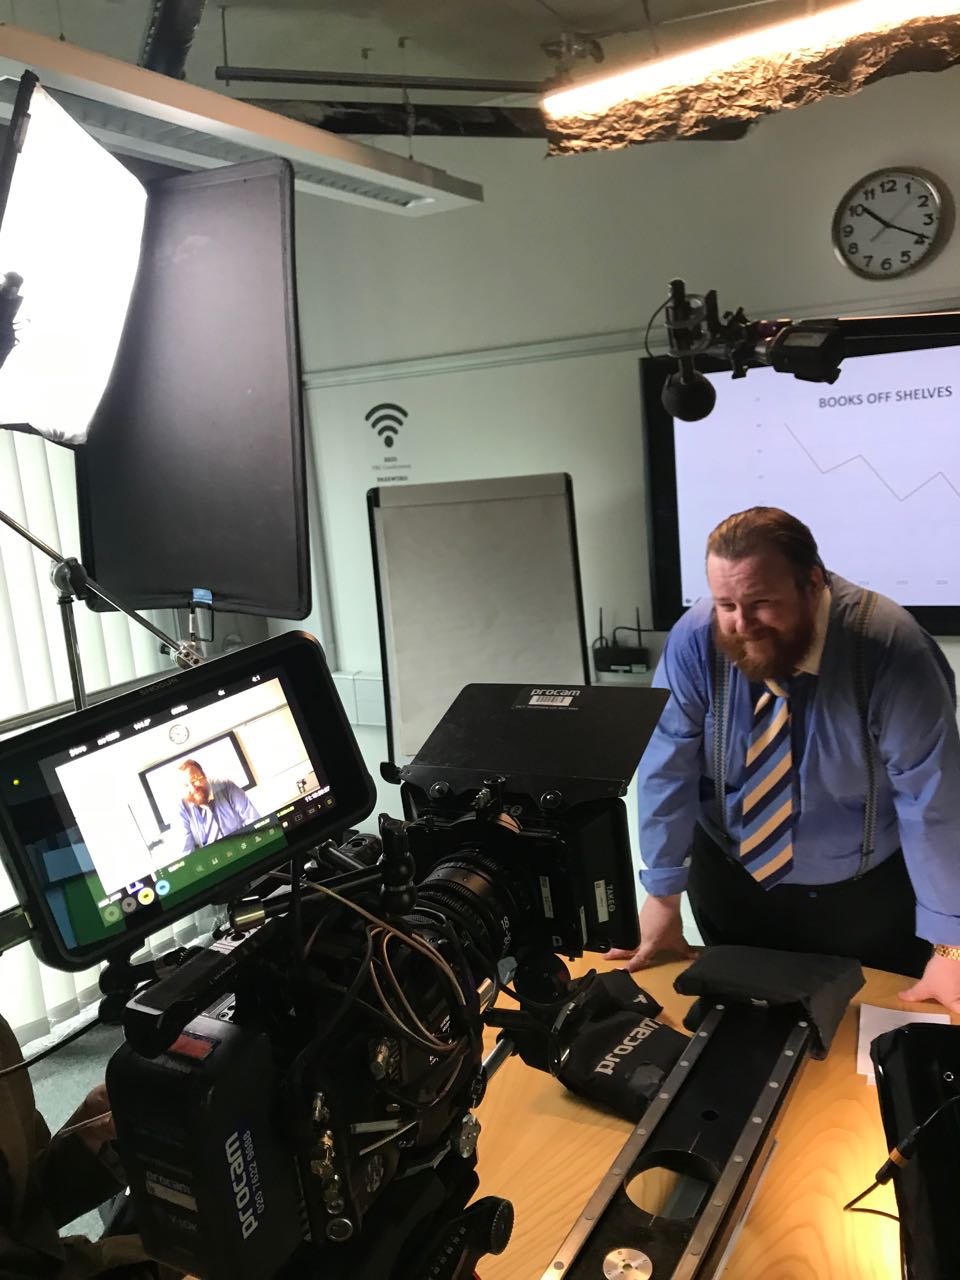
An actor’s view by Alan Hay as I fiddle with a TV’s settings to reduce its flickering on camera
In last week’s post I mentioned the minor trouble we had on Harvey Greenfield is Running Late with a flickering TV screen in the background of shot. In today’s post I’m going to look at the underlying maths, find out why the 144° shutter angle I ultimately chose gave the best results and how to calculate the exposure compensation when you change your shutter angle like this.
If you haven’t already read my exposure series, particularly the posts about shutter and ISO, I suggest you look at those before diving into this one.
Working out the shutter interval
Harvey Greenfield was shot at 24fps here in the UK, where the mains current alternates at 50Hz (i.e. 50 cycles per second). To avoid certain light sources and any screens in shot from flickering, you generally want to match your shutter interval – the period of time during which light is allowed to charge the sensor’s photosites – to the AC frequency, i.e. 1/50th of a second in the UK. That works out to a shutter angle of 172.8° because…
frame rate x shutter interval x 360 = shutter angle
24 x (1 ÷ 50) x 360 = 172.8
So, as with all features I shoot in the UK, I captured most of Harvey at a shutter angle of 172.8°.
Going back to the TV problem, I scrolled through the Red Gemini’s available shutter angles until I found the one that gave the least flicker: 144°. With the twin wonders of hindsight and maths I can work out what frequency the TV was operating at, using the first version of the formula above.
24 x (360 ÷ 144) = 60
144° with a frame rate of 24 meant that the Red was capturing 1/60th of a second’s worth of light each frame. To produce (almost) no flickering at this camera setting, the TV was evidently operating at 60Hz.
The TV screen reflects in the Soft FX filter.
Working out the exposure compensation
Reducing your shutter angle reduces the amount of light captured by the sensor each frame, i.e. it reduces the exposure. I was happy with the depth of field and didn’t want to change the aperture, so instead I compensated by increasing the ISO from 800 to 1280. This was a guess made under time pressure on set, but now I can calculate the right exposure compensation at my leisure.
Fortunately, unlike f-stops, shutter angles and ISO are linear scales. Double the shutter angle or ISO and you double the exposure; halve the shutter angle or ISO and you halve the exposure. This makes the maths relatively easy.
172.8° was my original shutter angle. Let’s think of this as 100% exposure. When I went down to 144°, what percentage of the original exposure was that? I still remember the mantra from calculating maths workbook scores in secondary school: “What you got divided by what you could have got, times 100.”
(144 ÷ 172.8) x 100 = 83%
Now we turn to the ISO. At its original value, 800, the camera is only providing 83% of the desired exposure, thanks to the reduced shutter angle. What must we increase the ISO to in order to hit 100% again?
(800 ÷ ?) x 100 = 83%
800 ÷ ? = 0.83
800 ÷ 0.83 = ? = 960
So I should have been at ISO 960 ideally. The closest available setting on the Red is ISO 1000, not 1280 as I selected, so I was actually over-exposing by a third of a stop. Given that we were shooting in RAW, so the ISO is only metadata, and I could see from the false colours display that nothing was clipping, this is a very minor error indeed.
“The question we have to ask ourselves is: how many 83 percents are left? And the answer is: not many.”
Letting the meter do the maths
One more thing. My Sekonic L-758D light meter assumes a 180° shutter (so I set it to 25fps when I’m actually shooting 24fps at 172.8°, as both work out to 1/50th of a second). Another way I could have worked the correct exposure out, if I’d clocked the 60Hz frequency of the TV at the time, is to have set the meter to 30fps (1/60th of a second at 180°) and then changed the ISO until it gave me the stop I wanted.
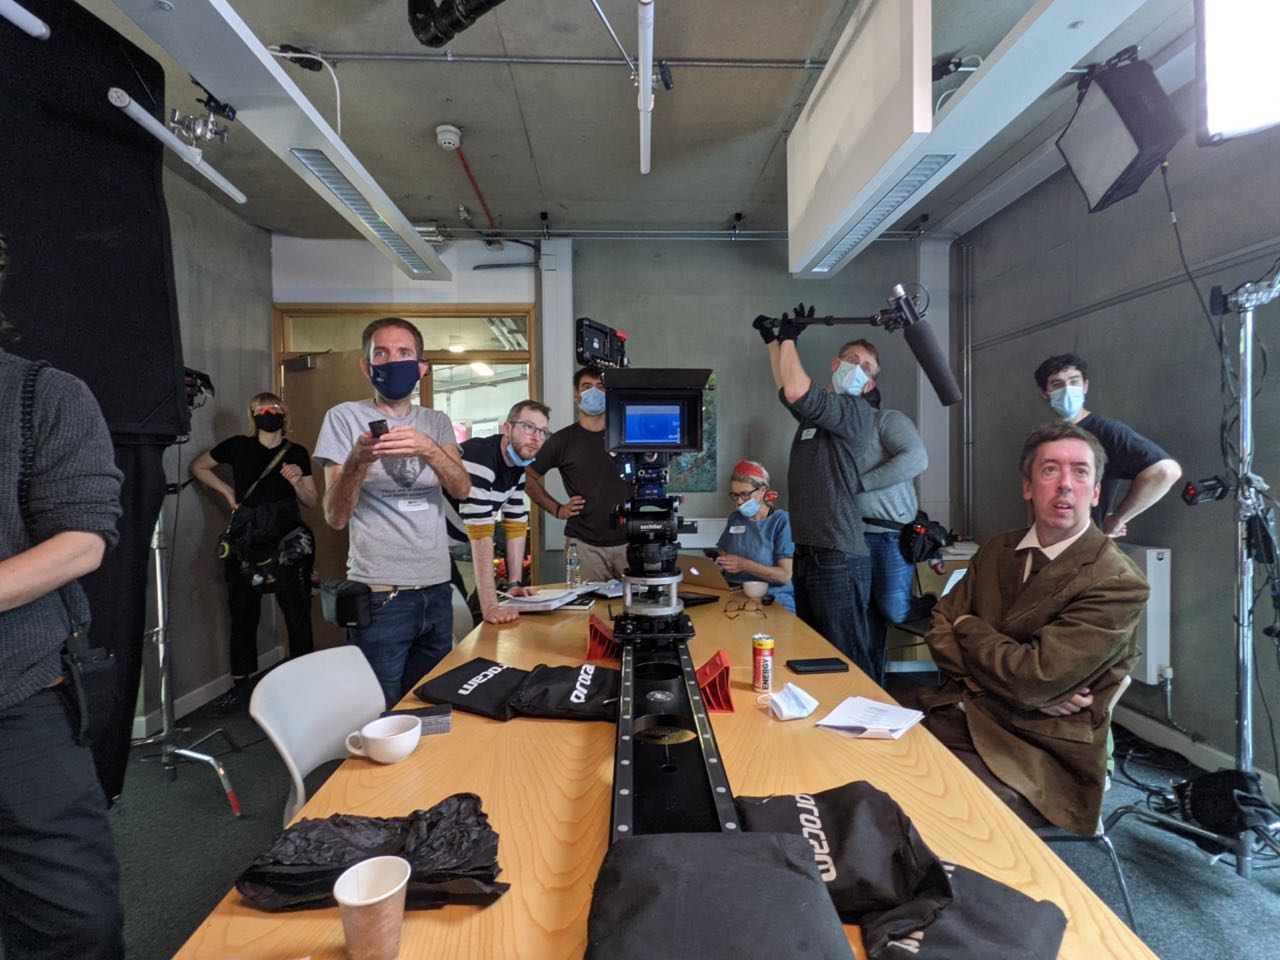
In a conference room at a business centre in north Cambridge we set up for a scene in which the titular Harvey arrives titularly late for a big meeting at work. Here we were joined by my good friend Alan Hay, who voiced all the pre-recorded male characters in the stage play, and now portrays Harvey’s overbearing boss Bryan on screen.
A TV monitor in the background of Bryan’s shot, displaying relevant graphics, gave us some trouble. Neither the 50Hz or 60Hz “flicker free” modes in the monitor’s menu lived up to their names. The best – though not perfect – results were achieved by setting the camera’s shutter to 144°, which works out as 60Hz at our frame rate of 24fps. (Next week’s post will be dedicated to the maths behind this. I bet you can’t wait.)
Stephen and James rigged several Astera tubes to the ceiling, which we mostly used to give everyone a tungsten-coloured backlight whichever direction we shot in (Harvey’s stress colour again). The key light was motivated from the window, which we weren’t able to light from outside of, but we generally used the Litemat 2S to punch up or wrap the natural light from that direction. We used floppy flags on the opposite side of the room to stop too much ambience from the atrium spilling in.
Unfortunately by the time we wrapped the meeting scene we were left with a difficult choice: to rush a long and funny scene in Bryan’s office, or to postpone it for some future pick-up shoot when we could do it justice. Jonnie wisely chose the latter, allowing us to decamp to a private home in Arbury and get ahead with the scenes set in Harvey’s house.
First up at the house was a happy flashback of Harvey and Alice dancing in the bedroom, which Amanda had dressed in calming shades of green. We shot towards the window at 48fps and supplemented the natural light with a single Astera tube in a corner.
Next was a less positive flashback set at night. As it was still broad daylight I closed the curtains, framed out the window and set the white balance to 3600K to turn the remaining light seeping through the curtains into a dim nighttime ambience. I had asked Amanda to provide matching practicals on the bedside cabinets, which we now turned on and dimmed to get a nice warm orange glow. This looked great but left the actors’ faces very under-exposed, so we added a 300W tungsten fresnel motivated by one of the tablelamps. (The thing you see hanging in front of it in the above photo is a makeshift flag to stop the other tablelamp from casting an unrealistic shadow.)
Then it was back to daylight – again natural light supplemented by an Astera – and the camera had to stay locked off so that Jonnie could jump-cut to this shot from the same angle at night. Stephen and James set up the lighting while the daylight faded. The main element that I wanted was a streak of sodium streetlight through a gap in the curtains, again part of the stress colour theme, which was achieved with the Aputure 300D gelled appropriately. We wanted to give the impression that this was bouncing off the wall and edge-lighting Harvey in his second position, but in reality we used the tungsten 300W fresnel – now hidden on top of the wardrobe – to get this effect. We bounced two Astera tubes, set very blue with a bit of green mixed in, off a wall to provide ambience.
Overall the frame was still pretty dark, so I decided to do something I’ve seen advised for night scenes before but never actually done: I reduced the ISO by one stop and opened the iris to compensate. Read my article about ISO if you want to understand all the ins and outs, but essentially doing this allowed one more stop of light to reach the sensor – that’s more information to grade with – without increasing the apparent brightness of the image.
Day 12
Back in the house, this time downstairs in the kitchen. We had three daylight scenes to shoot here, and the lighting approach was to push in soft light through the windows using the Litemat or an Aladdin, with some harder streaks where appropriate from the Aputure. Hiding another Aladdin on top of a cabinet and firing it into a corner of the ceiling was a good move by Stephen to raise the ambience in the room while still keeping some directionality.
Day 13
Our first task today was to return to the cemetery and pick up a dropped shot from day 8. Then it was another Steadicam/rickshaw scene on an Ely street where rain, traffic and a recalcitrant beer can combined to make things quite tricky.
After lunch we had a strict two-hour window in which to shoot three scenes with a hired limousine. The first required it to be driving around, so Filipe (sound mixer), Olga (focus puller) and I squeezed into the front of the main cabin, shooting down the length of the vehicle on the 14mm to where Paul and Alan’s characters were sitting at the back. Jonnie rode in the front passenger seat and watched the monitor over my shoulder. Next to him was an Aladdin which I could use for fill when necessary, but mostly I relied on the dynamic natural light. The heavily tinted windows were a big help, allowing me to retain most of the detail in the sky outside without under-exposing the talent.
When we returned to base, Stephen had all the flags, bolton and lights ready to move into position around the limo for the night scene. His custom-built LED was gelled with Urban Sodium again to key Alan, and an Astera tube inside the limo provided the impression of a passing ambulance.
Then we were left with less than 25 minutes to capture a daytime dialogue scene around the limo. Jonnie had storyboarded it as three set-ups but there was only time for one. Rupert came to the rescue, quickly balancing his Steadicam as Jonnie devised a camera move that would hit all the needed beats.
After a couple more Steadicam shots we moved on to a scene in a hospital car park, a rare moment of calm for the beleagured Harvey. We shot this mostly on the slider, capturing the dialogue in another single developing shot that taxed poor Filipe again but set exactly the right mood for the story. The natural light was very shapeless, so Stephen set up some floppies on one side and bounce on the other.
The day brought principal photography to an end for Stephen and for leading man Paul Richards, both of whom have done stellar work despite the long hours and high energy levels required.
Just after I wrote this Jonnie sent me a rough edit of the limo/hospital sequence and it has turned out very nicely indeed.
Day 14
We convened at a farm near Mildenhall to film Billy the pig farmer, one of the many people who hassles Harvey by phone during the story. In a last-minute casting coup Billy was portrayed by 1st AD Rob Oliver with the unscripted addition of his mother Shirley. A comedy duo to be reckoned with. Between takes we scattered food around to entice the porcine supporting artists into the right positions.
After completing this sequence we all took it in turns to hold a piglet. I’m not sure why.
The final scene of principal photography was a spoof charity appeal for “No More Racism UK”. We shot this down at Ely riverside again, where a crowd steadily gathered to watch us film an old white lady throwing bread at a black couple. We captured the whole thing on the slider with the 50-100mm zoom at 48fps and with the Soft FX 1 for extra cheesiness. To get the depth of field as shallow as possible with our limited ND filters I went down to ISO 250, the downside being a reduction in highlight detail which threatened to blow out the feathers of a white swan in shot. I’m sure that’s symbolic somehow.
We wrapped at the astonishingly reasonable time of 3pm and reconvened in the evening for a pizza-fuelled celebration at Othersyde. The shoot was great fun, the whole team has worked really hard, and I look forward to seeing everyone again for the pick-ups.
The “Harvey Greenfield” camera department: 1st AC Olga Lagun, 2nd AC Fiyin Oladimeji and me
I think the director is turning into Harvey Greenfield. This morning Jonnie burst unexpectedly out of a hedge apologising for being slightly late.
Our first location was a surprisingly busy park in the village of Exning. We shot under the trees lining the edge of the park, keeping the camera on the same side of the eye-line as this handy arboreal negative fill, allowing the open sky of the park proper to light the actors’ off-camera sides. It’s great when blocking works out in your favour like this.
Then we moved around the corner to Wests Garage. First up here was a 24mm tableau shot to establish Barry the mechanic when he first calls Harvey, just as we have done to introduce the other supporting characters. We placed Barry in an office with a window behind him showing the workshop. Stephen arranged our four Astera tubes (in tungsten mode) around the workshop as practical work-lights, clamping some to pillars and placing others on the floor; wherever possible we are adding orange splashes of light (Harvey’s stress colour) into the background of these tableaux.
Next we shot outside around a car (a Rover I think – they all look the same to me), getting a nice slider shot parallel to the vehicle. Shades of Wes Anderson again. The trouble with all these straight-on shots of windows and shiny cars is hiding all the reflections. Stephen had to build a wall of floppy flags to disguise the slider.
By the time we wrapped the heat was getting to us all, and there was nothing for it but to try out the local pub.
But that was closed for a private party so we went to the other local pub instead.
Day 7
Jonnie was wearing Harvey’s jacket. Definitely turning into him.
We were at Othersyde, part of the Cambridge Museum of Technology, for the biggest day of the shoot: 12 scenes and nine pages of script to cover.
We began in a tent – Amanda had kindly found an orange one at my request – which we flagged on one side, adding the Aputure 300D to the other side to bring some shape to the lighting.
Then we moved into one of the venue’s toilet cubicles, where we simply added a skirt of black wrap to the existing overhead light fitting to reduce the light on the walls and add contrast. (Stephen and spark daily James also had to build a black-out tent around the door so that it could be open for the camera to see in without admitting daylight.)
Then we jumped into the bar of the Engineer’s House to grab a one-shot flashback scene. We lit through two windows (the Aputure and the Litemat 2S, I think) and added fill (a CTB-gelled 2K bounced off poly) and a couple of other sources inside (an Aladdin into a dark corner; a tungsten lamp shining down some background stairs). The shot required some well-timed whip-pans – always good for comedy. These require great skill as a camera operator when executed on sticks, but fortunately for me this one was handheld which makes the muscle-memory involved much easier.
Next we were in another toilet cubicle. Again we skirted the ceiling light and tented around the door, but this time another character had to come in. Here we used an LED fixture which Stephen built himself, gelling it with Urban Sodium as this shot is part of a sequence that has a stressy, streetlamp look to it.
By this time it was getting towards evening and we set up for a slider shot at the front of the site, overlooking the River Cam and shooting towards the low sun. Thanks to Helios Pro – a sun tracking app – we managed to time this just right. A 4×4 poly bounce either side of camera was all that was needed to supplement the beautiful natural light.
Sounds like all that would be enough for one day, doesn’t it? But oh no, the big scene was still to come. With 20 or 30 extras we staged a wedding reception under Othersyde’s marquee. Stephen keyed the wedding party at the head table with the Aputure bounced off poly (both rigged to the marquee’s ceiling) and we backlit them with a tungsten 1K firing out of an upper window of the Engineer’s House. A character off to one side was lit with an Aladdin rigged to the roof of the bar. The aim was to keep the lighting fairly warm overall, but to make those warm foreground colours pop we added blue-gelled 300W fresnels uplighting the Engineer’s House and a 1K in the deep background, gelled with Steel Blue, for a hint of moonlight. All of this was supplemented by the venue’s existing string lights, bar lights, LED uplighters in the flower beds and candles which Amanda placed on the tables.
Although we didn’t quite make the call sheet, we only dropped one brief scene – a pretty amazing result and one for the whole team to be proud of. Our welcome reward was a selection of Othersyde’s finest pizzas.
Day 8
The morning was spent with a beautiful horse-drawn hearse (featuring more fun reflective surfaces!) while the afternoon took place around an off-camera grave in Ely Cemetery. Some brief scenes with the child actors, faking a corner of the cemetery as a park, completed a damp but straightforward day for cinematography.
Day 9
About a third of Harvey Greenfield is Running Late takes its title very literally, seeing Paul Richards’ character hurrying to his next appointments as he makes phone calls and talks to camera. Today was the first day dedicated to capturing these scenes.
The first few scenes were shot as Annie Hall-esque wides in the streets and parkland around of Ely. (Much as Hot Fuzz filmed in Wells but painted out the cathedral, we framed out Ely Cathedral to avoid it becoming an identifiable landmark.)
To get a shot of Harvey looking down at a piece of litter, we put the empty beer can on top of two peli cases. Using the lovely wide 14mm lens we were then able to shoot up past it to Harvey and even rack focus to the can. I never usually hire anything wider than an 18mm but I have certainly learnt to appreciate what a 14mm can do on this shoot, even if it does make lighting and boom-operating more challenging.
Our Steadicam operator Rupert joined us again for the rest of the day, bringing along a rickshaw to enable him to track Harvey more smoothly. This drew plenty of attention from the general public, particularly when we moved down to Ely’s picturesque riverside. Most people were very friendly and kindly stayed out of frame if asked to, but a couple of self-styled pirates seemed determined to get an unscripted cameo. Nevertheless we managed to pull off a long and complicated shot which begins with Harvey approaching camera down a tree-lined car park and then tracks him in profile as he pelts along the riverbank.
Day 10
The morning was spent filming outside a house in Romsey – a short walk from home for me – which was standing in for Harvey’s. There was yet more fun with reflections when we had to shoot Harvey’s neighbour looking out of his window. No matter how tight the budget is, I will never ever take a polarising filter off my kit hire list again.
In the afternoon we captured more Steadicam running scenes around Romsey Park, before moving onto the nearby streets when it got dark. Here the Gemini’s low light mode saw use again, allowing us to rely mostly on the existing streetlamps (not pretty, but it works for the story). Stephen rigged an Aladdin to the rickshaw so that Harvey would have a little fill light moving with him.
Finally we moved back into the park, where Stephen had cross-lit the kids’ playground with tungsten sources. This formed the background of the scene, with the action taking place under a streetlamp in front of the play area. As the streetlamp was naturally very toppy, we fired in a Litemat (gelled with Urban Sodium) from above the camera to make sure that we would see Paul’s face for this critical performance scene.
There will be more on Harvey Greenfield‘s second week in my next post. In the meantime you can follow the film’s official Instagram account or Facebook page.
 We’ve all been there. Schedules are tight. Sooner or later the 1st AD, a producer or even the director is going to want to save time by “shooting the rehearsal”. I strongly disagree with this and here’s why.