“Annabel Lee”: Lighting the Arrival

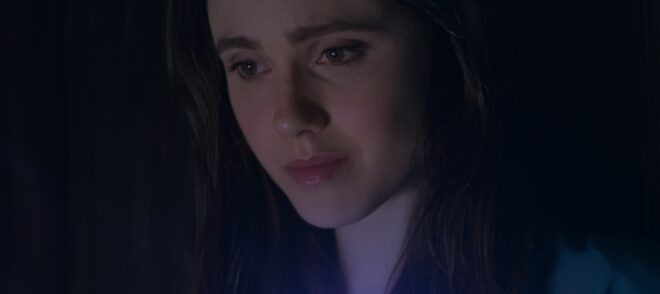
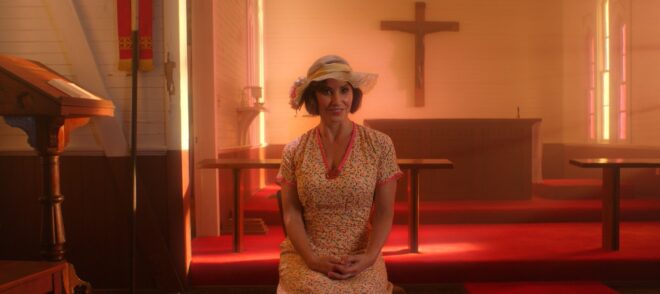
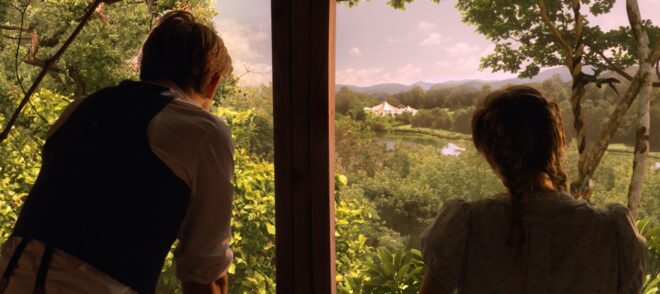
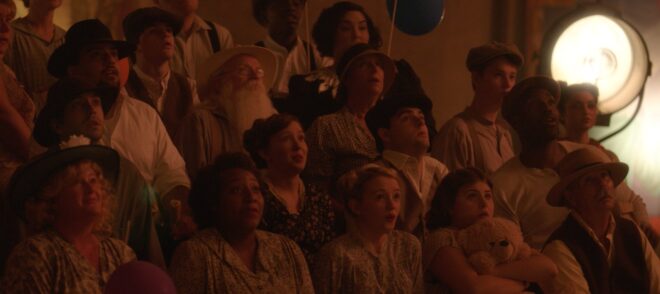
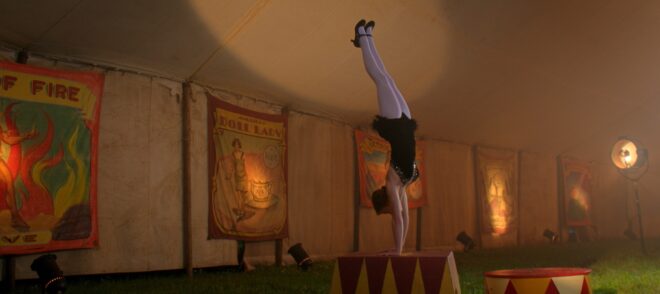
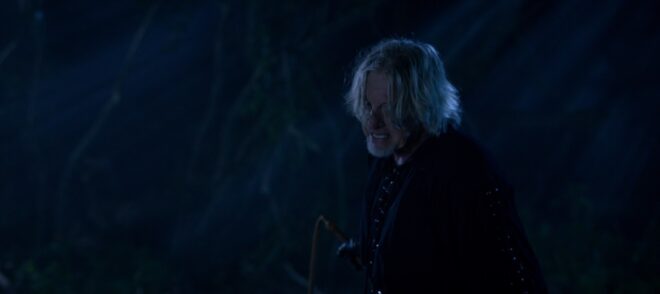
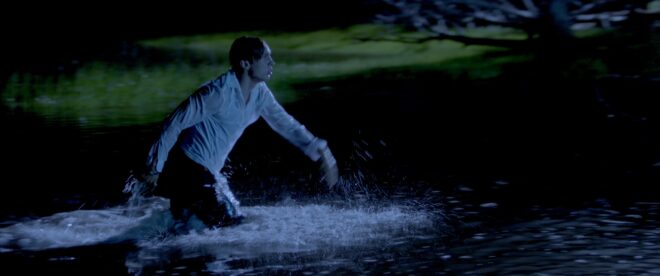
Last week, Annabel Lee – a short I photographed at the end of 2018 – won its sixth and seventh cinematography awards, its festival run having been somewhat delayed by Covid. I’ve previously written a couple of posts around shooting specific parts of Annabel Lee – here’s one about a Steadicam shot with a raven, and another about the church scene – and today I want to dissect the clip above. The sequence sees our two young refugees, Annabel and E, arriving at the Devonshire cottage where they’ll await passage to France.

I was a last-minute replacement for another DP who had to pull out, so the crew, kit list and locations were all in place when I joined. Director Amy Coop had chosen to shoot on an Alexa Mini with Cooke anamorphic glass, and gaffer Bertil Mulvad and the previous DP had put together a package including a nine-light Maxi Brute, a couple of 2.5K HMIs and some LiteMats.

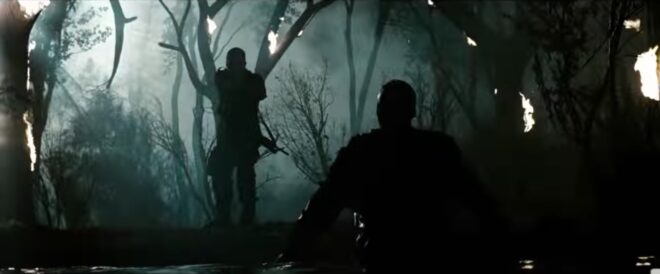
The Brute is serving as the moon in the exteriors, backlighting the (special effects) rain at least when we’re looking towards the driver. (If you’re not familiar with Maxi Brutes, they’re banks of 1K tungsten pars. Ours was gelled blue and rigged on a cherry-picker.) The topography of the location made it impossible to cheat the backlight around when we shot towards Annabel and E; rain doesn’t show up well unless it’s backlit, so this was quite frustrating.

We didn’t have any other sources going on except the period car’s tungsten headlights. It was very tricky to get the cast to hit the exact spots where the headlights would catch them while not shadowing themselves as they held out their hands with umbrellas or brooches.

Inside the cottage it’s a story point that the electricity doesn’t work, so until E lights the oil lamp we could only simulate moonlight and the headlights streaming in through the window. These latter were indeed a simulation, as we didn’t have the picture car at the time we shot inside. There was a whole sequence of bad luck that night when the camera van got stuck on the single-lane dirt track to the cottage, stranding certain crucial vehicles outside and sealing us all inside for three hours after wrap, until the RAC arrived and towed the camera van. So the “headlights” were a couple of tungsten fresnels, probably 650s, which were panned off and dimmed when the car supposedly departs. We also tried to dim them invisibly so that we could get more light on E as he comes in the door and avoid the Close Encounters look when the window comes into shot, but after a few takes of failing to make it undetectable we had to abandon the idea.

We also didn’t have the rain machine for the interiors, so as E opens the door you might briefly glimpse water being poured from an upstairs window by the art department, backlit by an LED panel. We put one of the HMIs outside a window that’s always off camera left to give us some “moonlight” in the room, create colour contrast with the tungsten headlights and the flame of the oil lamp, and ensure that we weren’t left in complete darkness when the “car” departs. Annabel looks right into it as she hugs E.

When the action moves upstairs, an HMI shines in through the window again. I remember it gave us real camera-shadow problems at the end of the scene, because Steadicam operator Rupert Peddle had to end with his back to that window and the talent in front of him (though the clip above cuts off before we get to that bit). The practical oil lamp does a lot of the work making this scene look great. I was sad that I had to put a little fill in the foreground to make E’s bruises at least a tiny bit visible; this was a LiteMat panel set to a very low intensity and bounced off the wall right of camera.

It’s worth mentioning the aspect ratio. My recollection is that I framed for 2.39:1, which is normal for anamorphic shooting. With the Alexa Mini in 4:3 mode, 2x anamorphic lenses produce an 8:3 or 2.66:1 image, which you would typically crop at the sides to 2.39 in post. When I arrived at the grade Annabel Lee was all in 2.66:1 and Amy wanted to keep it that way. I’m not generally a fan of changing aspect ratios in post because it ruins all the composition I worked hard to get right on set, but there’s no denying that this film looks beautiful in the super-wide ratio.

Finally, let me say a huge thank you to all the people who helped make the cinematography the award-winning success it has become, crucially drone operators Mighty Sky, underwater DP Ian Creed and colourist Caroline Morin. I’m sure the judges for these awards were swayed more by the beautiful aerial and aquatic work than the stuff I actually did!

“Annabel Lee”: Lighting the Arrival

Time Up for Tungsten?

Poppy Drayton, in “The Little Mermaid”, lit by a tungsten 1K bounced off poly

Last October, rental house VMI retired all of its tungsten lighting units as part of its mission to be a Net Zero company by 2030. I know this mainly because I am currently writing an article for British Cinematographer about sustainability in the film and TV industry, and VMI’s managing director Barry Bassett was one of the first people I interviewed.

Barry is very passionate about helping the environment and this is reflected in numerous initiatives he’s pioneered at VMI and elsewhere, but in this post I just want to discuss the tungsten issue.

I love tungsten lighting. There’s no better way to light a human face, in my opinion, than to bounce a tungsten light off a poly-board. (Poly-board is also terrible for the planet, I’ve just learnt, but that’s another story.) The continuous spectrum of light that tungsten gives out is matched only by daylight.

Dana Hajaj lit by another tungsten 1K bounced off poly

Tungsten has other advantages too: it’s cheap to hire, and it’s simple technology that’s reliable and easy to repair if it does go wrong.

But there’s no denying it’s horribly inefficient. “Tungsten lighting fixtures ought to be called lighting heaters, since 96% of the energy used is output as heat, leaving only 4% to produce light,” Barry observed in a British Cinematographer news piece. When you put it that way, it seems like a ridiculous waste of energy.

Without meaning to, I have drifted a little away from tungsten in recent years. When I shot Hamlet last year, I went into it telling gaffer Ben Millar that it should be a tungsten heavy show, but we ended up using a mix of real tungsten and tungsten-balanced LED. It’s so much easier to set up a LiteMat 2L on a battery than it is to run mains for a 2K, set up a bounce and flag off all the spill.

Shirley MacLaine lit by a tungsten book-light in “The Little Mermaid”

I admire what VMI have done, and I’ve no doubt that other companies will follow suit. The day is coming – maybe quite soon – when using tungsten is impossible, either because no rental companies stock it any more, or no-one’s making the bulbs, or producers ban it to make their productions sustainable.

Am I ready to give up tungsten completely? Honestly, no, not yet. But it is something I need to start thinking seriously about.

Time Up for Tungsten?

Newton Thomas Sigel on the Cinematography of “Bohemian Rhapsody”

The following article originally appeared on RedShark News in 2018.

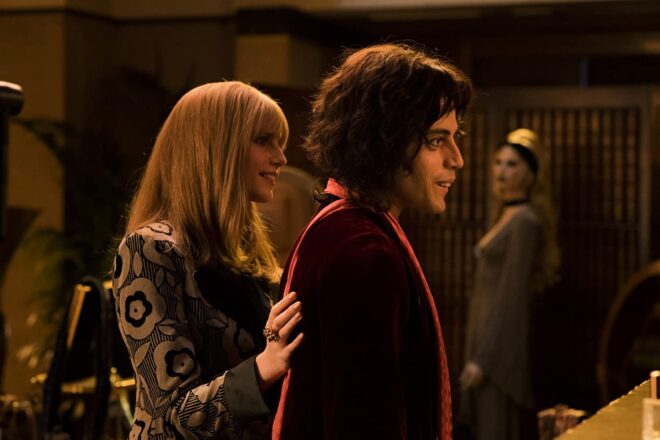
Directed by Bryan Singer, of X-Men and The Usual Suspects fame, Bohemian Rhapsody charts the story of Queen from their formation in 1970 to their triumphant Live Aid set in 1985, with plenty of their classic rock hits along the way. Rami Malek (from Amazon’s Mr. Robot) turns in an Oscar-winning performance as larger-than-life frontman Freddie Mercury.

In his tenth collaboration with Singer was director of photography Newton Thomas Sigel, ASC. I spoke to Sigel about how he approached evoking an era, recreating the concerts, and lensing a legend.

“Every day was this wonderful trip back in time,” enthuses Sigel, who saw the movie as a chance to relive his own youth. “I love shooting music. There is this wonderful transition from the end of the counter-culture, through glam-rock into the hedonism of the eighties.”

Shooting digitally, Sigel employed both the Alexa SXT and Alexa 65. “I decided the movie needed to have a visual arc that best represented the band’s transition from idealists to rock stars, and all the issues that creates. To that effect, I did the first act with old Cooke Speed Panchro lenses on the Alexa SXT. As Queen is discovered, and begins to be known on the international stage, we transition to the Alexa 65.” Sigel later fine-tuned this arc during grading.

The cinematographer paired the large-format Alexa 65 with Prime DNA and Prime 65-S glass, testing all the lenses to find the ones with the most gentle fall-off in focus. “Each lens had its own personality, and was never really ‘perfect’. Our 28mm had a particularly crazy quality that, when used sparingly, had great effect.”

One thing that struck me immediately about the cinematography is the distinctly un-British, warm and glowing look, with lots of sun streaming through windows. This was all part of Sigel’s plan, which develops as the film progresses. “What begins as warm and golden, with its own special LUT, grows ever sharper and cooler, even desaturated,” he explains. “The beginning is all handheld and grainy, the rest much cleaner, with the camera on Steadicam and crane.”

Sigel took a down-to-earth approach to photographing Malek’s Mercury. “I always wanted Freddie to feel very real,” he states. “It is important that you sense his vulnerability at the same time as he is projecting the bravado of the consummate showman. Like so many great performers, Freddie exuded confidence and brashness on stage, and yet, had a terribly shy insecurity in ‘real’ life.”

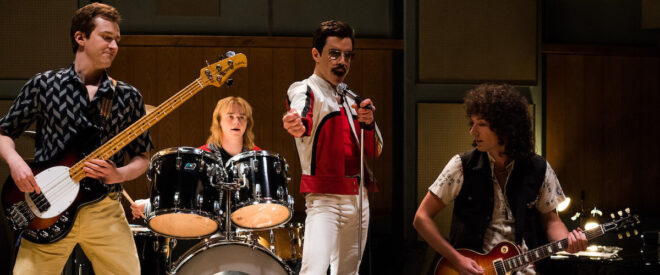
The highlights of Bohemian Rhapsody are undoubtedly the concert scenes. To tackle these, Sigel began by watching every single piece of Queen footage he could lay his hands on, noting the development of the stage lighting over the years. “I wanted to be as faithful to that as I could, while still having it service our story,” he says. That meant eschewing the easily-coloured RGB LED fixtures so common in movies and concerts today, and going back to the traditional method of laboriously changing gels on tungsten units. “We stuck to period lights,” Sigel confirms, “predominantly par cans and follow spots.”

The sheer number of concert scenes was a challenge for the filmmakers, who at one point had to shoot four gigs in just two days. “We had so many concerts to shoot and so little time, I needed to develop a system to quickly change from one venue to the next,” Sigel recalls. “Because Queen’s lighting was based on large racks of par cans, we were able to construct a very modular system that would allow us to raise or lower different sections very quickly. By pre-programming lighting sequences, we could also create sequence patterns with different configurations of light pods to make it look like a different venue.”

The types of units change as the story progresses through the band’s career. “By the late 70s, Queen was among the first bands to adopt the Vari-Lite, which was championed by the band Genesis,” Sigel explains. “That opened up many more possibilities in the theatrical lighting, which also reflected the band’s ascendancy to the upper echelons of the rock world.”

Sigel notes that he embraced all opportunities to capture lens flares from the concert lighting. “There is a great moment during Live Aid where Freddie makes this sweeping gesture through a circular flare, and it almost seems as if he is drawing on the lens.”

The historic Live Aid concert forms the jubilant climax of the film. Queen’s entire 20-minute set was recreated over seven days of shooting. “We photographed it in every type of weather Great Britain has ever seen: rain, sun, overcast, front-light, backlight – you name it. We couldn’t afford to silk the area as I would have liked,” Sigel adds, referring to large sheets of diffusion hung from cranes to maintain a soft, consistent daylight. “So it was a constant battle and the DI [digital intermediate] certainly helped.”

Filming for Bohemian Rhapsody began in autumn 2017, but by December trouble was brewing. Twentieth Century Fox halted production for a while, with the Hollywood Reporter citing the “unexpected unavailability of director Bryan Singer” as the reason. Dexter Fletcher, who had been attached to direct the nascent film back in 2013, ultimately replaced Singer for the last leg of photography.

“A change like that is never ideal,” admits Sigel, “but Dexter was very impressed with what we had done so far. With only a couple weeks to go, he was happy to carry on in the direction we had begun. Obviously he brought some of his own personal touches, but what I noticed the most was the ease he had in communicating with the actors.”

Reflecting on his long history of collaboration with Singer, Sigel is very positive. “When you have done that many movies together, there is a shorthand that develops and makes much of the work easier because you know your parameters from the beginning. Bohemian Rhapsody was truly the ‘labour of love’ cliché for so many people involved; it was quite remarkable.”

Asked to sum up the appeal of Bohemian Rhapsody, the cinematographer declares, “The film has everything – a deep emotional core at the centre of what is otherwise an exuberant celebration of Queen’s music. I also think Freddie’s story of an immigrant outsider just trying to fit in has a resonance today that is very profound.”

Newton Thomas Sigel on the Cinematography of “Bohemian Rhapsody”

“The Little Mermaid”: A Tale of Two Cameras

As The Little Mermaid is leaving Netflix next week, I decided to go back to my production diary from 2016 and see if there were any more extracts that might be of interest. Tying in with my recent post about shooting with two cameras, here are a number of extracts demonstrating how we used our Alexa Plus XR (operated by me) and Alexa Studio XR (operated by Tim Gill). I definitely won’t say that we made the most effective and efficient use of two cameras the whole time, but I certainly learnt a lot about the pros and cons of having a B-cam.


Day 1

We start in a third floor bedroom… After we get the main coverage, we head out to the garden for the next scene, while the B-camera team steps in to pick up a couple of inserts.

As soon as we’re outside, the sun starts to dick around. Those clouds are scudding in and out faster than we can swap ND filters and fly in Ultrabounce to fill the shadows. Eventually we get the three-channel Preston (which only arrived this morning) hooked up so I can pull the iris remotely for our big jib shot. B-camera arrives and picks up alternate angles, and using the two cameras we’re able to wrap out the scenes by lunchtime.

Now we’re inside, on the first floor this time, in a beautiful little circular study. The electrical department have already set up the lamps, so it doesn’t take much tweaking to get us ready to go. Over the course of the afternoon we shoot out our scenes in the study, while B-camera gets various POVs out of windows and establishers of the house exterior. Although the G&E (grip and electric) crew are thinly stretched to support both camera crews, having that second camera is incredibly useful.


Day 2

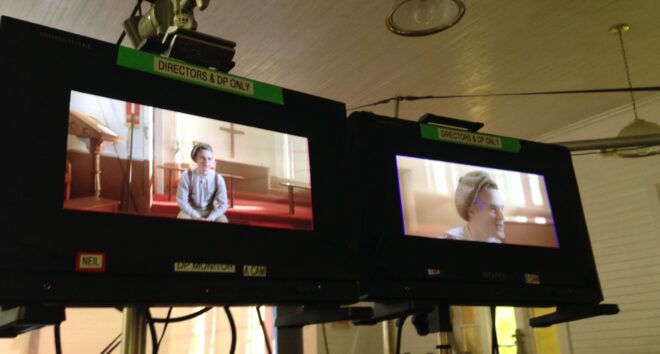
This morning we’re in a church, shooting a montage scene in which Cam interviews a number of locals. We use two cameras to capture a locked-off wide of the interviewee (which can be jump-cut between characters) and a roaming CU simultaneously. Since Tim’s B-camera is doing the roaming shot, I spend the morning at the monitors, keeping an eye on both feeds…


Day 3

The forecast says cloudy all week, and we dearly want our exteriors at Lorene’s House to be sunny and beautiful. But actually the dark, overcast skies work in our favour when the AD has us spend the morning shooting a “sunset” exterior. Our 12K HMI, gelled with full CTS, has enough power to cut through the dim natural light and give the impression of a gentle sunset. Working with both cameras, we get a great tracking shot, a jib shot and some other coverage. Then we leave the B-camera team behind, under the direction of VFX supervisor Rich (for the above green-screen shot), while we move back inside to block and light other scenes…


Day 8

… We have planned our day to maximise our two cameras. We’ve only been getting about eight set-ups a day, and we knew that with the stunts and effects we have today we would be pushed to even get that many. So we planned six two-camera set-ups and an insert, and we stick closely to this plan. A-camera lives on the crane with the (Angenieux 19.5-94mm Optimo) zoom most of the day, getting the most out of the scale and height of the big top and the action, while B-camera – using the (Cooke S4/i) primes for a change – gets the closer shots. This leaves me free to look at the monitors, which is useful but often boring. (All the material from this day sadly hit the cutting room floor.)


Day 12

Our last day at the circus… For most of the day the B-camera is nearby shooting different stuff. This is great in principle, but in practice we tend to get in each others’ way, our lighting affecting their shots and vice versa.


Day 24

… After lunch we have a big fight scene to shoot, and the pace of work kicks up several gears. I light a small clearing so we can shoot 180 degrees with two cameras simultaneously. Some directions look better than others, but in an action scene no shot will be held for very long, so it’s not necessary to get every angle perfect.

Normally I open the Cooke S4s no wider than 2 and two thirds, as no lens performs at its best when wide open, but my resolve on this is slipping, and it’s really hard to get a decent amount of light through the dense trees at this location, so I go wide open (T2) for this sequence.


Day 25

Our last day on Tybee Island. We start with pick-ups in the woods for various scenes shot over the last few days, then move to the beach, a portion of which we’re cheating as a “river marsh” location. This is a night scene, so we have to go through the slow process of moving the condor (cherry-picker) around from the woods. This involves a police escort to get it across the highway…

Meanwhile B-camera are shooting a shot of a car driving along the road behind the beach. Since the G&E crew are all tied up, at (co-director) Chris Bouchard’s suggestion they use the location work-light and have to fiddle with the white balance to render it a reasonable colour on camera. More and more micro-budget cheats are being employed as the production goes on, and to most of the crew, who are used to big-budget stuff, it’s ridiculous. I don’t mind so much, but I feel bad for the B-camera team.


Day 26

We are back on the stage, in three different sets. I’ve lit them all before, but most of the lamps are gone and some require a new look because the time of day is different. Towards the end of the night we leap-frog from set to set, sending G&E and the B-camera ahead to set up while we’re still shooting. To my surprise it works. The sets are small enough that we have enough G&E crew to split up like that.

Top row: A-cam 1st AC Jonathan Klepfer, A-cam 2nd AC Kane Pearson, me, B-cam 1st AC Geran Daniels; bottom row: B-cam 2nd AC Matt Bradford Dixon, digital loader Alex Dubois, B-cam operator/2nd unit DP Tim Gill

For more extracts from my Little Mermaid diary, visit these links:

The Little Mermaid is currently available on Netflix in the UK – but hurry because it leaves on November 30th – and Showtime in the US.

“The Little Mermaid”: A Tale of Two Cameras

6 Tips for Virtual Production

Part of the volume at ARRI Rental in Uxbridge, with the ceiling panel temporarily lowered

Virtual production technically covers a number of things, but what people normally mean by it is shooting on an LED volume. This is a stage where the walls are giant LED screens displaying real-time backgrounds for photographing the talent in front of. The background may be a simple 2D plate shot from a moving vehicle, for a scene inside a car, or a more elaborate set of plates shot with a 360° rig.

The most advanced set-ups do not use filmed backgrounds at all, but instead use 3D virtual environments rendered in real time by a gaming engine like Unreal. A motion-tracking system monitors the position of the camera within the volume and ensures that the proper perspective and parallax is displayed on the screens. Furthermore, the screens are bright enough that they provide most or all of the illumination needed on the talent in a very realistic way.

I have never done any virtual production myself, but earlier this year I was fortunate enough to interview some DPs who have, for British Cinematographer article. Here are some tips about VP shooting which I learnt from these pioneers.


1. Shoot large format

An ARRI Alexa Mini LF rigged with Mo-Sys for tracking its position within the volume

To prevent a moiré effect from the LED pixels, the screens need to be out of focus. Choosing an LF camera, with their shallower depth of field, makes this easier to accomplish. The Alexa Mini LF seems to be a popular choice, but the Sony Venice evidently works well too.


2. Keep your distance

To maintain the illusion, neither the talent nor the camera should get too close to the screens. A rule of thumb is that the minimum distance in metres should be no less than the pixel pitch of the screens. (The pixel pitch is the distance in millimetres between the centre of one pixel and the centre of the next.) So for a screen of 2.3mm pixel pitch, keep everything at least 2.3m away.


3. Tie it all together

Several DPs have found that the real foreground and the virtual background fit together more seamlessly if haze or a diffusion filter are used. This makes sense because both soften the image, blending light from nearby elements of the frame together. Other in-camera effects like rain (if the screens are rated weatherproof) and lens flares would also help.


4. Surround yourself

The back of ARRI’s main screen, composed of ROE LED panels

The most convincing LED volumes have screens surrounding the talent, perhaps 270° worth, and an overhead screen as well. Although typically only one of these screens will be of a high enough resolution to shoot towards, the others are important because they shed interactive light on the talent, making them really seem like they’re in the correct environment.


5. Match the lighting

If you need to supplement the light, use a colour meter to measure the ambience coming from the screens, then dial that temperature into an LED fixture. If you don’t have a colour meter you should conduct tests beforehand, as what matches to the eye may not necessarily match on camera.


6. Avoid fast camera moves

Behind the scenes at the ARRI volume, built in partnership with Creative Technology

It takes a huge amount of processing power to render a virtual background in real time, so there will always be a lag. The Mandalorian works around this by shooting in a very classical style (which fits the Star Wars universe perfectly), with dolly moves and jibs rather than a lot of handheld shots. The faster the camera moves, the more the delay in the background will be noticeable. For the same reason, high frame rates are not recommended, but as processing power increases, these restrictions will undoubtedly fall away.

6 Tips for Virtual Production

“Harvey Greenfield is Running Late”: Week 1

Day 1

The weather was dry and overcast, shedding a pleasantly soft light on the proceedings as the crew of Harvey Greenfield is Running Late set up for our first scene, in front of a small primary school in rural Cambridgeshire.

Then we started shooting and the weather went bananas.

One moment we had bright sunshine, the next we had heavy rain bordering on hail… sometimes in the same take. We had lots of fun and games dodging the showers, maneouvering a 12×12′ silk to soften the sun, keeping reflections and shadows out of shot, waiting for noisy trains to pass, and trying to get through takes without the light changing. But we got there in the end.

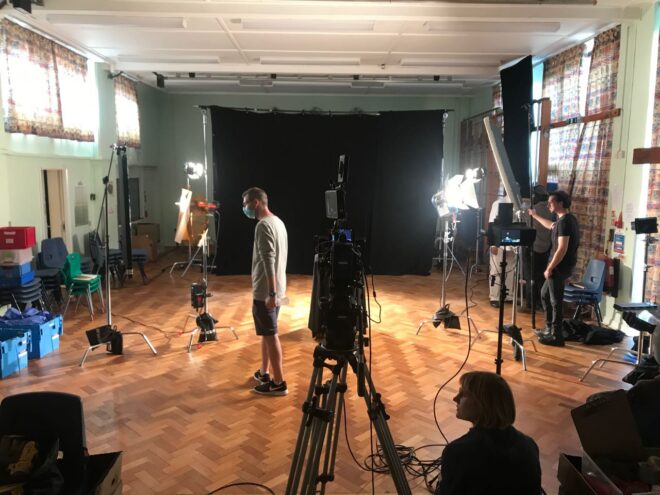
In the afternoon we moved into the school hall, which we were using as a makeshift studio. As well as numerous flashbacks, the film includes several imaginary sequences, including a spoof advert. This we shot against a black backdrop using dual backlights, one on either side, to highlight the talent. I totally stole this look from the Men in Black poster.

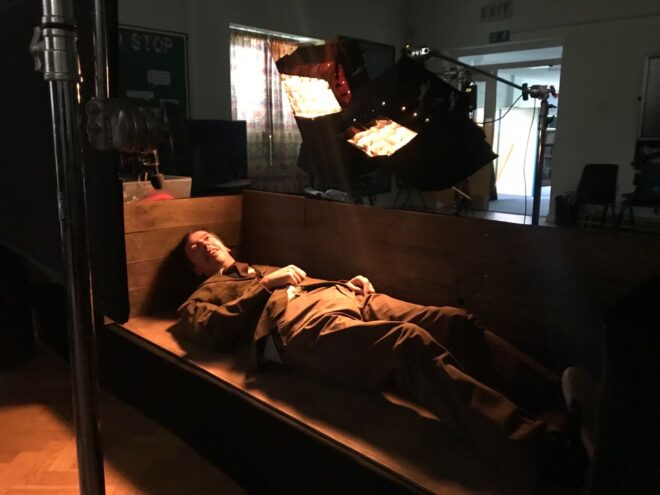
Our last shot of the day was Harvey’s first, and another imaginary scene, this time set in a coffin. To give the appearance of it being underground, the coffin (with no lid and one side missing) was placed on rostra with a black drape hanging below it. To create darkness above it, we simply set a flag in front of camera. Harvey (Paul Richards) lights a match to illuminate himself, which gaffer Stephen Allwright supplemented with two 1×1′ Aladdin Bi-flexes set to tungsten and gelled even more orange.


Day 2

One of the few occasions in my life when I’ve been able to walk to set from home: we started at the University Arms Hotel overlooking Parker’s Piece, one of Cambridge’s many green spaces (and, fact fans, the place where the rules of Association Football were first established).

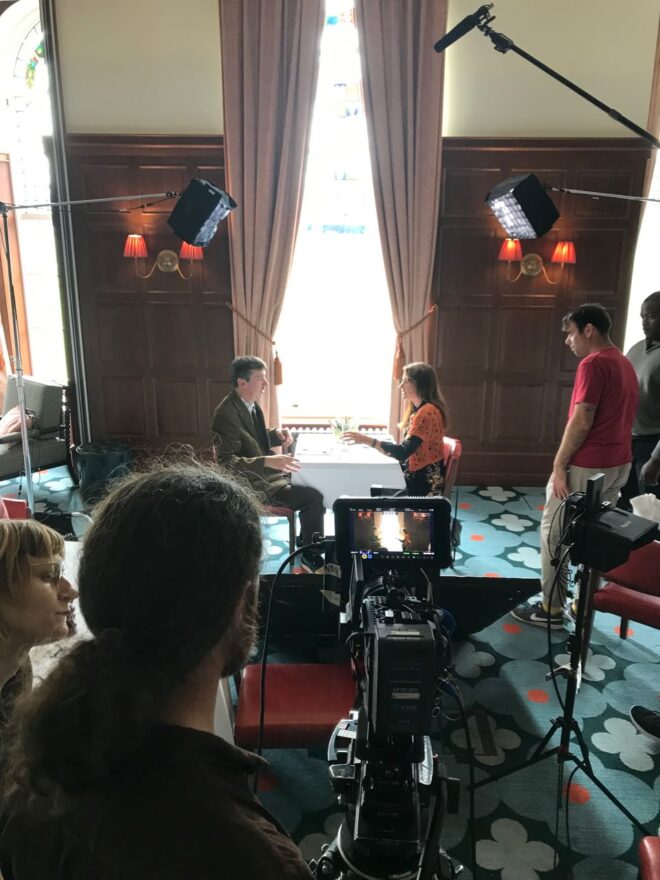
The hotel’s function room was dressed as an upmarket restaurant, where we captured Harvey’s first date with his girlfriend Alice (Liz Todd). We shot towards a window; putting your main light source in the background is always a good move, and it gave us the perfect excuse to do soft cross-backlight on the two characters. The room’s wood panelling and sconces looked great on camera too.

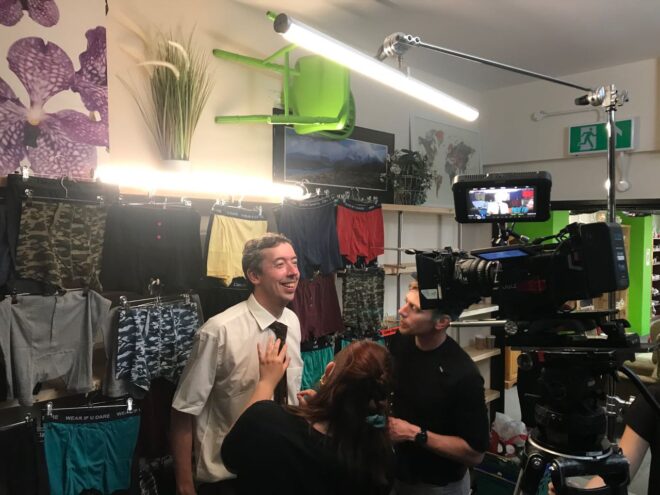
The unit then moved to Emmaus, a large charity shop north of the city, where we filmed a Wall of Pants and some tightly choreographed Sandwich Action. Here we broke out the Astera tubes for the fist time, using them as a toppy, fluorescent-style key-light and backlight.

By now we were getting into the visual rhythm of the film, embracing wide angles (our 18-35mm zoom gets heavy use), central framing (or sometimes short-siding), Wes Anderson-type pans/tilts, and a 14mm lens and/or handheld moves for crazier moments.


Day 3

We were based at Paul’s house for day 3, beginning in the street outside for a brief scene in his car. Shooting from the back, we mounted an Aladdin in the passenger seat to key Paul, and blacked out some of the rear windows to create negative fill, much like I did for the driving scenes in Above the Clouds.

The rest of the day was spent in and around Paul’s shed. Or, to be more specific, the middle one of his three sheds. This is Harvey’s “Happy Place” so I stepped up from the Soft FX 0.5 filter I’d been shooting with so far to the Soft FX 1, to diffuse the image a little more. We also used haze for the only time on the film.

Some shots through the shed window gave us the usual reflection challenges. Stephen rigged a 12×12 black solid to help with this, and we draped some bolton over the camera. Inside the shed we used an Aladdin to bring up the level, and once we stopped shooting through the window we fired a tungsten 2K in through there instead. This was gelled with just half CTB so that it would still be warm compared with the daylight, and Stephen swapped the solid for a silk to keep the natural light consistent and eliminate the real direct sun.

I made my first use of the Red Gemini’s low light mode today, switching to ISO 3200 to maintain the depth of field when filming in slow motion. (I have been shooting at T4-5.6 because a sharper, busier background feels more stressful for Harvey.)


Day 4

Back to the primary school. We spent the morning outside shooting flashbacks with some talented child actors from the Pauline Quirke Academy. We got some nice slider shots and comedy pans while dealing with the ever-changing cloud cover.

Inside in the afternoon we picked up a dropped scene from day 1, then moved on to one of the film’s biggest challenges: a six-minute dialogue scene travelling through a corridor and around a classroom, to be filmed in a single continuous Steadicam shot. This could easily have been a nightmare, but a number of factors worked in our favour. Firstly, we had rehearsed the scene on location with actors and a phone camera during pre-production. Secondly, we had the brilliant Rupert Peddle operating the Steadicam. Thirdly, it would have been so difficult to keep a boom and its shadows out of shot that mixer Filipe Pinheiro and his team didn’t even try, instead relying on lavaliers and a mic mounted on the camera.

For similar reasons, we didn’t do much lighting either; there were almost no areas of the rooms and their ceilings that didn’t come into shot at some point. In two places Stephen rigged blackout for negative fill. I then chose which of the existing ceiling lights to turn off and which to keep on, to get as much shape into the image as possible. We tried to rig a grid onto one of the ceiling lights to take it off a wall that was getting too hot, but after one take we realised that this was in frame, so instead we stuck a square of ND gel to it. We also rigged two Astera tubes in the corridor, but discovered that one of those came into frame too, so in the end a single Astera tube was the only additive lighting. The existing ceiling lights worked particularly well for a slow push-in to Alice near the end of the shot, providing her with both key and backlight from perfect angles.


Day 5

Today we shot a big scene based around a school play. Production designer Amanda Stekly had created a suitably cheesy, sparkly backdrop, and more PQA students dressed up in weird and wonderful costumes to enact snatches of a very random production called Spamlet (making it the second time this year I’ve shot “to be or not to be”, though this time was… er… a little different).

The school had a basic lighting rig already. We refocused and re-gelled some of the lights, keeping it very simple and frontal. Behind the set I put one of my old 800W Arri Lites as a backlight for the kids on stage. To one side, where Alice was standing, we used two Astera tubes, one to key her and one to backlight her. These were both set to a cool, slightly minty colour. My idea of using green for calming characters and moments hasn’t come to fruition quite as I’d planned, because it hasn’t fitted the locations and other design elements, but there’s a little hint of it here.

For the audience, Stephen rigged an Aputure 300D to the ceiling as a backlight, then we bounced the stage lighting back onto them using a silver board. We also used the school’s follow spot, which gave us some nice flares for the stressful moments later in the scene. It was daytime both in reality and in the story, but we closed the (thin) curtains and reduced the ambience outside with floppy flags so that the artificial lighting would have more effect.

We had to move at breakneck speed in the afternoon to get everything in the can before wrap time, but we managed it, finishing our first week on schedule. No mean feat.

“Harvey Greenfield is Running Late”: Week 1

Pre-production for “Harvey Greenfield is Running Late”

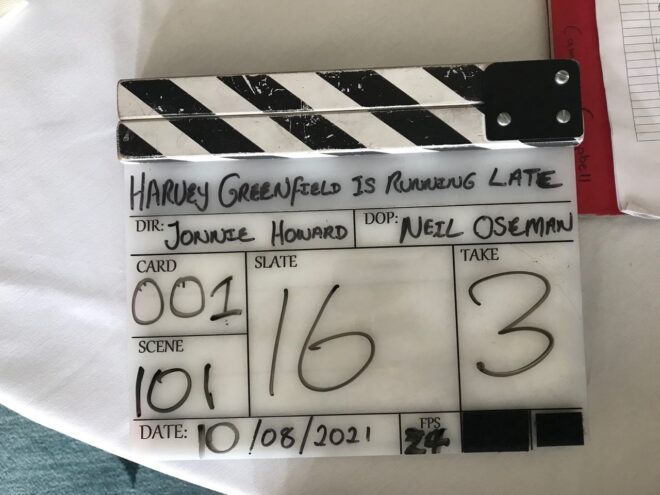
Next week filming commences for Harvey Greenfield is Running Late, a comedy feature based on the critically acclaimed one-man play by Paul Richards. Paul reprises the title role in the film, directed by Jonnie Howard, who I previously worked with on A Cliché for the End of the World and The Knowledge.

The production is based locally to me in Cambridgeshire, and over the last couple of months I’ve attended recces, rehearsals and meetings. I’ve tried to approach it the same way I did Hamlet, reading each draft of the script carefully and creating a spreadsheet breakdown. Scene by scene, the breakdown lists my ideas for camerawork and lighting.

Harvey is a stressed and neurotic character who can’t say no to anything. The film takes place over a single day of his life when he finds himself having to attend a wedding, a funeral, a big meeting at his office, a school play and an appointment at a garage. Numerous scenes see him jogging from commitment to commitment (always running late in more ways than one) while taking phone calls that only add to the pressure. In the finest tradition of Alfie, Ferris Bueller and Fleabag, he also talks to camera.

Talking of finest traditions, the budget is very low but ambitions are high! With 100 script pages and 14 days the shoot will be more of a sprint than a marathon.

The UK film and TV industry is busier at present than I’ve ever known it, making up for lost time last year, so sourcing crew and kit has certainly been challenging. But thanks to generous sponsorship by Global Distribution and Sigma we will be shooting on a Red Ranger Gemini – which regular readers may recall I almost selected for Hamlet – with Sigma Cine primes and zooms. I will be working with a completely new camera team and gaffer.

One of the first things Jonnie told me was that he wanted to use a lot of wide lenses. This makes a lot of sense for the story. Wide lenses fill the background with more clutter, making the frame busier and more stressful for Harvey. They also put us into Harvey’s headspace by forcing the camera physically close to get a tighter shot. We shot some tests early on with Paul, primarily on the Sigma Cine 14mm, to start getting a feel for that look.

Influences include Woody Allen, the Coen brothers, Wes Anderson, Terry Gilliam and Napoleon Dynamite, and as usual, watching reference films has formed an important part of prep for me.

Based on the colour palette Nicole Stone has put together for her costumes, I’ve decided to use orange as Harvey’s stress colour and green when he’s calmer. For most of the film this will just be a case of framing in orange or green elements when appropriate, or putting a splash of the relevant colour in the background. For key scenes later in the story we may go so far as to bathe Harvey in the colour.

Right, I’d better get back to trying to sort out the lighting kit hire, which is still up in the air. Possibly this post should have been called Pre-production for “Harvey Greenfield” is running late.

Pre-production for “Harvey Greenfield is Running Late”

5 Ways to Use Astera Tubes

Astera Titan Tubes seem to be everywhere at the moment, every gaffer and DP’s favourite tool. Resembling fluorescent tubes, Asteras are wireless, flicker-free LED batons comprised of 16 pixels which can be individually coloured, flashed and programmed from an app to produce a range of effects.

Here are five ways in which I used Titan Tubes on my most recent feature, Hamlet. I’m not being sponsored by Astera to write this. I just know that loads of people out there are using them and I thought it would be interesting to share my own experiences.


1. Substitute fluorescents

We had a lot of scenes with pre-existing practical fluorescents in them. Sometimes we gelled these with ND or a colour to get the look we wanted, but other times it was easier to remove the fluorescent tube and cable-tie an Astera into the housing. As long as the camera didn’t get too close you were never going to see the ties, and the light could now be altered with the tap of an app.

On other occasions, when we moved in for close-ups, the real fluorescents weren’t in an ideal position, so we would supplement or replace them with an Astera on a stand and match the colour.


2. Hidden behind corners

Orientated vertically, Asteras are easy to hide behind pillars and doorways. One of the rooms we shot in had quite a dark doorway into a narrow corridor. There was just enough space to put in a vertical pole-cat with a tube on it which would light up characters standing in the doorway without it being seen by the camera.


3. Eye light

Ben Millar, Hamlet‘s gaffer, frequently lay an Astera on the floor to simulate a bit of floor bounce and put a sparkle in the talent’s eye. On other occasions when our key light was coming in at a very sidey angle, we would put an Astera in a more frontal position, to ping the eyes again and to wrap the side light very slightly.


4. rigged to the ceiling

We had a scene in a bathroom that was all white tiles. It looked very flat with the extant overhead light on. Our solution was to put up a couple of pole-cats, at the tops of the two walls that the camera would be facing most, and hang Asteras horizontally from them. Being tubes they have a low profile so it wasn’t hard to keep them out of the top of frame. We put honeycombs on them and the result was that we always had soft, wrappy backlight with minimal illumination of the bright white tiles.


5. Special effects

One of the most powerful things about Titan Tubes is that you can programme them with your own special effects. When we needed a Northern Lights effect, best boy Connor Adams researched the phenomenon and programmed a pattern of shifting greens into two tubes rigged above the set.

On War of the Worlds in 2019 we used the Asteras’ emergency lights preset to pick up some close-ups which were meant to have a police car just out of shot.

There are all kinds of other effects you could use the tubes for. There is a good example by DP Rowan Biddiscombe in this article I wrote for British Cinematographer.

5 Ways to Use Astera Tubes

The Colour of Moonlight

What colour is moonlight? In cinema, the answer is often blue, but what is the reality? Where does the idea of blue moonlight come from? And how has the colour of cinematic moonlight evolved over the decades?


The science bit

According to universetoday.com the lunar surface “is mostly oxygen, silicon, magnesium, iron, calcium and aluminium”. These elements give the moon its colour: grey, as seen best in photographs from the Apollo missions and images taken from space.

When viewed from Earth, Rayleigh scattering by the atmosphere removes the bluer wavelengths of light. This is most noticeable when the moon is low in the sky, when the large amount of atmosphere that the light has to travel through turns the lunar disc quite red, just as with the sun, while at its zenith the moon merely looks yellow.

Yellow is literally the opposite (or complement) of blue, so where on (or off) Earth did this idea of blue cinematic moonlight come from?

One explanation is that, in low light, our vision comes from our rods, the most numerous type of receptor in the human retina (see my article “How Colour Works” for more on this). These cells are more sensitive to blue than any other colour. This doesn’t actually mean that things look blue in moonlight exactly, just that objects which reflect blue light are more visible than those that don’t.

In reality everything looks monochromatic under moonlight because there is only one type of rod, unlike the three types of cones (red, green and blue) which permit colour vision in brighter situations. I would personally describe moonlight as a fragile, silvery grey.

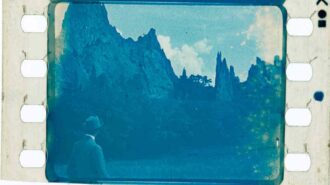
Blue moonlight on screen dates back to the early days of cinema, before colour cinematography was possible, but when enterprising producers were colour-tinting black-and-white films to get more bums on seats. The Complete Guide to Colour by Tom Fraser has this to say:

As an interesting example of the objectivity of colour, Western films were tinted blue to indicate nighttime, since our eyes detect mostly blue wavelengths in low light, but orange served the same function in films about the Far East, presumably in reference to the warm evening light there.

It’s entirely possible that that choice to tint night scenes blue has as much to do with our perception of blue as a cold colour as it does with the functioning of our rods. This perception in turn may come from the way our skin turns bluer when cold, due to reduced blood flow, and redder when hot. (We saw in my recent article on white balance that, when dealing with incandescence at least, bluer actually means hotter.)

Whatever the reason, by the time it became possible to shoot in colour, blue had lodged in the minds of filmmakers and moviegoers as a shorthand for night.


Examples

Early colour films often staged their night scenes during the day; DPs underexposed and fitted blue filters in their matte boxes to create the illusion. It is hard to say whether the blue filters were an honest effort to make the sunlight look like moonlight or simply a way of winking to the audience: “Remember those black-and-white films where blue tinting meant you were watching a night scene? Well, this is the same thing.”

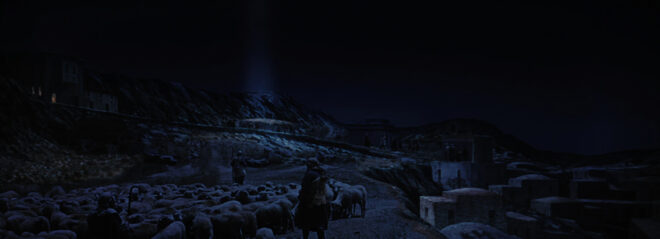
This scene from “Ben Hur” (1959, DP: Robert Surtees, ASC) appears to be a matte painting combined with a heavily blue-tinted day-for-night shot.
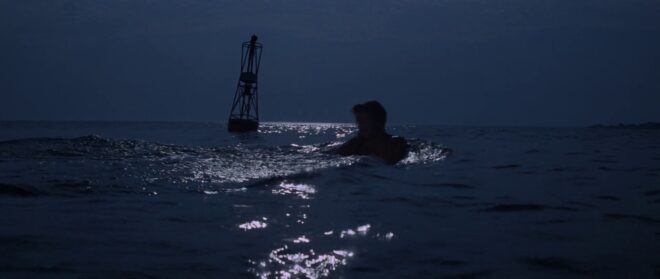
A classic and convincing day-for-night scene from “Jaws” (1975, DP: Bill Butler, ASC)

Day-for-night fell out of fashion probably for a number of reasons: 1. audiences grew more savvy and demanded more realism; 2. lighting technology for large night exteriors improved; 3. day-for-night scenes looked extremely unconvincing when brightened up for TV broadcast. Nonetheless, it remains the only practical way to show an expansive seascape or landscape, such as the desert in Mad Max: Fury Road.

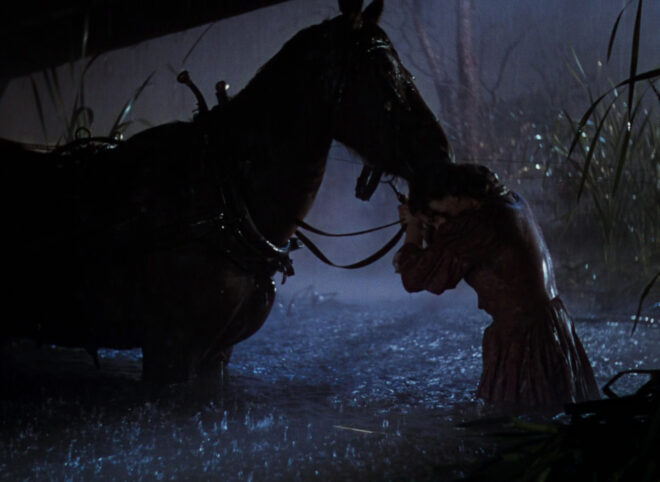
Blue moonlight on stage for “Gone with the Wind” (1939, DP: Ernest Haller)
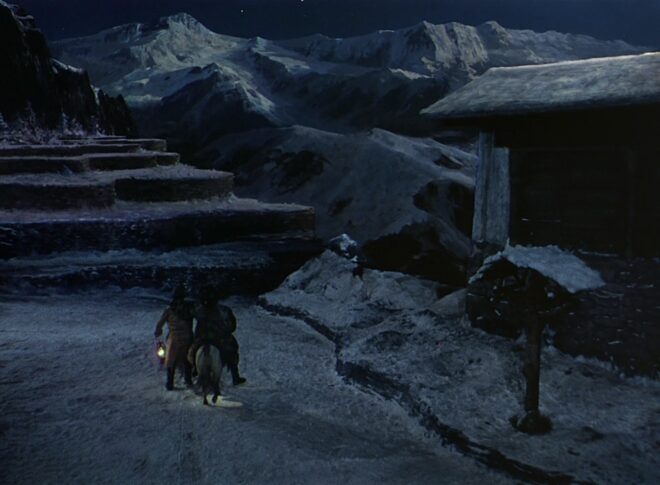
Cold stage lighting matches the matte-painted mountains in “Black Narcissus” (1947, DP: Jack Cardiff, OBE)

One of the big technological changes for night shooting was the availability of HMI lighting, developed by Osram in the late 1960s. With these efficient, daylight-balanced fixtures large areas could be lit with less power, and it was easy to render the light blue without gels by photographing on tungsten film stock.

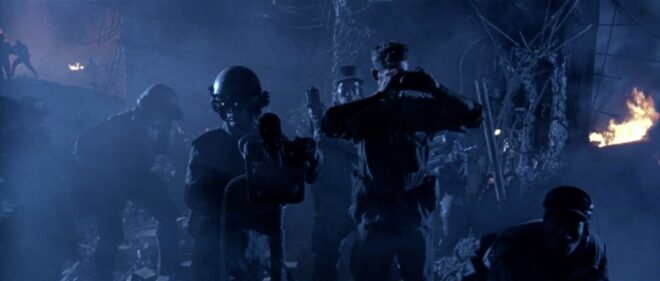
Cinematic moonlight reached a peak of blueness in the late 1980s and early ’90s, in keeping with the general fashion for saturated neon colours at that time. Filmmakers like Tony Scott, James Cameron and Jan de Bont went heavy on the candy-blue night scenes.

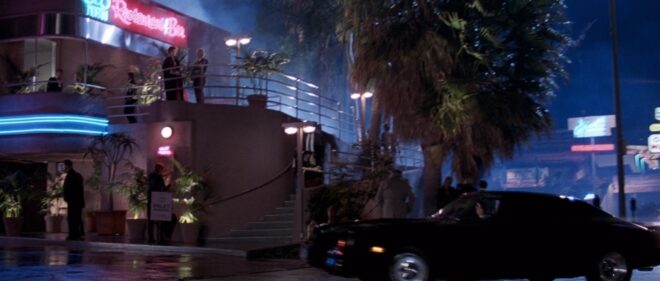
“Beverly Hills Cop II” (1987, DP: Jeffrey Kimball, ASC)
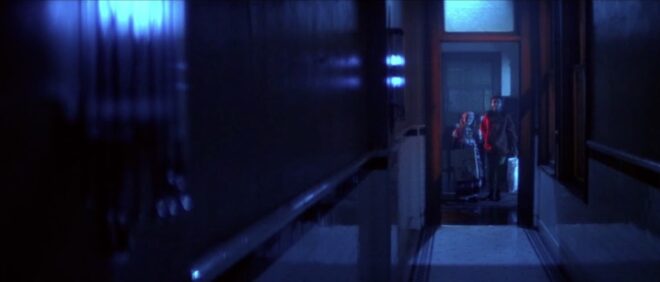
“Flatliners” (1990, DP: Jan de Bont, ASC)
“Terminator 2: Judgment Day” (1991, DP: Adam Greenberg, ASC) uses a lot of strong, blue light, partly to symbolise the cold inhumanity of the robots, and partly because it’s a hallmark of director James Cameron.

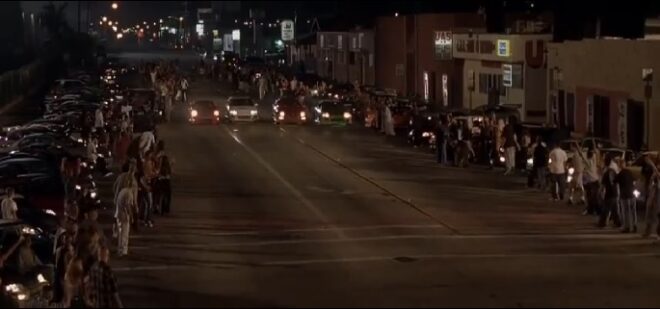
By the start of the 21st century bright blue moonlight was starting to feel a bit cheesy, and DPs were experimenting with other looks.

“The Fast and the Furious” (2001, DP: Ericson Core) has generally warm-coloured night scenes to reflect LA’s mild weather after dark, but often there is a cooler area of moonlight in the deep background.
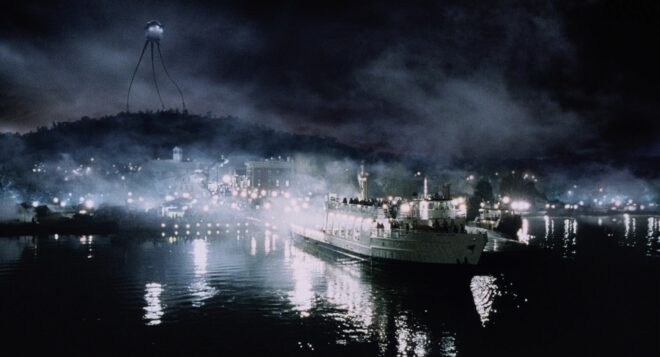
“War of the Worlds” (2005, DP: Janusz Kaminski, ASC)

Speaking of the above ferry scene in War of the Worlds, Janusz Kaminski, ASC said:

I didn’t use blue for that night lighting. I wanted the night to feel more neutral. The ferryboat was practically illuminated with warm light and I didn’t want to create a big contrast between that light and a blue night look.

The invention of the digital intermediate (DI) process, and later the all-digital cinematography workflow, greatly expanded the possibilities for moonlight. It can now be desaturated to produce something much closer to the silvery grey of reality. Conversely, it can be pushed towards cyan or even green in order to fit an orange-and-teal scheme of colour contrast.

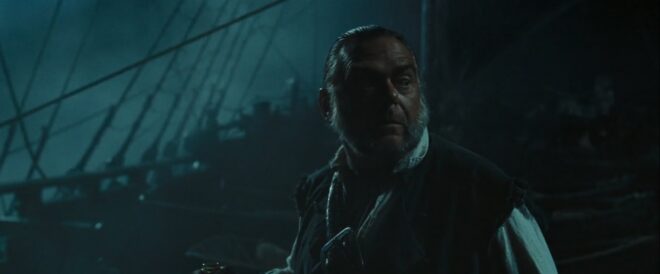
“Pirates of the Carribean: Dead Man’s Chest” (2006, DP: Darius Wolski, ASC)

Darius Wolksi, ASC made this remark to American Cinematographer in 2007 about HMI moonlight on the Pirates of the Caribbean movies:

The colour temperature difference between the HMIs and the firelight is huge. If this were printed without a DI, the night would be candy blue and the faces would be red. [With a digital intermediate] I can take the blue out and turn it into more of a grey-green, and I can take the red out of the firelight and make it more yellow.

Compare Shane Hurlbut, ASC’s moonlight here in “Terminator Salvation” (2009) to the “Terminator 2” shot earlier in the article.
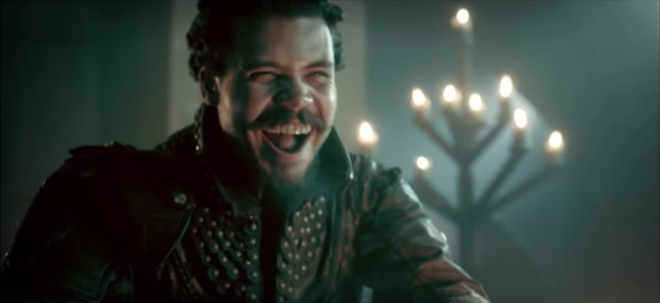
The BBC series “The Musketeers” (2014-2016, pilot DP: Stephan Pehrsson) employed very green moonlight, presumably to get the maximum colour contrast with orange candles and other fire sources.

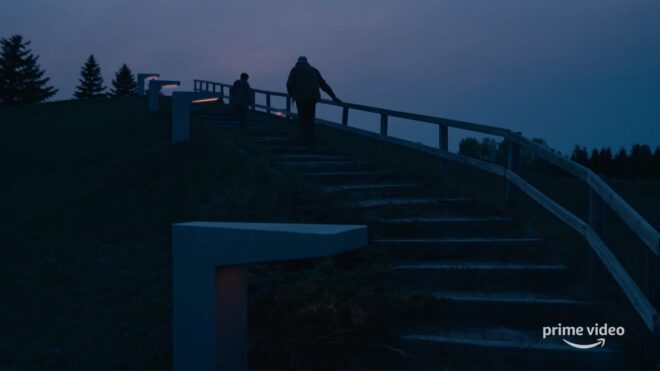
My favourite recent approach to moonlight was in the Amazon sci-fi series Tales from the Loop. Jeff Cronenweth, ASC decided to shoot all the show’s night scenes at blue hour, a decision motivated by the long dusks (up to 75 minutes) in Winnipeg, where the production was based, and the legal limits on how late the child actors could work.

The results are beautiful. Blue moonlight may be a cinematic myth, but Tales from the Loop is one of the few places where you can see real, naturally blue light in a night scene.

“Tales from the Loop” (2020, DP: Jeff Cronenweth, ASC)

If you would like to learn how to light and shoot night scenes, why not take my online course, Cinematic Lighting? 2,300 students have enrolled to date, awarding it an average of 4.5 stars out of 5. Visit Udemy to sign up now.

The Colour of Moonlight

“Terminator 2: Judgment Day” Retrospective

Next month, Terminator 2: Judgment Day turns 30. Made by a director and star at the peaks of their powers, T2 was the most expensive film ever at the time, and remains both the highest-grossing movie of Arnold Schwarzenegger’s career and the sequel which furthest out-performed its progenitor. It is also one of a handful of films that changed the world of visual effects forever, signalling as it did – to borrow the subtitle from its woeful follow-up – the rise of the machines.

No fate but what we make: Linda Hamilton as Sarah Connor

The original Terminator, a low-budget surprise hit in 1984, launched director James Cameron’s career and cemented Schwarzenegger’s stardom, but it wasn’t until 1990 that the sequel was green-lit, mainly due to rights issues. At the Cannes Film Festival that year, Cameron handed executive producer Mario Kassar his script.

Today it’s easy to forget how risky it was to turn the Terminator, an iconic villain, an unstoppable, merciless death machine from an apocalyptic future, into a good guy who doesn’t kill anyone, stands on one leg when ordered, and looks like a horse when he attempts to smile. But Kassar didn’t balk, granting Cameron a budget ten times what he had had for the original, while stipulating that the film had to be in cinemas just 14 months later.

Even with some expensive sequences cut – including John Connor sending Kyle Reese back through time in the heart of Skynet HQ, a scene that would ultimately materialise in Terminator Genisys – the script was lengthy and extremely ambitious. Beginning on October 8th, 1990, the shooting schedule was front-loaded with effects shots to give the maximum time for CGI pioneers Industrial Light and Magic to realise the liquid metal T-1000 (Robert Patrick).

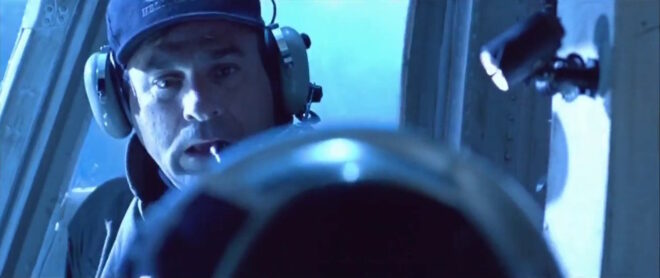
Rather than CGI, the T-1000’s head in this shot is a chrome model lifted into frame by a crew member.

To further ease ILM’s burden, every trick in the book was employed to get T-1000 shots in camera wherever possible: quick shots of the villain’s fight with the T-800 (Schwarzenegger) in the steel mill finale were done with a stuntman in a foil suit; a chrome bust of Patrick was hand-raised into frame for a helicopter pilot’s reaction shot; the reforming of the shattered T-1000 was achieved by blowing mercury around with a hair dryer; bullet hits on the character’s torso were represented by spring-loaded silver “flowers” that burst out of a pre-scored shirt on cue.

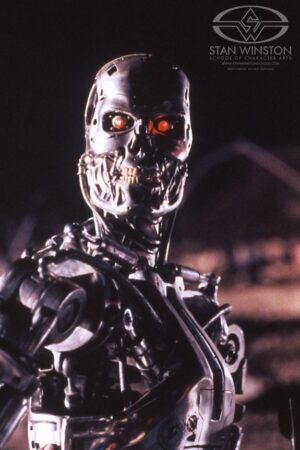
One of the chilling full-size T-800 endoskeleton puppets created by Stan Winston Studio for the Future War sequence

Stan Winston Studio also constructed a number of cable-controlled puppets to show more extensive damage to the morphing menace. These included “Splash Head”, a bust of Patrick with the head split in two by a shotgun blast, and “Pretzel Man”, the nightmarish result of a grenade hit moments before the T-1000 falls to its doom in the molten steel.

Traditional models and rear projection are used throughout the film. A few instances are all too obvious to a modern audience, but most still look great and some are virtually undetectable. Did you know that the roll-over and crash of the cryo-tanker were shot with miniatures? Or that the T-800 plucking John off his bike in the drainage channel was filmed against a rear projection screen?

Plenty of the action was accomplished without such trickery. The production added a third storey to a disused office building near Silicon Valley, then blew it up with 100 gallons of petrol, to show the demise of Cyberdyne Systems. DP Adam Greenberg lit 5.5 miles of freeway for the car chase, and pilot Chuck Tamburro really did fly the T-1000’s police helicopter under a 20ft underpass.

Chaotic, confusing action scenes are the norm today, but it is notable that T2’s action is thrilling yet never unclear. The film sends somewhat mixed messages though, with its horrific images of nuclear annihilation and the T-800’s morality lessons from John juxtaposed with indulgent violence and a reverence for firearms. “I think of T2 as a violent movie about world peace,” Cameron paradoxically stated. “It’s an action movie about the value of human life.”

More Stan Winston puppets were used to depict Sarah’s death by nuclear blast in her nightmare.

Meanwhile, 25 person-years of human life were being devoted by ILM to the T-1000’s metallic morphing abilities. Assistant VFX supervisor Mark Dippé noted: “We were pushing the limits of everything – the amount of disc space we had, the amount of memory we had in the computers, the amount of CPUs we had. Each shot, even though it only lasted about five seconds on the screen, typically would take about eight weeks to complete.”

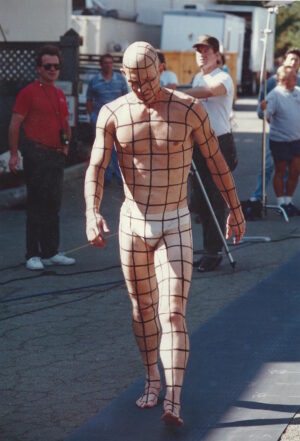
Robert Patrick shooting reference footage for ILM’s animators

The team began by painting a 2×2” grid on a near-naked Patrick and shooting reference footage of him walking, before laser-scanning his head at the appropriately-named Cyberware Laboratory. Four separate computer models of the T-1000 were built on Silicon Graphics Iris 4Ds, from an amorphous blob to a fully-detailed chrome replica of Patrick, each with corresponding points in 3D space so that the custom software Model Interp could morph between them.

Other custom applications included Body Sock, a solution to gaps that initially appeared when the models flexed their joints, Polyalloy Shader, which gave the T-1000 its chrome appearance, and Make Sticky, with which images of Patrick were texture-mapped onto the distorting 3D model, as when he melts through a barred gate at the mental hospital.

The film’s legacy in visual effects – for which it won the 1992 Oscar – cannot be understated. A straight line can be drawn from the water tendril in Cameron’s The Abyss, through T2 to Jurassic Park and all the way on to Avatar, with which Cameron again broke the record for the highest-grossing film of all time. The Avatar sequels will undoubtedly push the technology even further, but for many Cameron fans his greatest achievement will always be Terminator 2: Judgment Day, with its perfect blend of huge stunts, traditional effects and groundbreaking CGI.

“Terminator 2: Judgment Day” Retrospective