14 months ago production began on the comedy feature Harvey Greenfield is Running Late. Most of the editing is done, and yesterday a reduced crew assembled to shoot one final scene and few odd shots to plug holes.
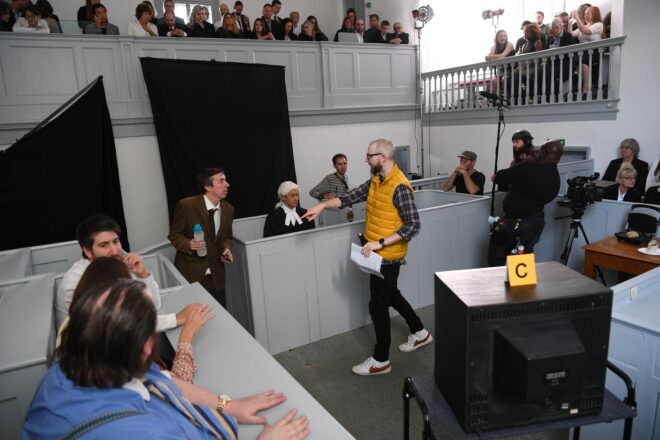
The crew may have been reduced, but the cast was bigger than it’s ever been. Jonnie and the team managed to pack out Sessions House, a historic courthouse in Ely, with about 60 extras to watch Harvey (Paul Richards) present a case against Choice. Also not reduced was the shot list, an ambitious 21 set-ups to be accomplished in just a few hours. I’m not sure how many we got in the end, but we covered everything so we must have got close.
Since the budget was a dim and distant memory, I shot on Jonnie’s own Canon C200 and lenses. An important part of Harvey‘s visual grammar is the use of wide lenses for stressy scenes, with a 14mm having been the apotheosis throughout production. For this reason, but also for speed, we shot almost everything in the courthouse on Jonnie’s Samyang 14mm, swinging to an L-series 24-70mm zoom right at the end. We couldn’t get hold of a Soft/FX filter to perfectly match with principal photography, but we were able to borrow a 1/8th Black Pro Mist to provide a little diffusion at least.
For lighting, Jeremy set up his Aputure 300D and 600D in an upper gallery at the side of the courtroom, firing into the wall to provide a soft side-light throughout the room. We’d hoped not to have to tweak it much from shot to shot, but it did prove necessary, not least because we needed to look up to that gallery in a couple of set-ups. I wanted to use a lot of negative fill to bring down the ambient bounce off the walls, which had evidently been repainted at some point in the recent past by someone with an Ideal Home subscription. But the 14mm doesn’t leave much room to hide things, so there was a limit to the contrast we could introduce. Adjusting the blinds over the main windows – whenever they were out of frame – became one of our major methods of controlling the light.
Once Harvey had rested his case we moved out into the carpark to get Bryan’s “manic wides”. These grotesque caricatures of the supporting characters, imagined by Harvey at the climax of the film, required each actor, in this case Alan, to deliver key lines from their earlier scenes while I shoved the 14mm lens in their face and dutch-tilted like crazy. We recreated the day-for-night shot grabbed with the limo back on Day 13, covering the car in black drapes and firing the 300D with Urban Sodium gel through a side window – orange being another symbol of stress in the movie.
The few of us that were left then regrouped at Jonnie’s house for some ADR and a handful of inserts. The probe lens got another airing to capture a macro shot of a tape recorder, and I got to double as Harvey’s hands flicking through a book. In Paul’s very last shot he was out of focus, due to a lack of continuity-matching make-up, with the book sharp in the foreground.
The final shot of all was Cat, the editor, dropping some Post-its into frame and Jonnie, clad in Harvey’s jacket, picking them up. Not a grand shot to go out on, but one that nicely sums up the collaborative, all-hands-on-deck nature of no-budget filmmaking. It’s been a fun ride.
Read all my Harvey Greenfield is Running Late posts:
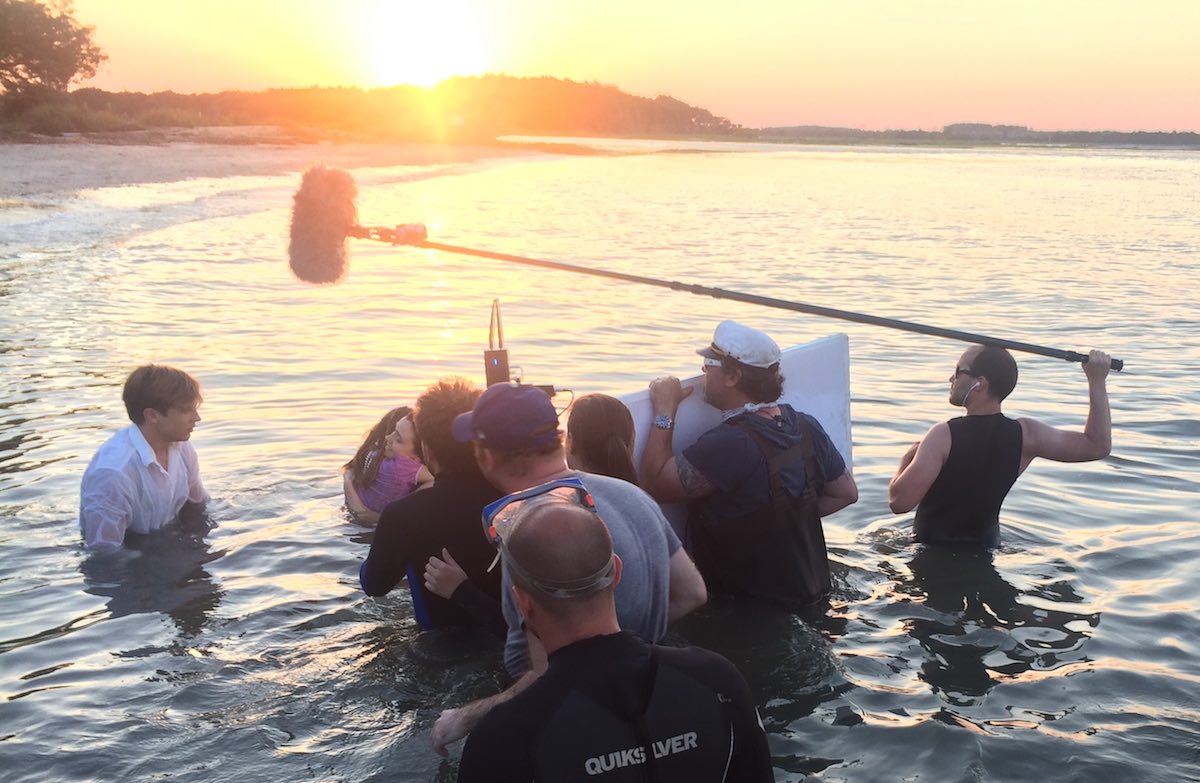
Poppy Drayton in a scene from “The Little Mermaid” where we were blessed with beautiful evening light
Natural light can be beautiful, but it is not easy for a cinematographer to work with. Continuity, dynamic range, hardness and intensity are all potential challenges.
The most obvious difficulty with natural light is that it is forever changing. It can do stunning and unexpected things, but if you don’t move quickly it’s gone. Anyone who’s ever filmed a sunset scene and had the director push for another take after the perfect light has gone knows the disappointment it can bring.
Preparation is key. Previewing the sun path using an app like Helios Pro or Sun Seeker is essential, as is working out the blocking to make the best use of the light. For The Little Mermaid I shot a sunset scene with three actors up to their waists in the Atlantic Ocean. I had to make sure, through rehearsals on dry land, that they would end up with their backs to the sun so that I would be shooting towards it.
Shooting the ocean scene for “The Little Mermaid”
I also had a grip next to me with a poly-board to bounce some of the sunlight back into the actors’ faces. This brings us to dynamic range, the fact that there may be too much or too little difference between the brightest and darkest areas. Too much contrast is common with exteriors under direct sun, or interiors with small windows or dark walls. Too little is often the case with overcast exteriors, or interiors with large windows or white walls.
As in my Mermaid example, shadows can be filled in using a reflector, be that the 5-in-1 collapsible kind that are widely and cheaply available, a white poly-board, a frame of Ultrabounce or even a white bedsheet. These will be much less effective indoors, where you may well need to add an artificial fill light, perhaps bounced off the ceiling.
If the light is too flat, contrast can be reduced using negative fill. Anything black can be used for this – a flag, a bedsheet, or the black side of a poly-board or 5-in-1 reflector. Typically this is placed to cut the light on the side of the talent’s face nearest camera to get the most shape in the image.
A demo of negative fill from my online course, “Cinematic Lighting”, available on Udemy
Direct sun is often too hard to be flattering, particularly in closer shots. The solution is to introduce some kind of diffusion between the actor and the sun. This could be anything from a shower curtain to a 12×12’ frame of Full Silk. 5-in-1 reflectors can be stripped down to a translucent white disc that works well for tight shots.
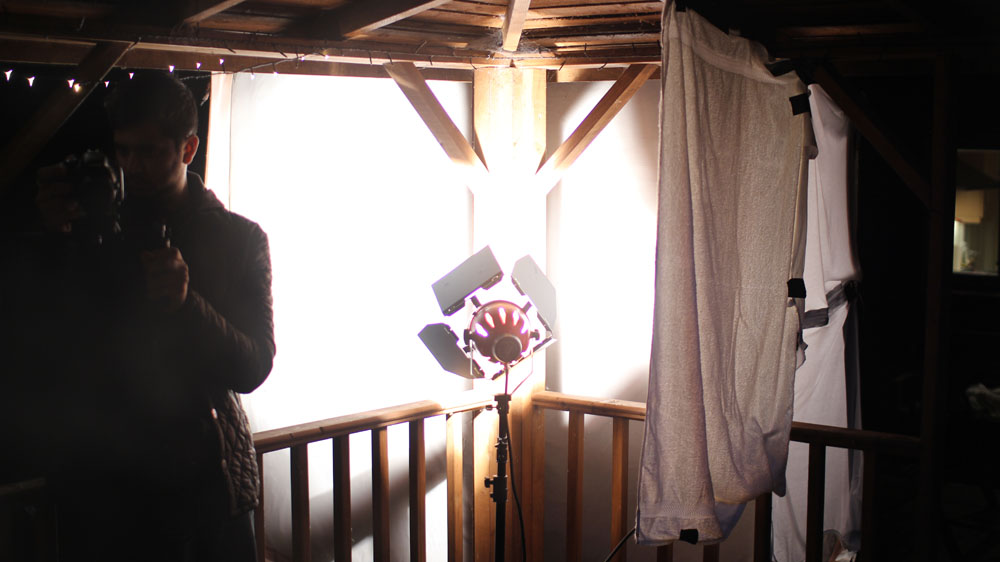
Indoors the trouble with natural light is that there might not be enough of it. If you like what it’s doing but just need more, try setting up a soft artificial source outside the window. A bigger production will often use 12K or 18K HMIs firing into Ultrabounce, but that requires a serious rental budget and a big generator. A smaller HMI pushing through a diffusion frame won’t be quite as soft but will be much cheaper.
If that’s not possible either, the next best thing is a soft source like an LED panel rigged indoors above the window. By having the source indoors you will lose the natural shaping of the light that the window frame gives you, but some of this can be regained by fitting a honeycomb or egg-crate.
Hard reflector
Another option is to place a hard reflector – essentially a mirror on a C-stand – outside the window and angle it to reflect the brightest part of the sky, or even direct sun, into the room. The great news for anyone working on a tight budget is that any old mirror will do, so long as you can find a way to position and angle it conveniently.
The opposite problem is one all DPs have to tackle at some point – namely direct sun coming into a room and moving across it, spoiling continuity. Choosing a north-facing location will save a lot of trouble here, otherwise flags will need to be rigged and regularly adjusted as the sun moves, unless you can move quickly enough to shoot everything before the light has noticeably changed.
Natural light can be one of the biggest challenges for a cinematographer, but also one of the greatest gifts and highest goals to emulate.
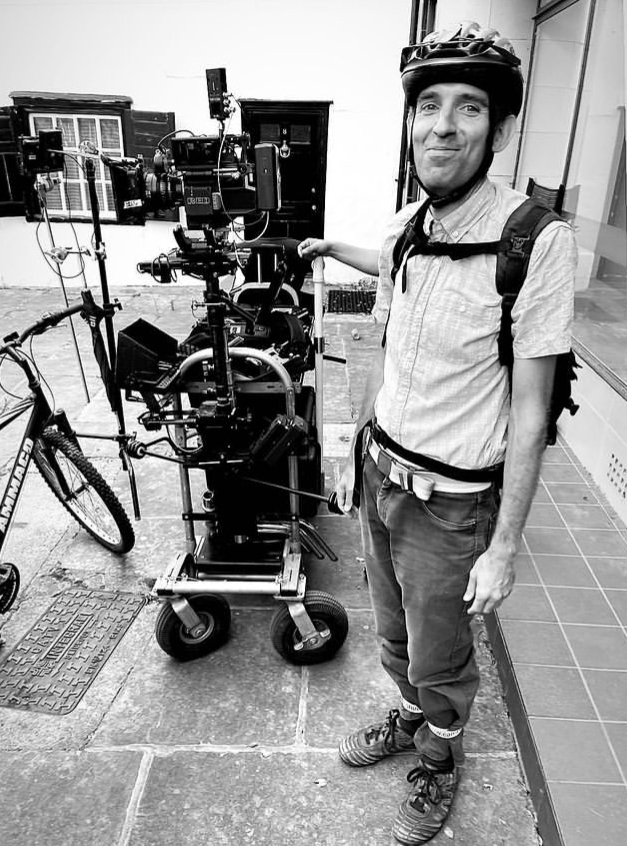
A morning full of short running scenes, all shot as oners on the Steadicam by Luke Oliver. Pretty much every crew member had had a cameo by this point, and today it was my turn. My character: Nerdy Cyclist. Alright, technically it was just Cyclist. The nerdy bit was just me (a) beefing up my part and (b) playing to type.
For the afternoon we moved to The Lab, a cocktail bar, where we filmed one of the fantasy/imaginary scenes that cuts with the very first shot we did of Harvey back on Day 1. Mixologist Tom was dressed in an elaborate all-black costume so Stephen and I hit him with two tungsten lamps, one either side, at an angle somewhere between side-light and backlight. This cut him out from the background, showed up the layering in the costume, edge-lit the cocktail shaker and liquids being poured, and deliberately kept Tom’s face dark. Quadruple win!
Day 22
We returned to Othersyde to pick up the one scene we dropped there on our most packed day of principal photography, Day 7. I referred to the blog post to help get the vibe of the lighting the same. The main motivation was the real streetlamp at the front of the site, which we wrapped using an Aputure with a lantern attachment, rigged on a mini boom. Another Aputure lantern gave a cool moonlight wash on the venue’s terraced outdoor seating, and a blue-gelled 300W tungsten fresnel uplighter replicated what we did on the other side of the building last year. A 2K blasted light from the direction Harvey has come; this light represented the ongoing wedding, so we had a couple of people moving around in front of it for dynamic shadows.
I ended up turning off the first Aputure for the wide as it seemed to kill the mood, but we brought it back for the close-up to show more of Paul’s face. To represent the light of his phone as he turns it on, Stephen held a PavoTube just above the camera and twisted it quickly around to face Paul on cue. We adjusted the eyebrow on the camera to flag the tube’s light off the phone itself.
There were a few bitty pick-ups to do while we were outside with access to power, including a “BOV” – a POV of a bee. We did this with the probe lens on Jonnie’s Canon C200, which I had to float around and then jab into Paul’s neck. Sorry, Paul.
At 1am we moved into an adjacent industrial street – having decided that it was unreasonable to have Paul shouting dialogue in a residential area at that hour – for some Steadicam shots. I went to the Gemini’s low-light ISO 3200 and Stephen hand-bashed a lantern on a boom pole to fill Paul in between streetlamps, which became a fun dance when we had to do a 270° orbit!
Day 23
We convened at Cambridge’s Castle Hill. Nearby Indian restaurant Namaste Village kindly agreed to let us shoot a brief scene there at the last minute, even having one of the staff do a spot of acting. I posted a video breakdown on Instagram – here it is:
Back outside we filmed a nice sequence of shots ending with a 360° pan following Harvey as he walks around the top of Castle Hill talking on the phone. As the other end of the phone call had been shot with Steve’s head sometimes out of frame, we went the other way and gave Harvey loads of headroom, capturing some nice clouds along the way.
Then it was time for another pick-up from Day 7, reshooting the tent scene for continuity reasons. Again we put a light on one side and black-draped the other to get some shape into the light inside. This time we used a wider lens, the 14mm, and with the help of a runner I handheld it over Paul rather than trying to squeeze the tripod in around him like last time. He got a nasty shock when I accidentally knocked the matte box off and it hit him in the face. Er, sorry again.
After wrapping a few of us went back across the road to Namaste Village, where the food was excellent.
Day 24
On our last day we caught up to the elusive pick-up that was always meant to be a pick-up: the scenes with Harvey’s mum. We took over Rachel’s grandmother’s house for several hours, most of the shots being in a corner of her living room. Unusually I was drawn to a corner that didn’t have a window in it, because it had the best furniture and dressing to establish the character in our standard 24mm tableau shot.
But this meant – with all the windows behind camera – that it was a challenge to make the lighting interesting. We faked a window just off camera left using a diffusion frame with muslin and a grid over it; Stephen bounced the 600D into it from across the room. I closed the room’s curtains as much as I could get away with before the lack of natural fill light started to make it look like night. (For later scenes we closed them all the way and put a 300D behind the muslin, as pictured above.)
To add more interest to the shot I played around with the positions of two table lamps and a floor lamp. Pausing to check my script breakdown notes from last year I saw that I had written “a single practical floor lamp” in the lighting column; too many lamps would kill the scene’s sad tone. This is a good example of a breakdown keeping me honest as a DP and preventing me from getting carried away doing stuff on set just because I can (though that definitely still happens sometimes). I ended up with just one lamp in the back of the main shot.
After some variations on that main shot for later scenes, and a brief scene in the kitchen, we packed up and headed out for exteriors. Most of these were happy flashbacks from the early days of Harvey and Alice’s relationship, and Jonnie wanted to fill them with filmic references. First up was a Jules et Jim homage with the pair racing across a bridge, then a “remake” of one of Jonnie’s own amateur films with Harvey and Alice spinning around holding hands. For POV reverse shots we put the tripod on the point which they span around, and I set the panning tension to zero so that they could pull the camera around themselves by holding the moose bars (handgrips).
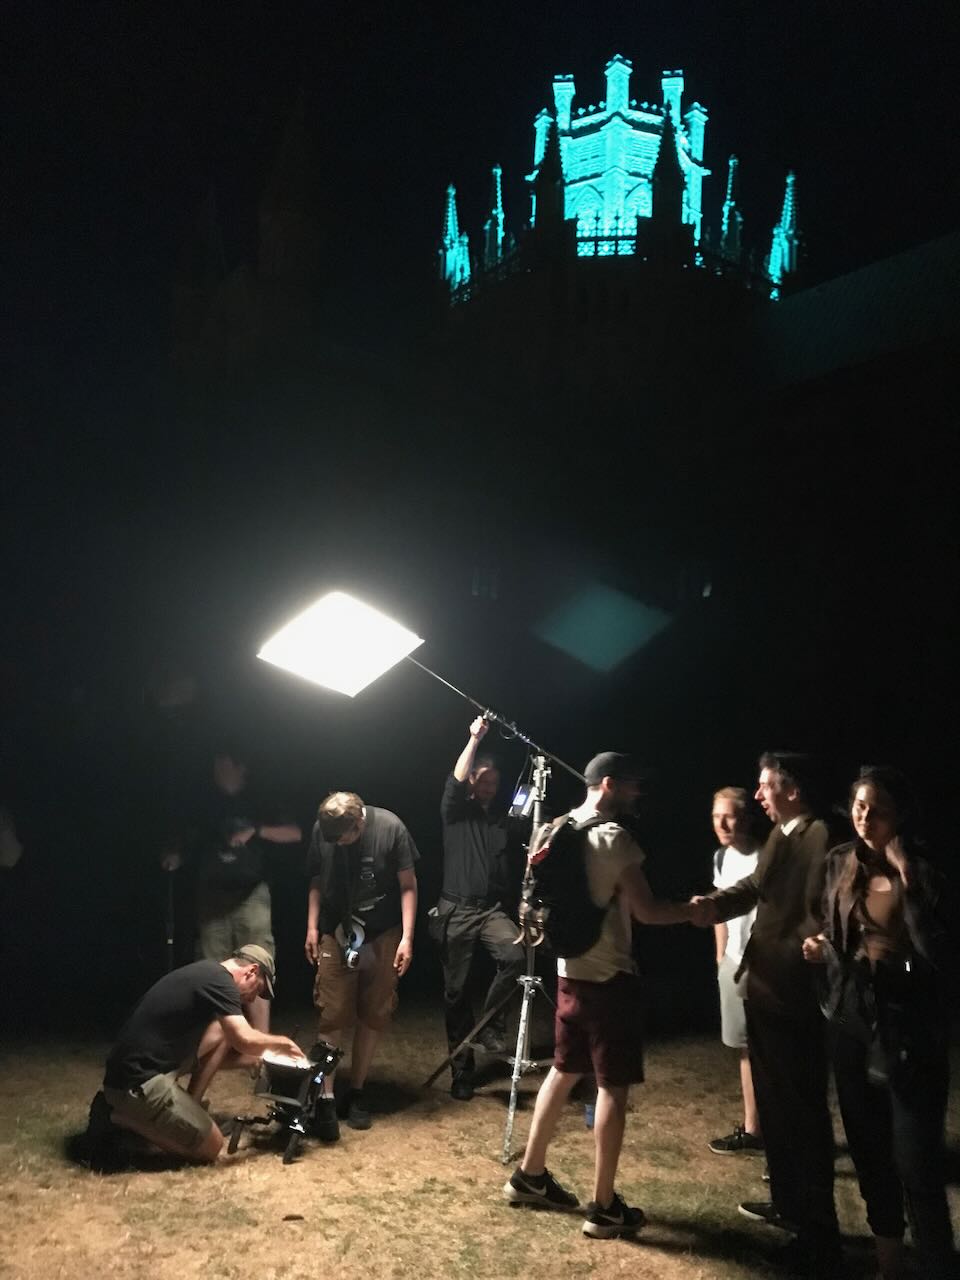
Next was a Manhattan-esque shot with the couple on a bench looking up at Ely Cathedral. We clearly weren’t going to light the cathedral on our budget, so we set up around sunset and waited for the streetlamps to come on and the ambient light to drop to a nice dusky level. We rolled when the daylight was metering at T1.4 at ISO 800, though I exposed at T2. To cut Harvey and Alice out from the background a bit Stephen stood just out of frame with an LED lantern motivated by a nearby streetlamp.
He pulled the same trick at our next location, a passageway beside Prezzo, where we did actually have to light a small portion of the cathedral wall as well, using a battery-powered Aputure (200X I think). We couldn’t have done it for long on the batteries we had, but fortunately it was a brief scene.
Our final set-up was a Poor Man’s shot of Harvey running at night. We did this on the green beside the cathedral because it was a handy open space where we could get a completely dark background save for a few dots of distant lights. Stephen armed a FalconEyes over Paul and swung it back and forth to create the illusion of passing streetlamps. The shot needed a tiny touch of fill, so we taped a PavoTube to the top of the matte box, setting it to 1% intensity and taping over most of it to get it down to a low enough level. (I was at ISO 3200 and on a 14mm lens, so mere inches from Paul’s face.)
Then Rob said the magic words, “It’s a wrap.” Like most micro-budget projects there are still a few loose ends to be shot, but those will be done with Jonnie’s camera and no crew. For most of the cast and crew Harvey Greenfield has run his course and I’ll see them at some distant time for the premiere. Thank you Stephen Allwright (gaffer), Jeremy Dawson (spark), Hamish Nichols (1st AC), Fiyin Oladimeji (2nd AC) and Nana Nabi (2nd AC daily) for all your hard work, and to Jonnie for bringing me onto this fun and creative film. Huge thanks also to Global Distribution, Red and Sigma who supported us with equipment which brought the whole thing up a level. The rough cut is already fantastic and I can’t wait to see it finished.
Read all my Harvey Greenfield is Running Late posts:
I’ve been shooting films for Rick Goldsmith and his company Catcher Media for over 20 years now. “That’s longer than I’ve been alive,” said the make-up artist on U & Me, Catcher’s latest, when I told her. Ouch.
Like most of the films I’ve done with Rick, U & ME is a drama for schools, about healthy relationships. These projects are as much about giving young people a chance to be involved in the making of a film as they are about the finished product. This means that we have to be pretty light on our feet as a crew – always a good challenge.
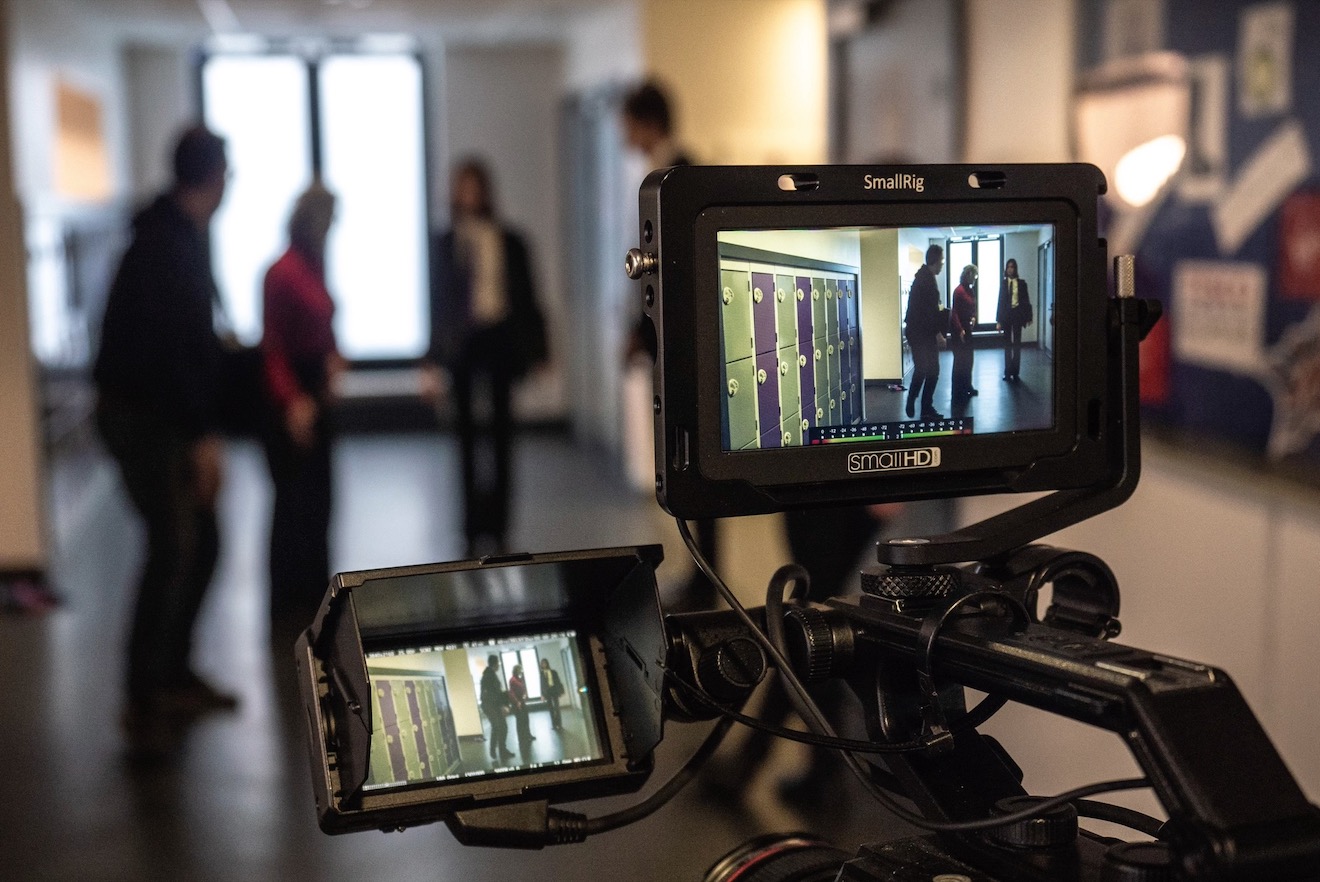
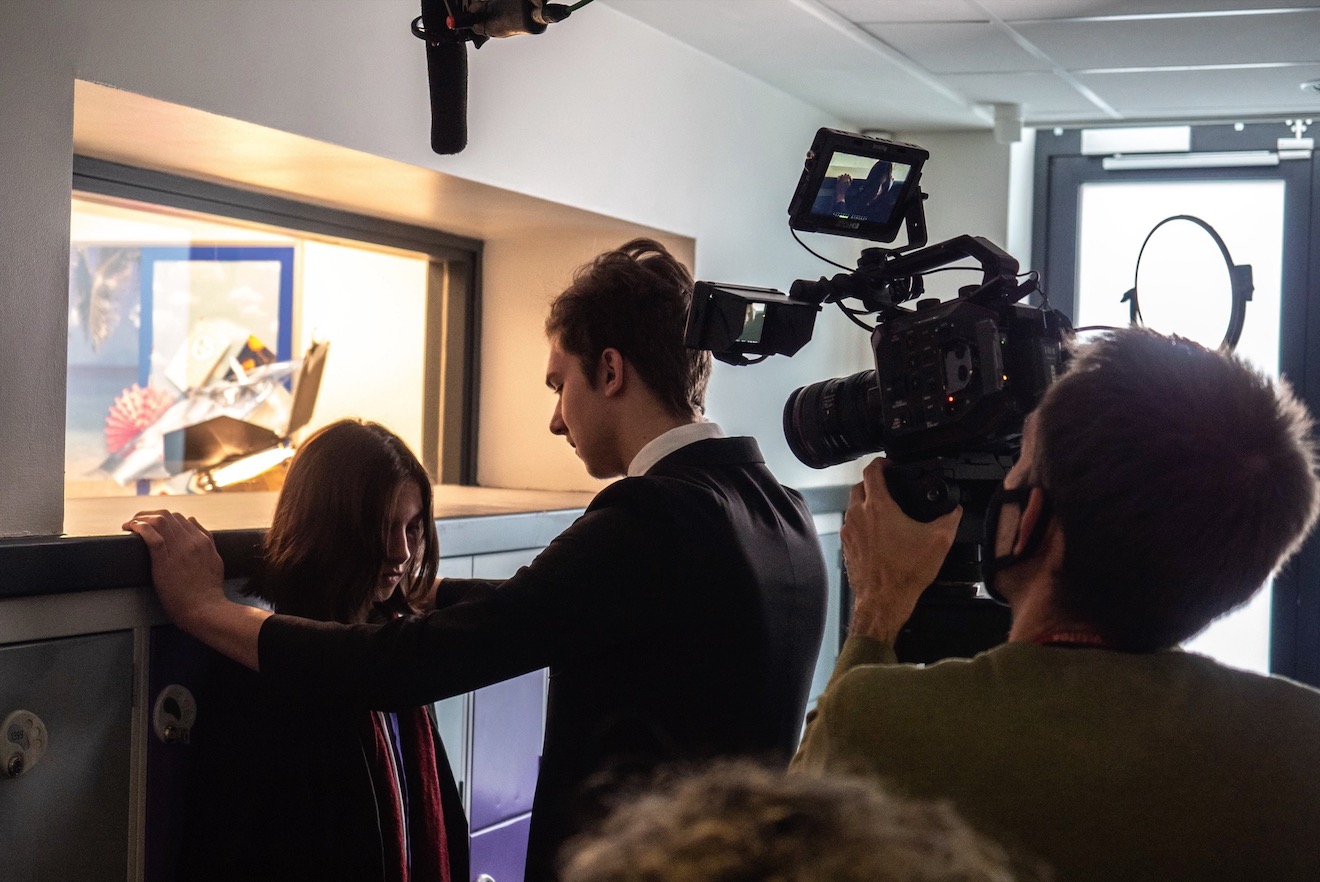
One of the main scenes was in the corridor of a school, or “academy” as they all seem to be called now (have we established yet that I’m old?). Rick had picked a corridor that was relatively quiet, though it was still impossible to film when kids were moving between lessons. It had a nice double-door fire exit at the end with diffuse glass. Any corridor/tunnel benefits from having light at the end of it. That’s not a metaphor; light in the deep background is a staple of cinematography, and this light kicked nicely off the shiny floor as well. Whenever framing permitted, I beefed up the light from the doors with one of Rick’s Neewer NL-200As, circular LED fixtures.
For the key light there was a convenient window above the hero lockers. The window looked into an office which – even more conveniently – was empty. In here I put an open-face tungsten 2K pointing at the ceiling. This turned the ceiling into a soft source that spilled through the window. I added another Neewer panel when I needed a bit more exposure.
I also wanted to control the existing overhead lights in the corridor. They couldn’t be turned off – I don’t think there were even any switches – so I flagged the ones I didn’t like using black wrap and a blackout curtain hung from the drop ceiling. I taped diffusion over another light, one that I didn’t want to kill completely.
It looked nice and moody in the end.
A brighter scene was shot in the kitchen of an AirBnB that doubled as accommodation for us crew. Here I used the 2K outside the window to fire in a hot streak of sunlight that spilt across the worktops, the actor’s clothes and the cupboards (bouncing back onto her face when she looked towards them).
The 2K would have been too hard to light her face with. Instead I fired one of the Neewers into the corner next to the window, creating a soft source for her key. The only other thing I did was to add another Neewer bouncing into the ceiling behind camera for later scenes, when the natural light outside was falling off and it was starting to look too contrasty inside.
It might not have been rocket science, but it was quite satisfying to get an interesting look out of ordinary locations and limited kit.
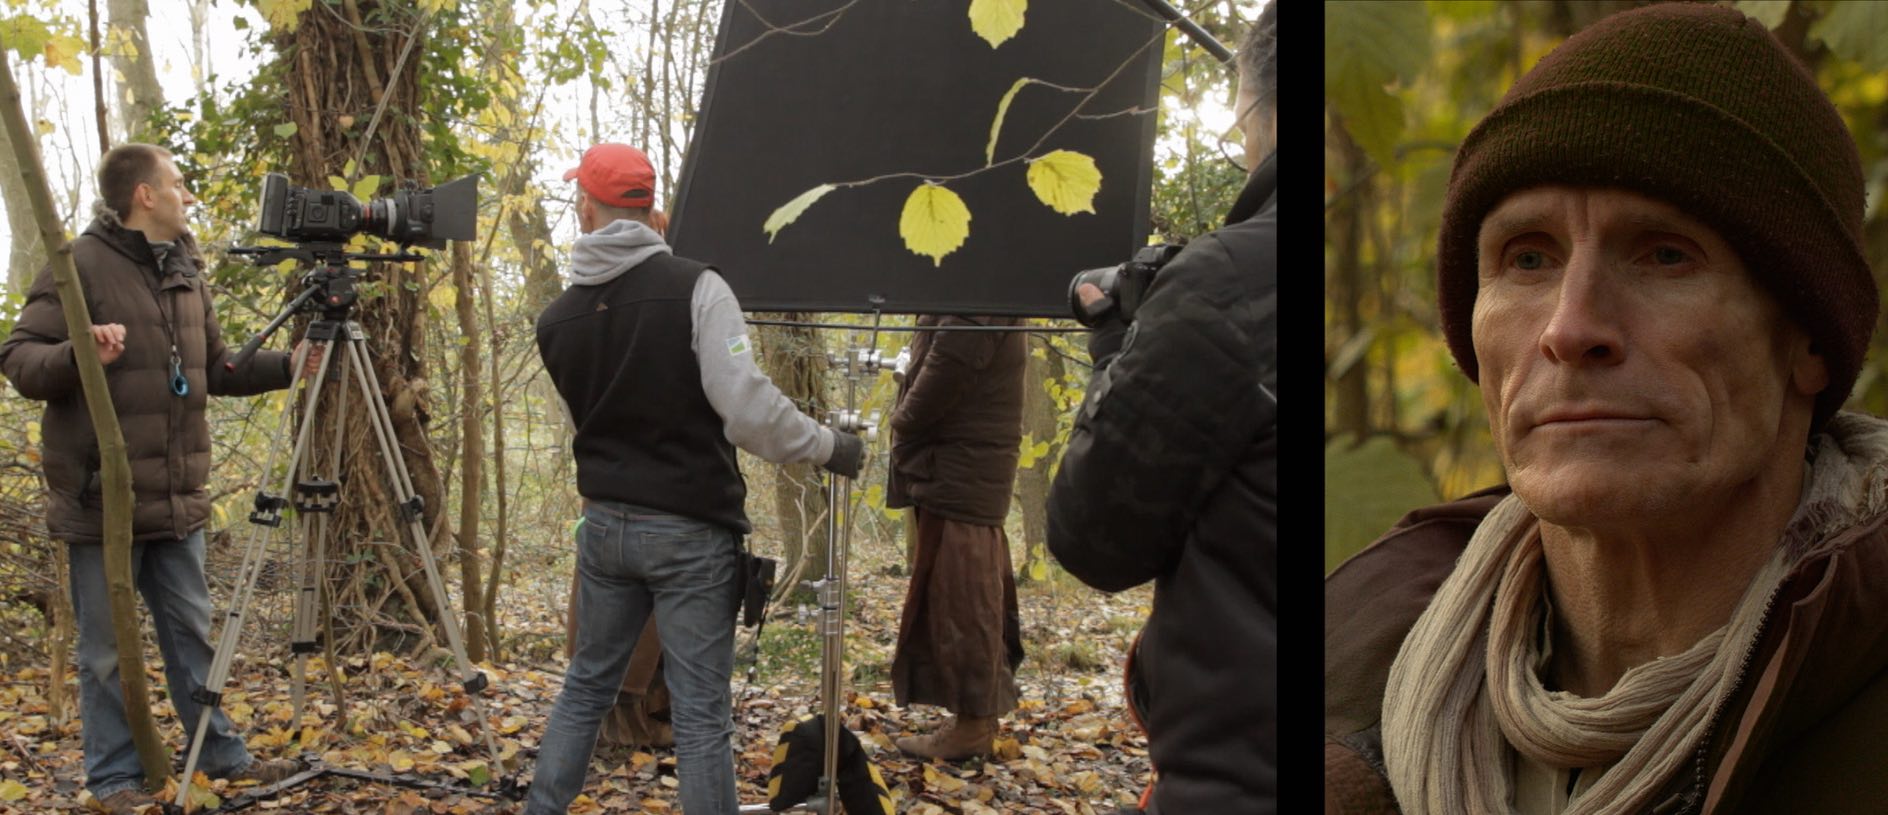
Here’s another lighting breakdown from the short filmAnnabel Lee, which has won many awards at festivals around the world, including seven now for Best Cinematography.
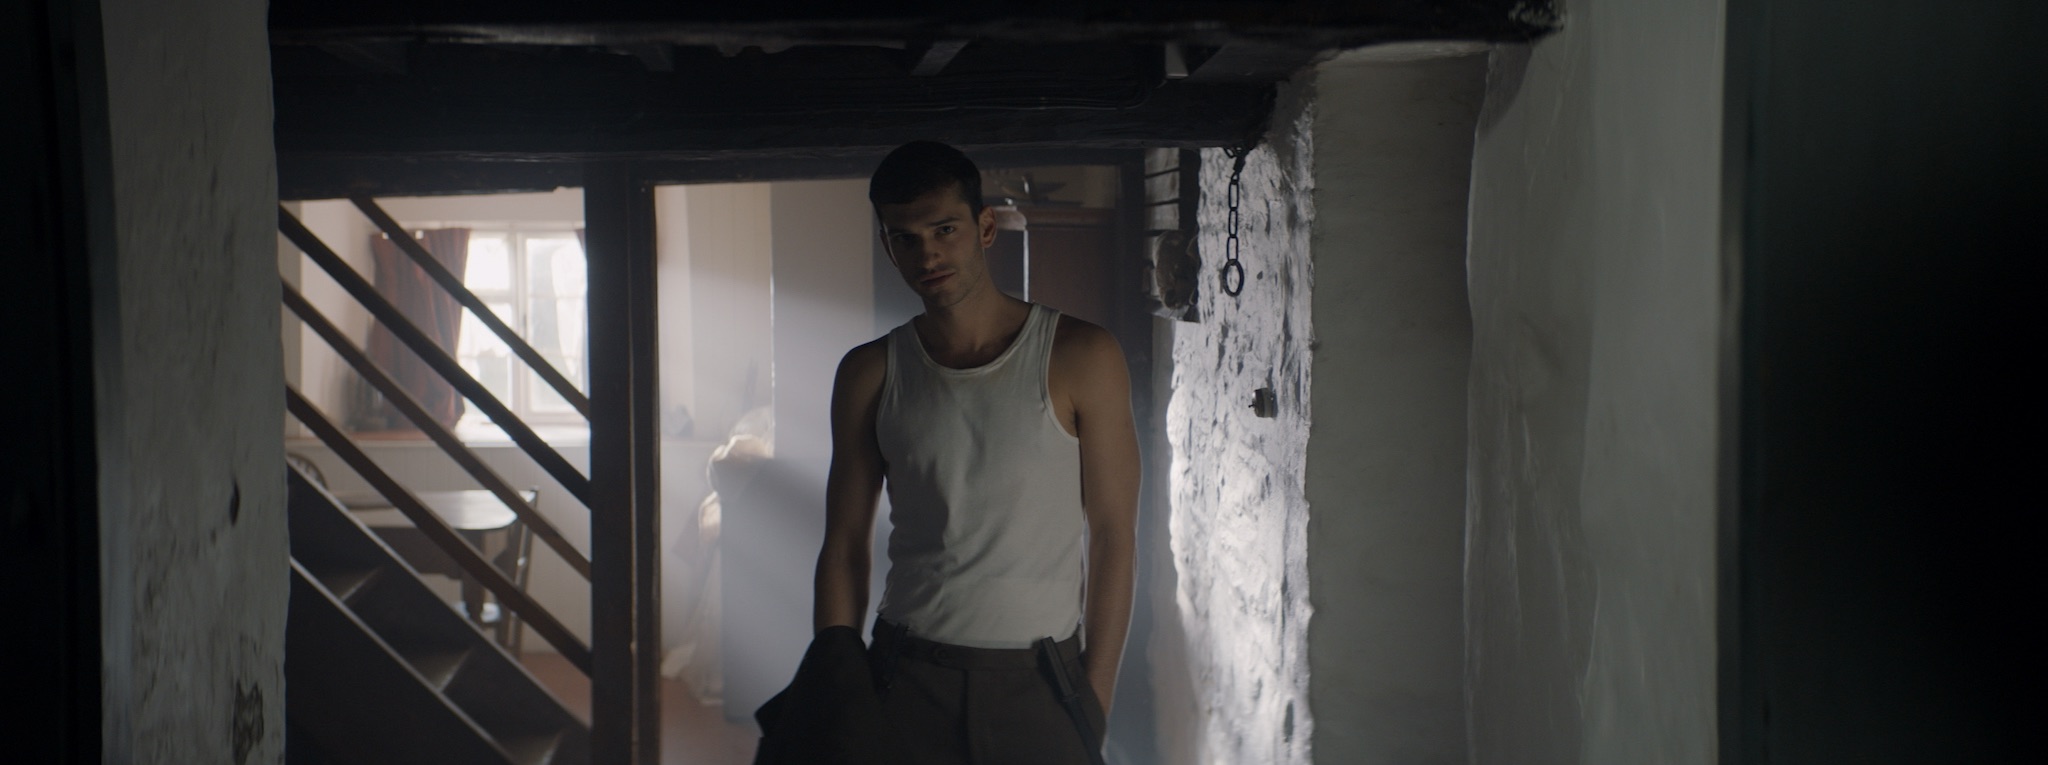
I wanted the cottage to feel like a safe place for Annabel and E early in the film. When they come back inside and discuss going to the village for food, I knew I wanted a bright beam of sunlight coming in somewhere. I also knew that, as is usual for most DPs in most scenes, I wanted the lighting to be short-key, i.e. coming from the opposite of the characters’ eye-lines to the camera. The blocking of the scene made this difficult though, with Annabel and E standing against a wall and closed door. In the story the cottage does not have working electricity, so I couldn’t imply a ceiling light behind them to edge them out from the wall. Normally I would have suggested to the director, Amy Coop, that we flip things around and wedge the camera in between the cast and the wall so that we could use the depth of the kitchen as a background and the kitchen window as the source of key-light. But it had been agreed with the art department that we would never show the kitchen, which had not been dressed and was full of catering supplies.
The solution was firing a 2.5K HMI in through one of the dining room windows to create a bright rectangle of light on the white wall. This rectangle of bounce became the source of key-light for the scene. We added a matt silver bounce board just out of the bottom of frame on the two-shot, and clamped silver card to the door for the close-ups, to increase the amount of bounce. The unseen kitchen window (behind camera in the two-shot) was blacked out to create contrast. I particularly like E’s close-up, where the diffuse light coming from the HMI’s beam in the haze gives him a lovely rim (stop sniggering).
Adding to the fun was the fact that it was a Steadicam scene. The two-shot had to follow E through into the dining room, almost all of which would be seen on camera, and end on a new two-shot. We put our second 2.5K outside the smaller window (camera left in the shot below), firing through a diffusion frame, to bring up the level in the room. I think we might have put an LED panel outside the bigger window, but it didn’t really do anything useful without coming into shot.
For more on the cinematography of Annabel Lee, visit these links:
Good lighting can boost the production values of a film tremendously, making the difference between an amateur and a professional-looking piece. For filmmakers early in their careers, however, the equipment typically used to achieve these results can be prohibitively expensive. Far from the Hollywood productions attended by trucks full of lights, a micro-budget film may be unable to rent even a single HMI. Do not despair though, as there are ways to light scenes well without breaking the bank. Here are my top six tips for lighting on the cheap.
1. Make the most of natural light
Guesstimating the sun path on location
The hardest shots to light without the proper equipment are wide shots. Where a fully-budgeted production would rig Maxi Brutes on cherry-pickers, or pound HMIs through windows, a filmmaker of limited means simply won’t have access to the raw power of such fixtures. Instead, plan your day carefully to capture the wide shots at the time when natural light gives you the most assistance. For a day interior, this means shooting when the sun is on the correct side of the building.
There are a plethora of LED fixtures on the market, designed for all kinds of applications, some of them very reasonably priced. It might be tempting to purchase some of these to provide your primary illumination, but I advise against it. Cheap LED units (and fluorescents) have a terrible Colour Rendering Index (CRI), making for unnatural and unappealing skintones. Such units are therefore best restricted to backgrounds, accent lighting and “specials”. For example, I purchased a little LED camping light from a charity shop for about £2, and I often use it to create the blue glow from computer screens or hang it from the ceiling to produce a hint of hair-light.
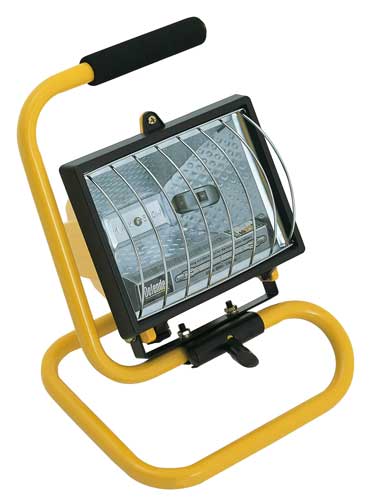
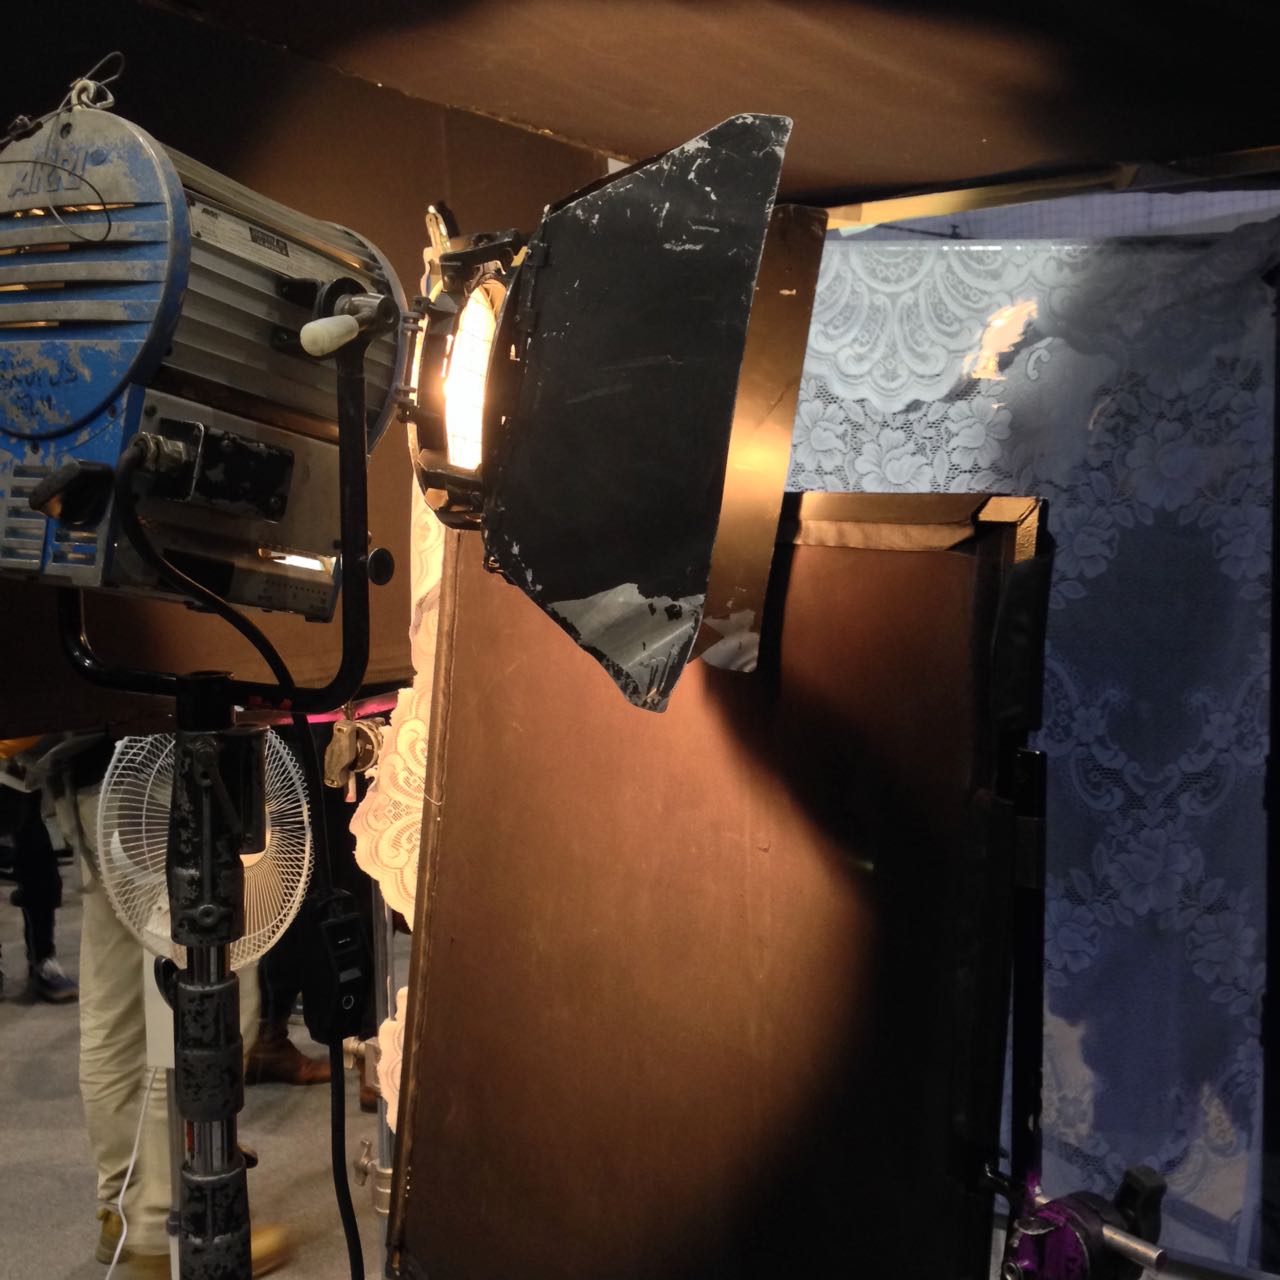
By far the best solution for a high output, high CRI, low cost key is a halogen floodlight; 500W models are available for as little as £5. Their chief disadvantage is the lack of barn doors, making the light hard to control, though if you can stretch to a roll of black wrap you can fashion a kind of snoot. Alternatively, consider investing in a secondhand tungsten movie fixture. With many people switching to LEDs, there are plenty of old tungsten units out there. Try to get a reputable brand like Arri or Ianiro, as some of the unbranded units available on Ebay are poorly wired and can be unsafe.
Lace curtains used to break up light in a Camerimage workshop last year
Flooding a halogen light onto a scene is never going to look good, but then the same is often true of dedicated movie fixtures. Instead it’s more how you modify the light that creates the nuanced, professional look. Improvise flags from pieces of cardboard to stop the light spilling into unwanted places – but be VERY careful how close you put them to a tungsten or halogen source, as these get extremely hot. For example, when shooting indoors, flag light off the background wall (especially if it’s white or cream) to help your subject stand out.
Almost all cinematographers today prefer the subtlety of soft light to the harshness of hard light. You can achieve this by bouncing your fixture off a wall or ceiling, or a sheet of polystyrene or card. Or you could hang a white bedsheet or a shower curtain in front of the light as diffusion, but again be sure to leave a safe distance between them. Professional collapsible reflectors are available very cheaply online, and can be used in multiple ways to diffuse or reflect light.
Finally, don’t be afraid to use existing practical lighting in your scene. Turning on the main overhead light usually kills the mood, but sometimes it can be useful. You can generate more contrast and shape by covering up the top of the lampshade, thus preventing ceiling bounce, or conversely use the ceiling bounce to give some ambient top-light and cover the bottom of the lampshade to prevent a harsh hotspot underneath it. Table lamps and under-cupboard kitchen lights can add a lot of interest and production value to your backgrounds. If possible, swap out LED or fluorescent bulbs for conventional tungsten ones for a more attractive colour and to eliminate potential flickering on camera.
Can a scene be lit with just one lamp? It certainly can, and in fact some of cinema’s most stunning and iconic images have been achieved this way. A single source image can be realistic or stylised, flattering or scary, but is almost always arresting. Even if you decide the look of a single source is too extreme, and add more lamps, building the lighting around that one key source can still be a very useful approach.
Let’s consider some of the ways in which a single source can be used.
Front Light
Front light is not very common in cinematography because – and this will be especially true without any other sources – it produces a flat image. Often we think of front light as being devoid of depth, though in fact it does reveal depth because things closer to the camera (and therefore also closer to the light) are brighter, while distant backgrounds are darker. An example is the sequence from Eternal Sunshine of the Spotless Mind in which the frontal spotlight and the resultant dark surroundings represent the protagonist’s memories being erased.
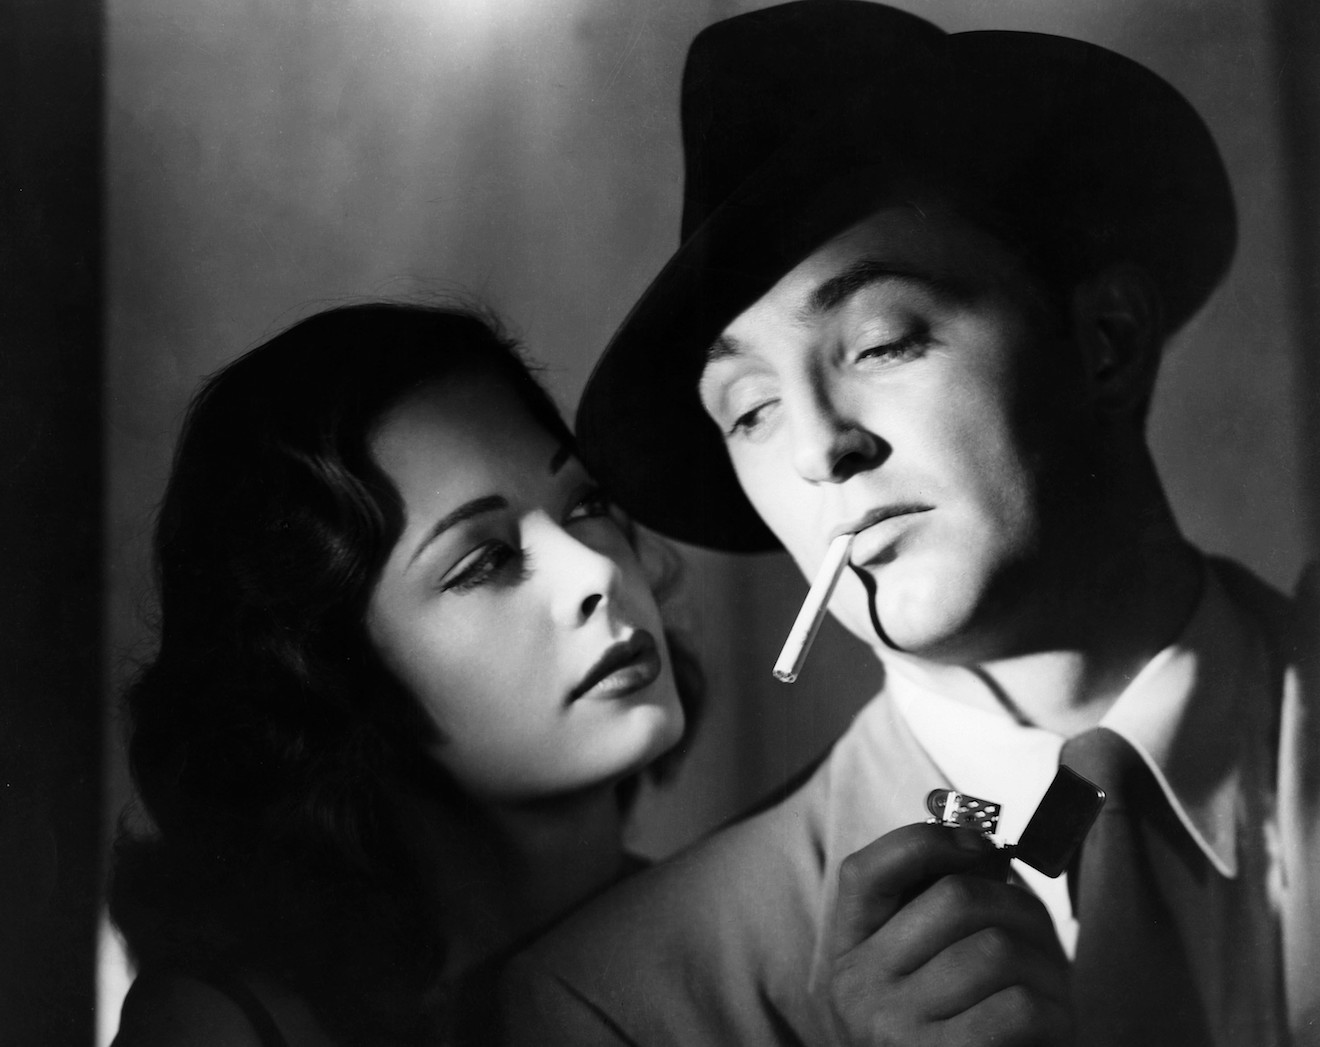
“Eternal Sunshine of the Spotless Mind” – DP: Ellen Kuras ASC“Out of the Past” – DP: Nicholas Musuraca ASC. This one’s a bit of a cheat because there appears to be a second light on the background.
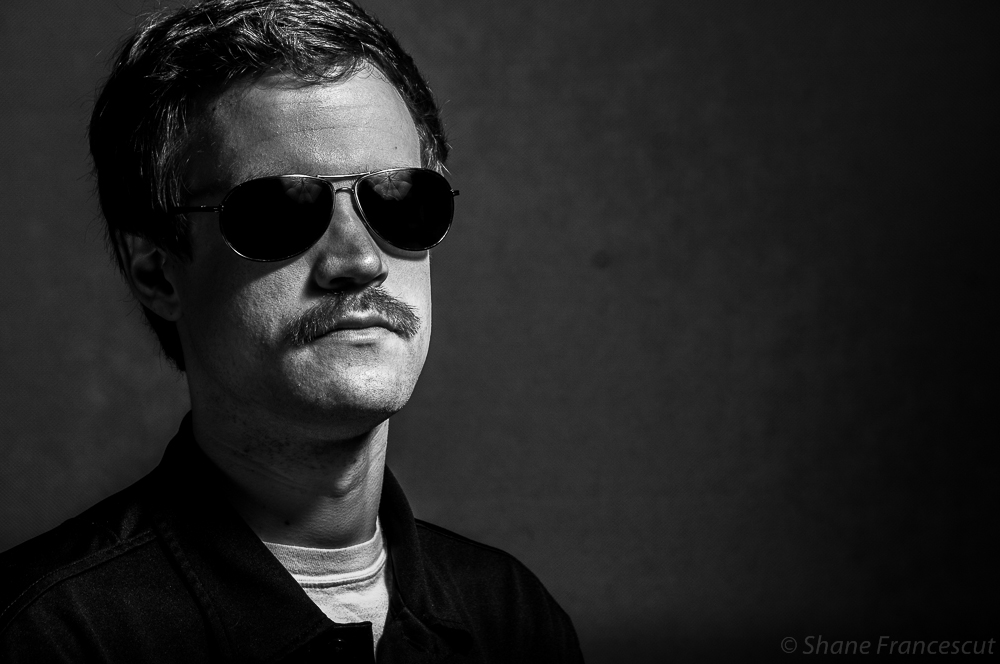
More common is three-quarter front light, which gives some modelling on the face, and is consequently seen a lot in portraiture, both modern and classical.
Photo by Shane Francescut, www.theweeklyminute.wordpress.com“Portrait of Doge Leornardo Loredan” – Giovanni Bellini (1501)
Side Light
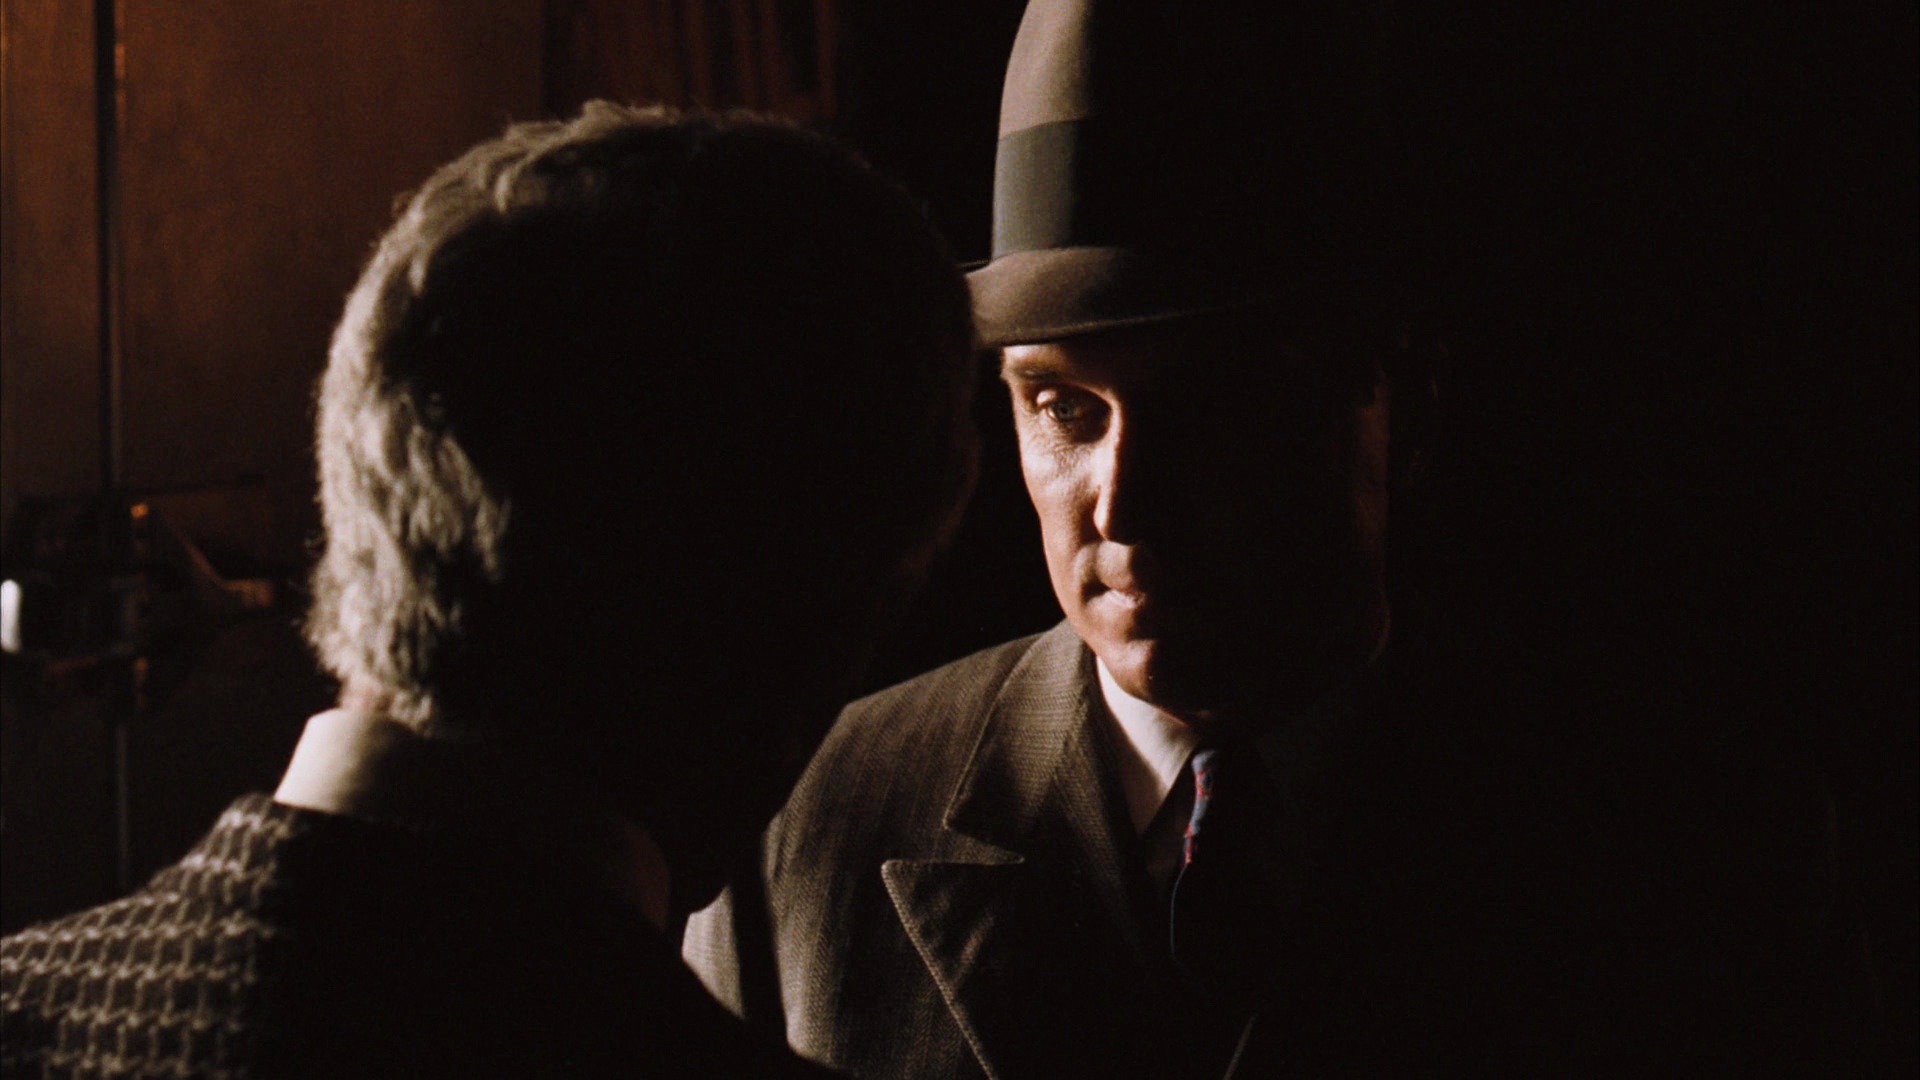
Light from the side can be the most informative, revealing shape, texture and detail. As a single source, it produces incredible chiaroscuro – contrast between light and shade. This shot from the The Godfather is a great example.
“The Godfather” – DP: Gordon Willis ASC
Here is a more complex example from classical art. I saw this painting at the Guildhall recently and it inspired me to write this post. I love the way that the soft light comes in through an unseen doorway to the right, illuminating the wall and modelling each of the people differently according to the angle it reaches them at.
“The Reading of the Bible by the Rabbis” – Jean Jules Antoine Lecomte du Noüy (1882)
Toplight
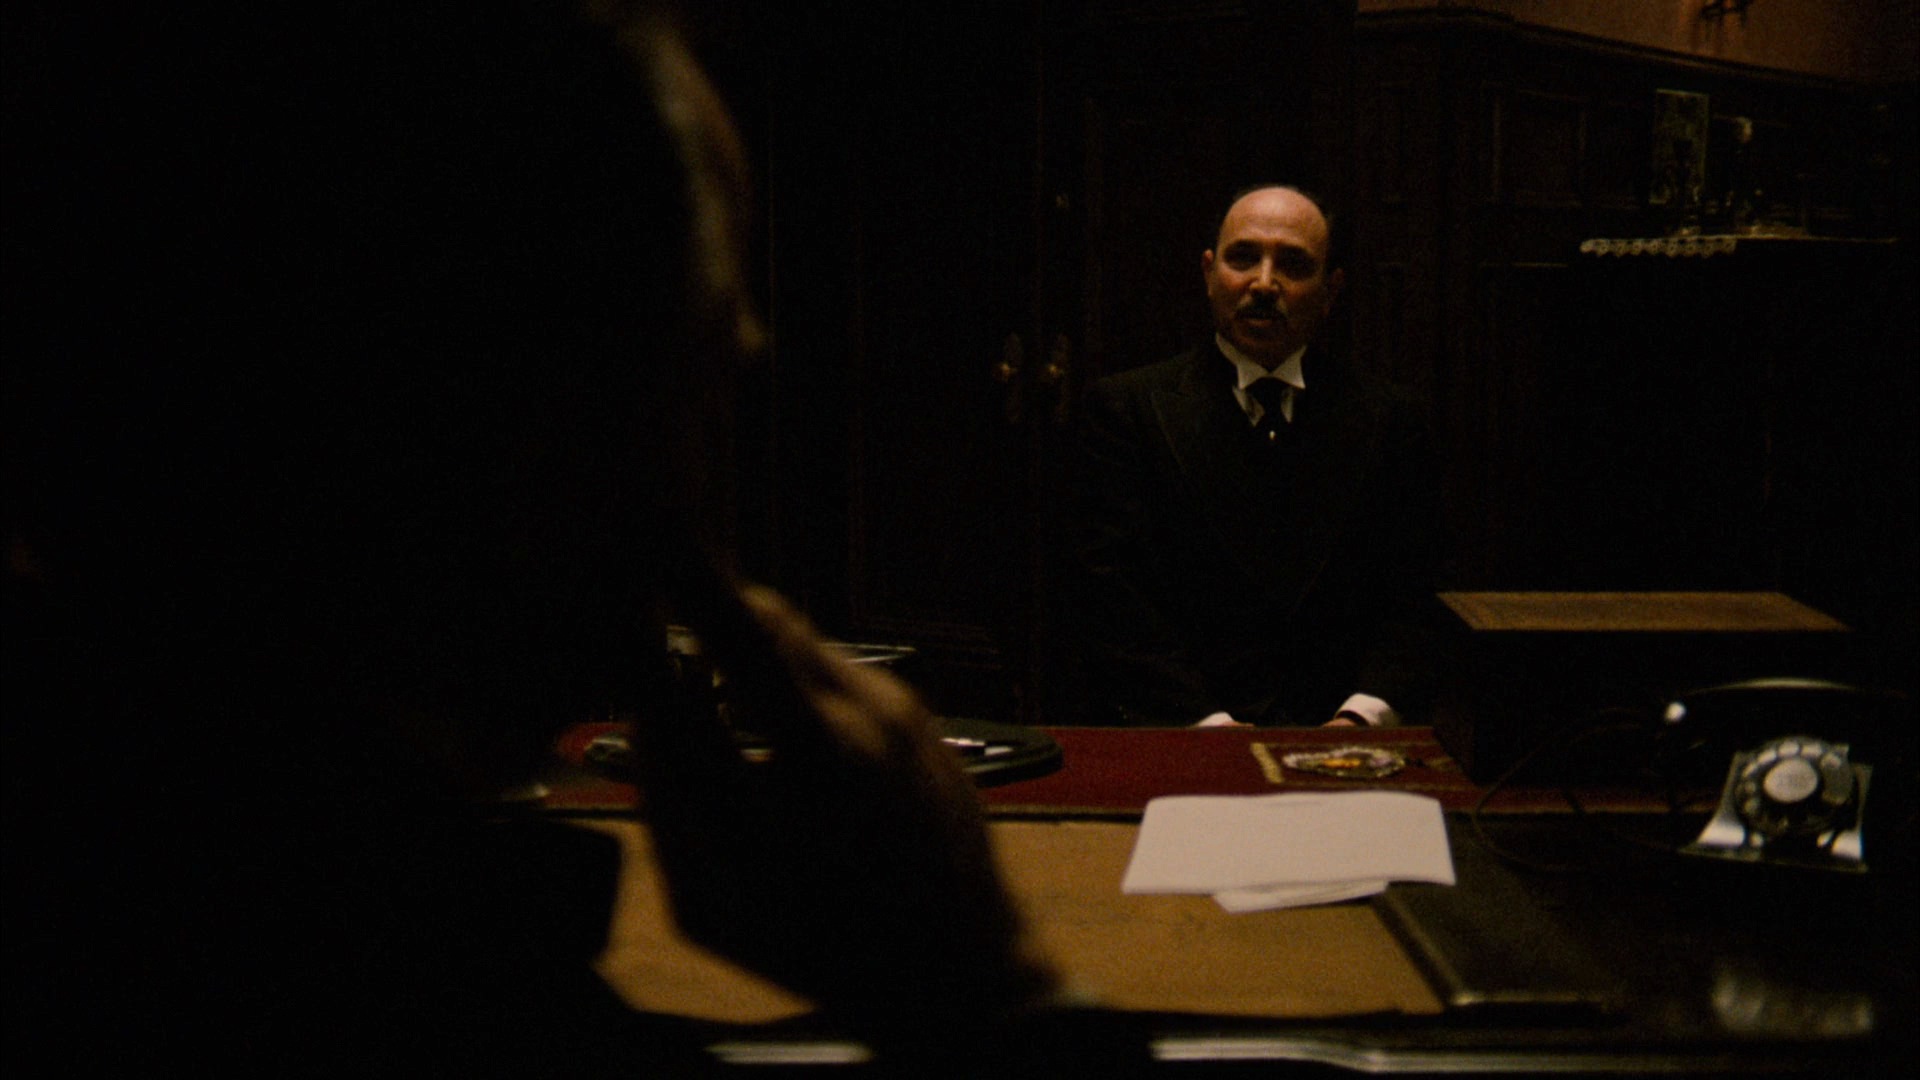
Perhaps the most famous use of toplight is in The Godfather‘s opening scene, where the characters’ eye sockets are rendered black and hollow by the steep angle of the single source.
“The Godfather” – DP: Gordon Willis ASC
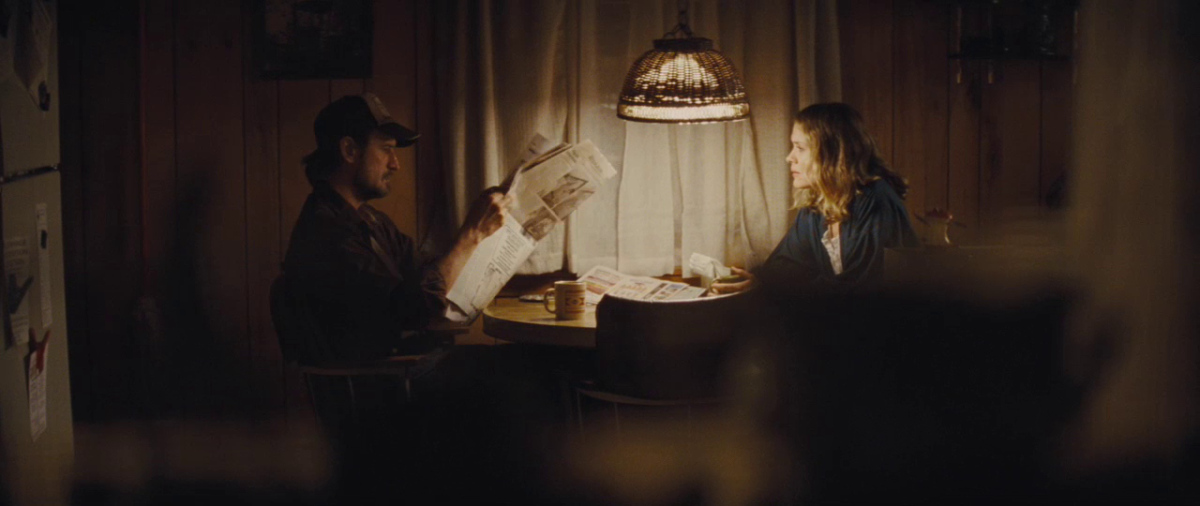
A ceiling lamp hanging over a table is one of the most frequently seen examples of single source top-lighting.
“Mud” – DP: Adam Stone
Often the table or things on it – papers, white tablecloths – will reflect back some of the toplight, filling in the shadows. Film Riot investigates the many variations of this set-up in their episode on single source lighting.
Backlight
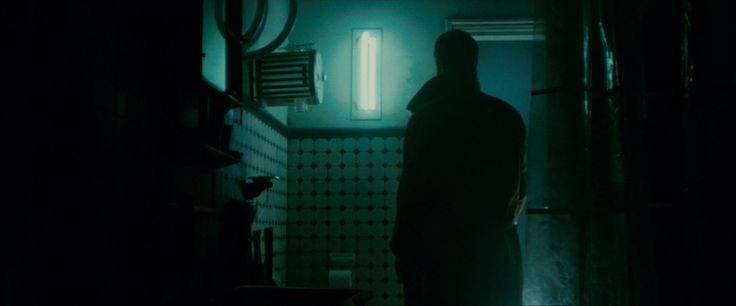
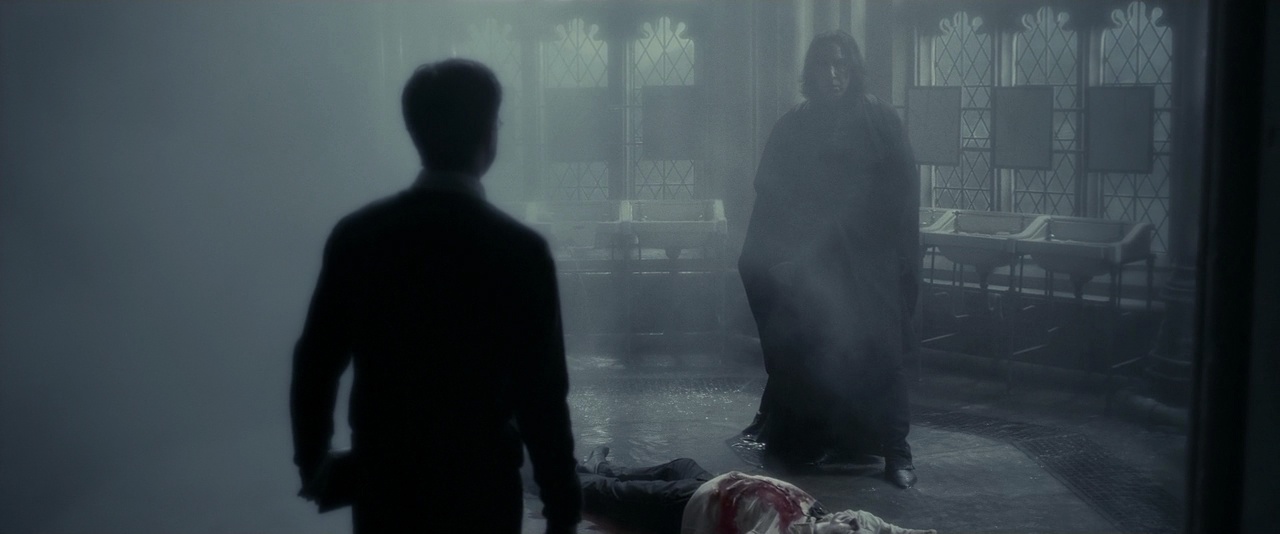
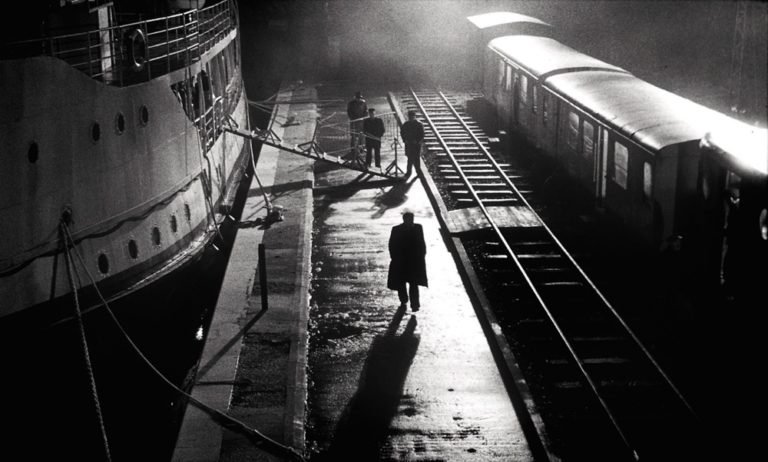
There are many examples of scenes lit only from the back. It’s a beautiful look, creating mood and mystery, revealing form without details, reducing people to simulacra. The optional addition of smoke helps the light to wrap a little and lift the shadows.
“Blade Runner” – DP: Jordan Cronenweth ASC“Harry Potter and the Half-blood Prince” – DP: Bruno Delbonnel AFC, ASC“The Man from London” – DP: Fred Kelemen“The Assassination of Jesse James by the Coward Robert Ford” – DP: Roger Deakins CBE, ASC, BSC“The Social Network” – DP: Jeff Cronenweth ASC
It’s not uncommon for a DP to begin lighting by setting a backlight to give form and depth to the scene, then seeing if and where other sources are necessary, to illuminate faces and other important details.
OMNIDIRECTIONAL
Most film fixtures shed their illumination in broadly one direction, but of course most light sources in day-to-day life aren’t that discriminating, throwing rays all around them. In the form of practicals, such omnidirectional lights can create very interesting images, particularly when they are handheld.
“O Brother, Where Art Thou?” – DP: Roger Deakins CBE, ASC, BSC
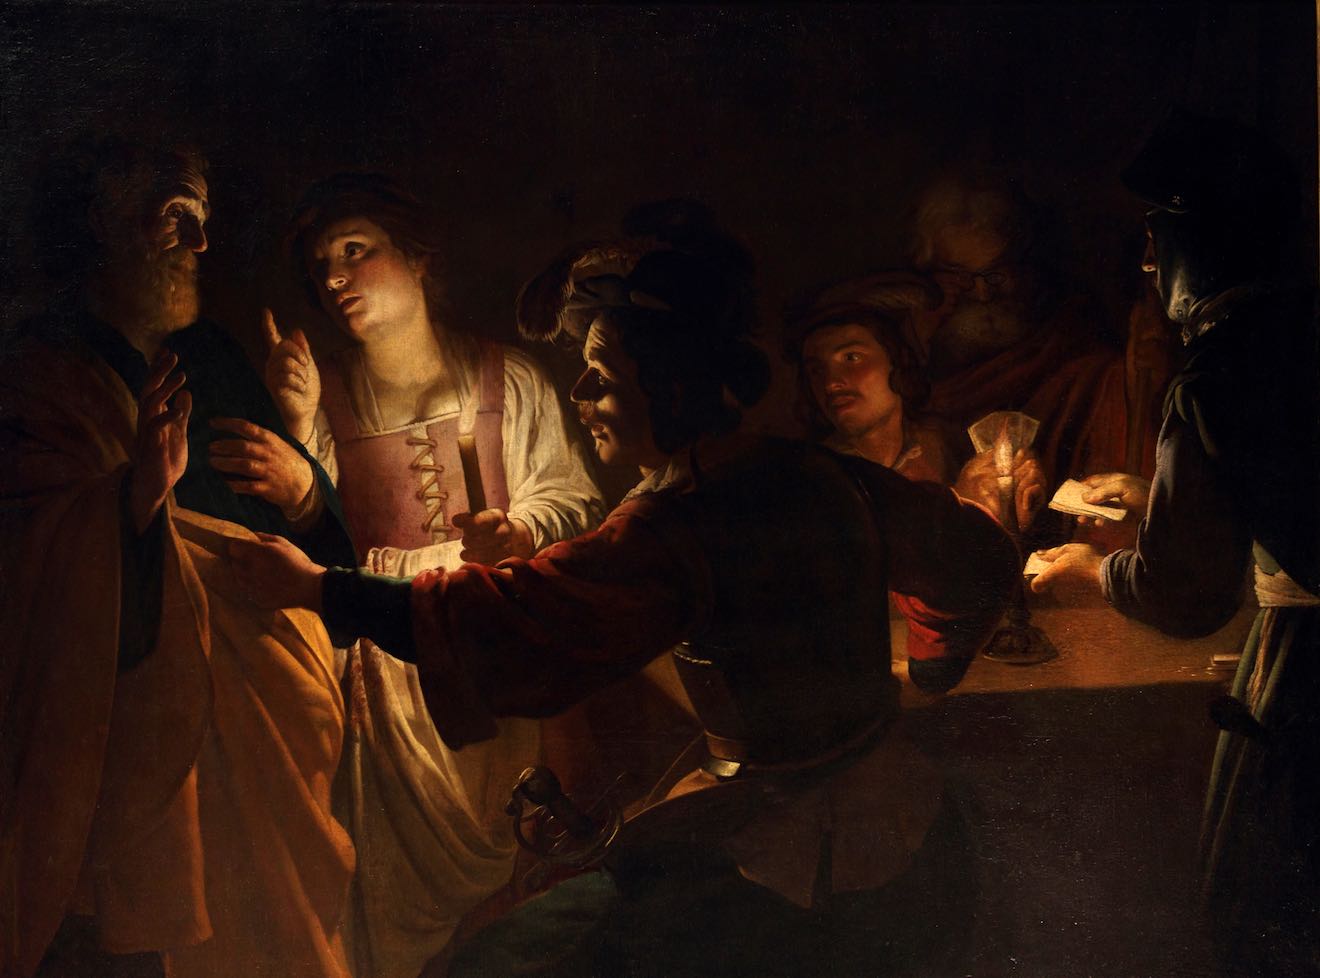
When people are grouped around an omnidirectional source, each one is modelled differently. Characters in the foreground, between the lamp and the camera, become silhouettes, while those to the sides are rendered in chiaroscuro, and those in the background are lit frontally. This creates a wonderful feeling of dark-to-light/near-to-far depth and dimensionality. 17th century Dutch masters like Gerrit Dou and Gerard van Honthorst painted such effects beautifully.
“The Match-maker” – Gerard van Honthorst (1625)“The Denial of St Peter” – Gerard van Honthorst (circa 1618-1620)
Having recently re-equipped myself with a 35mm SLR, I’m planning a photography project inspired by some of these candlelit scenes. Watch this space!
Preacher is the subject of this week’s episode of Lighting I Like. I discuss two scenes, from the second episode of the second season, “Mumbai Sky Tower”, which demonstrate the over-the-top, comic-book style of the show.
Both seasons of Preacher can be seen on Amazon Video in the UK.
The second episode in the latest run of Lighting I Like is now out, looking at some of the cinematography in The Man in the High Castle.
Based on the Philip K. Dick novel, The Man in the High Castle is set in an alternate reality where Japan and Nazi Germany won the Second World War. Both seasons of the show are available on Amazon in the UK.
The scenes I focus on use powerful light sources coming in through windows and bouncing off furnishings to softly uplight the talent. For more on this technique, see my article on 5 Ways to Use Hard Light Through a Window.
The first step in lighting a daytime interior scene is almost always to blast a light through the window. Sometimes soft light is the right choice for this, but unless you’re on a big production you simply may not have the huge units and generators necessary to bounce light and still have a reasonable amount of it coming through the window. So in low budget land, hard light is usually the way we have to go.
Now, I used to think that this hard window light had to hit the talent’s faces, otherwise what’s the point? But eventually I learnt that there are many things you can do with this light….
1. Light the talent directly.
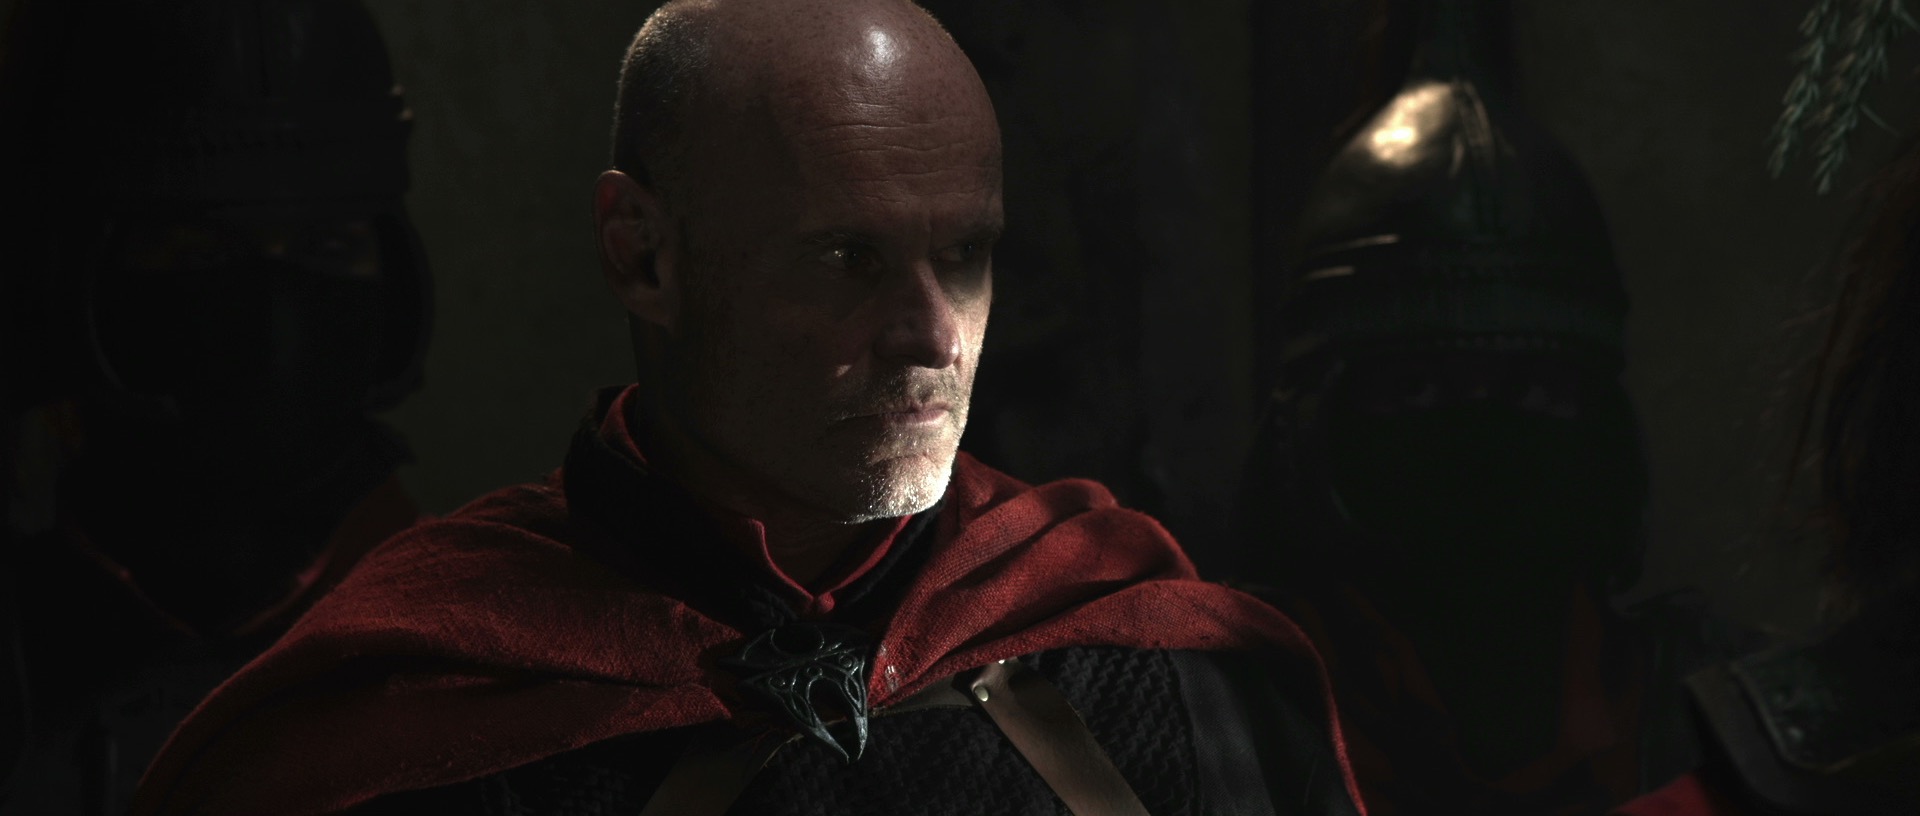
This is what I always used to do. The problem is that the light will be very harsh. If there is a good amount of natural light coming in through the window too, that might soften the look enough. If not, slipping a diffusion frame in front of the light will take the edge off the hardness. And it depends which way the talent is facing. If the hard light is backlighting or edging them, the effect might well be beautiful.
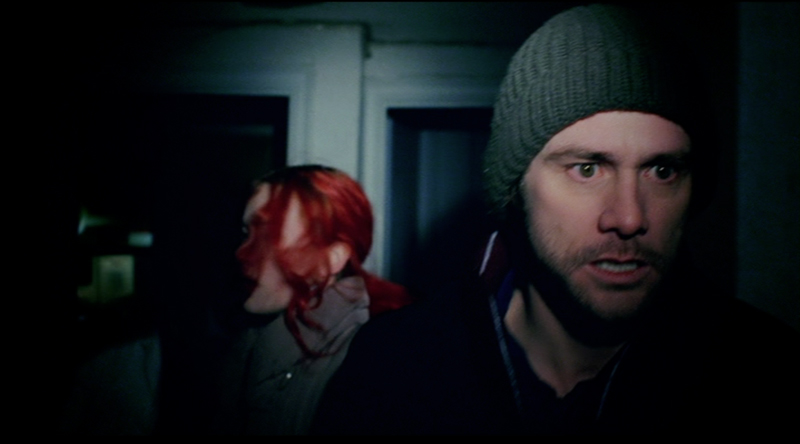
Ren: The Girl with the Mark, S1 E4, director: Kate Madison, DP: Neil OsemanThe Gong Fu Connection, director: Ted Duran, DP: Neil Oseman
2. Light part of the talent directly.
This is a nice way to get the best of both worlds. You hit their clothes with the hard light, maybe a bit of their chin too; it creates contrast, brings out the texture in the costume, and adds dynamics because as the talent moves, the edge of the hard light will move around on them. To light the parts which the hard source doesn’t hit you can use bounce, or a kinoflo Window Wrap.
Ren: The Girl with the Mark, S1 E4, director: Kate Madison, DP: Neil OsemanRen: The Girl with the Mark, S1 E2, director: Kate Madison, DP: Neil Oseman
3. Light the floor.
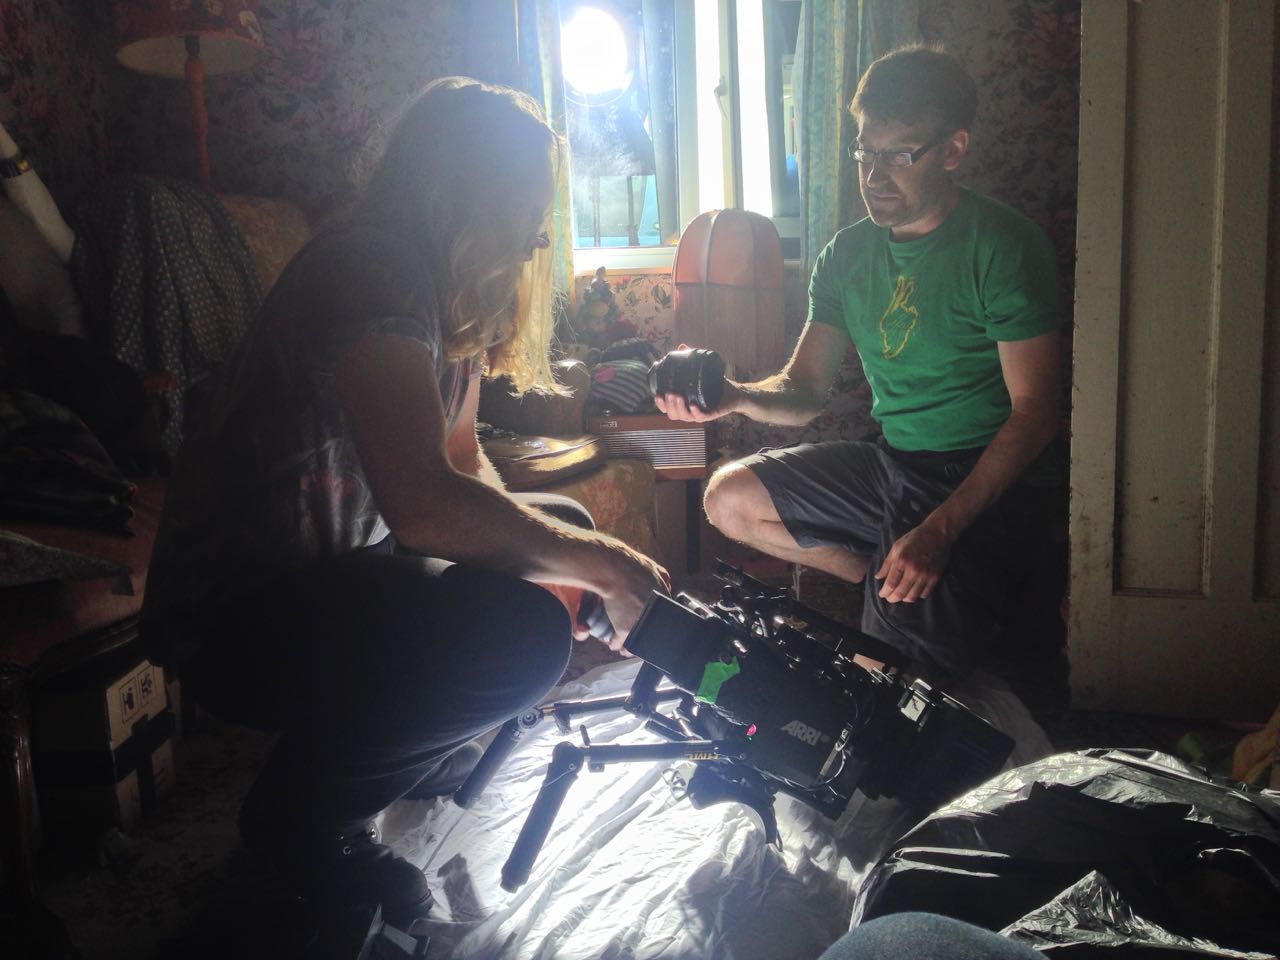
Arrange the light so it hits the floor, creating a skip bounce. Unless the floor’s a very dark colour, the light will bounce back up and light your talent softly from below. While some people are afraid of the “monster” look of lighting from below, it can often produce a very beautiful look. It’s well worth exploring. Alternatively, bounce the hard window light off a wall to create a soft side light.
Manure, director: Michael Polish, DP: M. David MullenThis photo from the set of Above the Clouds (director: Leon Chambers) shows a white sheet which I laid on the floor to skip-bounce the HMI outside the window.
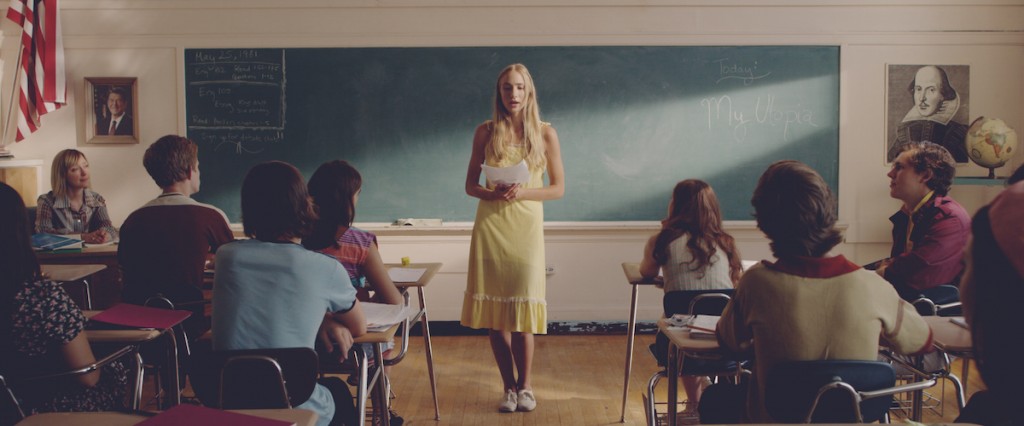
4. Light the background.
A hot splash of “sunlight” on the background is a common way to add interest to a wide shot. It can show off the production design and the textures in it, or help frame the talent or separate them from the background.
The Crown, S1 E10 “Gloriana”, director: Philip Martin, DP: Ole Bratt BirkelandMy Utopia, director: Patrick Moreau, DP: Joyce Tsang
5. Light nothing.
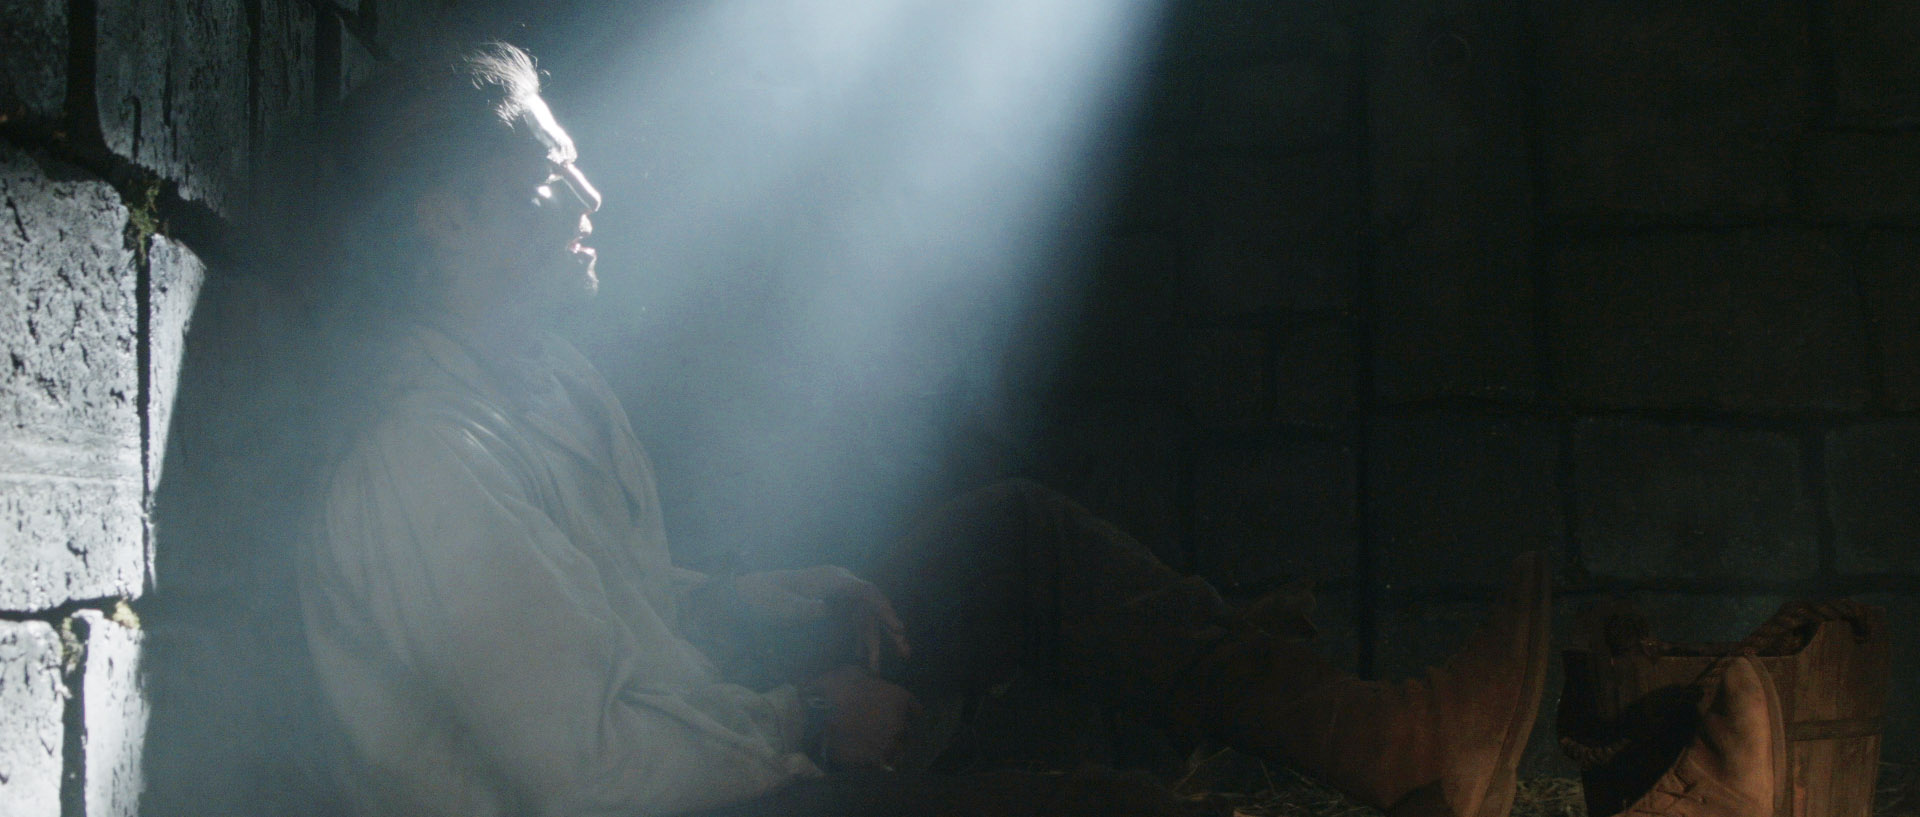
Sometimes the most effective way to use a shaft of light through a window is simply as background interest. Volumize the light using smoke, and it creates a nice bit of contrast and production value in the scene. Silhouetting characters in front of the beam can be very effective too.
Ren: The Girl with the Mark, S1 E4, director: Kate Madison, DP: Neil OsemanBig Sur, director: Michael Polish, DP: M. David Mullen
Any that I’ve missed? What are your techniques for lighting through windows?

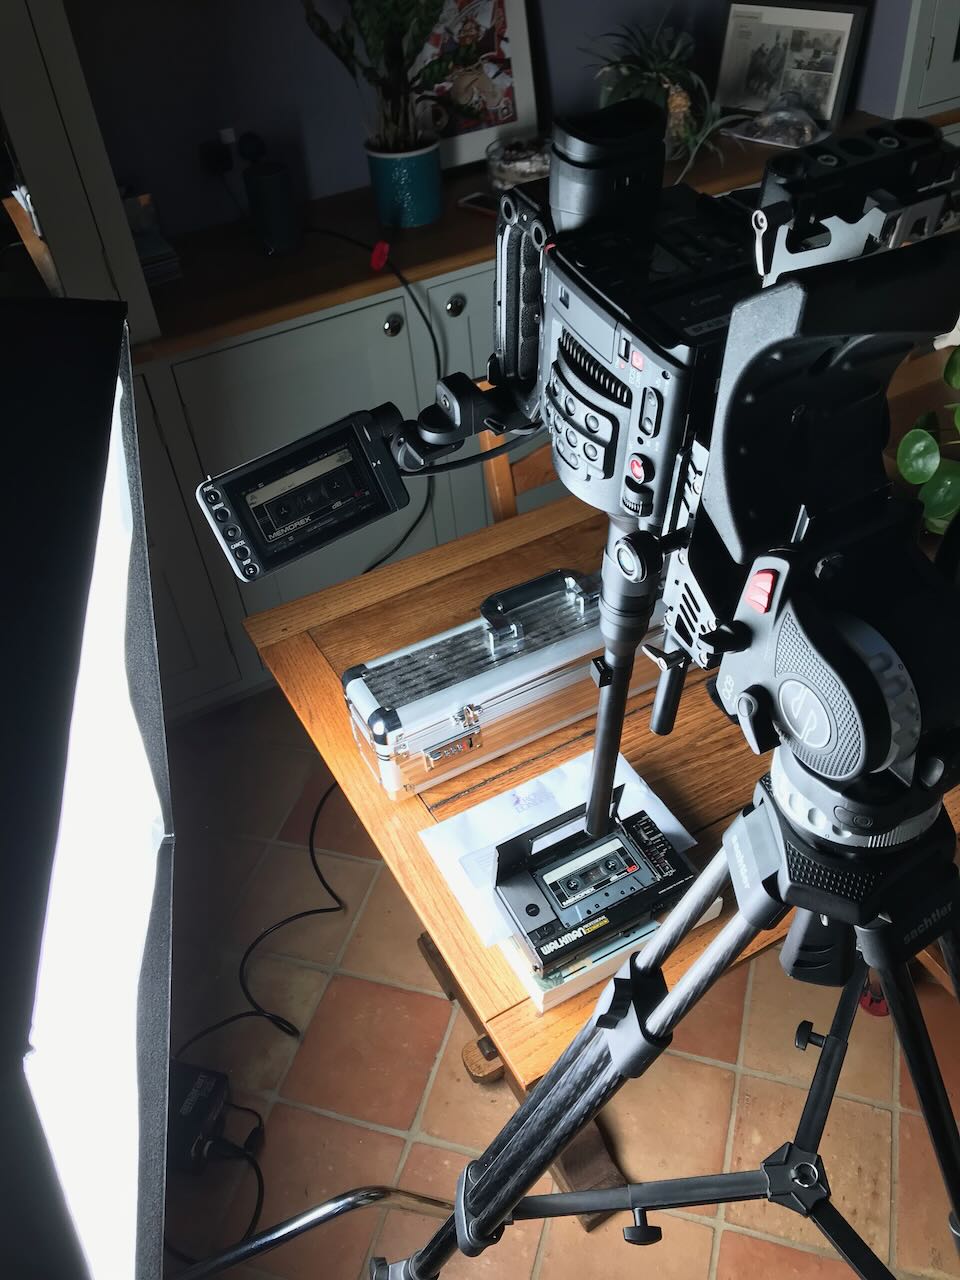 The few of us that were left then regrouped at Jonnie’s house for some ADR and a handful of inserts. The probe lens got another airing to capture a macro shot of a tape recorder, and I got to double as Harvey’s hands flicking through a book. In Paul’s very last shot he was out of focus, due to a lack of continuity-matching make-up, with the book sharp in the foreground.